

This guide shows you how to add a ZenAppBuilder Create App action to a Zaplane workflow, so a new app is created automatically whenever your trigger fires. Make sure the ZenAppBuilder plugin is installed and active on your site before you begin.
Step 1: Create a Workflow
Go to Zaplane > Workflows from your WordPress dashboard, then click Create Workflow to open the workflow editor.
Before adding a ZenAppBuilder action, you need to set up a trigger first. Here is how to do it quickly:
Once your trigger is saved, proceed to the next step to add the ZenAppBuilder action.
Step 2: Add an Action
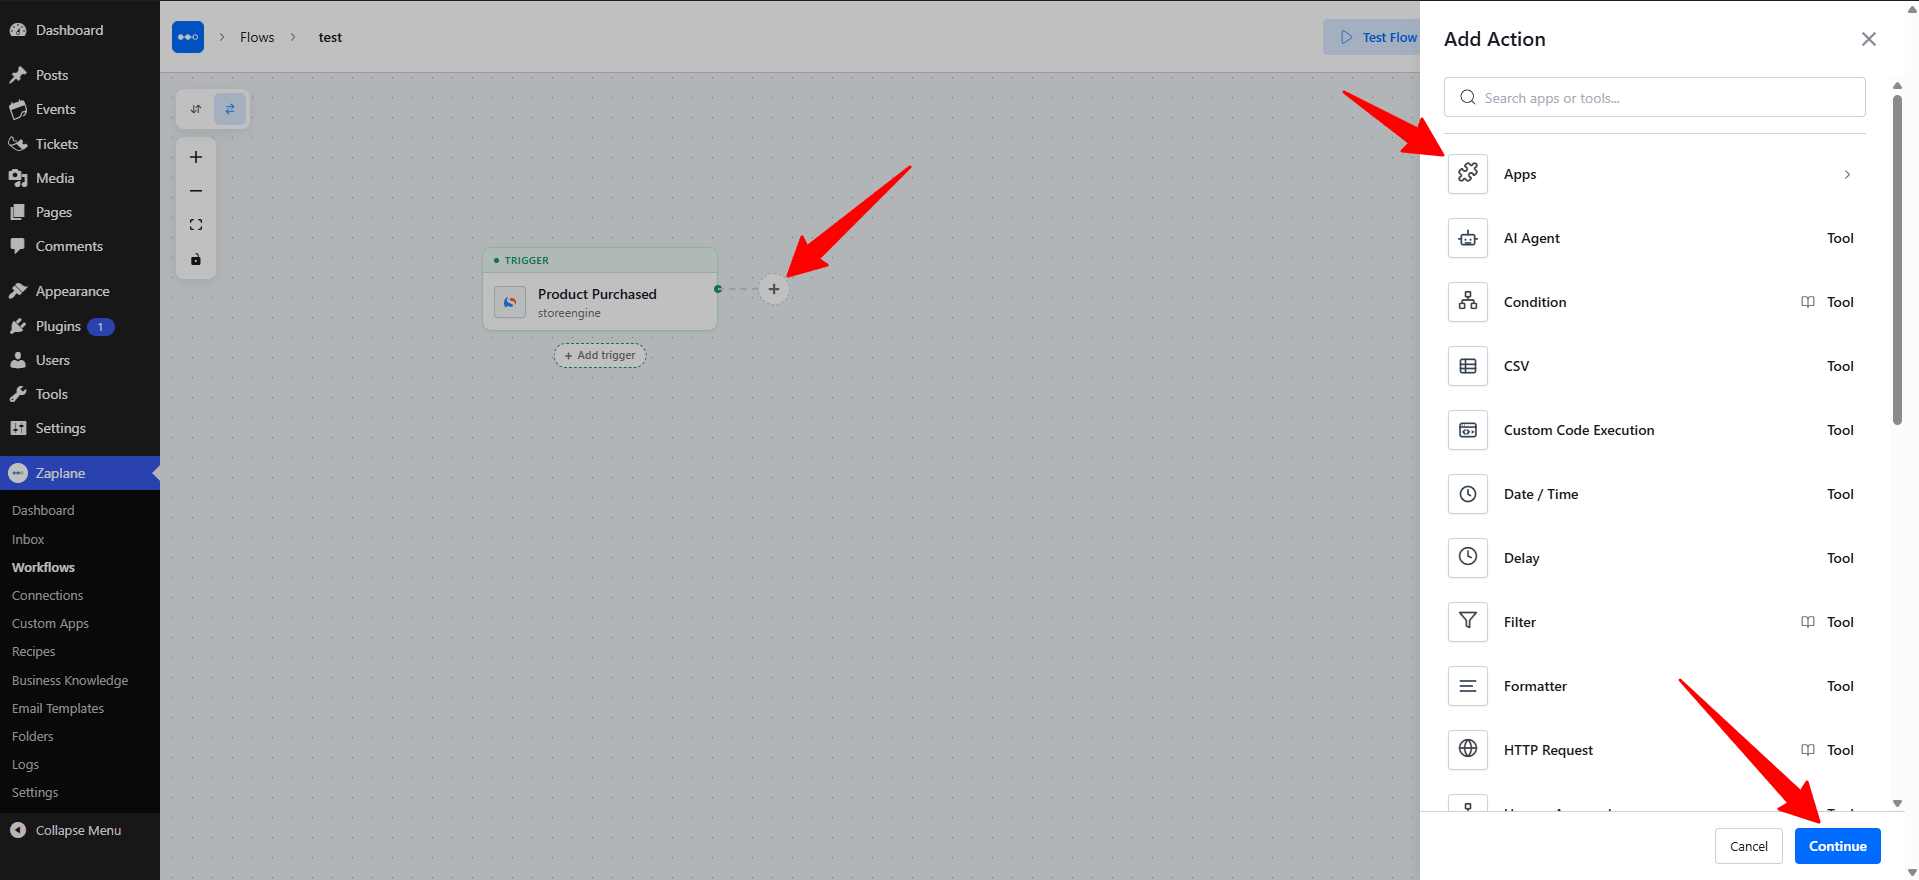
Click the + button next to your trigger. In the Add Action panel, choose Apps.
Step 3: Select the ZenAppBuilder App
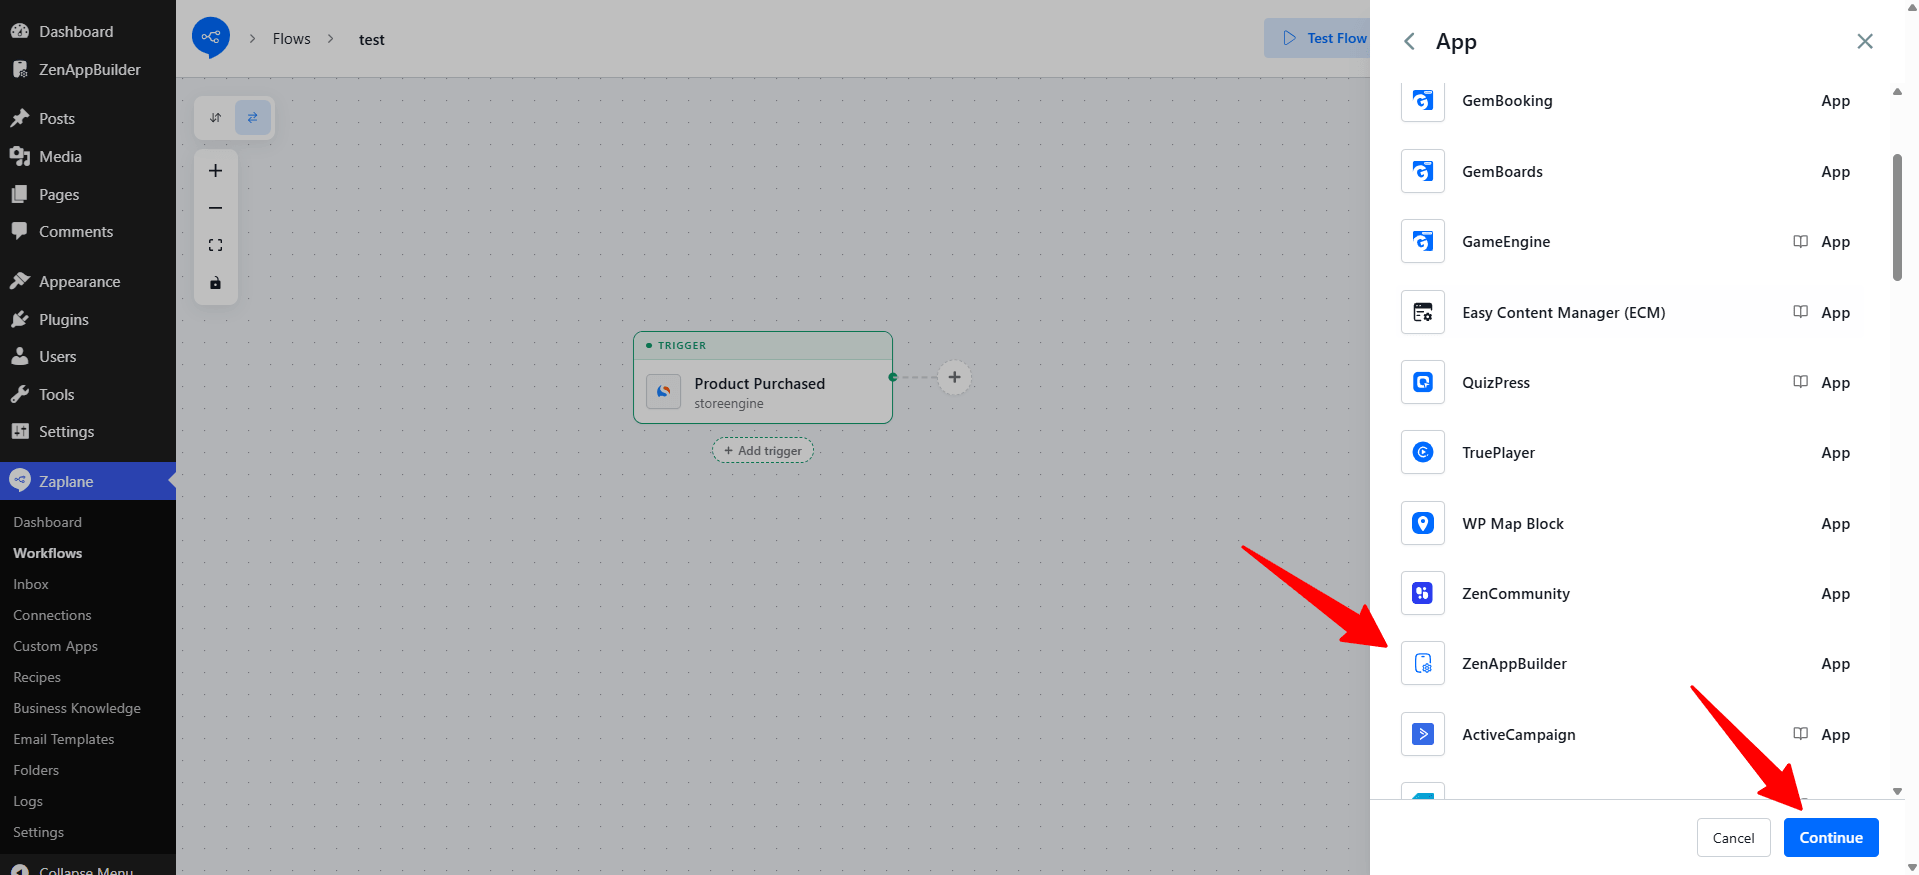
Find ZenAppBuilder in the app list, select it, and click Continue.
Step 4: Choose the Action Type
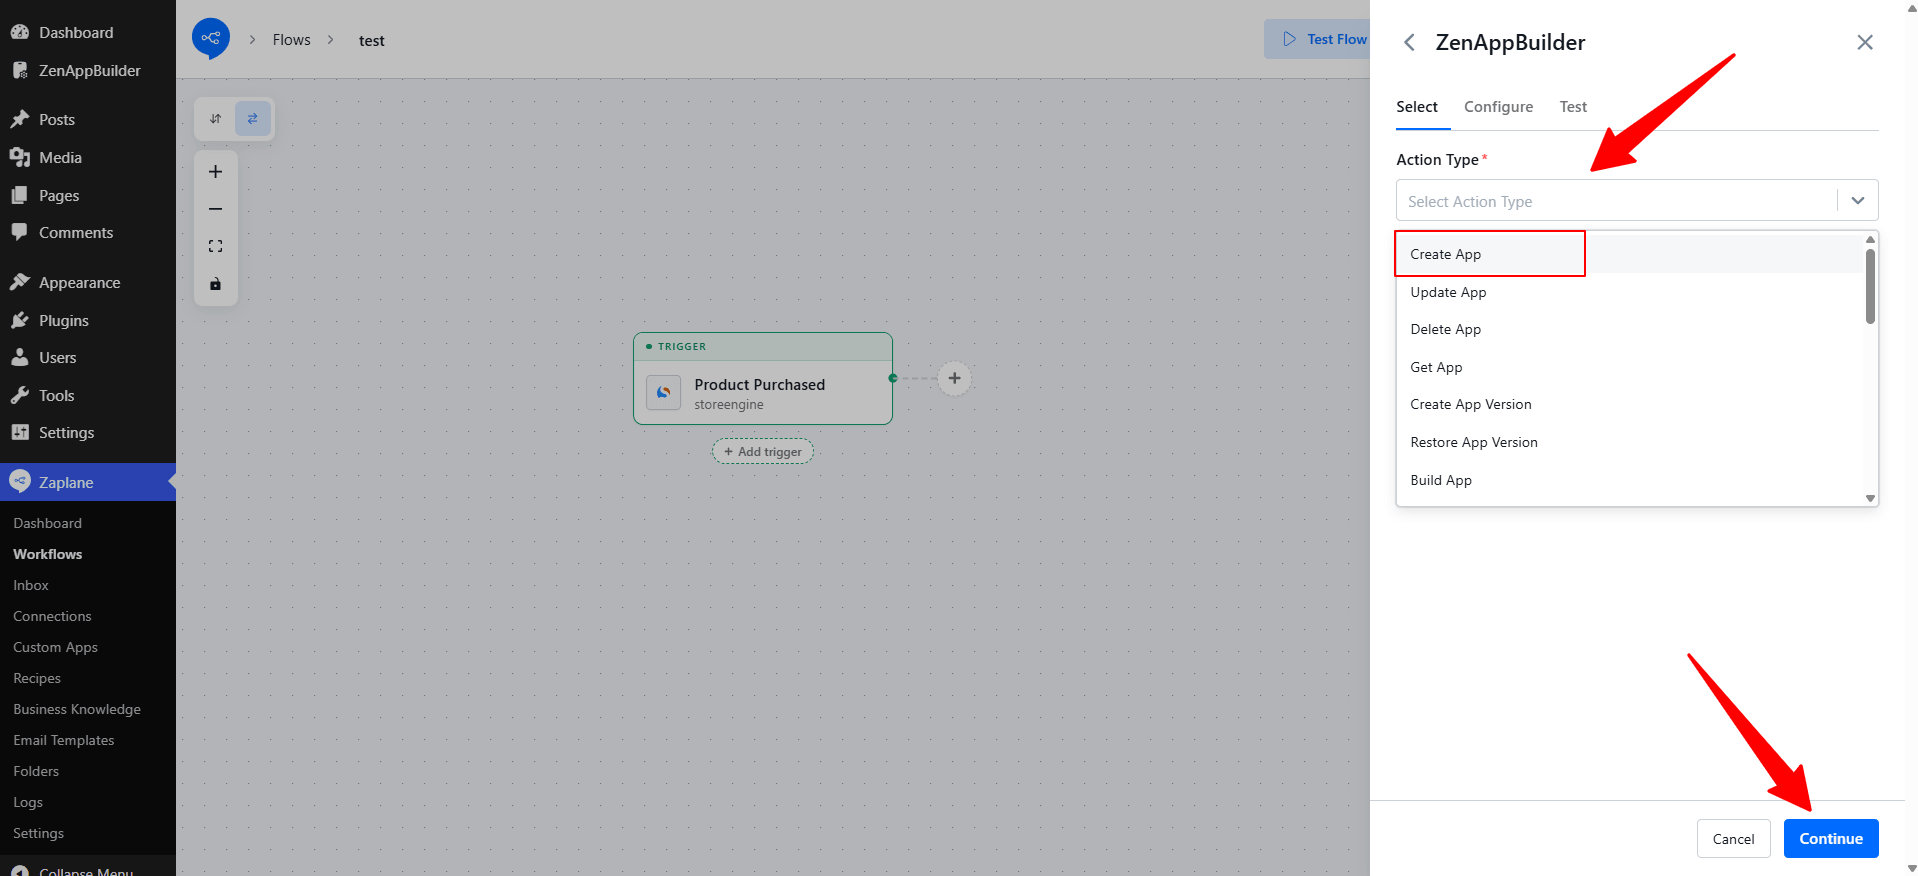
On the Select tab, open the Action Type dropdown and pick what you want ZenAppBuilder to do. Several action types are available. In this example we choose Create App. Then click Continue.
Step 5: Configure the Action
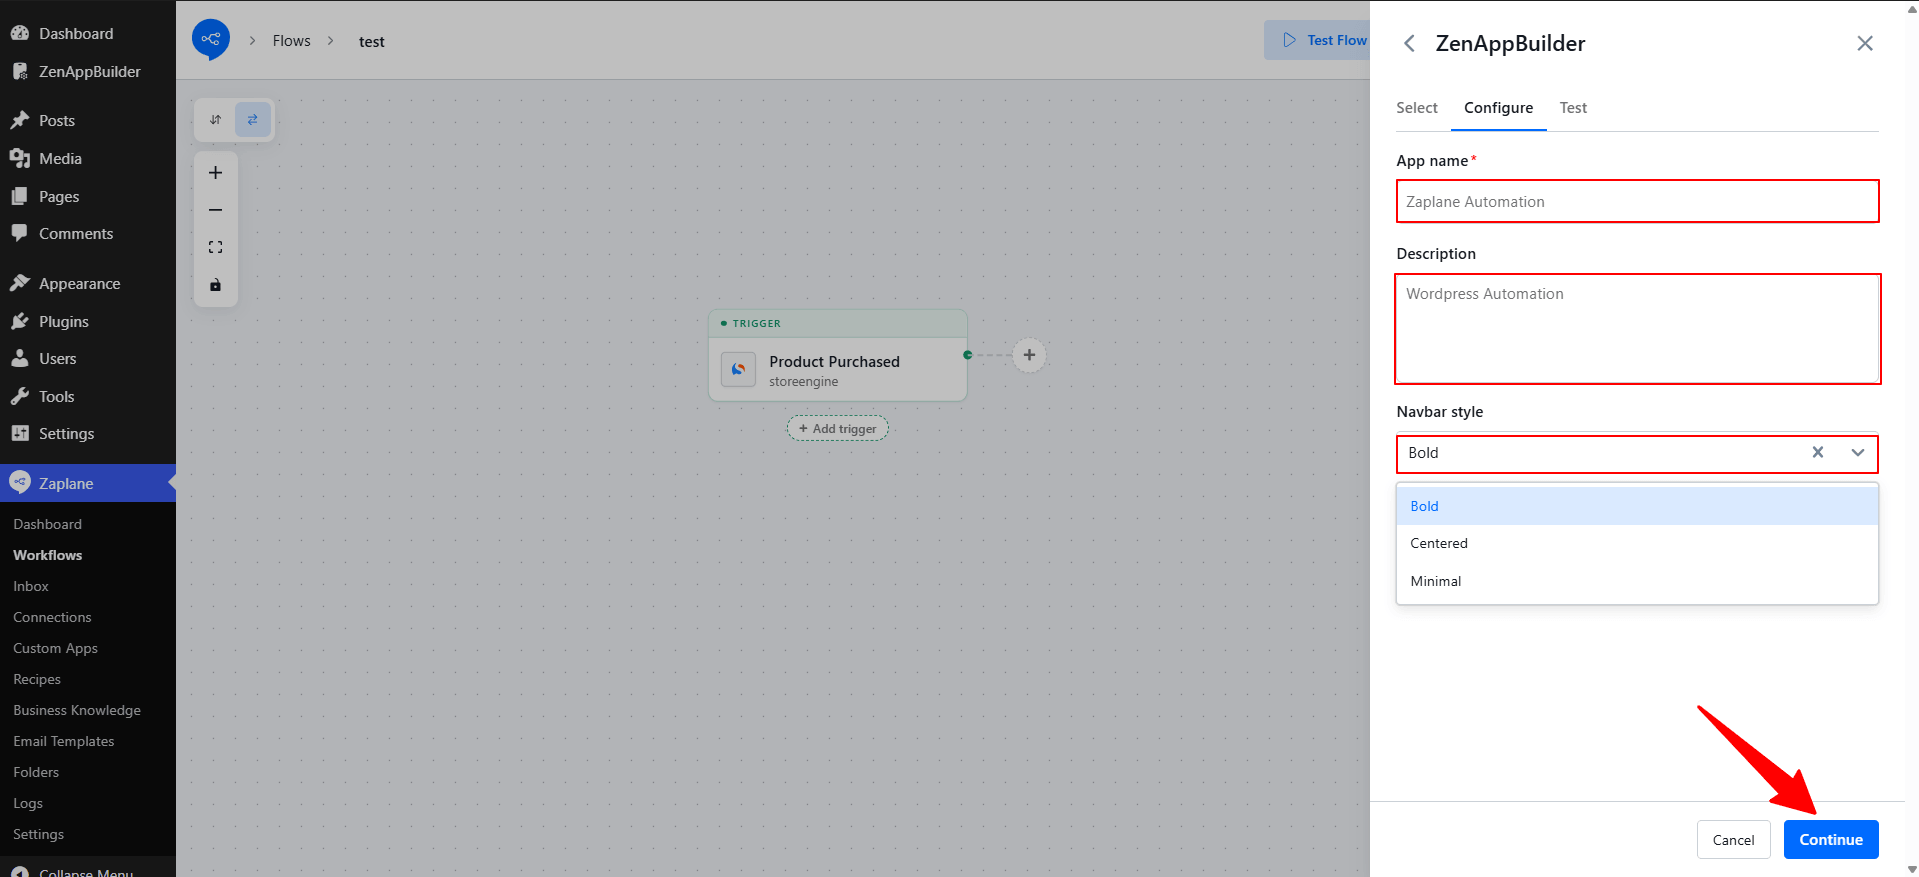
On the Configure tab, fill in the App name (required) and an optional Description, then choose a Navbar style from the dropdown. Click Continue when you are done.
Step 6: Test the Action
On the Test tab, click Test Action to check that ZenAppBuilder responds as expected, then click Save.
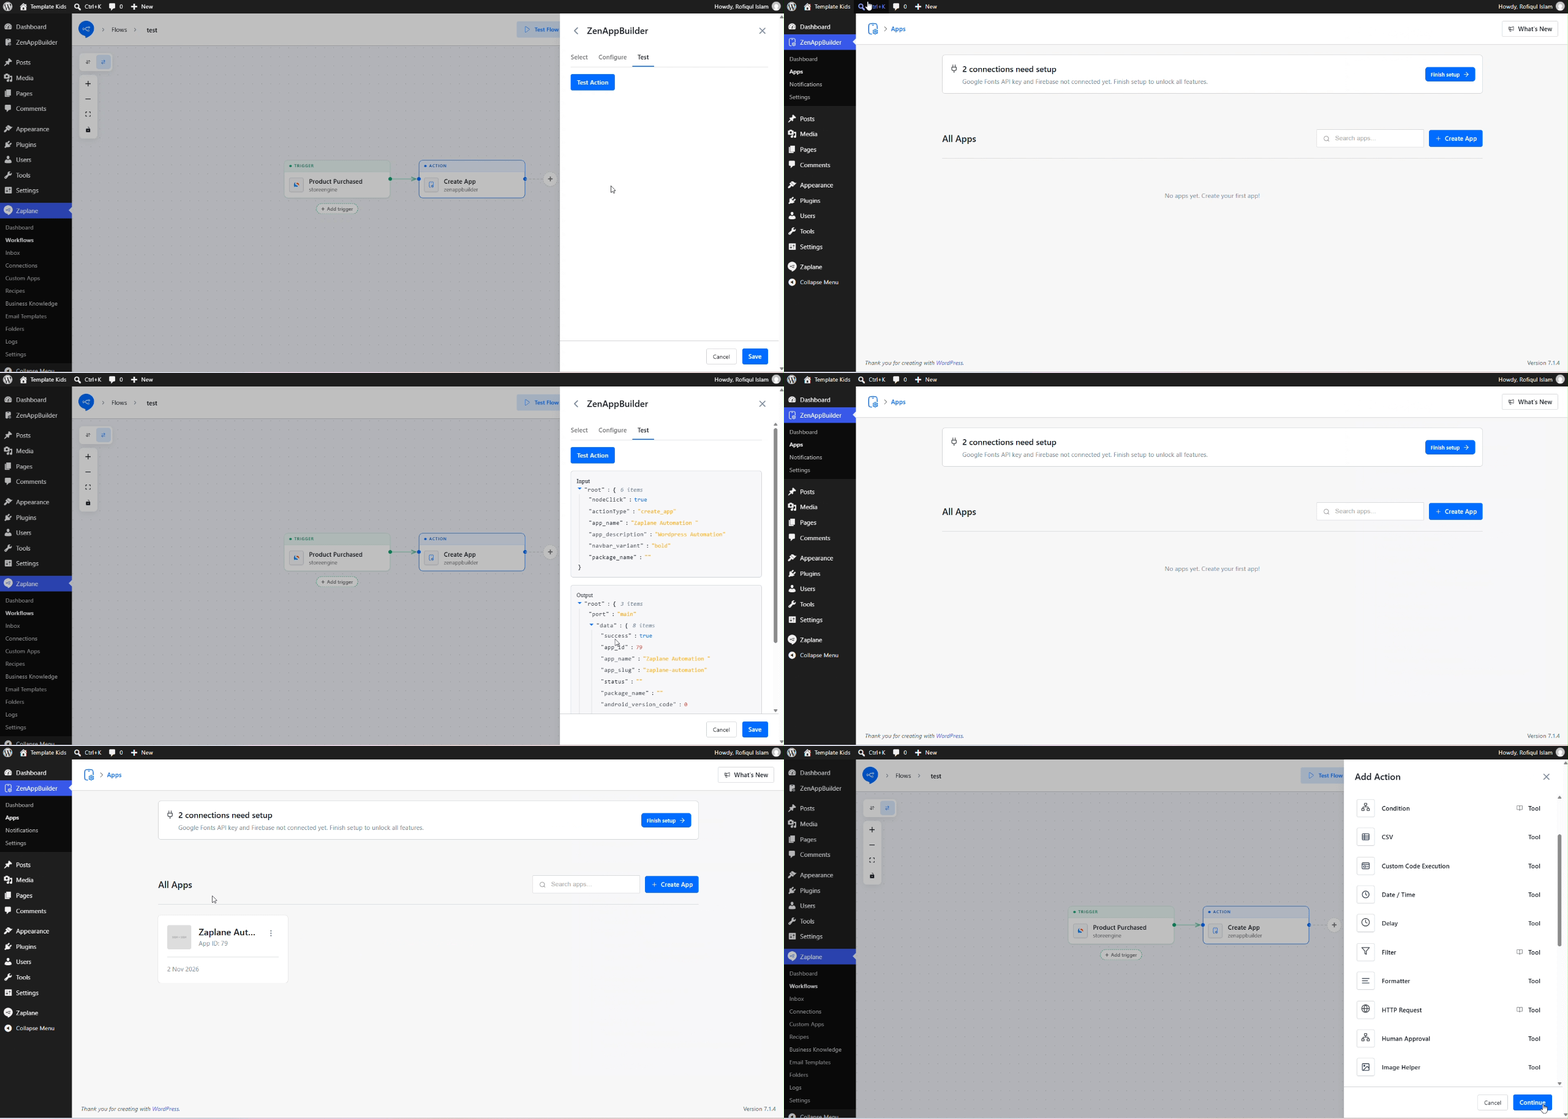
Step 7: Update and Activate the Workflow
Back in the workflow editor, set the workflow status to Active and click Update to publish your changes. You can use Logs to review every run.
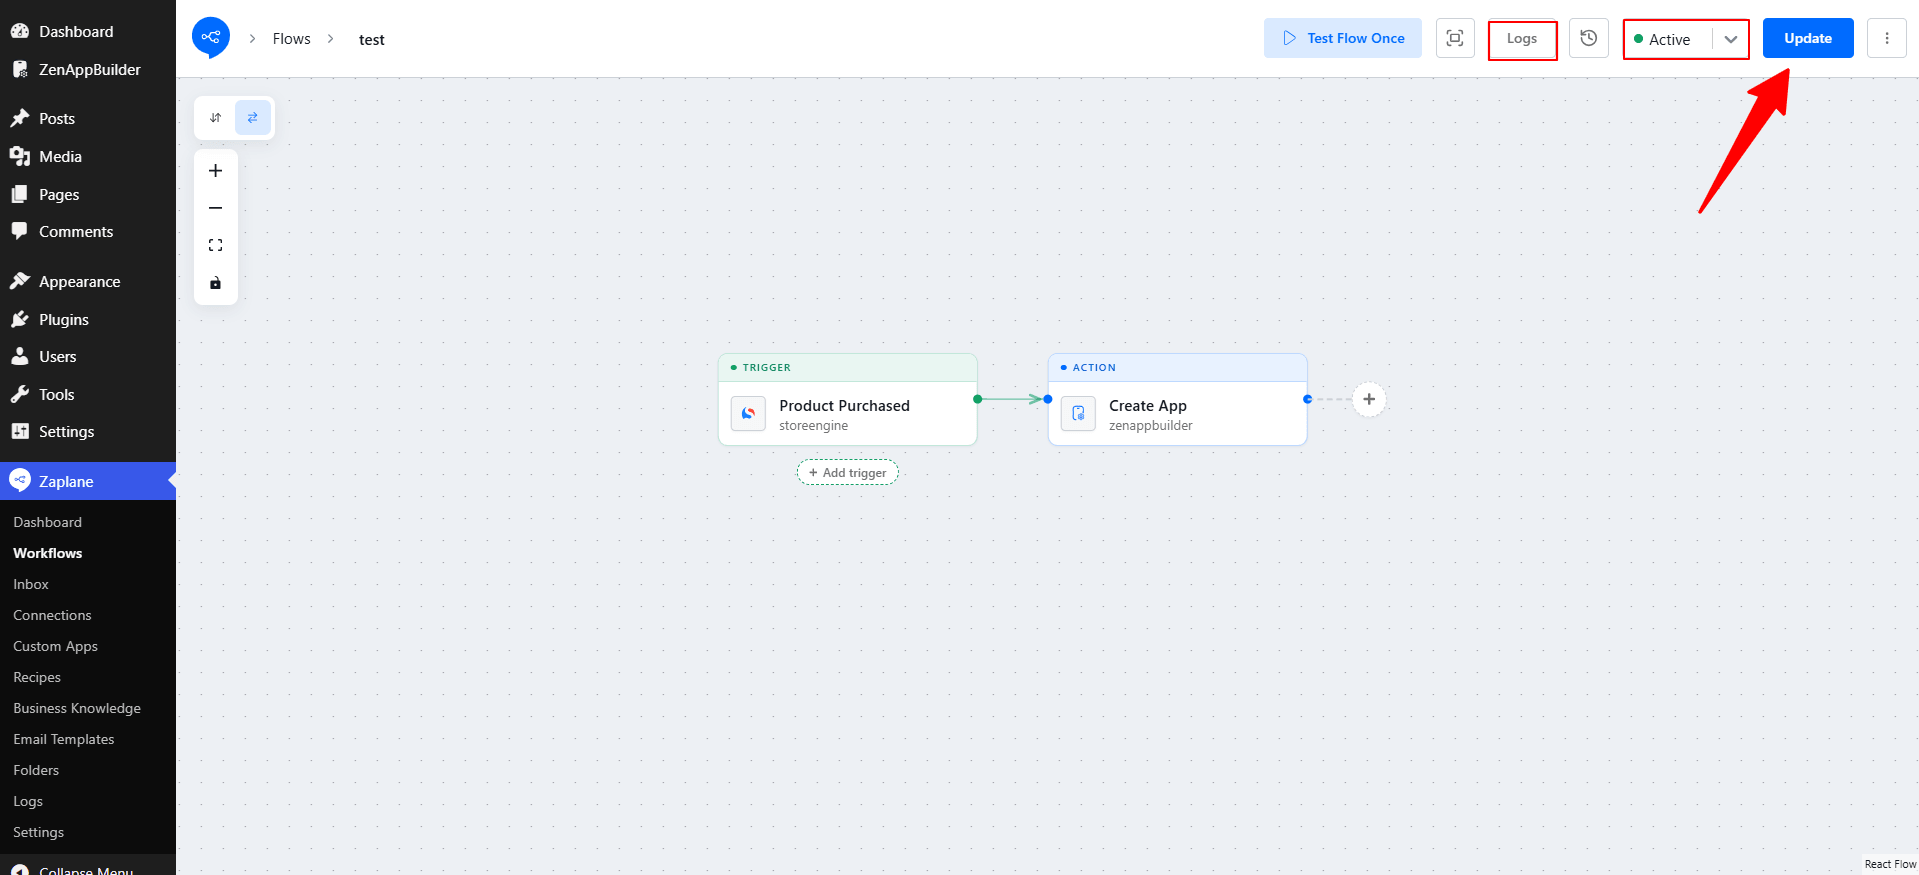
Every time your trigger fires, Zaplane now creates a new app in ZenAppBuilder automatically.
Done!
ZenAppBuilder is now connected to your workflow, and the Create App action will run automatically whenever your trigger fires.