

This guide walks you through adding a Ninja Forms trigger to a Zaplane workflow, so your workflow runs automatically whenever someone submits one of your Ninja Forms. Before you start, make sure your Ninja Forms connection is set up under Zaplane > Connections. Let’s go through the process step by step.
Step 1: Create a Workflow
- Go to Zaplane > Workflows, then click Create Workflow.

Step 2: Add a Ninja Forms Trigger
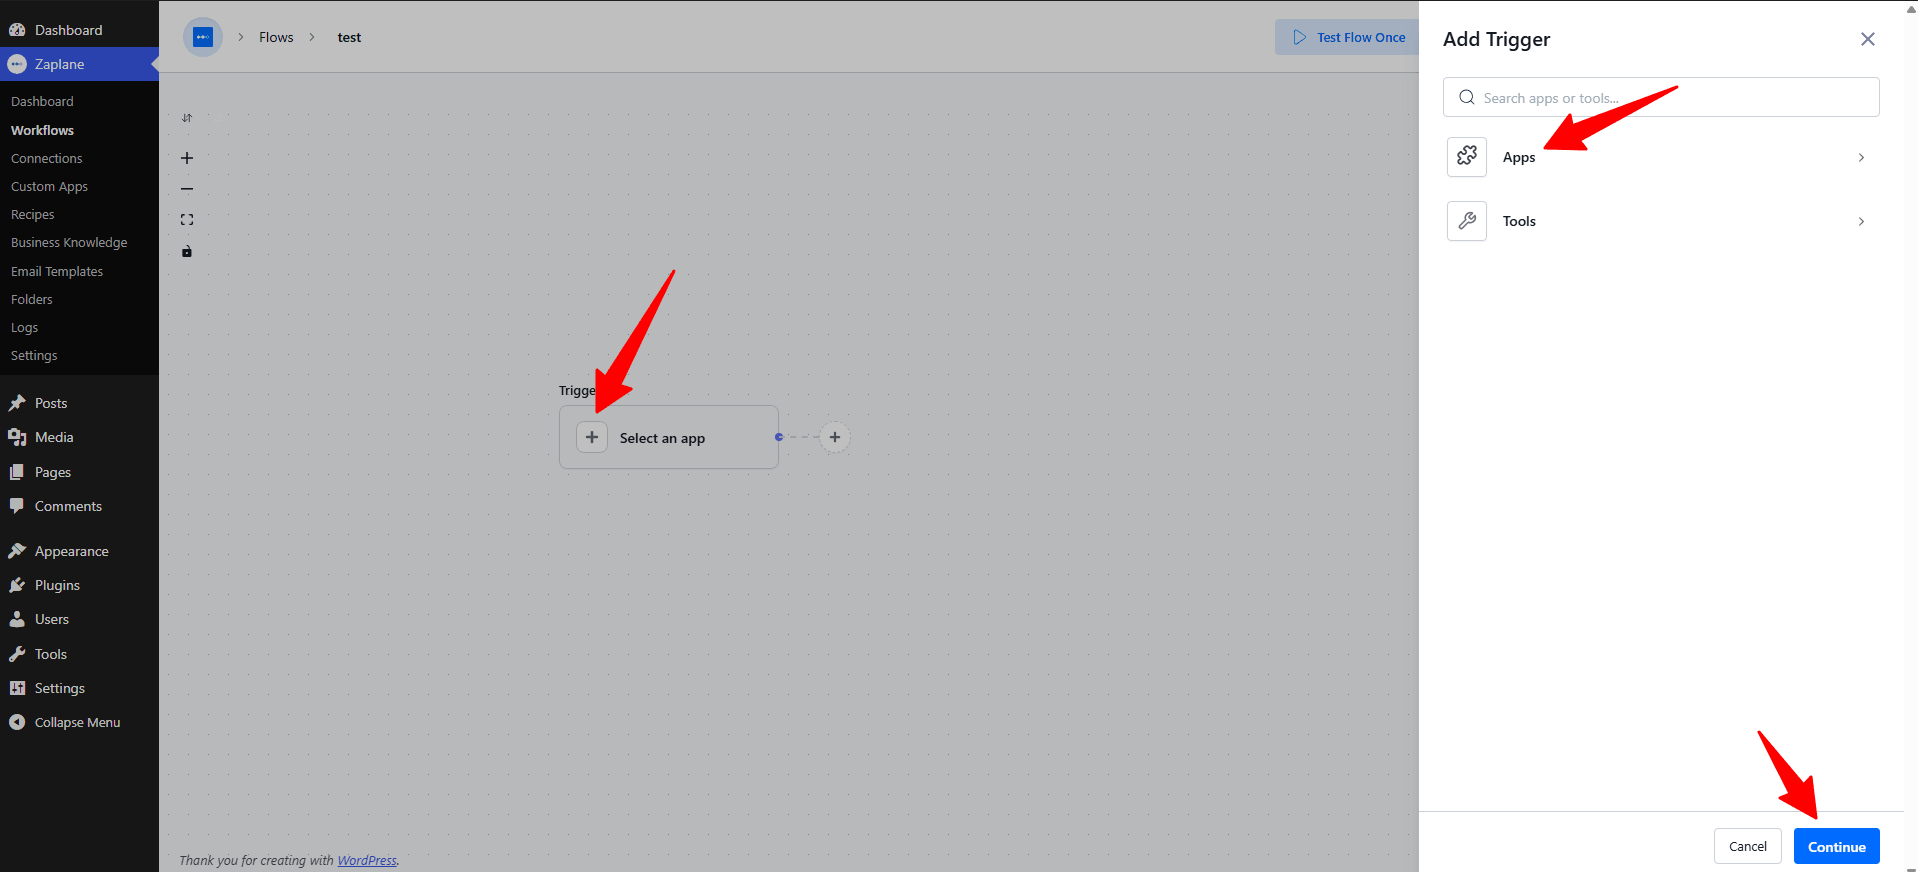
- Inside the workflow editor, click Select an app under the Trigger box, then choose Apps.
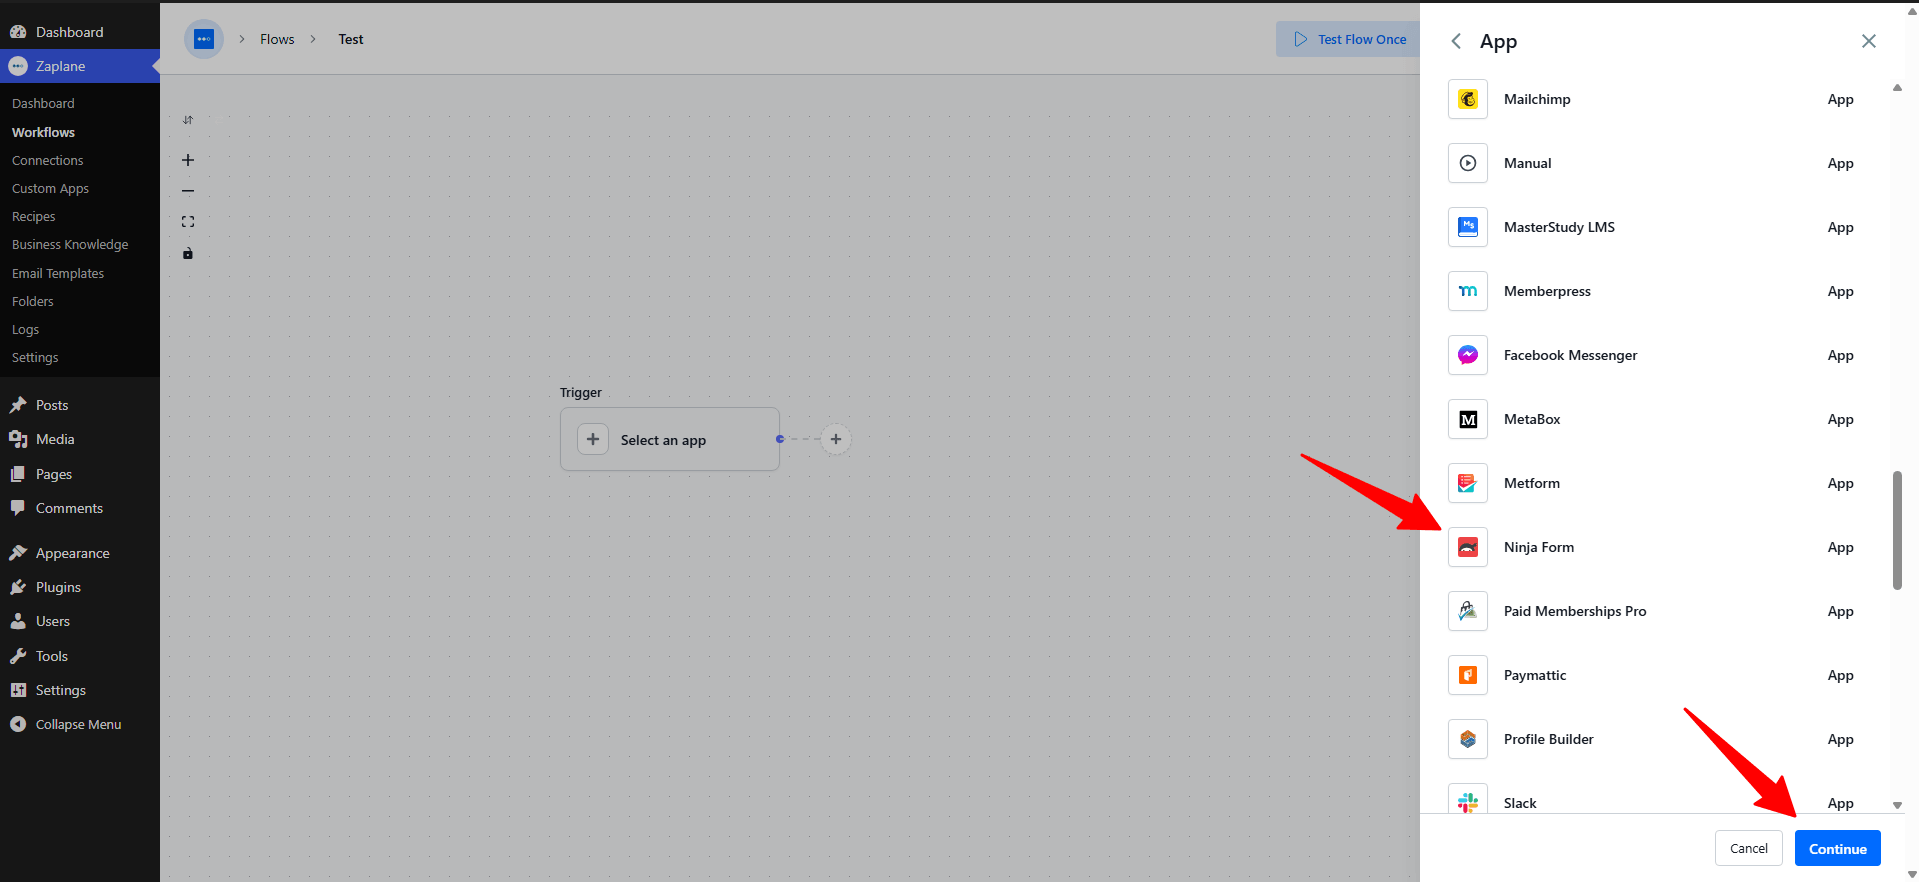
- Search for and select Ninja Form, then click Continue.
Step 3: Choose the Trigger Type
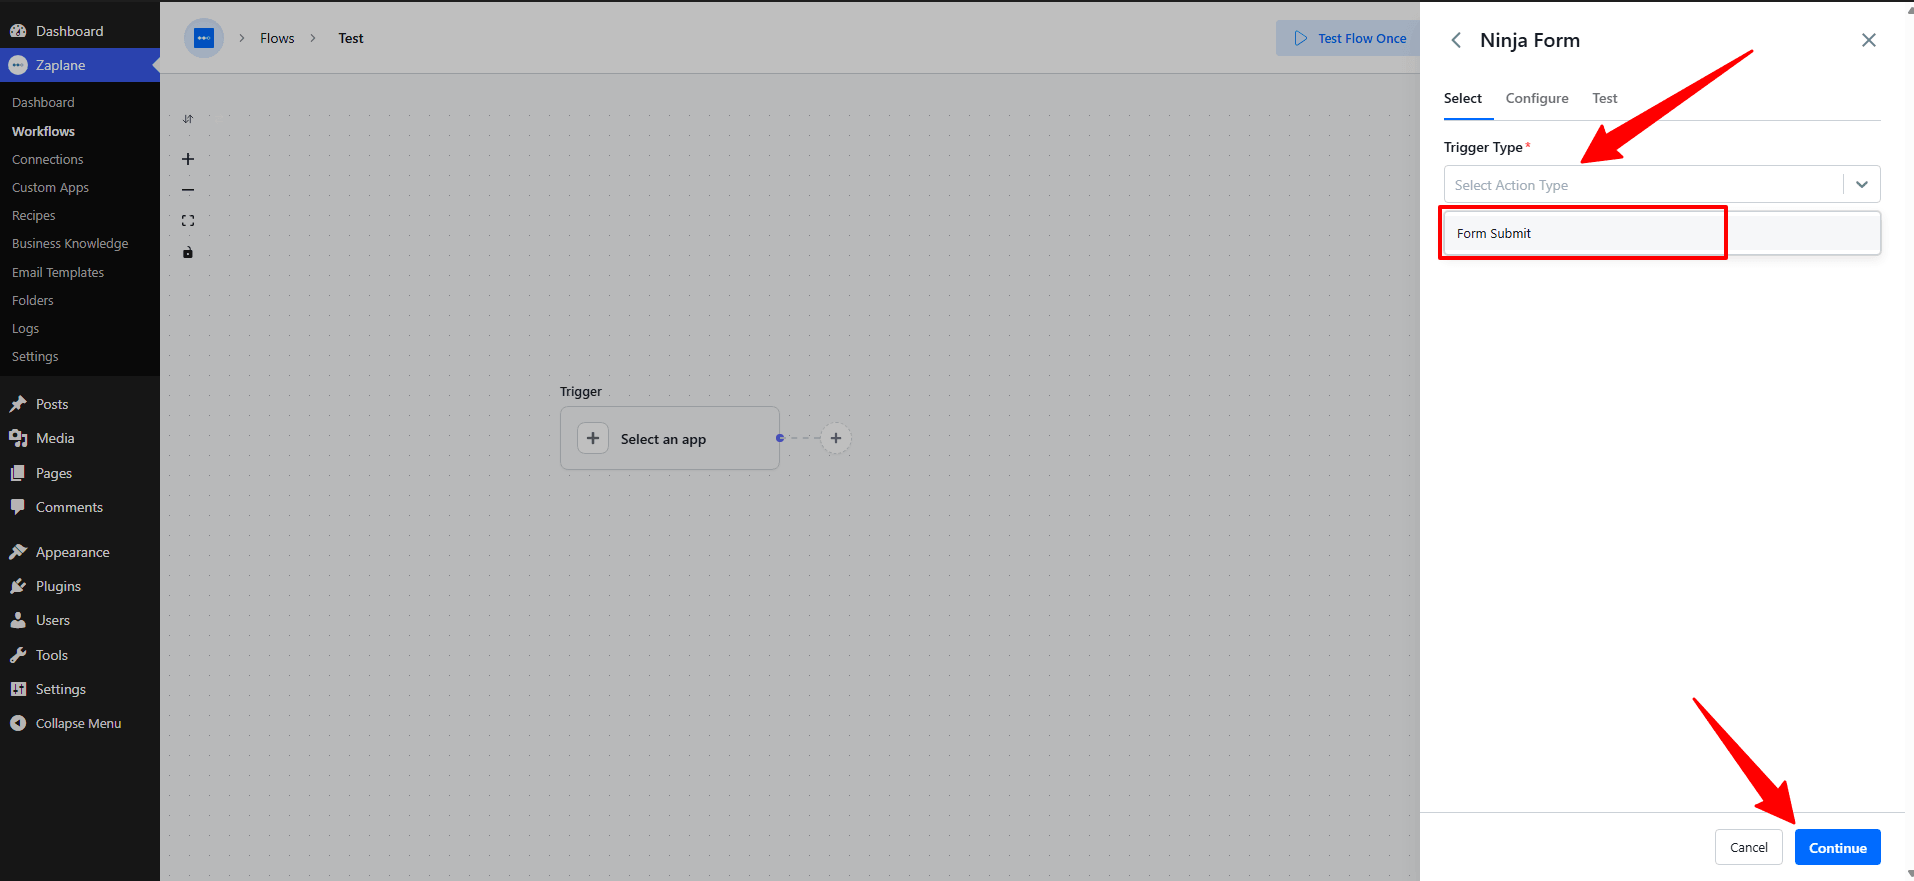
- On the Select tab, open the Trigger Type dropdown and choose Form Submit, then click Continue.
Step 4: Configure the Trigger
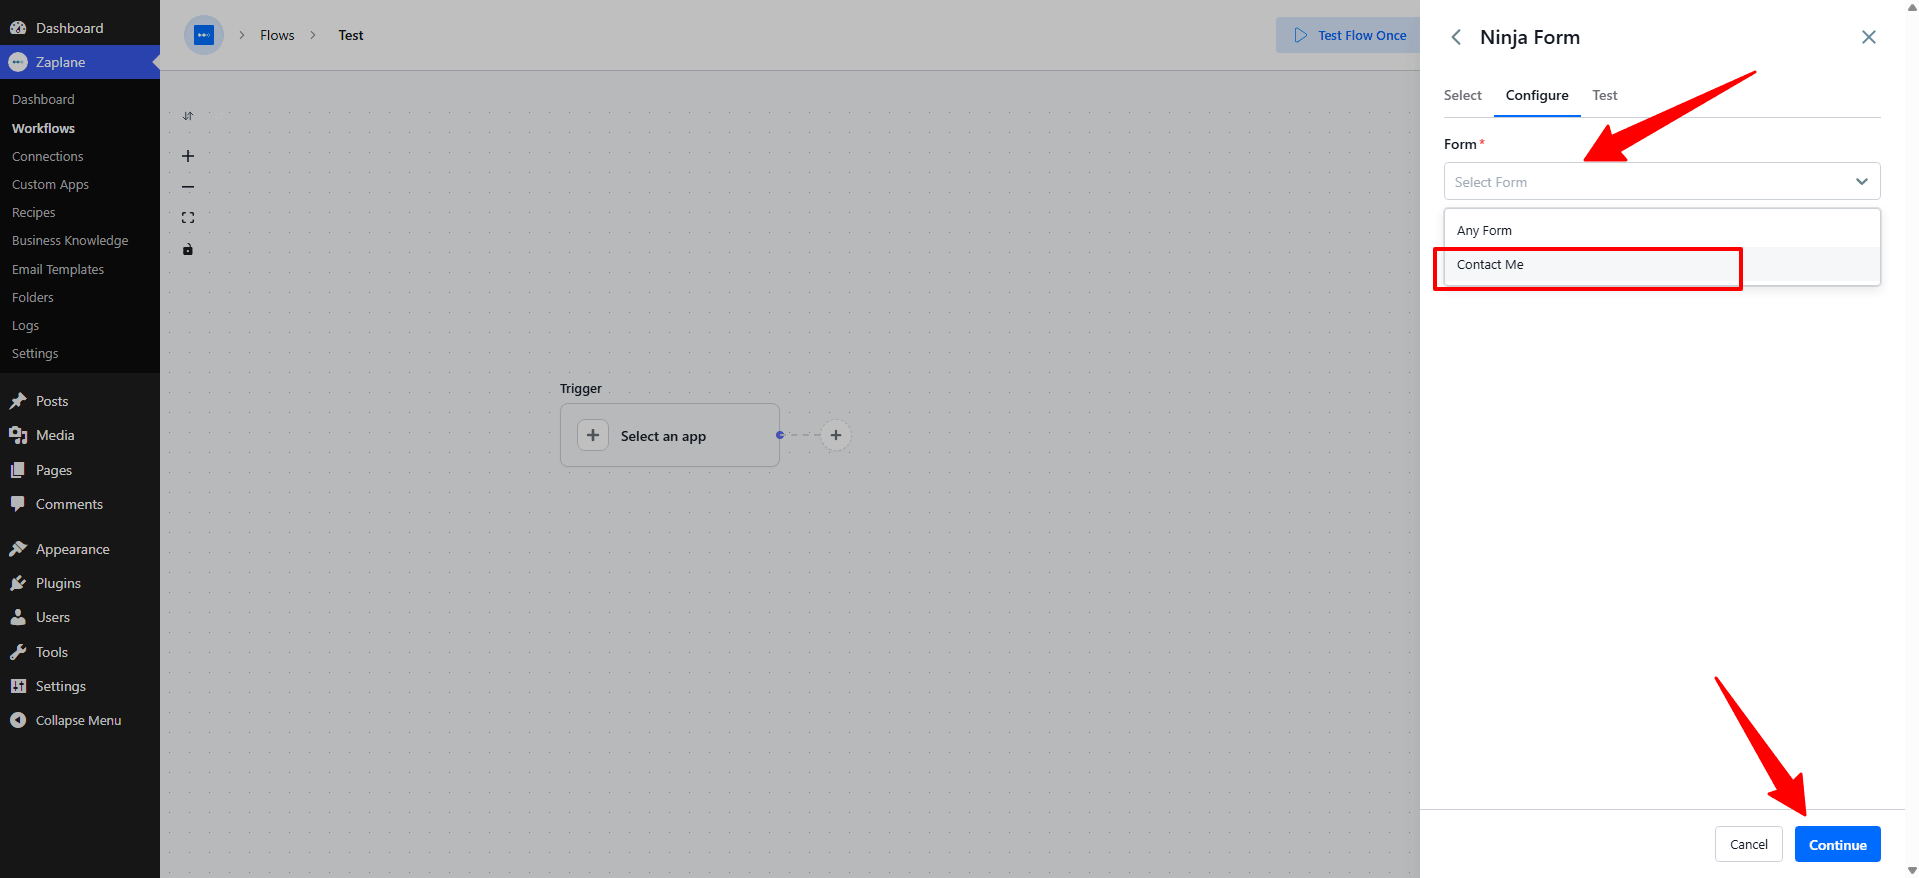
- On the Configure tab, select the Form you want to watch (or choose “Any Form” to match every form), then click Continue.
Step 5: Test and Activate the Workflow
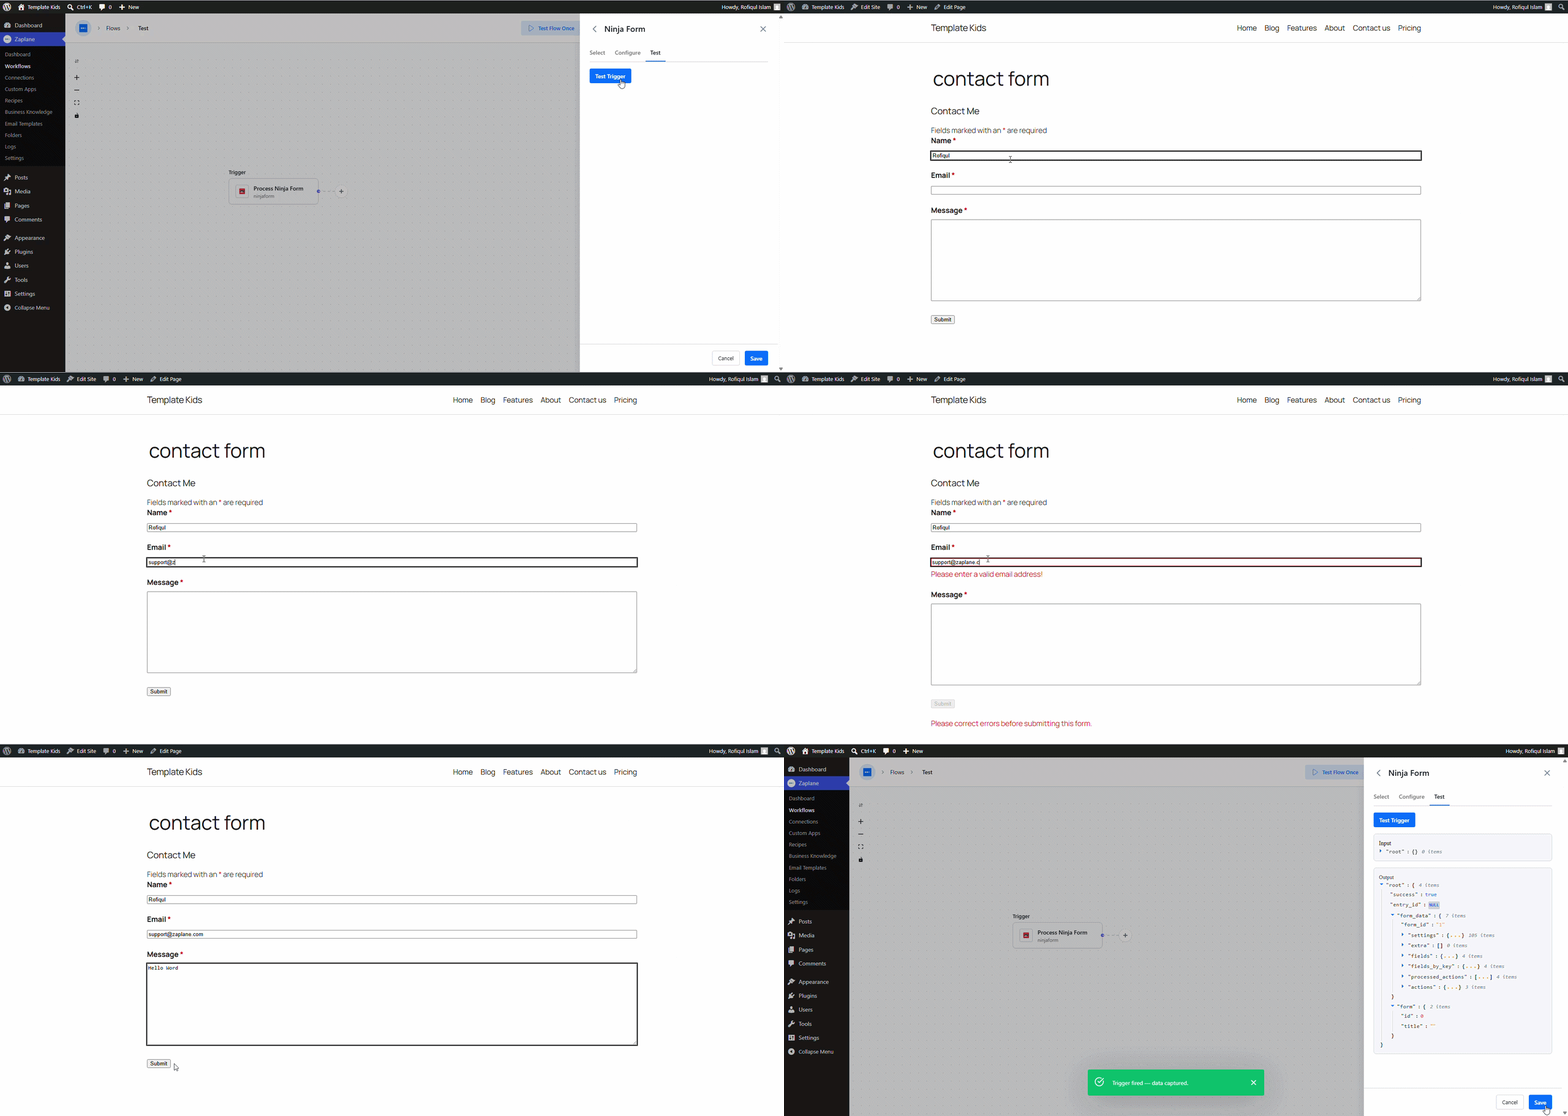
- On the Test tab, click Test Trigger to confirm it’s picking up the Ninja Forms submission correctly, then click Save.
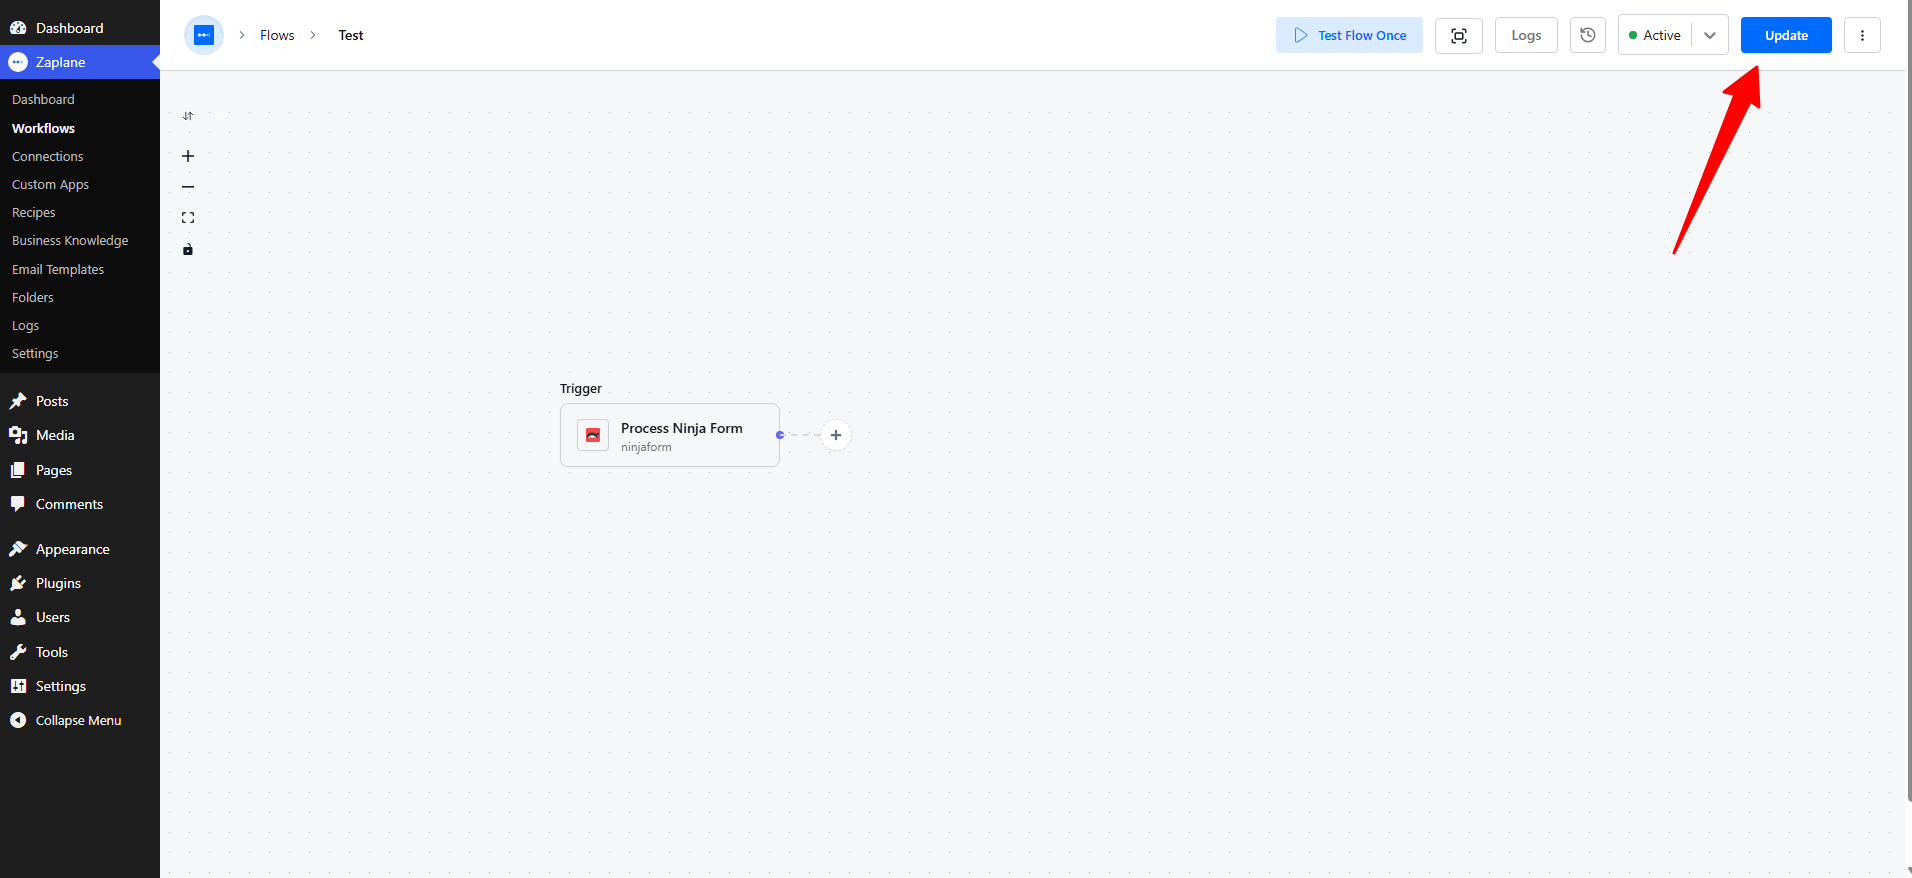
- Finally, toggle the workflow to Active and click Update to publish it.
You’re all set
Ninja Forms is now connected to Zaplane. Your workflow will run automatically every time someone submits the selected form on your site.