

This guide walks through creating a workflow, adding an AR Form trigger, and configuring it to start your workflow whenever a specific form is submitted.
Step 1: Create a Workflow
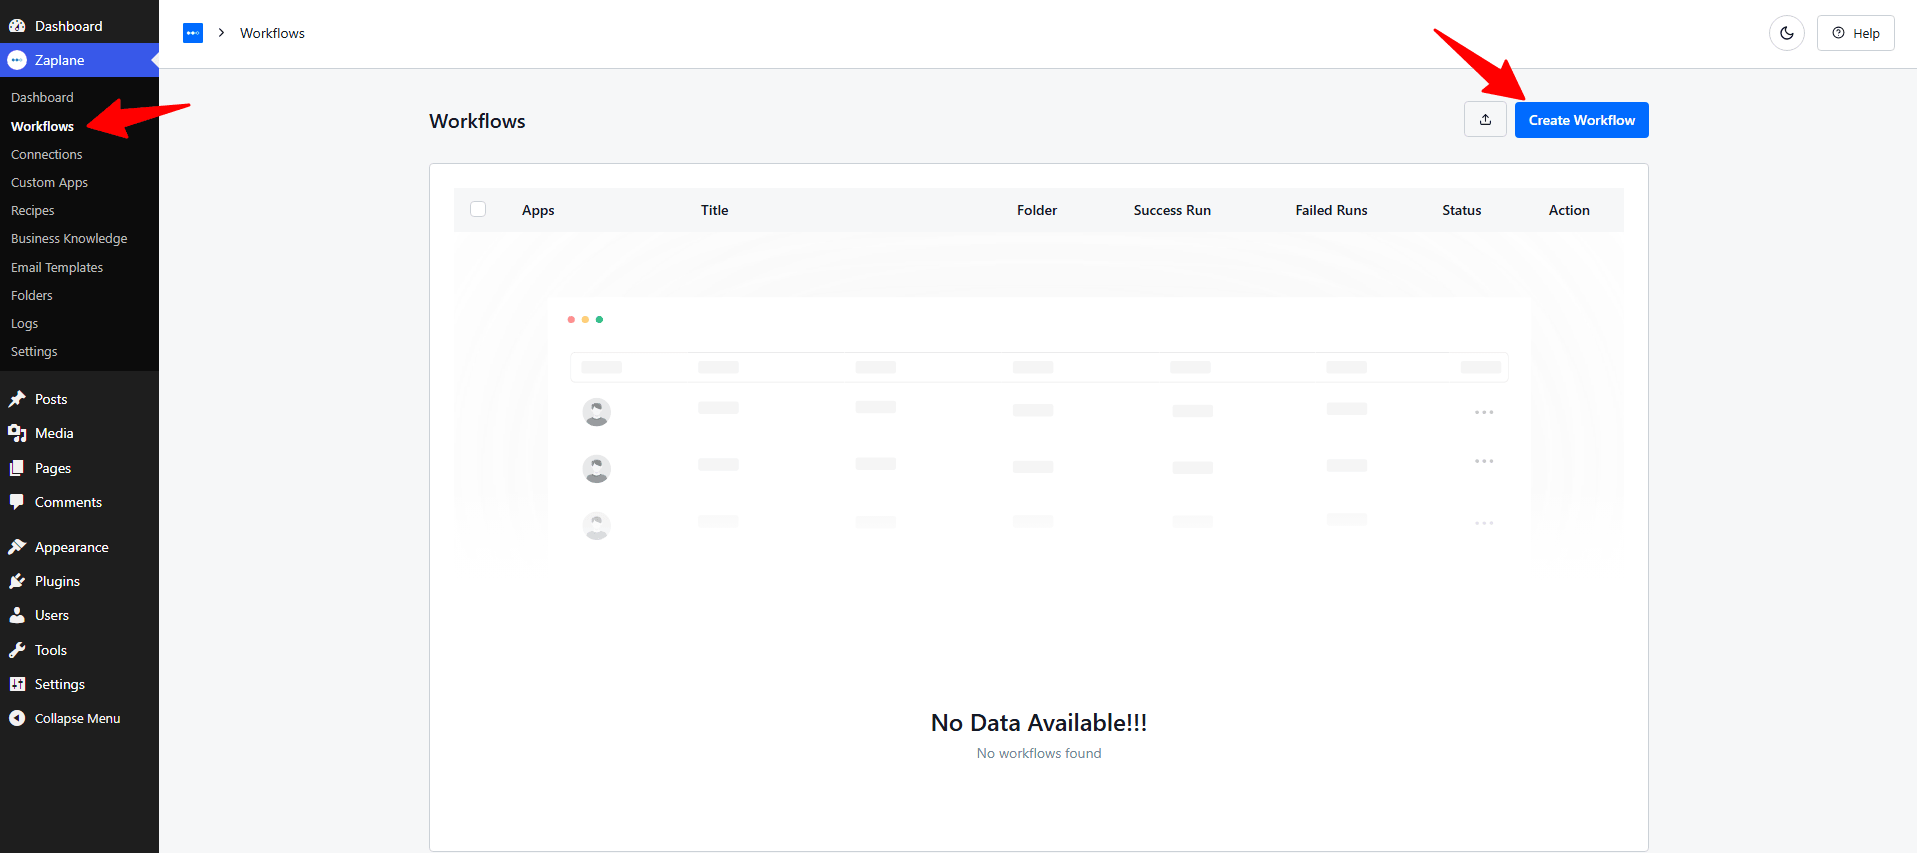
- Go to Zaplane > Workflows and click Create Workflow.
Step 2: Add the Trigger
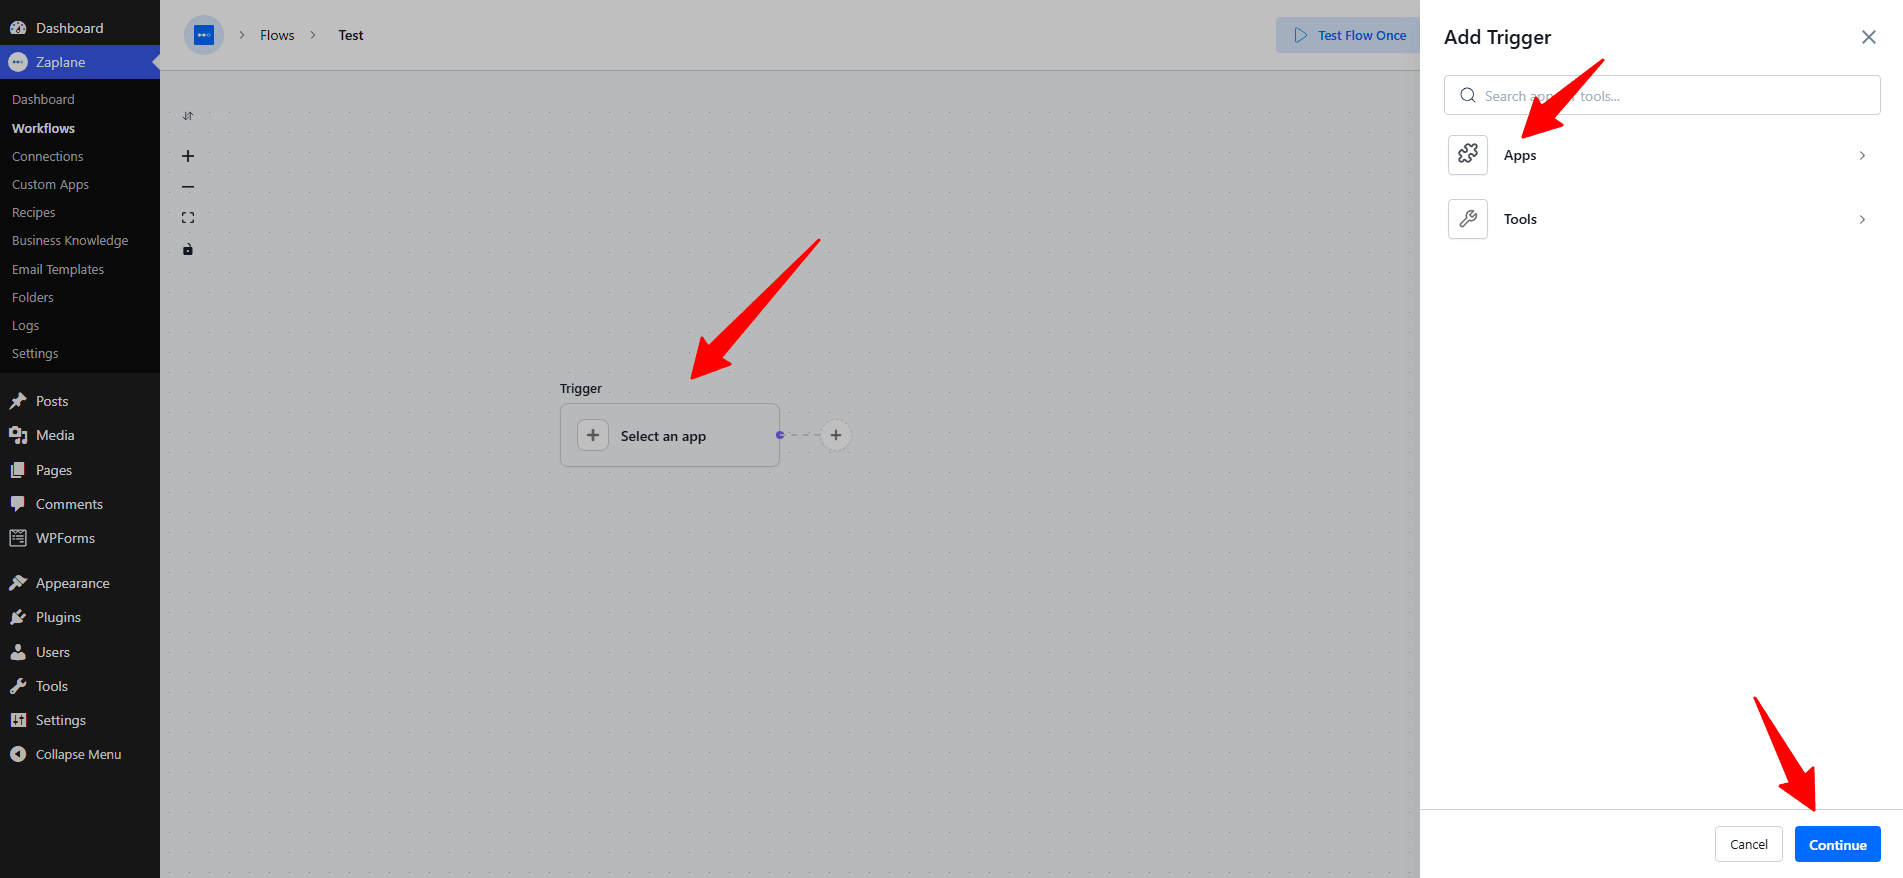
- Click Select an app on the trigger node, then choose Apps to search for the app you want to trigger from.
Step 3: Select the AR Form App
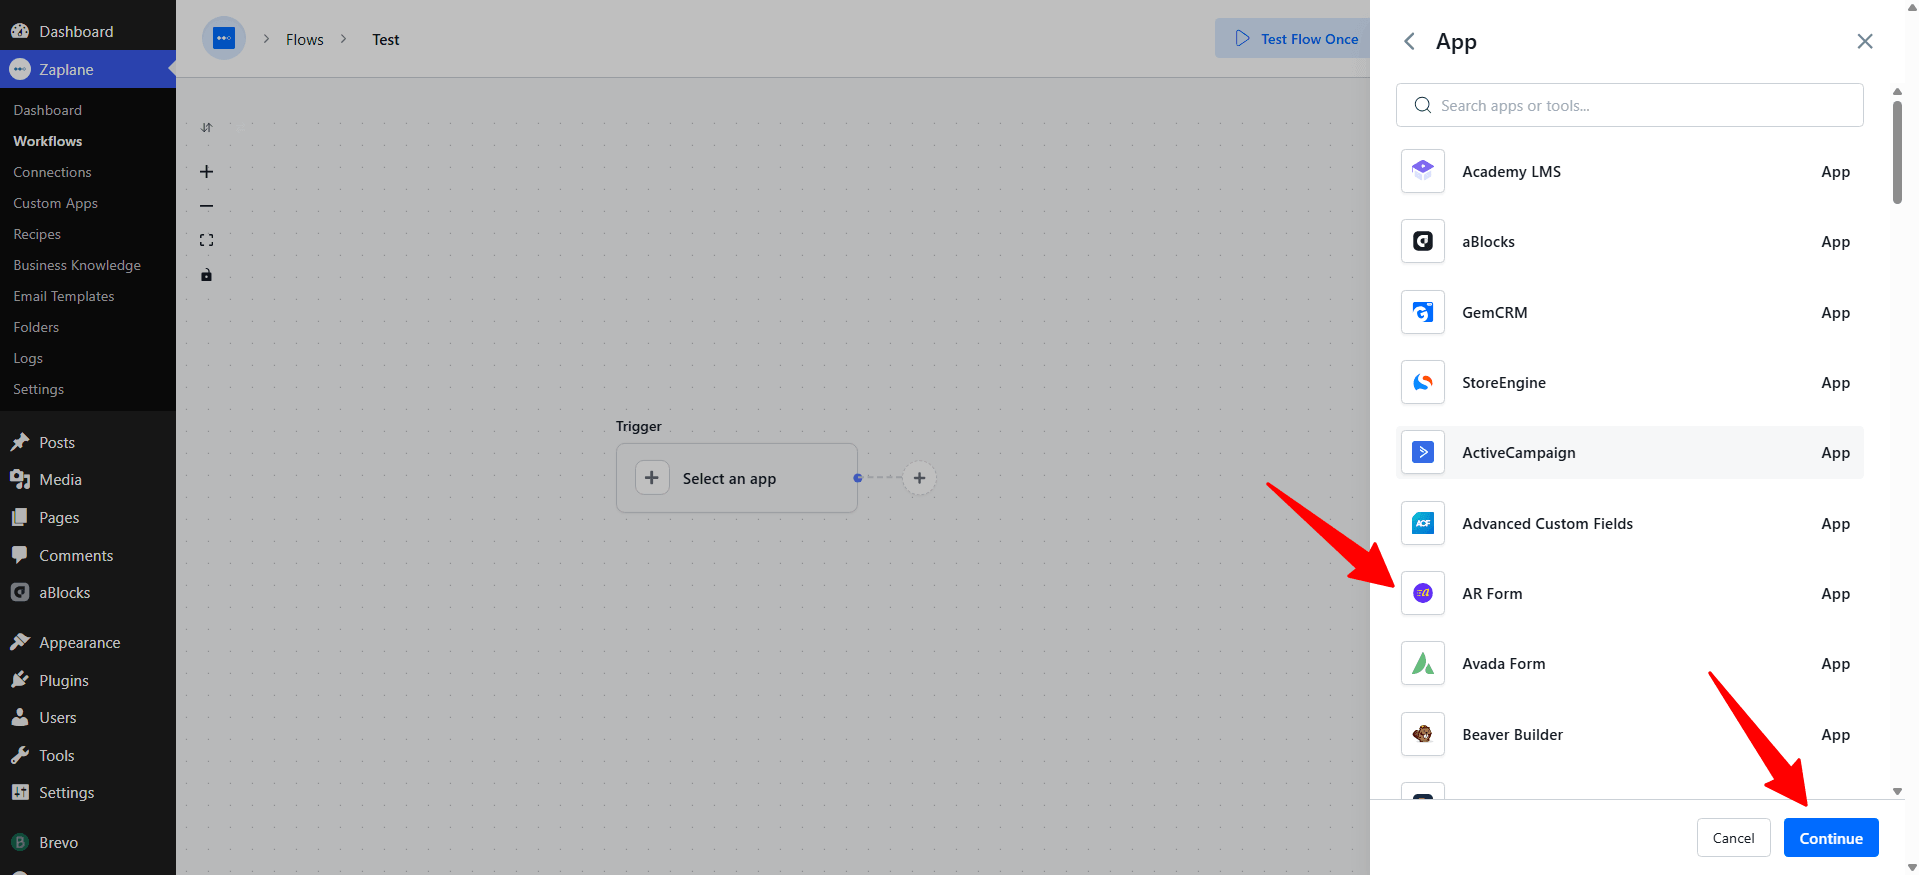
- From the list of apps, choose AR Form, then click Continue.
Step 4: Choose the Trigger Type
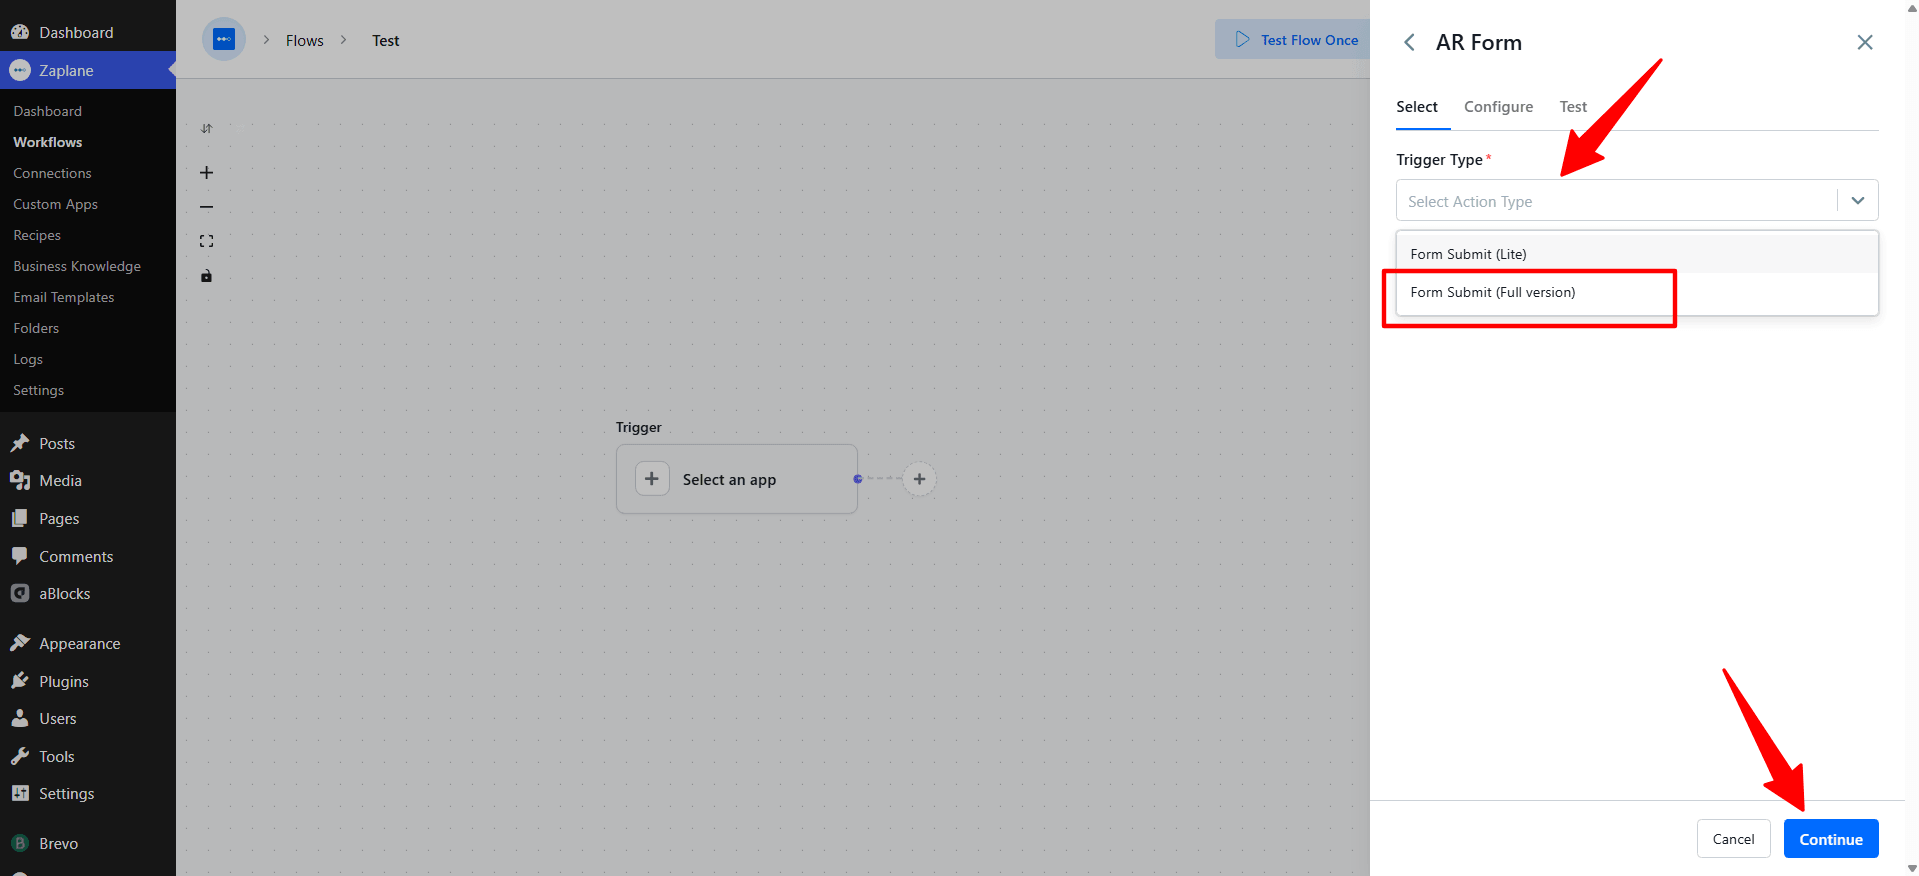
- On the Select tab, set Trigger Type to Form Submit (Full version), then click Continue.
Step 5: Configure the Trigger
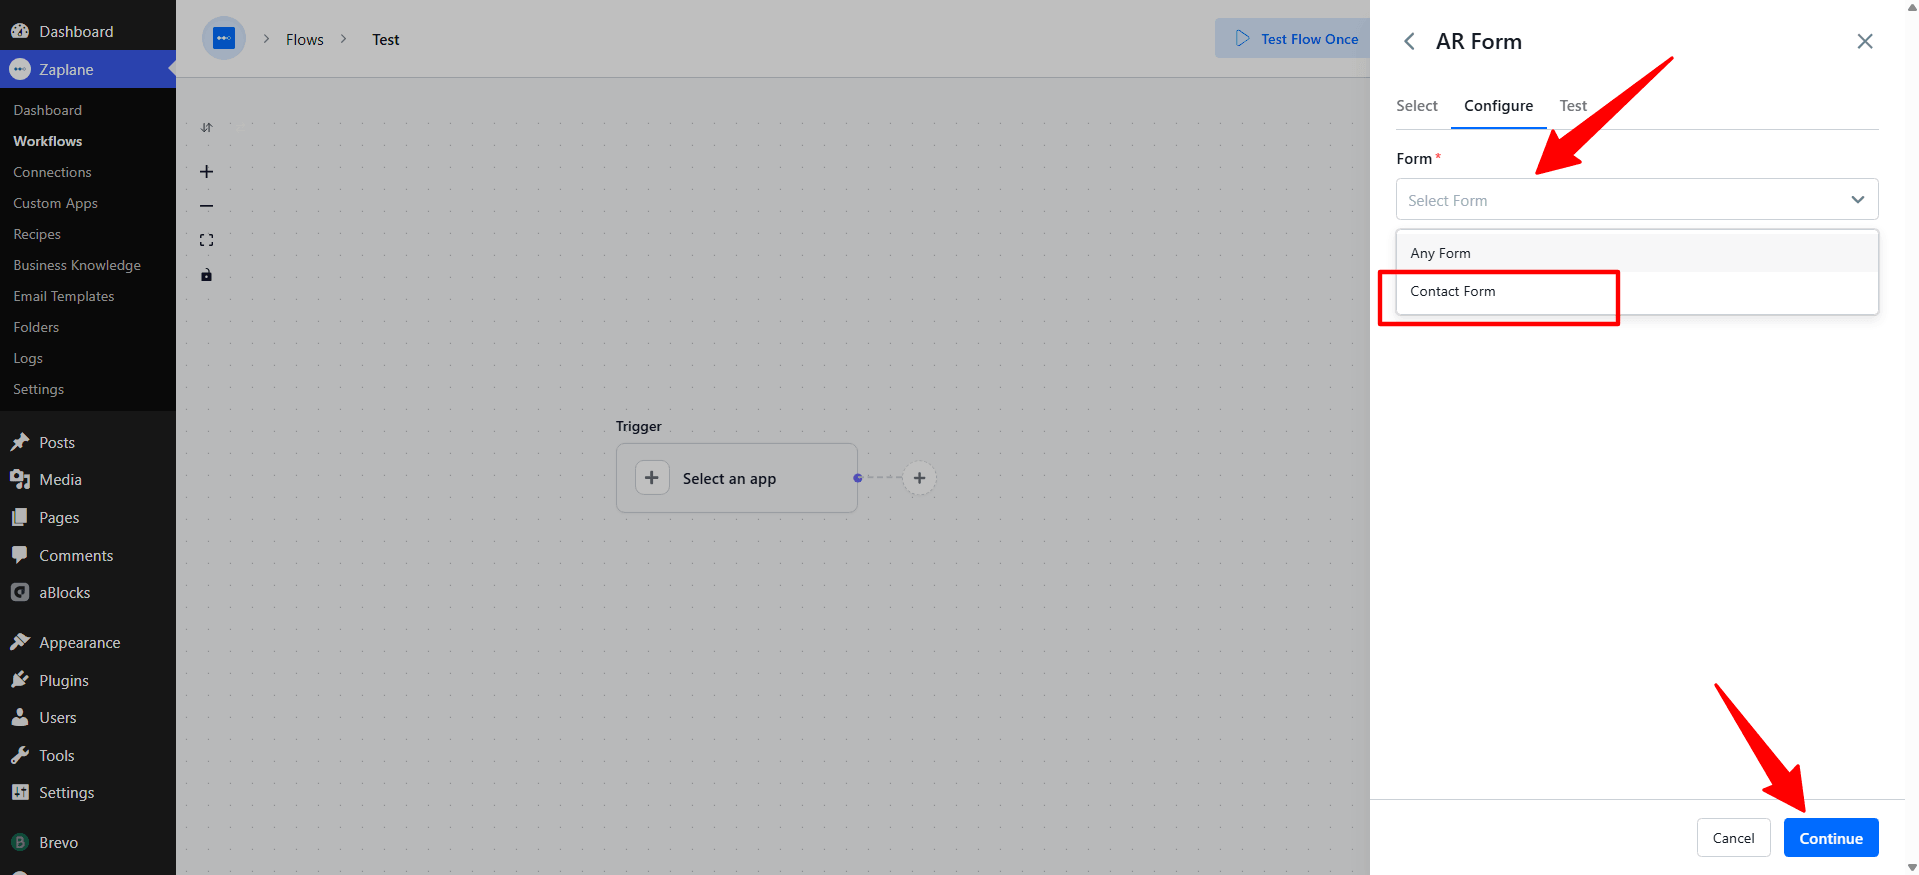
- On the Configure tab, choose which Form should trigger the workflow — either Any Form or a specific form like Contact Form — then click Continue.
Step 6: Test and Save the Trigger
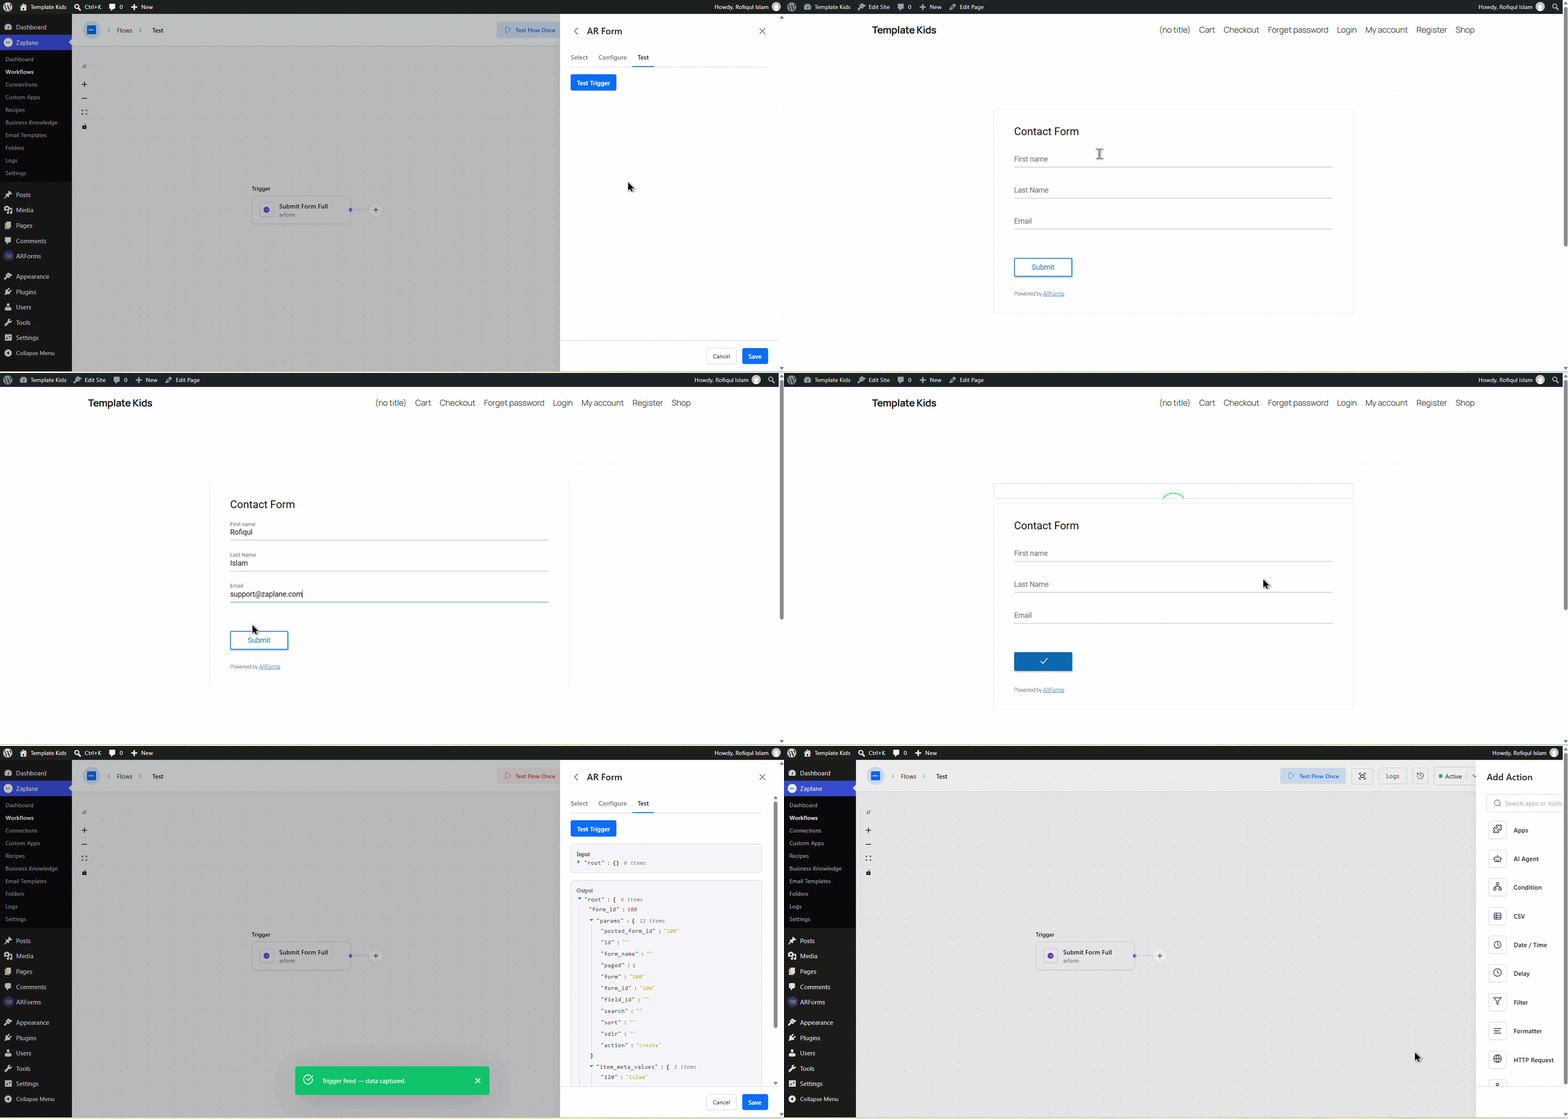
- On the Test tab, click Test Trigger to submit the form and confirm Zaplane receives the data, then click Save.
Step 7: Update and Activate the Workflow
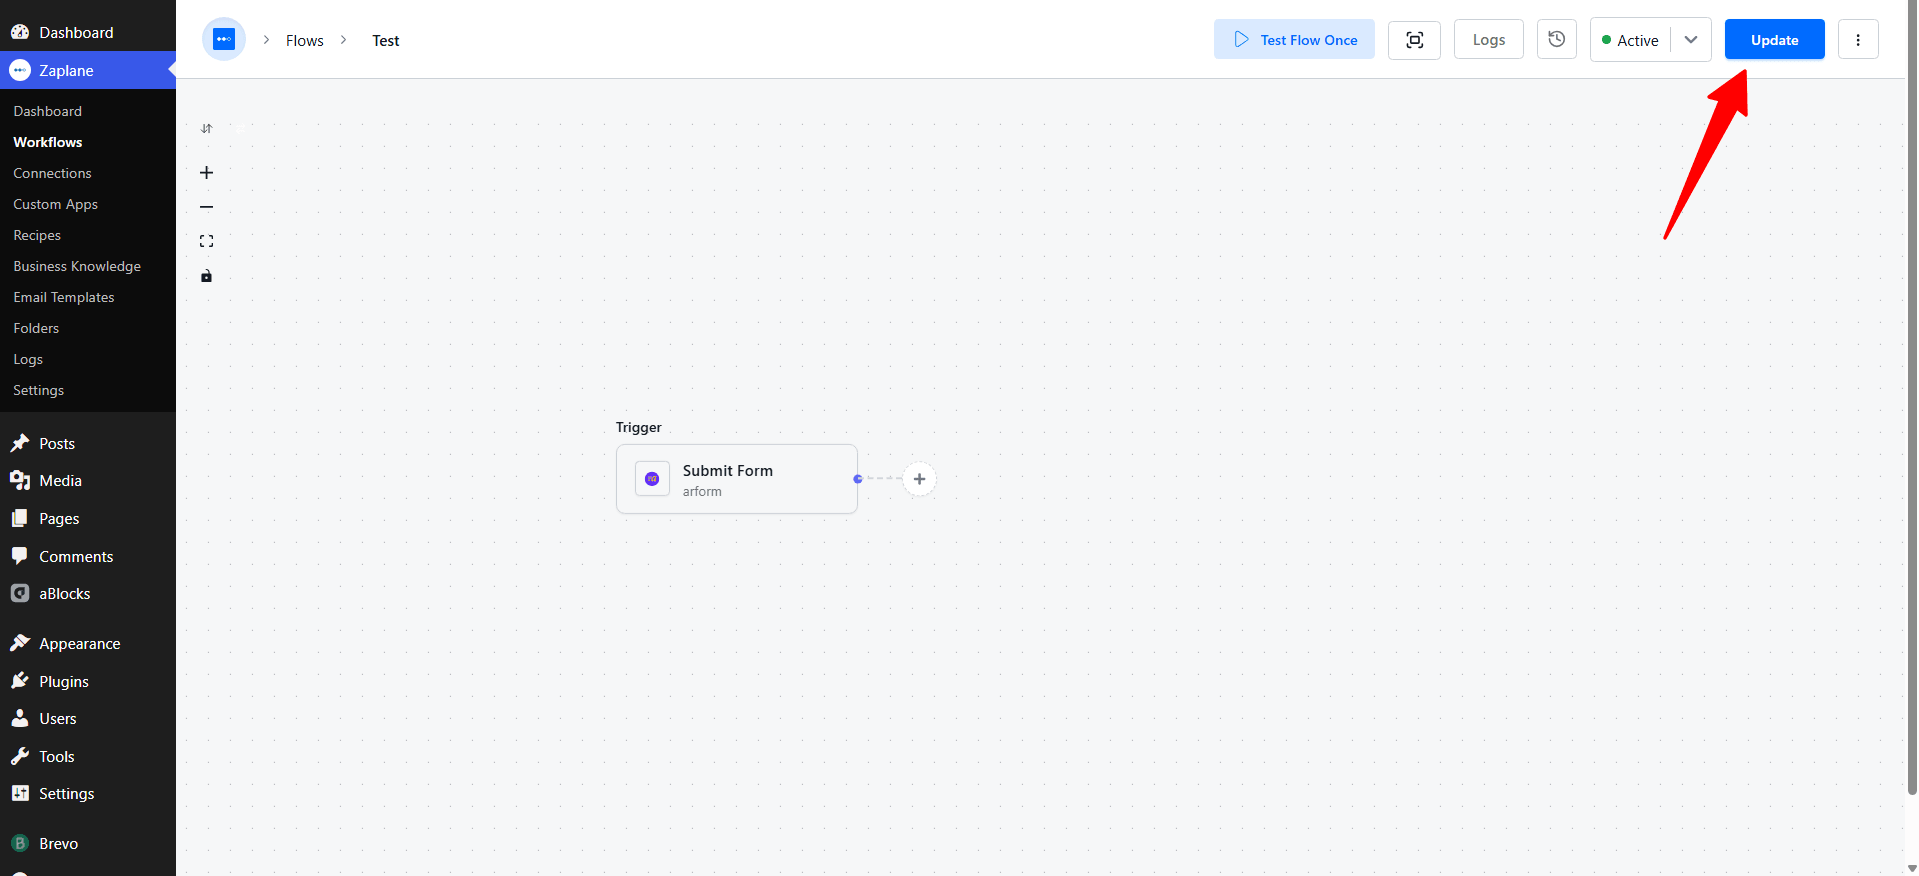
- Click Update in the top-right corner to save your changes and keep the workflow Active.
Your Zaplane workflow now runs automatically every time this form is submitted.
Done!
AR Form is now connected in Zaplane and ready to trigger workflows from your form submissions.