

Google Meet uses OAuth, so connecting it takes a few more steps than a simple API key integration: you’ll first get a Client ID and Client Secret from Google Cloud Console, then use them to create a connection inside Zaplane, and finally add the Google Meet action to a workflow. This guide walks through all three parts using a “create a meeting when a form is submitted” workflow as the example.
Part 1: Create a Workflow
Go to Zaplane > Workflows from your WordPress dashboard, then click Create Workflow to open the workflow editor.
Before adding a Google Meet action, you need to set up a trigger first. Here is how to do it quickly:
- Click Select an app under the Trigger box, then choose Apps.
- Search for and select your trigger app — in this example, we are using aBlocks Contact Form.
- Choose the Trigger Type that matches the event you want to watch for, then click Continue.
- On the Configure tab, set up any required options, then click Continue.
- On the Test tab, click Test Trigger to confirm it is working correctly, then click Save.
Once your trigger is saved, proceed to the next step to add the Google Meet action.
Part 2: Get Your Google Meet Credentials
Step 1: Open Google Cloud Console
- Go to Google Cloud Console and make sure you’re on the project you want to use (create one first if you don’t have one yet, e.g. “zaplane”).
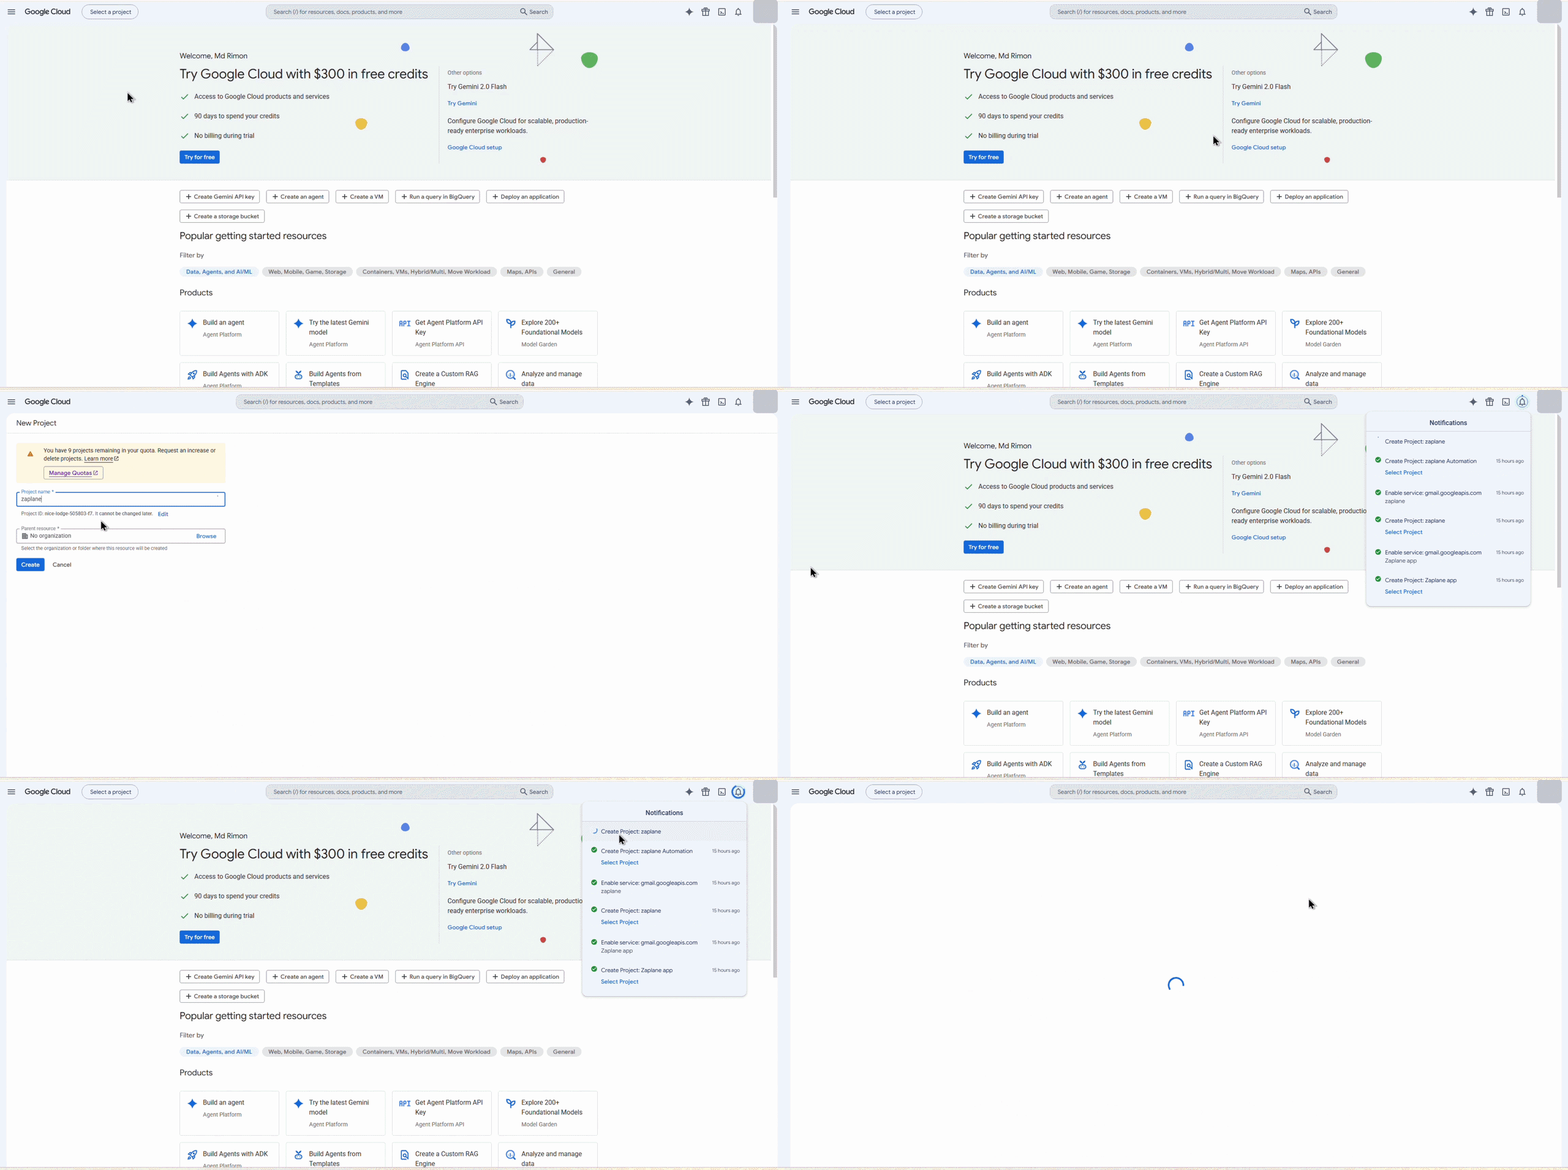
Step 2: Start the OAuth Consent Screen Setup
- Go to APIs & Services > Credentials and try to create a client — Google will prompt you to configure the OAuth consent screen first. Click Get started.
Step 3: Fill in the Consent Screen Details
- Work through the four sections: App Information (app name and support email), Audience, Contact Information (an email for Google’s notifications), and Finish (agree to the API Services User Data Policy). Click Create.
Step 4: Publish the App
- On the Audience tab, click Publish app and confirm. This moves your app out of “Testing” status so it isn’t limited to a small list of test users.
Step 5: Go to the Clients Tab
- Open the Clients tab under Google Auth Platform and click + Create client.
Step 6: Set the Application Type
- Choose Web application as the Application type and give it a Name (e.g. “zaplane”).
Step 7: Add the Authorized Redirect URI
- Under Authorized redirect URIs, click + Add URI and enter your WordPress site’s URL, then click Create.
Step 8: Copy the Client ID and Client Secret
- Google shows the Client ID and Client secret in a one-time dialog — copy both (or download the JSON) before closing it, since the secret can’t be viewed again afterward.
Part 3: Create the Connection in Zaplane
Step 9: Open Connections and Create a Credential
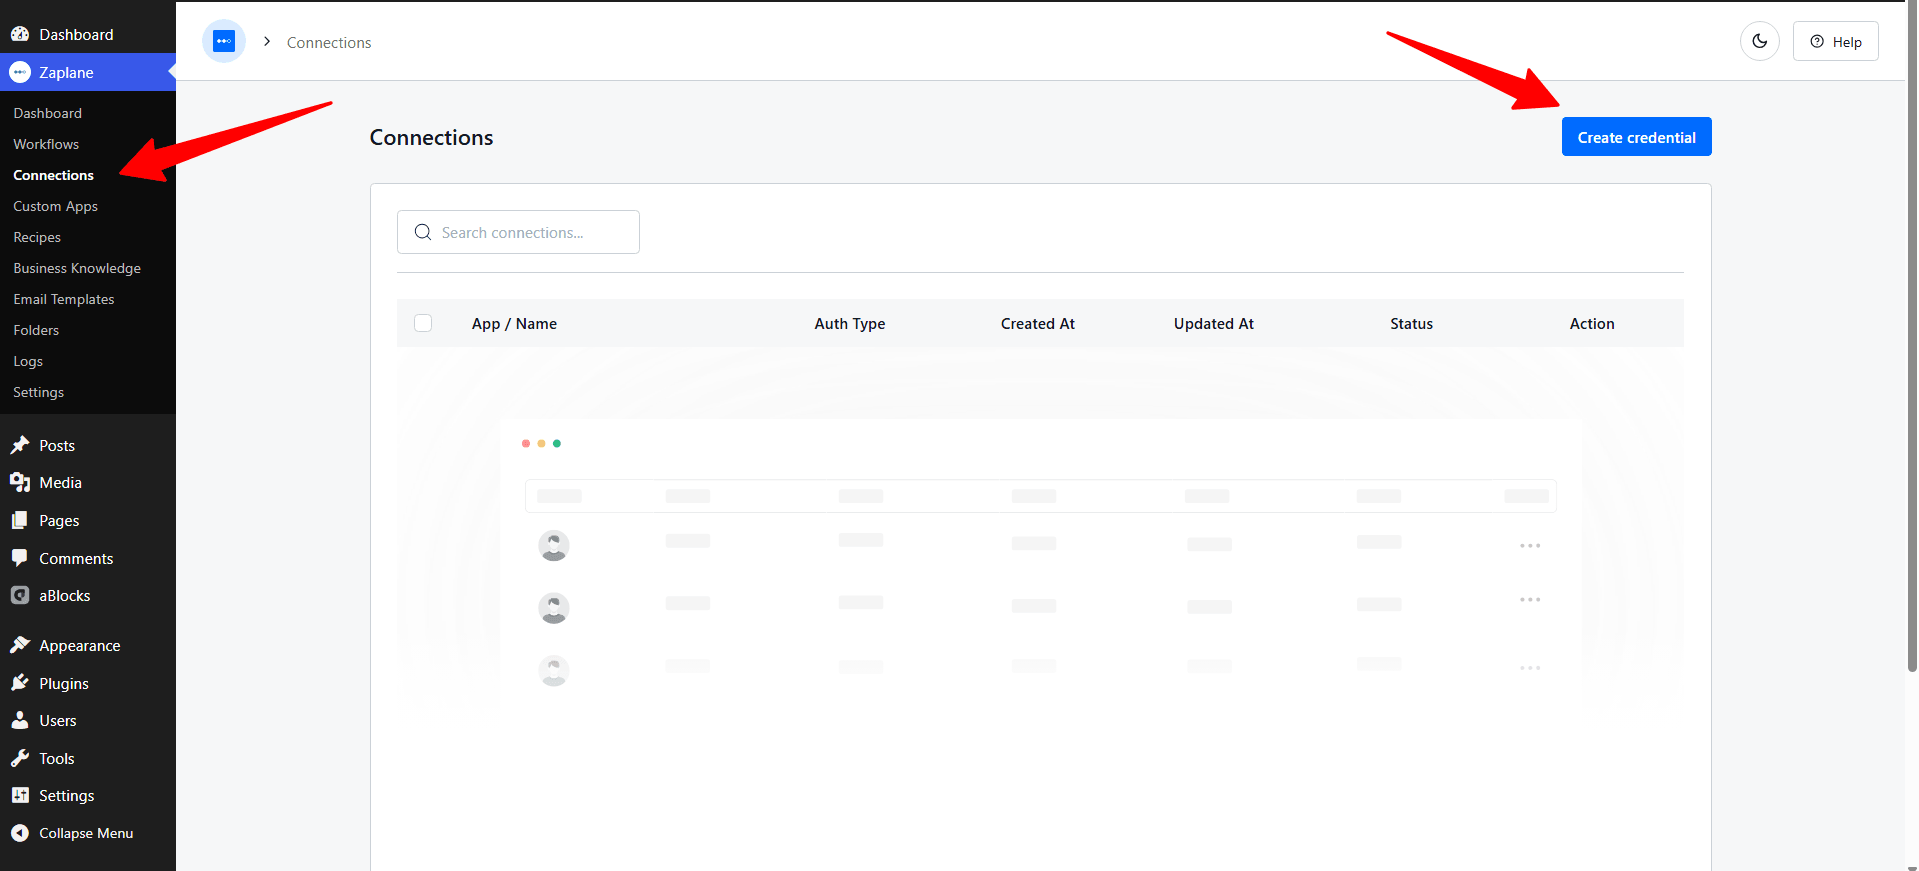
- In WordPress, go to Zaplane > Connections and click Create credential.
Step 10: Select Google Meet
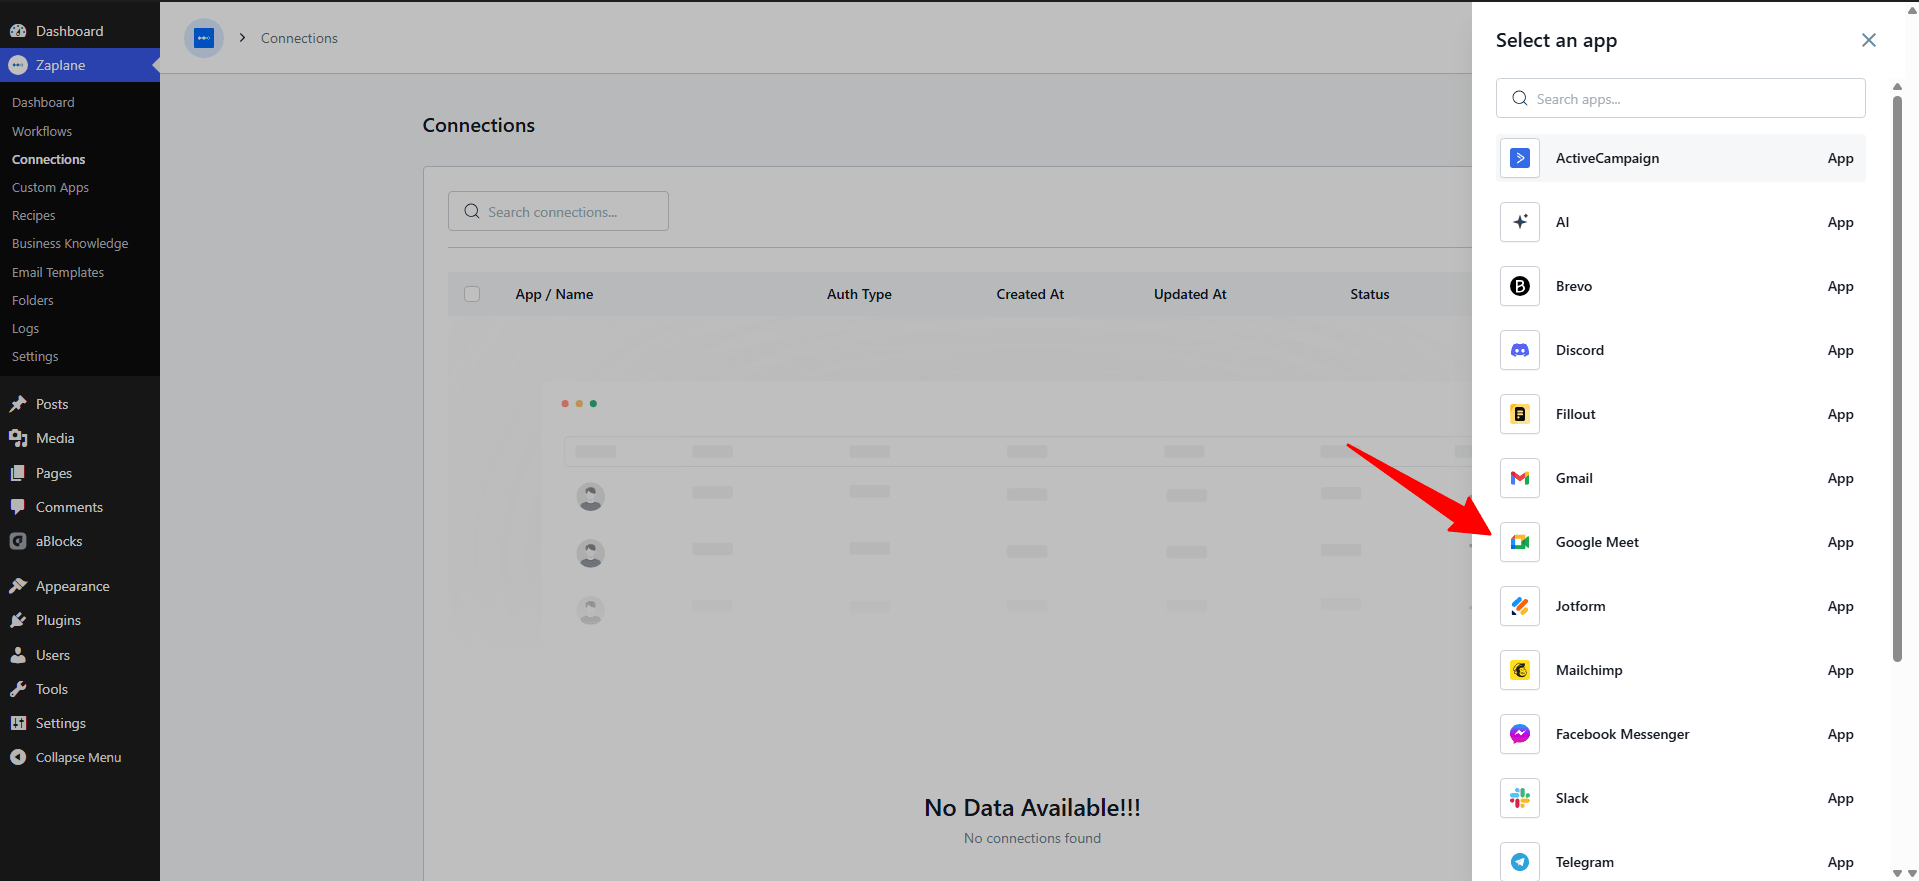
- From the Select an app list, choose Google Meet.
Step 11: Paste Your Credentials and Save
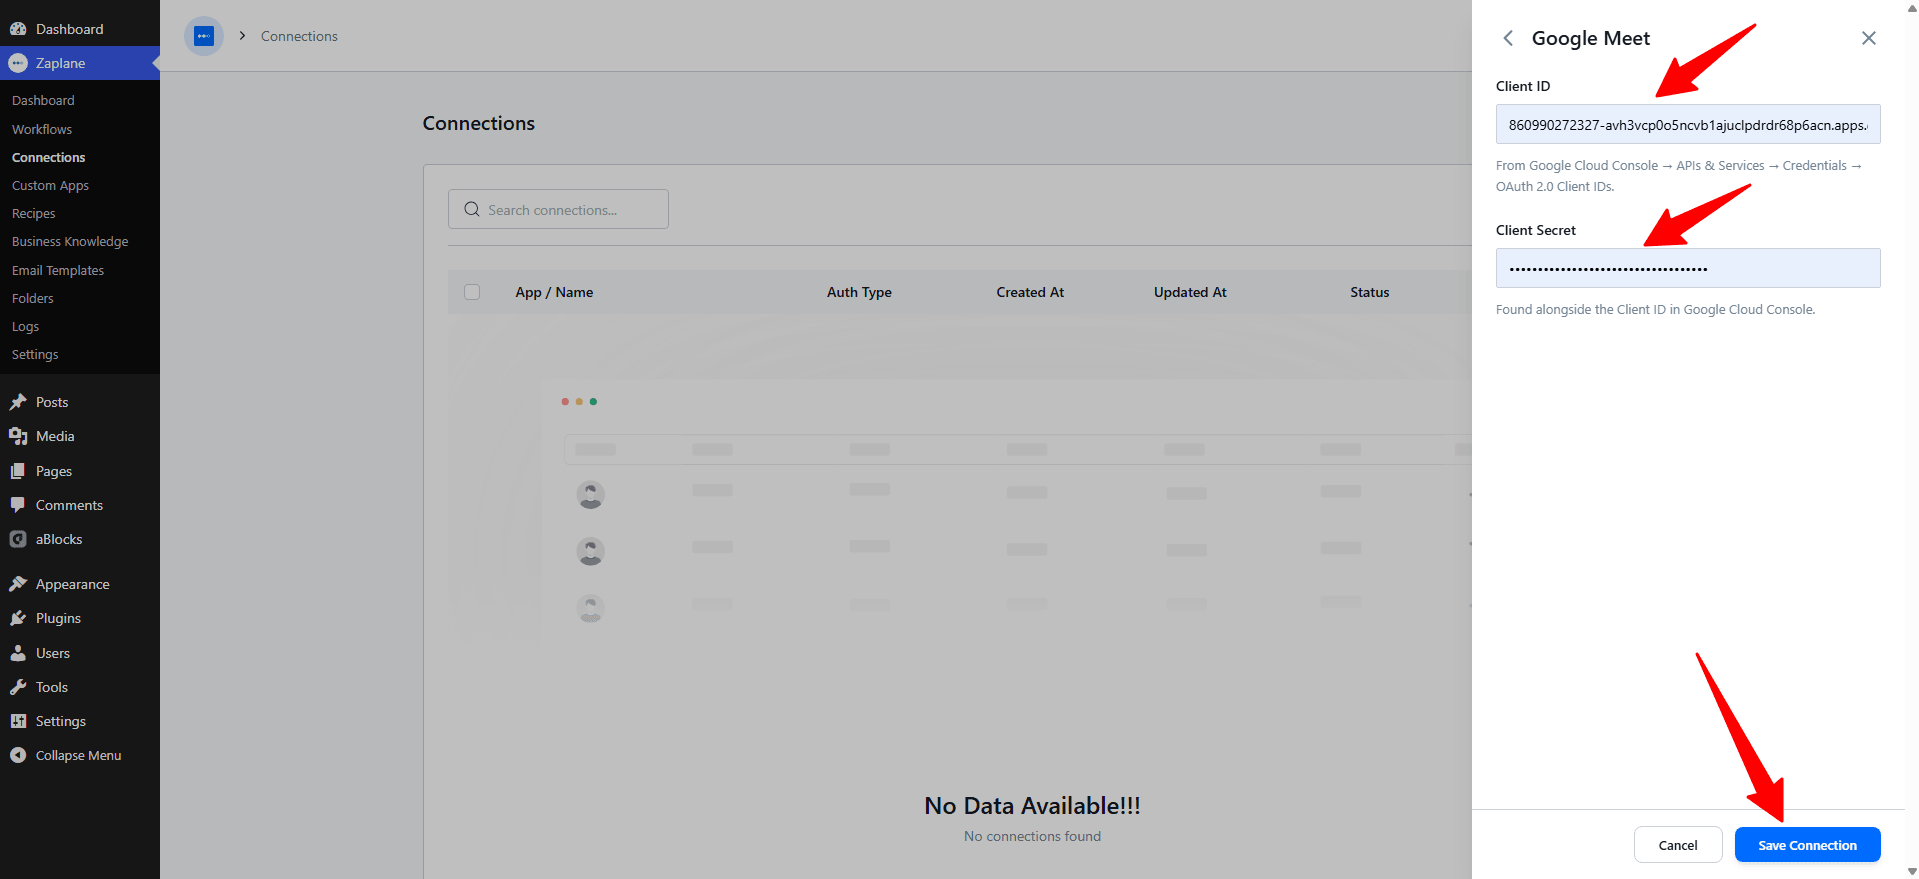
- Paste the Client ID and Client Secret from Google Cloud Console into the matching fields, then click Save Connection.
Part 4: Add the Action to Your Workflow
Step 12: Add an Action to Your Workflow
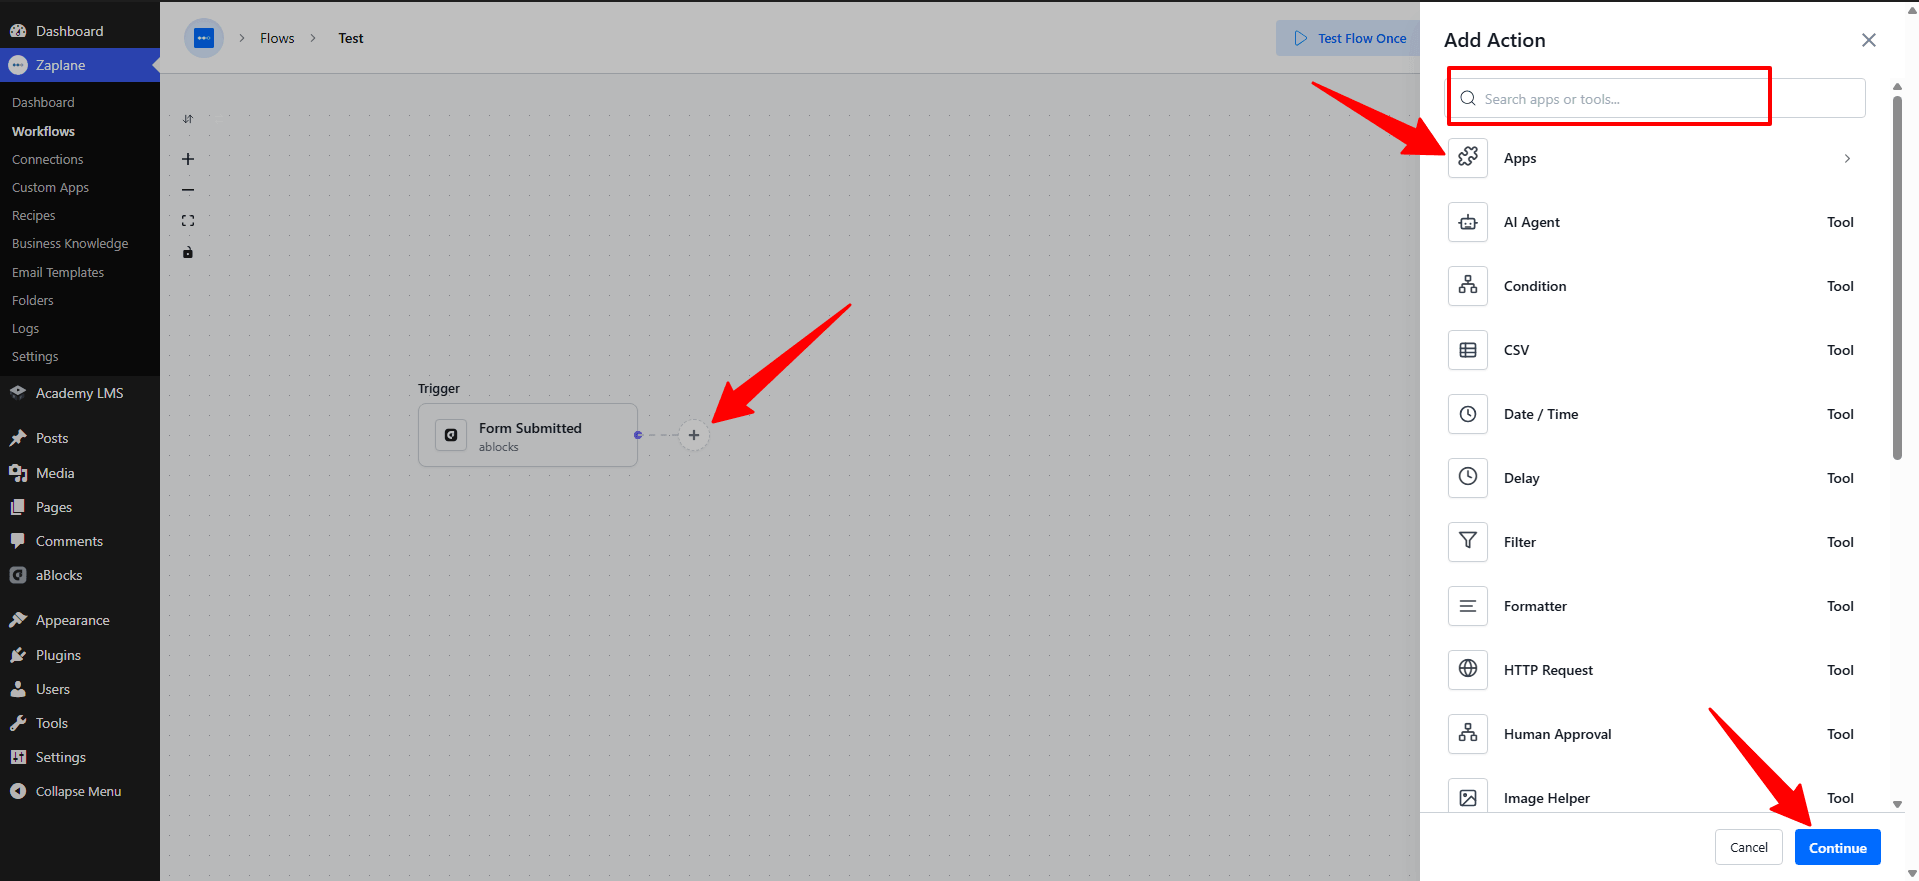
- On your workflow’s trigger, click the + icon, then choose Apps in the Add Action panel.
Step 13: Choose Google Meet
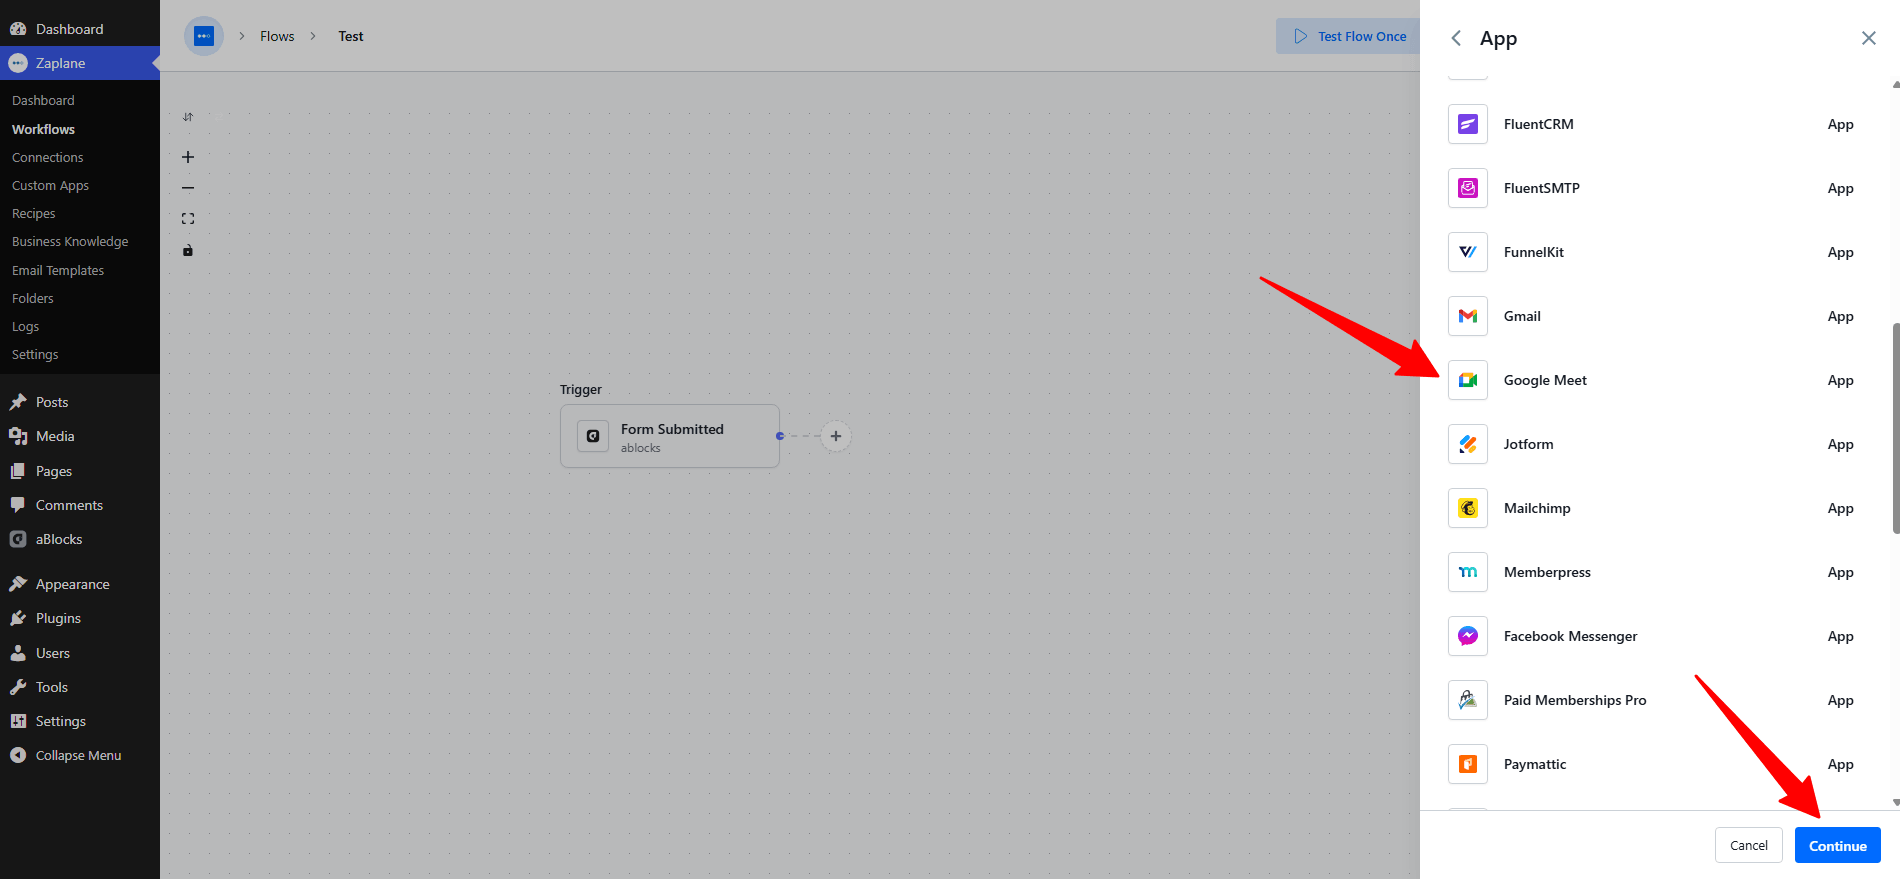
- Search for and select Google Meet from the app list, then click Continue.
Step 14: Select the Action Type and Connection
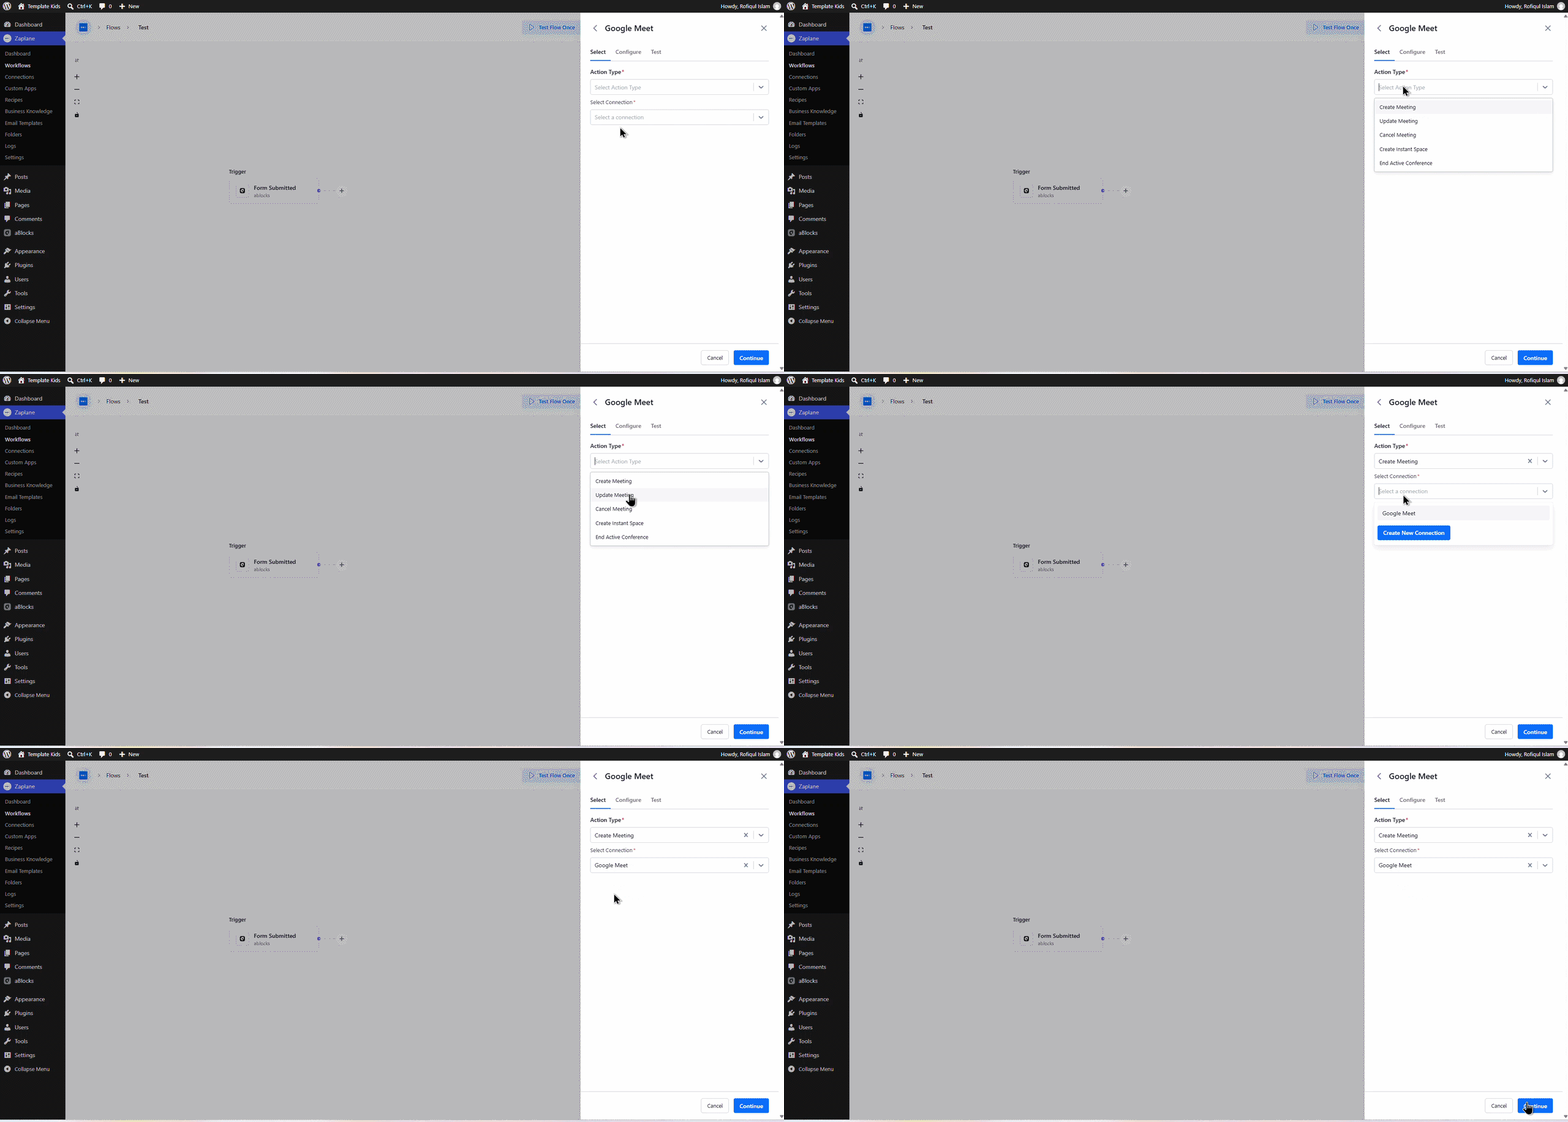
- Set Action Type to Create Meeting, and pick your saved Google Meet connection under Select Connection.
Step 15: Configure the Meeting
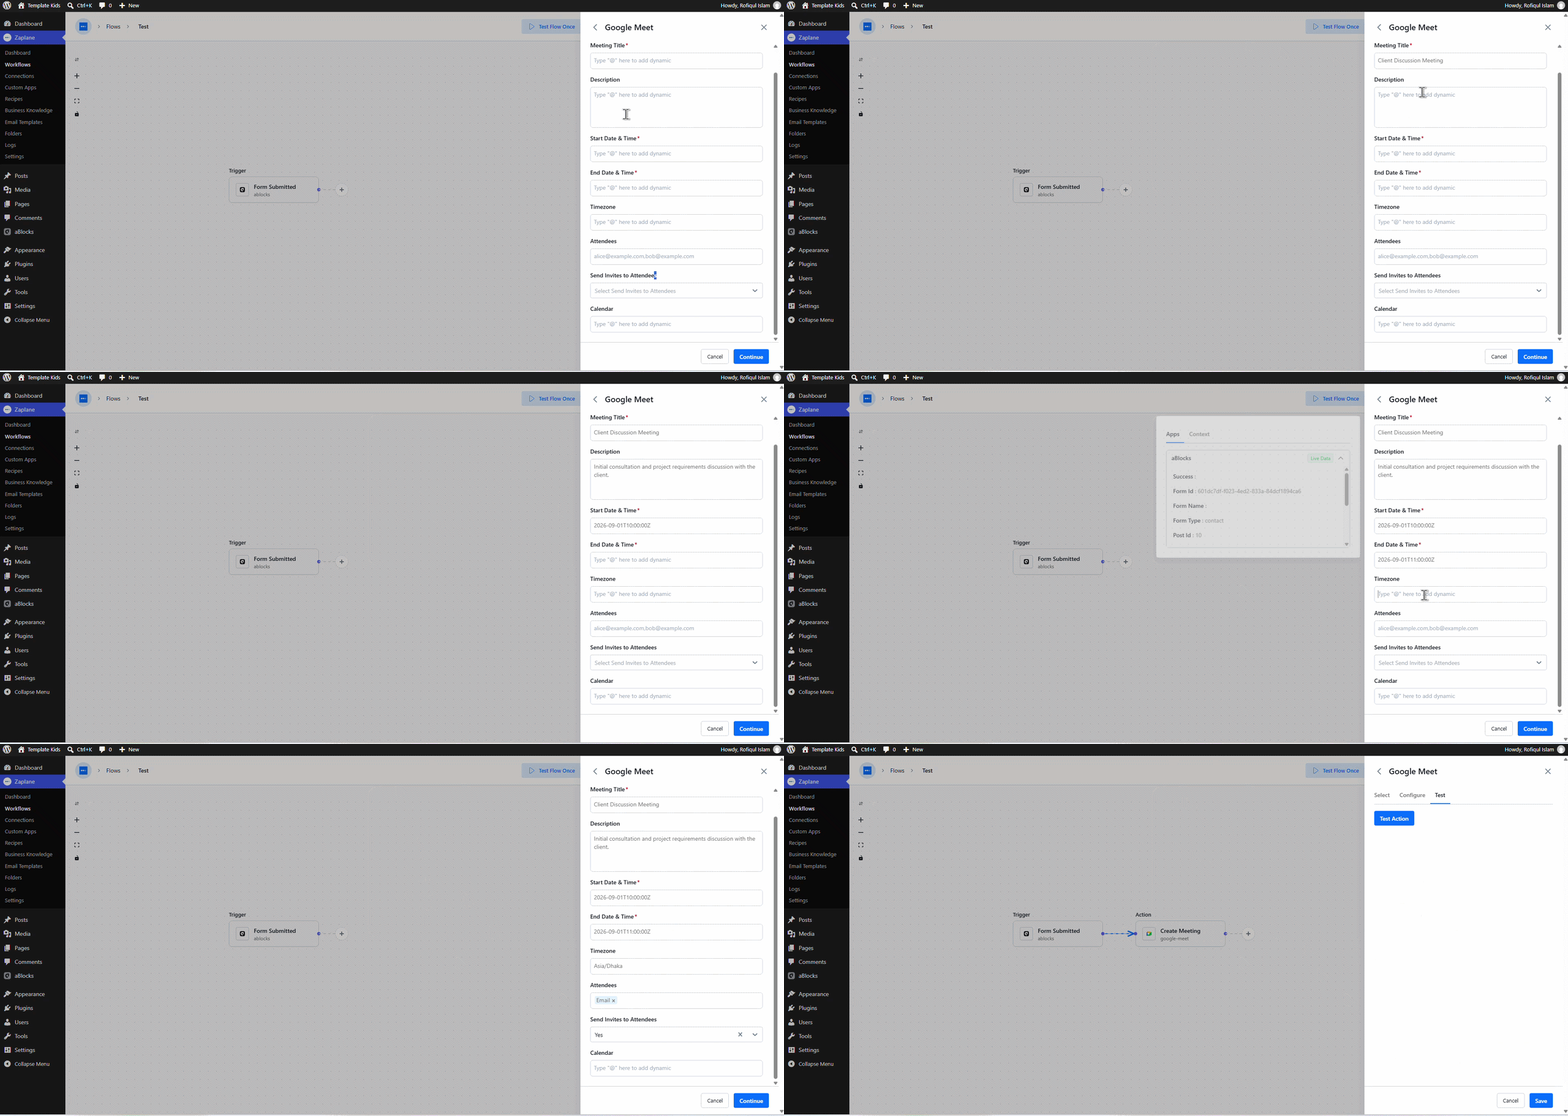
- On the Configure tab, fill in the Meeting Title, Description, Start Date & Time, End Date & Time, Timezone, Attendees, and whether to Send Invites to Attendees — using dynamic data from the trigger (like the submitter’s name and email) wherever it fits.
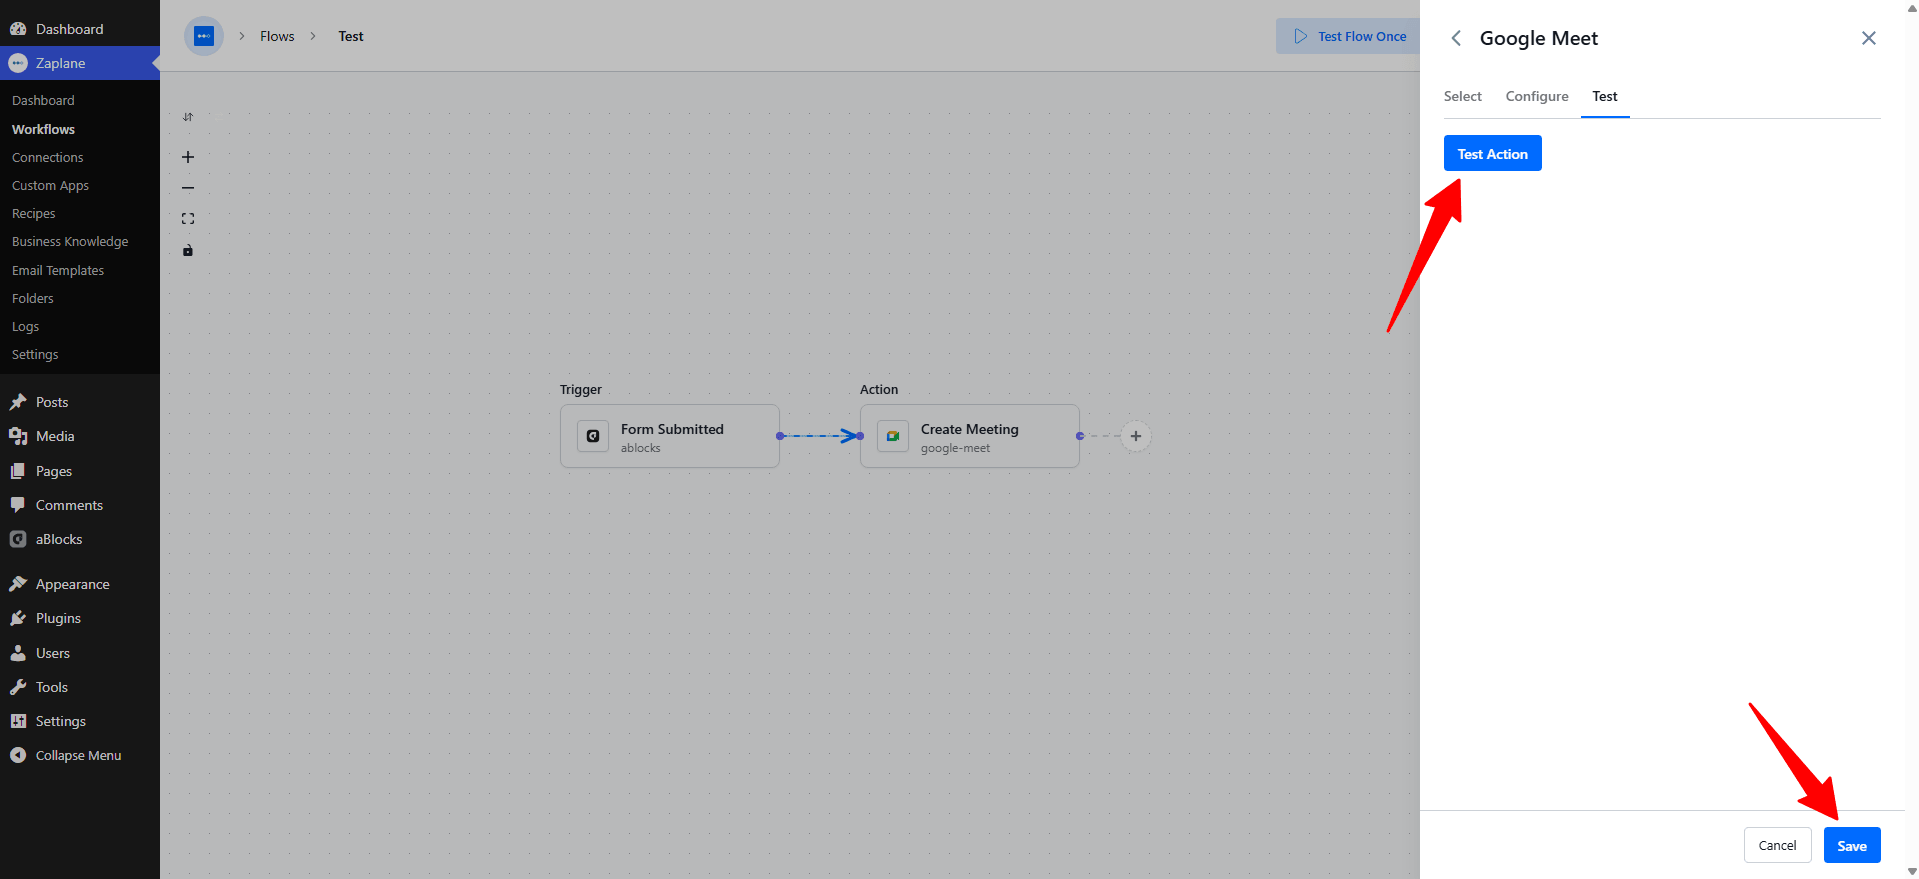
Step 16: Test the Action
- On the Test tab, click Test Action to confirm Zaplane can create a real Google Meet event, then click Save.
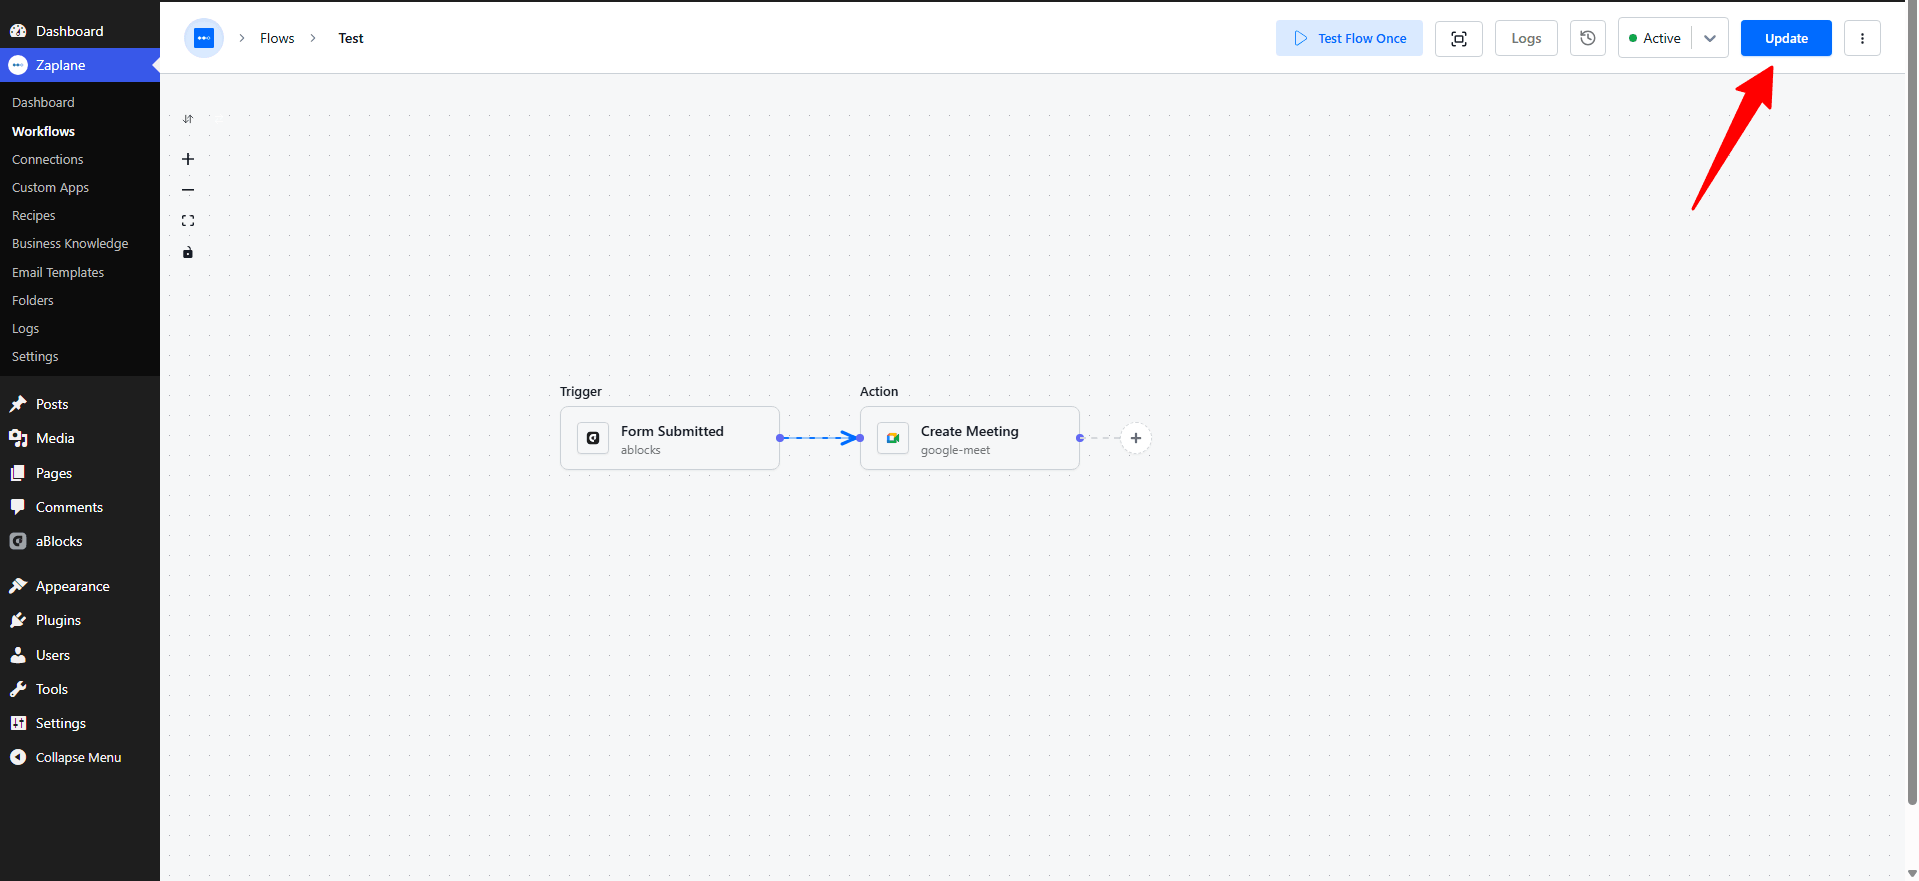
Step 17: Update and Activate the Workflow
- Click Update to save the workflow with the new action in place.
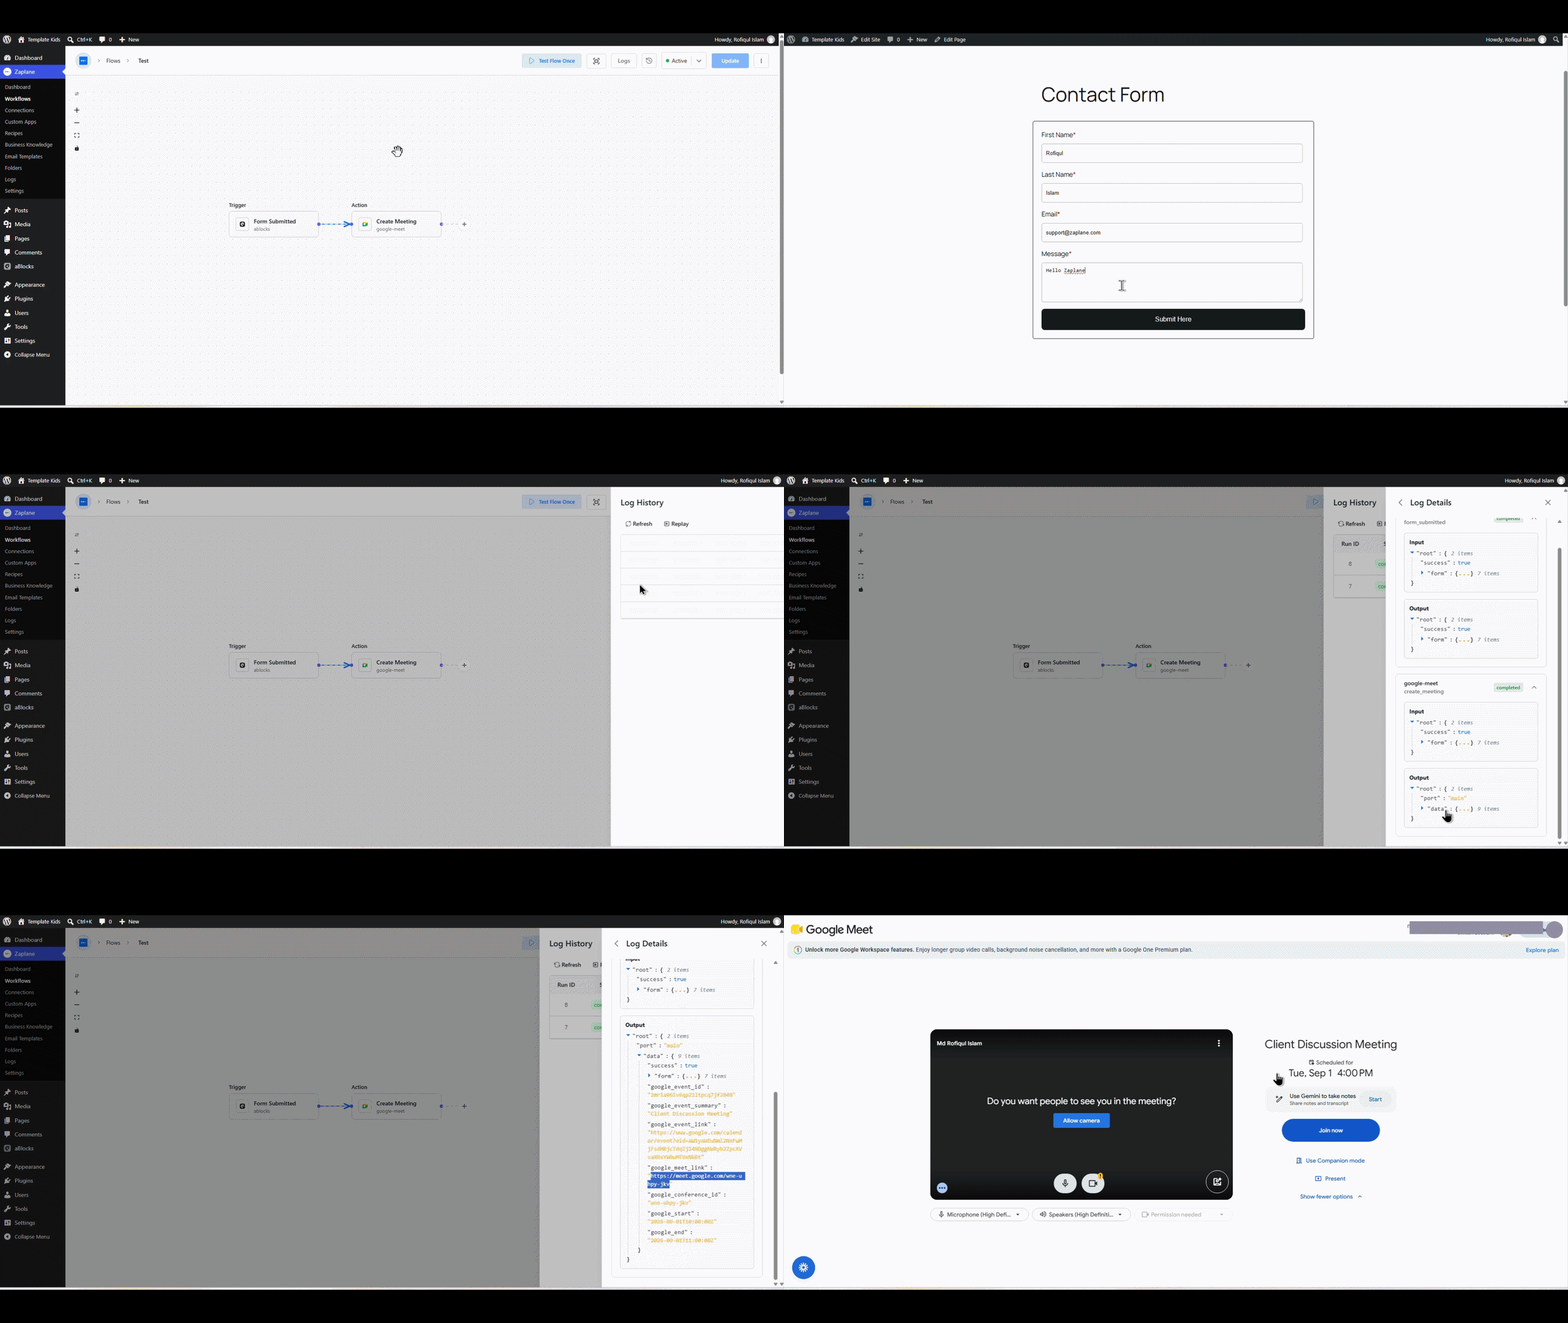
Step 18: Submit a Real Test Entry
- Submit the actual form on your site once. In Log History, you’ll see both the trigger and the google-meet create_meeting action complete successfully, with a real google_meet_link in the output.
- Your Zaplane workflow now creates a real Google Meet meeting — complete with a join link and calendar event — every time the trigger fires, with the meeting details filled in from your form’s data.
Done!
You’ve connected Google Meet to Zaplane and automated meeting creation from your workflow.