

This guide shows you how to use The Events Calendar as a trigger in Zaplane, so your workflow starts automatically whenever something happens to an event on your site. You will need The Events Calendar plugin installed and active on your WordPress site.
Step 1: Create a Workflow
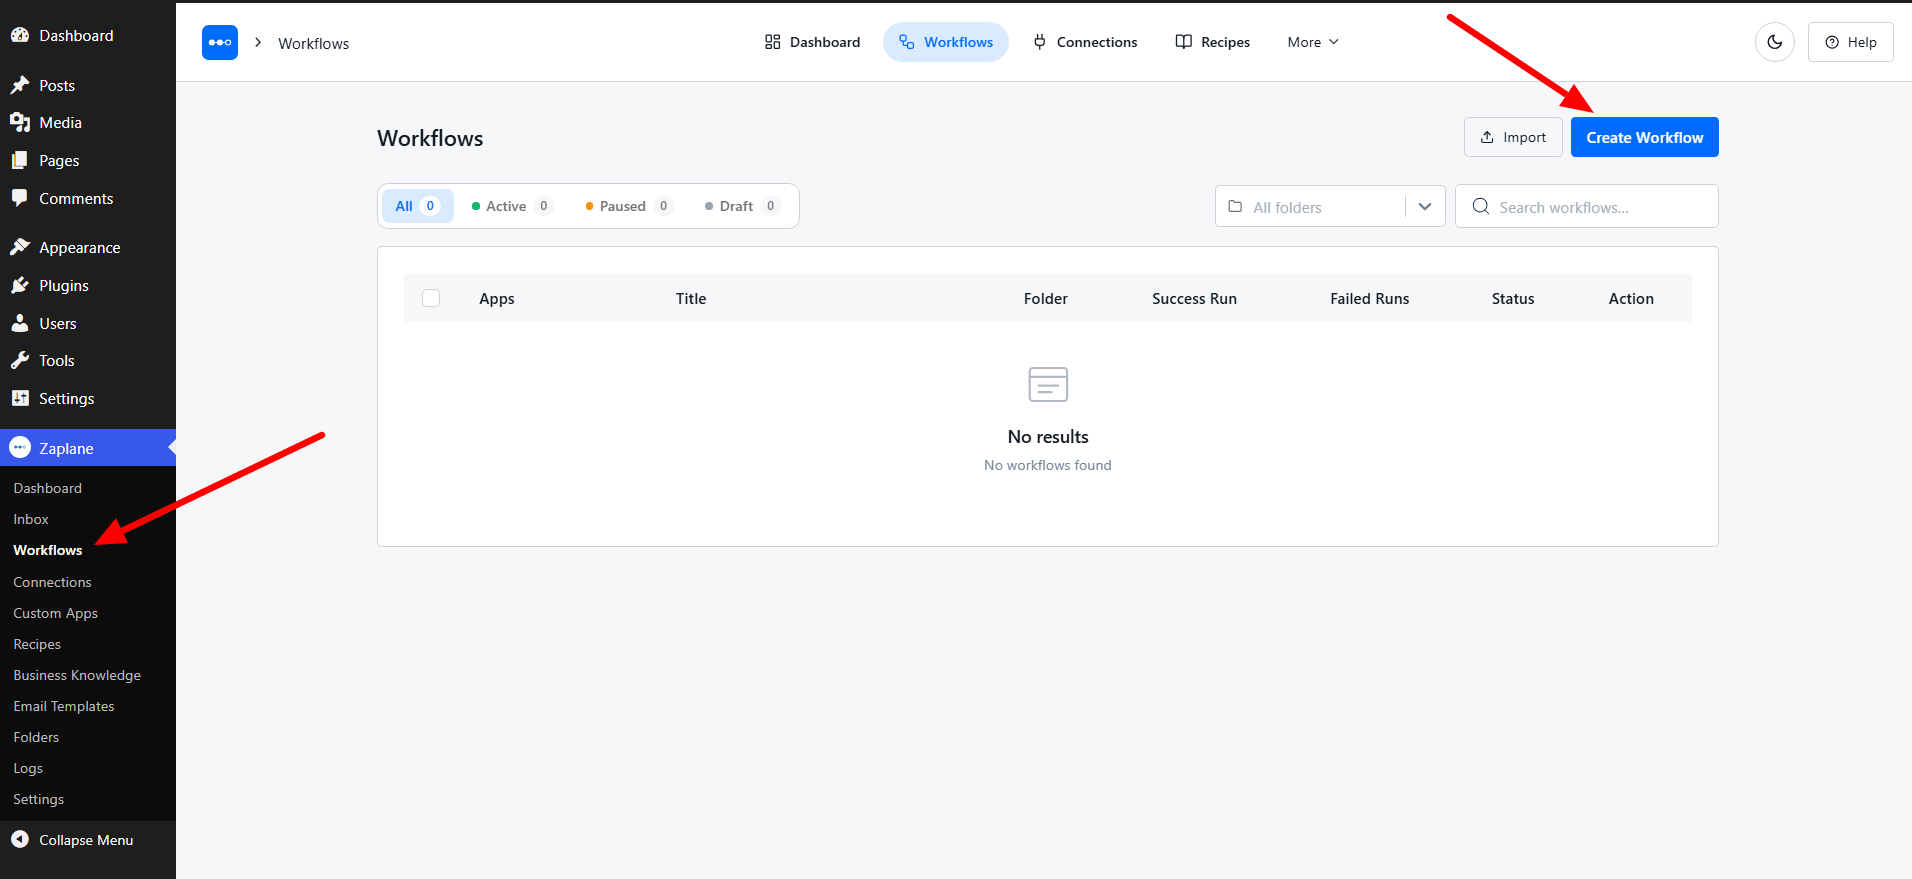
Go to Zaplane > Workflows from your WordPress dashboard, then click Create Workflow to open the workflow editor.
Step 2: Add the Trigger
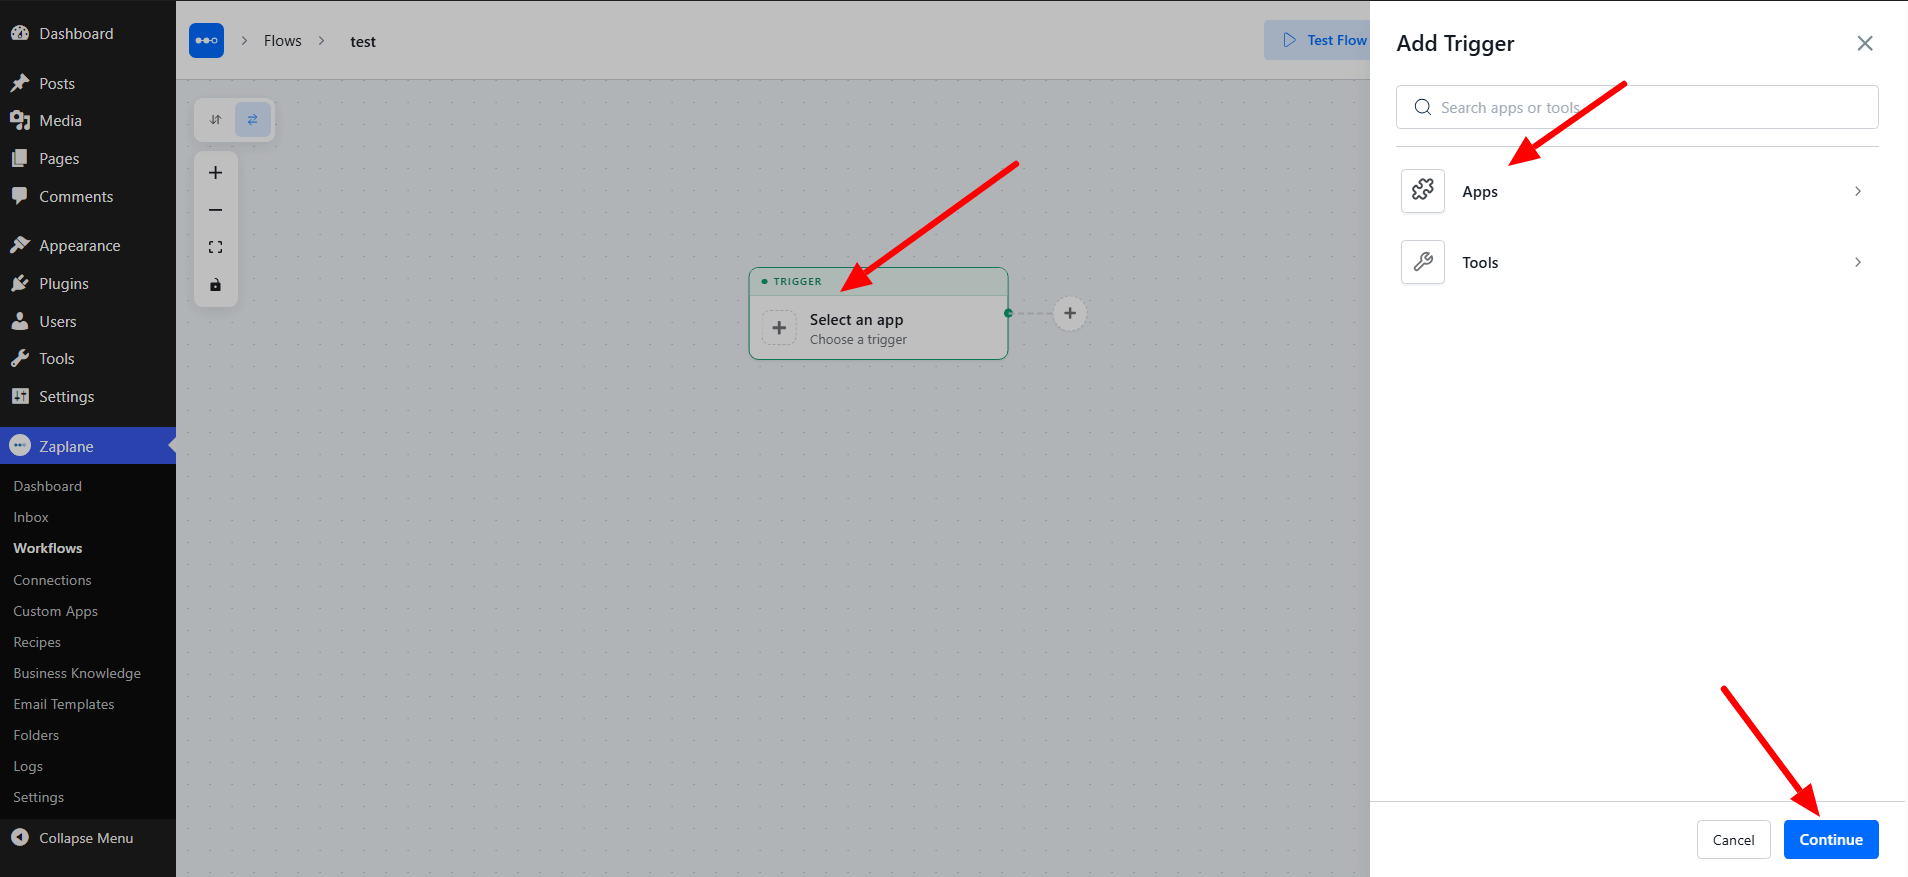
Click Select an app in the Trigger box. In the Add Trigger panel, choose Apps.
Step 3: Select The Events Calendar App
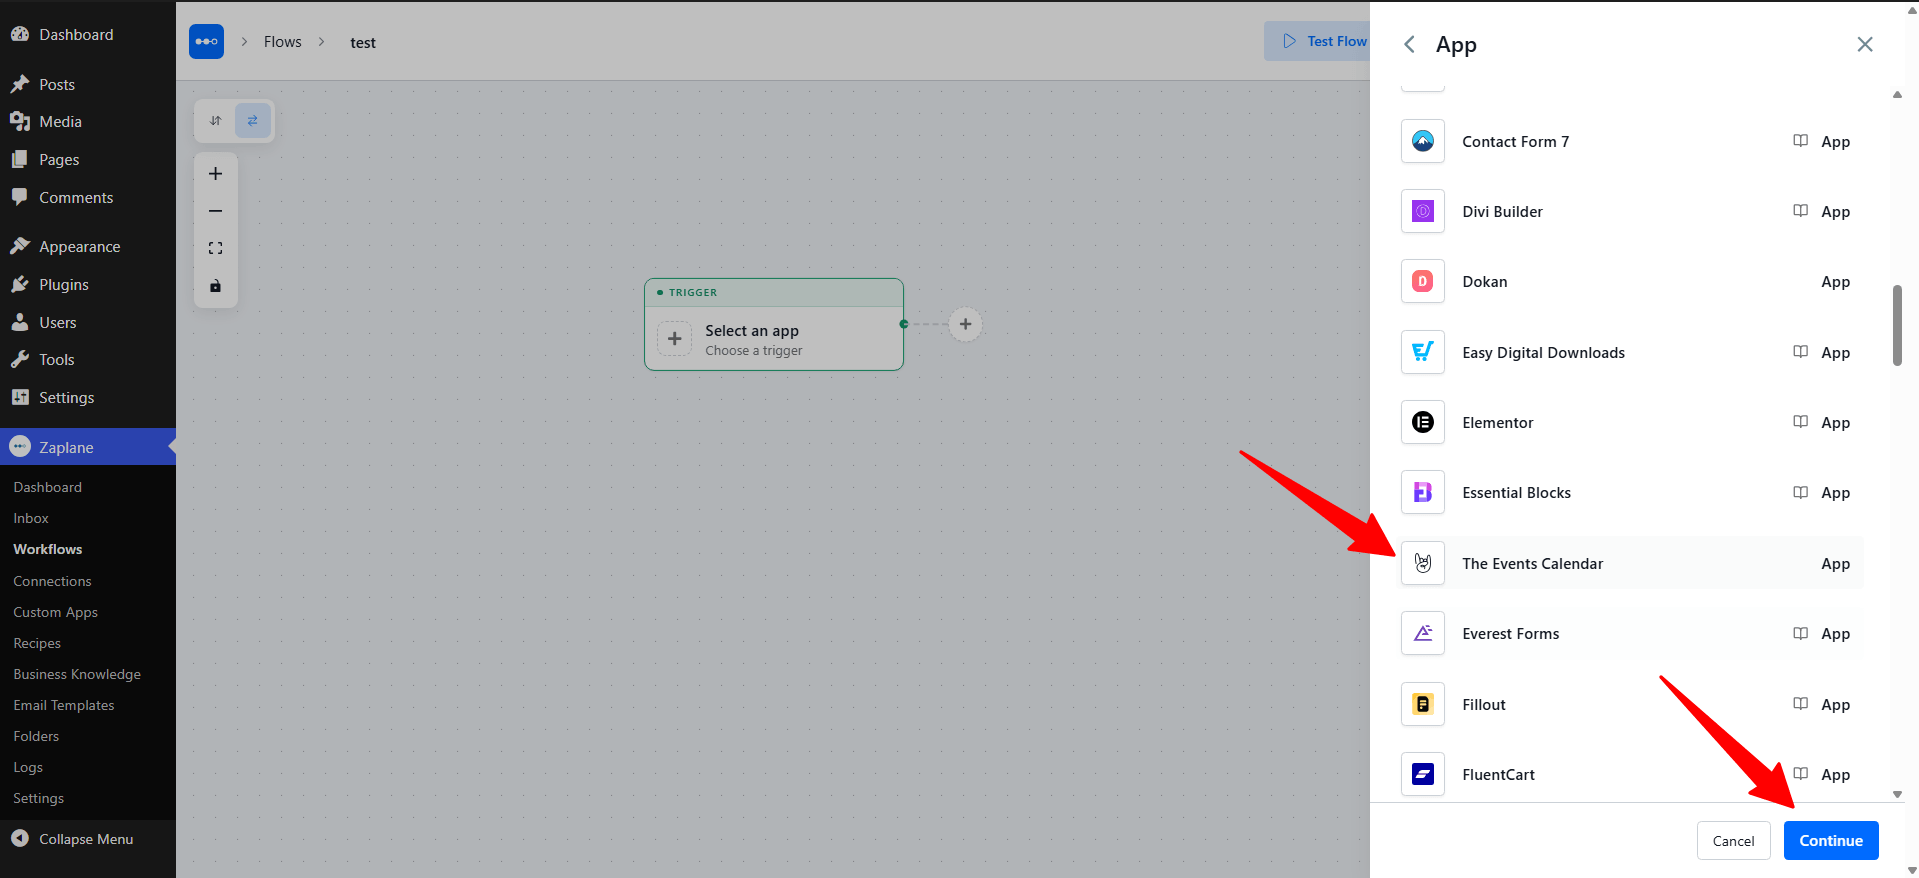
Scroll through the app list, select The Events Calendar, then click Continue.
Step 4: Choose the Trigger Type
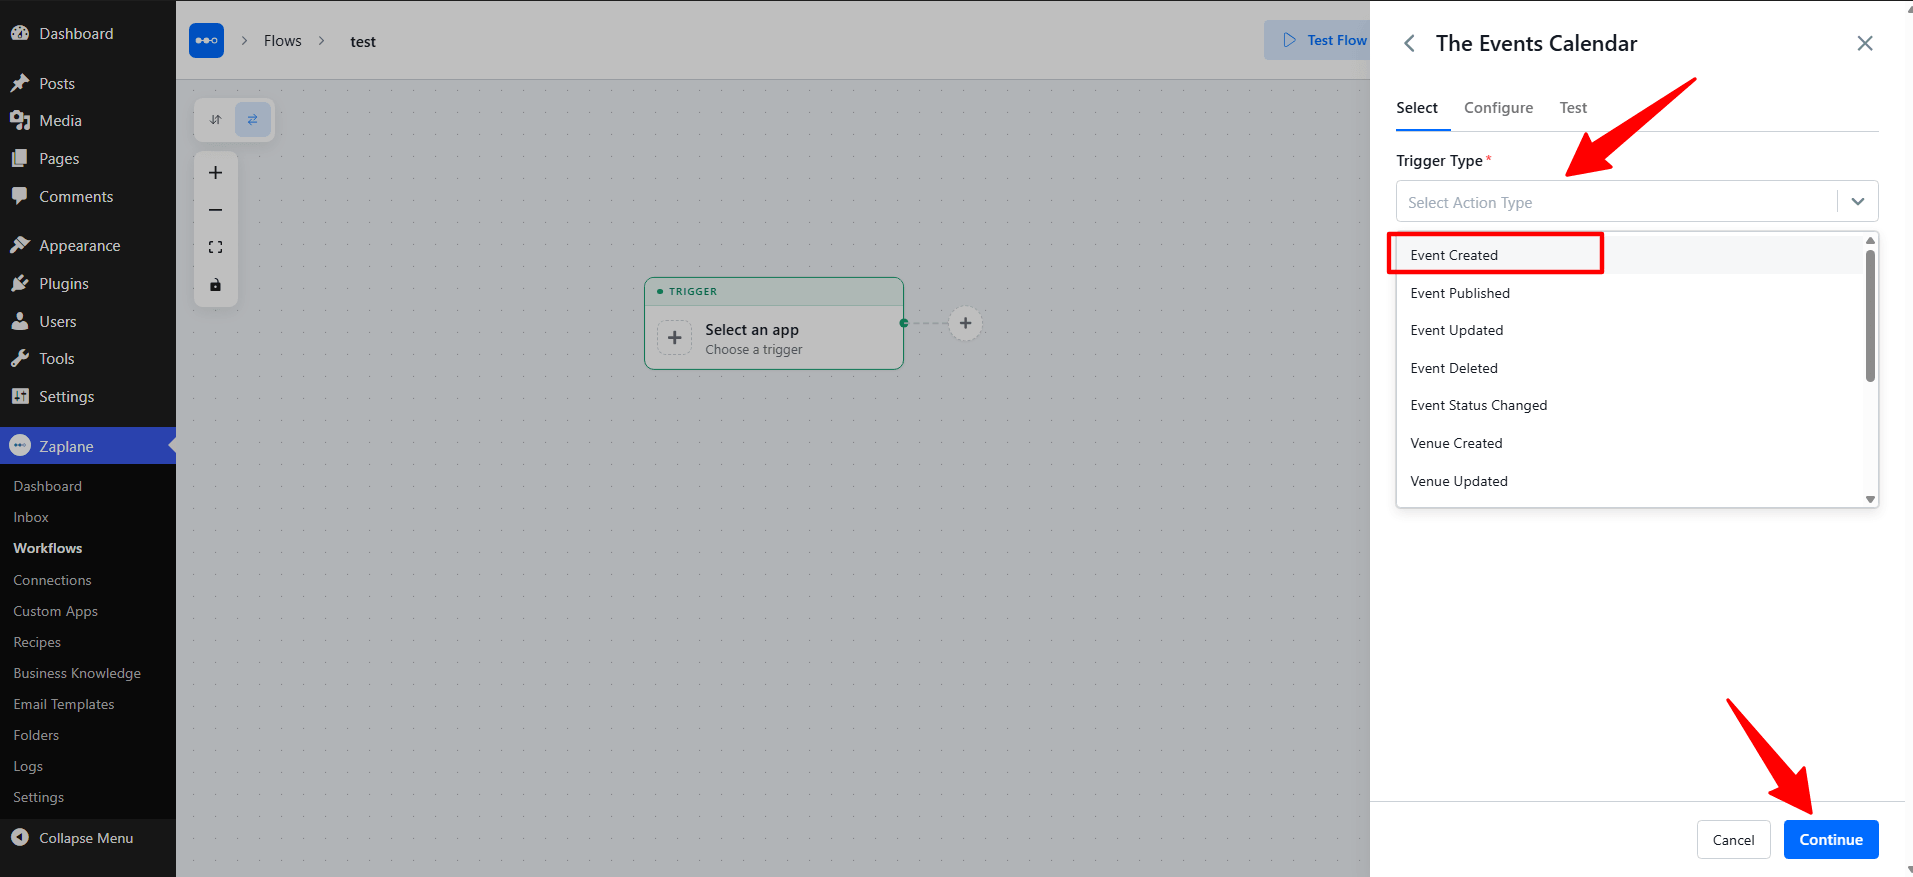
On the Select tab, open the Trigger Type dropdown. Several trigger types are available for events and venues, so pick the one that matches the moment you want your workflow to start (in this example, Event Created), then click Continue.
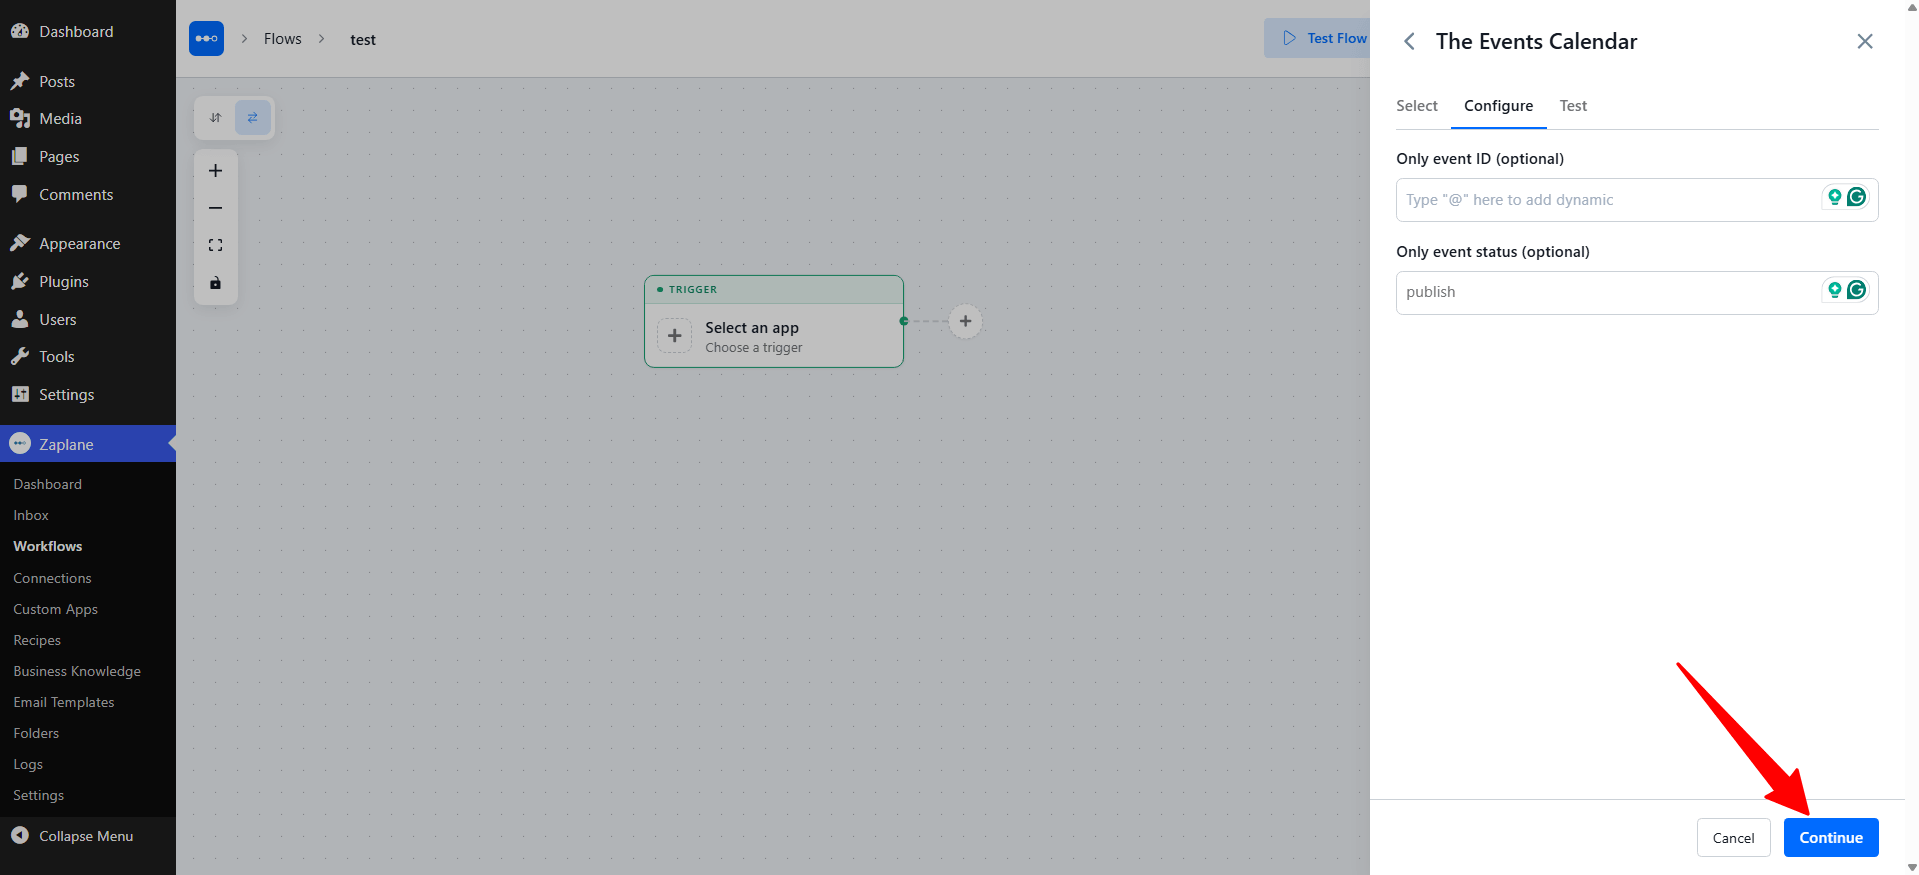
Step 5: Configure the Trigger
On the Configure tab, you can optionally narrow down when the trigger runs, then click Continue:
Leave both fields empty to run the workflow for every matching event.
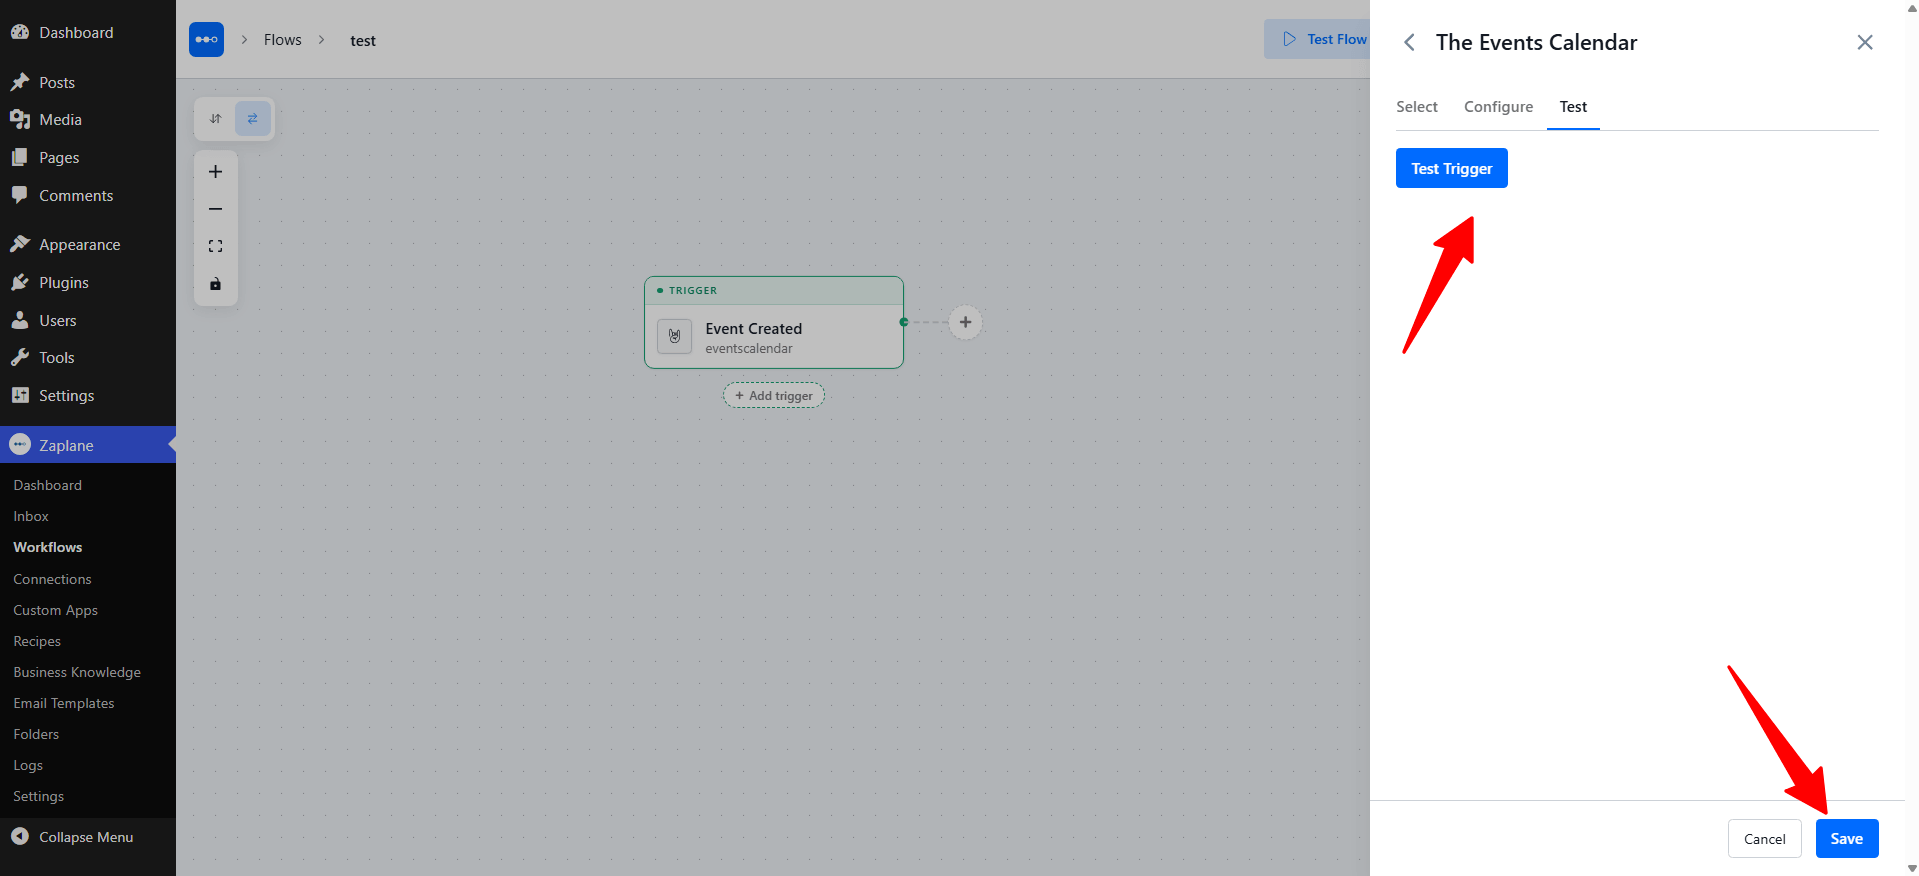
Step 6: Test and Save the Trigger
On the Test tab, click Test Trigger to confirm it works, then click Save.
Step 7: Update and Activate the Workflow
Back on the workflow canvas, click Update at the top right to save your changes and make sure the workflow status is set to Active.
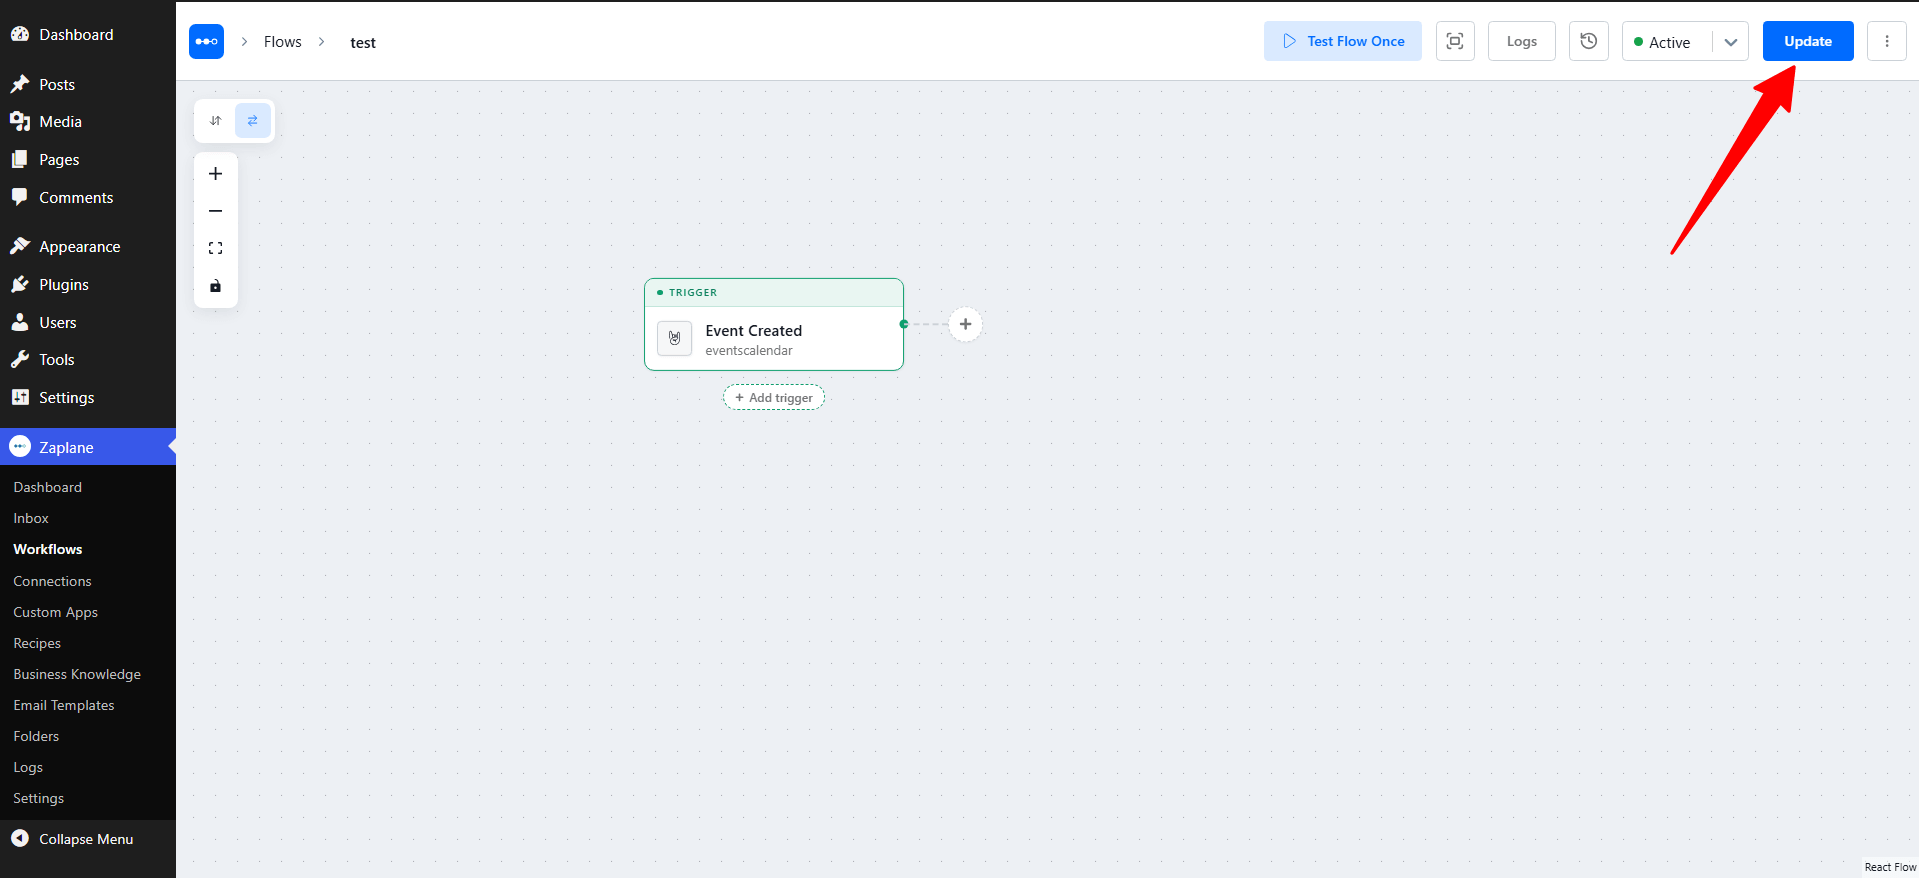
Every time the selected event happens on your site, Zaplane now starts this workflow automatically.
Done!
The Events Calendar is now connected to Zaplane, and your workflow will run whenever your chosen event trigger fires.