

This guide covers everything end-to-end: creating a Telegram bot and getting its token from BotFather, creating the connection inside Zaplane, and adding a Telegram action (Send Text Message) to a workflow. Make sure your workflow already has a trigger set up before starting — this example uses a Form Submitted trigger.
Part 1: Create a Workflow
Go to Zaplane > Workflows from your WordPress dashboard, then click Create Workflow to open the workflow editor.
Before adding an Telegram action, you need to set up a trigger first. Here is how to do it quickly:
- Click Select an app under the Trigger box, then choose Apps.
- Search for and select your trigger app — in this example, we are using aBlocks Contact Form.
- Choose the Trigger Type that matches the event you want to watch for, then click Continue.
- On the Configure tab, set up any required options, then click Continue.
- On the Test tab, click Test Trigger to confirm it is working correctly, then click Save.
Once your trigger is saved, proceed to the next step to add the Telegram action.
Part 2: Get Your Telegram Bot Token
Step 1: Create a Bot with BotFather
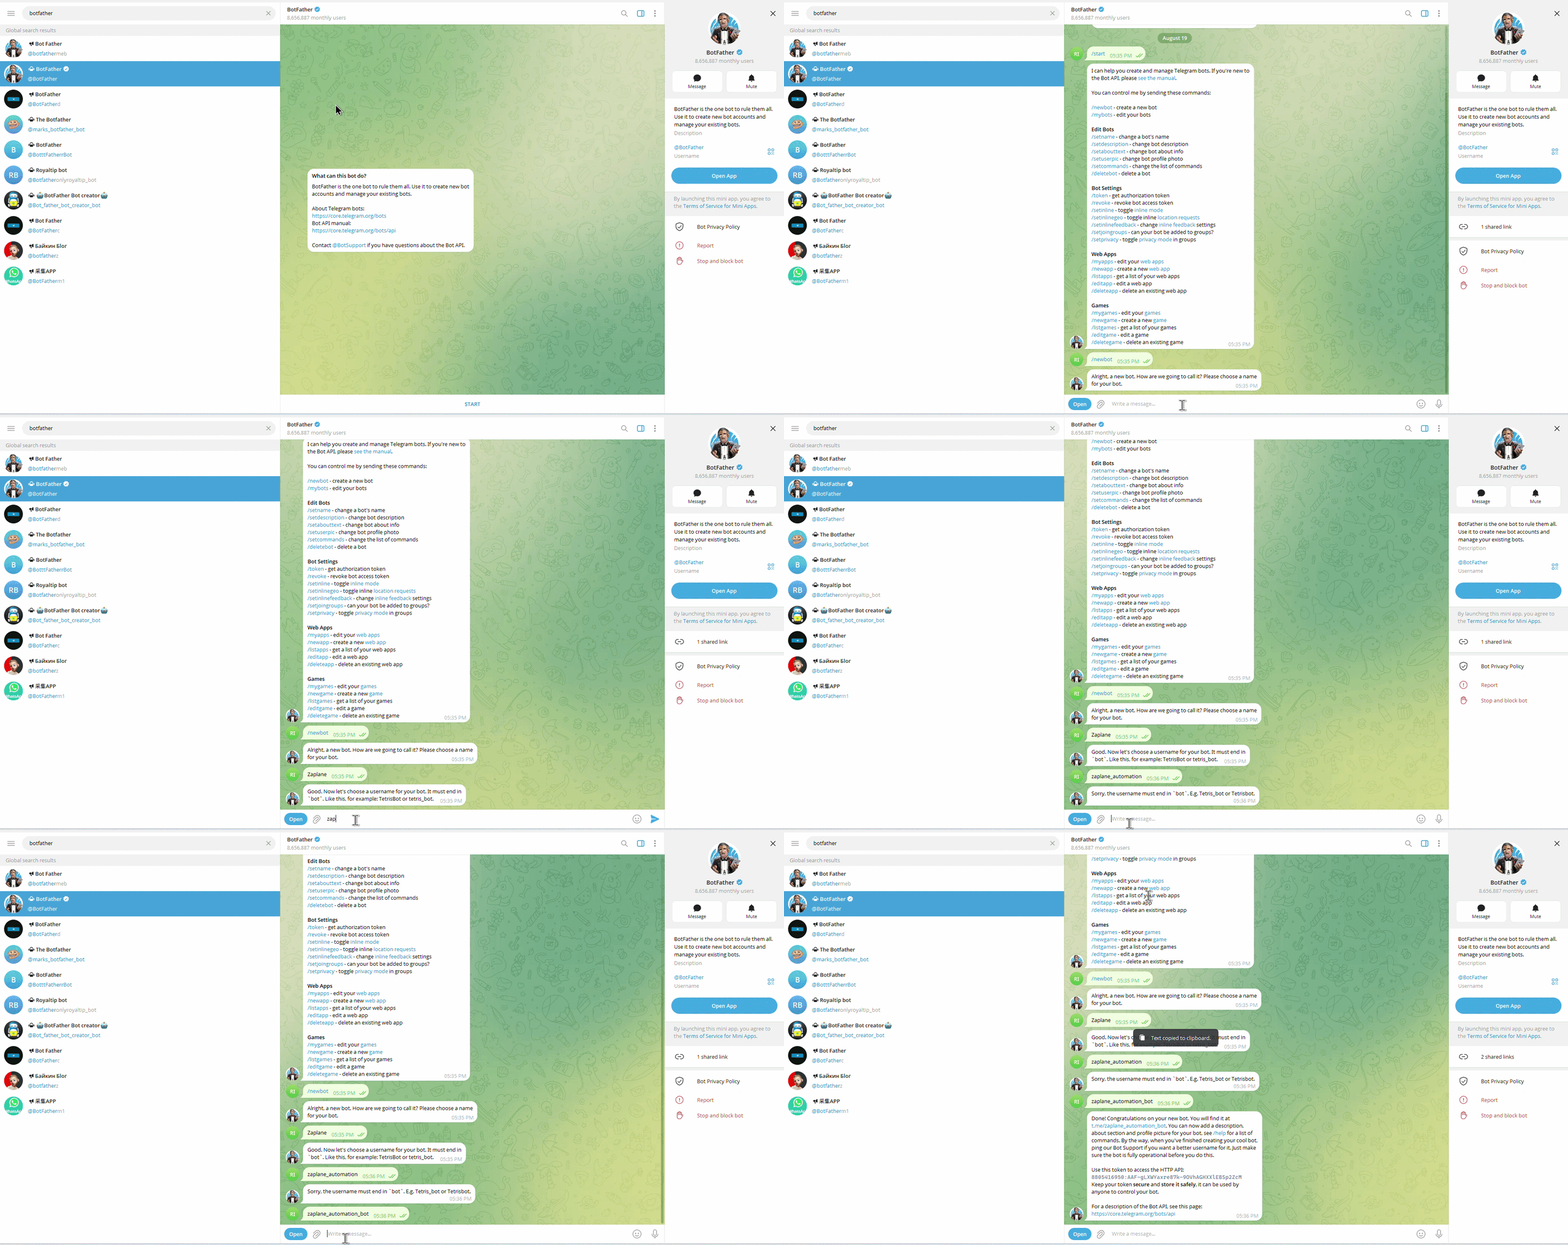
Open Telegram and search for @BotFather. Start a chat and follow its prompts to create a new bot — BotFather will give you a Bot Token at the end. Copy this token; you’ll need it in Zaplane.
Part 3: Create the Connection in Zaplane
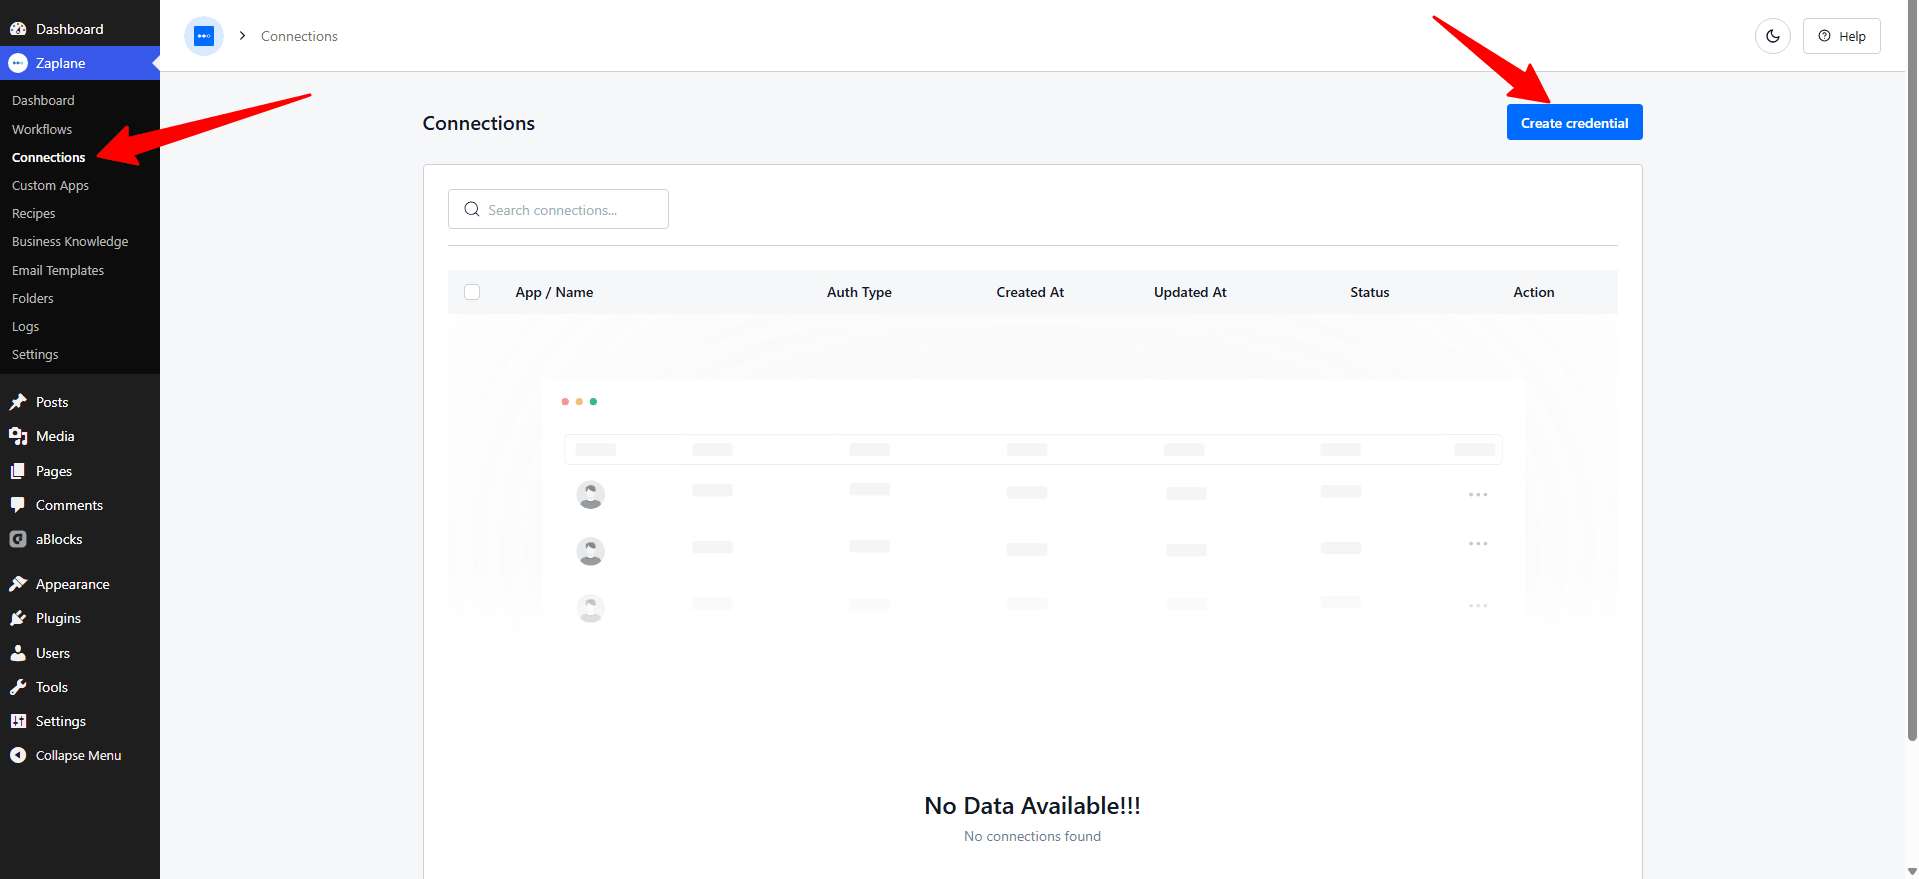
Step 2: Open Connections
In Zaplane, go to Connections, then click Create credential.
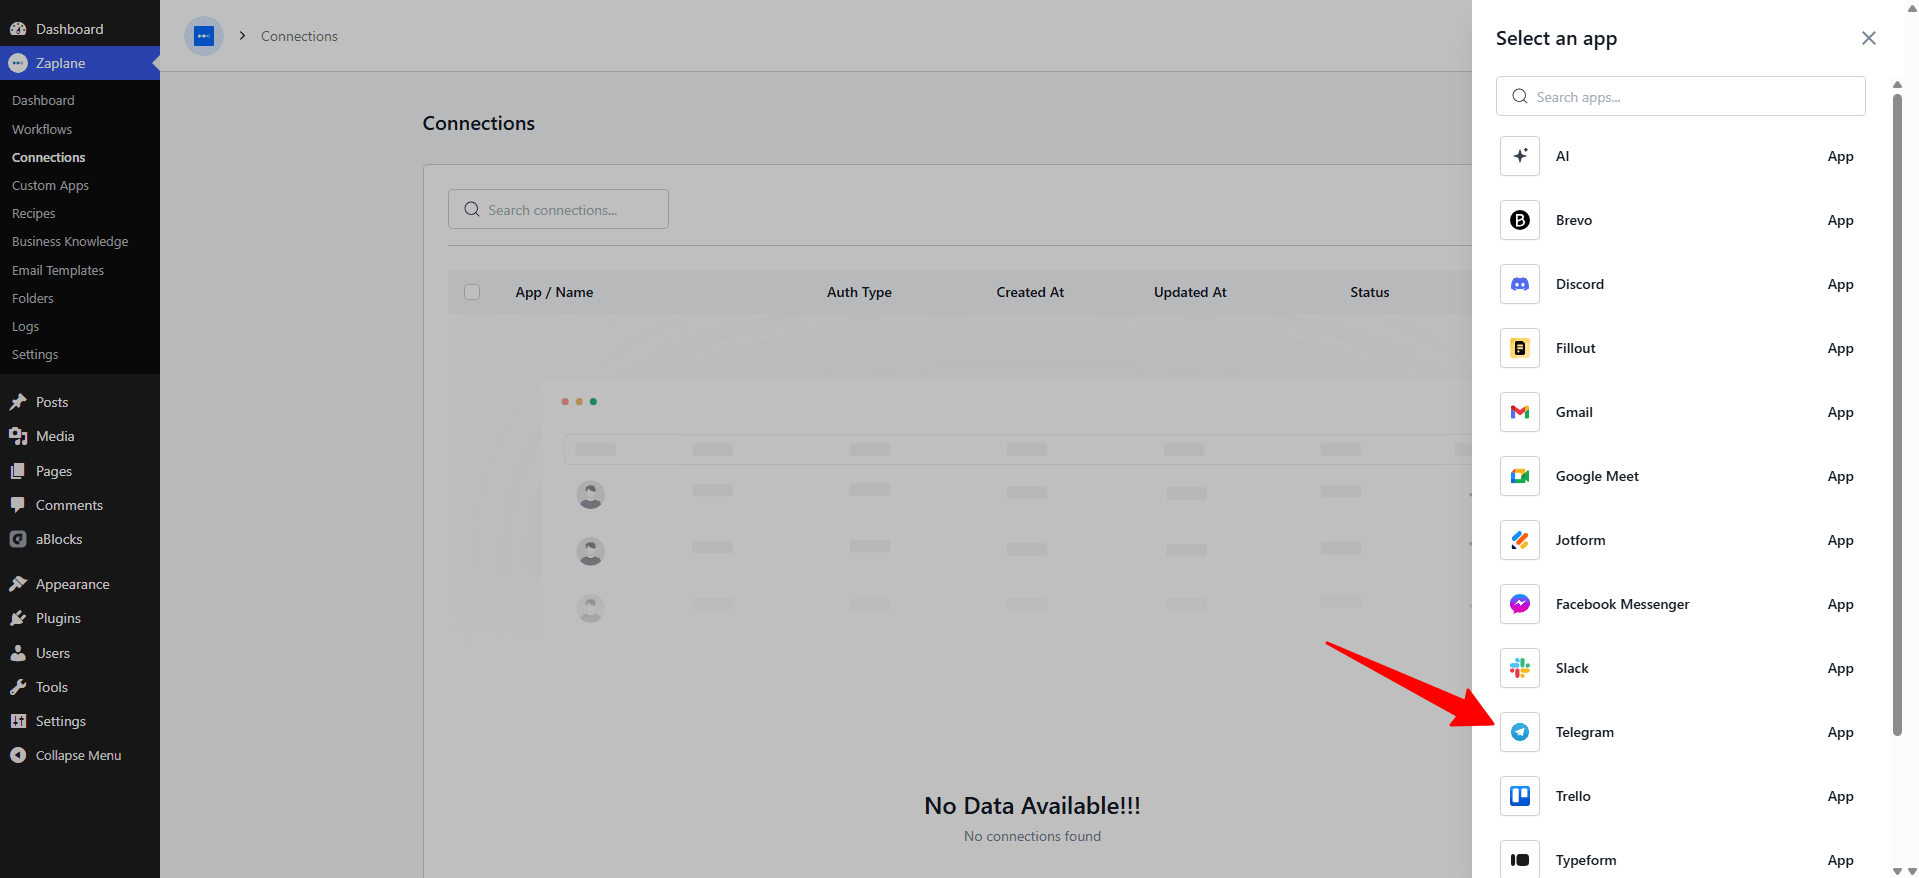
Step 3: Select Telegram
From the app list, search for and select Telegram.
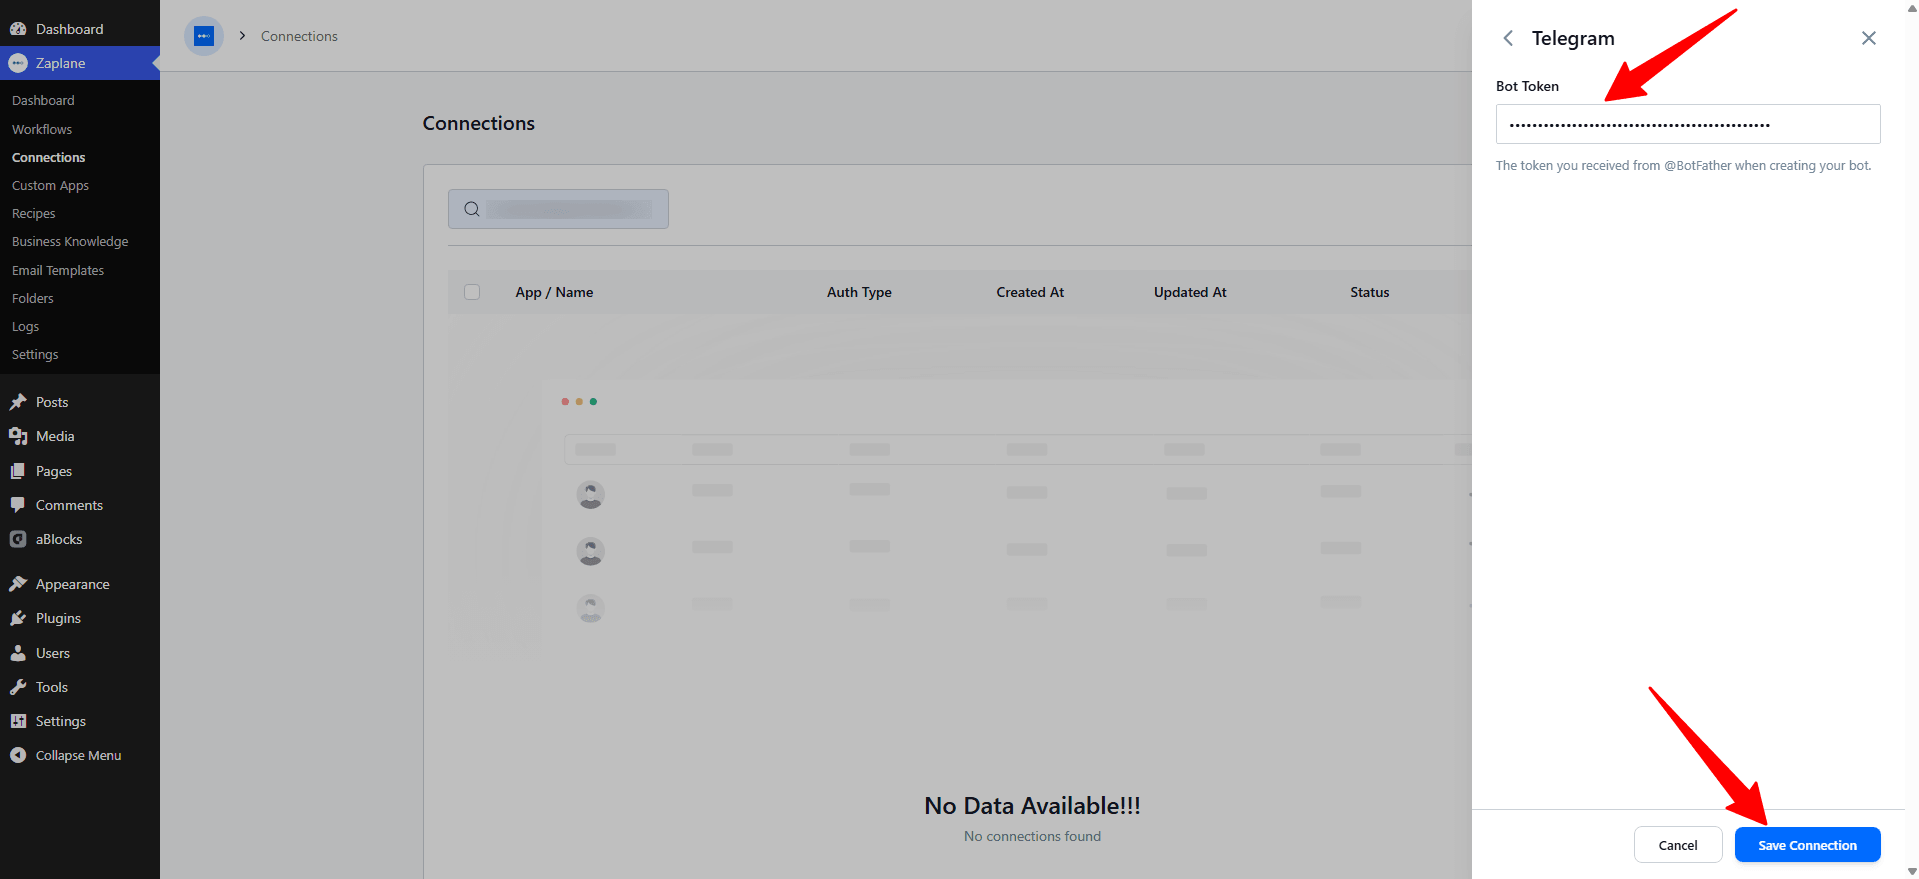
Step 4: Paste Your Bot Token
Paste the Bot Token you copied from BotFather into the Bot Token field, then click Save Connection.
Part 4: Add the Telegram Action to Your Workflow
Step 5: Add an Action
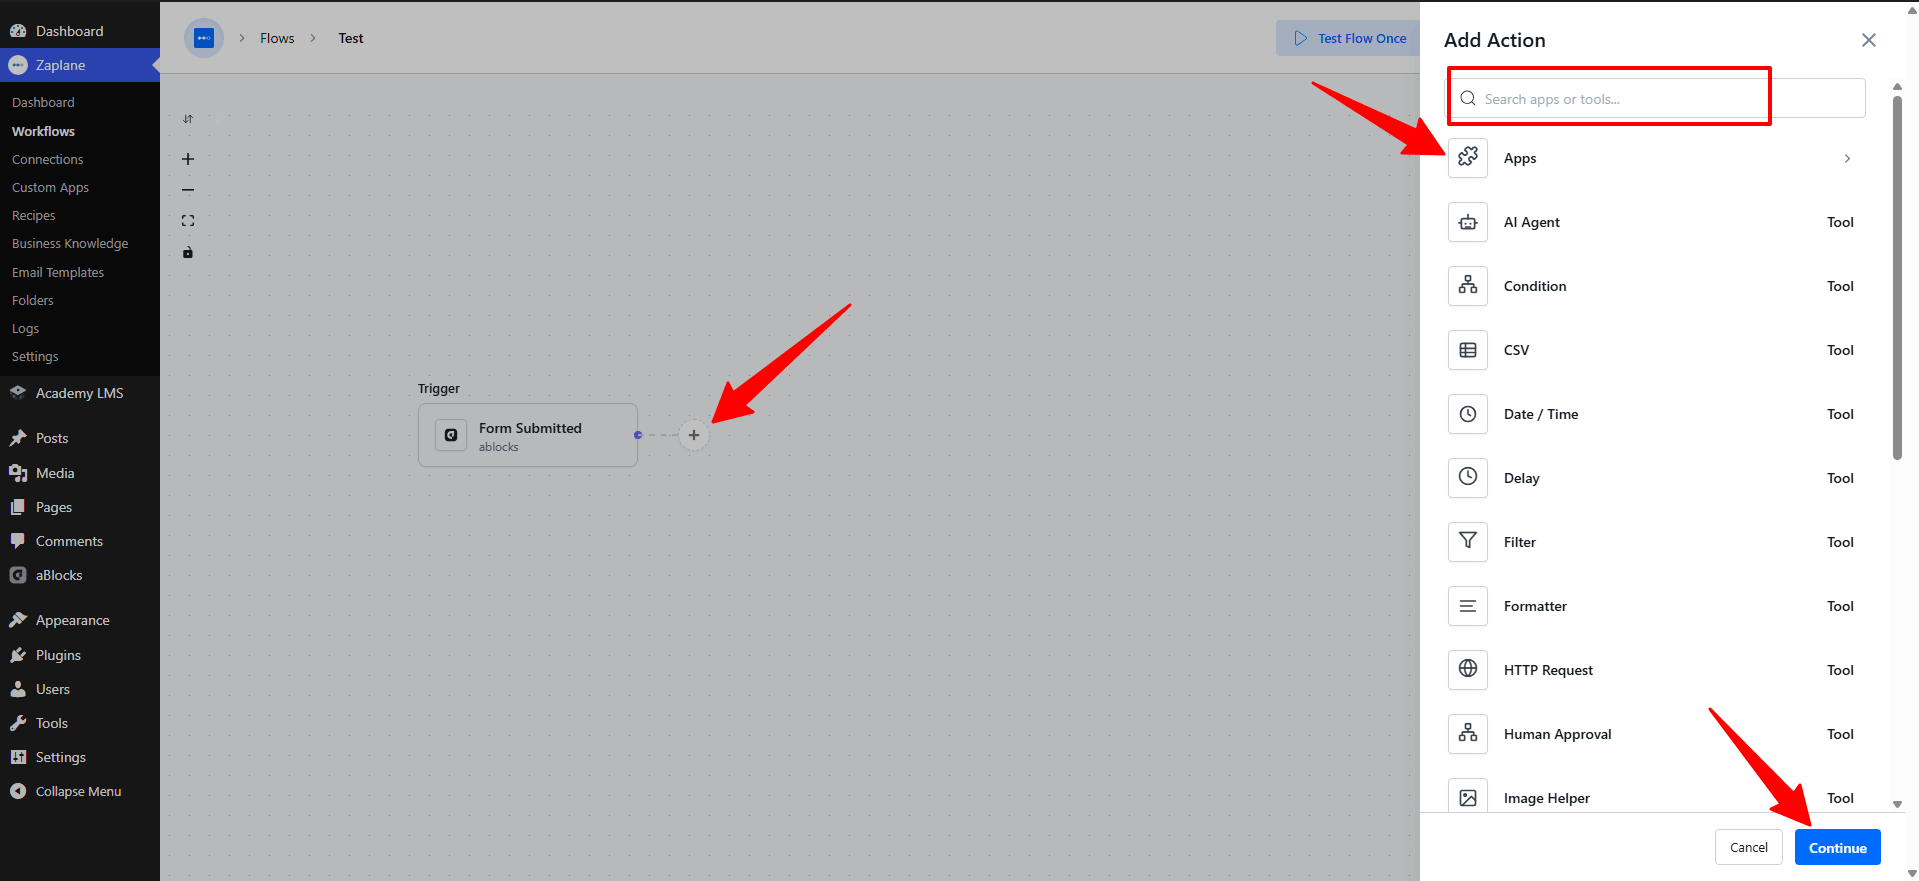
On your workflow canvas, click the + icon next to your trigger to open the Add Action panel, then click Apps.
Step 6: Select Telegram
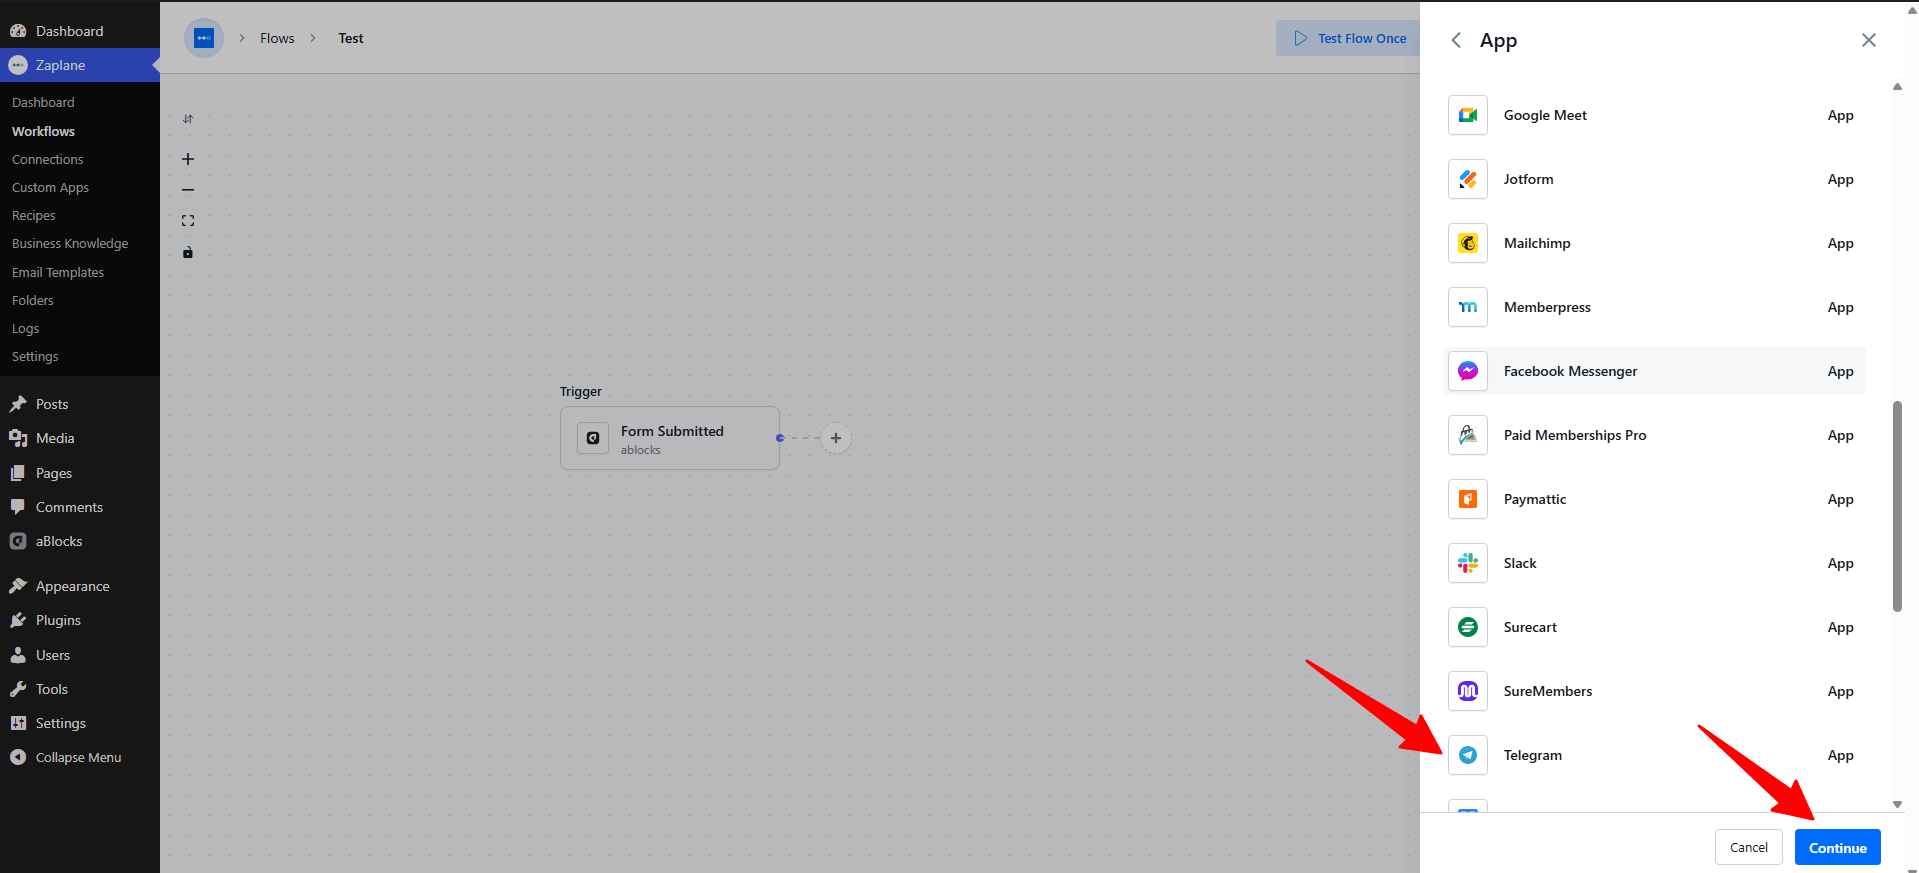
Search for and select Telegram from the app list.
Step 7: Choose the Action Type and Connection
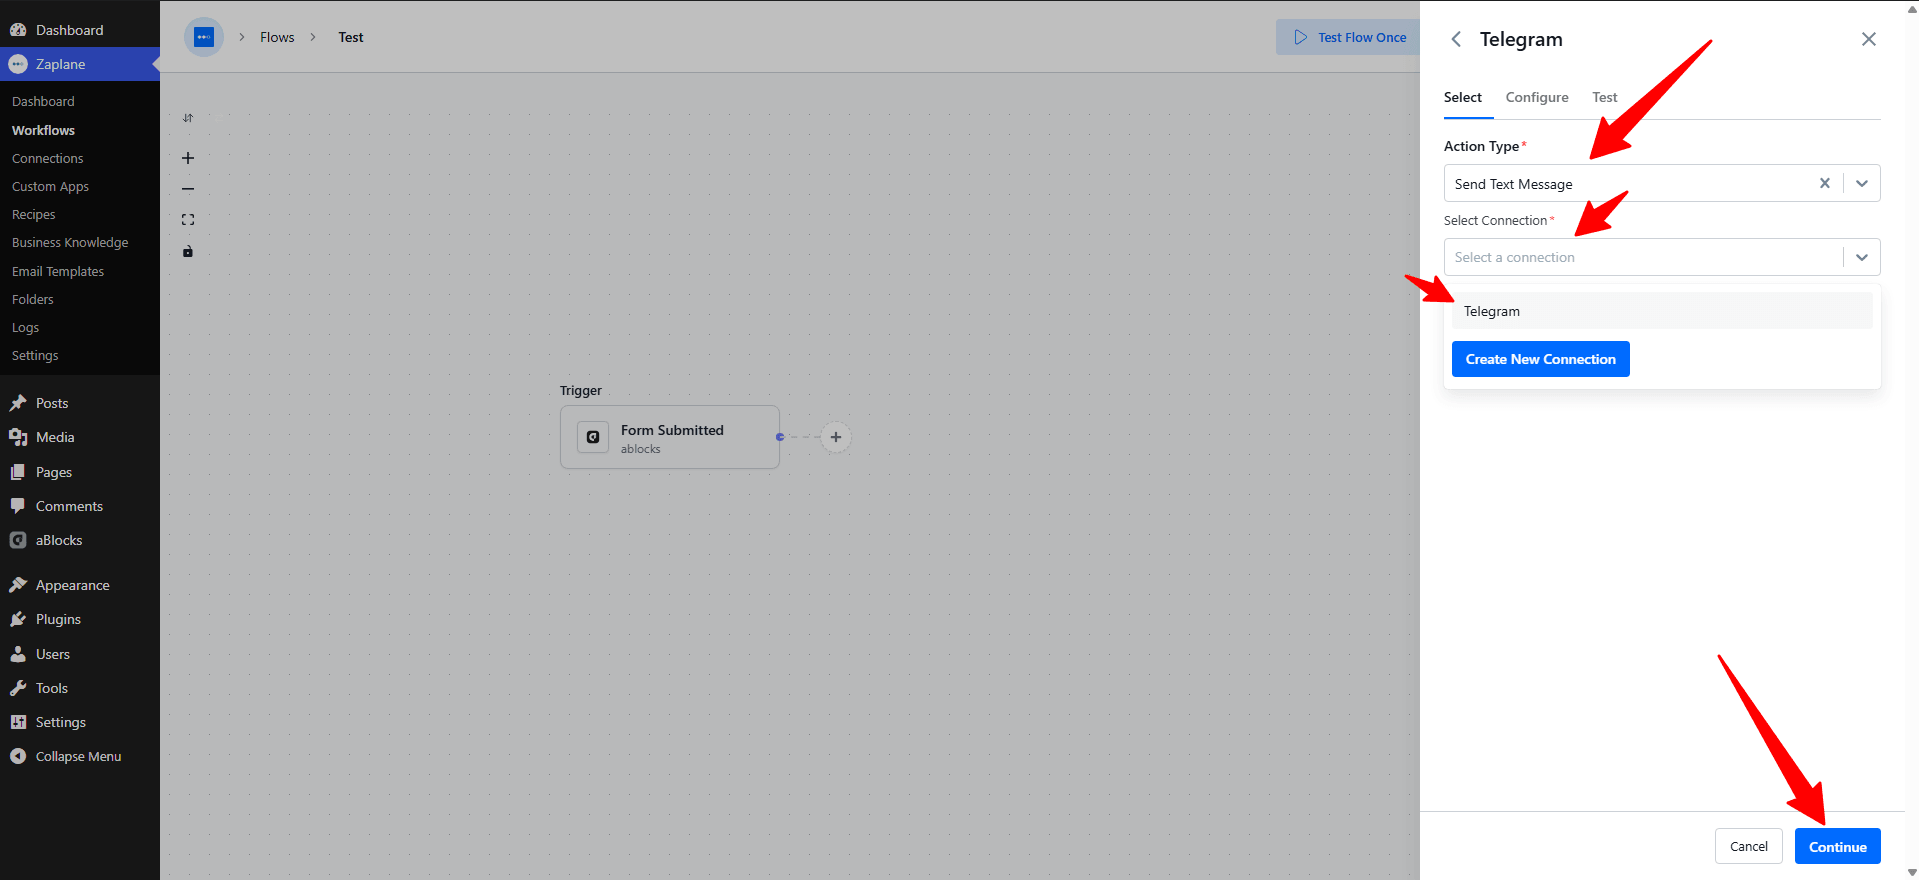
Select Send Text Message as the Action Type. Under Select Connection, choose the Telegram connection you just created (or click Create New Connection if you skipped Part 2). Click Continue.
Step 8: Configure the Action
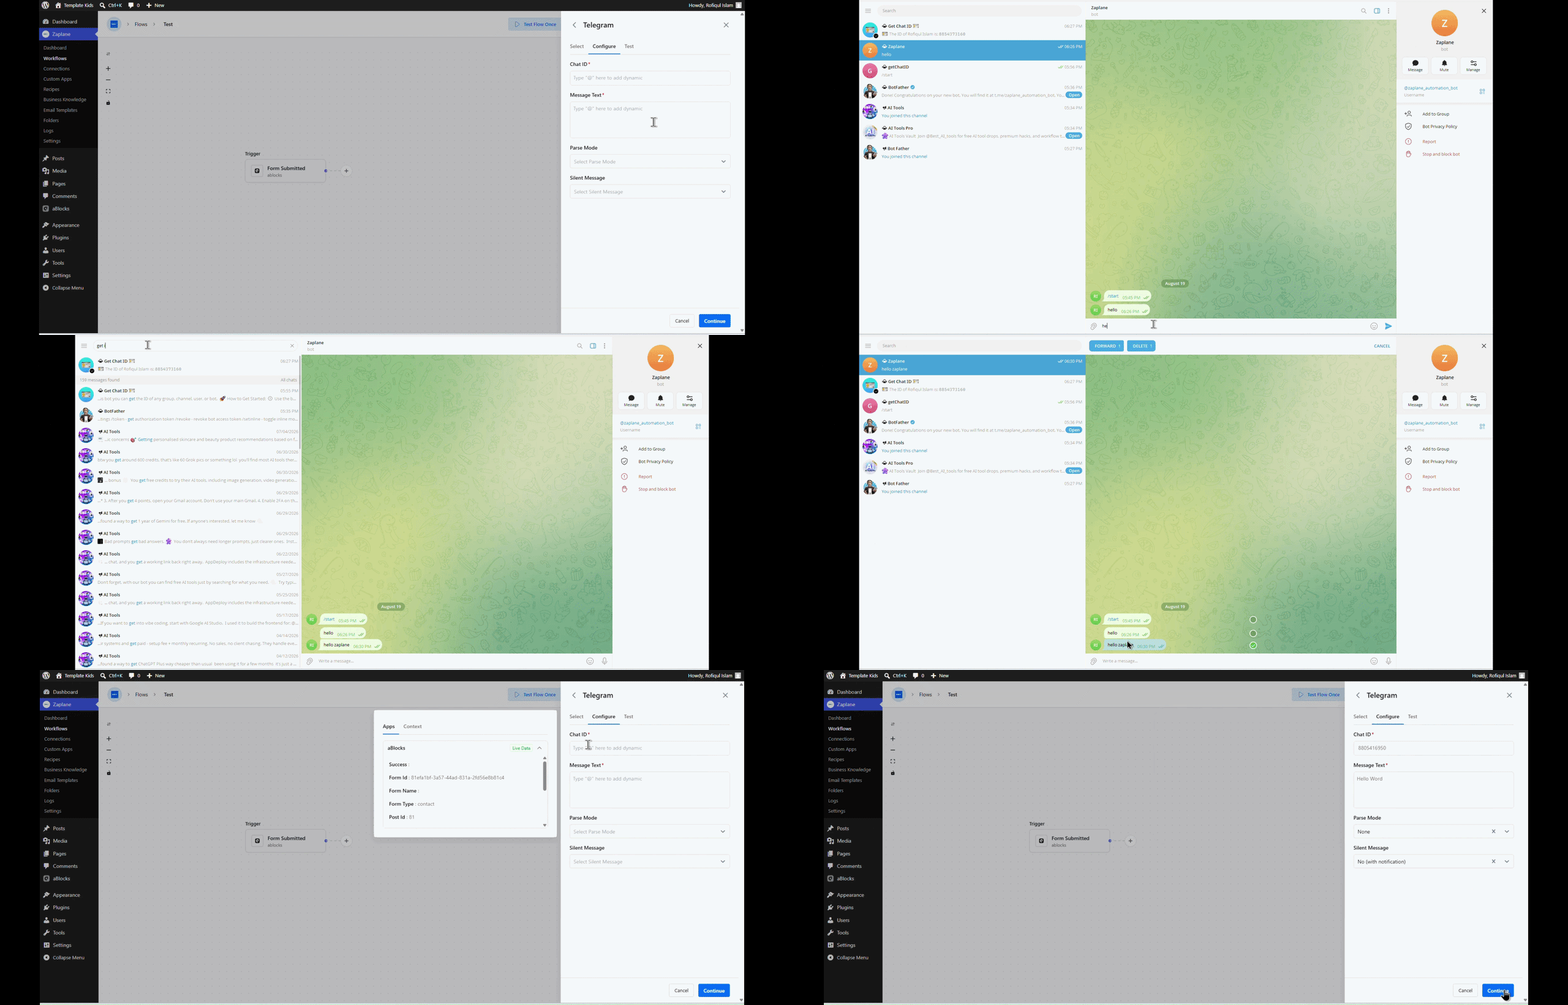
On the Configure tab, enter the Chat ID and Message Text — you can map these dynamically from your trigger data. Optionally set Parse Mode and Silent Message. Click Continue when done.
Step 9: Test the Action
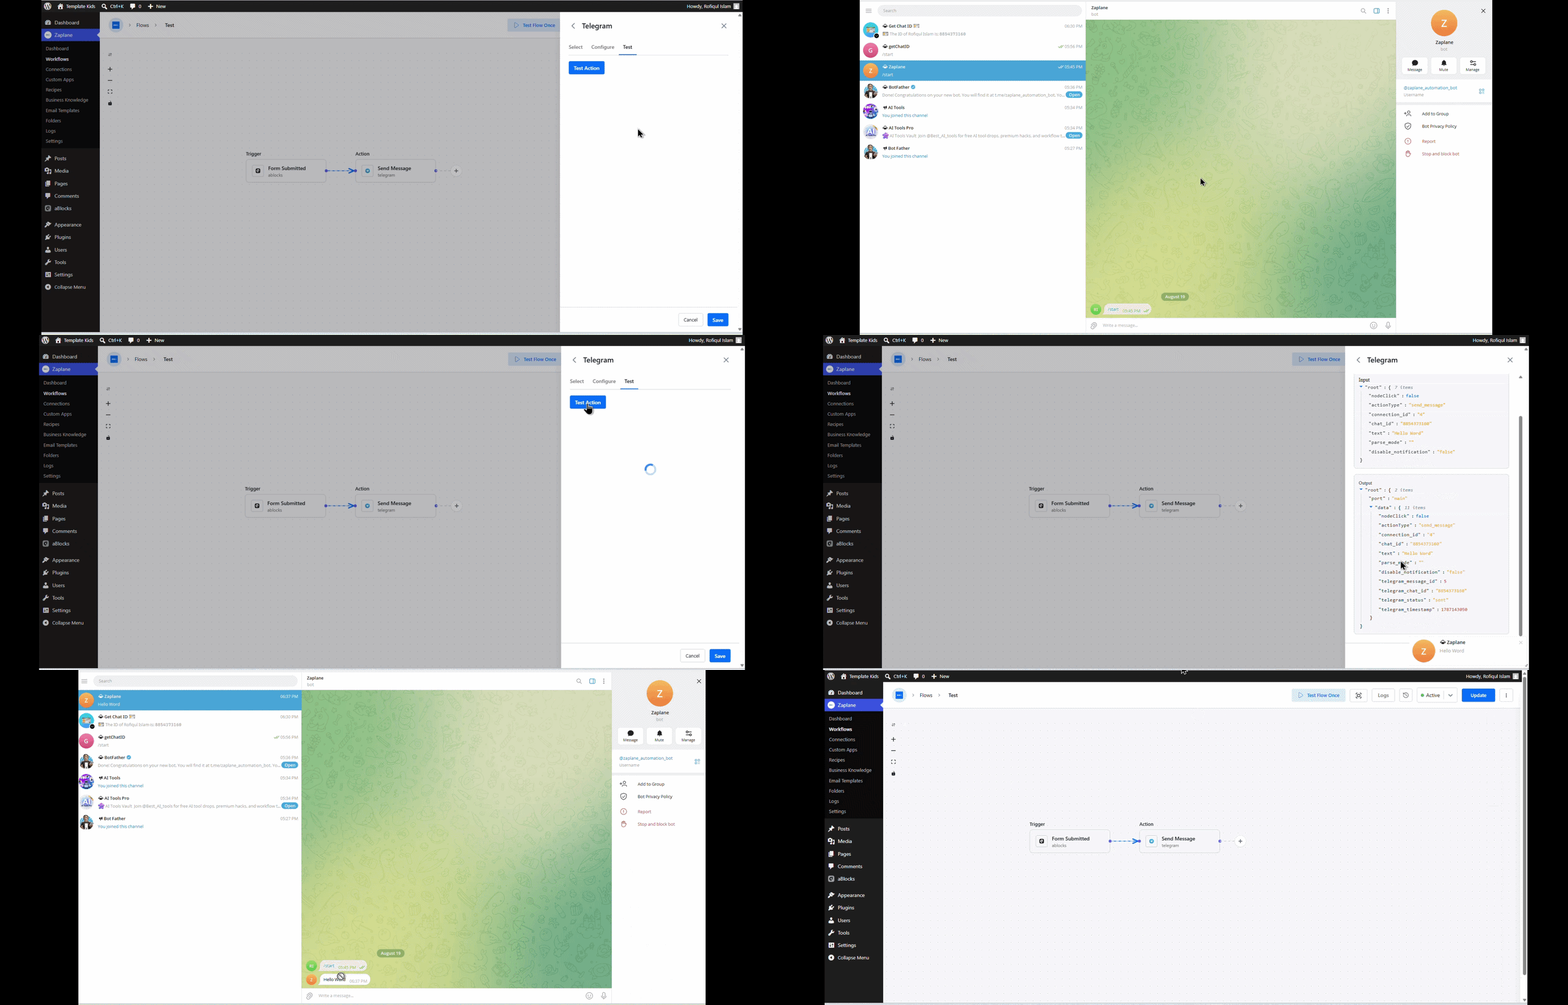
On the Test tab, click Test Action to run it with sample data and confirm the message sends correctly. Once the test succeeds, click Save.
Step 10: Update and Activate the Workflow
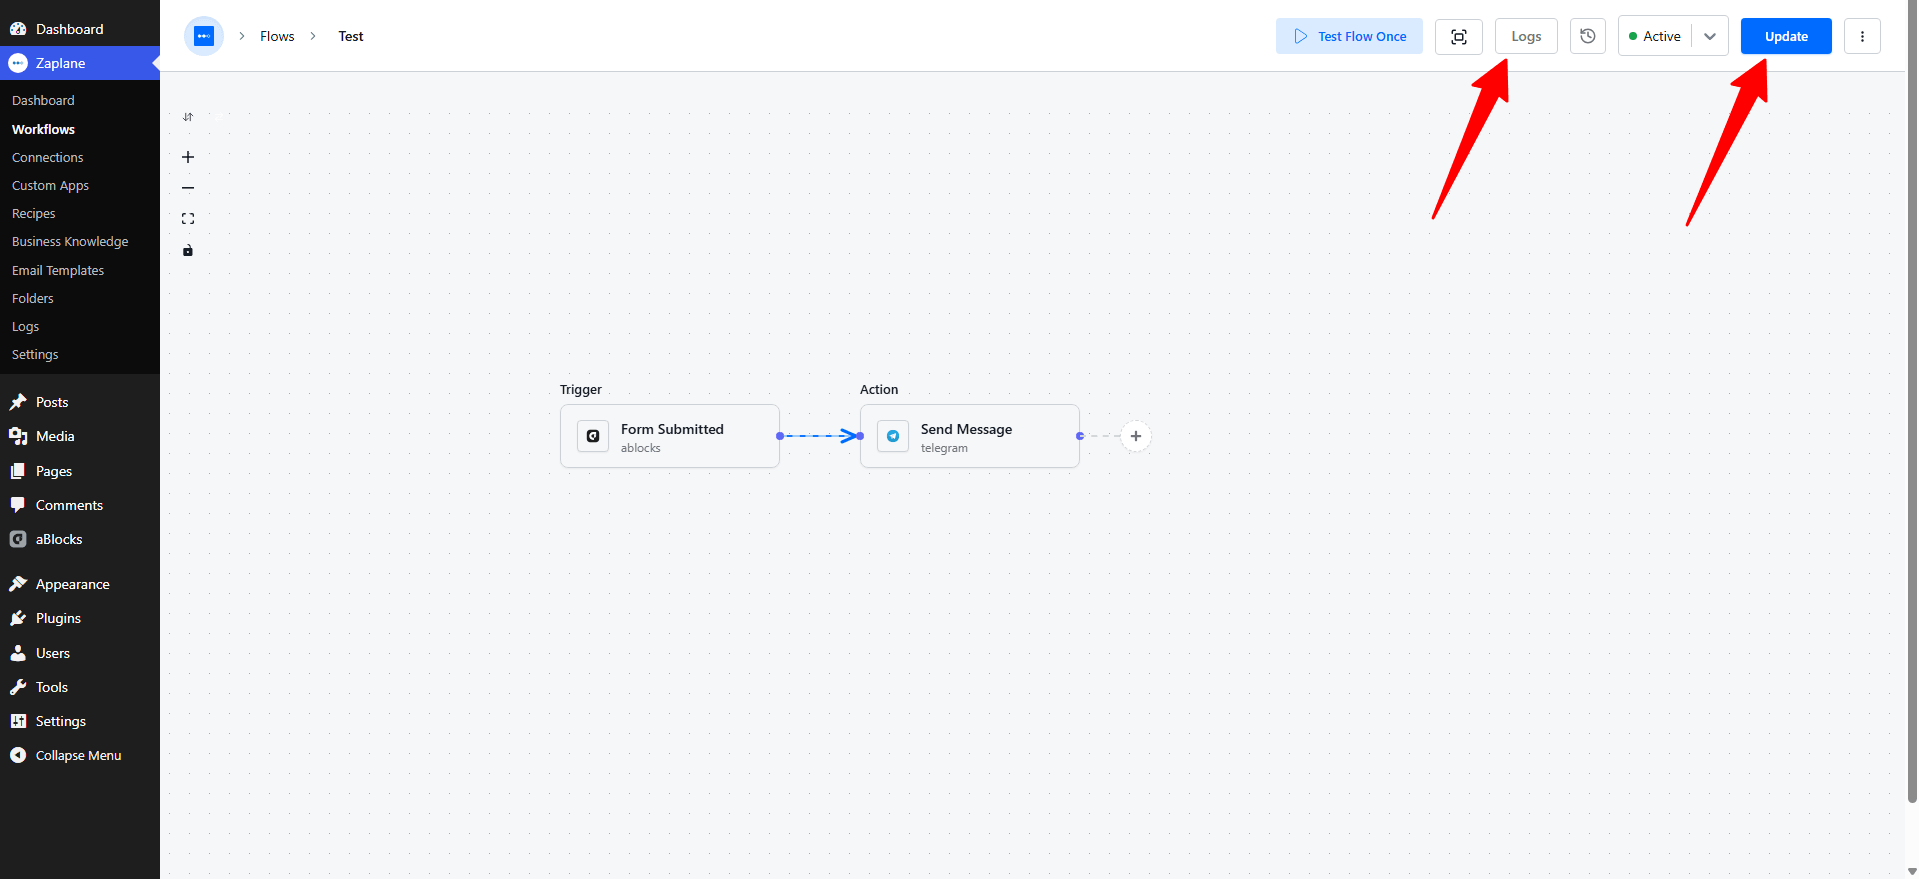
Back on the workflow canvas, click Update to save your changes, and make sure the workflow status is set to Active. You can view execution results anytime from the Logs.
Done!
Your Zaplane workflow is now connected to Telegram. Every time the trigger runs, a message will be sent automatically to the specified chat using the data from your trigger.