

This guide shows you how to create a Zaplane workflow that starts whenever your WhatsApp Business number receives a message. You will first create a Meta app and get your WhatsApp credentials, then connect them to Zaplane and build the workflow.
Step 1: Create a Meta App
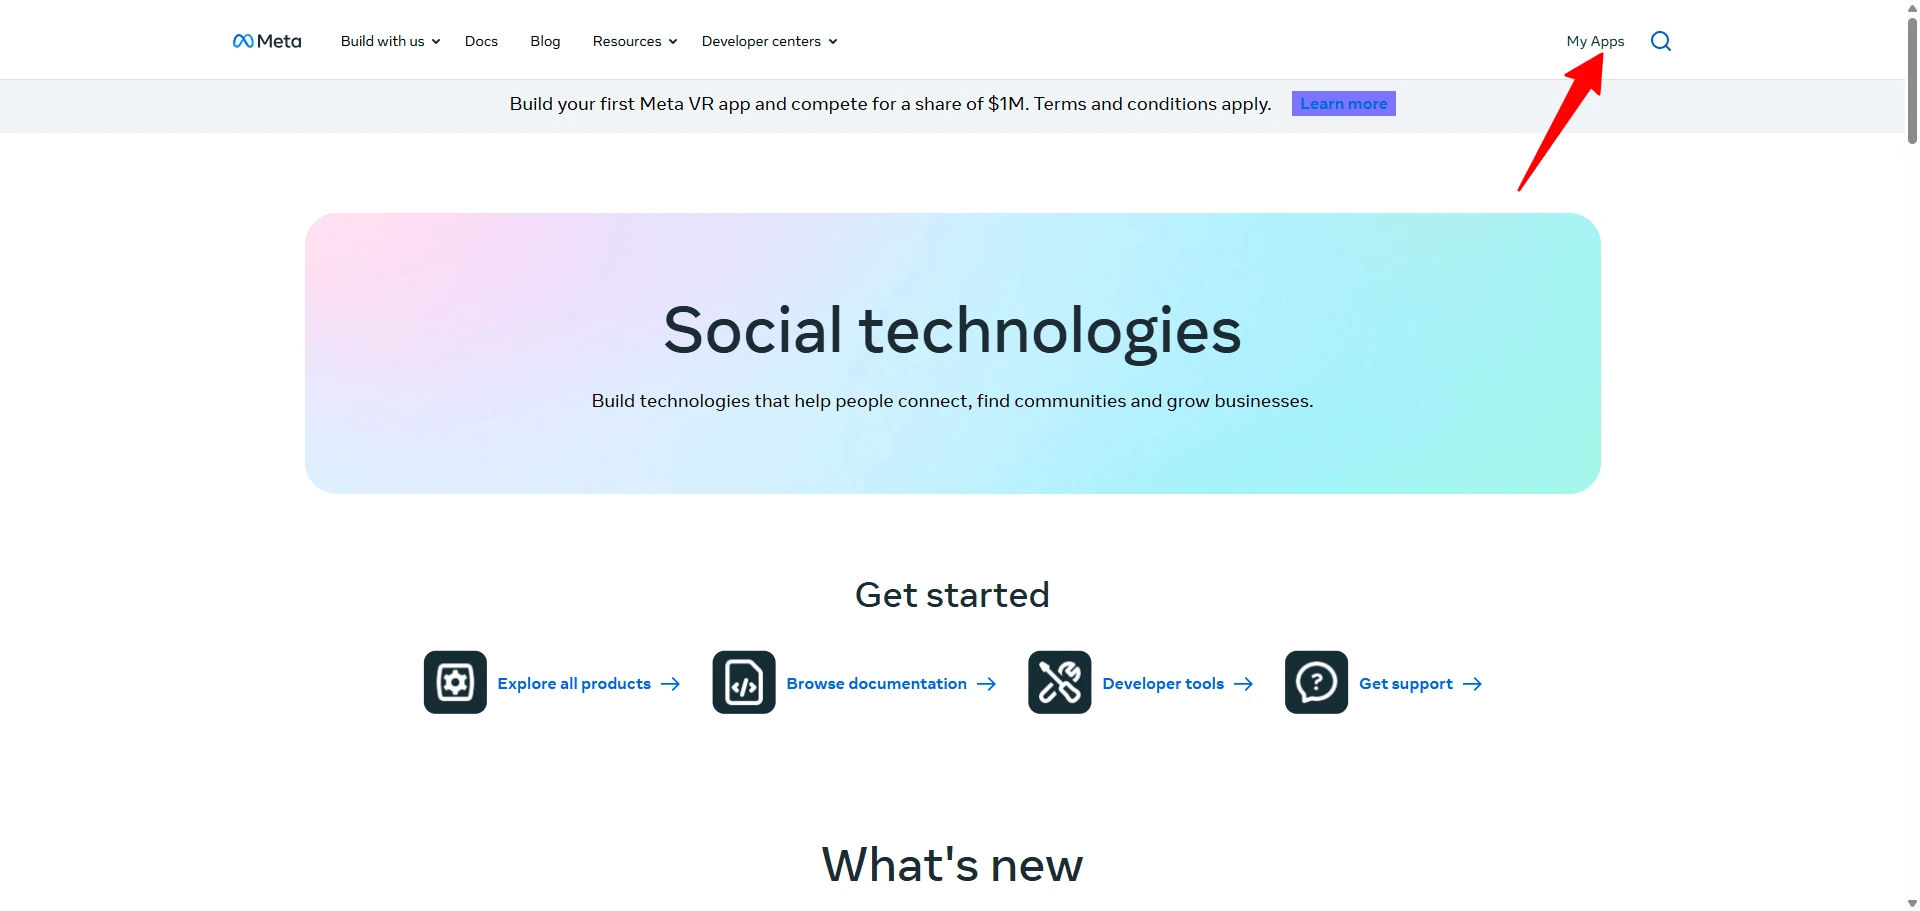
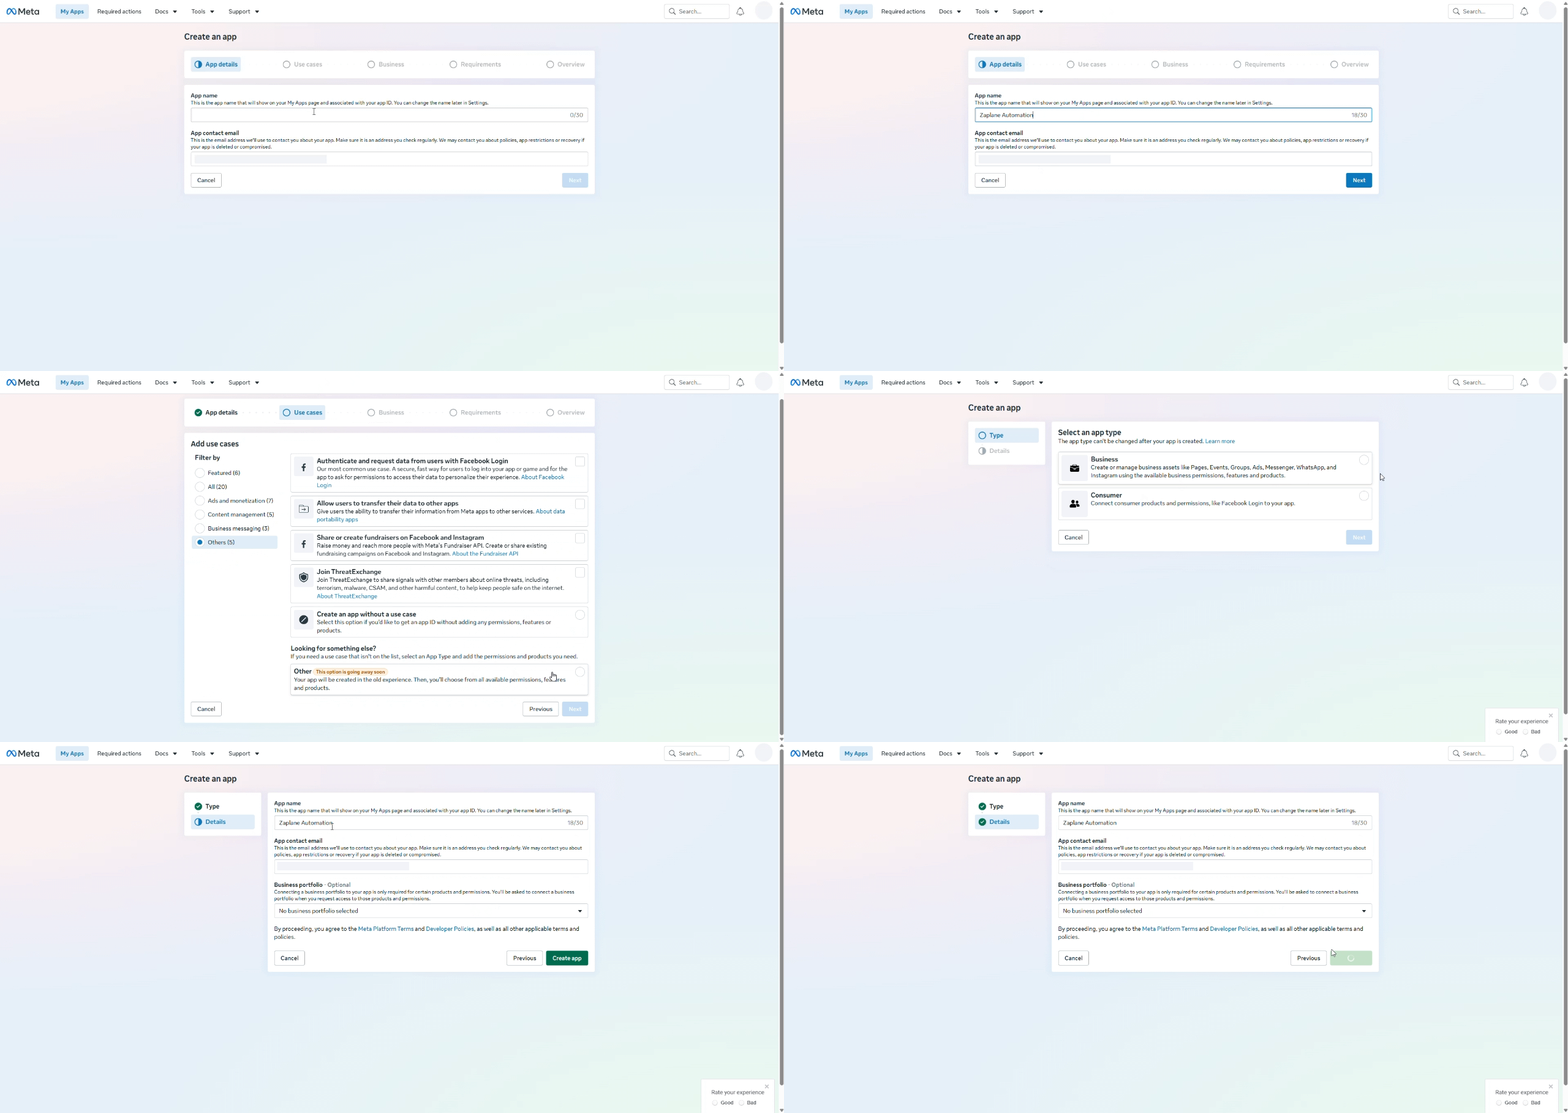
Go to Meta for Developers and log in, then click My Apps at the top right.
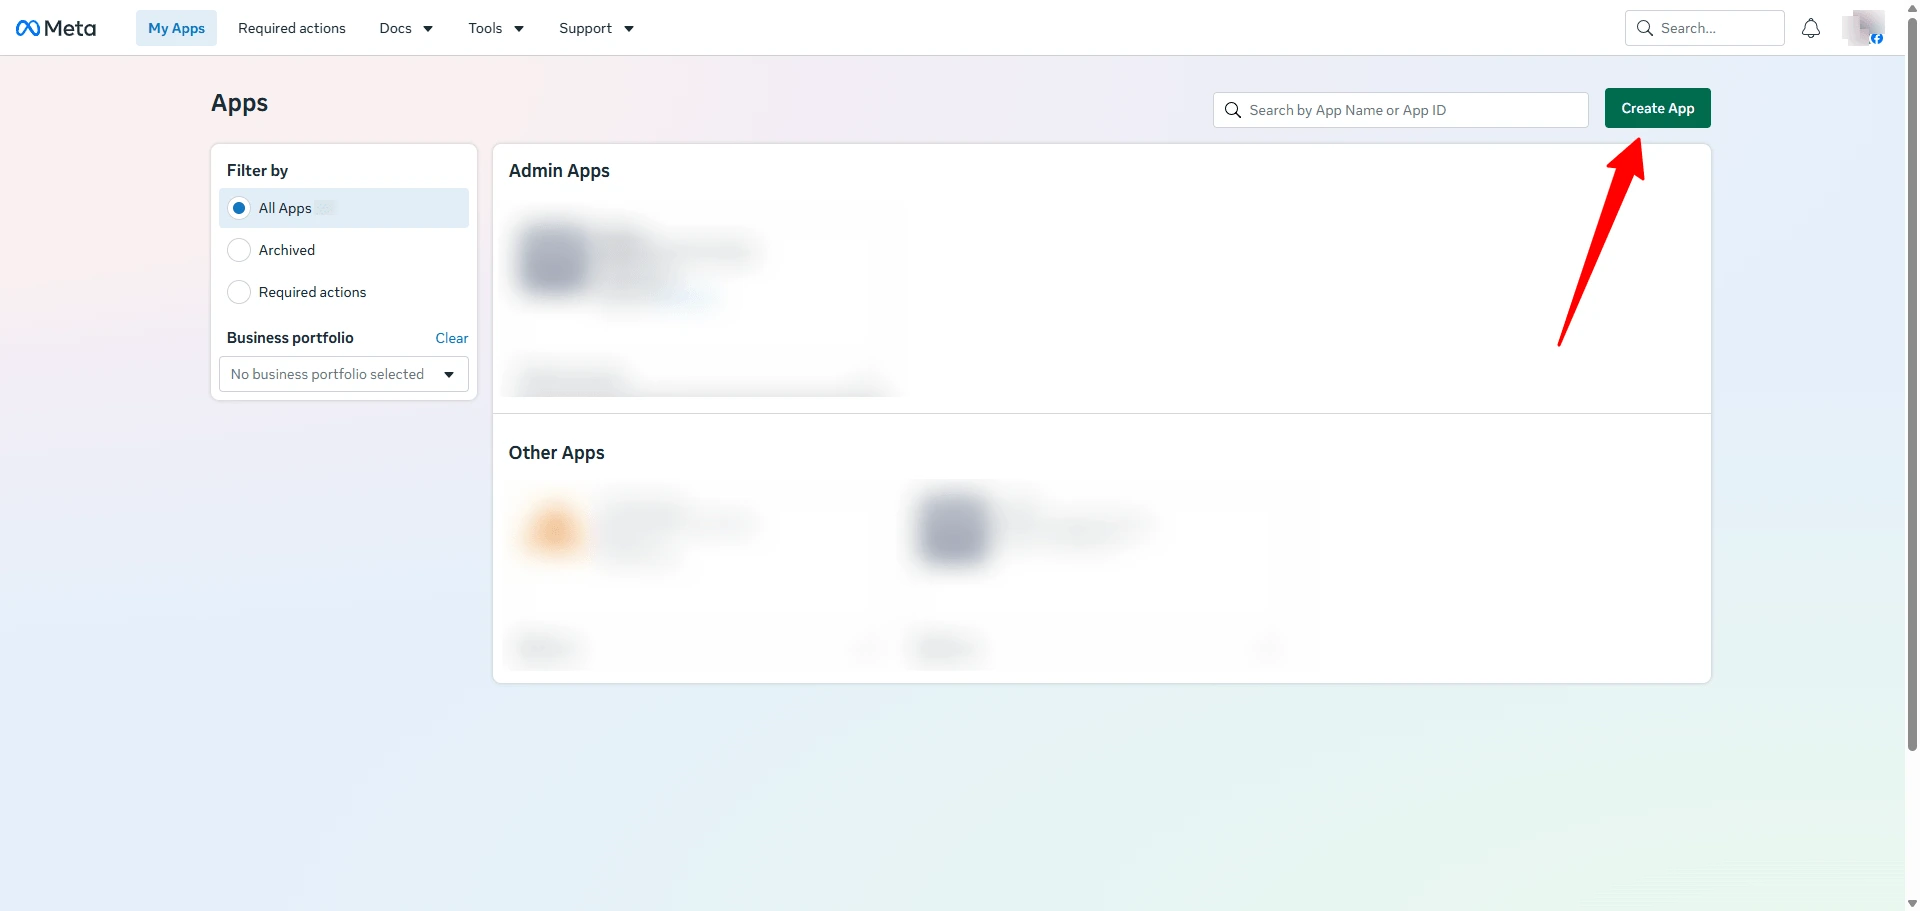
On the Apps page, click Create App.
Follow the setup steps, choosing the Other use case when asked. On the details screen, enter an App name and App contact email, then click Create app. When your app opens, find WhatsApp under Available products and click Set up.
Step 2: Get Your Access Token and Phone Number ID
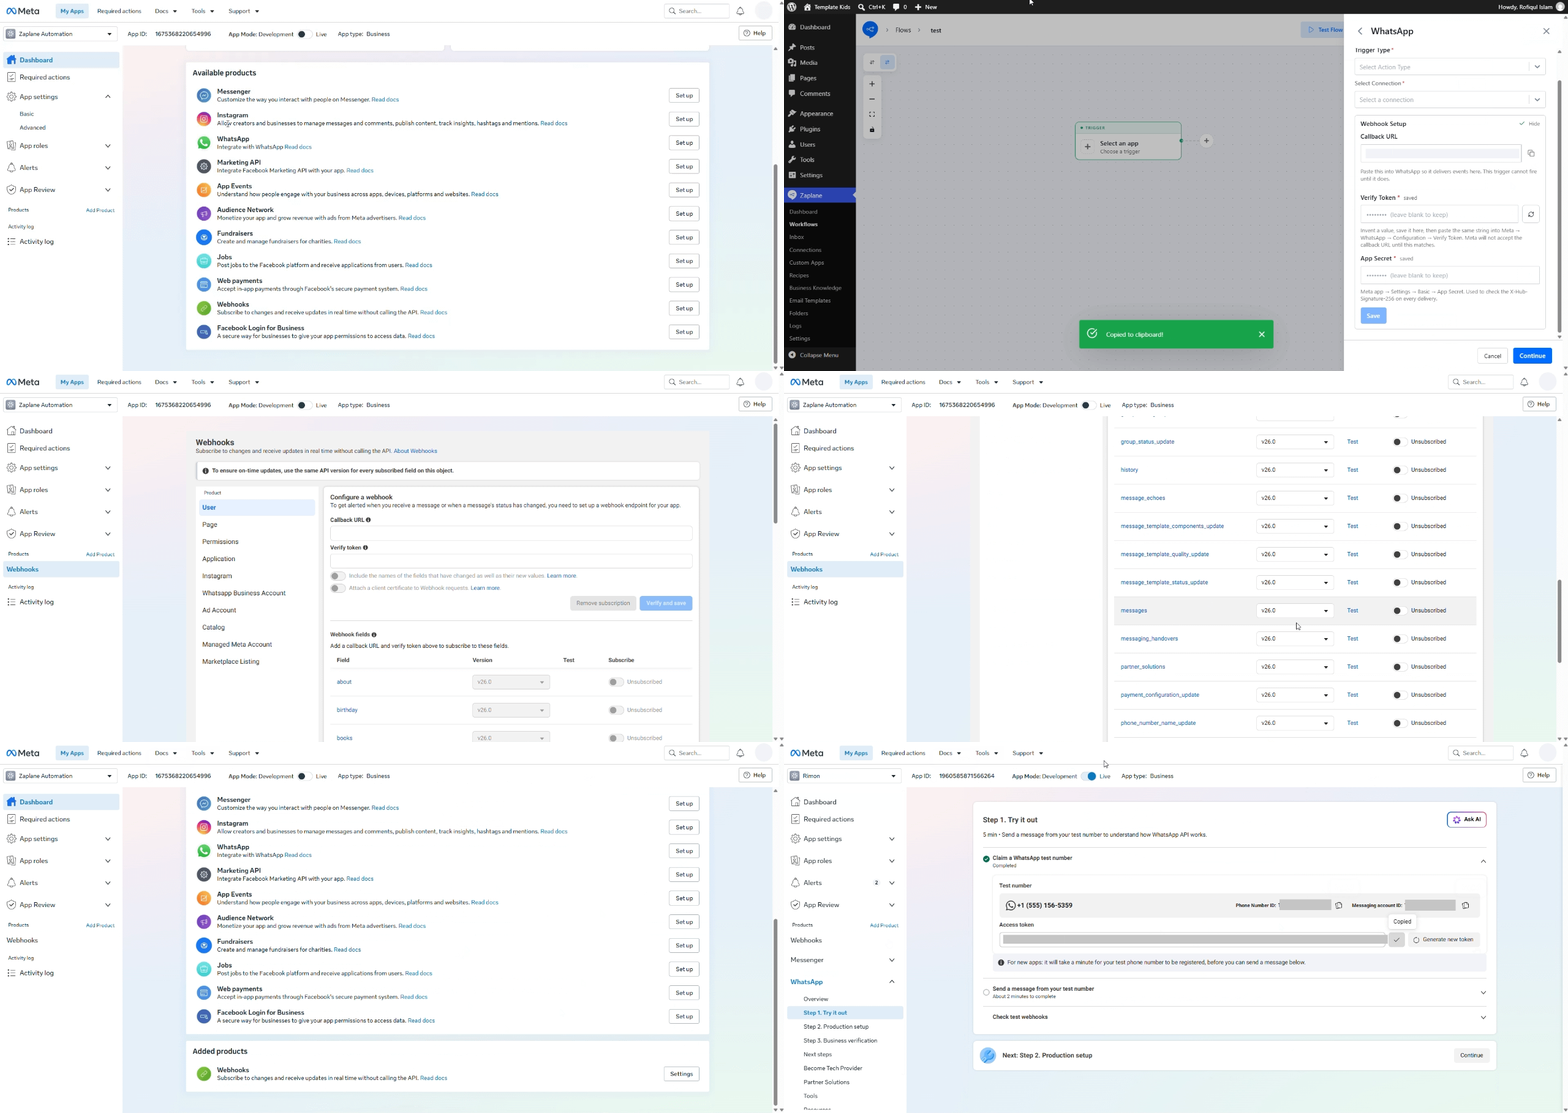
In your app dashboard, open WhatsApp > Step 1. Try it out from the left menu. Copy your Phone Number ID and Access token (use Generate new token if you need a new one) and keep them handy for the next step. This recording also shows the Webhooks page of your Meta app, which you will use later to register your webhook.
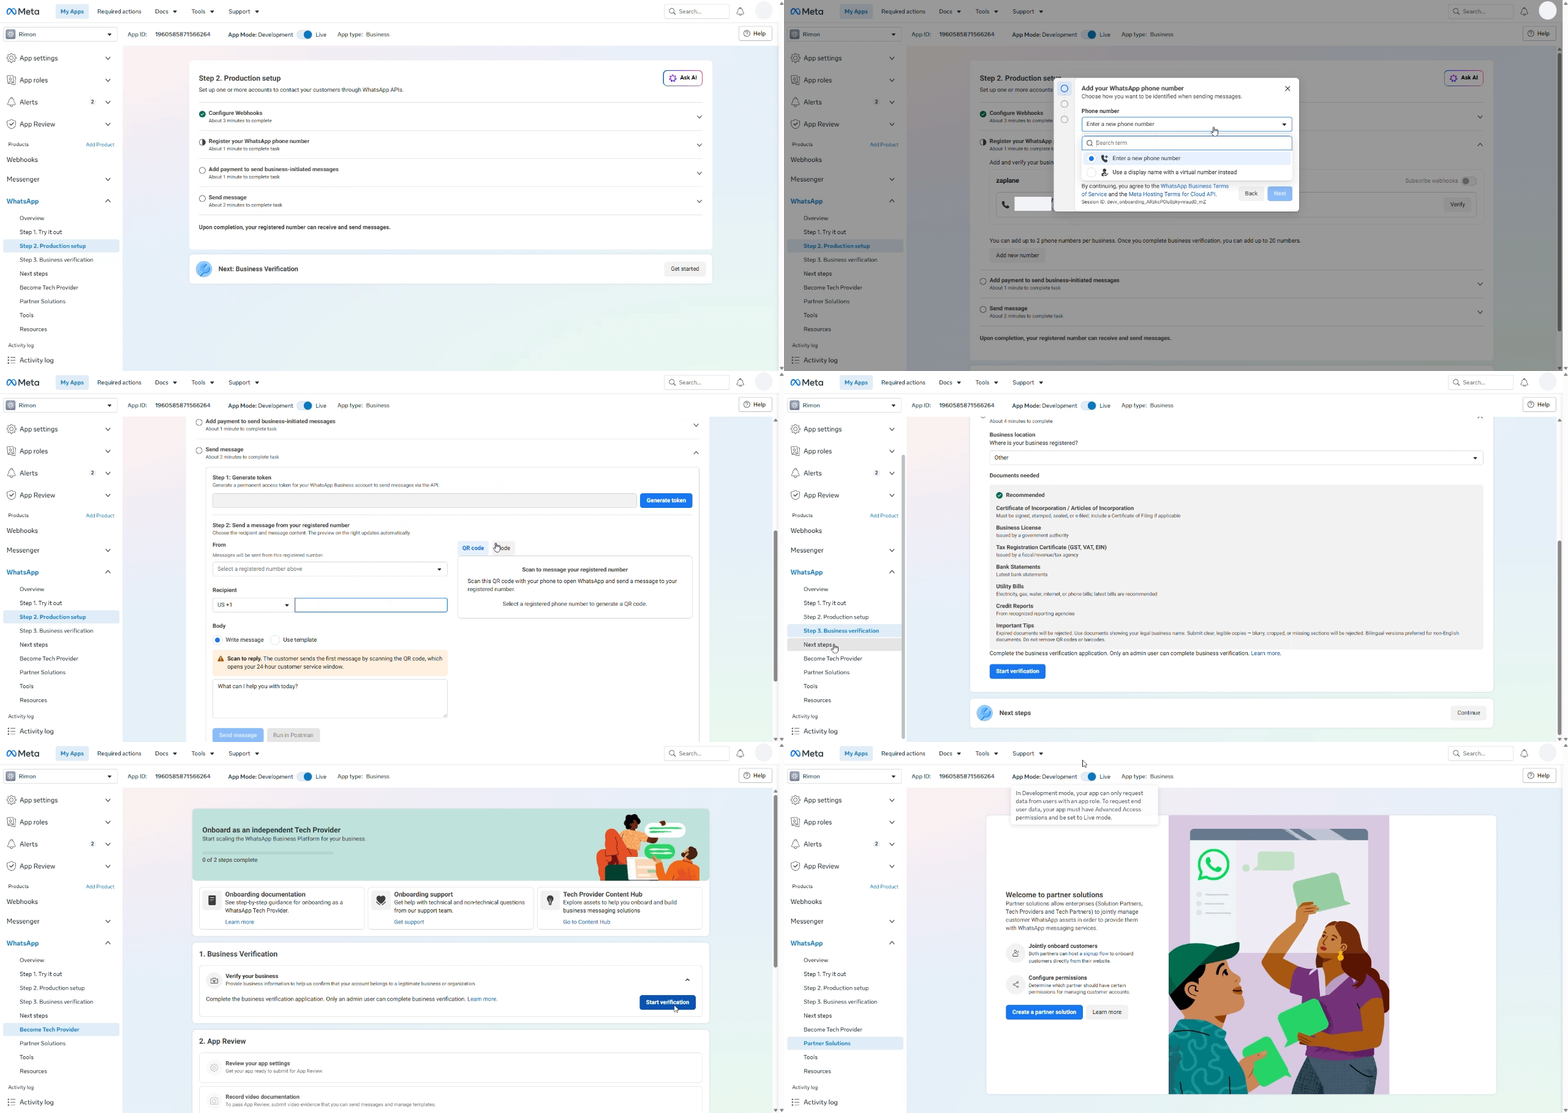
To use WhatsApp with real customers, also complete Step 2. Production setup and Step 3. Business verification from the same WhatsApp menu.
Step 3: Create the Connection in Zaplane
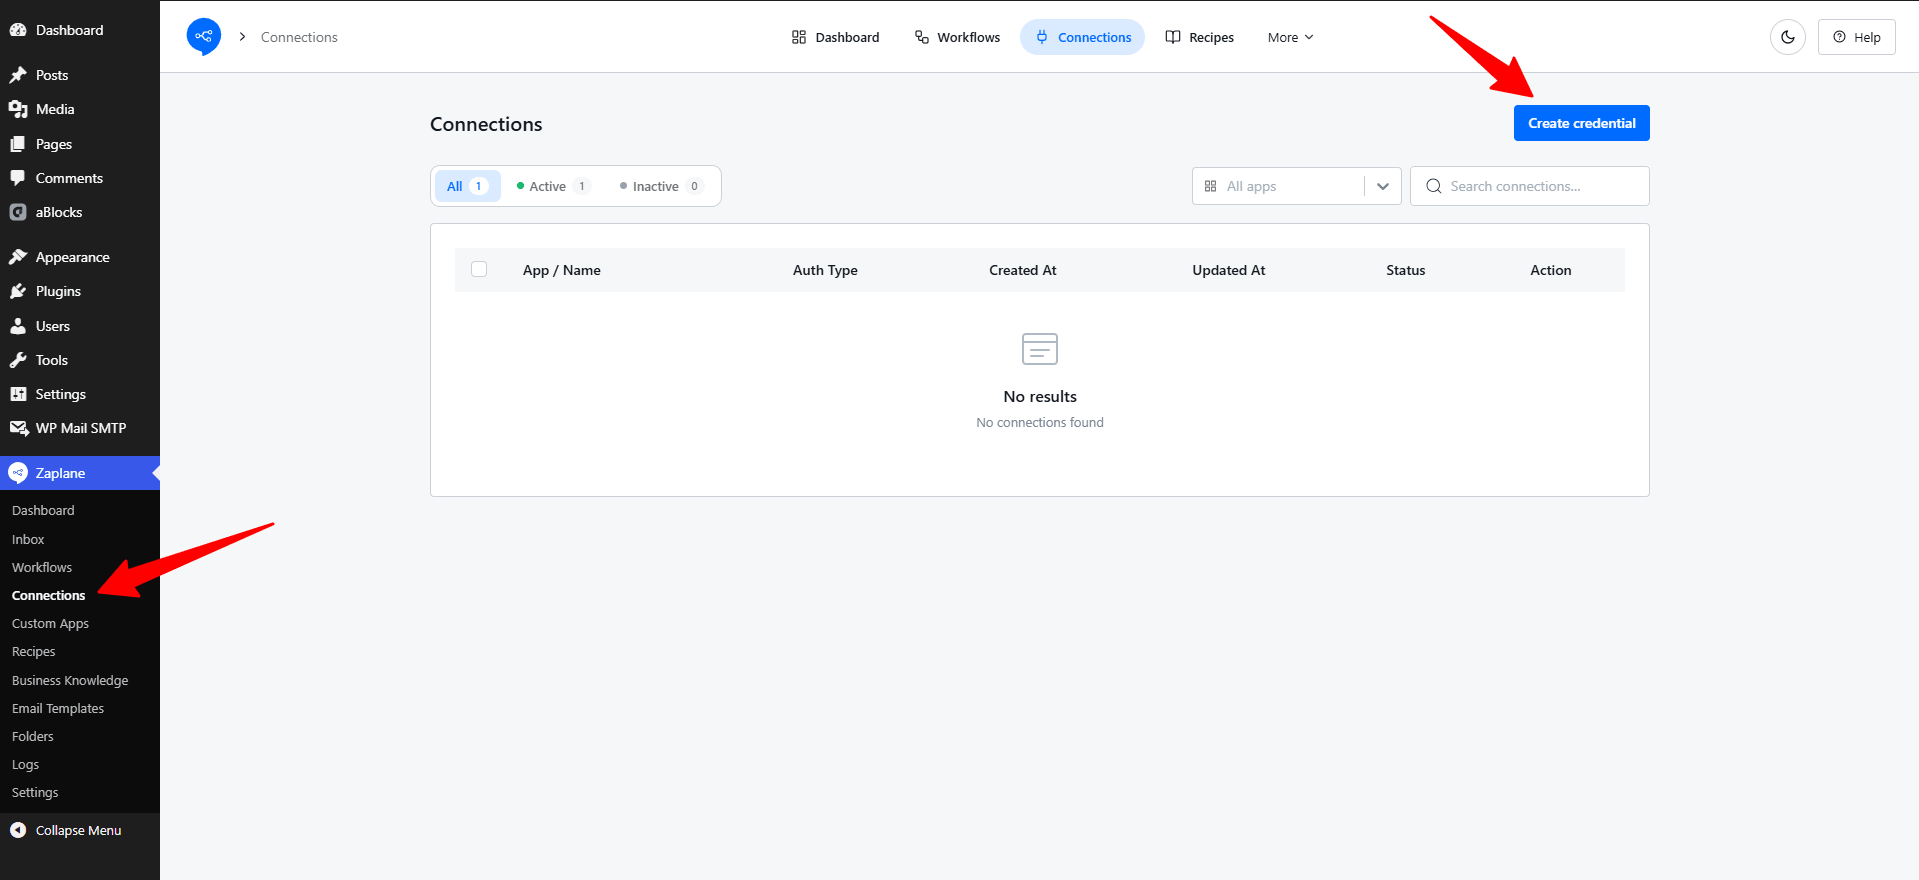
Go to Zaplane > Connections from your WordPress dashboard, then click Create credential.
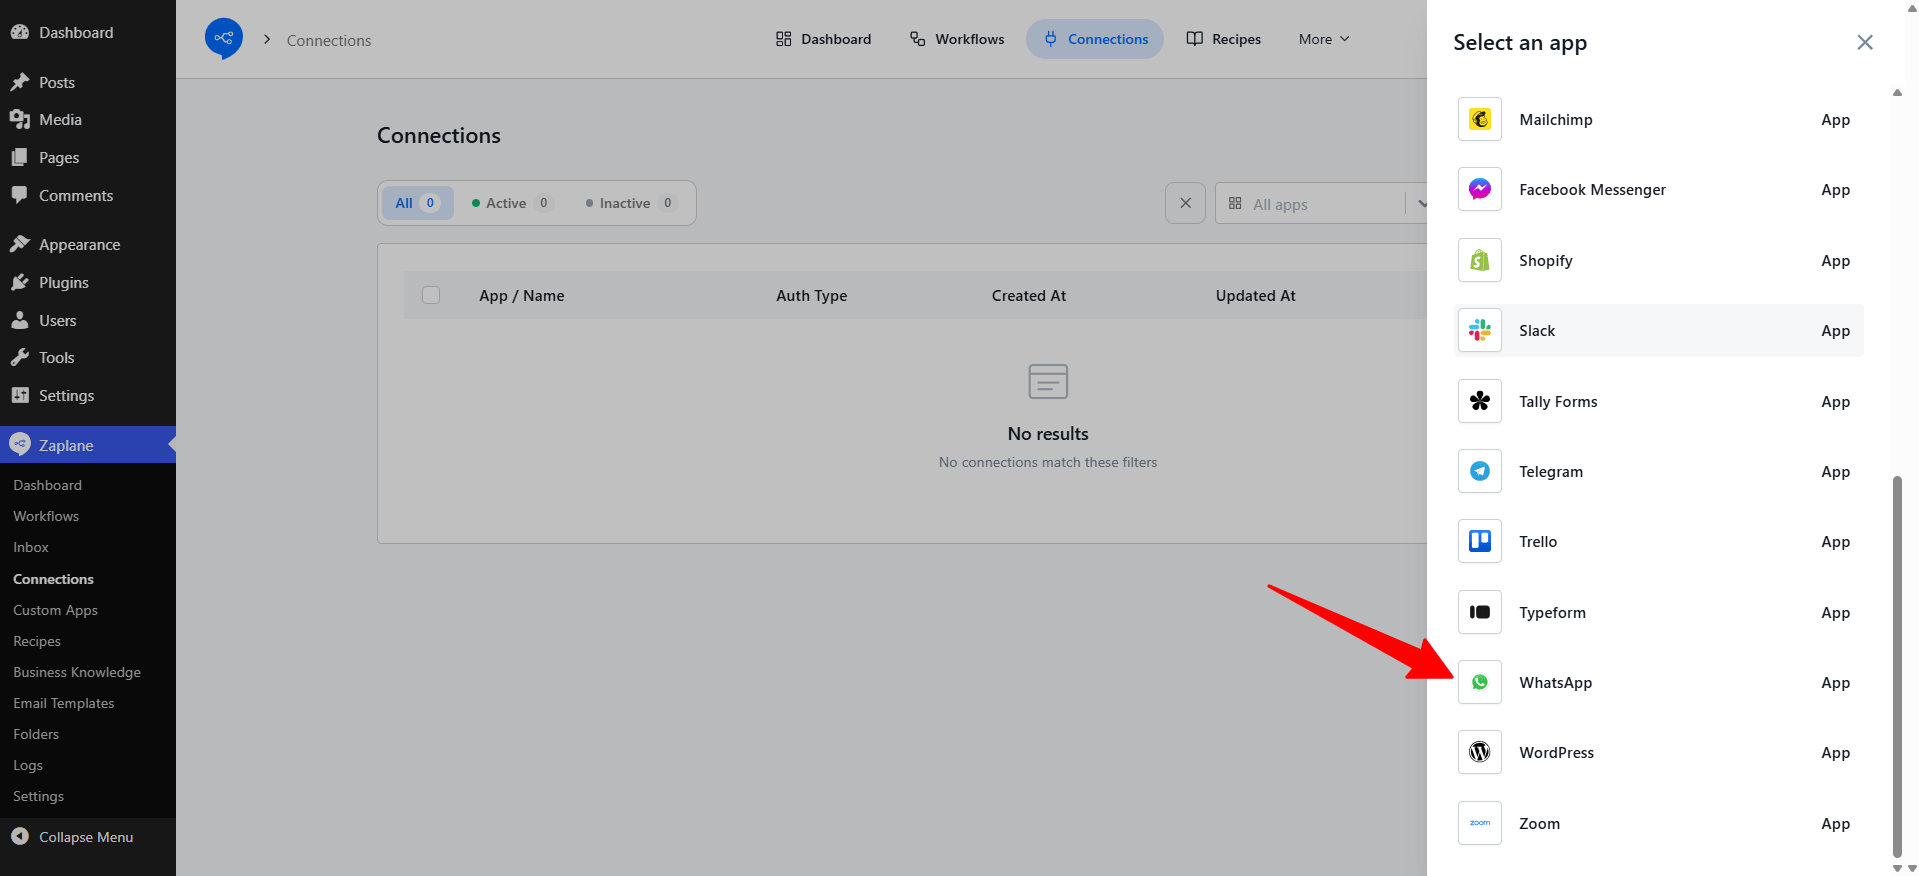
In the Select an app panel, choose WhatsApp.
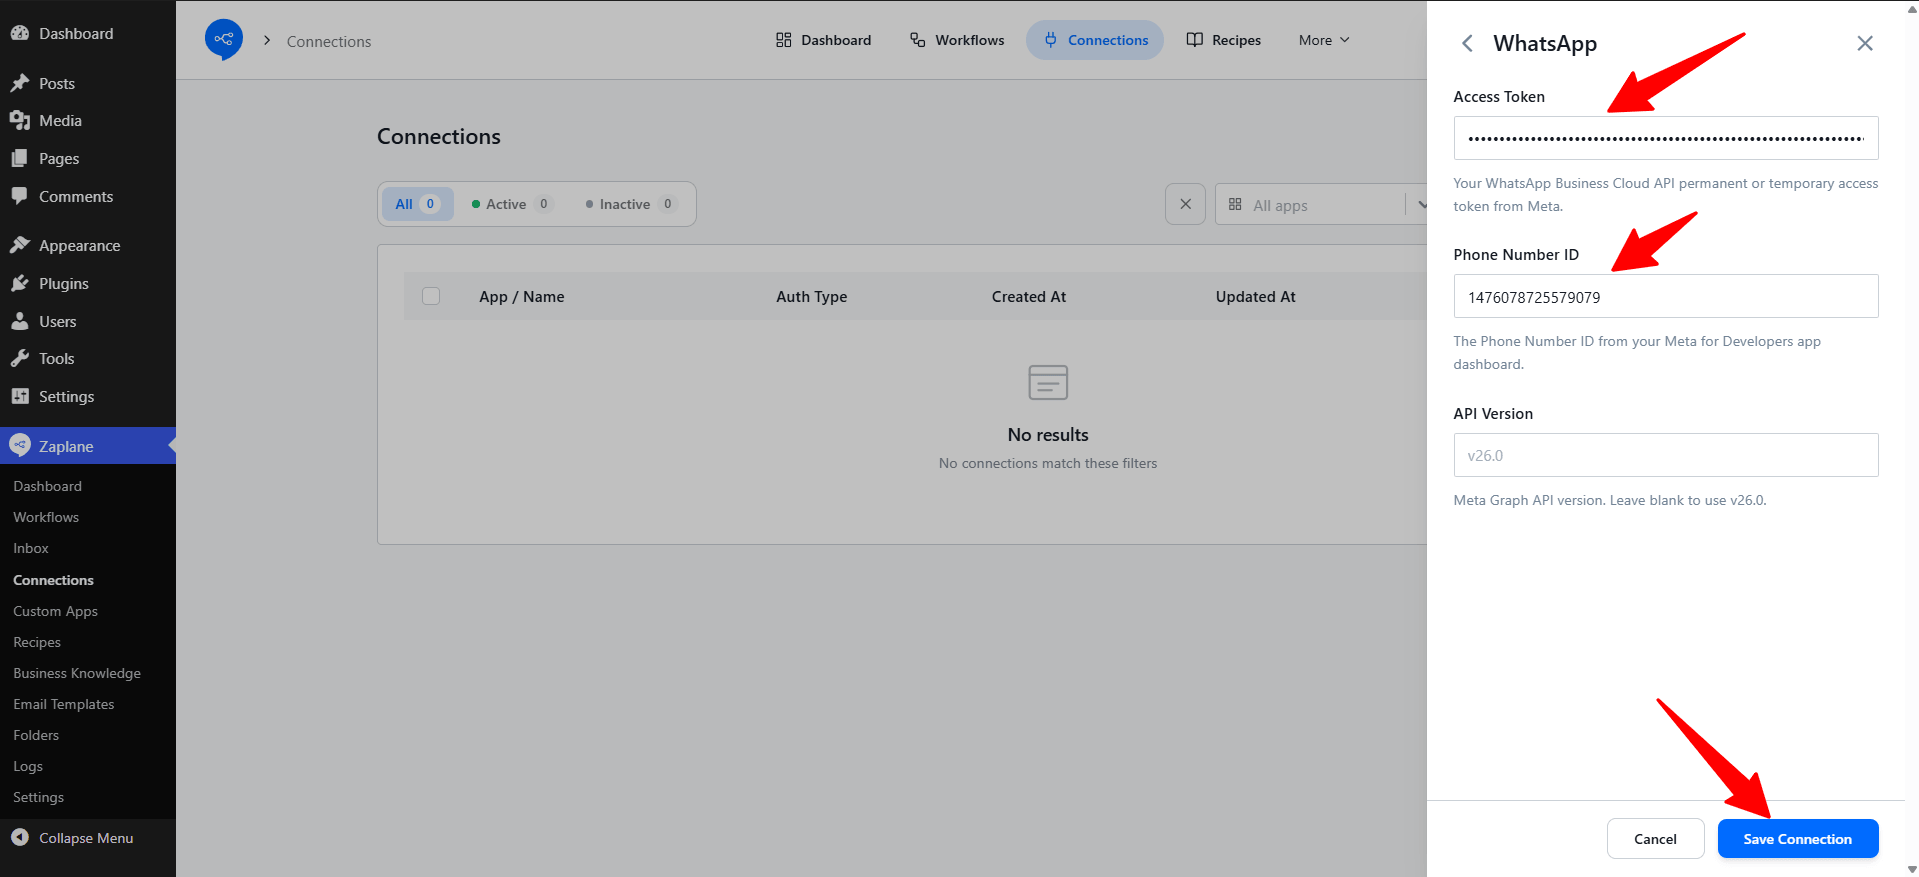
Paste your Access Token and Phone Number ID. The API Version field is optional, and Zaplane uses v26.0 if you leave it blank. Then click Save Connection.
Step 4: Create a Workflow
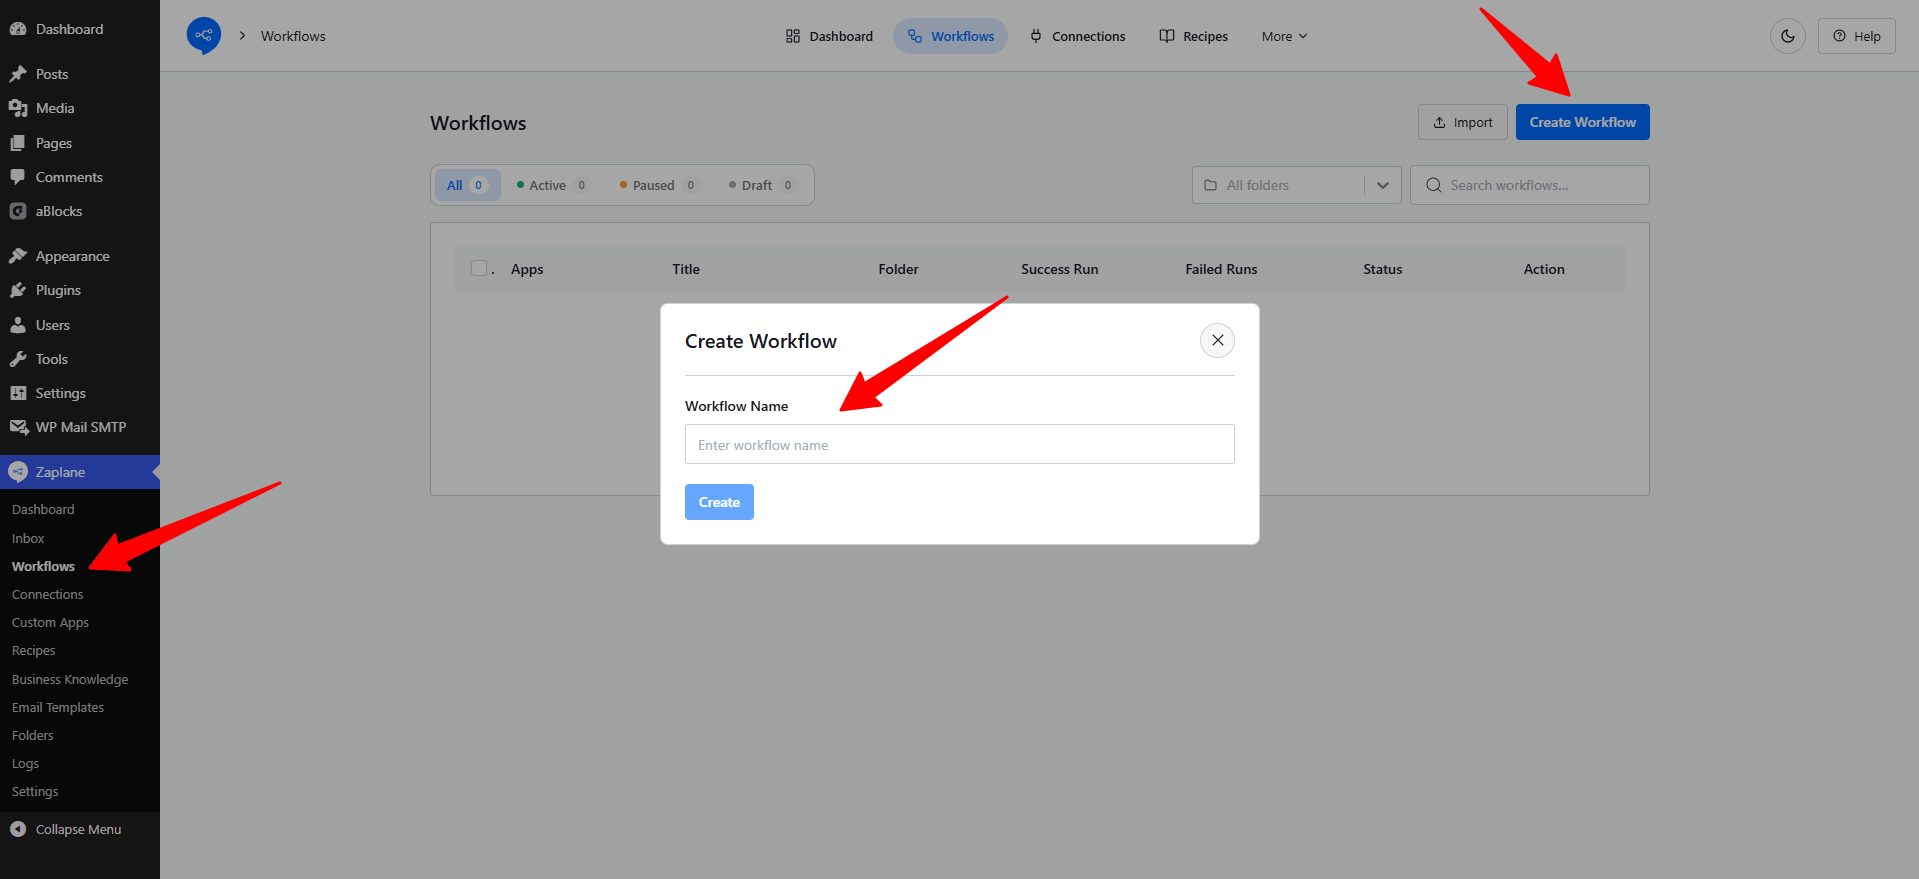
Go to Zaplane > Workflows from your WordPress dashboard, then click Create Workflow. Enter a name in the Workflow Name field and click Create to open the workflow editor.
Step 5: Add the WhatsApp Trigger
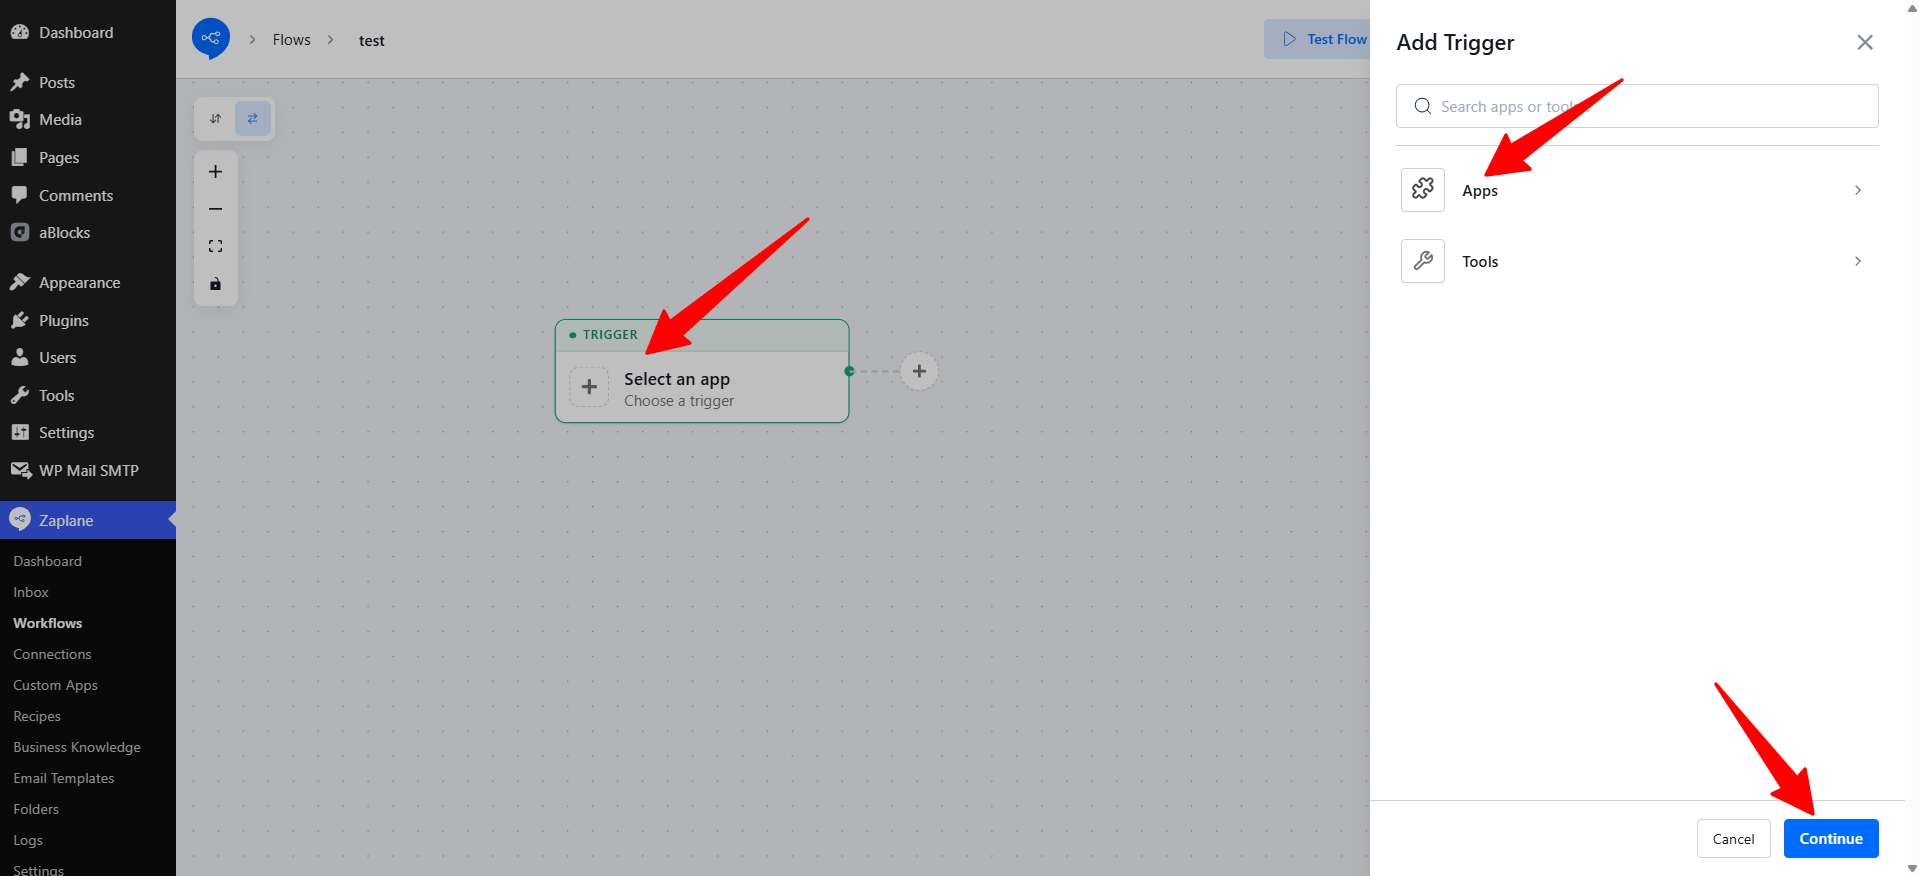
In the workflow editor, click Select an app inside the Trigger box. In the Add Trigger panel, choose Apps.
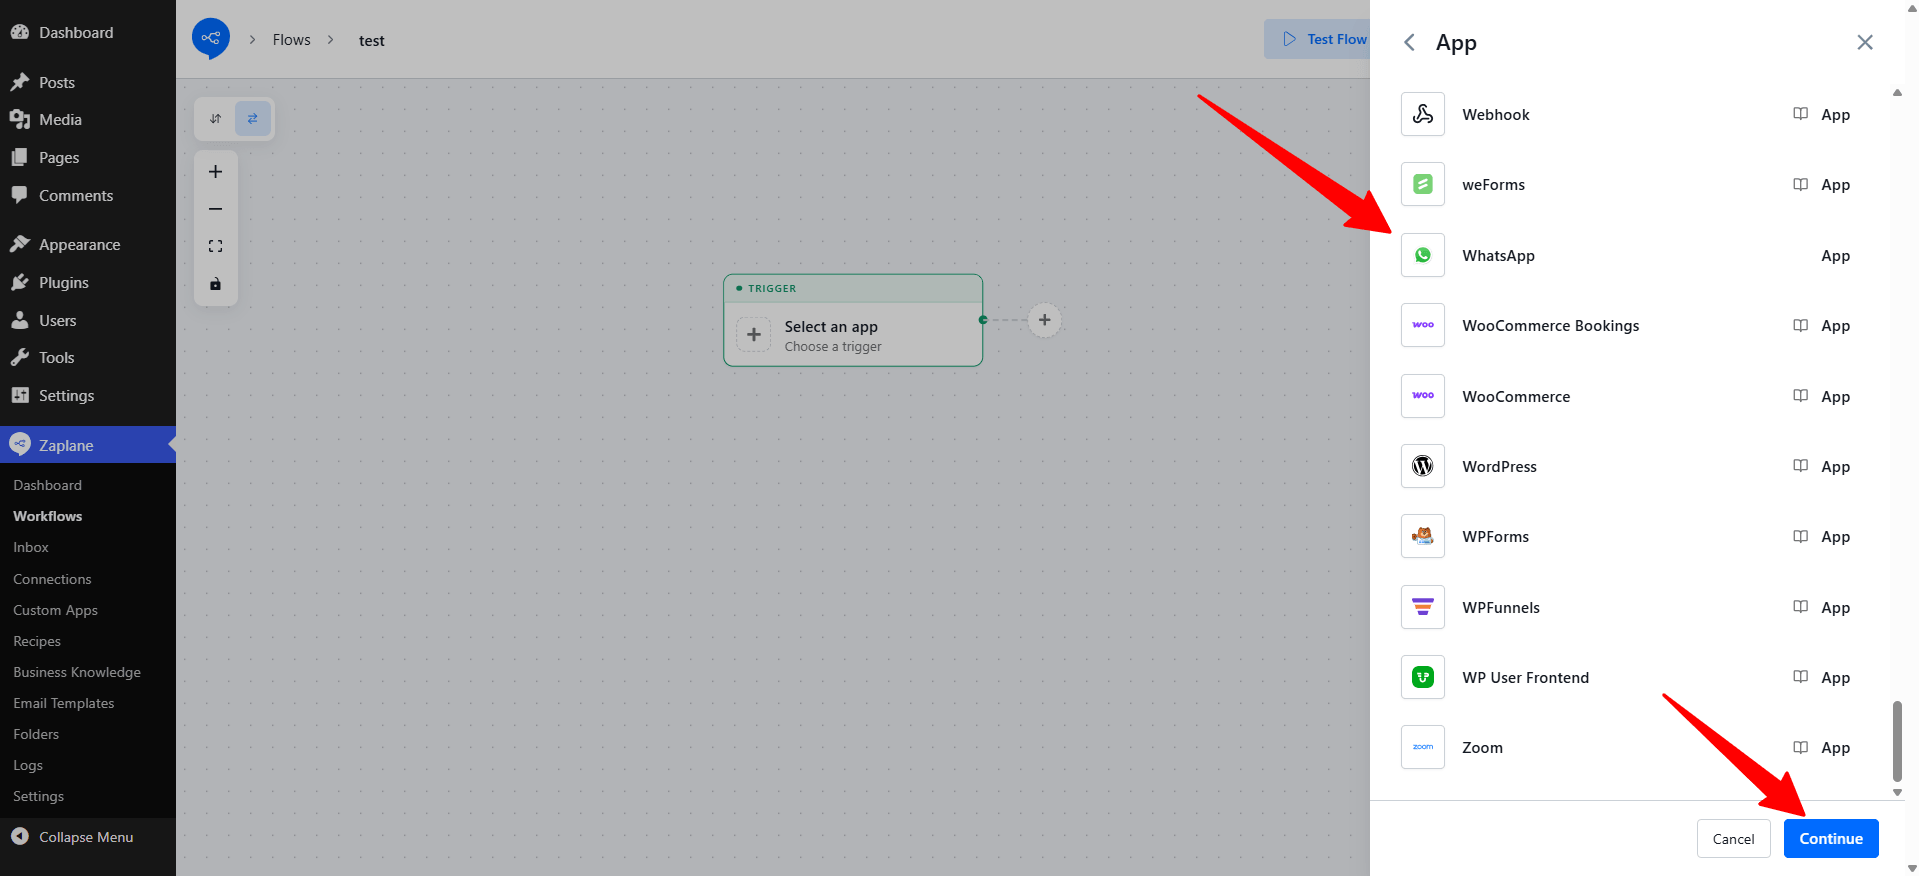
Find WhatsApp in the app list, select it, and click Continue.
Step 6: Choose the Trigger Type and Connection
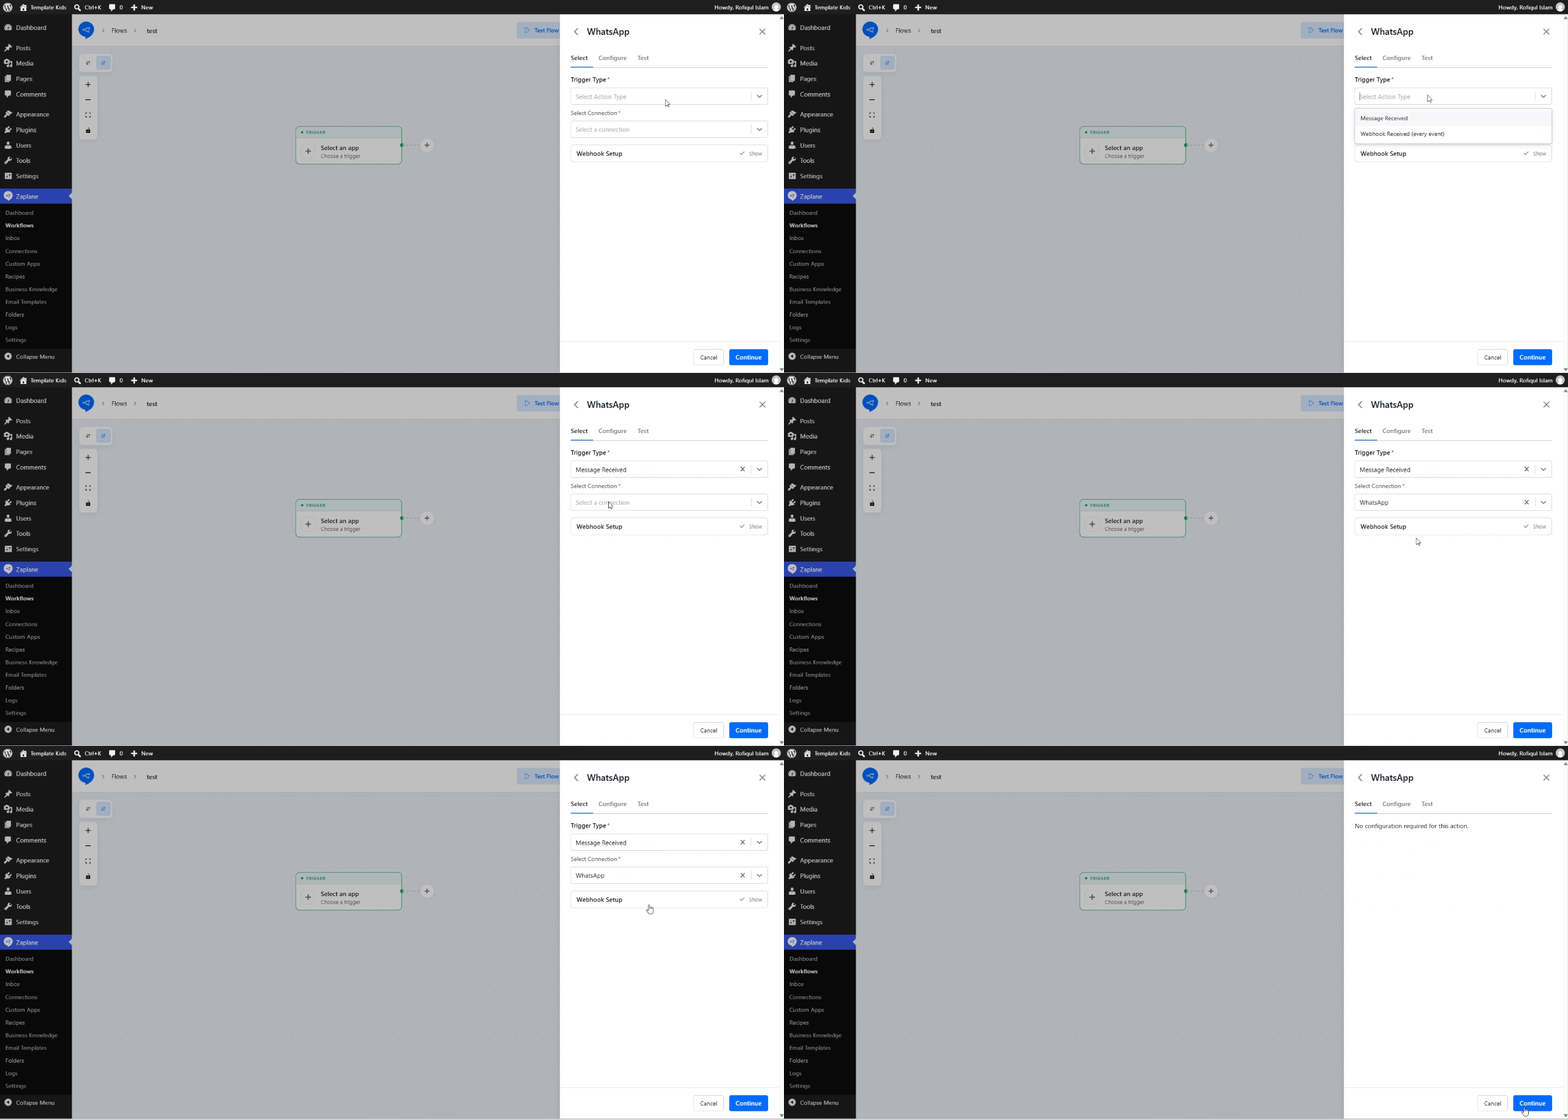
On the Select tab, open the Trigger Type dropdown and pick the event that should start your workflow. In this example we choose Message Received. Then open the Select Connection dropdown, choose the WhatsApp connection you created in Step 3, and click Continue.
Step 7: Configure the Trigger
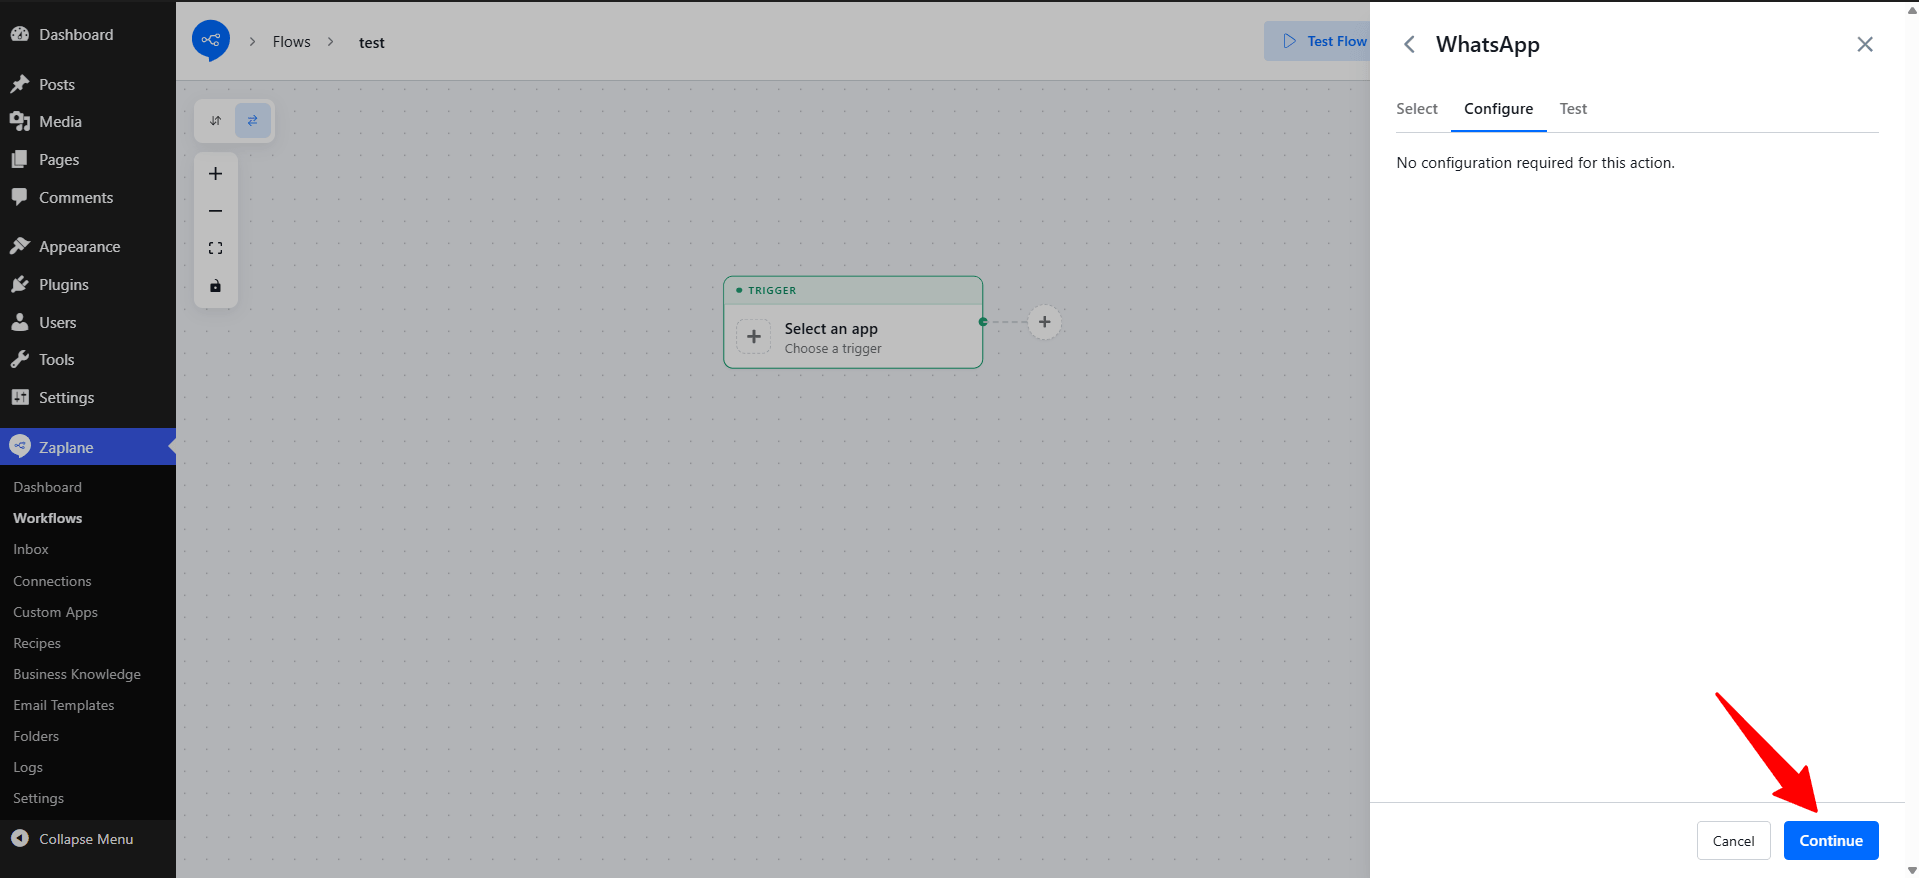
On the Configure tab, Zaplane shows “No configuration required for this action.” Click Continue to move on.
Step 8: Test and Activate the Workflow
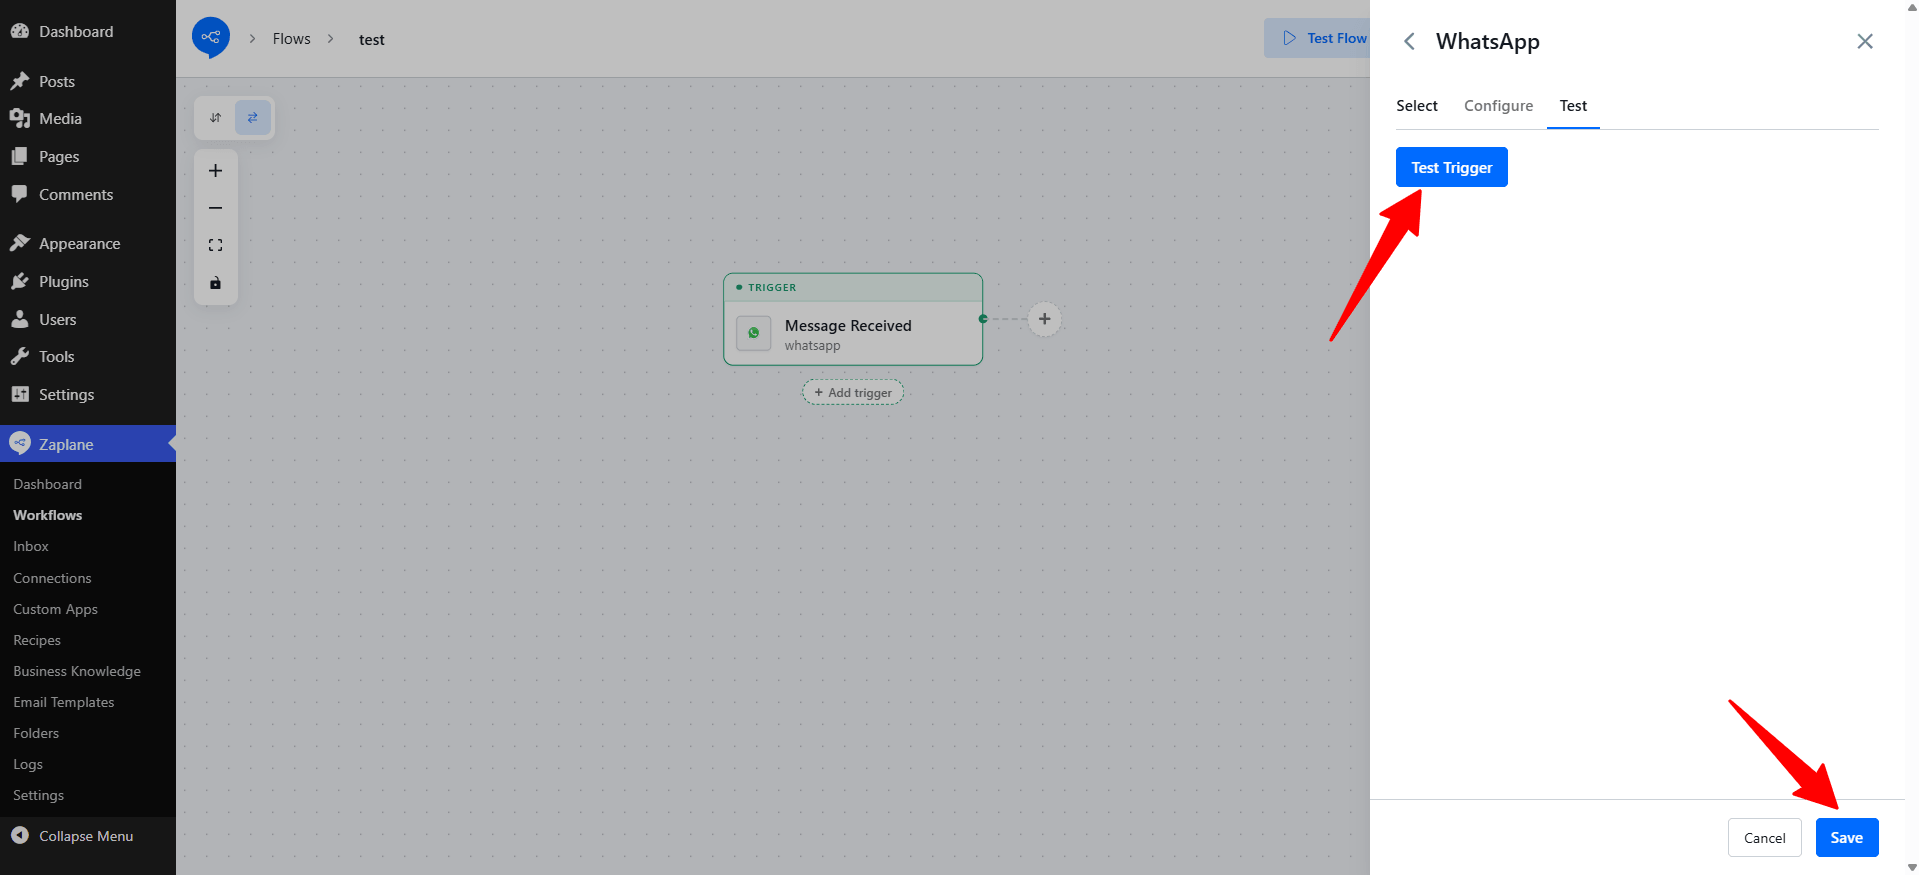
On the Test tab, click Test Trigger to check that Zaplane can receive data from WhatsApp, then click Save.
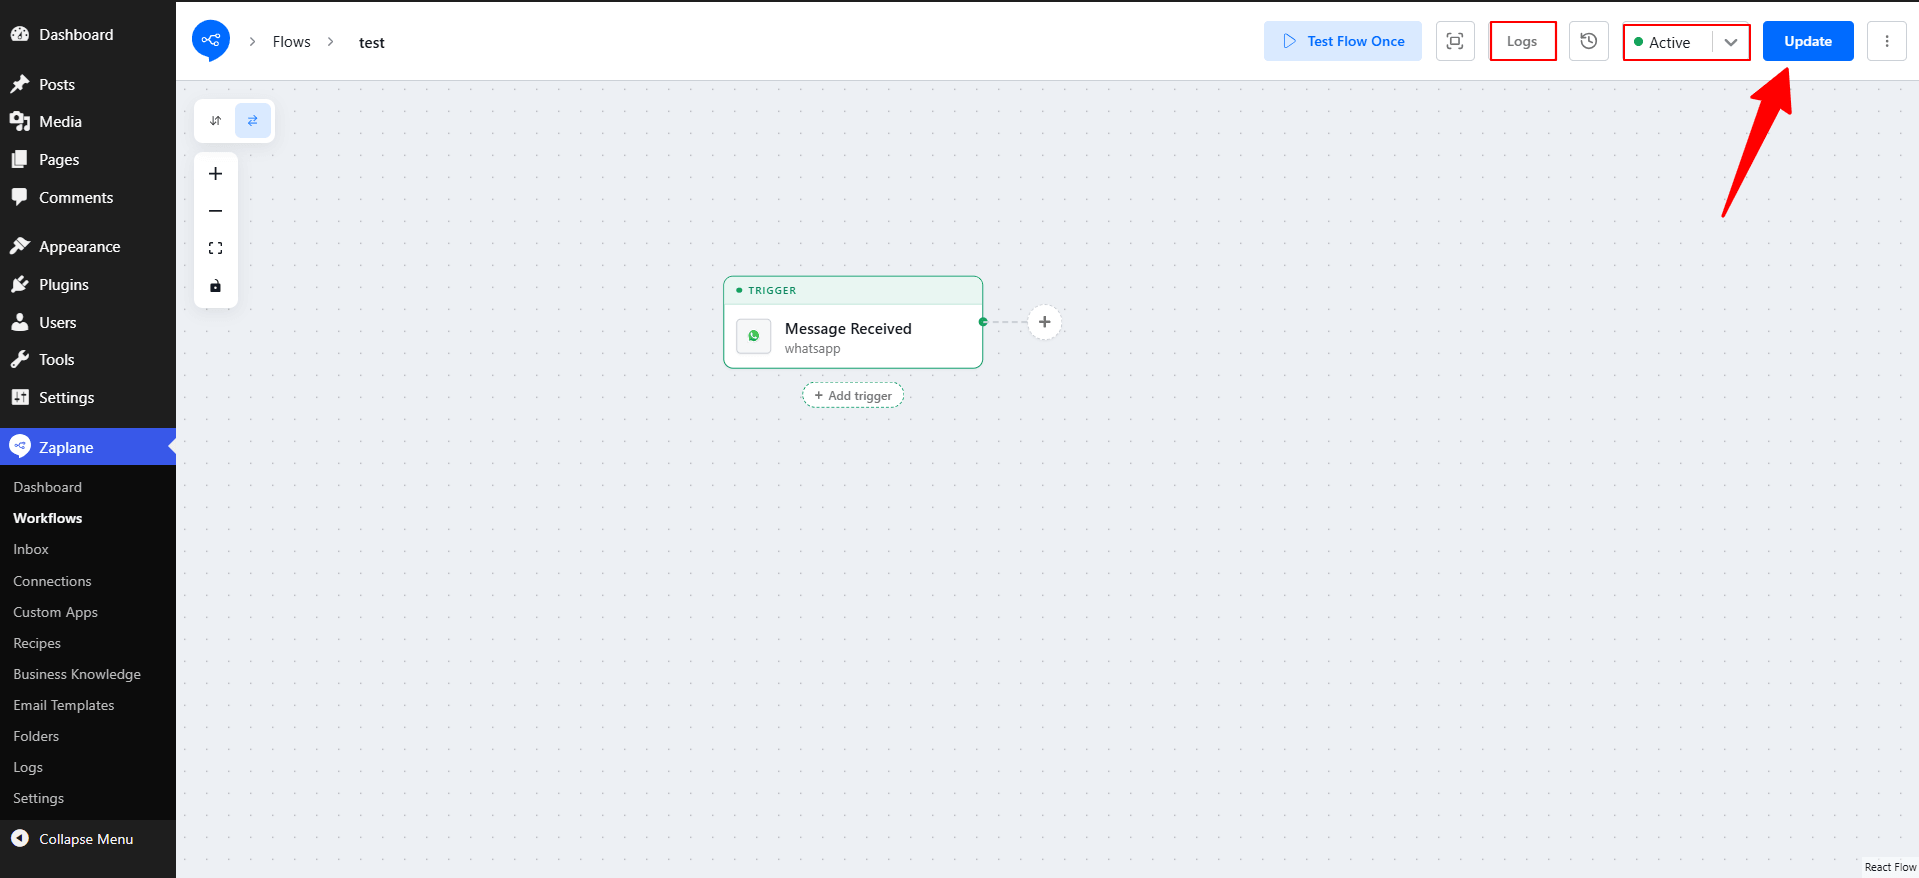
Back in the workflow editor, set the workflow status to Active and click Update to publish your changes. You can also use Logs to review every run.
Done!
WhatsApp is now connected to Zaplane. Every time your selected trigger event happens, your workflow will run automatically.