

This guide shows you how to start an automation in Zaplane every time someone submits a MailPoet form on your WordPress site. MailPoet runs inside WordPress, so there is no API key or connection to set up. It takes about two minutes and needs no code.
Before you begin: make sure both the Zaplane and MailPoet plugins are installed and active, and that you have at least one MailPoet form (for example, a Contact Form).
Step 1: Create a new workflow
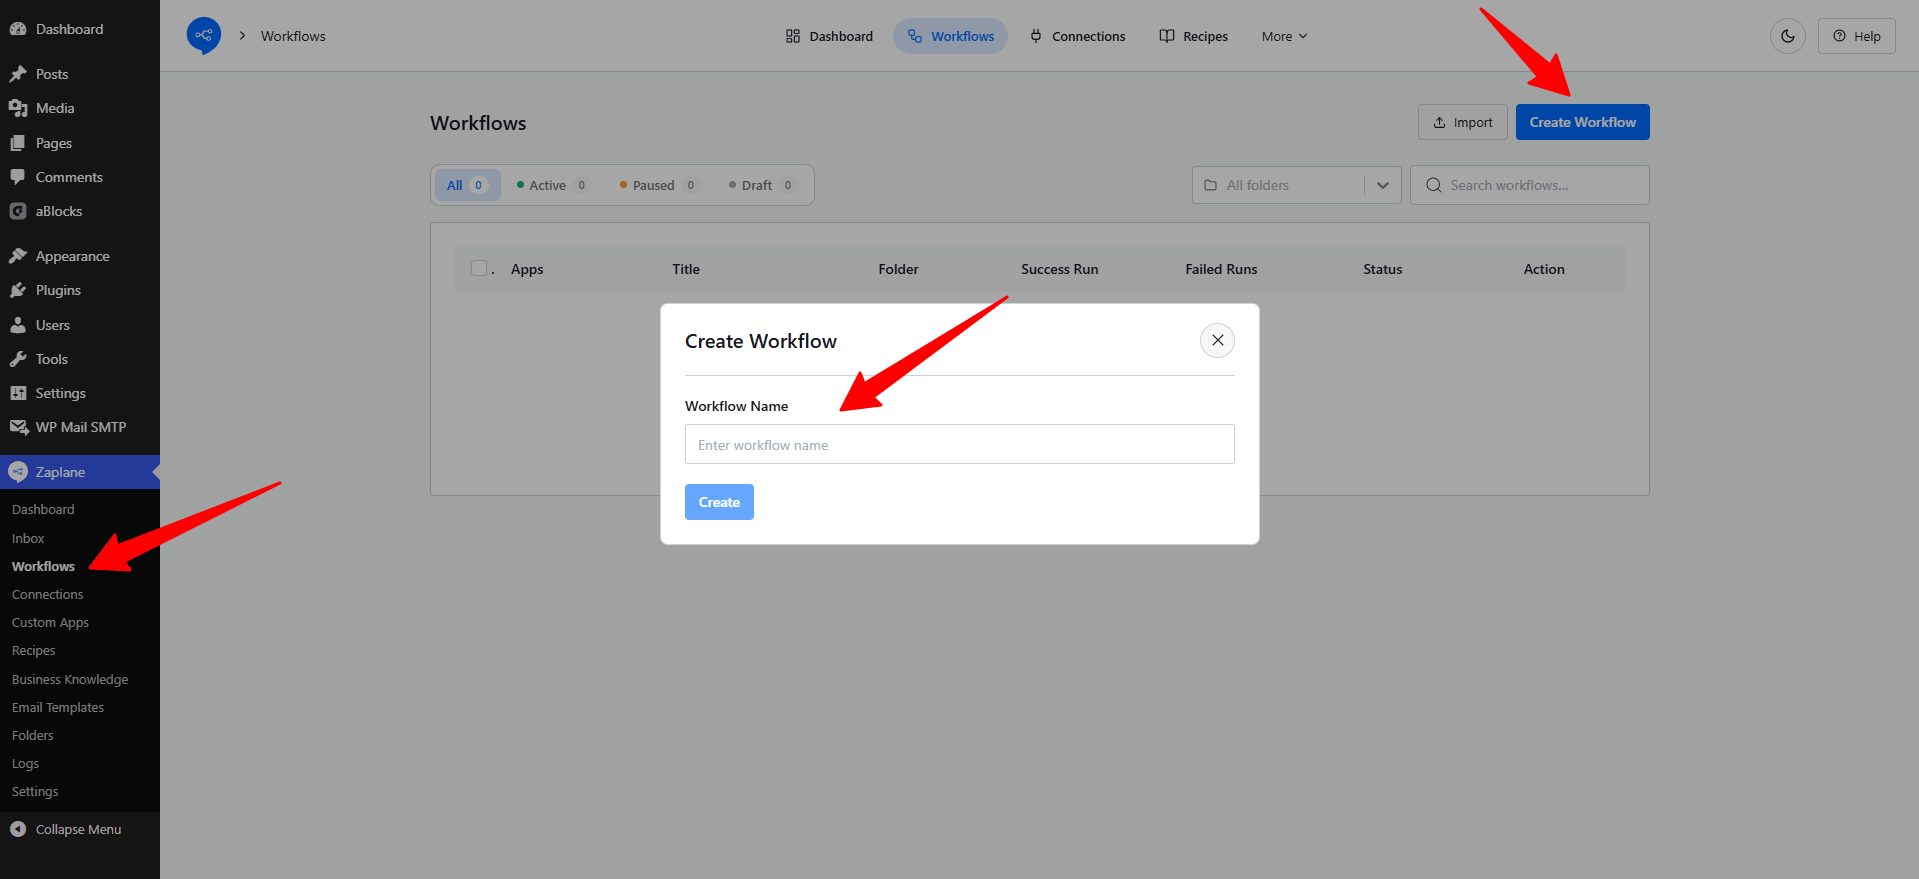
In your WordPress dashboard, go to Zaplane → Workflows and click the blue Create Workflow button. Enter a Workflow Name and click Create.
Step 2: Add a trigger
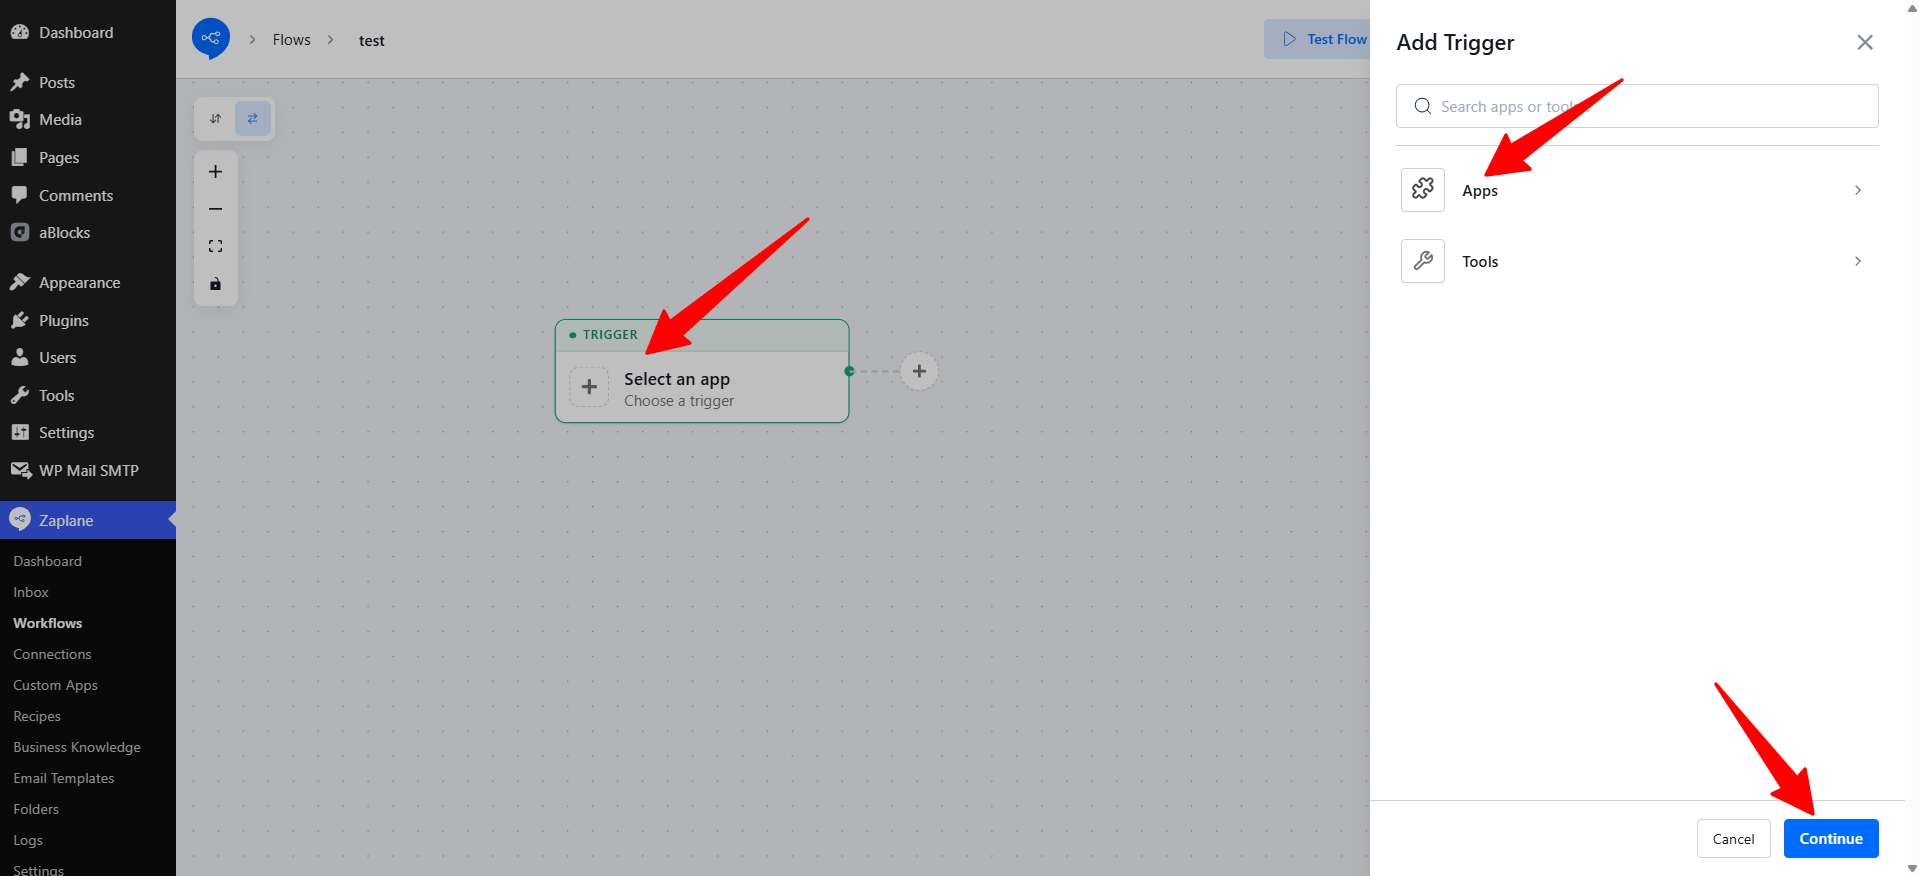
In the workflow editor, click the Select an app trigger card. The Add Trigger panel opens on the right. Choose Apps and click Continue.
Step 3: Choose MailPoet
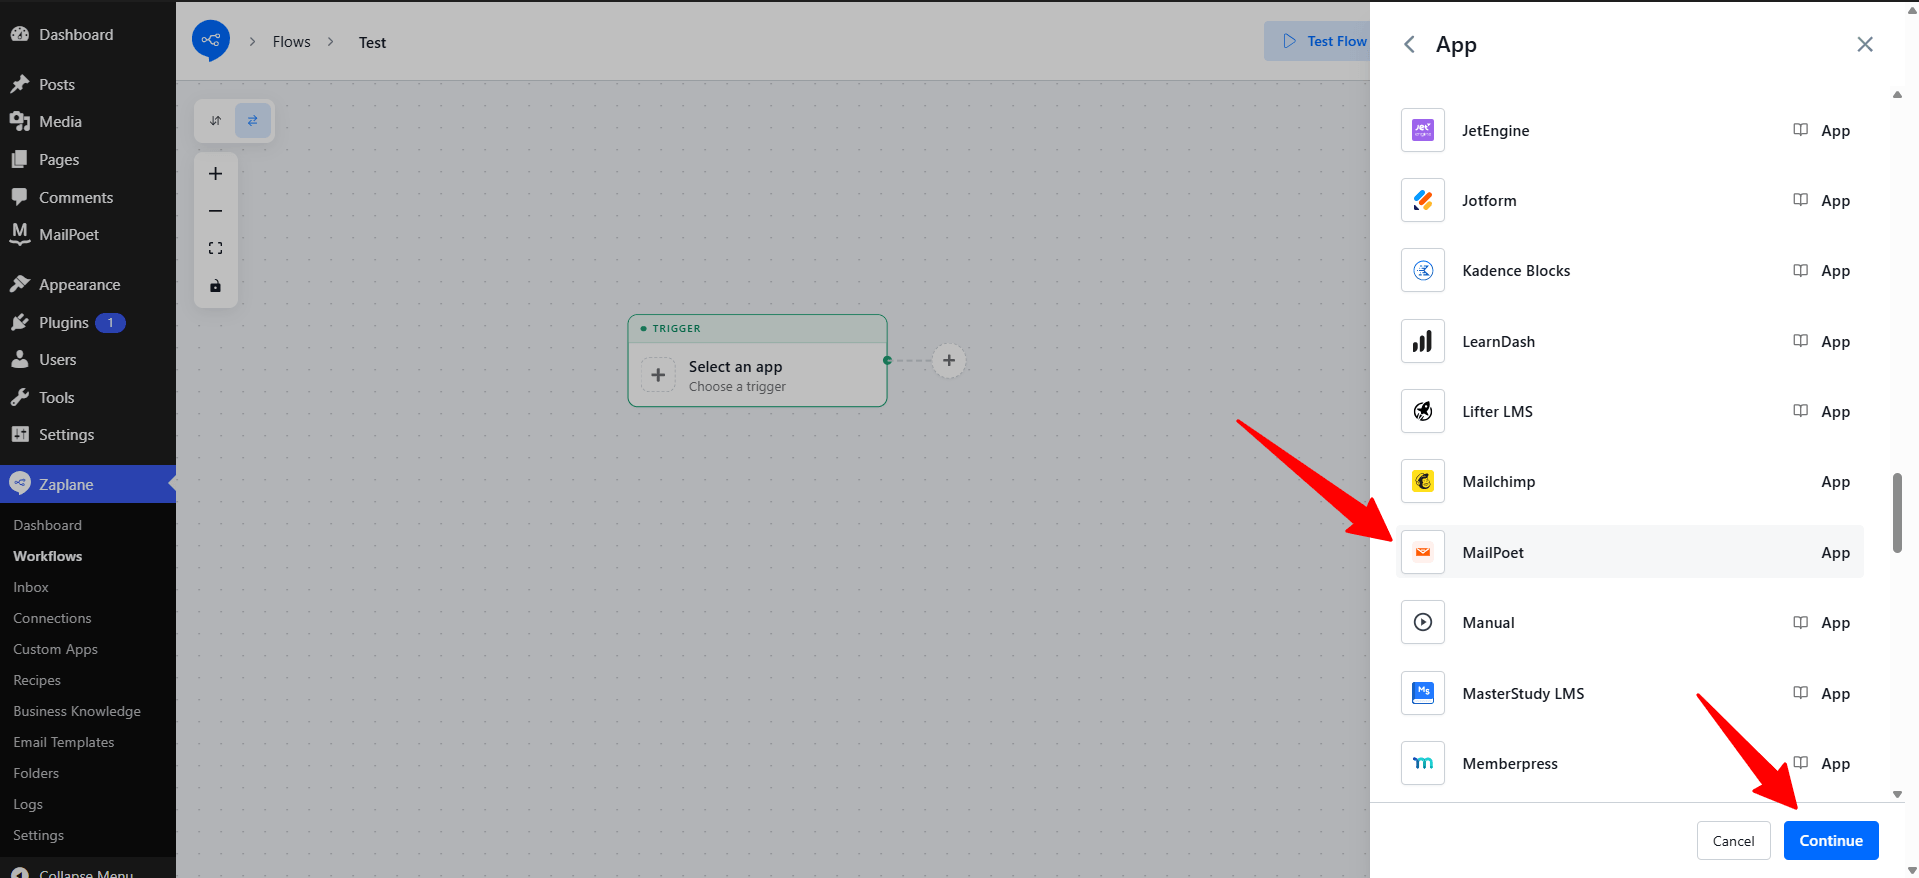
Scroll through the app list, select MailPoet, and click Continue.
Step 4: Select the trigger type
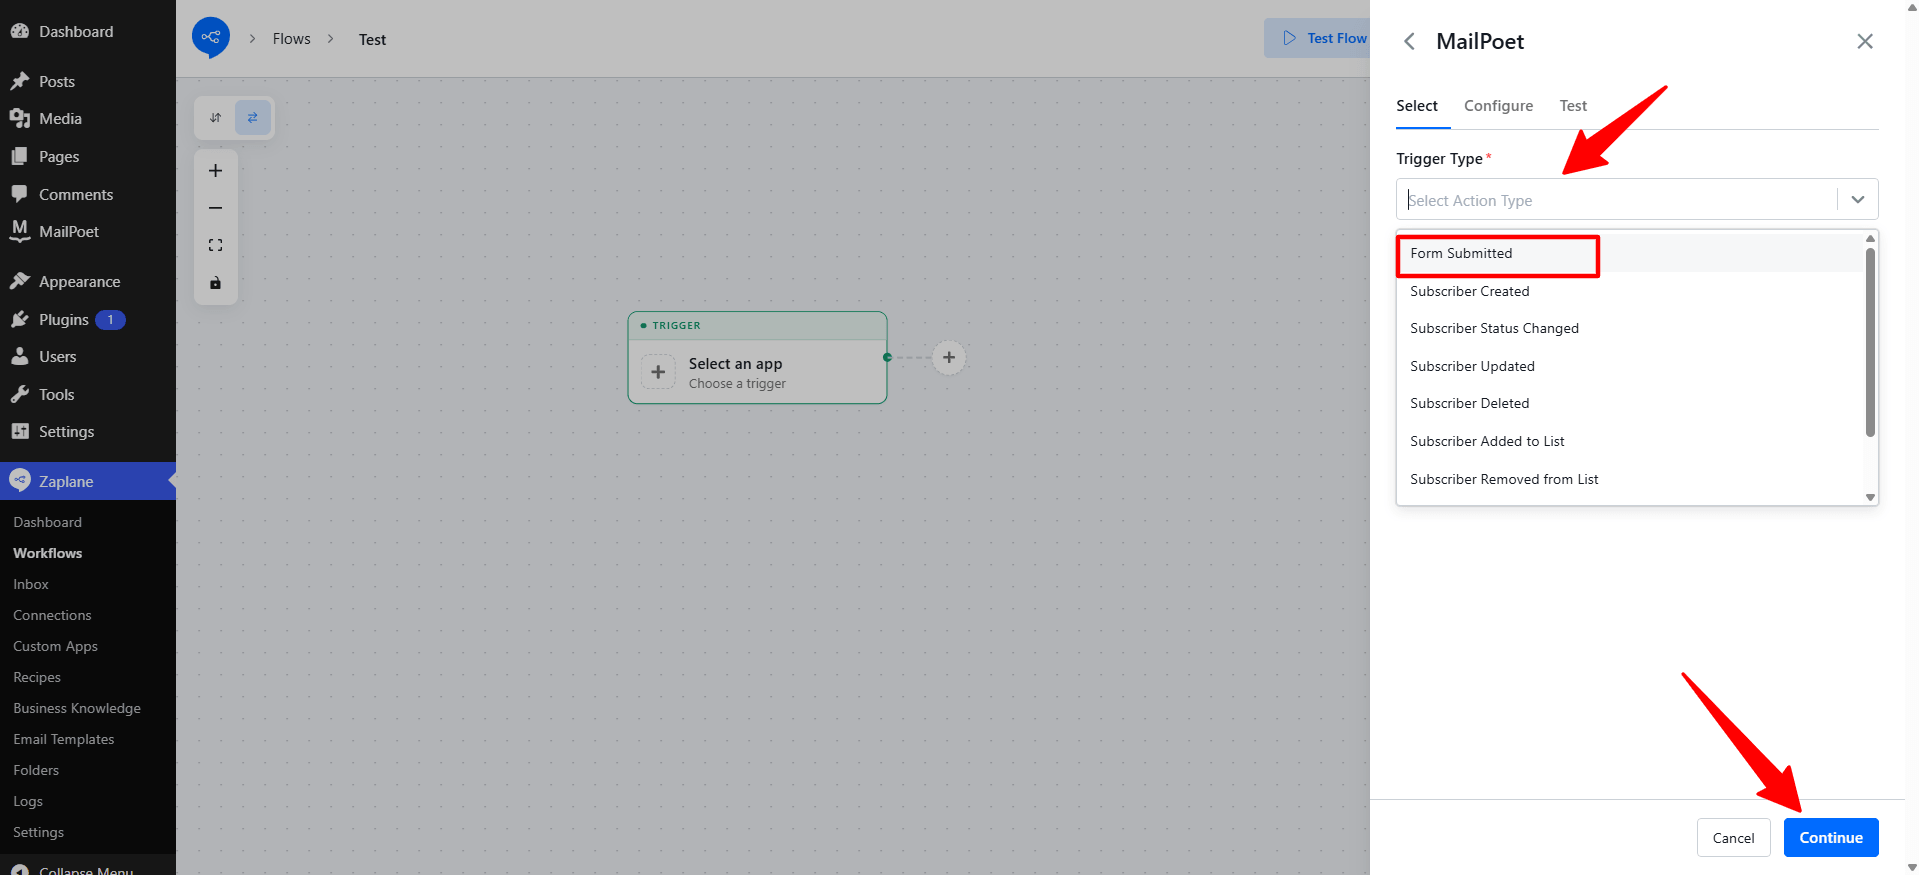
Open the Trigger Type dropdown and pick Form Submitted. Click Continue.
MailPoet offers more triggers you can use in other workflows. Scroll the list to see them all, including Subscriber Created, Subscriber Status Changed, Subscriber Updated, Subscriber Deleted, Subscriber Added to List, and Subscriber Removed from List.
Step 5: Configure the form
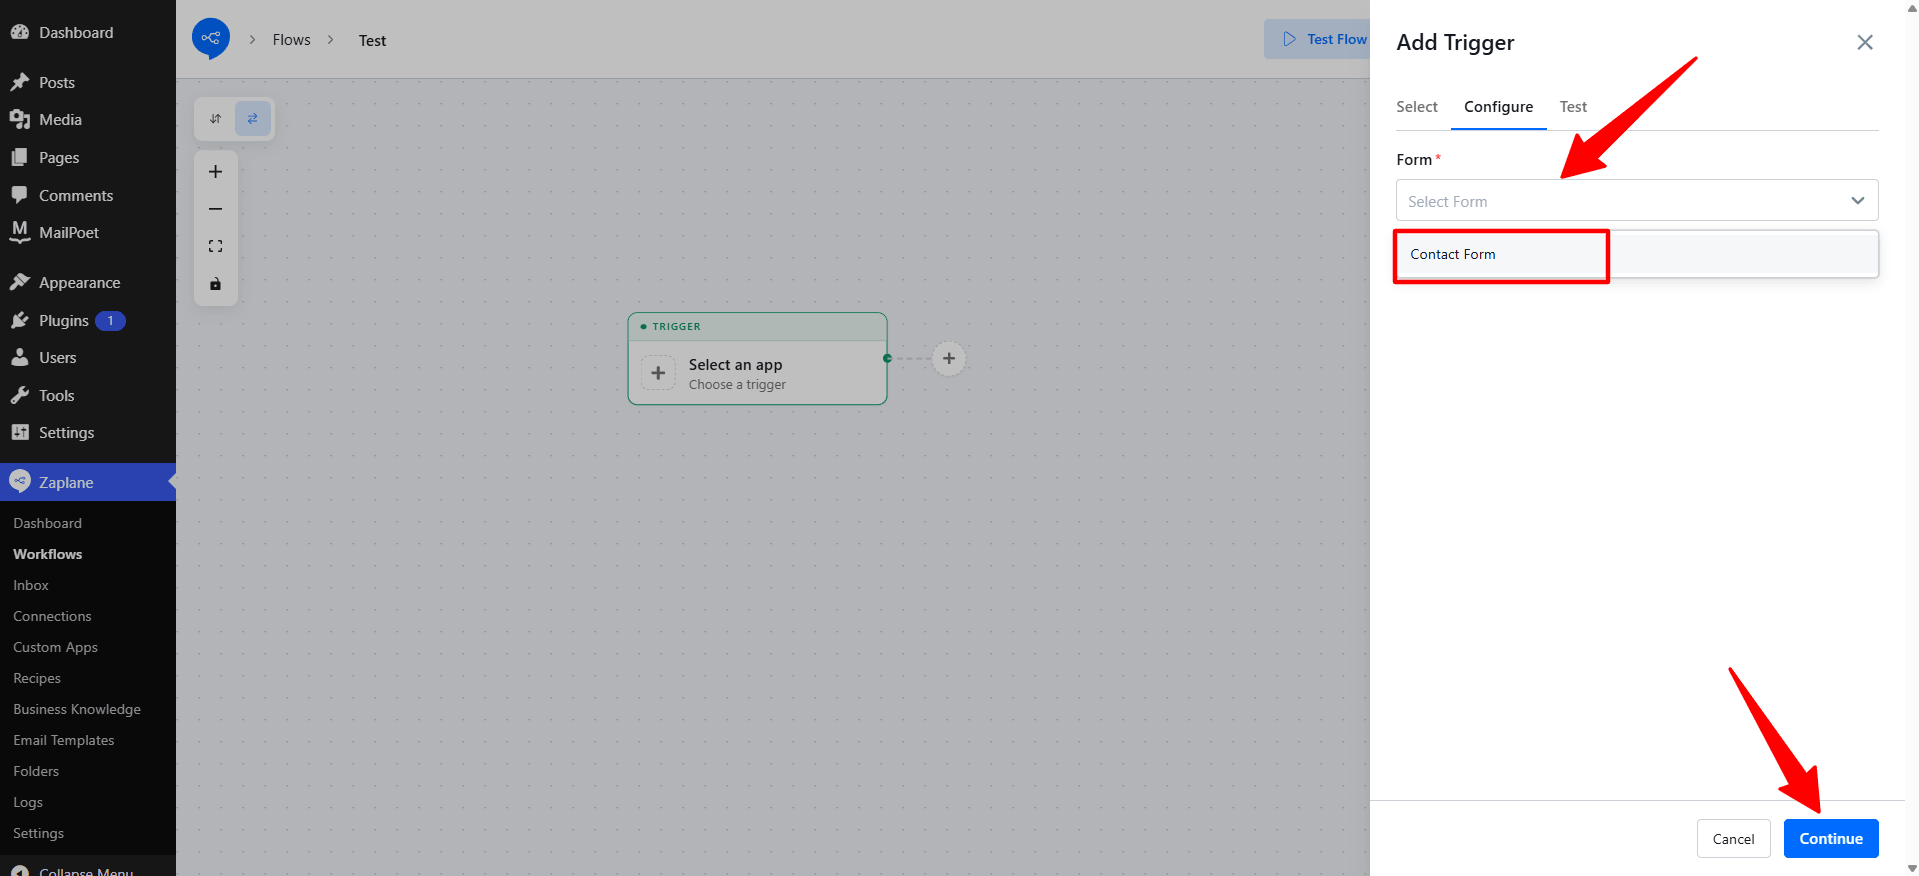
On the Configure tab, open the Form dropdown and choose the MailPoet form that should start this workflow (for example, Contact Form). Then click Continue.
Step 6: Test the trigger
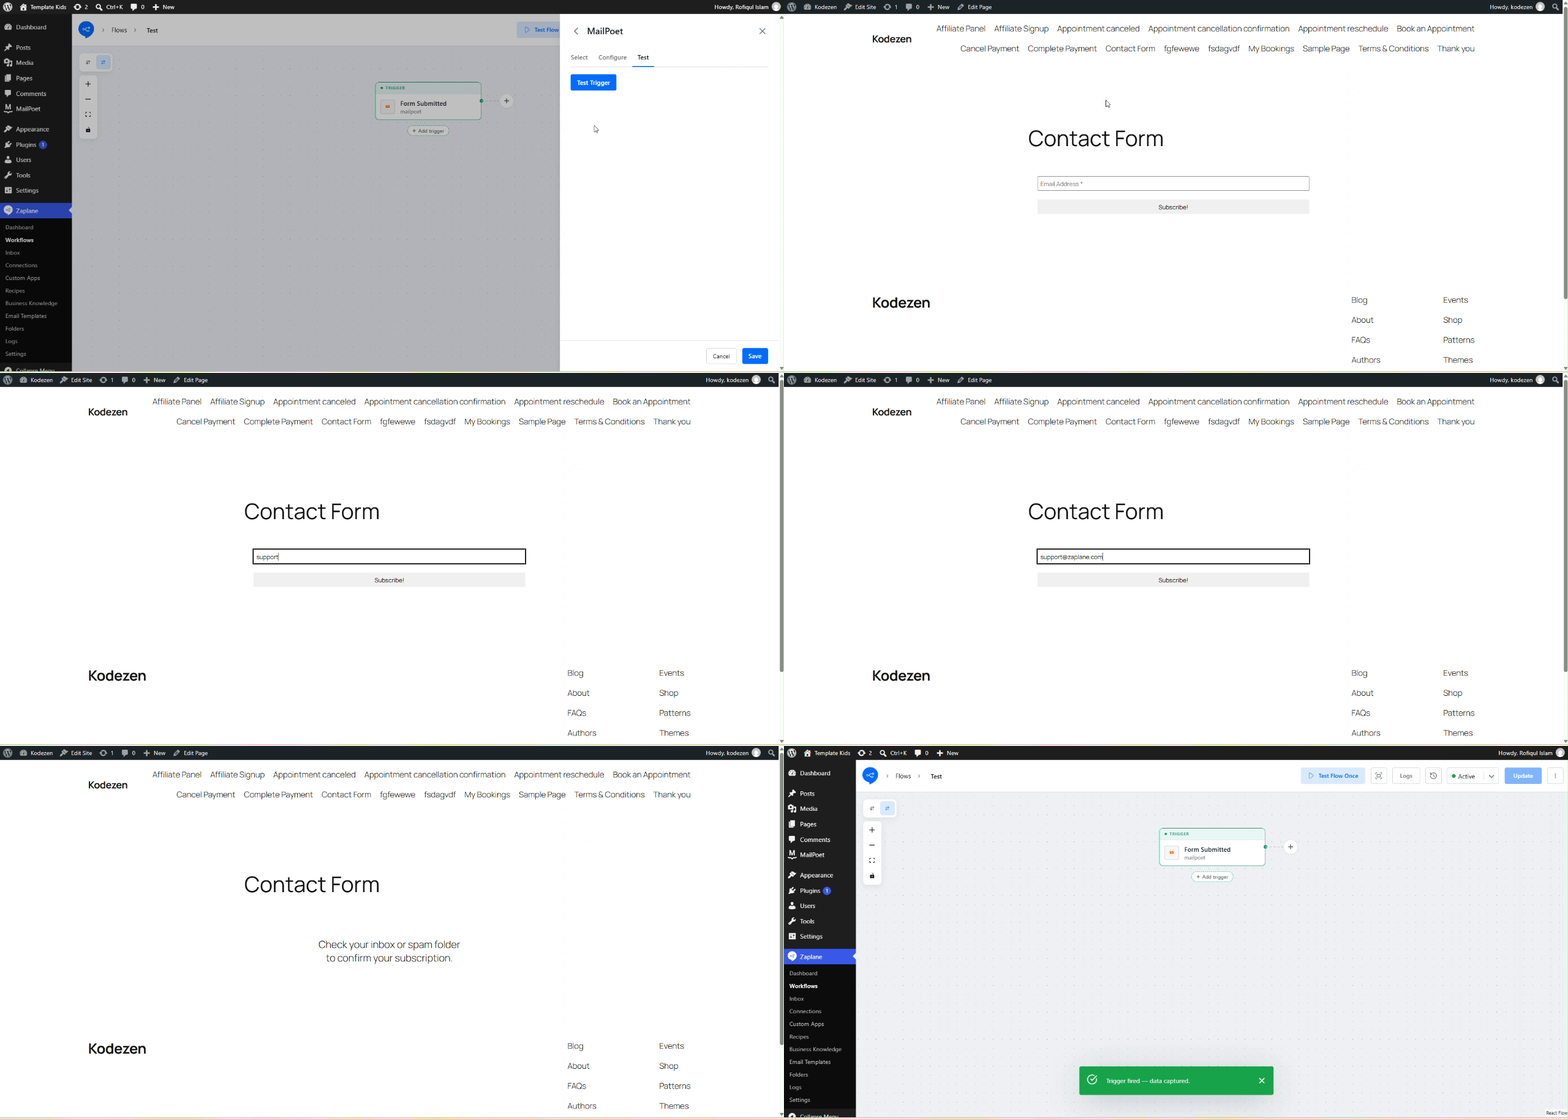
Open the Test tab and click Test Trigger. Then submit your MailPoet form once on the front end of your site so Zaplane can capture sample data. When the test succeeds, click Save.
Step 7: Save and activate your workflow
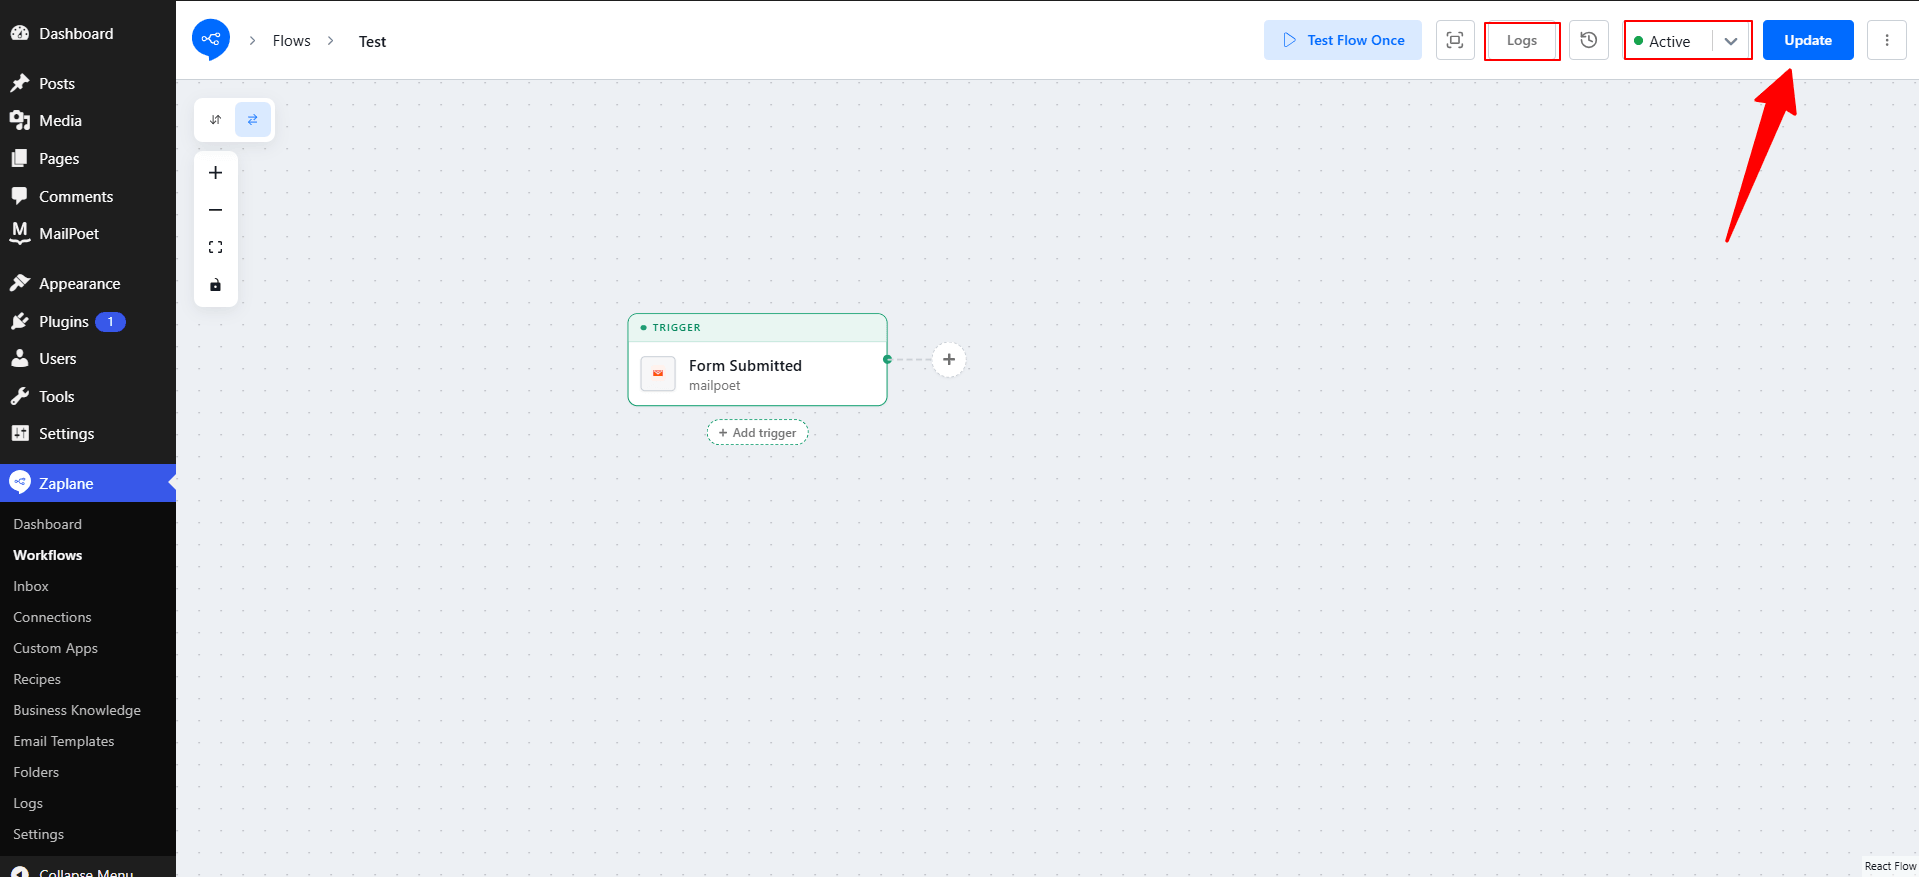
Your trigger now shows as Form Submitted (MailPoet). Before you finish:
What’s next?
Click the + button next to your trigger to add actions, such as sending an email, adding a subscriber to another tool, or notifying your team. Form field values from the submission are available in every following step.