

This guide shows how to start a Zaplane workflow whenever something happens in Everest Forms, such as a form being submitted. Make sure the Everest Forms plugin is installed and active on your site before you begin.
Step 1: Create a Workflow
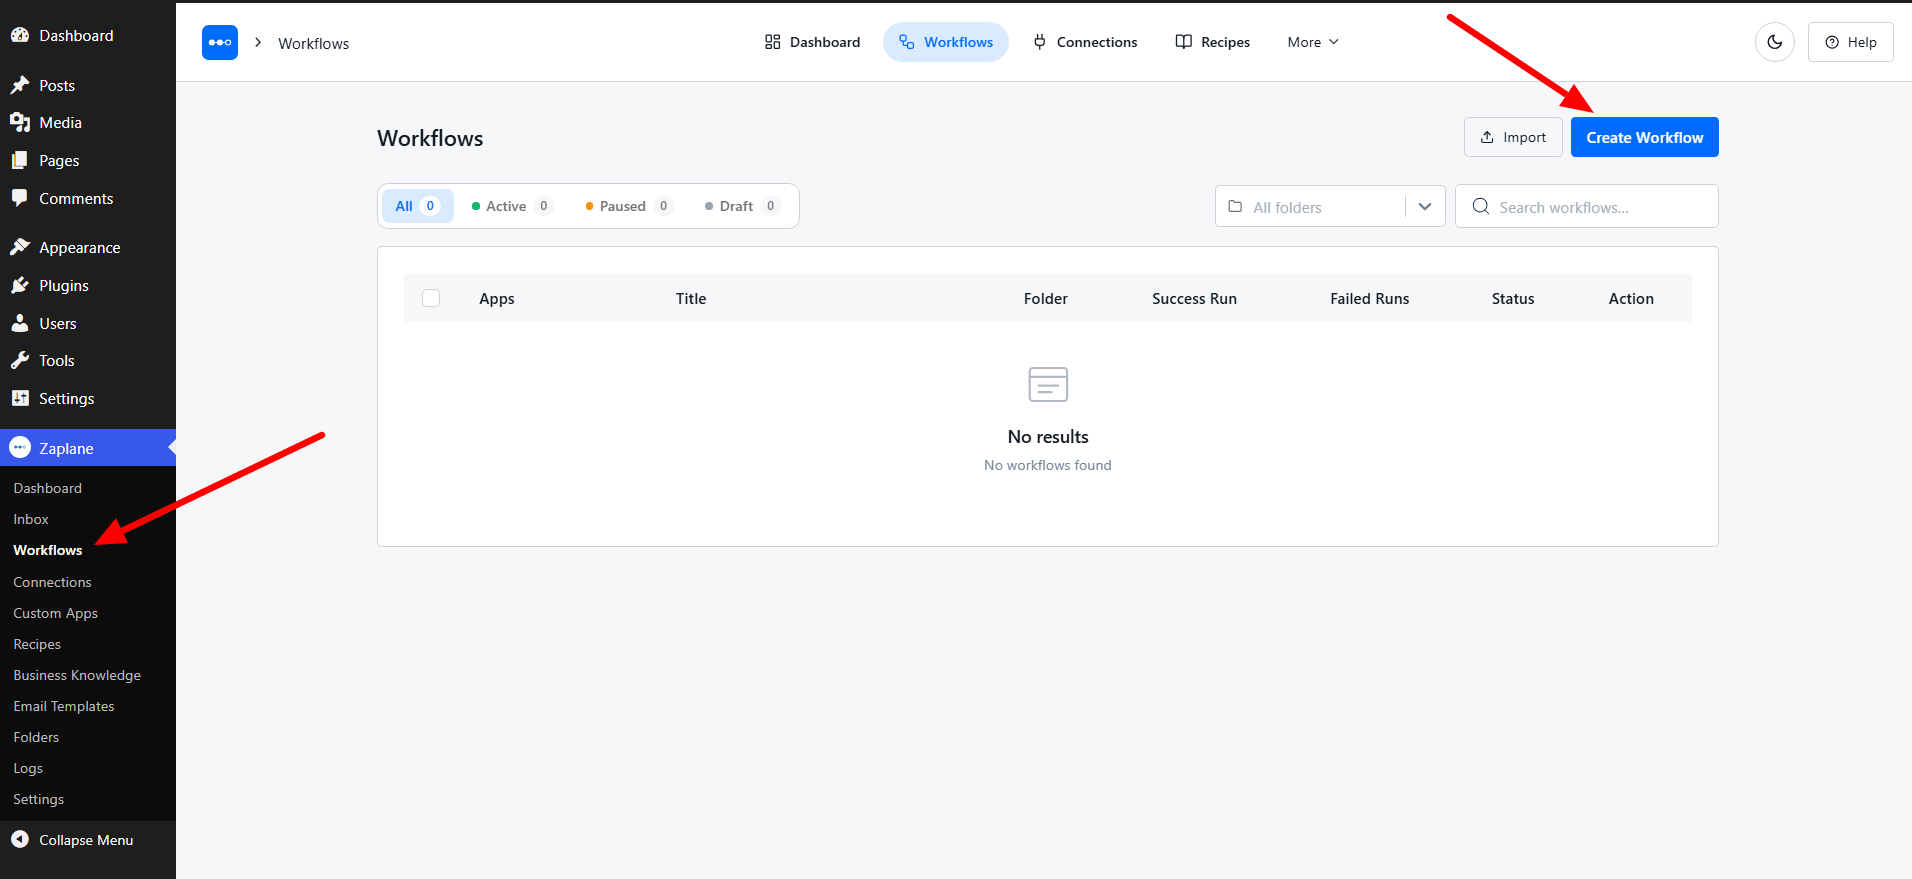
Go to Zaplane > Workflows from your WordPress dashboard, then click Create Workflow to open the workflow builder.
Step 2: Add the Everest Forms Trigger
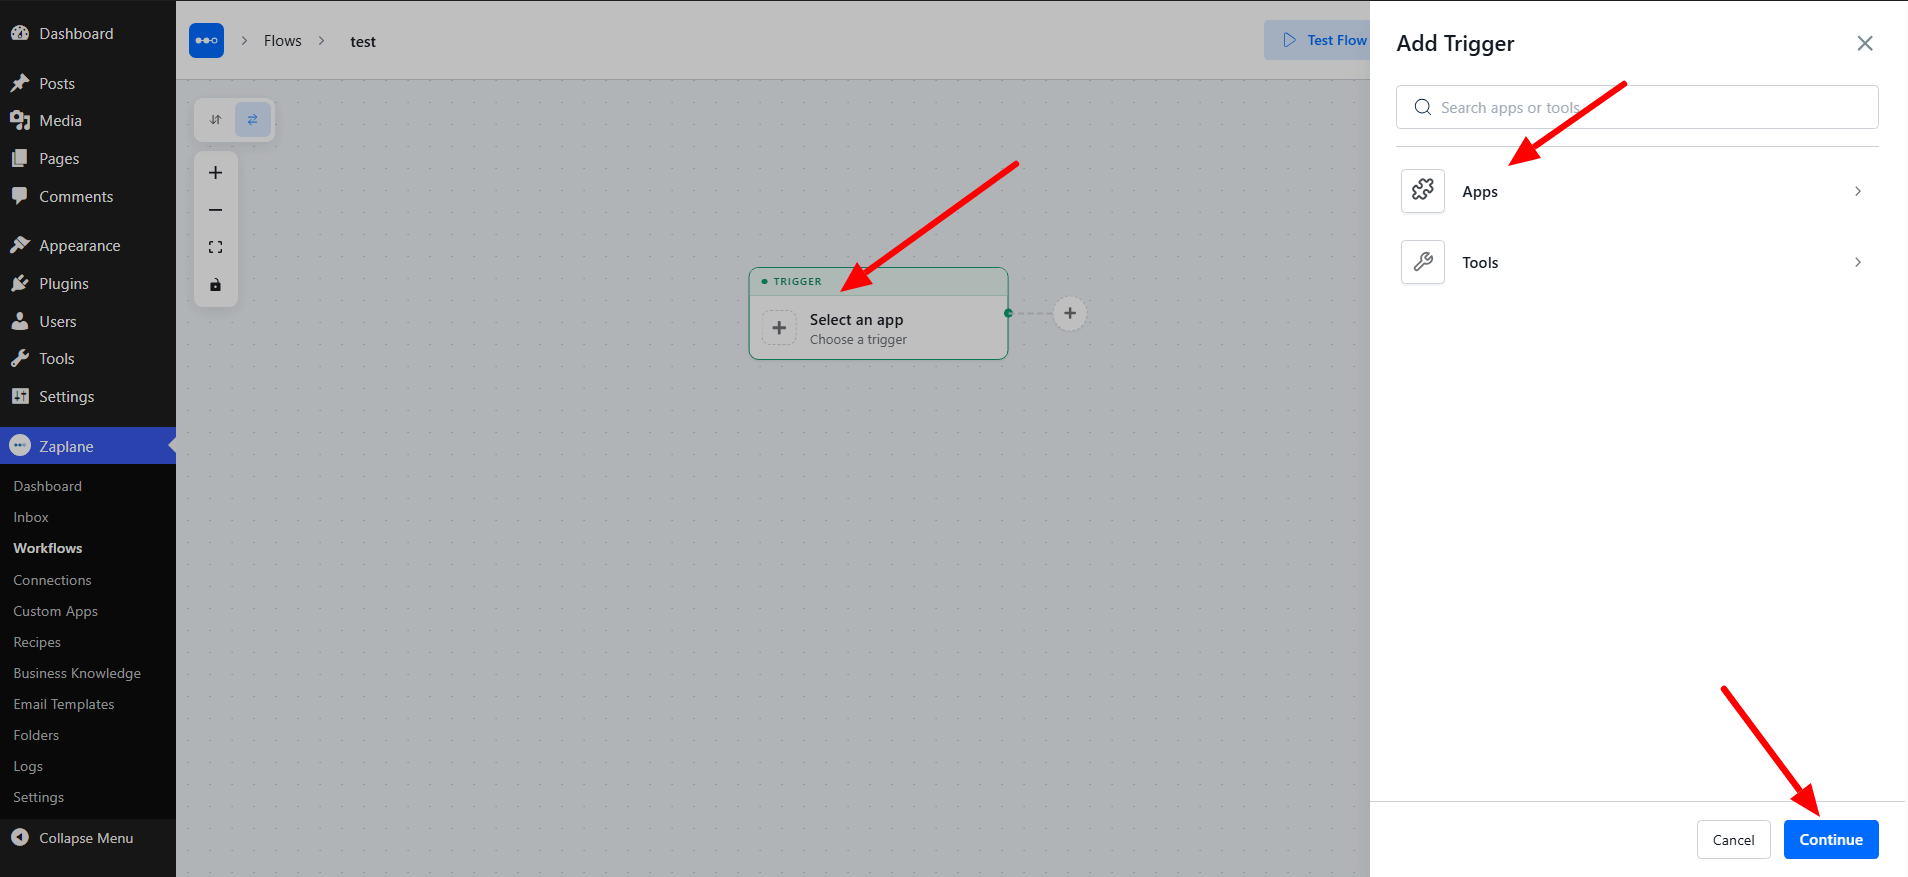
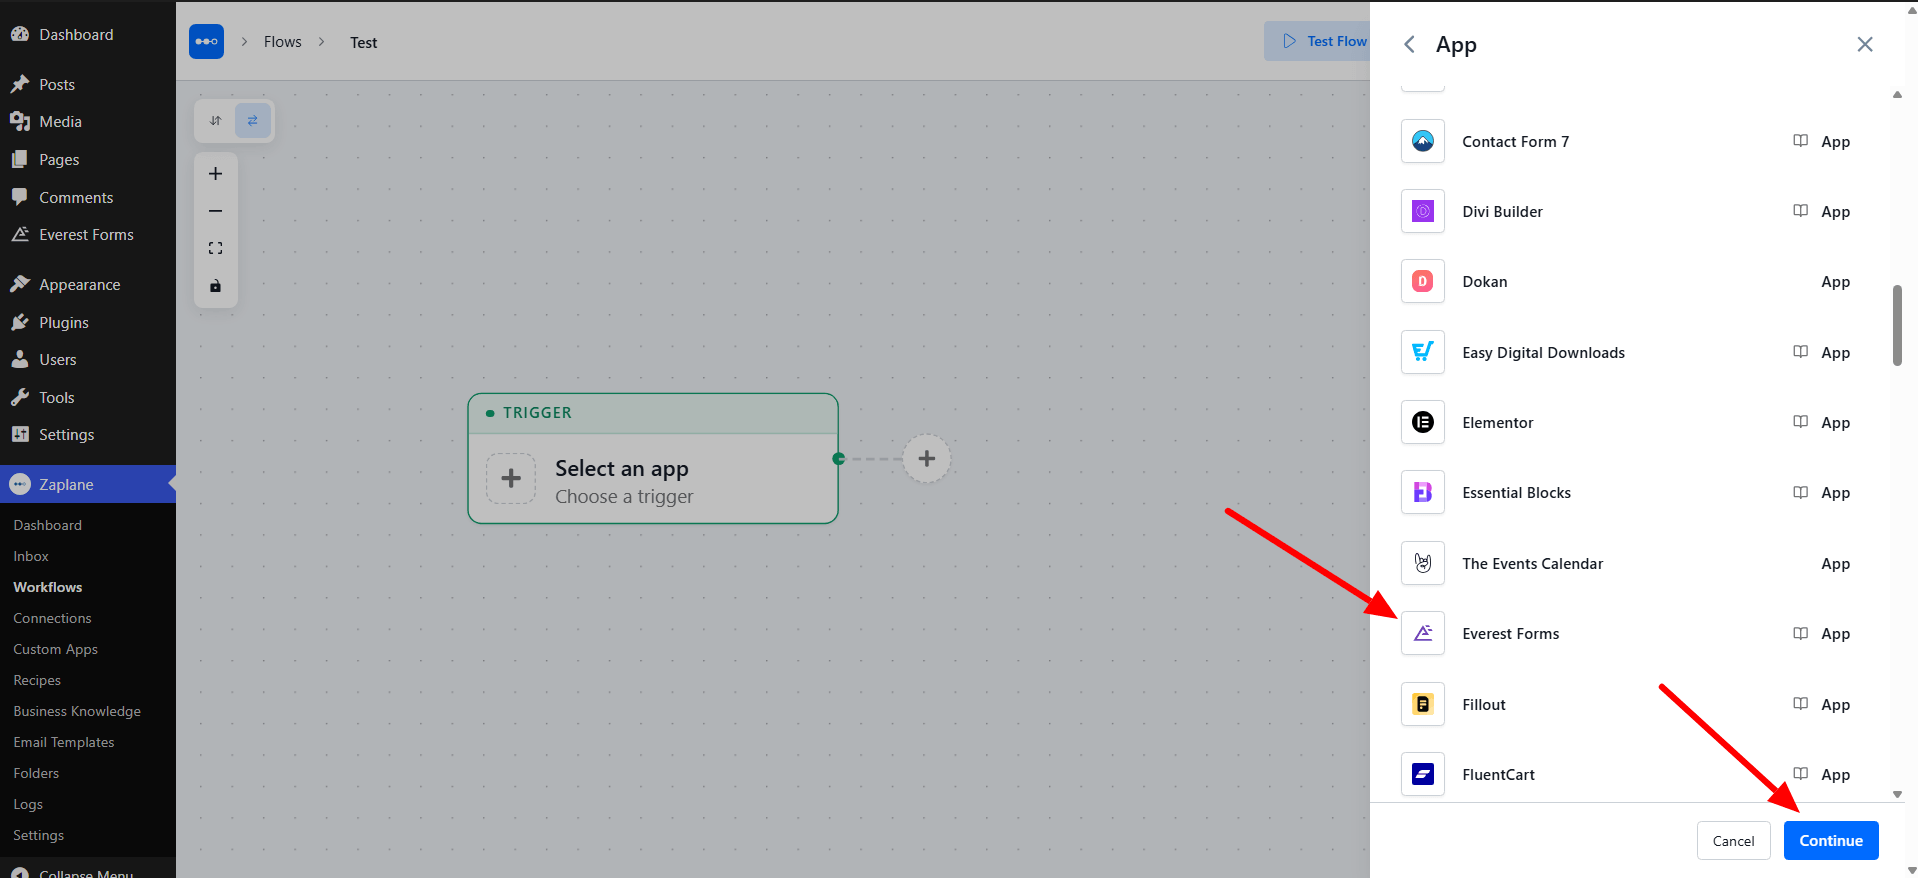
Click the Select an app trigger node on the canvas. In the Add Trigger panel, choose Apps, then select Everest Forms from the app list and click Continue.
Step 3: Choose the Trigger Type
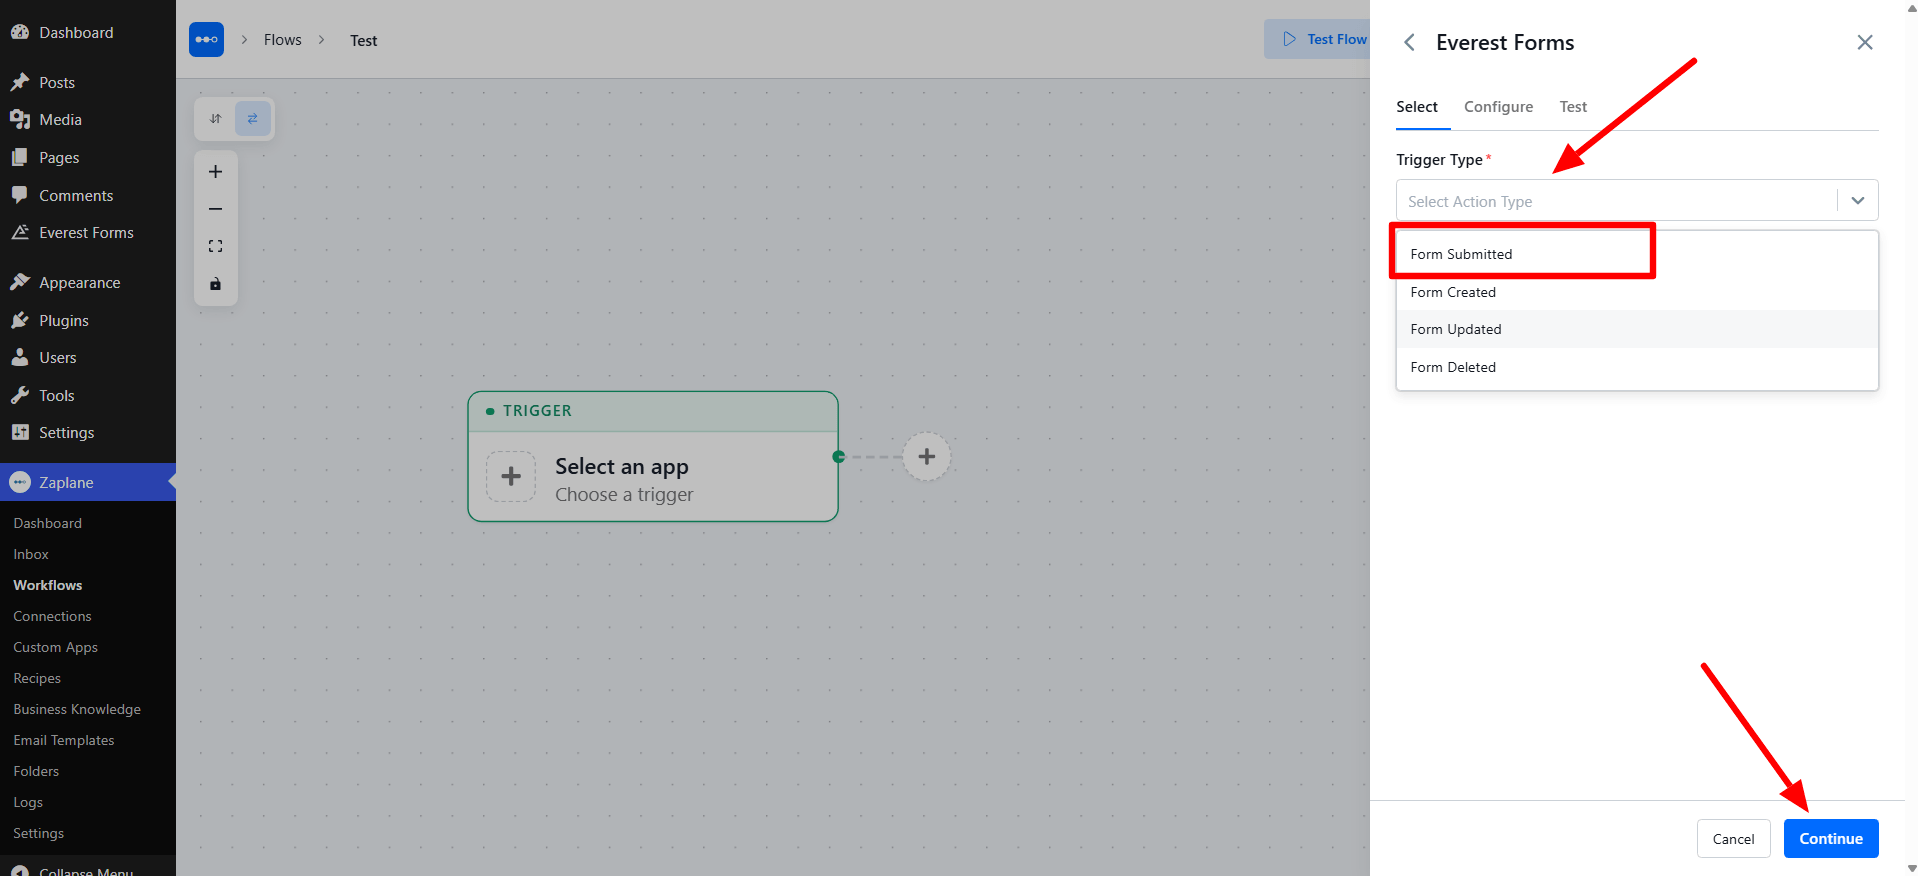
Open the Trigger Type dropdown and pick the event that should start your workflow. Everest Forms offers several trigger types, such as form submitted, created, updated and deleted events. Here we use Form Submitted. Click Continue.
Step 4: Configure the Trigger
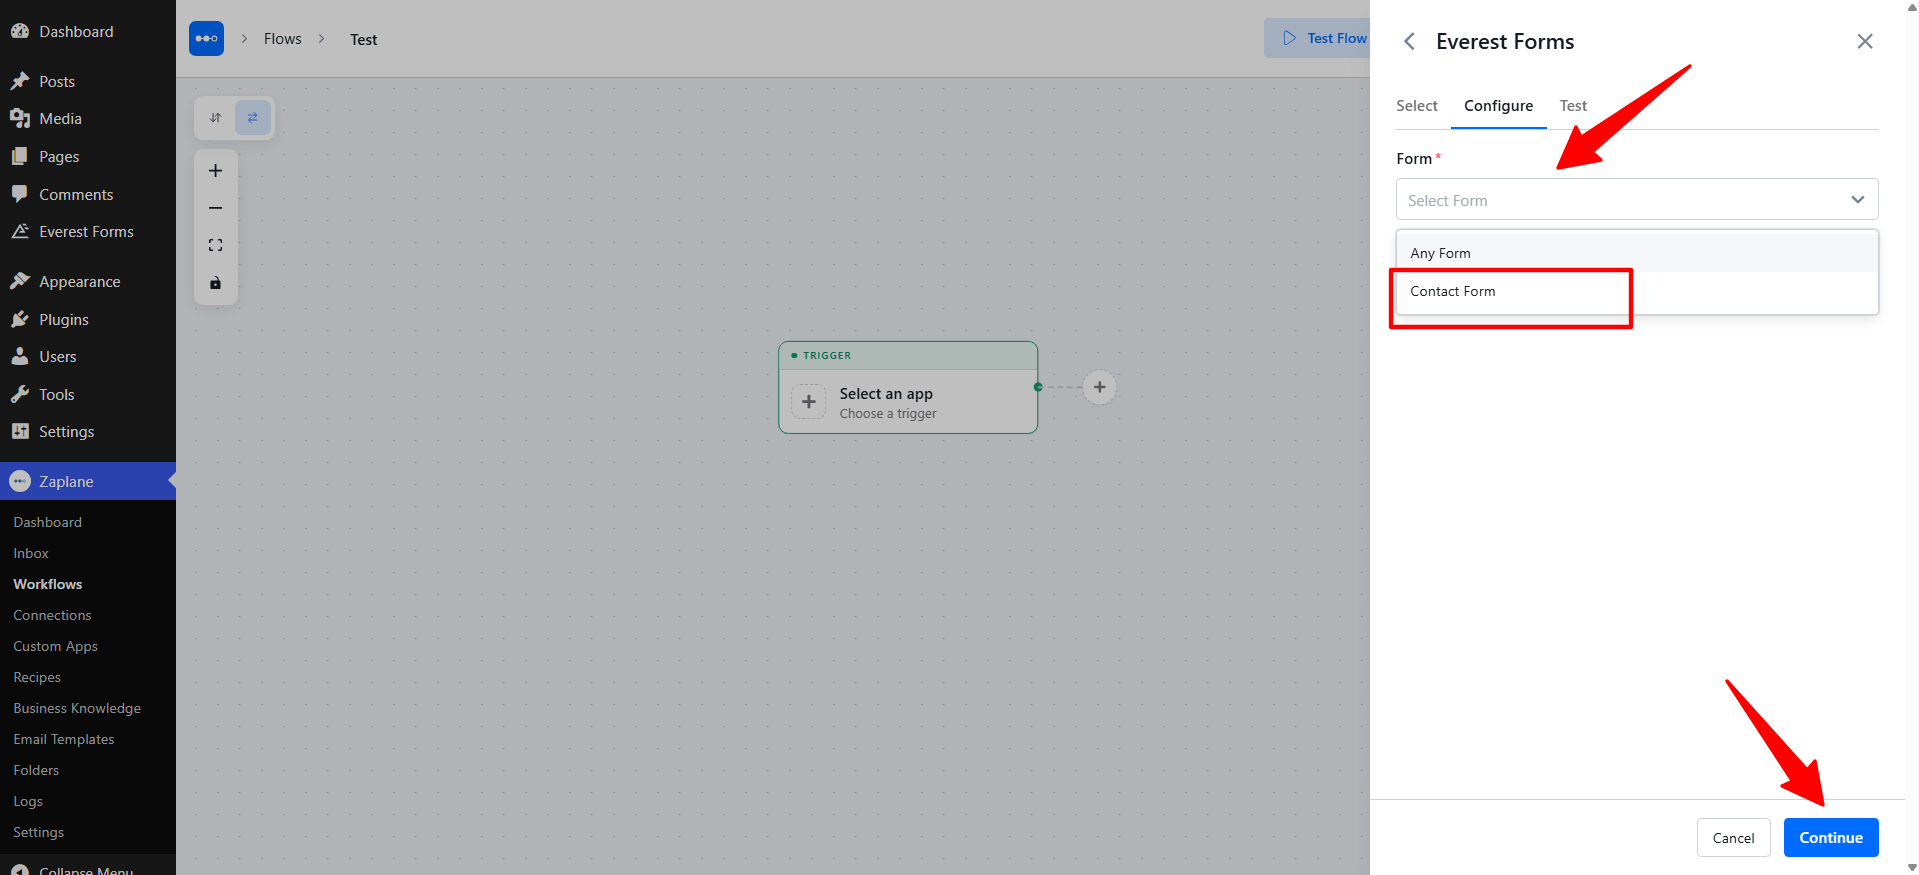
On the Configure tab, open the Form dropdown (required) and choose which form the trigger should watch. Select Any Form, or pick a specific form from the list. Click Continue.
Step 5: Test and Activate the Workflow
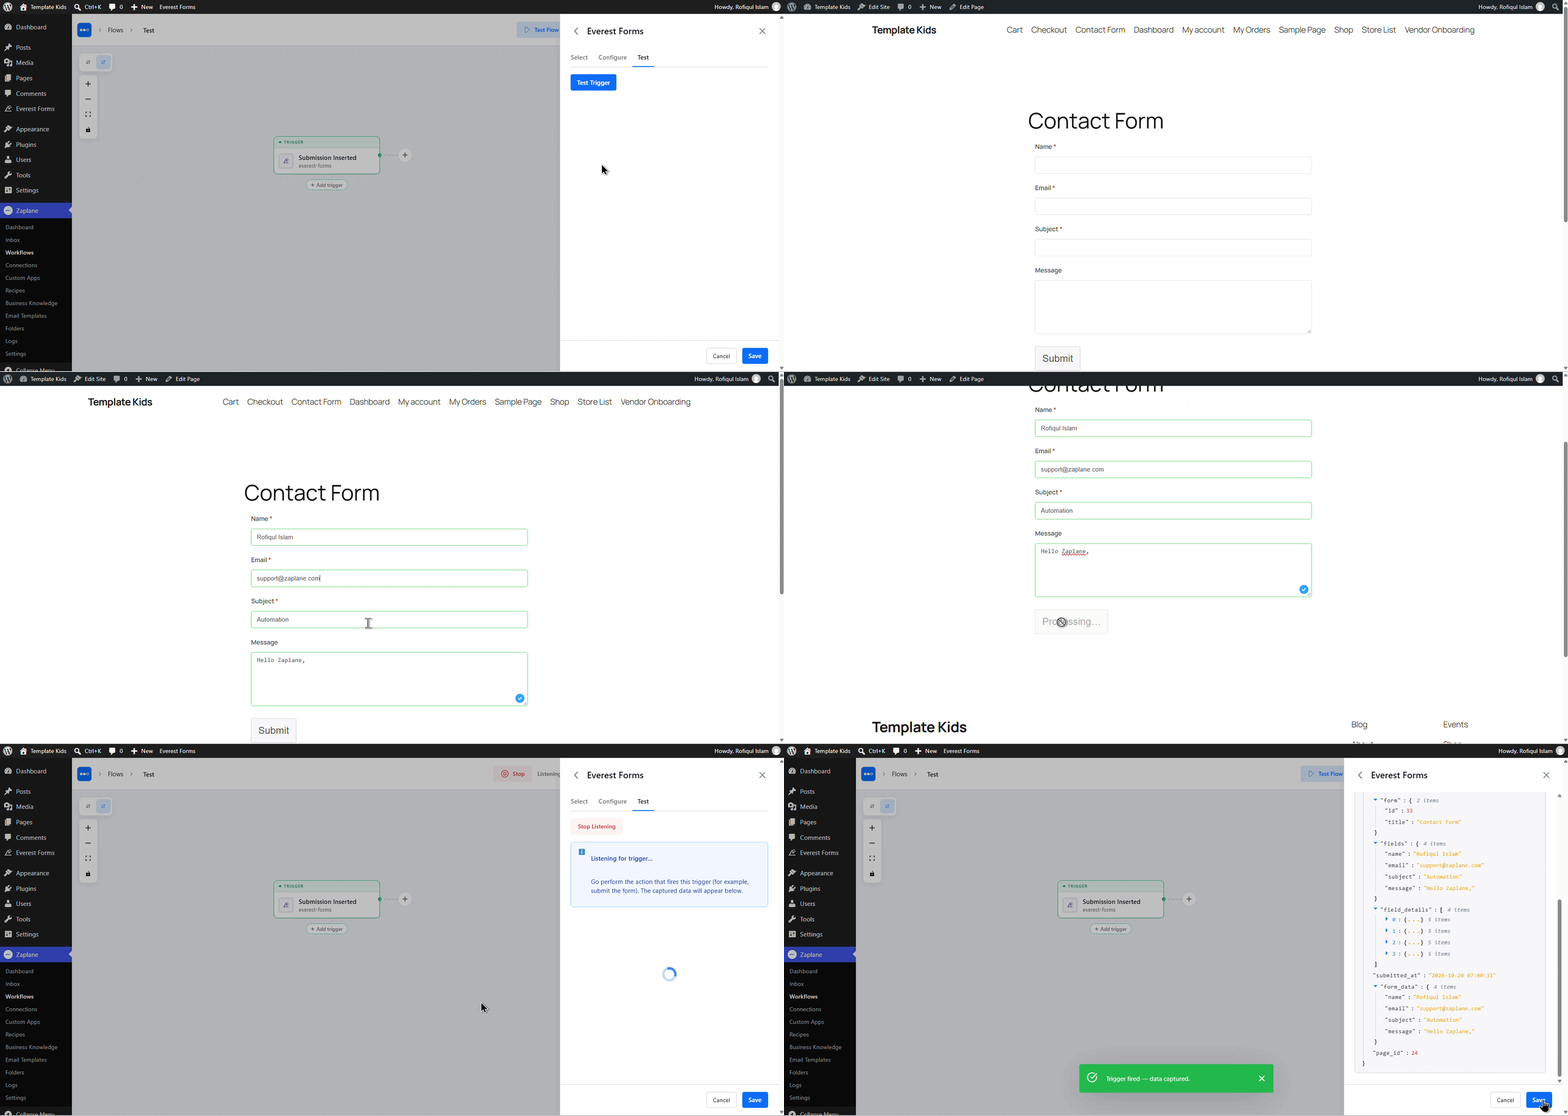
On the Test tab, click Test Trigger to check that Zaplane can receive Everest Forms data, then click Save.
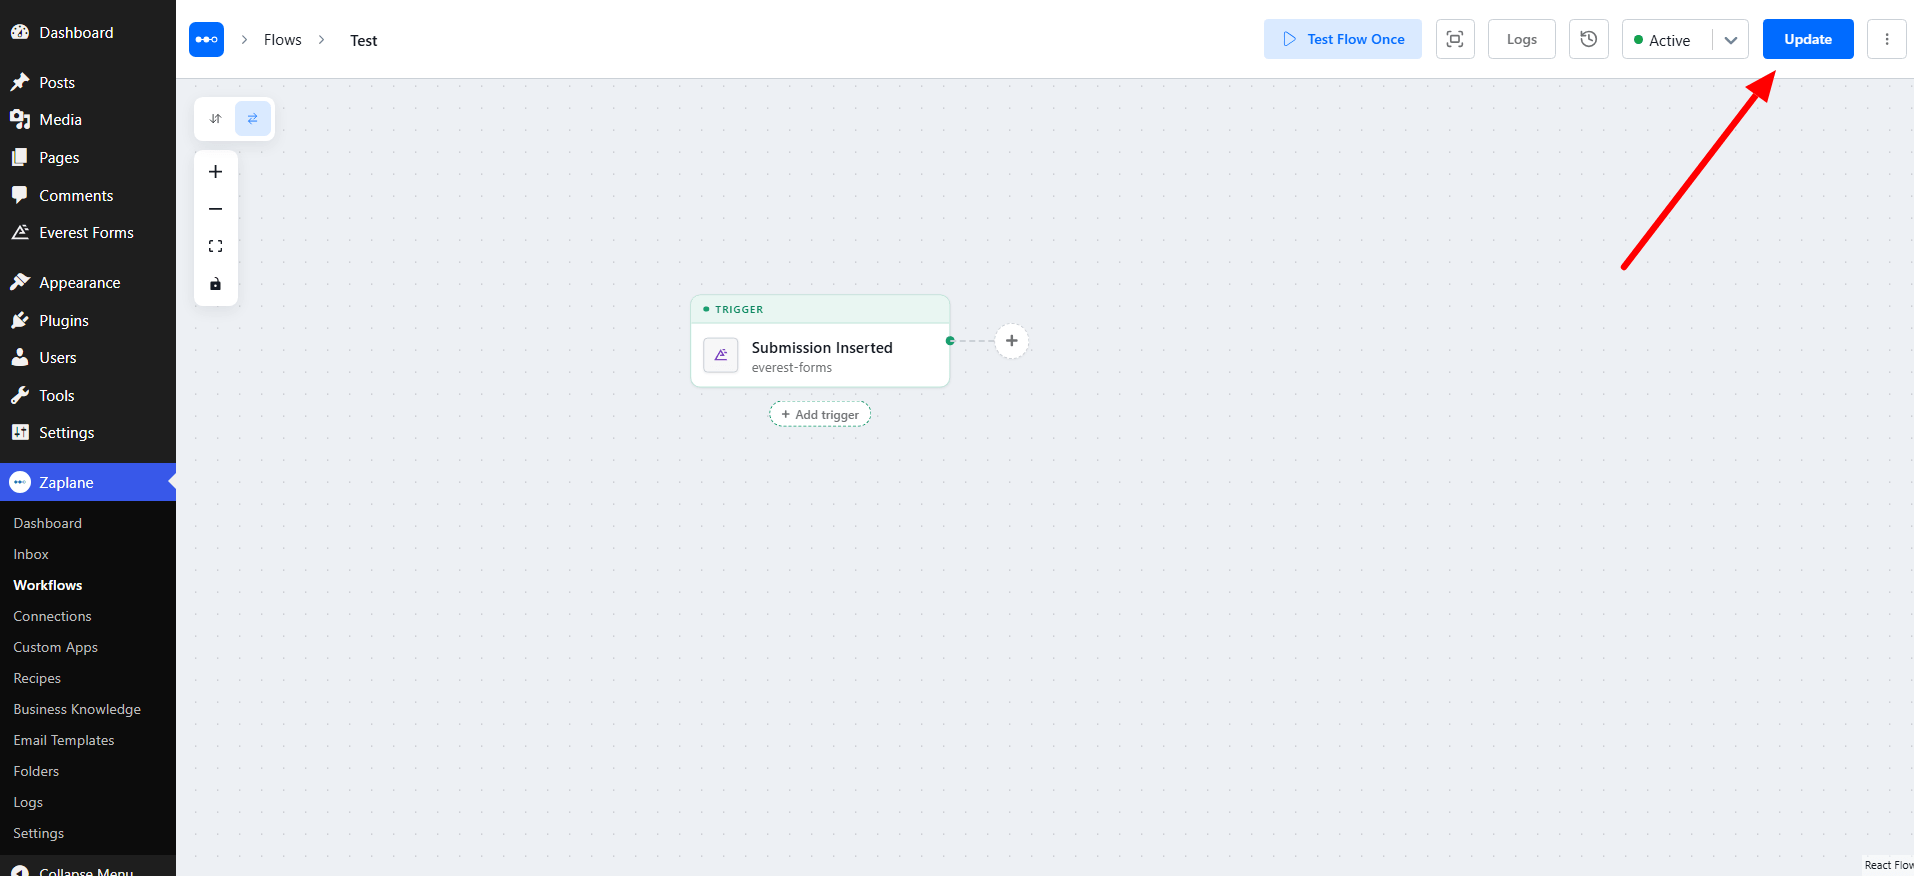
Your trigger node now shows Submission Inserted. Make sure the workflow status is Active, then click Update in the top-right corner to save and activate the workflow.
Done!
Everest Forms is now connected to Zaplane. From now on, every time a form is submitted, your workflow runs automatically.