

This guide shows you how to create a Zaplane workflow that starts whenever a Mailchimp event happens, such as a new subscriber joining your audience. You will first create a Mailchimp API key and connect it to Zaplane, then build the workflow.
Part 1: Get Your Mailchimp API Key
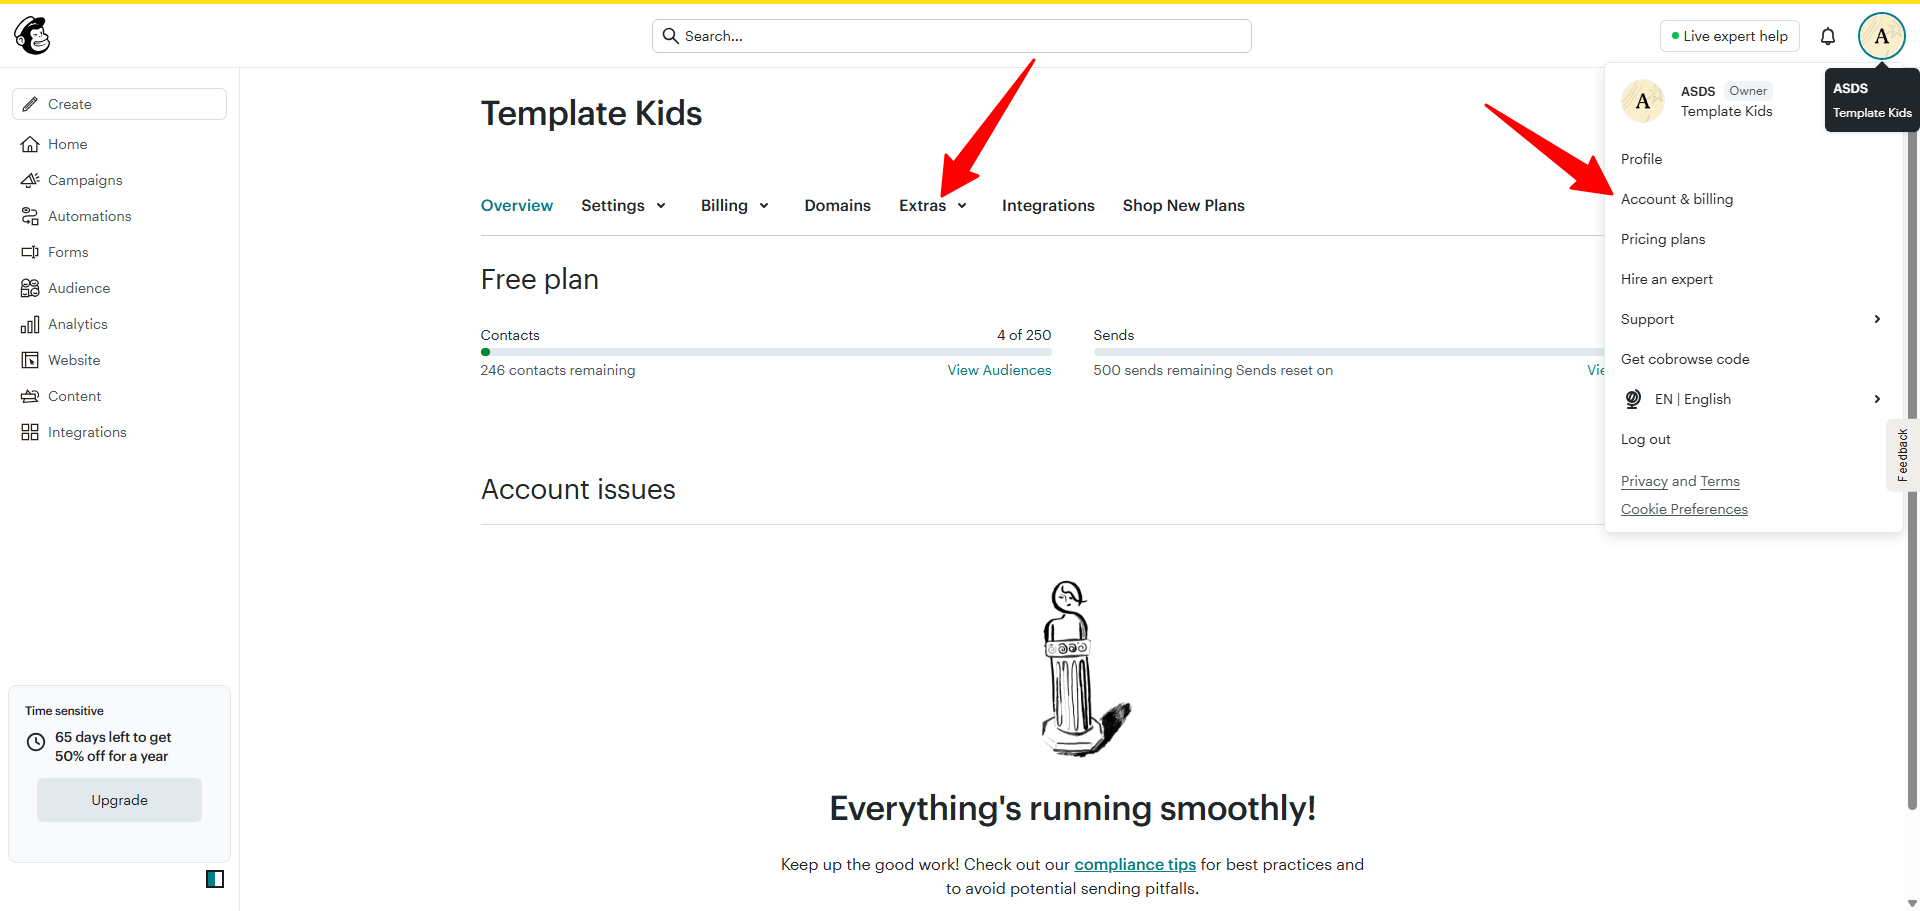
Step 1: Open Account & Billing
In Mailchimp, click your profile icon, then go to Extras or your account menu and select Account & billing.
Step 2: Go to API Keys
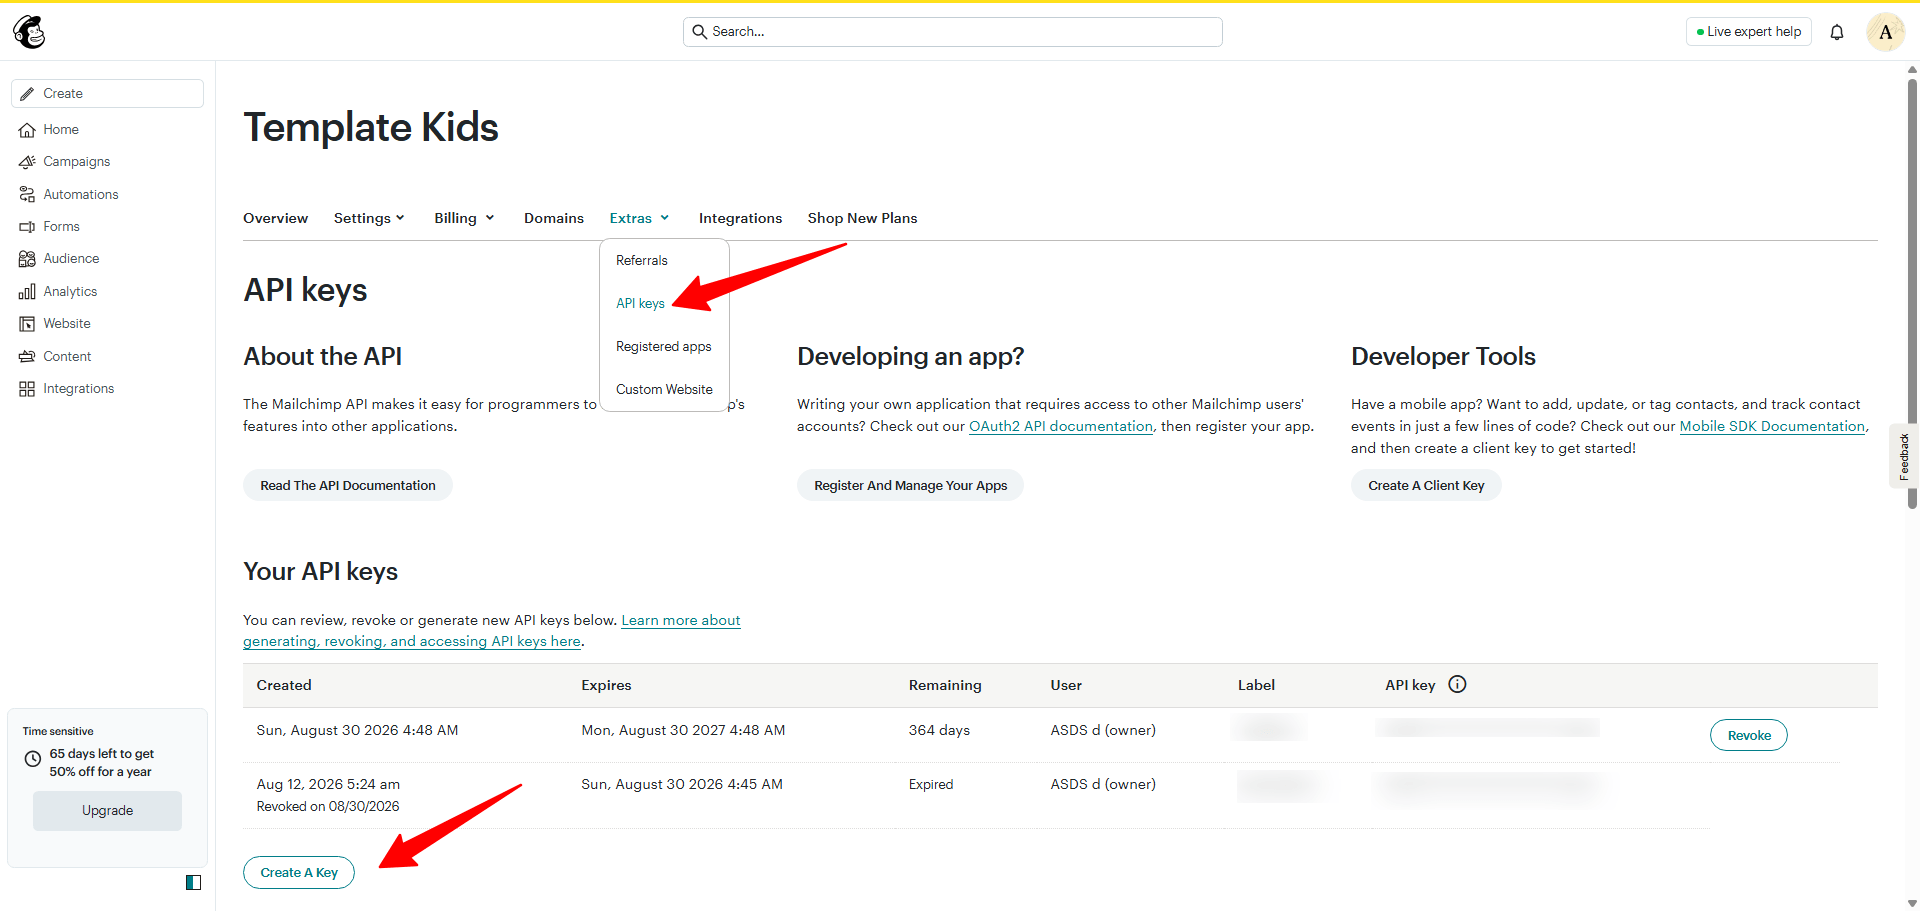
Under Extras, click API keys, then click Create A Key.
Step 3: Name, Generate, and Copy the Key
Give the key a descriptive API Key Name (e.g. “Automation”) and click Generate Key. Mailchimp shows the full key only once — click Copy To Clipboard before leaving the page. Note that the key ends with your datacenter suffix (like
-us16), which Zaplane needs as part of the key.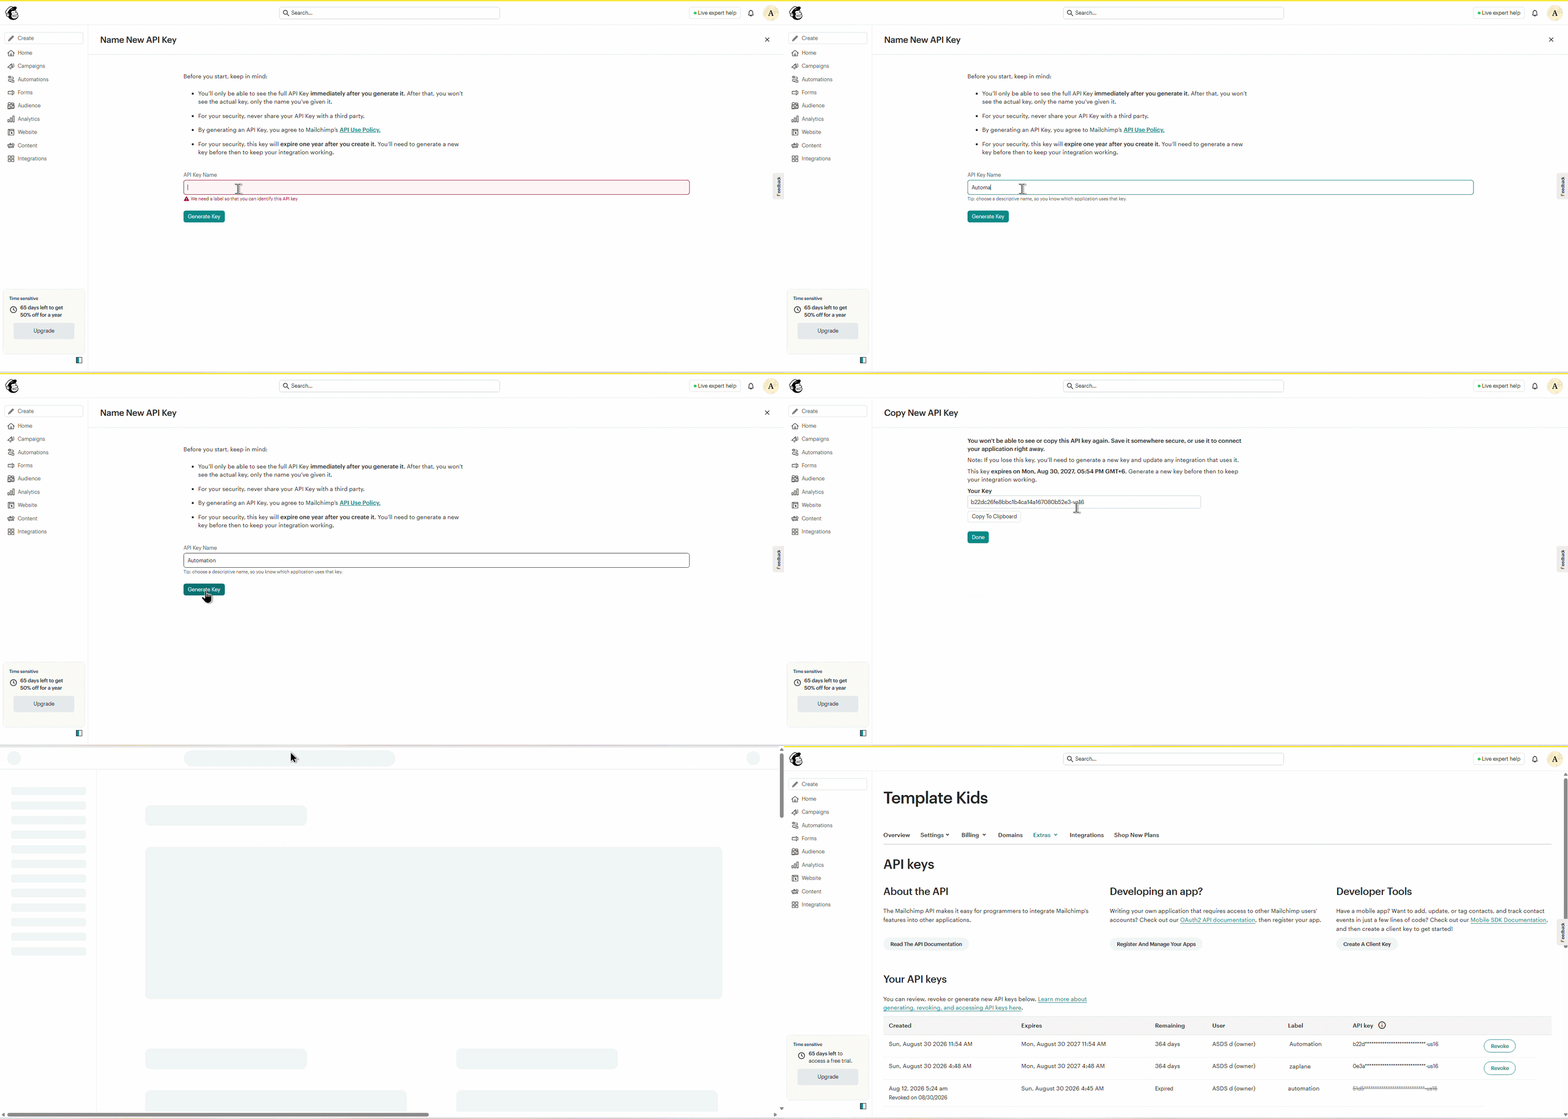
Part 2: Create the Connection in Zaplane
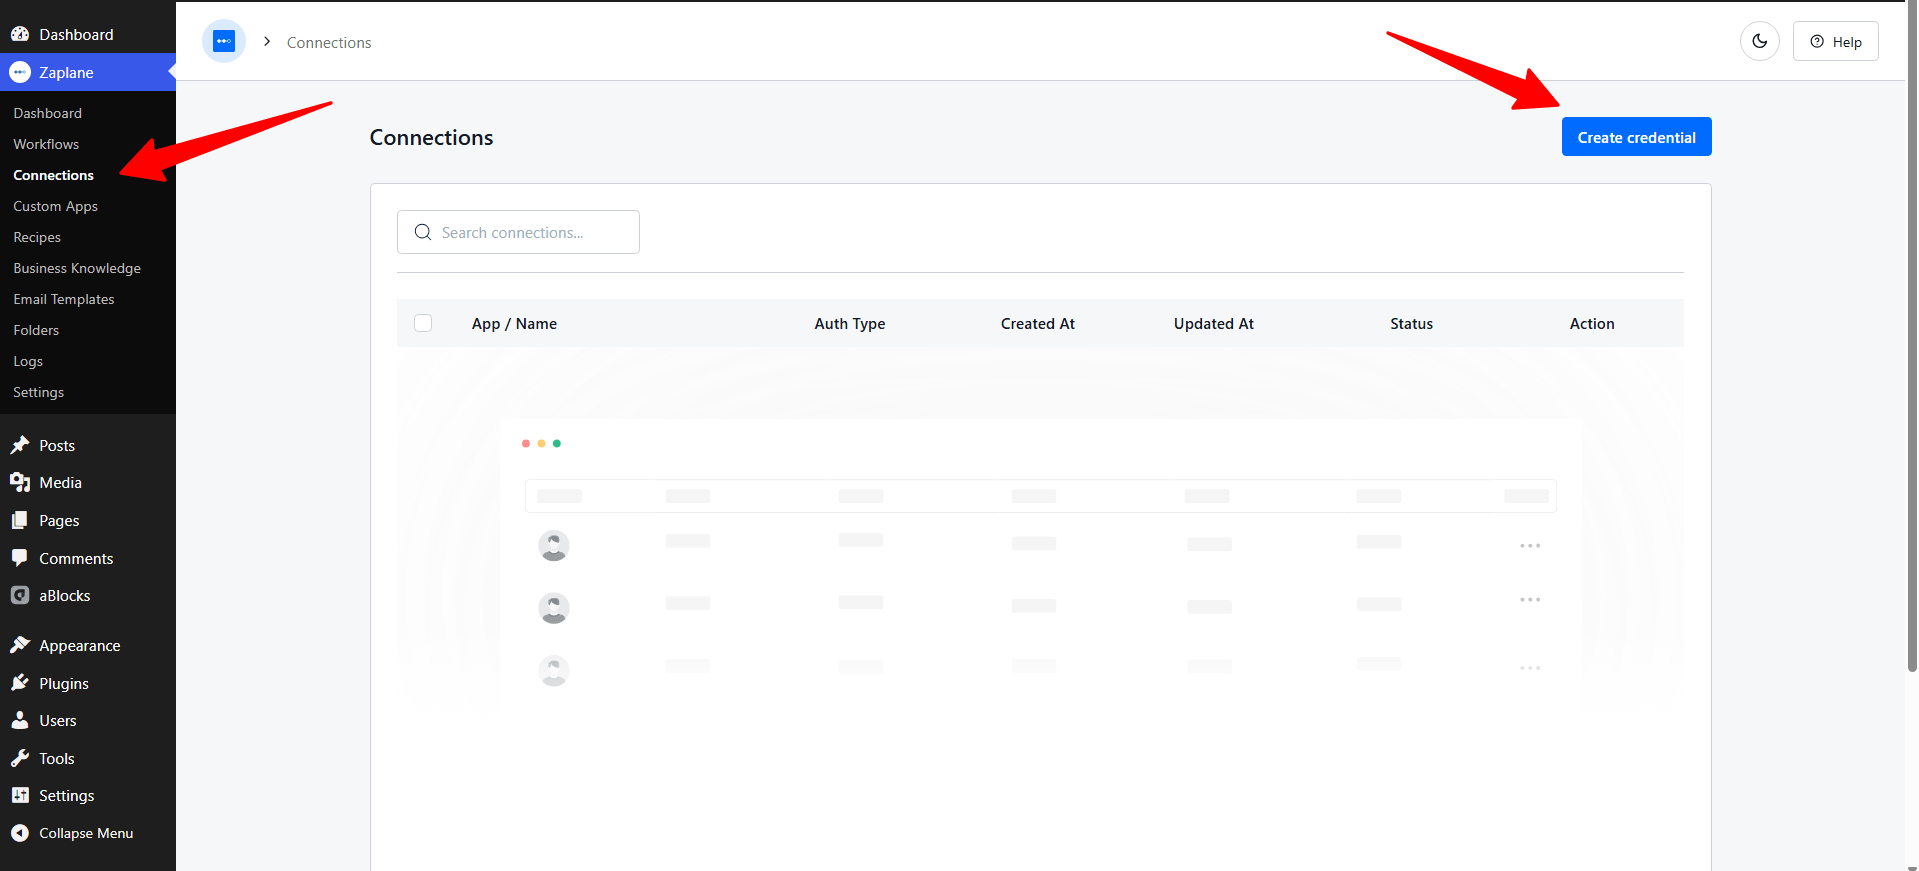
Step 4: Open Connections and Create a Credential
In WordPress, go to Zaplane > Connections and click Create credential.
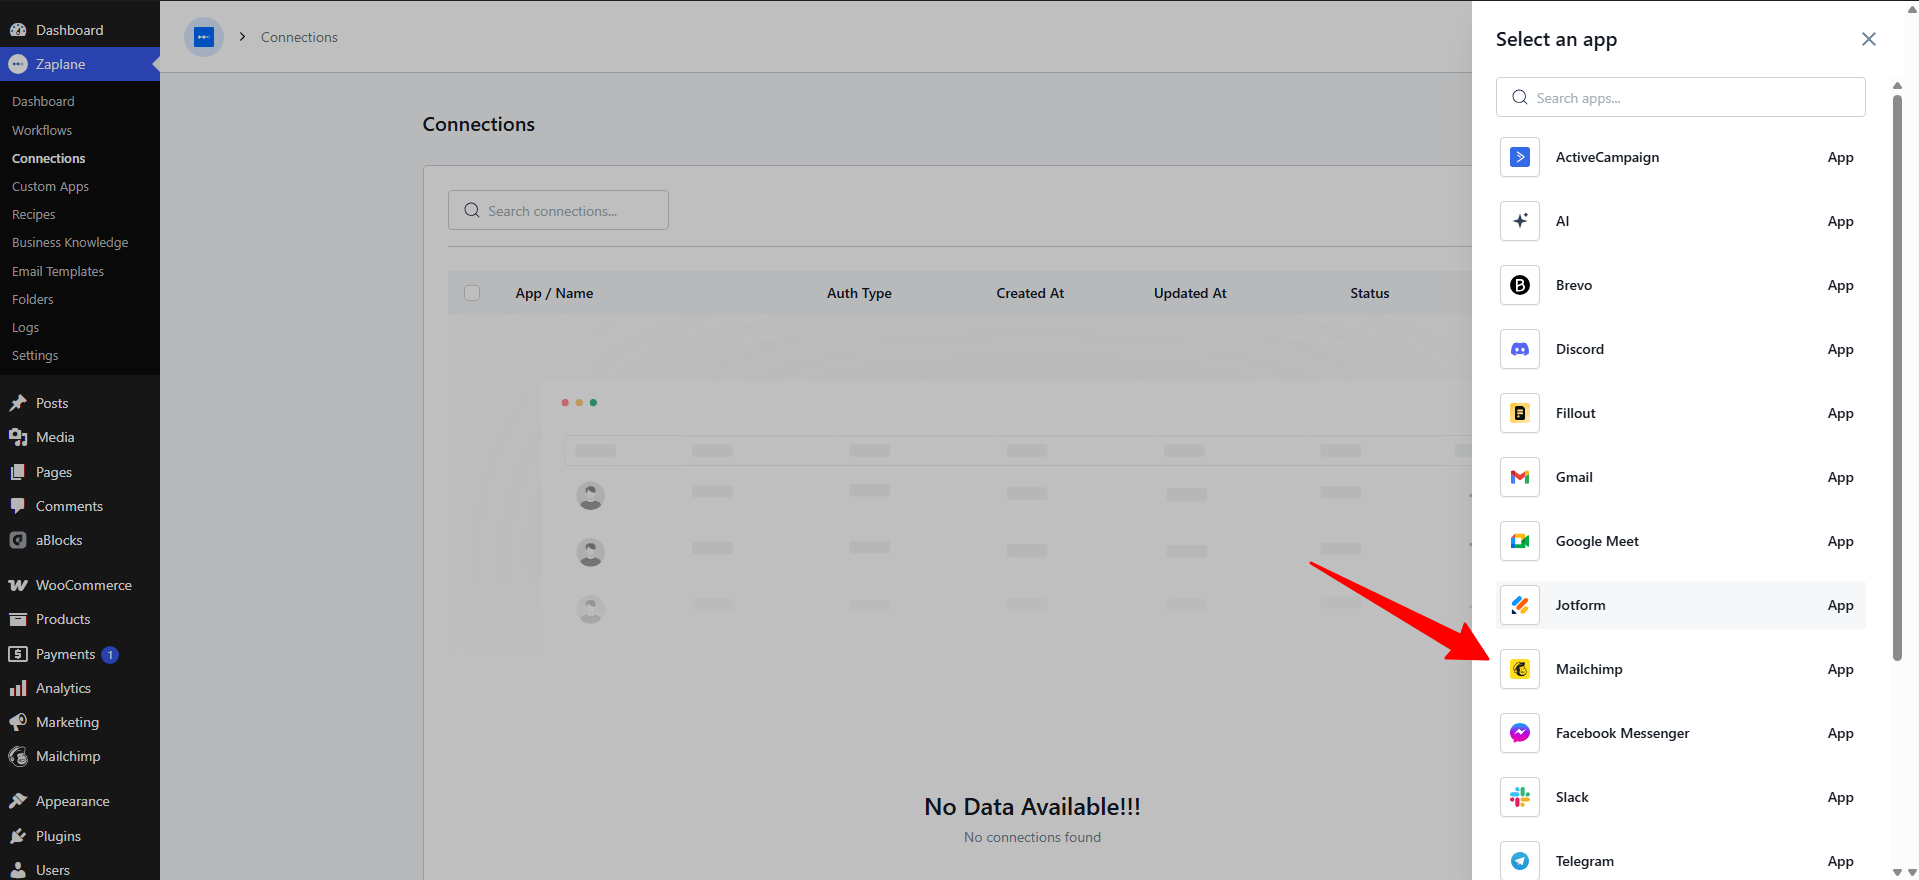
Step 5: Select Mailchimp
From the Select an app list, choose Mailchimp.
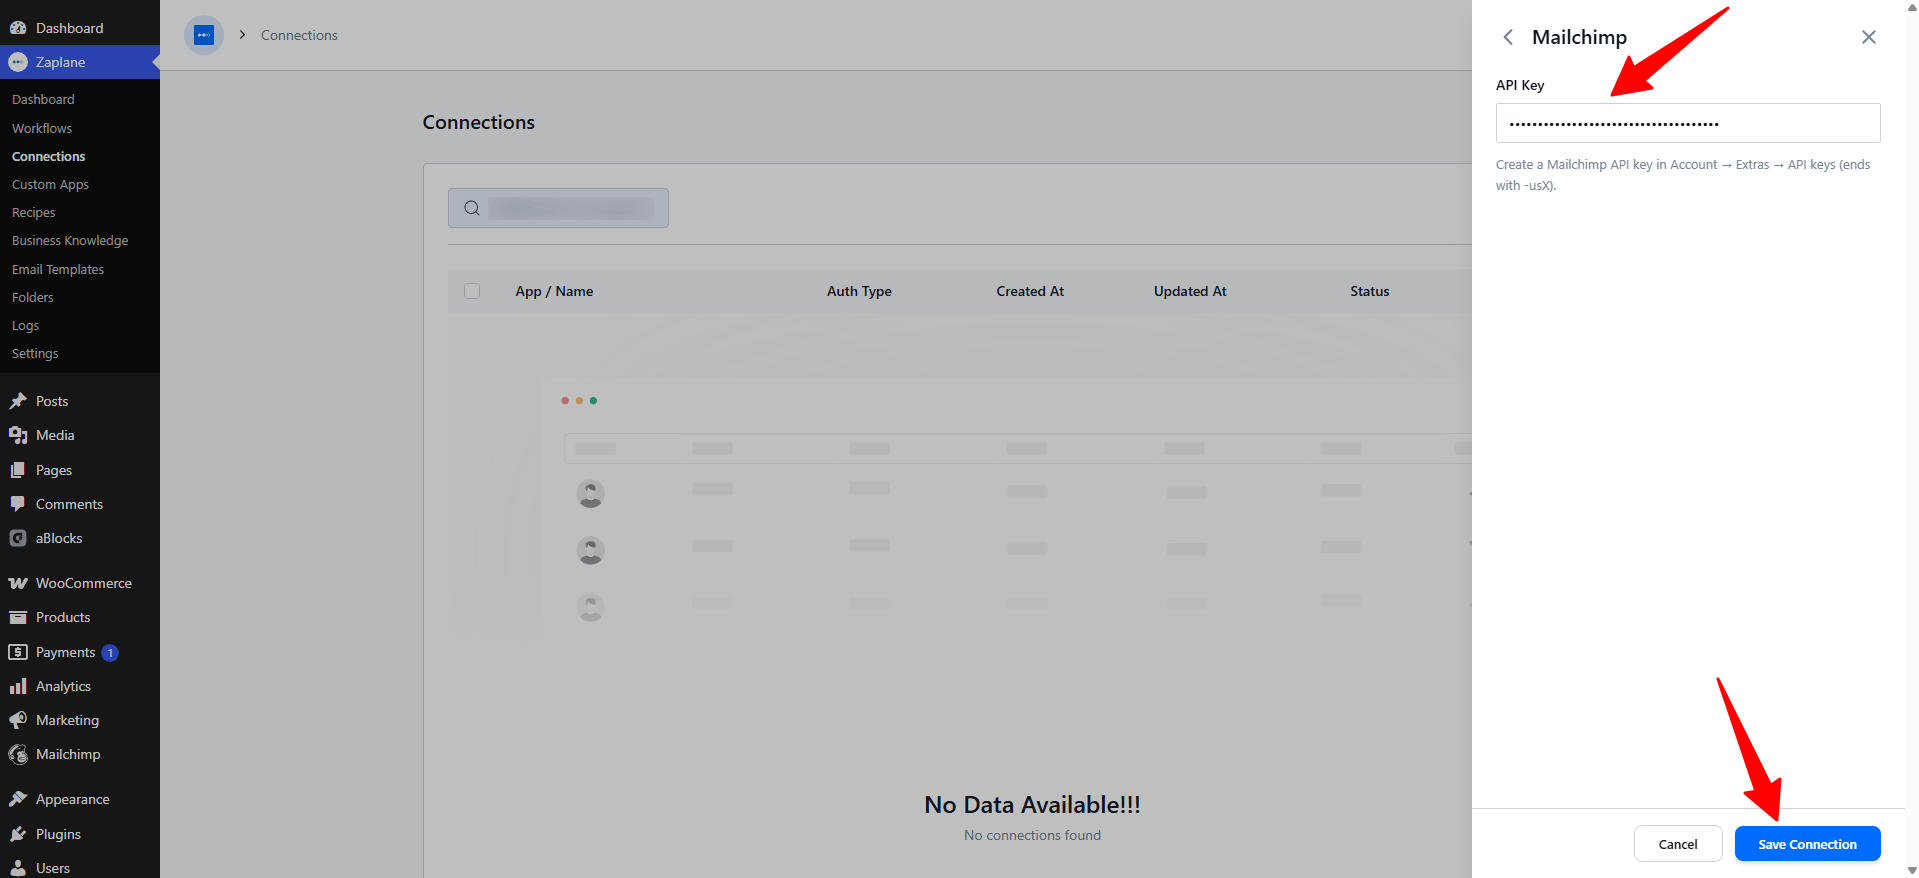
Step 6: Paste Your API Key and Save
Paste the API Key you copied from Mailchimp, then click Save Connection.
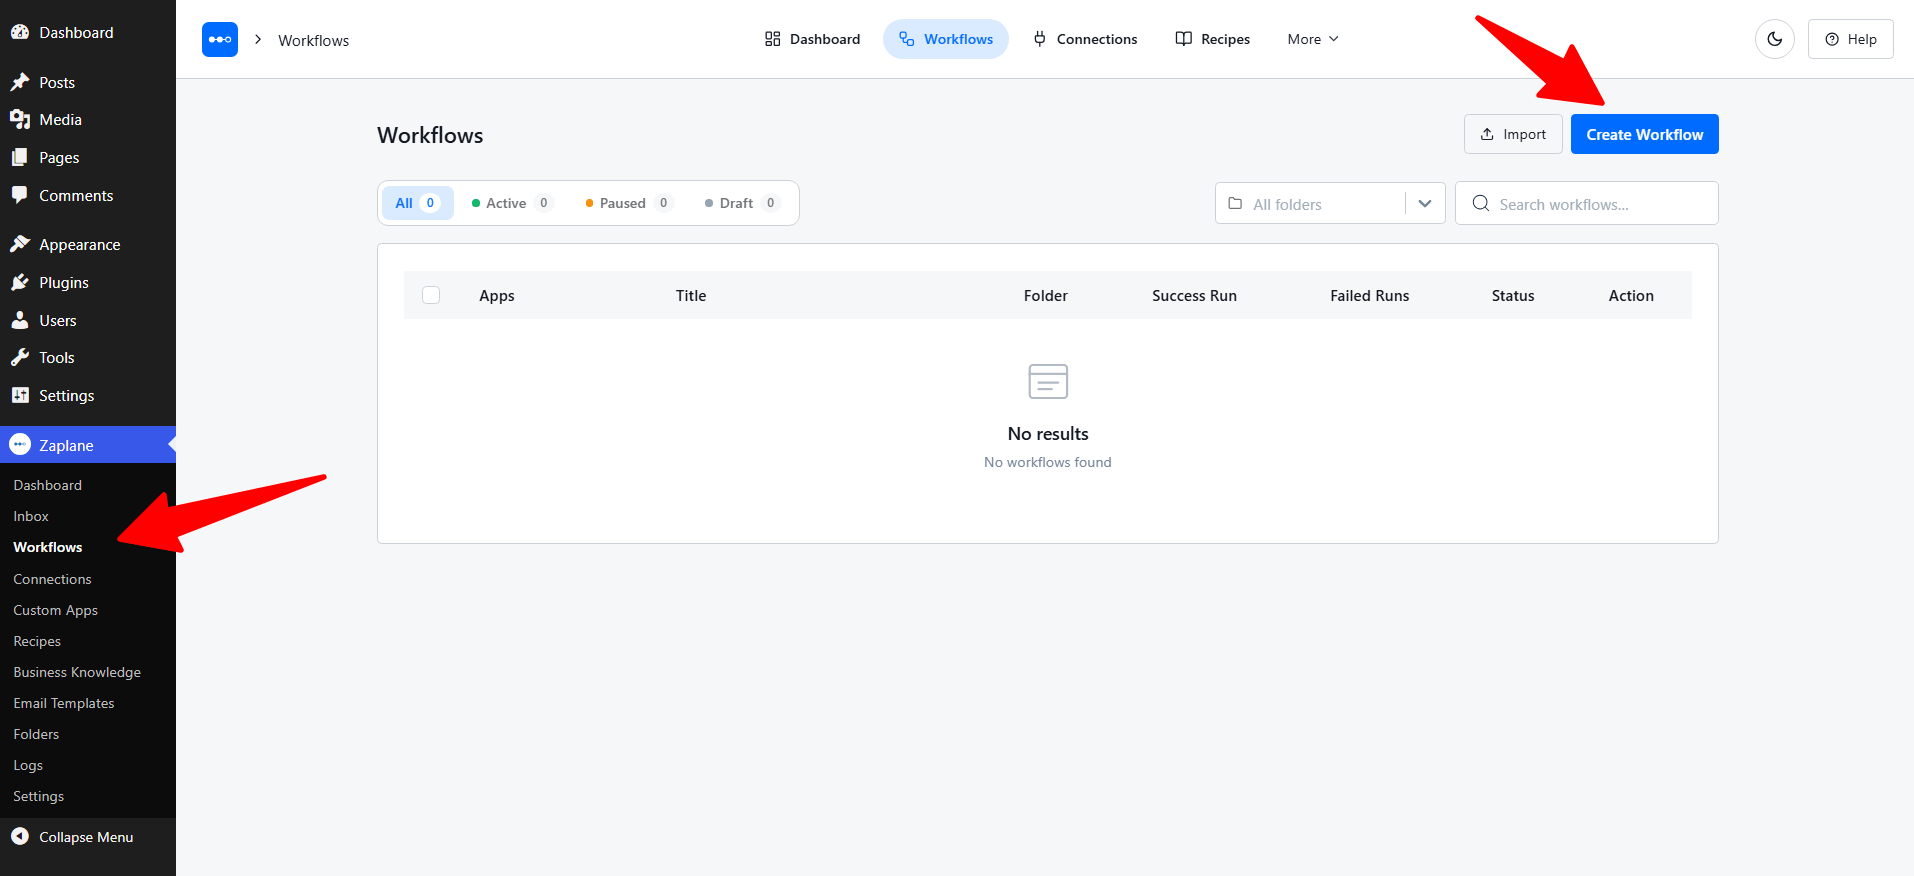
Step 7: Create a Workflow
Go to Zaplane > Workflows from your WordPress dashboard, then click Create Workflow to open the workflow editor.
Step 8: Add the Mailchimp Trigger
In the workflow editor, click Select an app inside the Trigger box. In the Add Trigger panel, choose Apps.
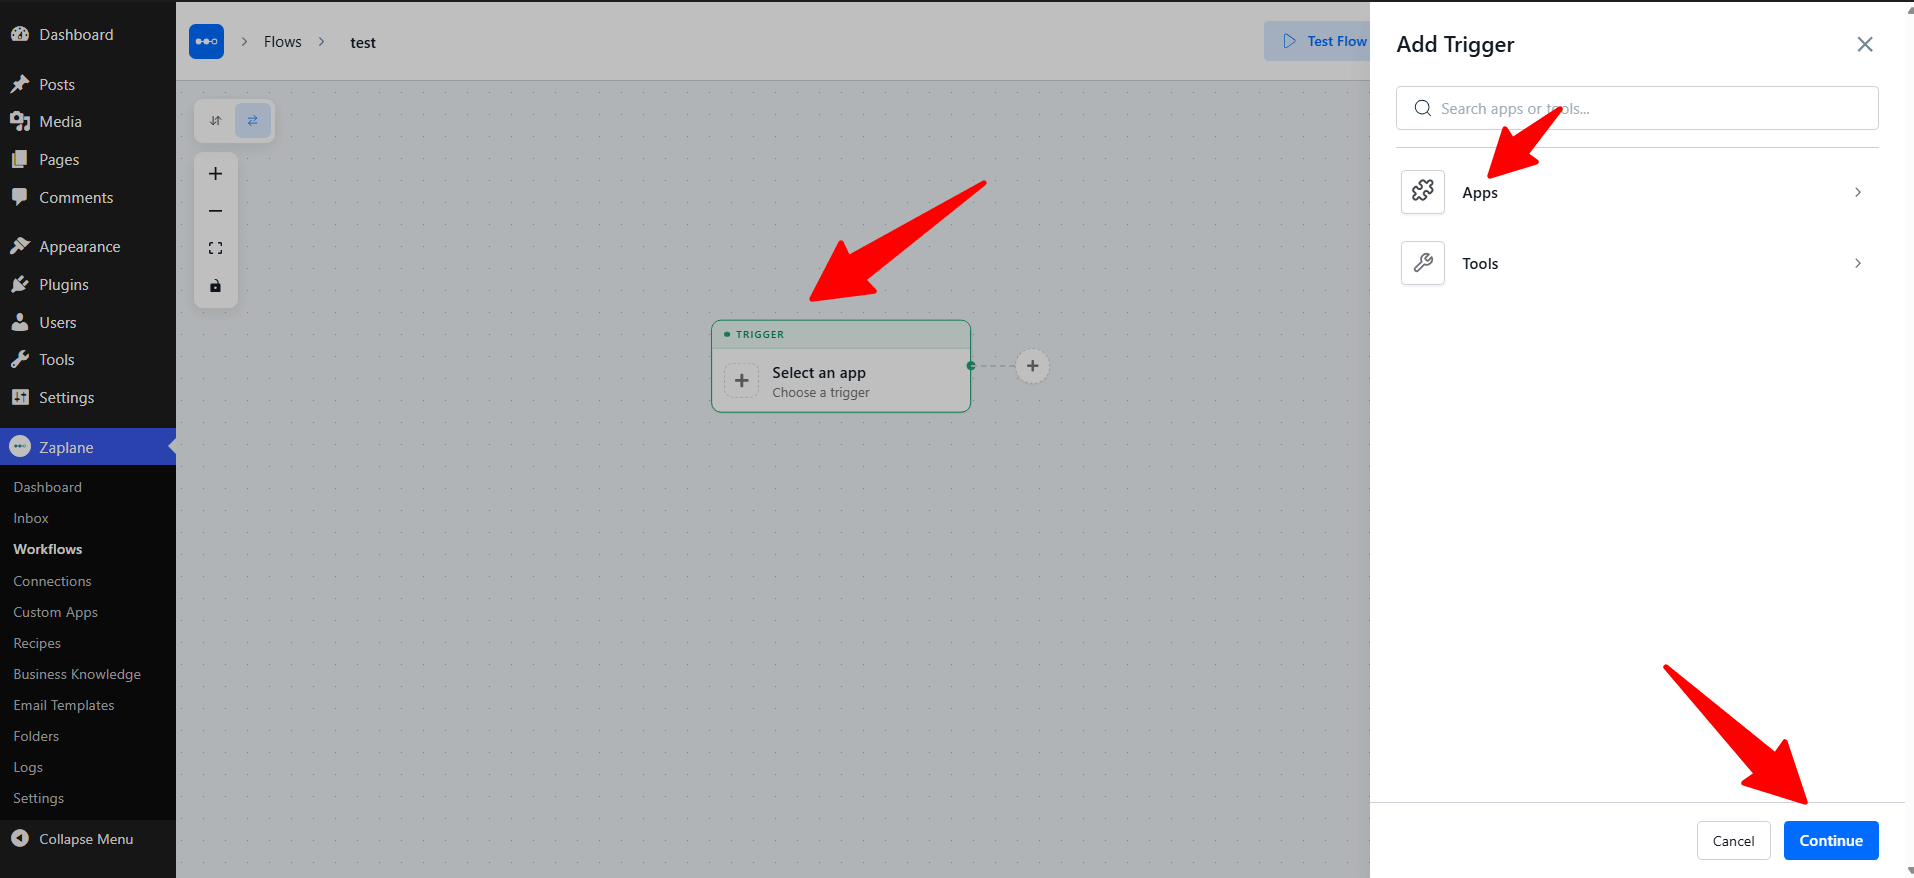
Find Mailchimp in the app list, select it, and click Continue.
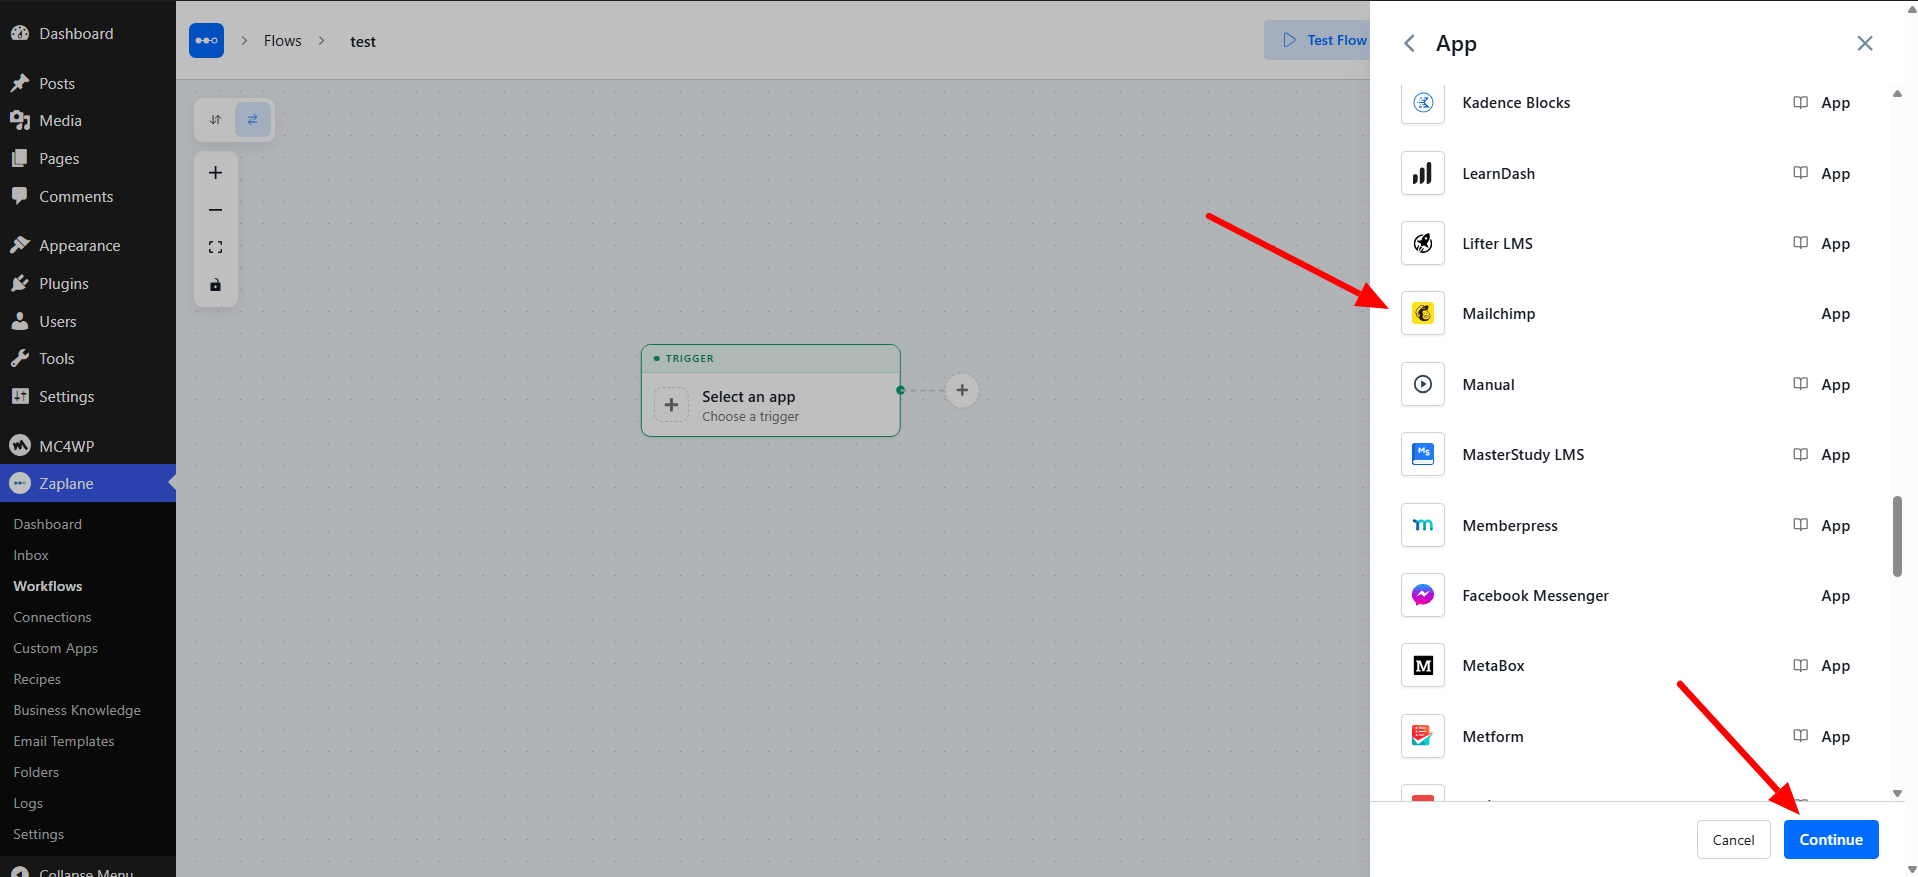
Step 9: Choose the Trigger Type and Connection
On the Select tab, open the Trigger Type dropdown and pick the event that should start your workflow. In this example we choose Subscribed. Then open the Select Connection dropdown, choose the Mailchimp connection you created in Step 2, and click Continue.
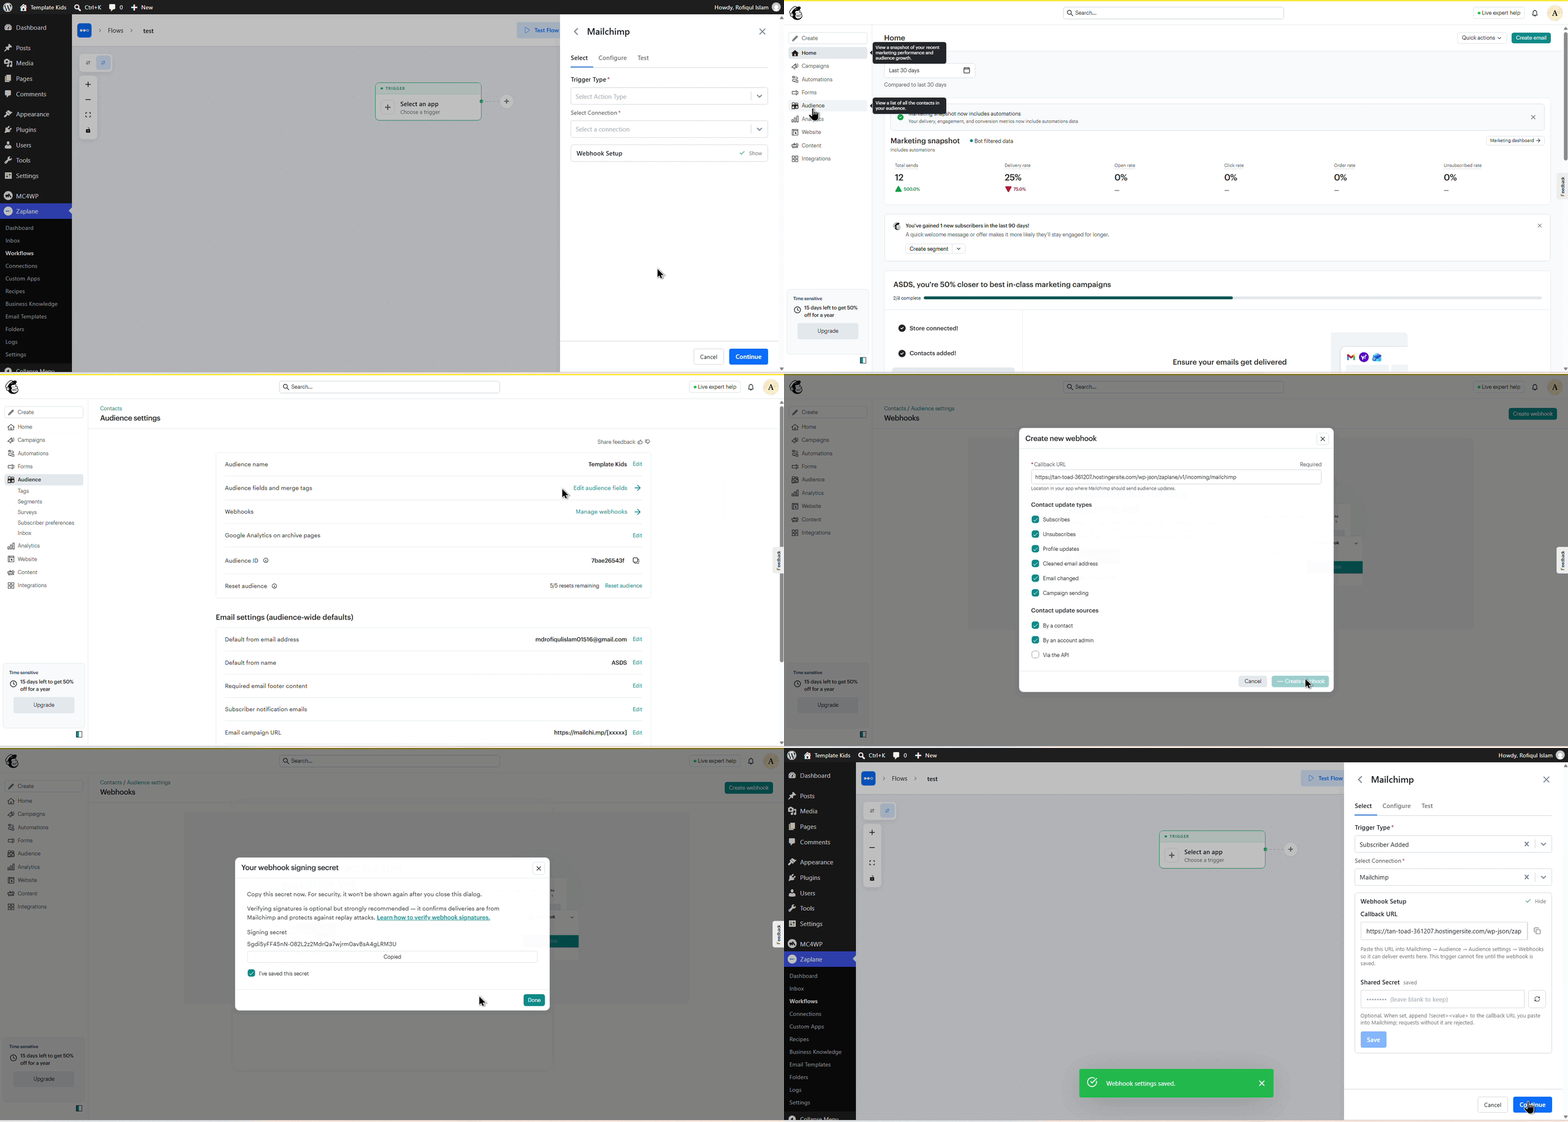
Step 10: Configure the Trigger
On the Configure tab, Zaplane shows “No configuration required for this action.” Click Continue to move on.
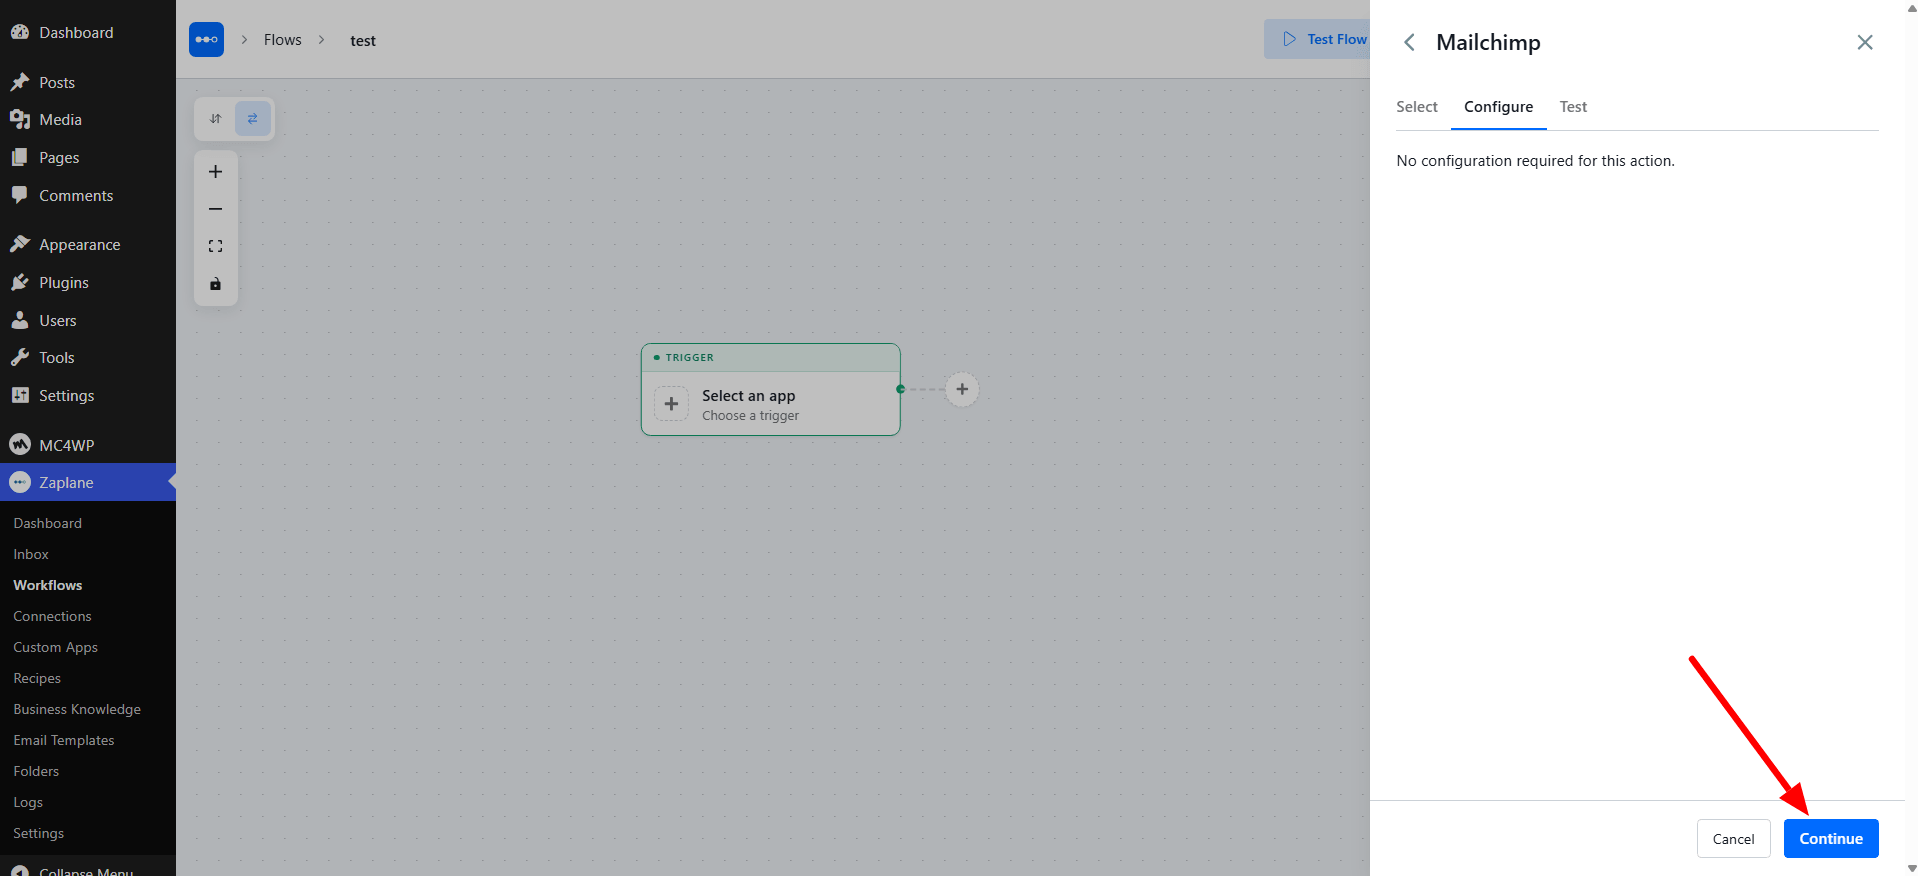
Step 11: Test and Activate the Workflow
On the Test tab, click Test Trigger to check that Zaplane can receive data from Mailchimp, then click Save.
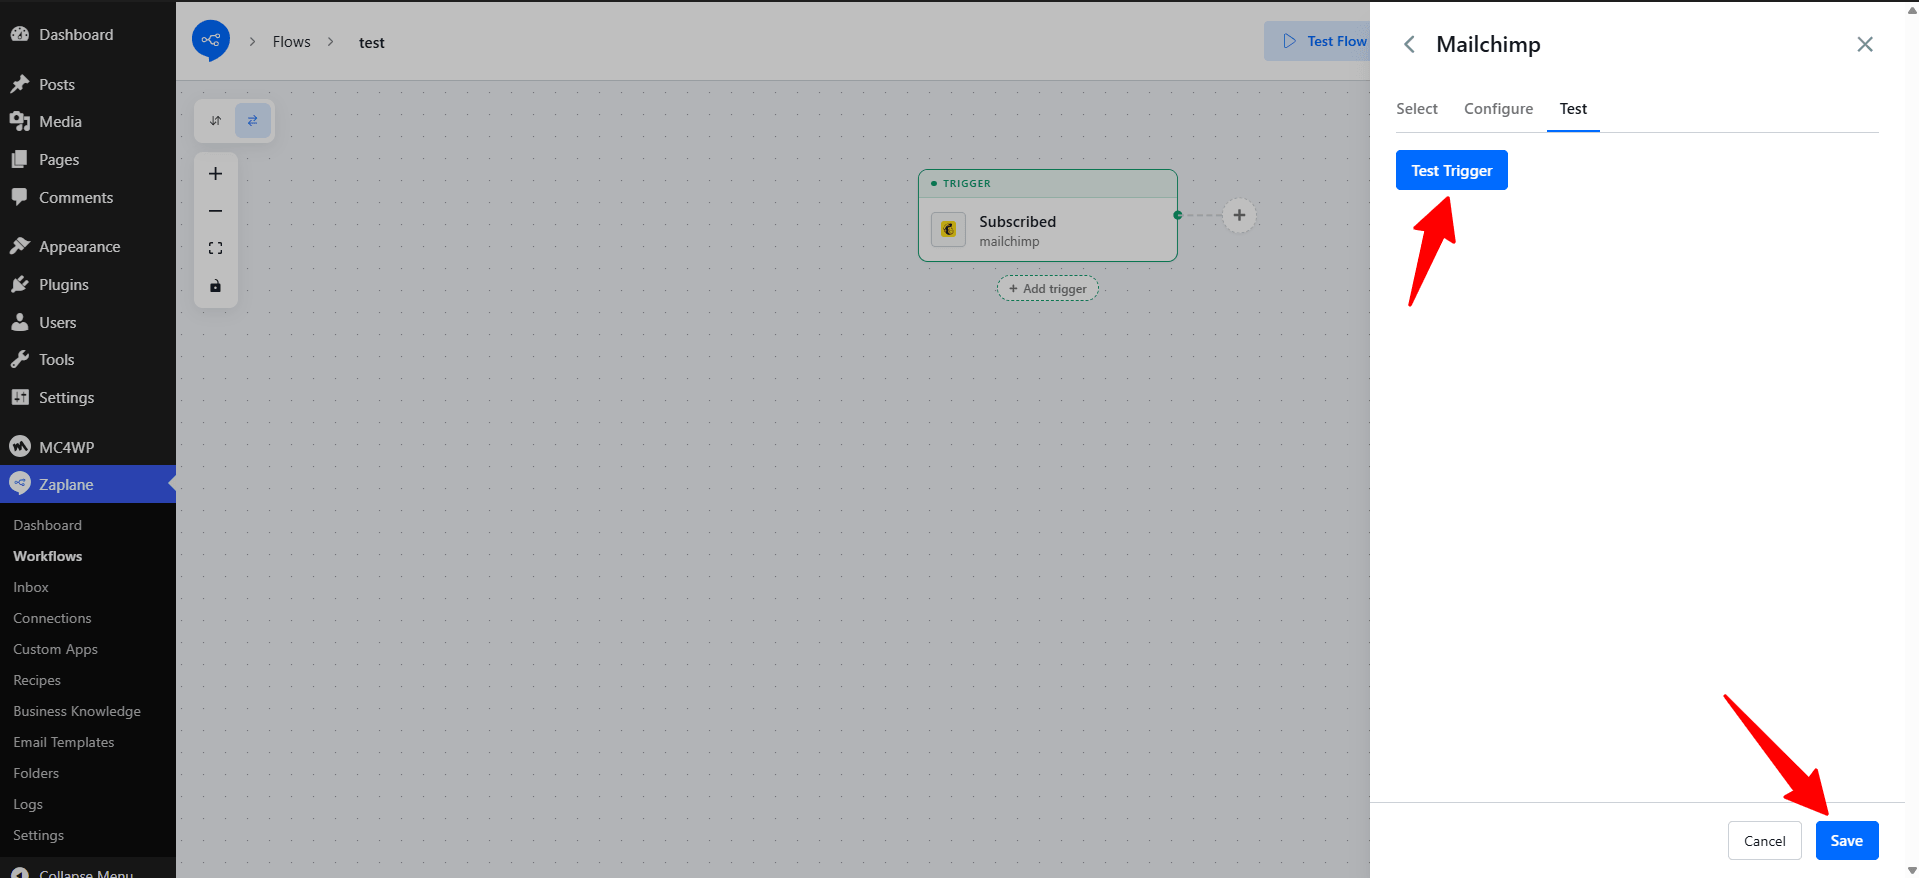
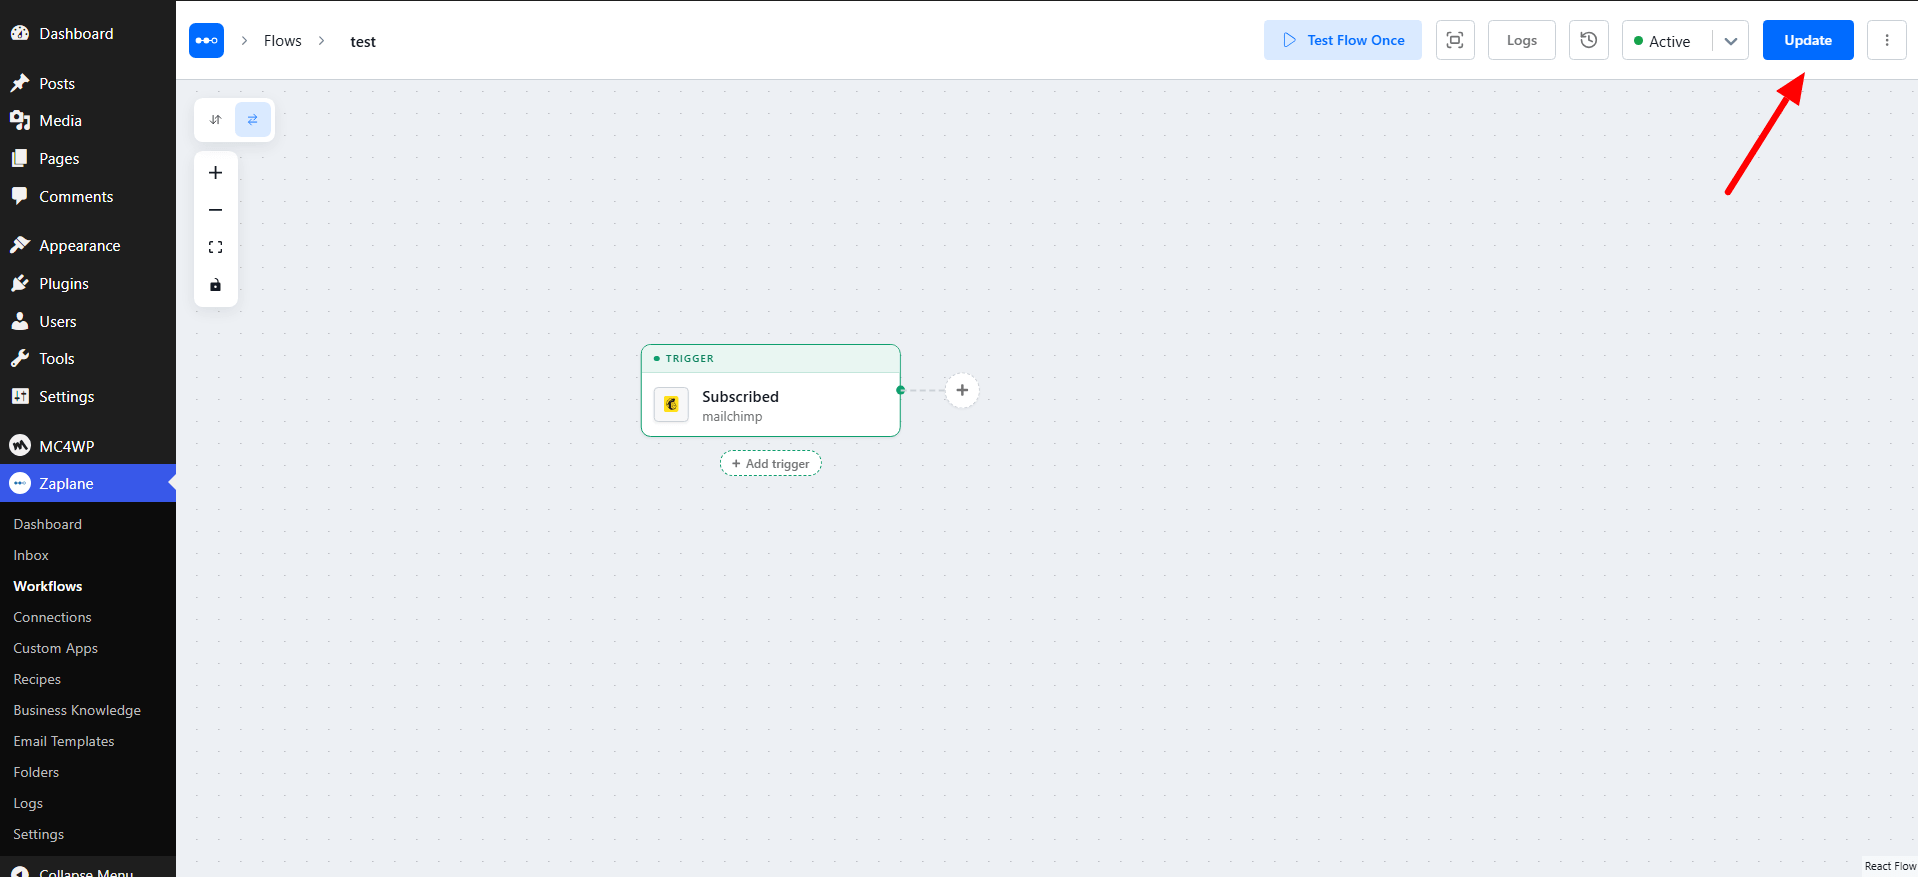
Back in the workflow editor, set the workflow status to Active and click Update to publish your changes.
Done!
Mailchimp is now connected to Zaplane. Every time your selected trigger event happens, your workflow will run automatically.