

This guide shows you how to start an automation in Zaplane every time someone sends a message to your Facebook Page on Messenger. It has three parts: getting a Page access token from Meta, connecting it to Zaplane, and building the workflow.
Part 1: Get your Page access token from Meta (one time)
Zaplane talks to Messenger through an app you create in Meta for Developers. You will need a Page access token with the pages_messaging permission.
Step 1: Open My Apps
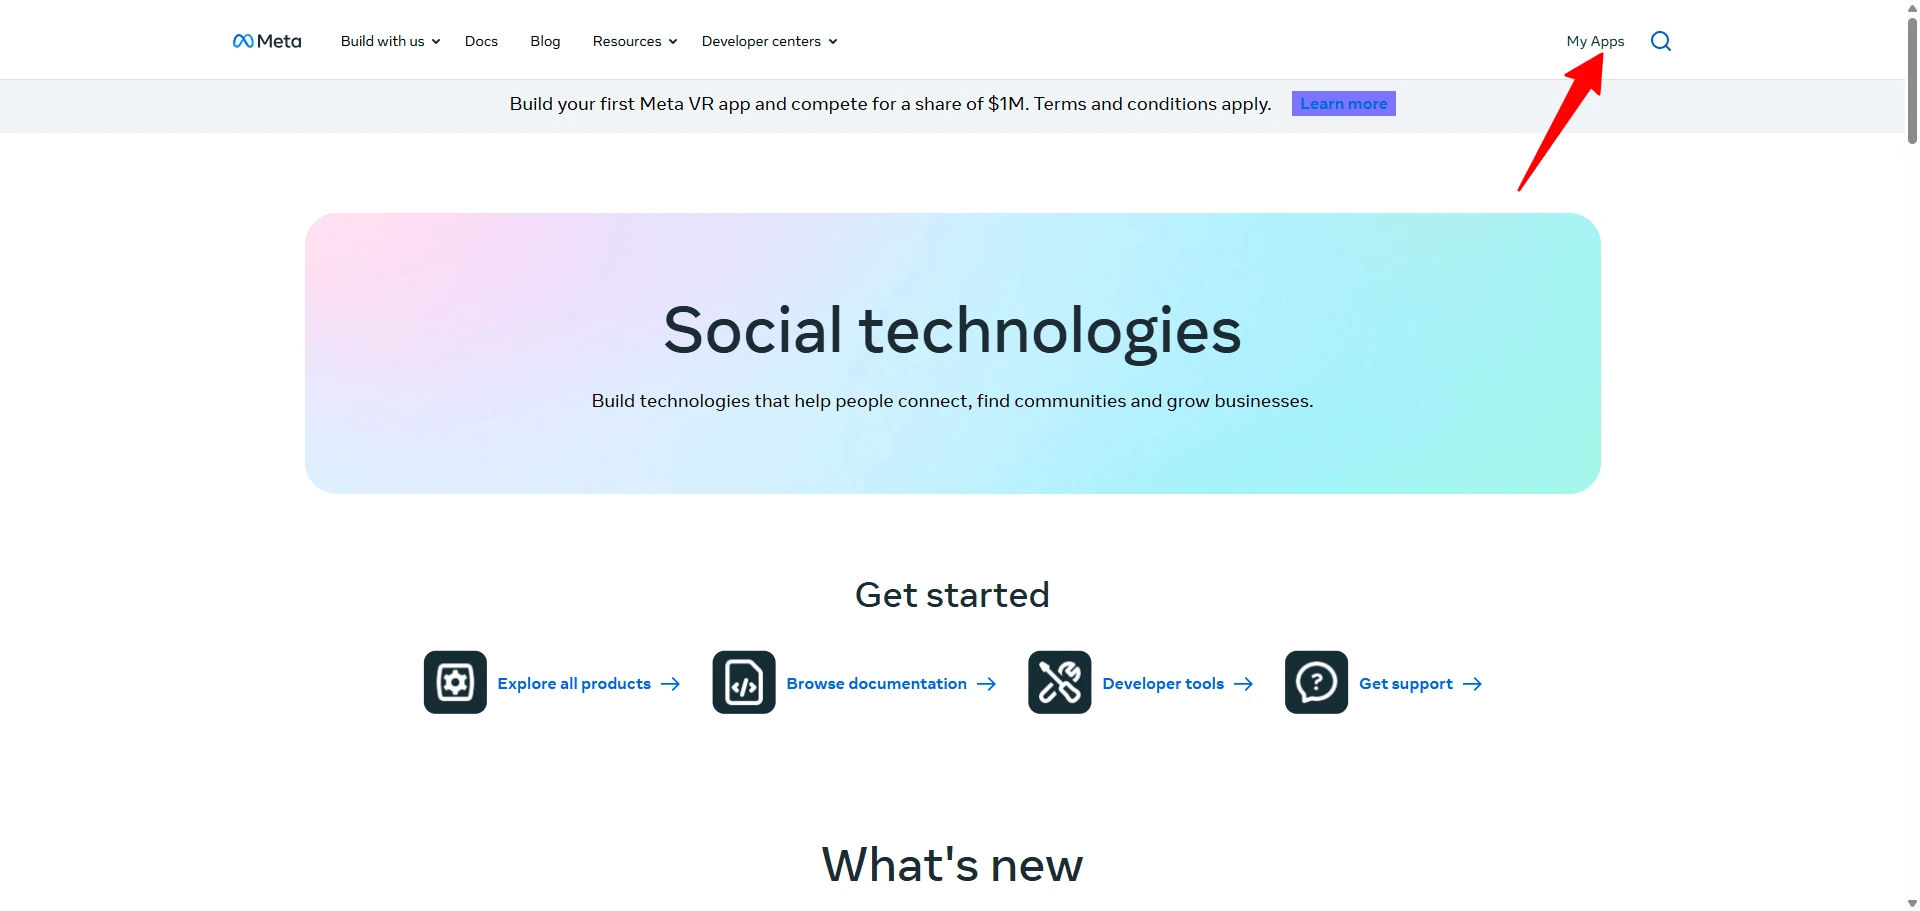
Go to Meta for Developers and sign in. In the top navigation, click My Apps.
Step 2: Create an app
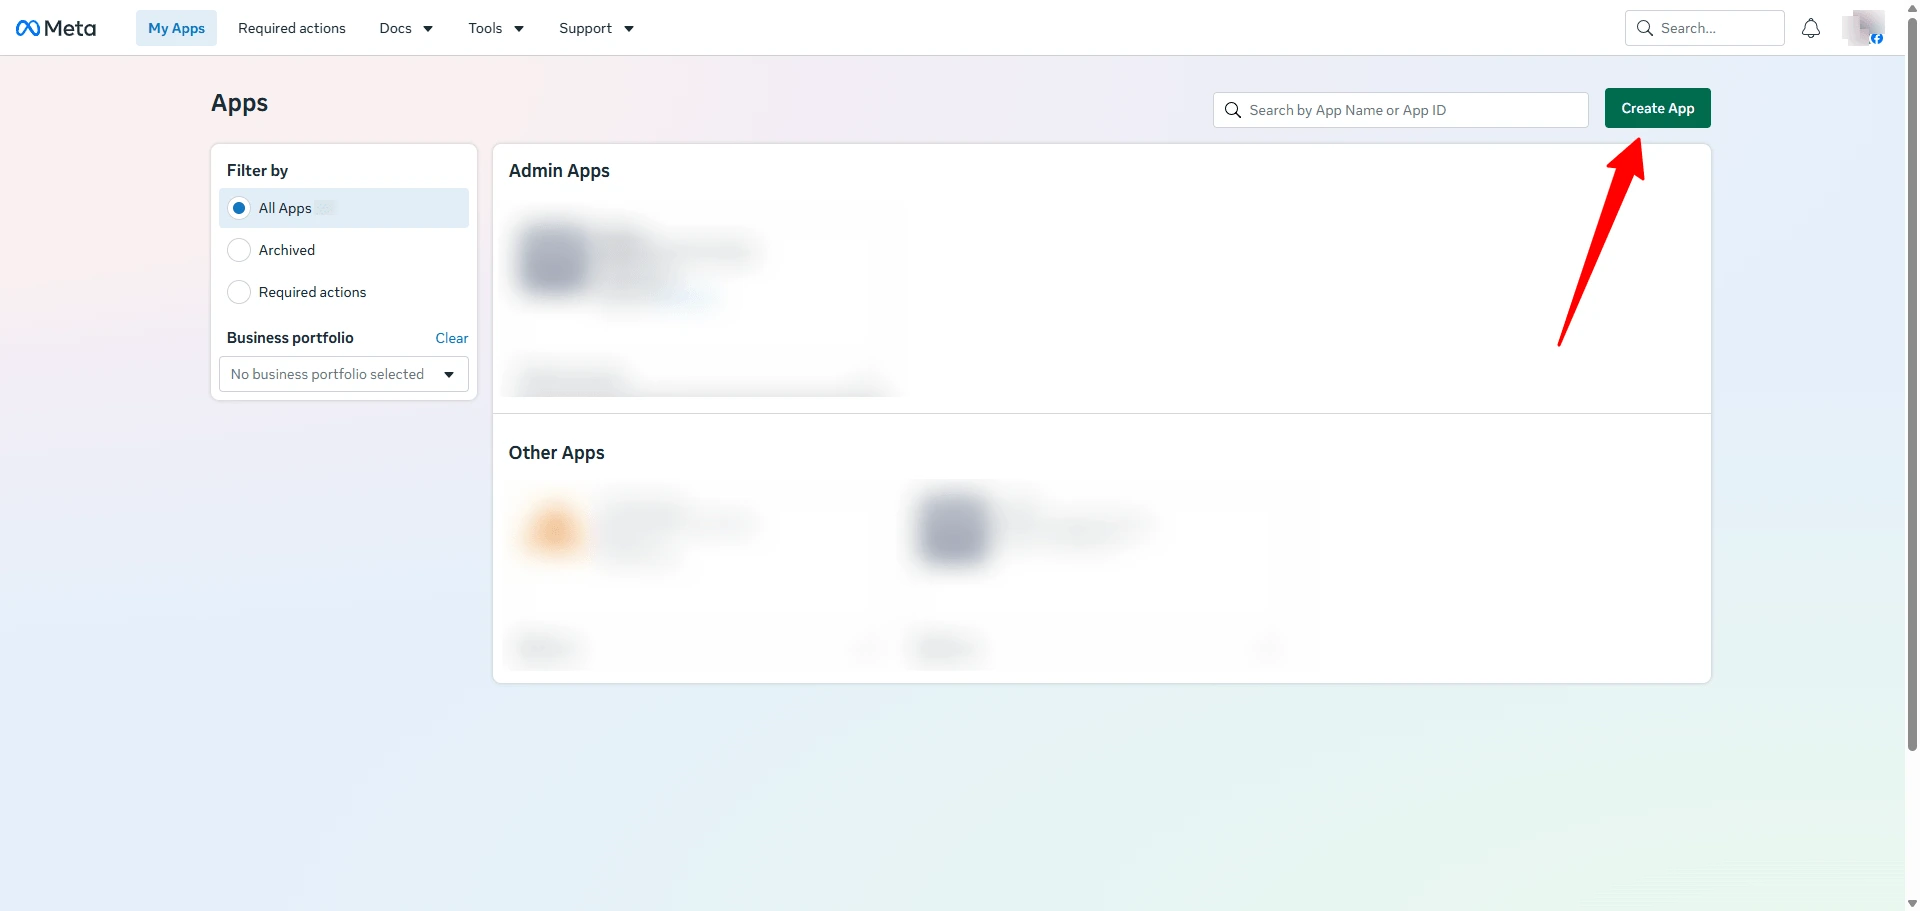
On the Apps page, click the green Create App button.
Step 3: Enter your app details
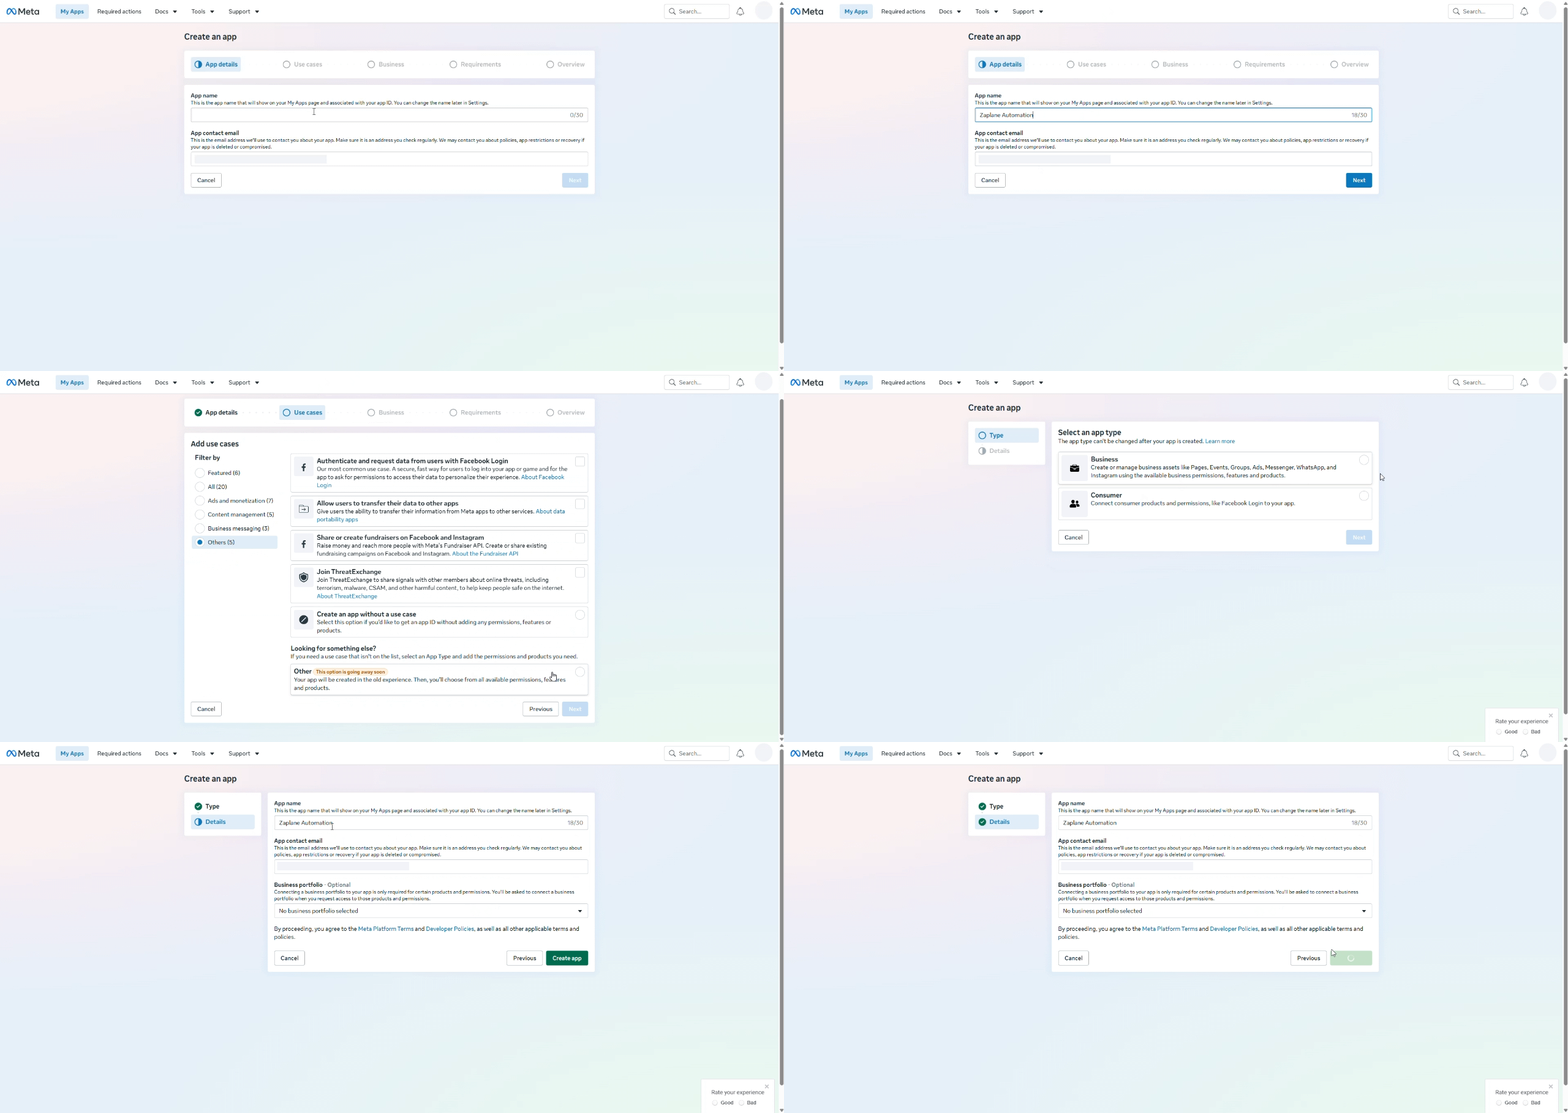
Enter an App name (up to 30 characters) and check the App contact email, then click Next. Meta guides you through the remaining steps: Use cases, Business, Requirements and Overview. Complete each one to create the app.
Step 4: Set up Messenger and copy your token
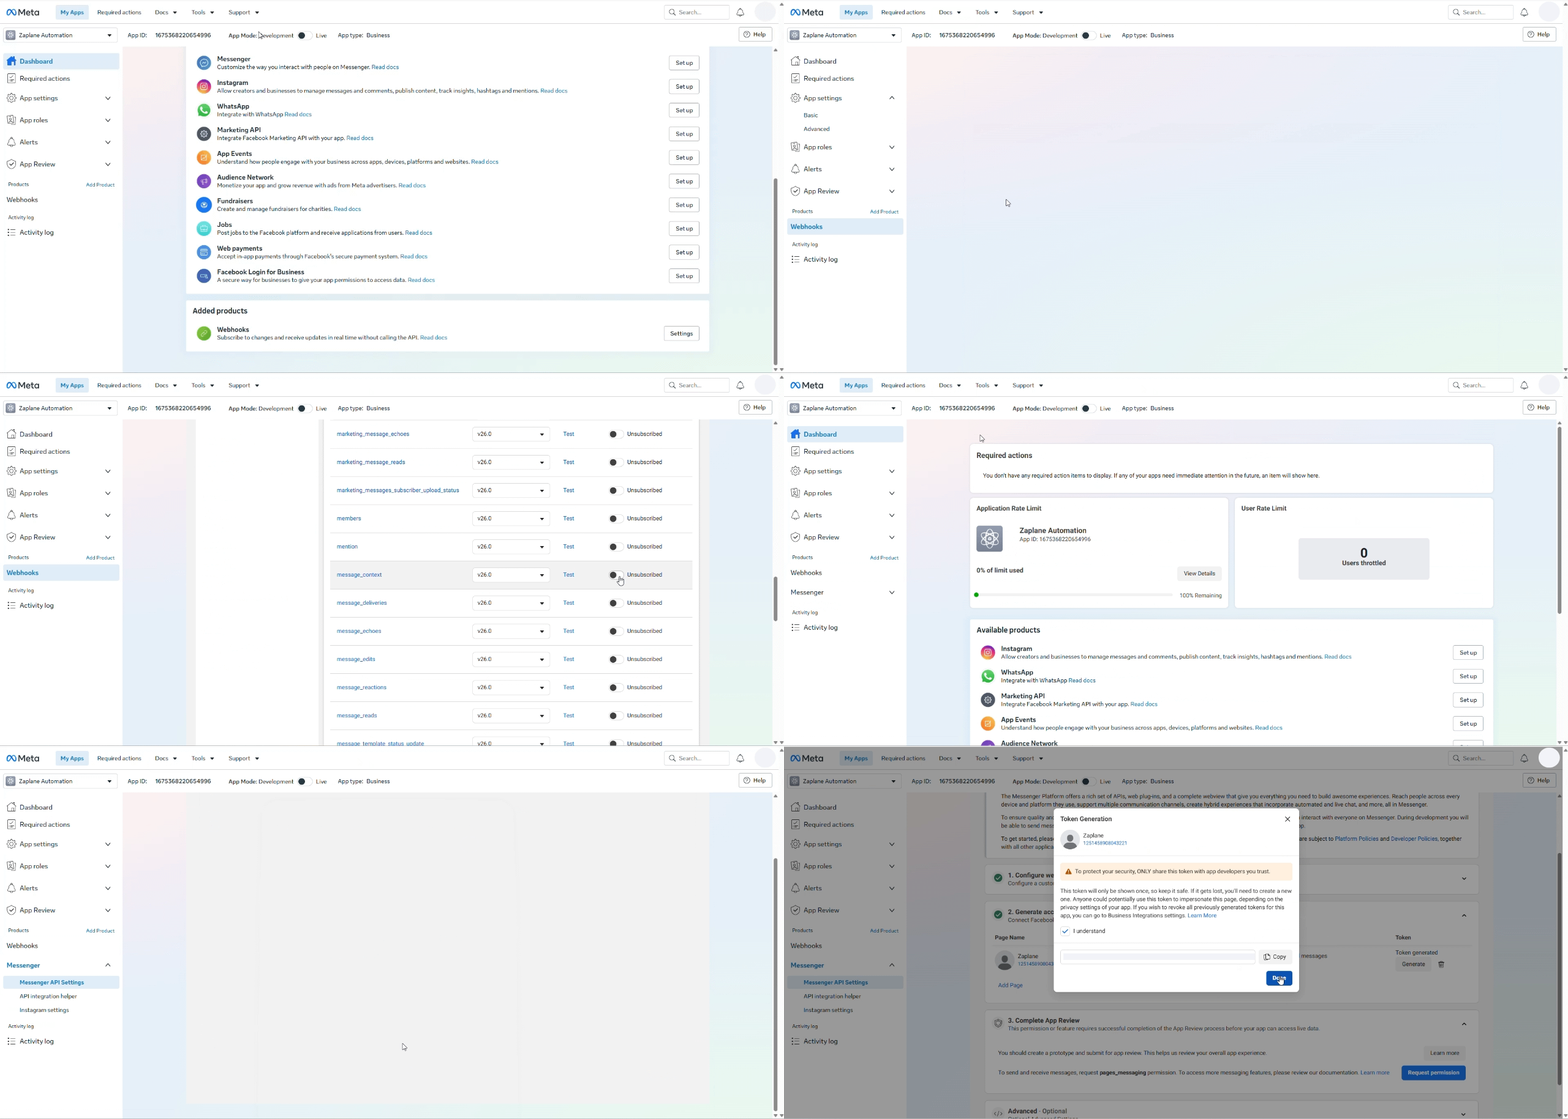
In your app’s Dashboard, find Messenger in the product list and click Set up. Make sure Webhooks is also added to your app. Then generate a Page access token for your Facebook Page and copy it. The screen recording below shows the whole process.
Part 2: Connect Messenger to Zaplane
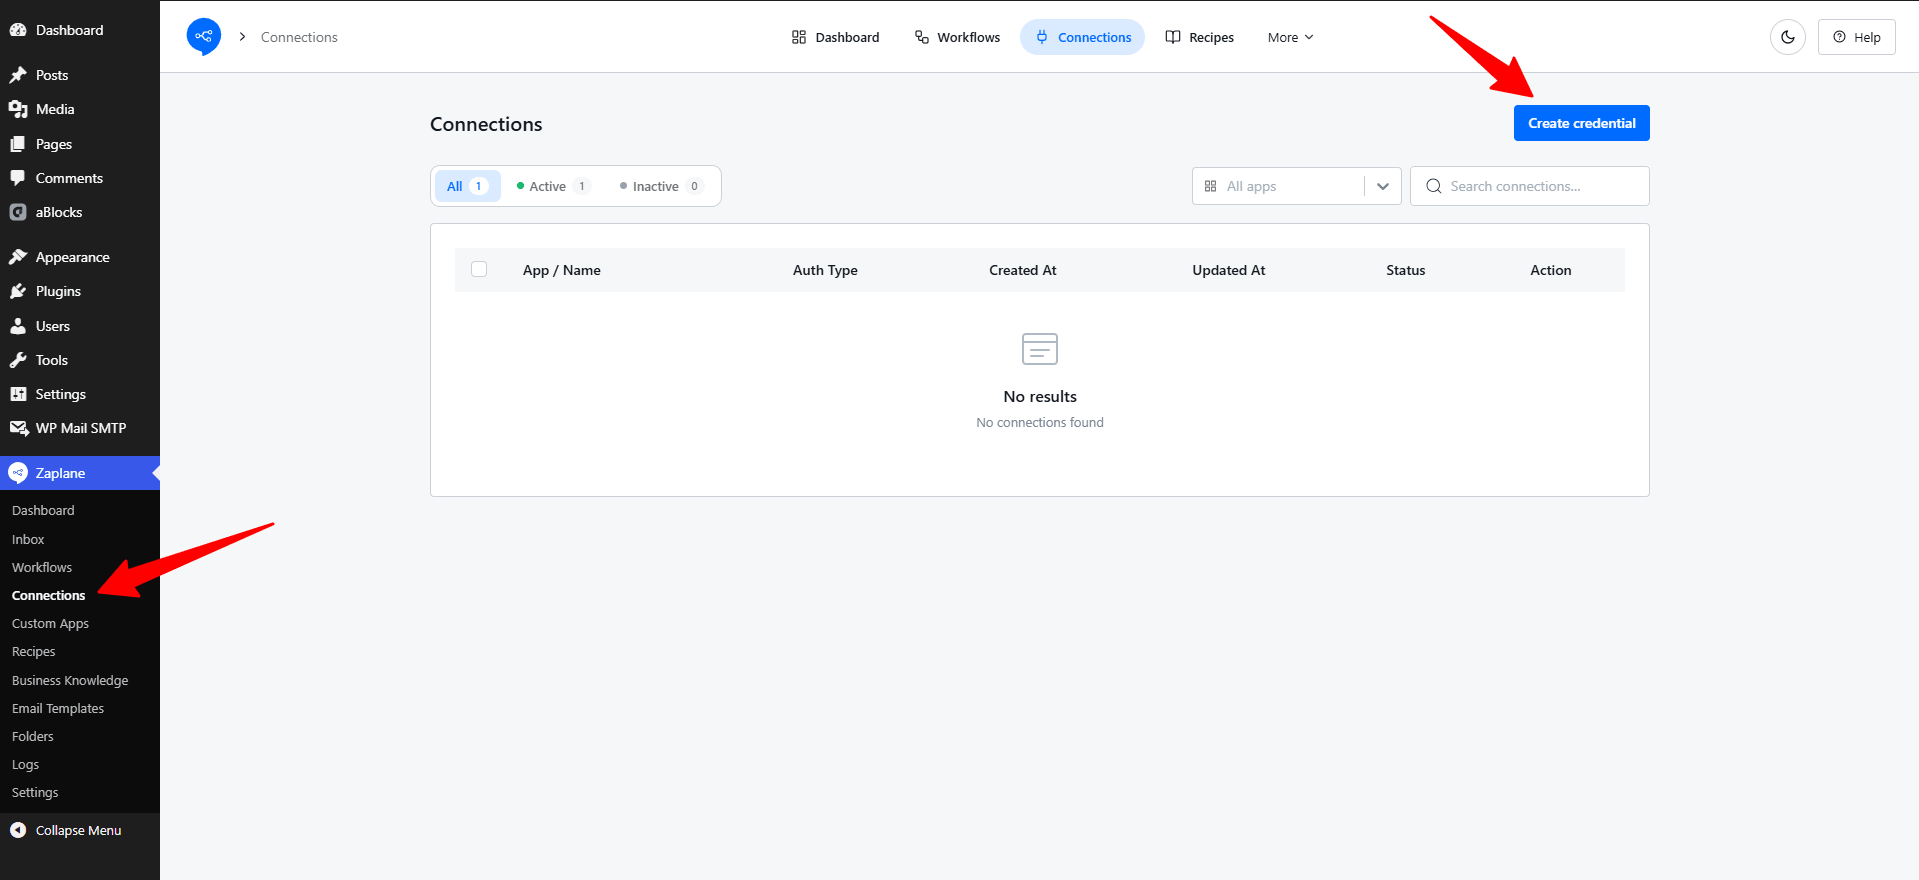
Step 5: Open Zaplane Connections
In your WordPress dashboard, go to Zaplane → Connections and click Create credential.
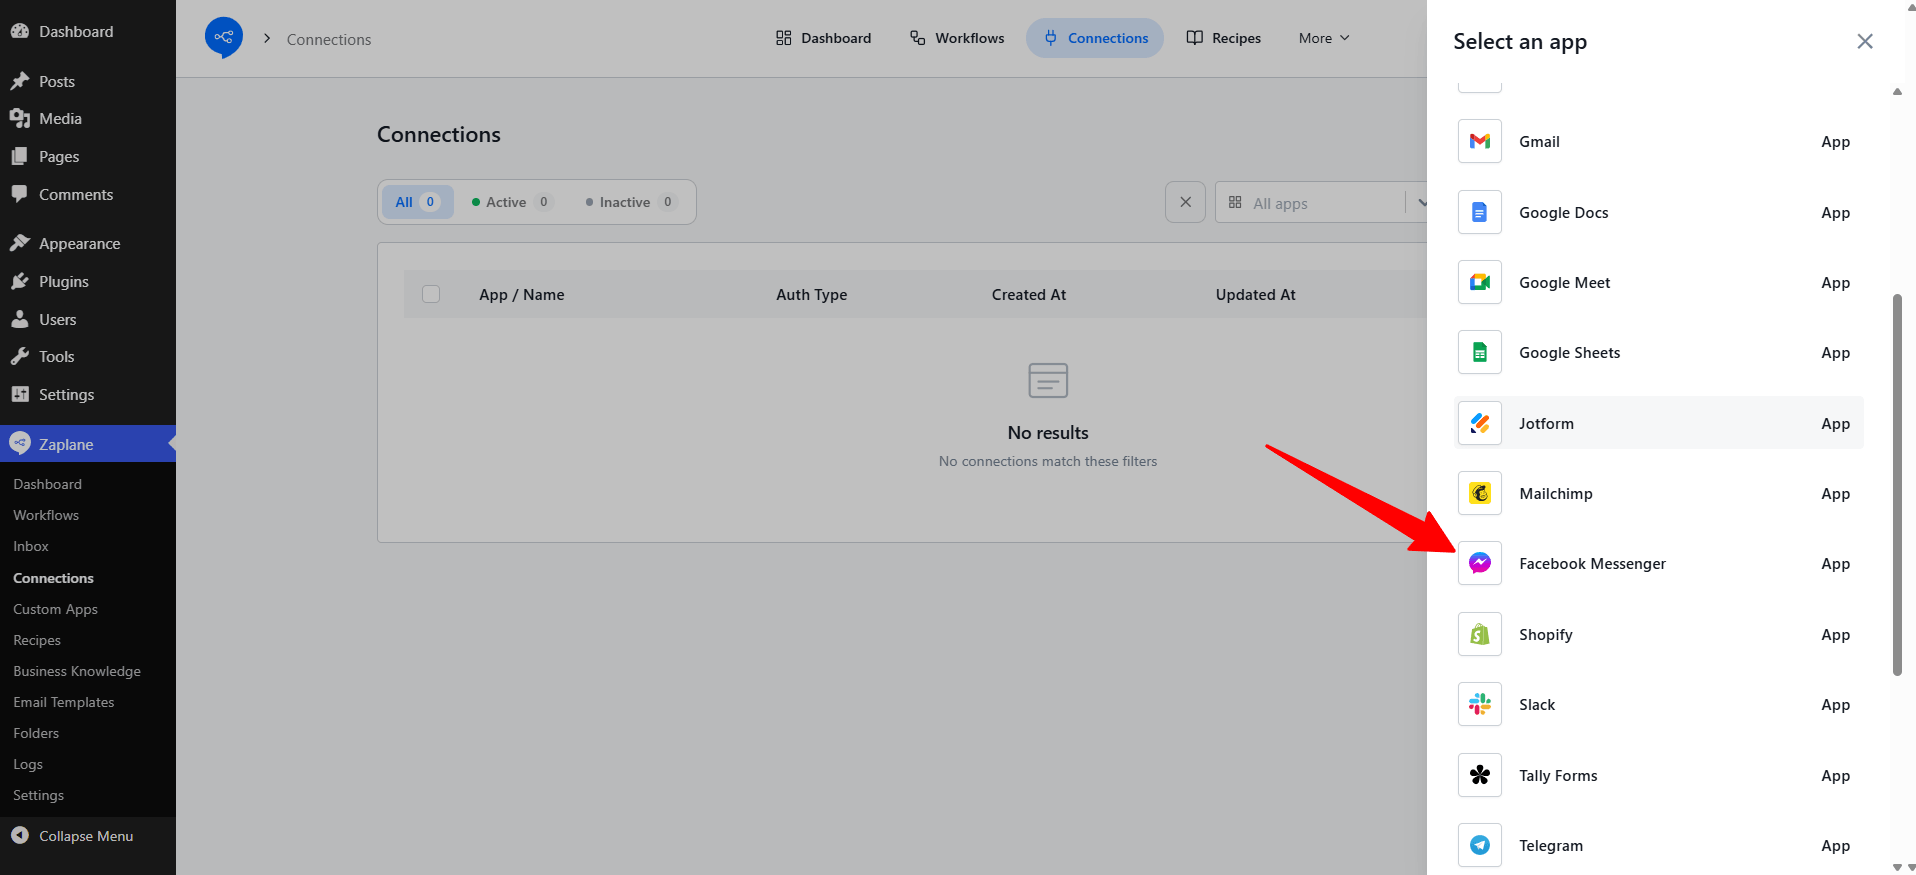
Step 6: Select Facebook Messenger
In the Select an app panel, choose Facebook Messenger.
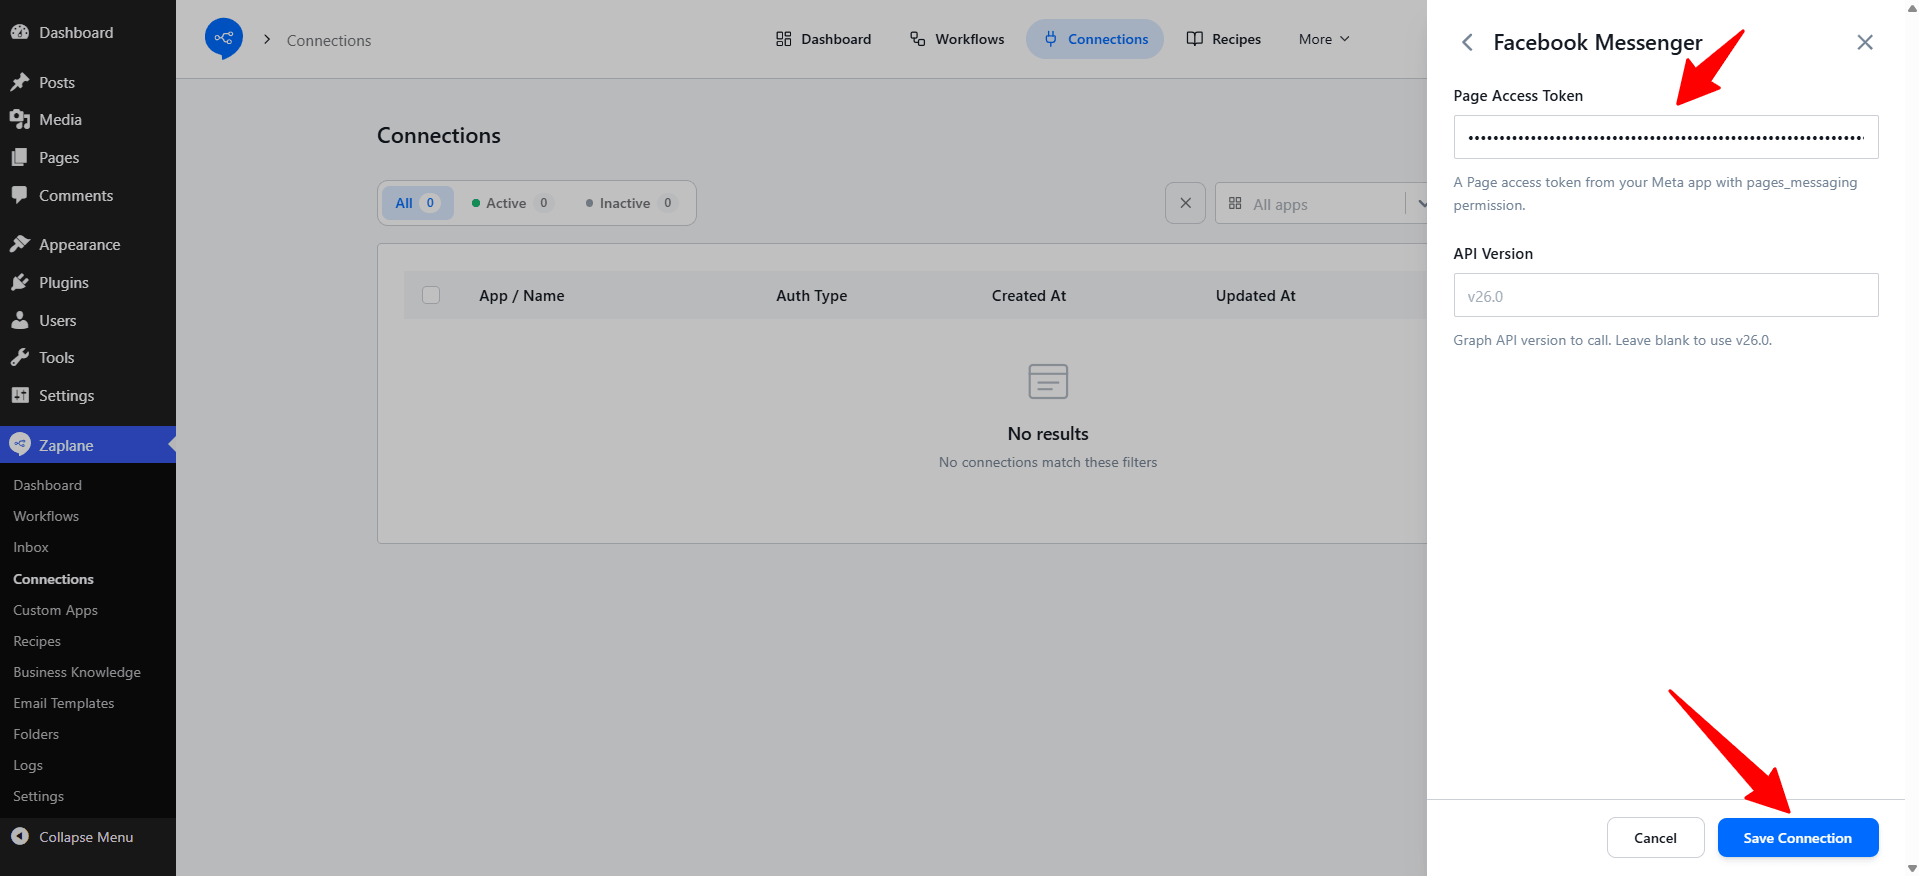
Step 7: Paste your token
Paste your token into the Page Access Token field. You can leave API Version empty to use the default (v26.0). Click Save Connection.
Part 3: Build the workflow
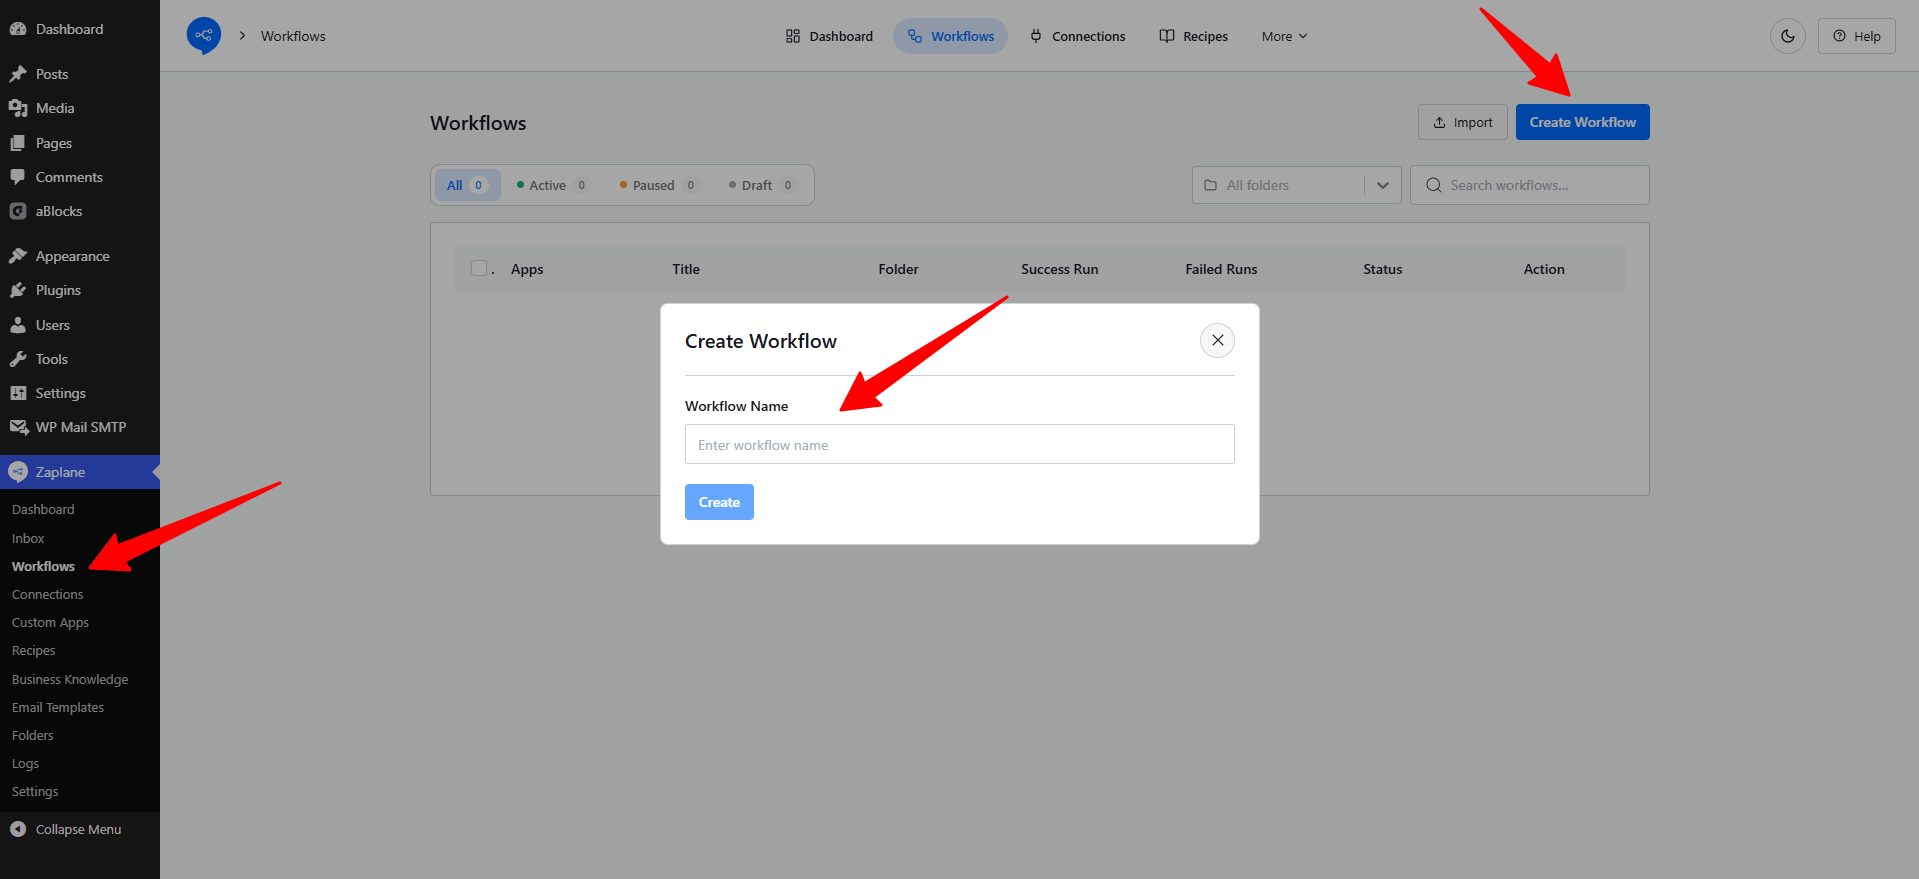
Step 8: Create a new workflow
Go to Zaplane → Workflows and click Create Workflow. Enter a Workflow Name and click Create.
Step 9: Add a trigger
In the workflow editor, click the Select an app trigger card. In the Add Trigger panel, choose Apps and click Continue.
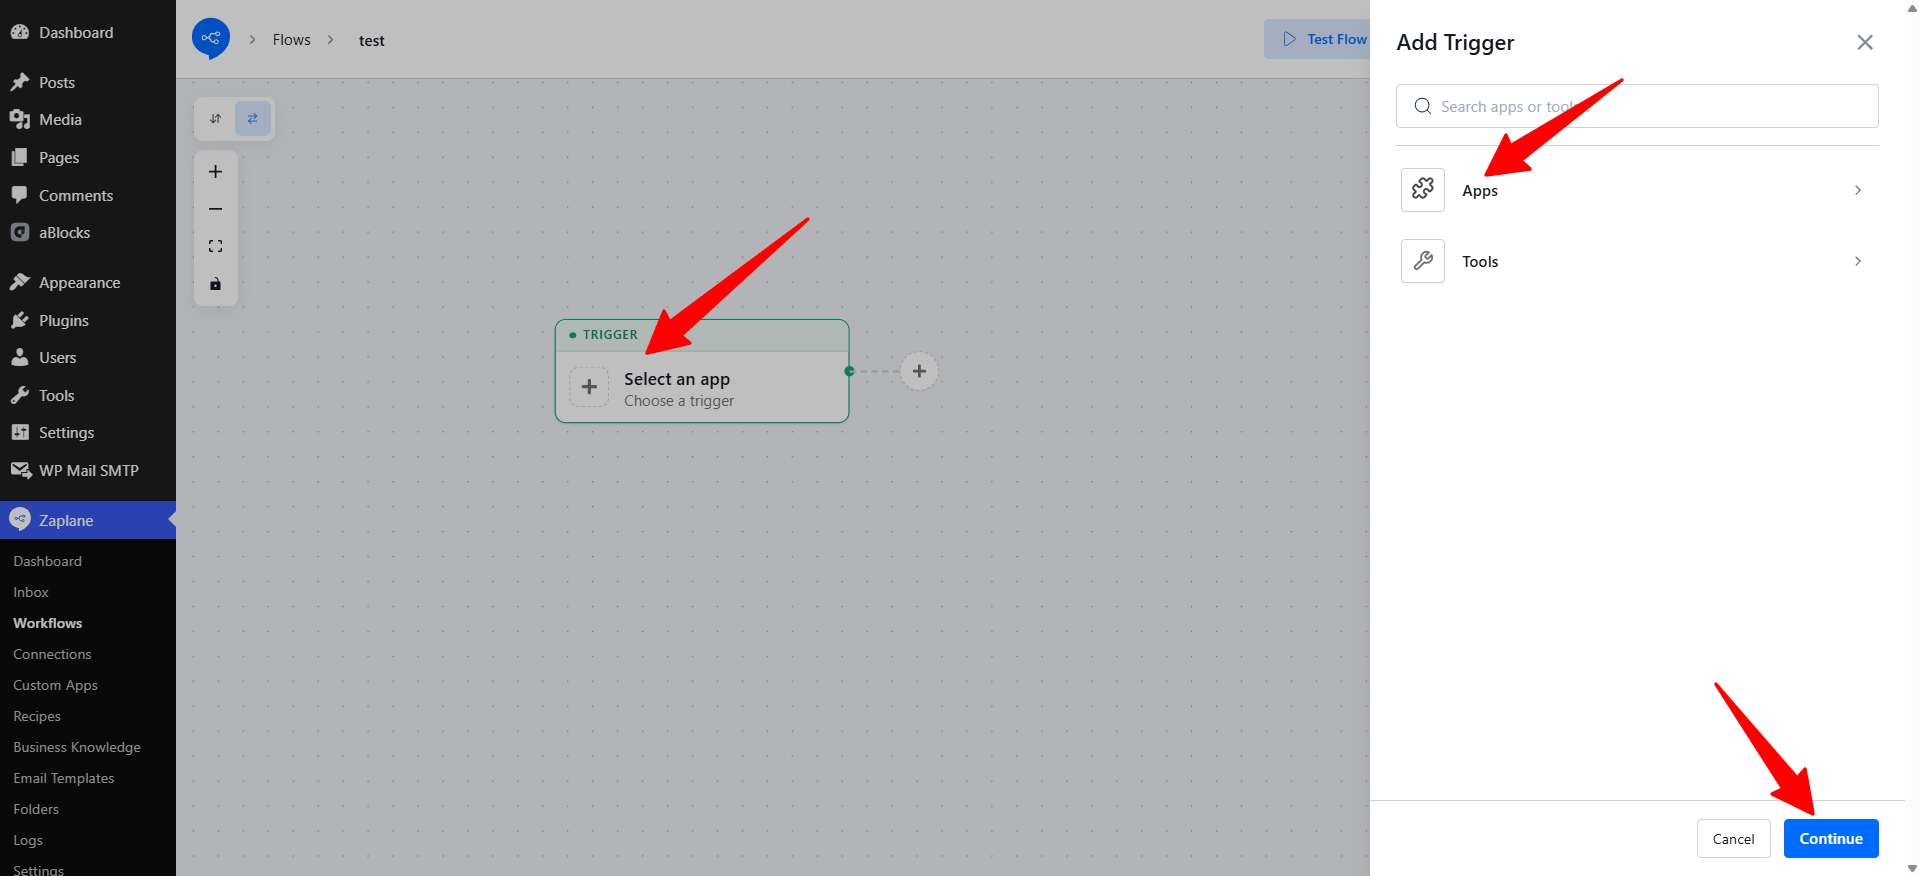
Step 10: Choose Facebook Messenger
Scroll the app list, select Facebook Messenger, and click Continue.
Step 11: Select the trigger and your connection
On the Select tab:
Then click Continue.
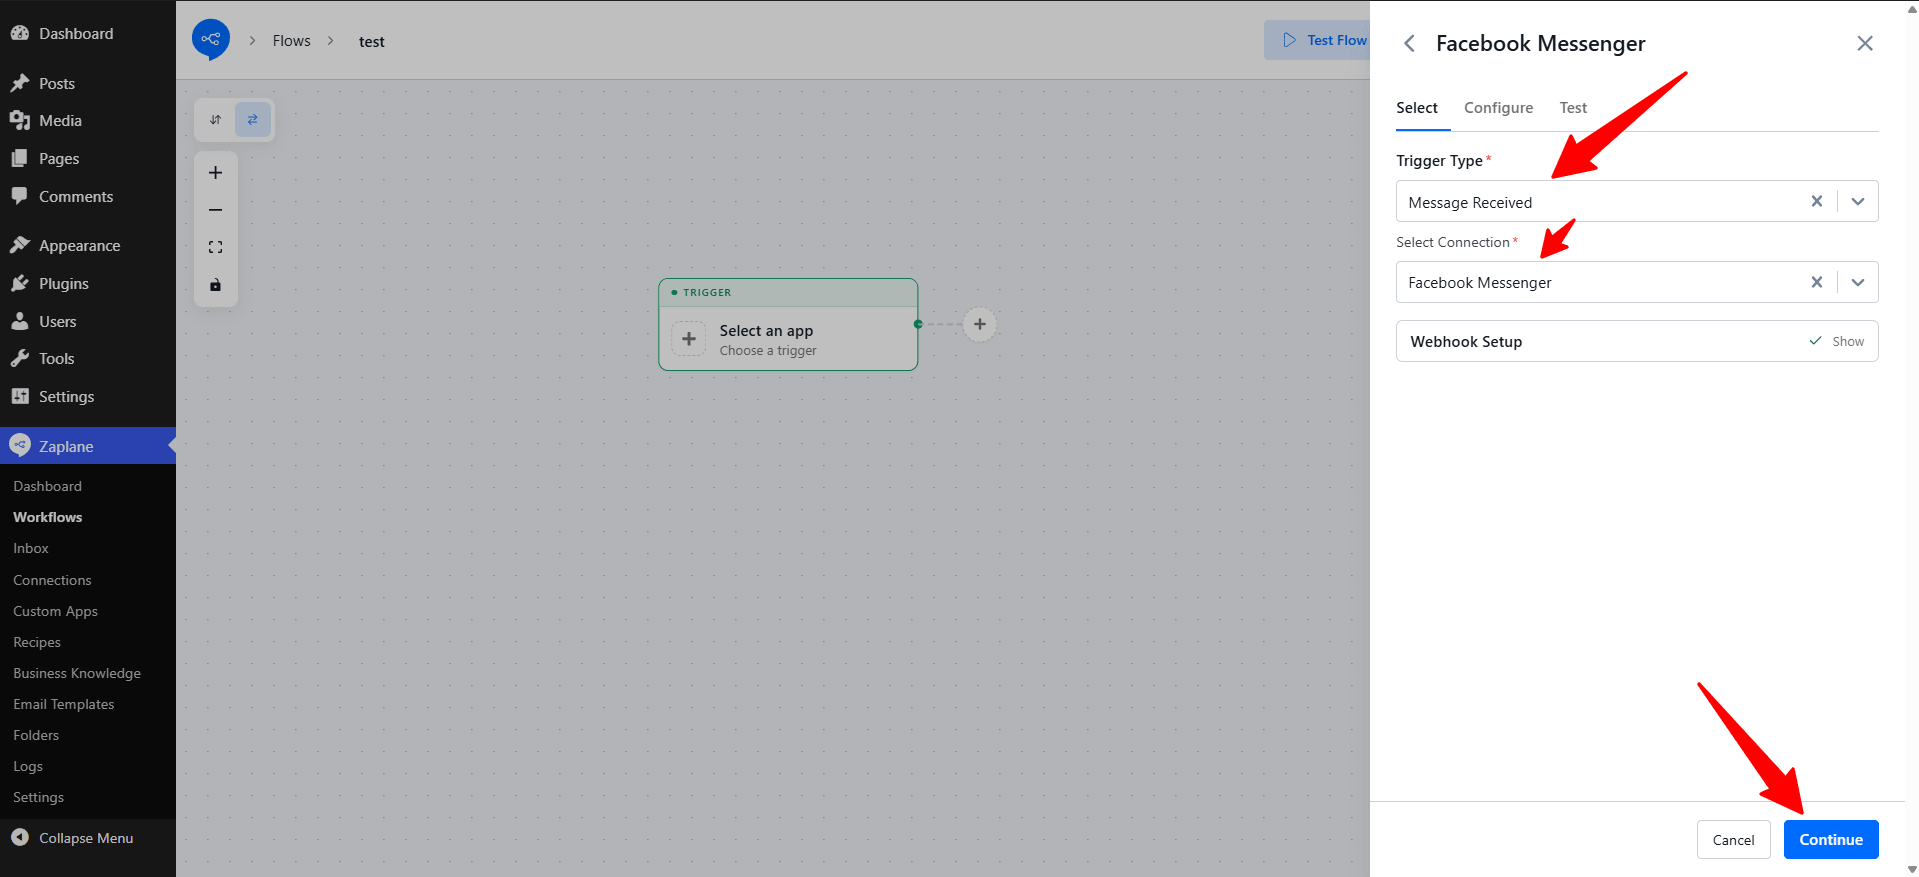
Step 12: Continue past Configure
The Configure tab says No configuration required for this action. Nothing to fill in. Click Continue.
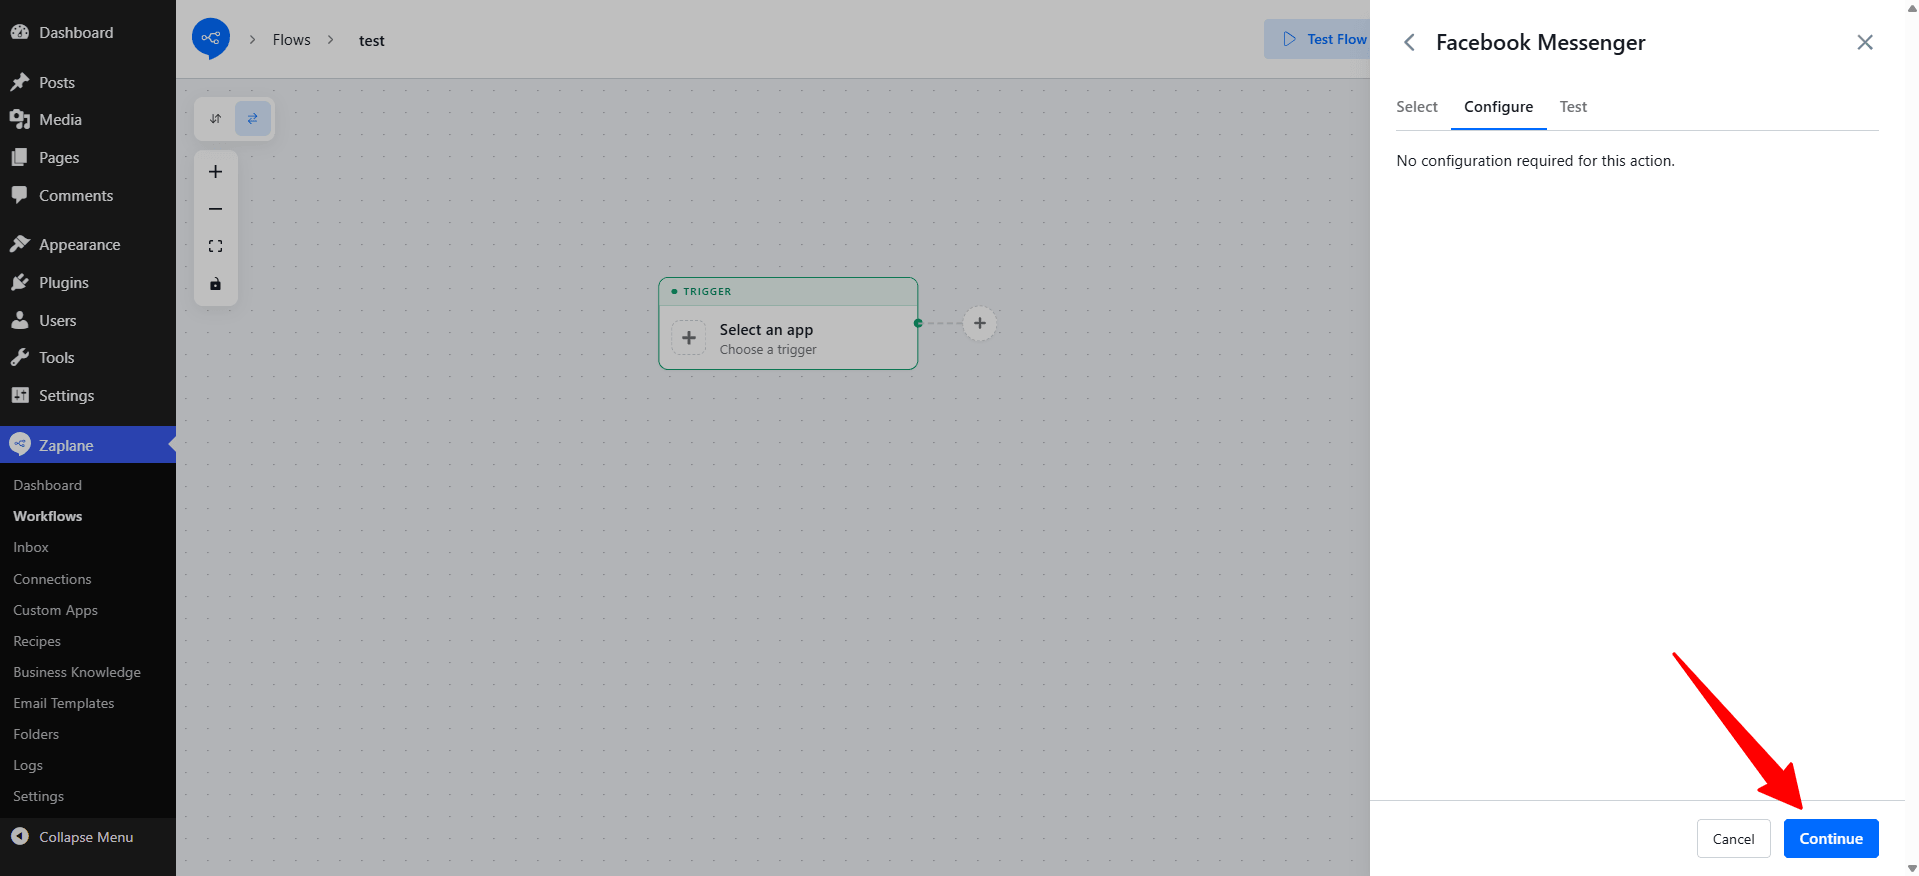
Step 13: Test the trigger
Open the Test tab and click Test Trigger. Then send a message to your Facebook Page so Zaplane can capture sample data. When the test succeeds, click Save.
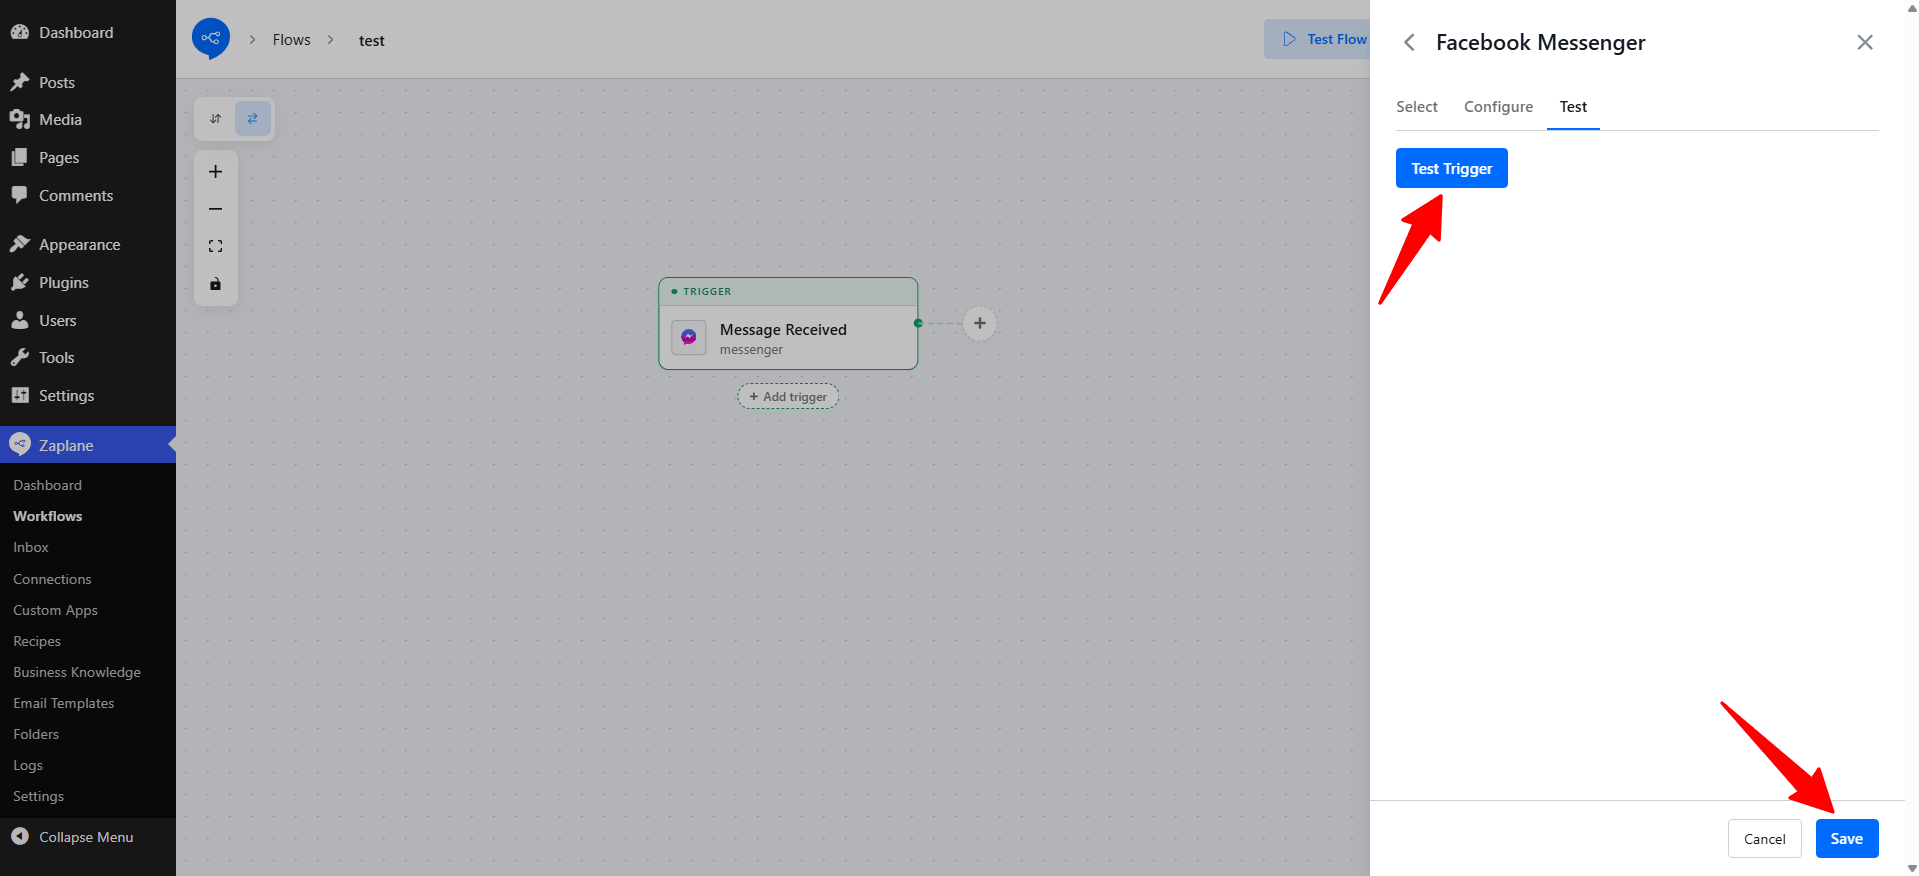
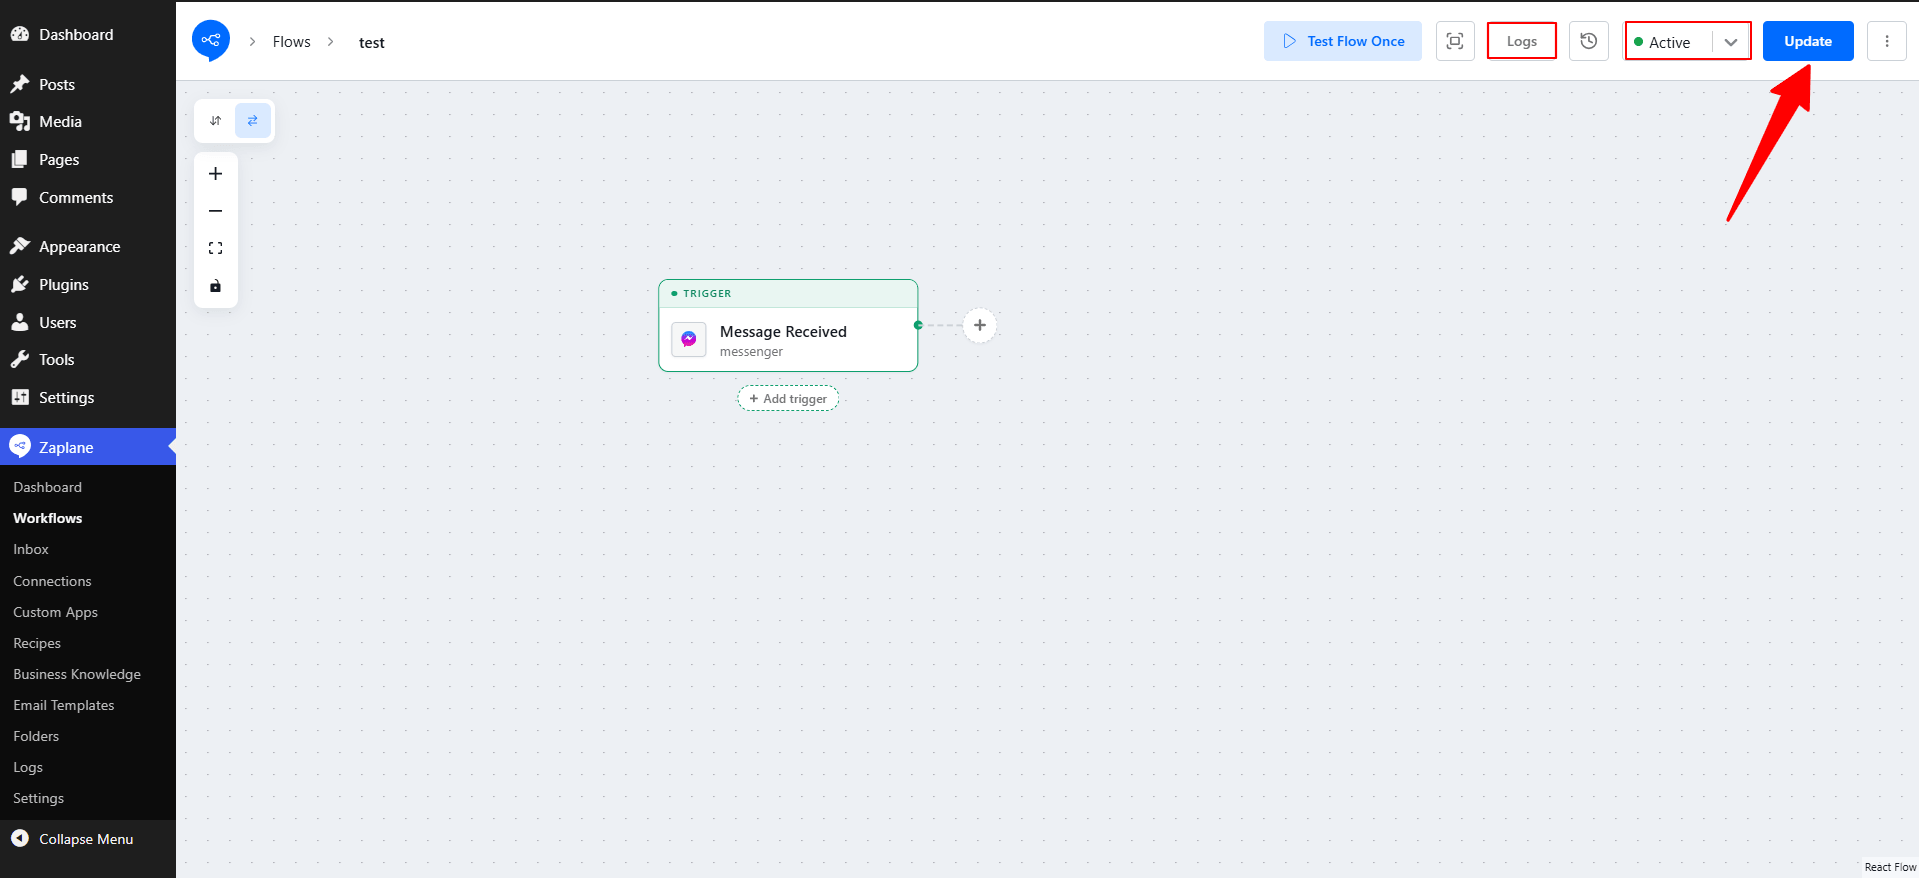
Step 14: Save and activate your workflow
Your trigger now shows as Message Received (messenger). Before you finish:
What’s next?
Click the + button next to your trigger to add actions, such as sending a reply, saving the message to Google Sheets, or notifying your team on Slack. The sender and message details are available in every following step.
Troubleshooting
pages_messaging permission.