

The Inbox brings every customer conversation into one place, starting with a chat widget for your website. This guide shows you how to turn the Inbox on, set up the chat, choose who answers, and add the chat to another website.
Part 1: Turn On the Inbox
Step 1: Enable the Inbox Module
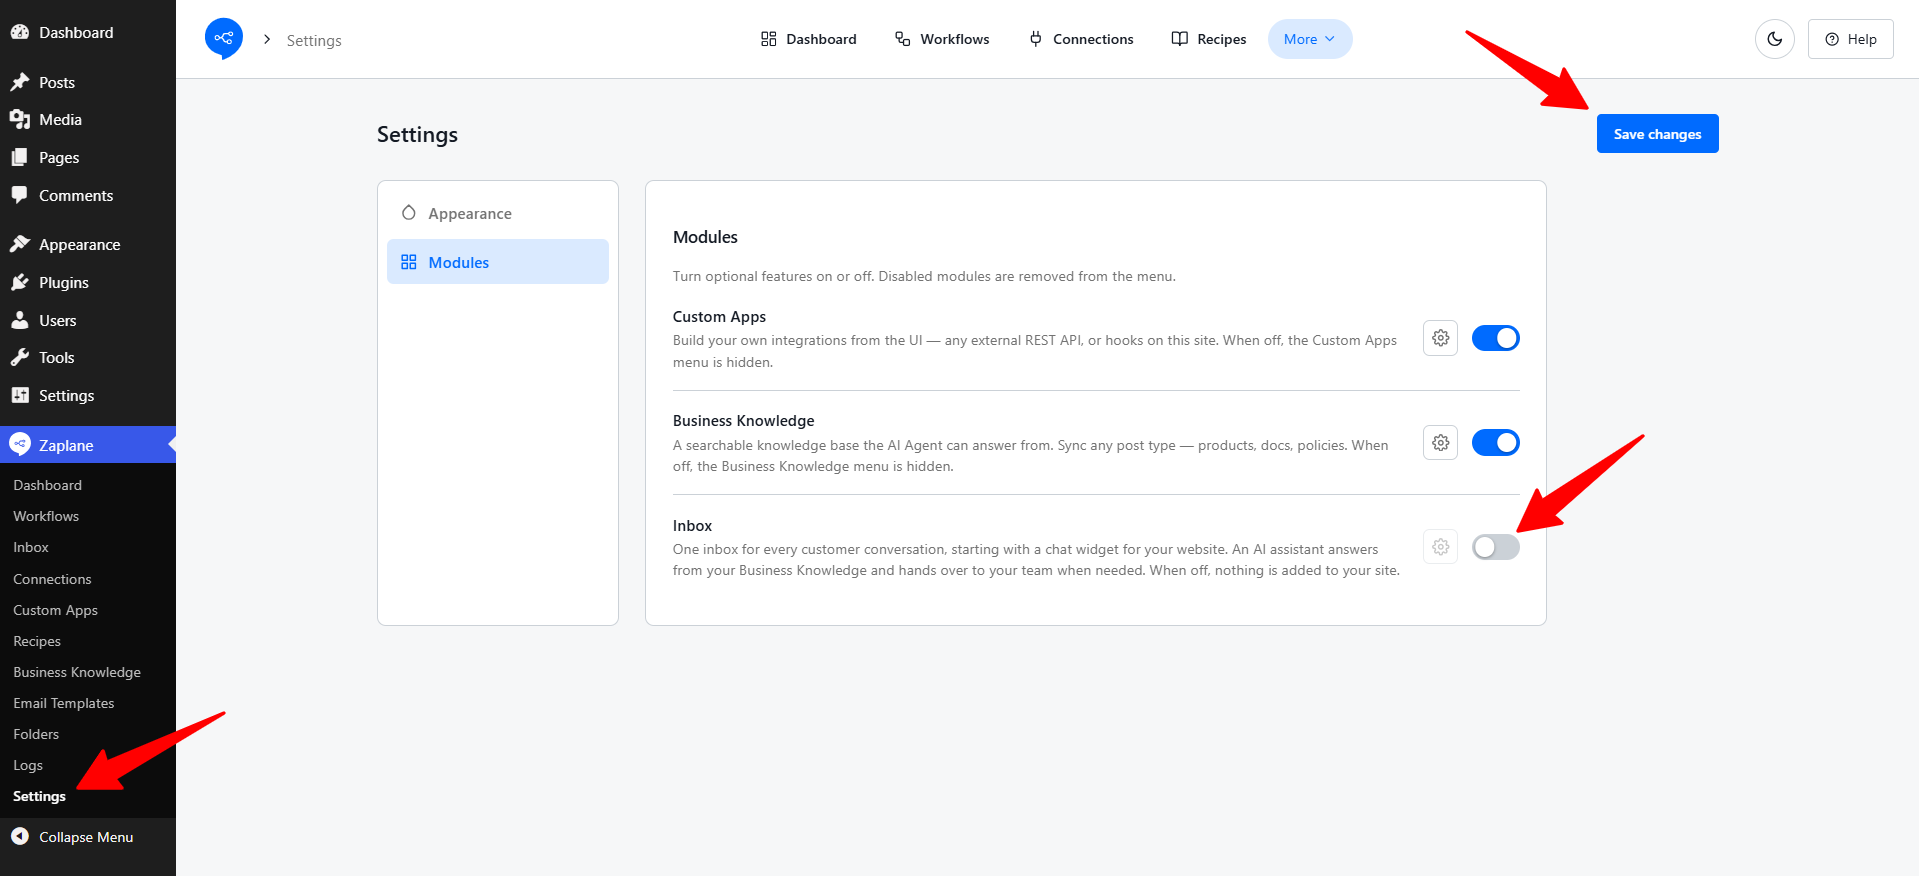
Go to Zaplane > Settings from your WordPress dashboard and open the Modules tab. Turn on the Inbox toggle, then click Save changes.
Step 2: Open the Inbox Settings
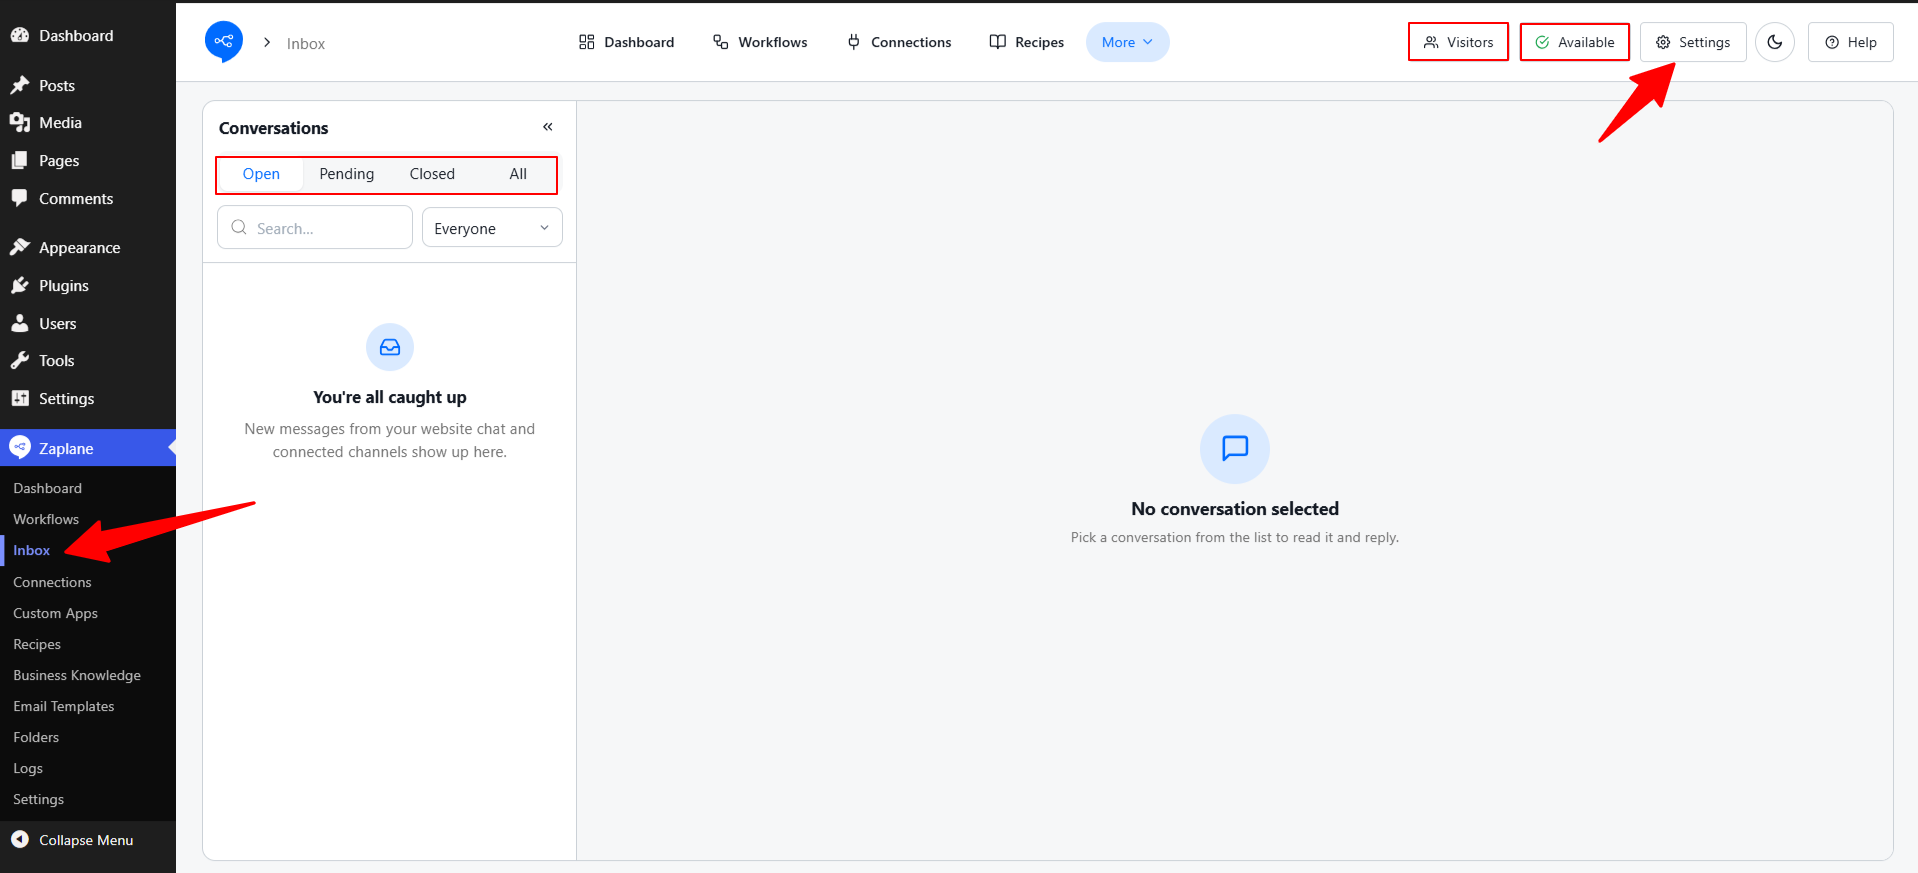
Go to Zaplane > Inbox. Your conversations appear here, sorted by the Open, Pending, Closed, and All tabs, with Visitors and Available buttons at the top. Click Settings to set up your Inbox.
Part 2: Configure Your Inbox
Step 3: Set Up the Website Chat
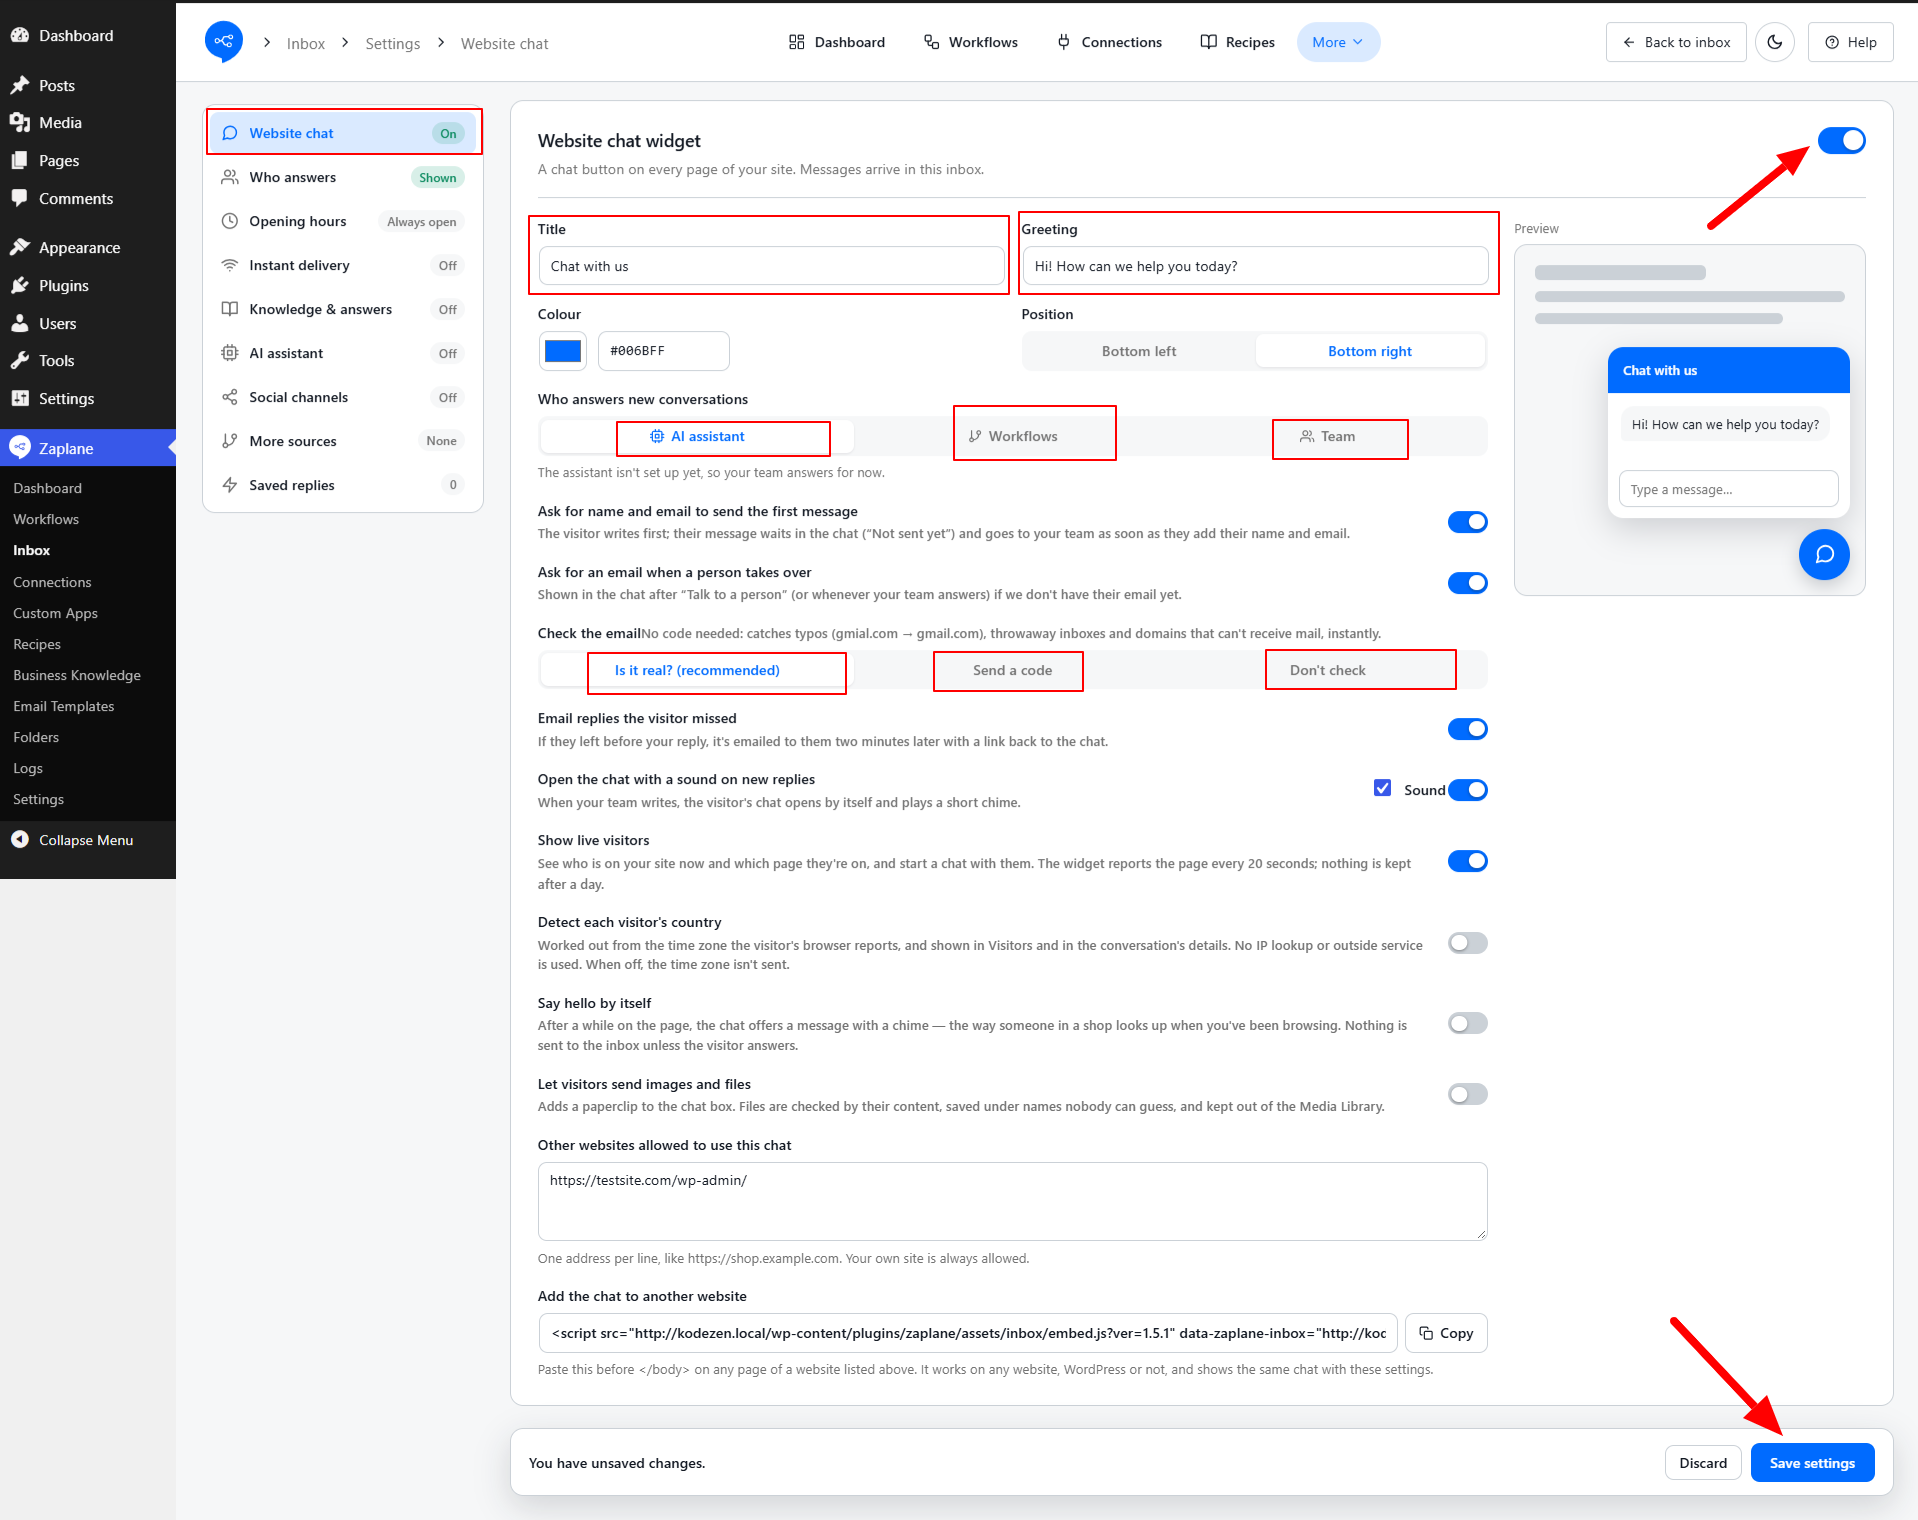
Select Website chat and turn the toggle on. Set the Title and Greeting your visitors will see, then choose Colour and Position. Under Who answers new conversations, pick AI assistant, Workflows, or Team, and choose how the visitor’s email is checked: Is it real? (recommended), Send a code, or Don’t check. Click Save settings when you are done.
Step 4: Choose Who Answers
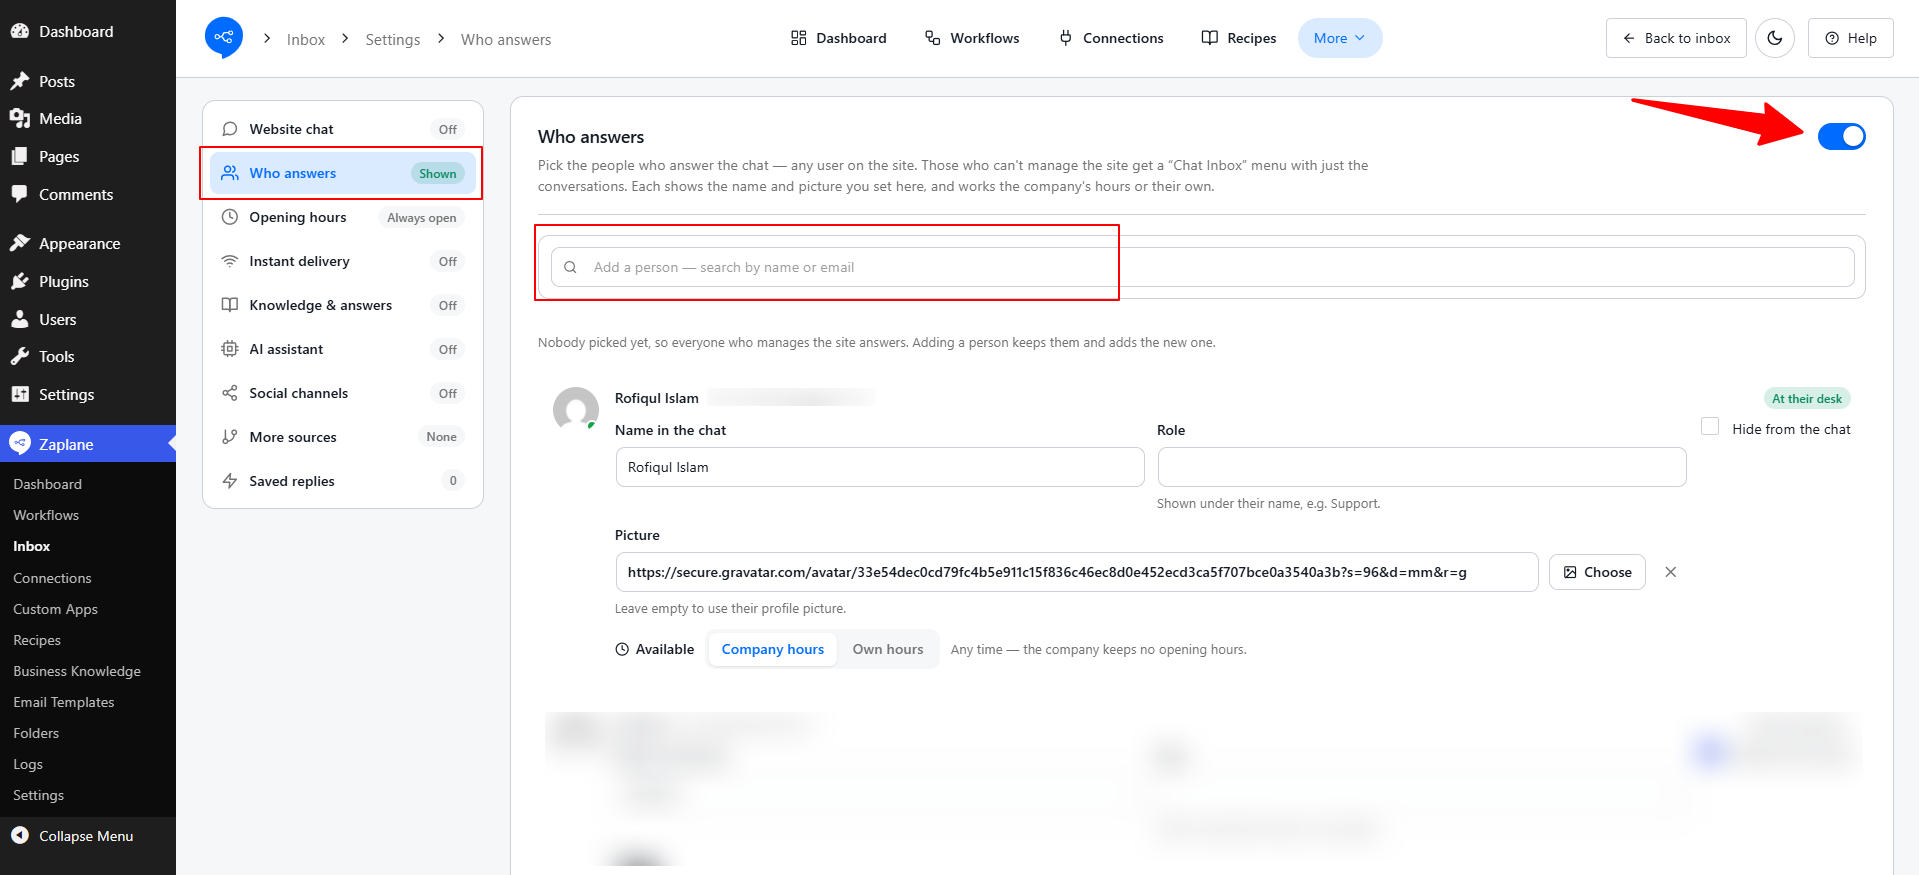
Select Who answers and turn the toggle on. Use Add a person to search by name or email, then set the Name in the chat, Role, and Picture for each person. Choose Company hours or Own hours for when they are available, then click Save settings.
Step 5: Set Your Opening Hours
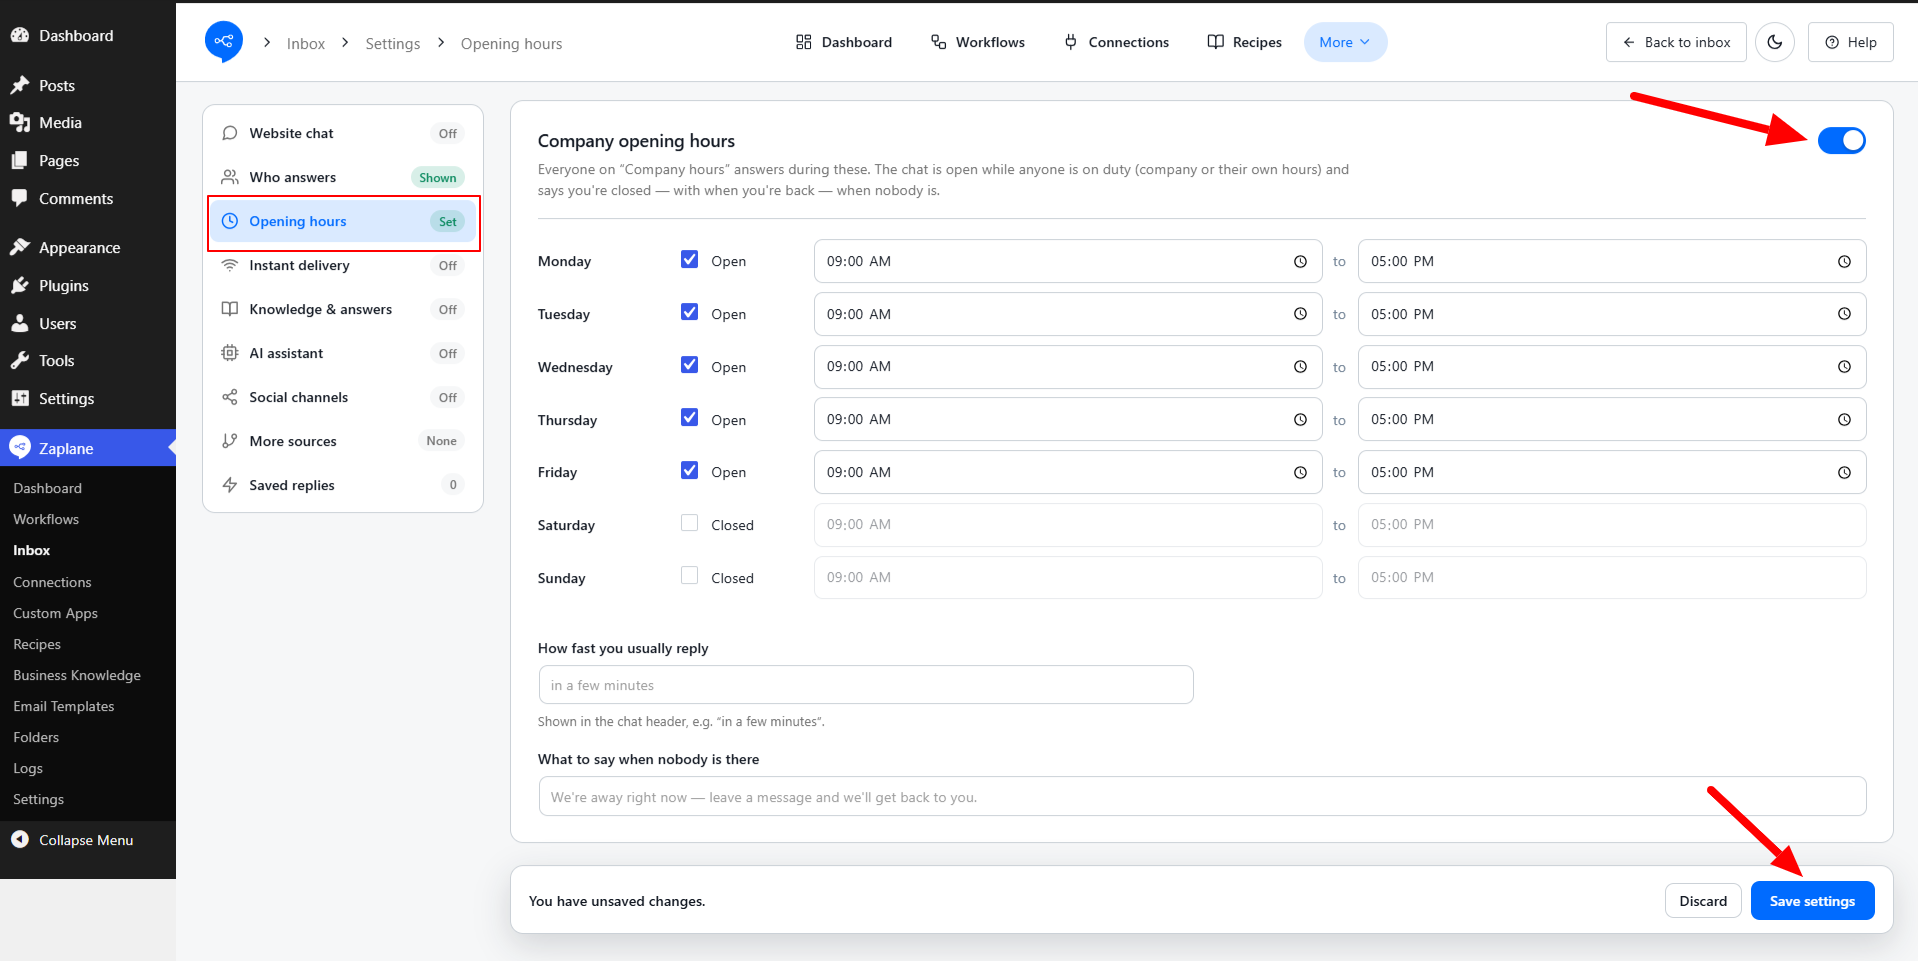
Select Opening hours and turn the toggle on. Tick Open for each day you answer and set the start and end times. Then fill in How fast you usually reply and What to say when nobody is there, and click Save settings.
Step 6: Turn On Knowledge & Answers
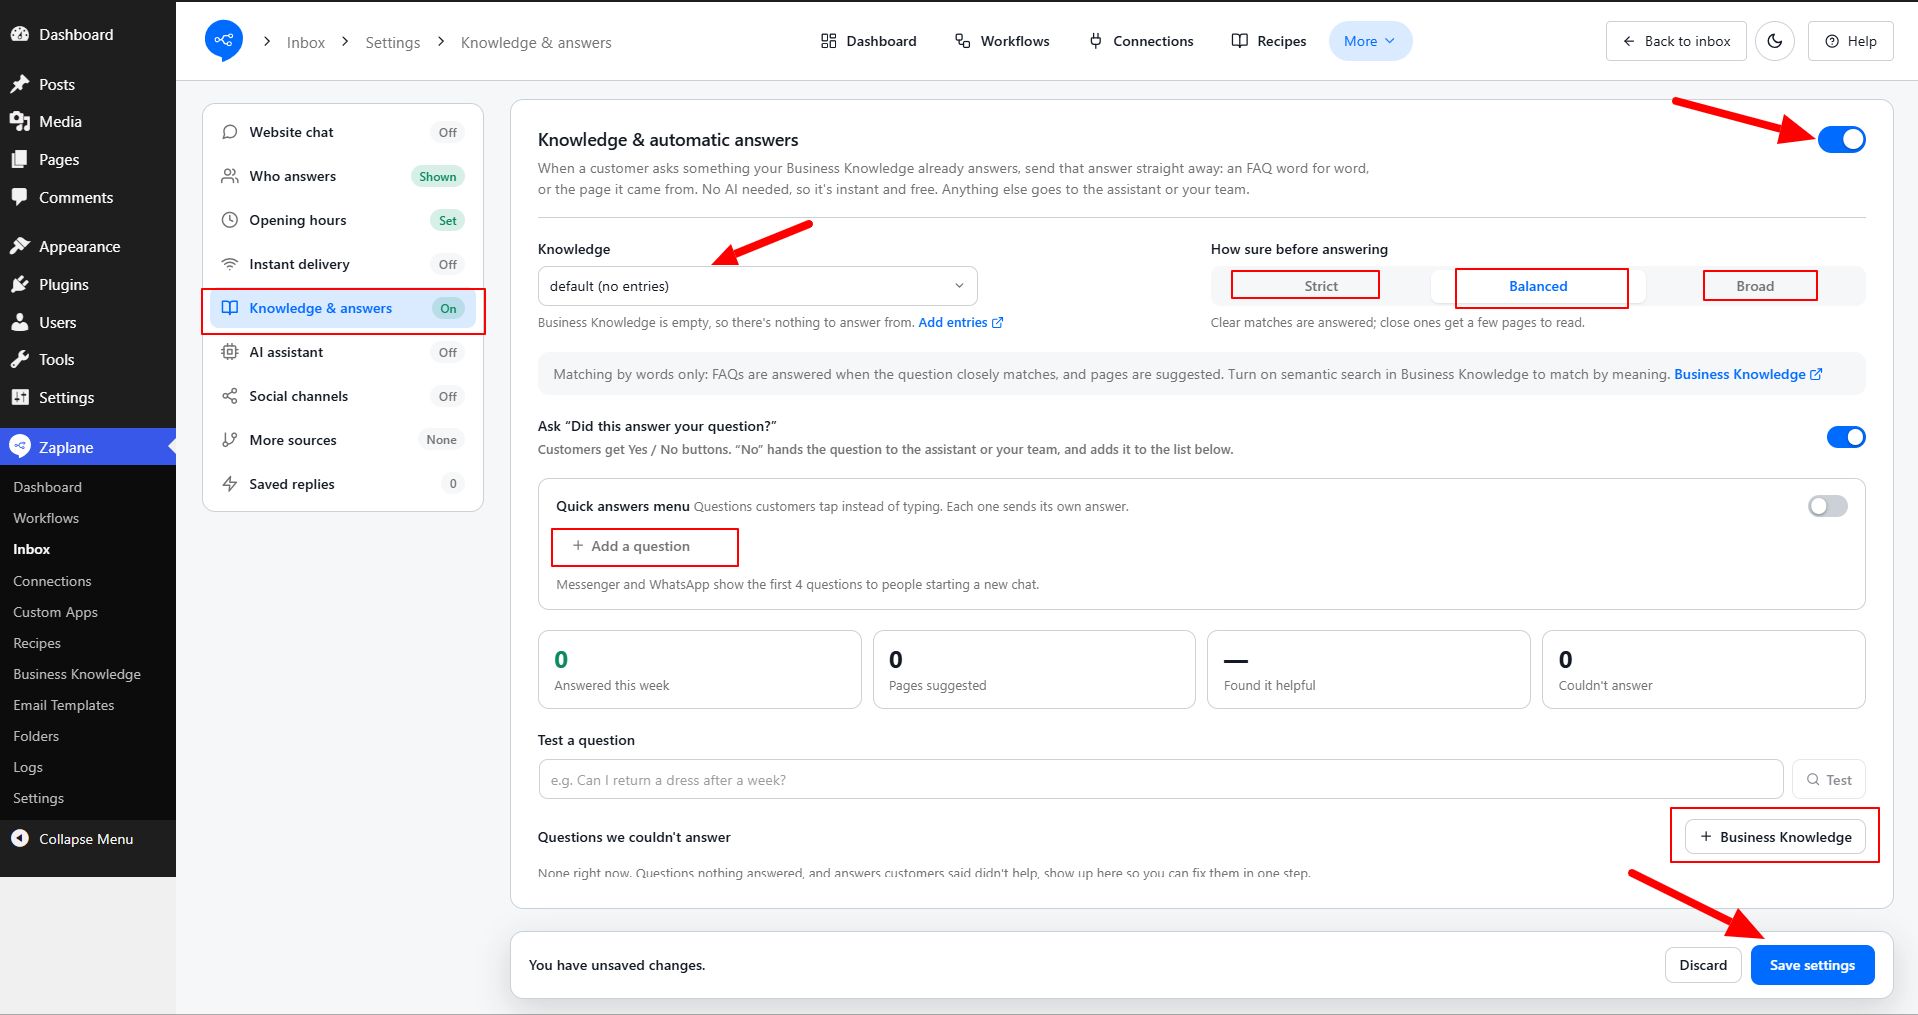
Select Knowledge & answers and turn the toggle on. Choose your Knowledge, then set How sure before answering to Strict, Balanced, or Broad. You can click Add a question to build a quick answers menu, use Test a question to try it out, and click Business Knowledge to add entries. Click Save settings when you are done.
Step 7: Set Up the AI Assistant
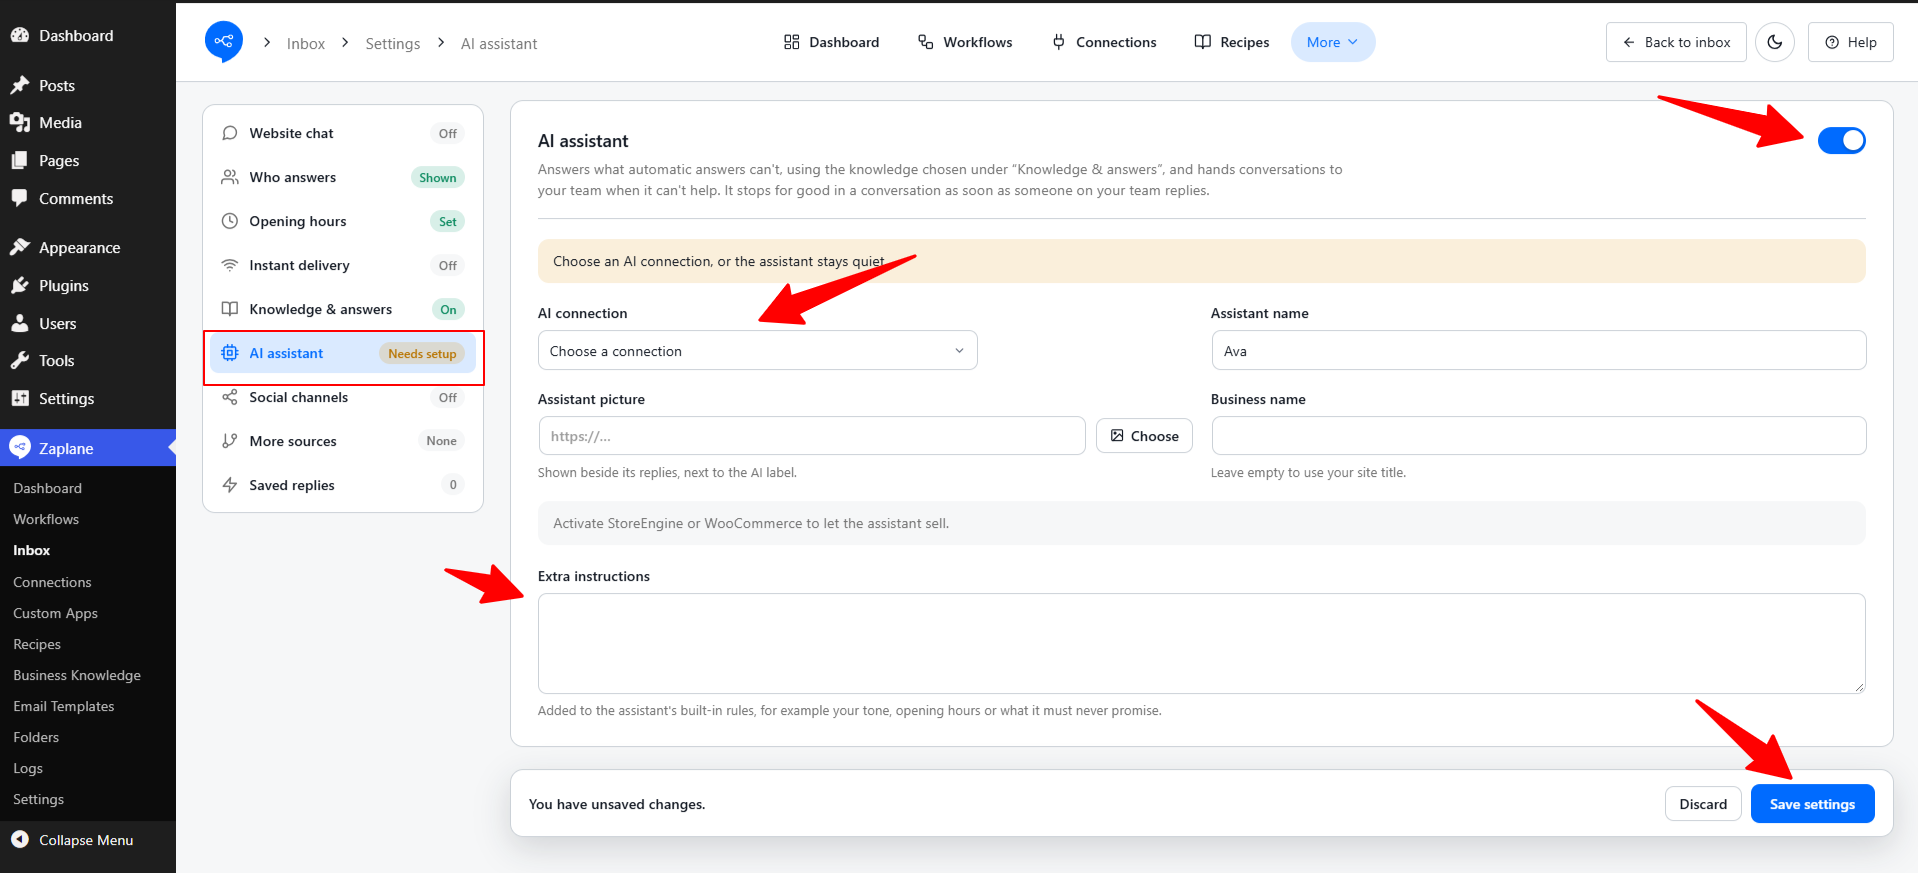
Select AI assistant and turn the toggle on. Choose an AI connection (the assistant stays quiet until you do), then set the Assistant name, Assistant picture, and Business name. Use Extra instructions to add your own rules, such as your tone or what it must never promise, then click Save settings.
Step 8: Connect Social Channels
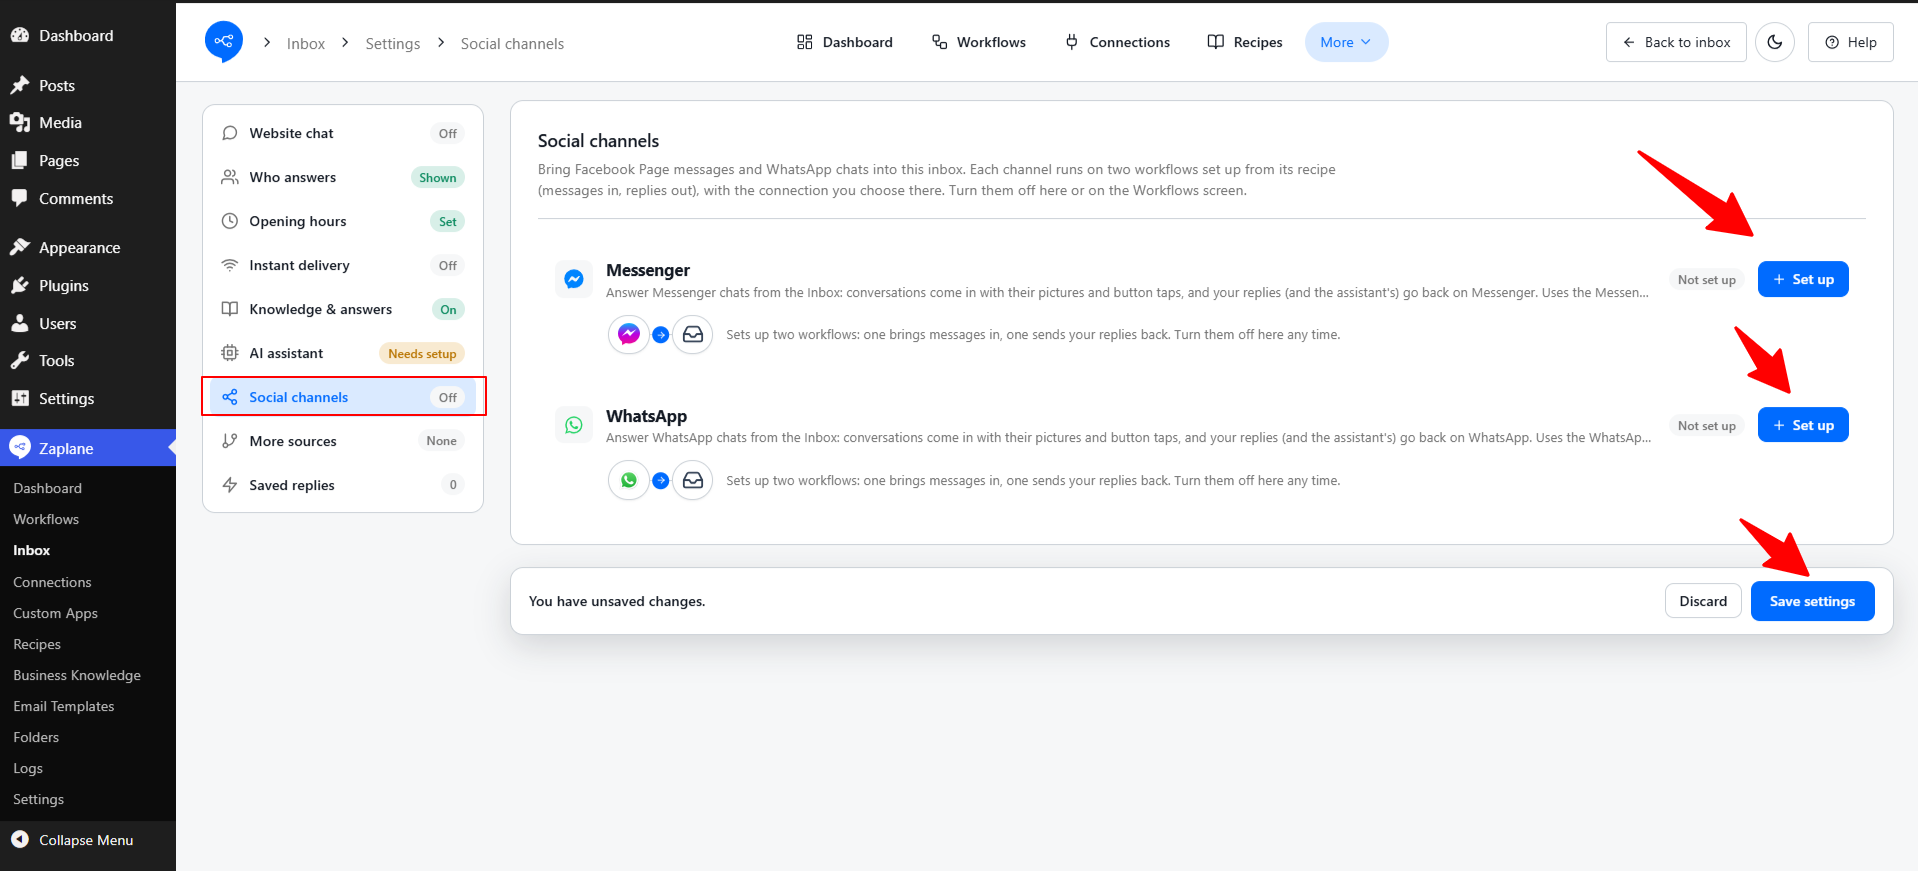
Select Social channels, then click Set up next to Messenger or WhatsApp to bring those chats into your Inbox. Each channel sets up two workflows, one for messages coming in and one for replies going out. Click Save settings when you are done.
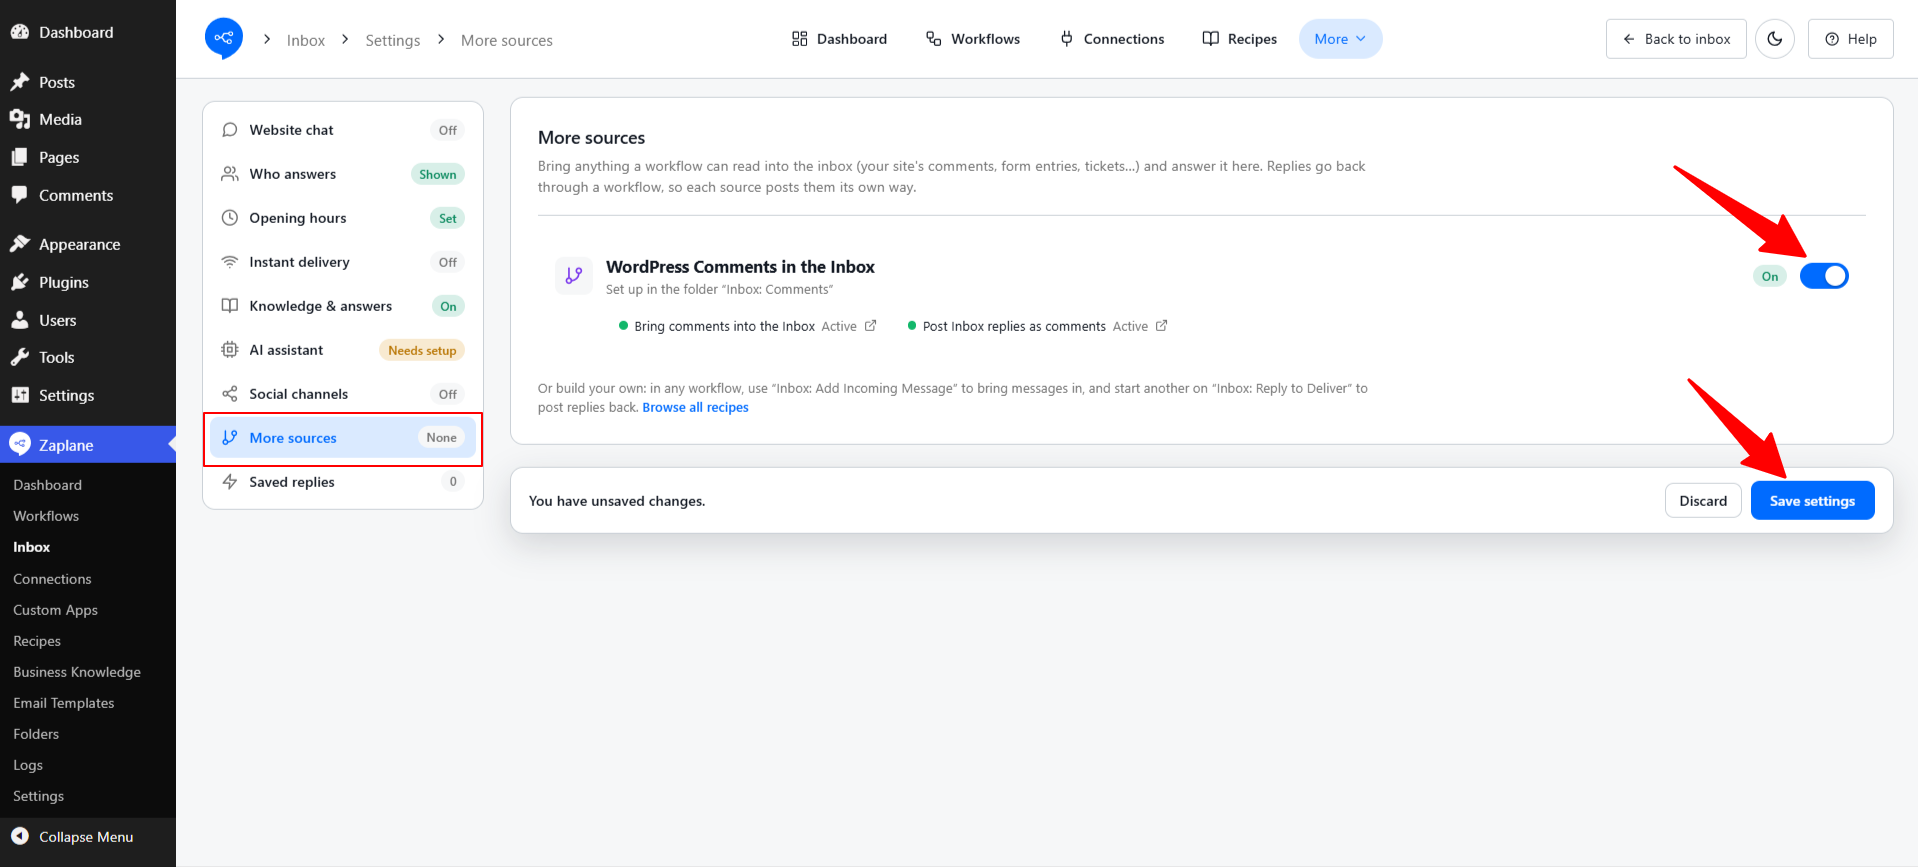
Step 9: Add More Sources
Select More sources and turn on WordPress Comments in the Inbox to read and answer your site’s comments from the Inbox. Click Save settings.
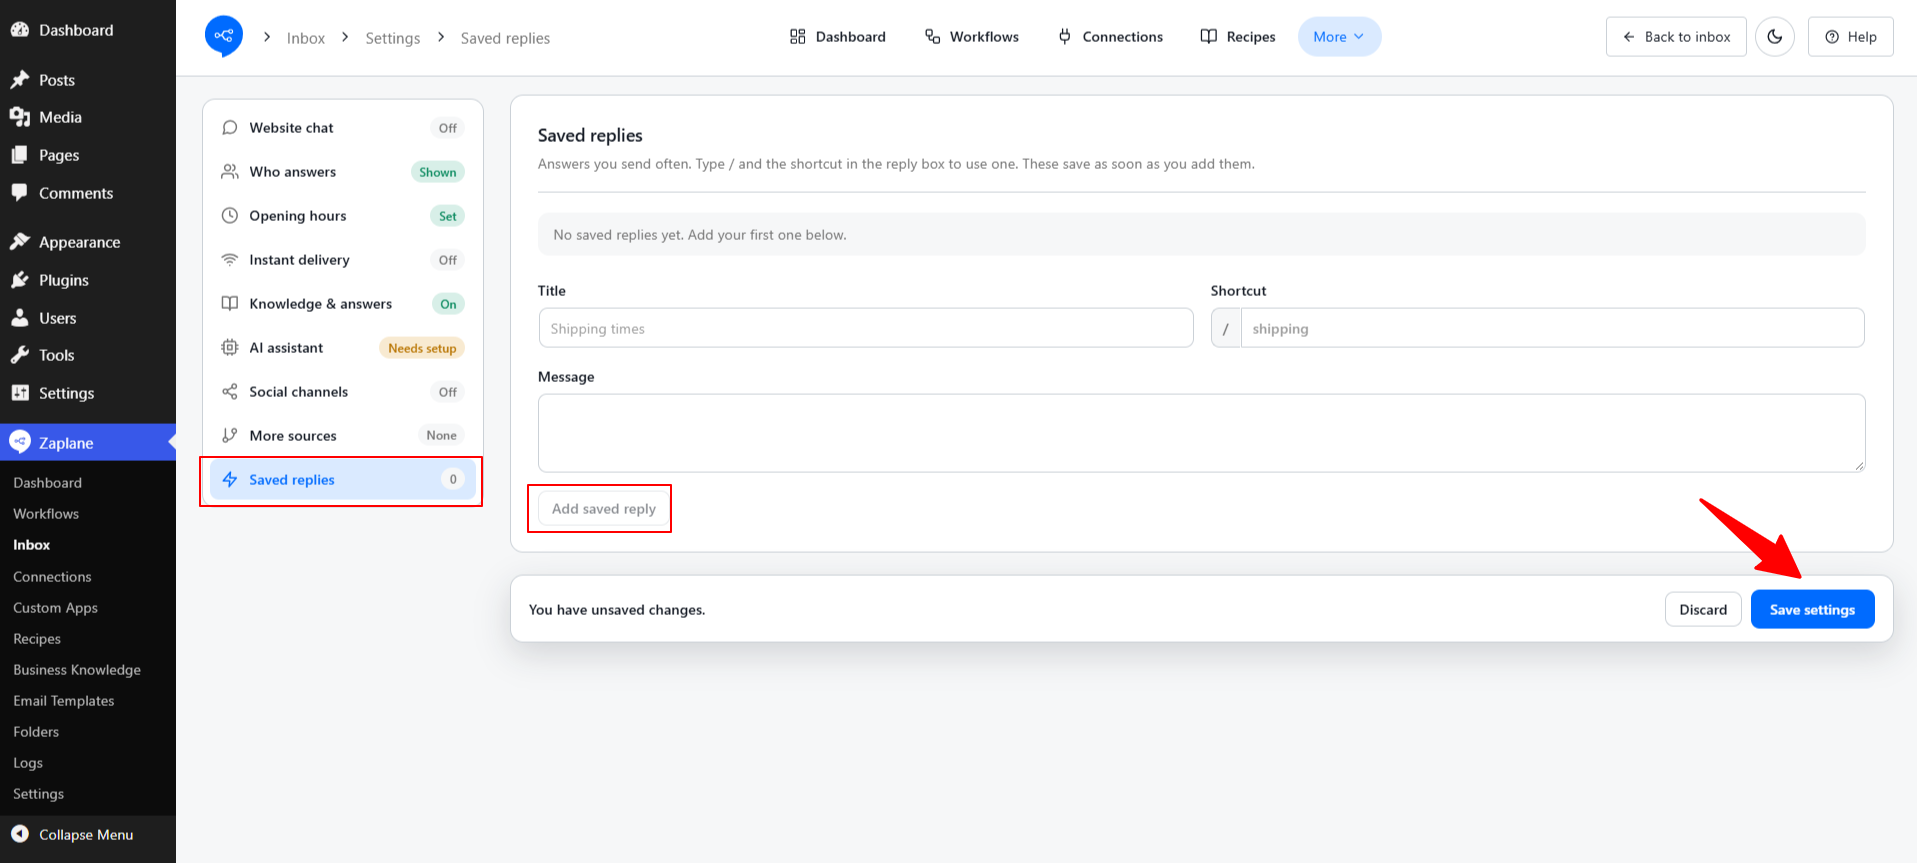
Step 10: Create Saved Replies
Select Saved replies. Enter a Title, a Shortcut, and your Message, then click Add saved reply and Save settings. To use one, type / followed by the shortcut in the reply box.
Part 3: Add the Chat to Another Website
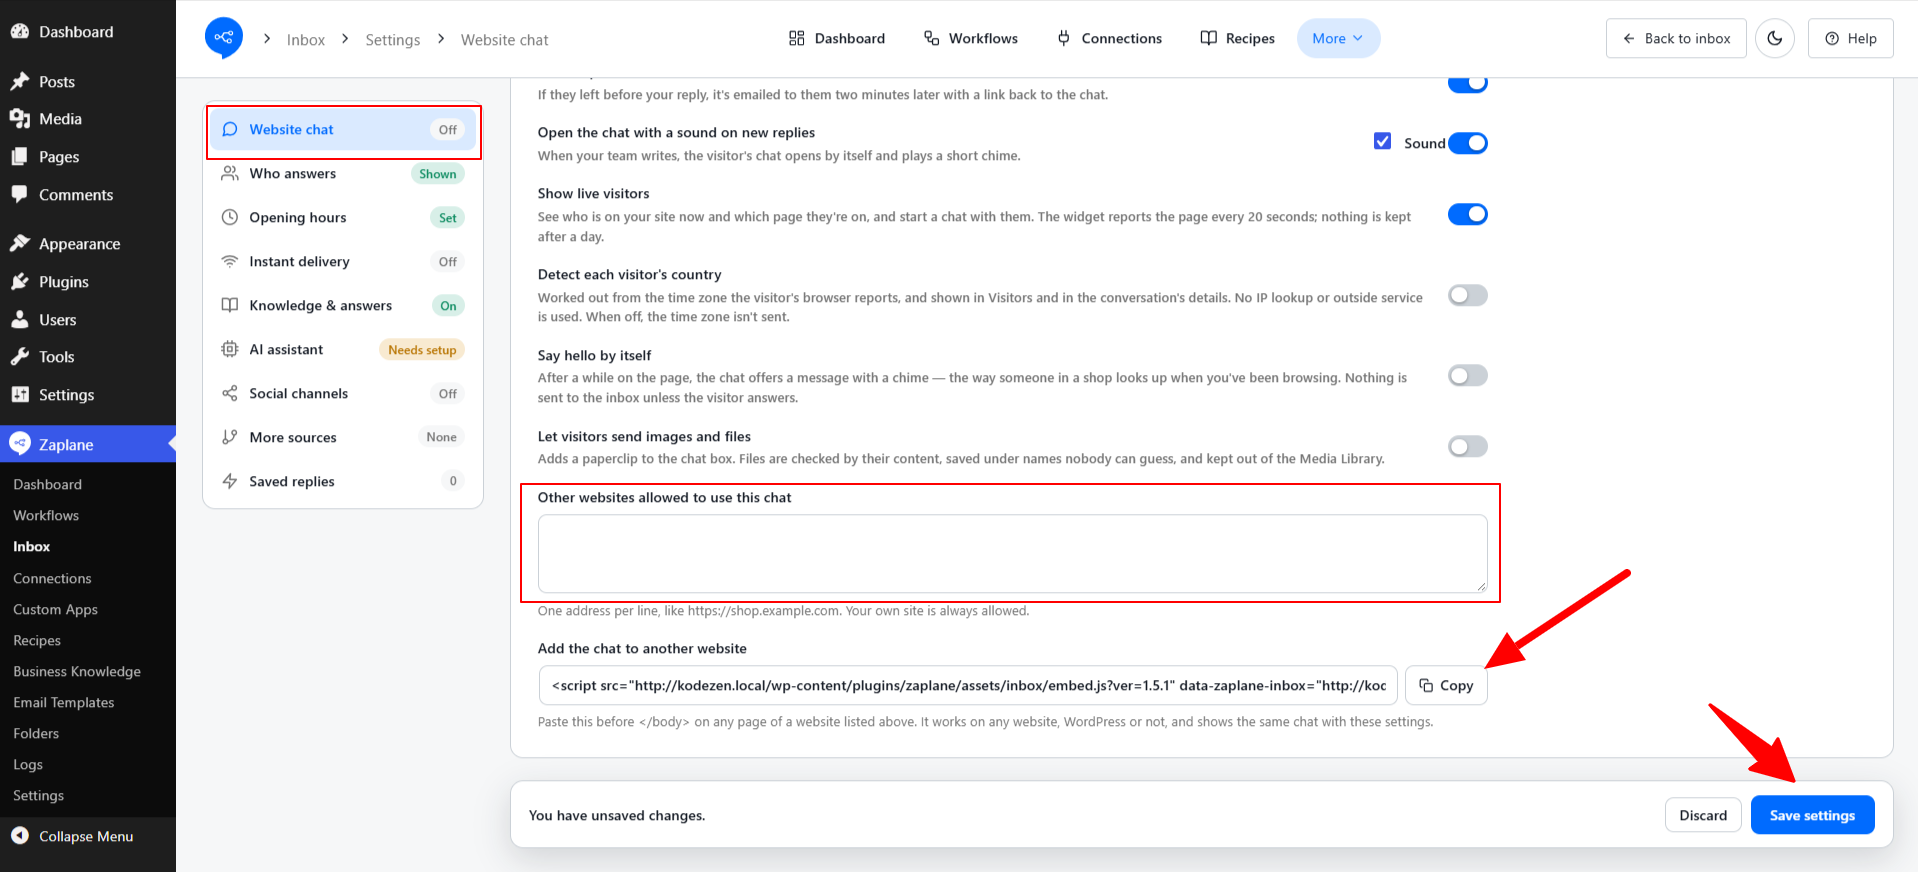
Step 11: Copy the Chat Script
Go back to Website chat. Under Other websites allowed to use this chat, add the other site’s address, one address per line. Then click Copy next to Add the chat to another website and click Save settings.
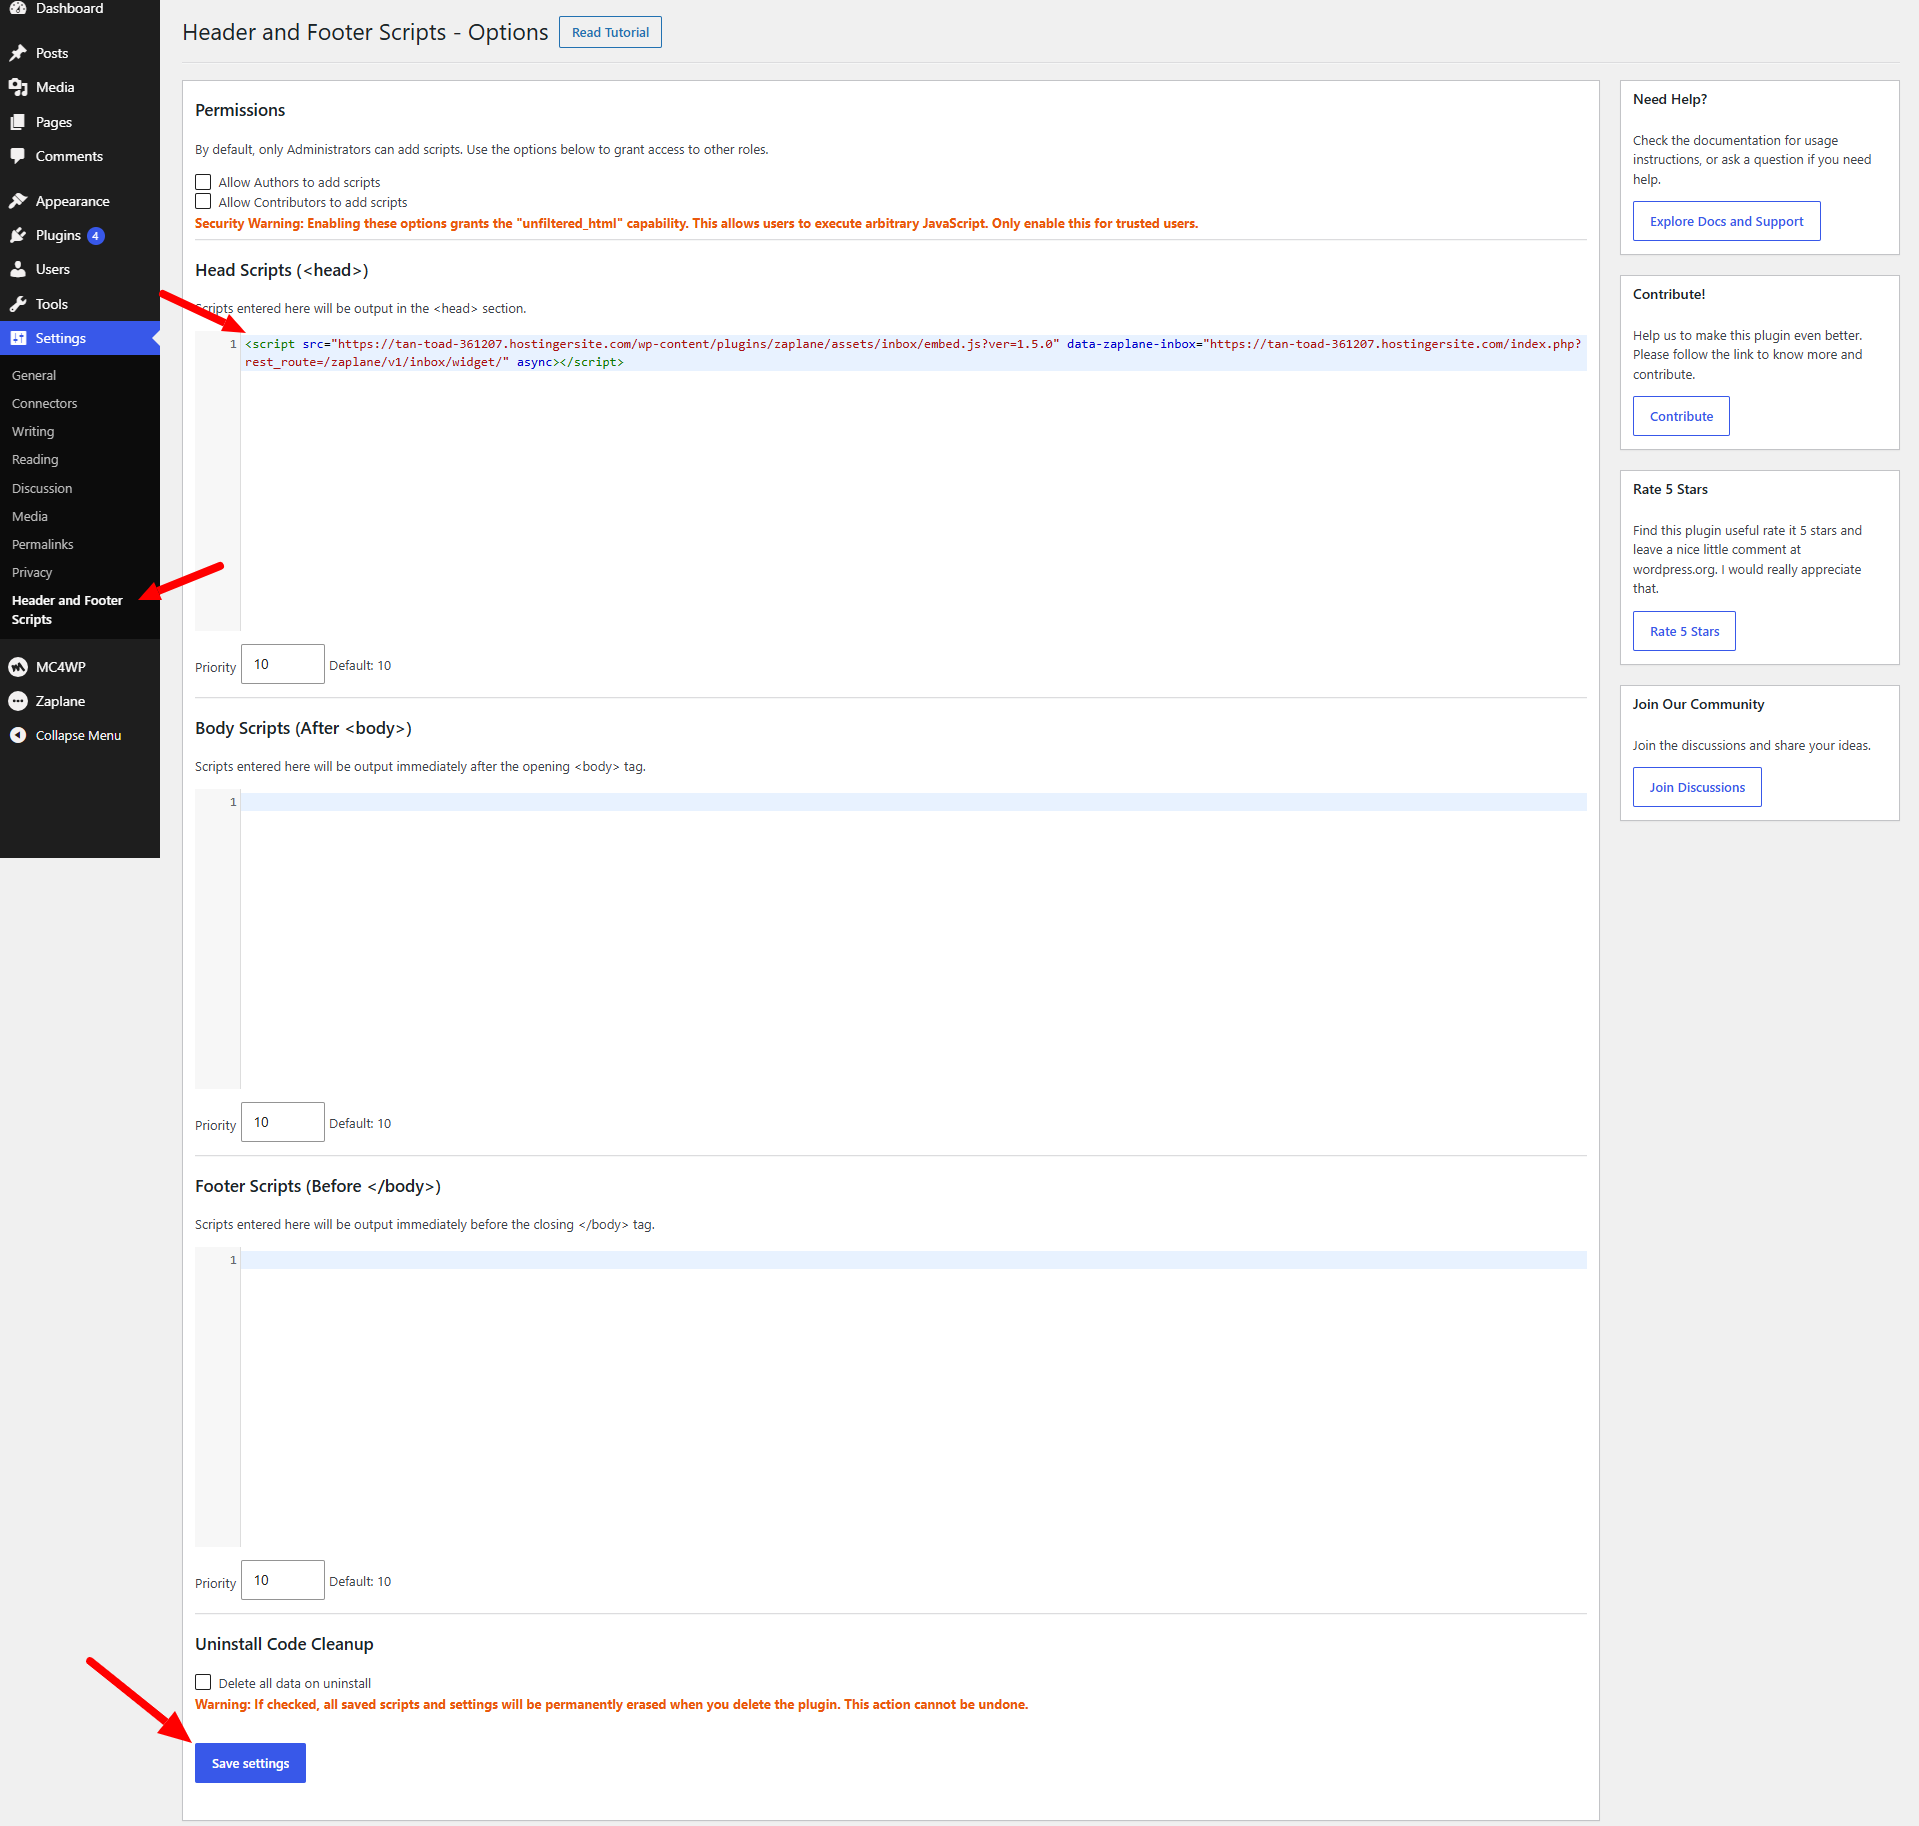
Step 12: Paste the Script on the Other Website
On the other website, paste the script so it loads on every page. For example, with the Header and Footer Scripts plugin, go to Settings > Header and Footer Scripts, paste the script into Head Scripts, and click Save settings.
Done!
Your Inbox is set up. Messages from your website chat and connected channels now arrive in one place, ready for you to answer.