

This guide shows you how to connect Google Docs to Zaplane and use the Create Document Tabs trigger, so your workflow starts automatically whenever a new tab is created in a Google Doc you choose. You will need a Google account and a Google Cloud project to get started.
Part 1: Get Your Google OAuth Client ID and Secret
Step 1: Create a Google Cloud Project
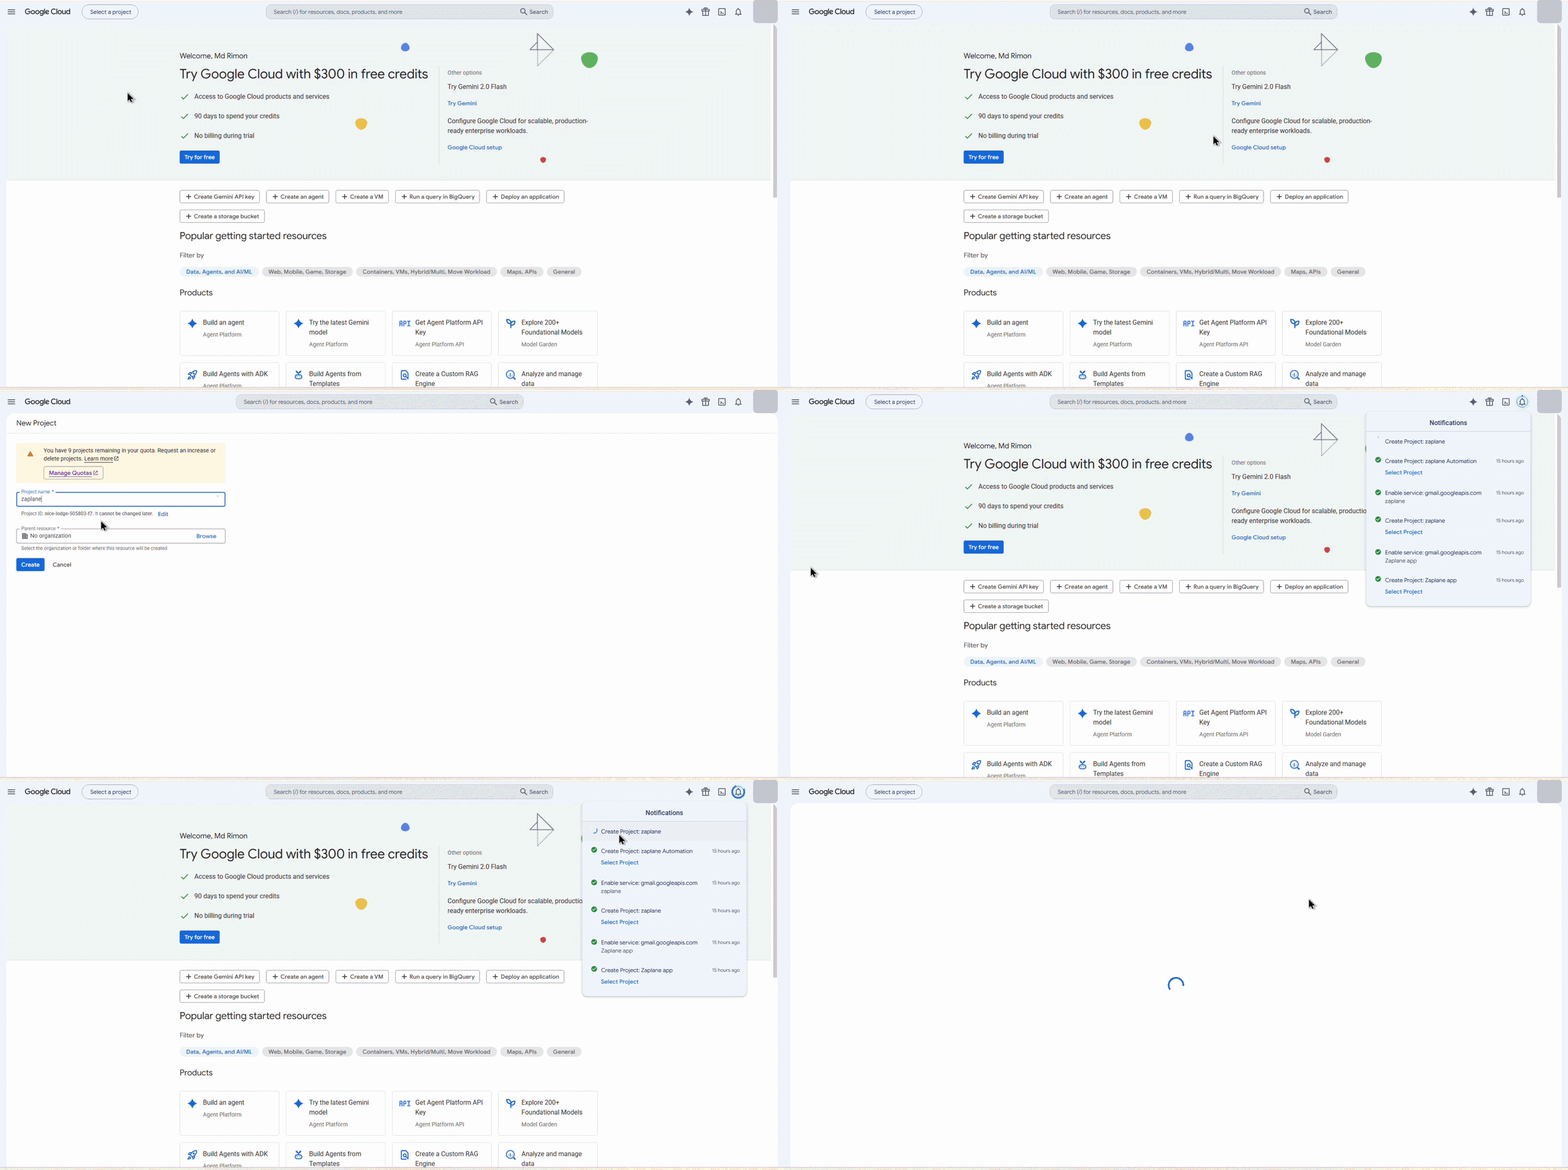
Step 2: Start Creating an OAuth Client ID
Step 3: Complete the OAuth Consent Screen Setup
Step 4: Publish the App to Production
Step 5: Create the OAuth Client ID
Step 6: Copy Your Client ID and Client Secret
https://drive.google.com/file/d/1drcxhXFY9k0jTT6_VuQvR9EYx5Kuf8Tk/view?usp=sharing
Part 2: Create the Connection in Zaplane
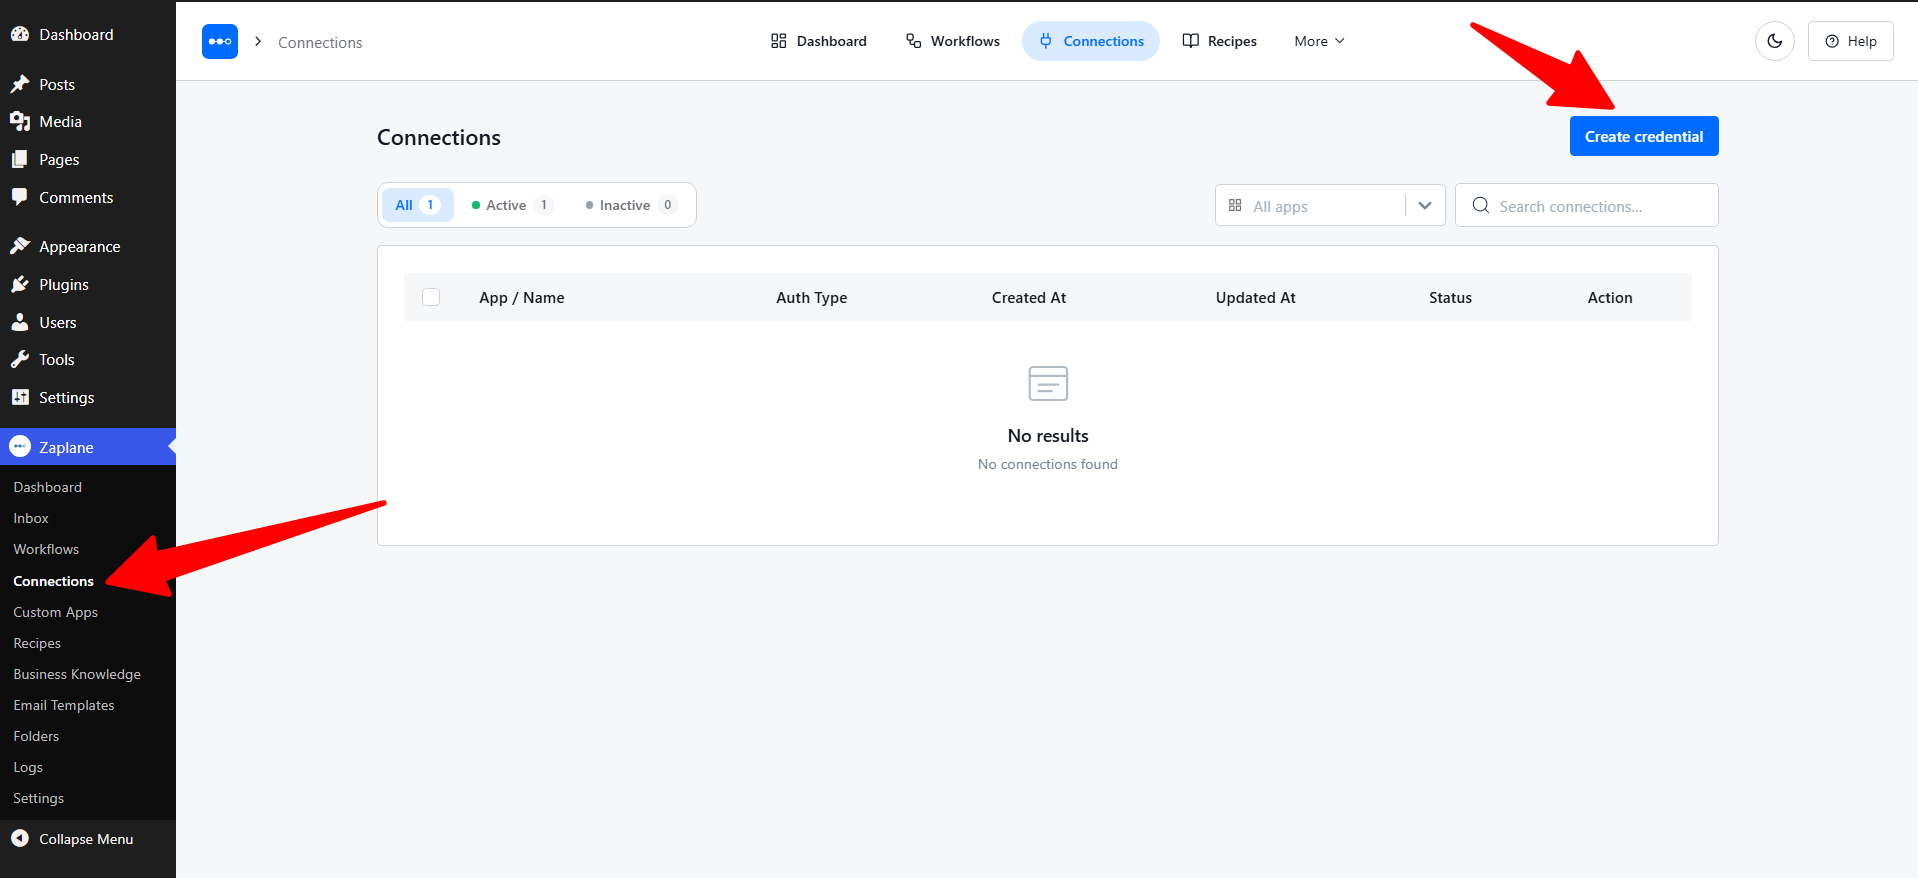
Step 2: Open Connections
From your WordPress dashboard, go to Zaplane > Connections, then click Create credential.
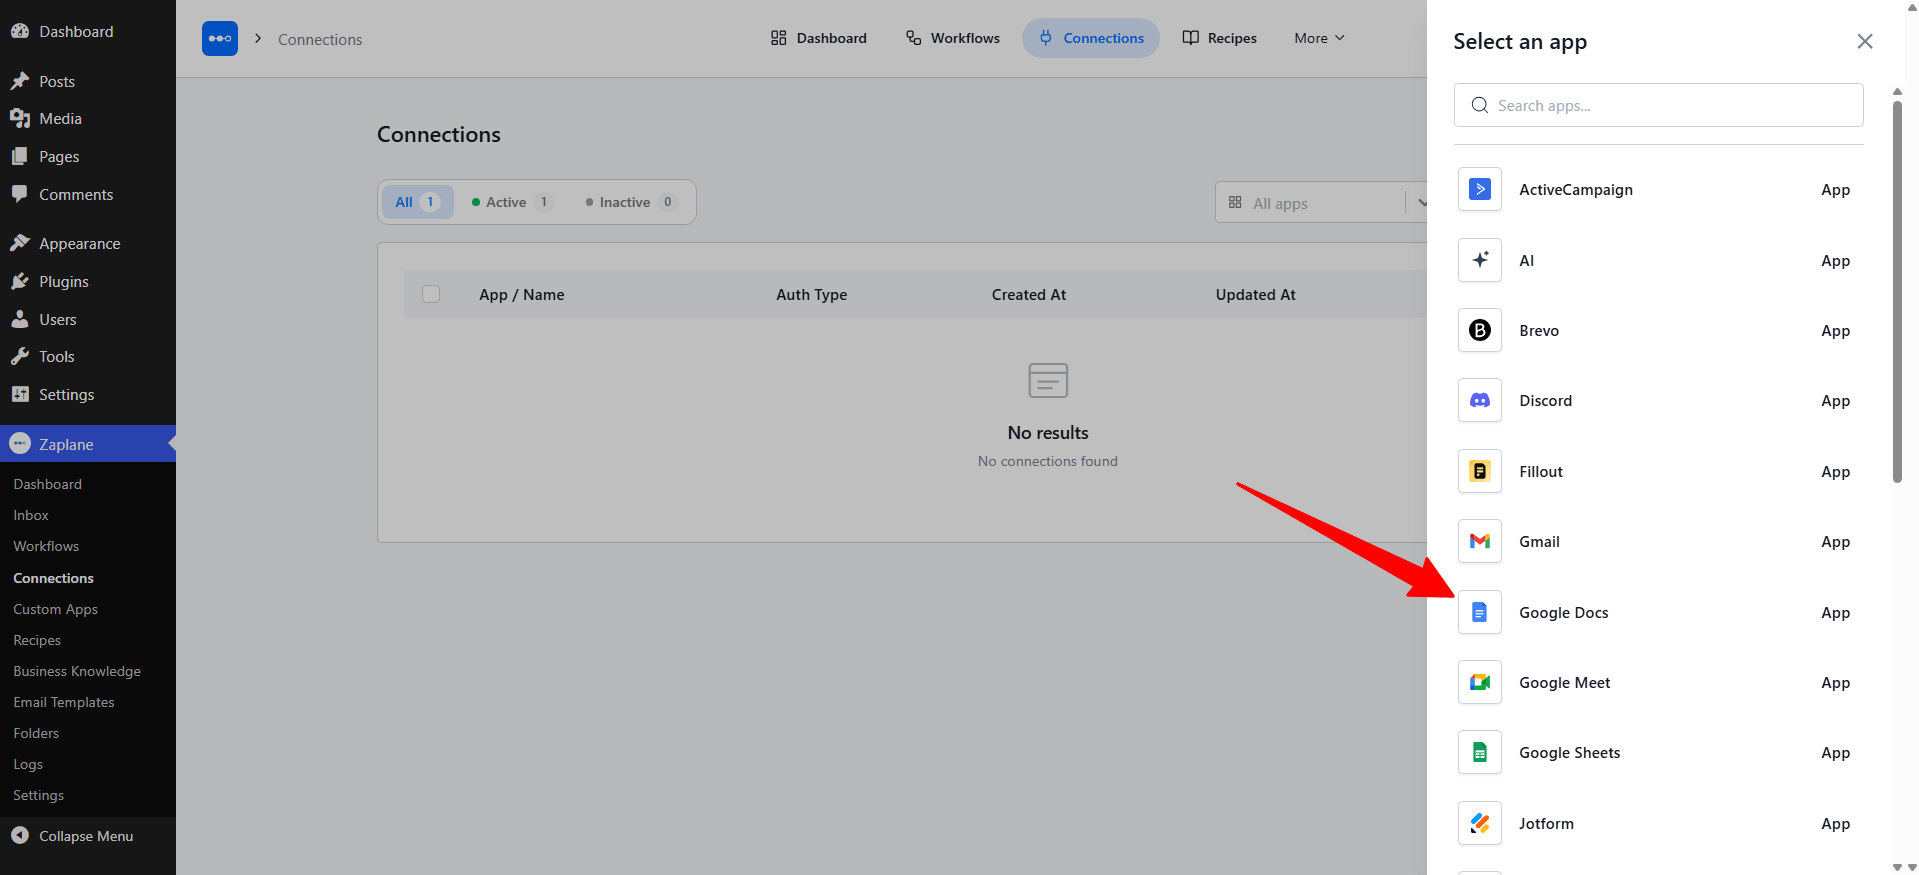
Step 3: Select Google Docs
In the Select an app panel, find and select Google Docs.
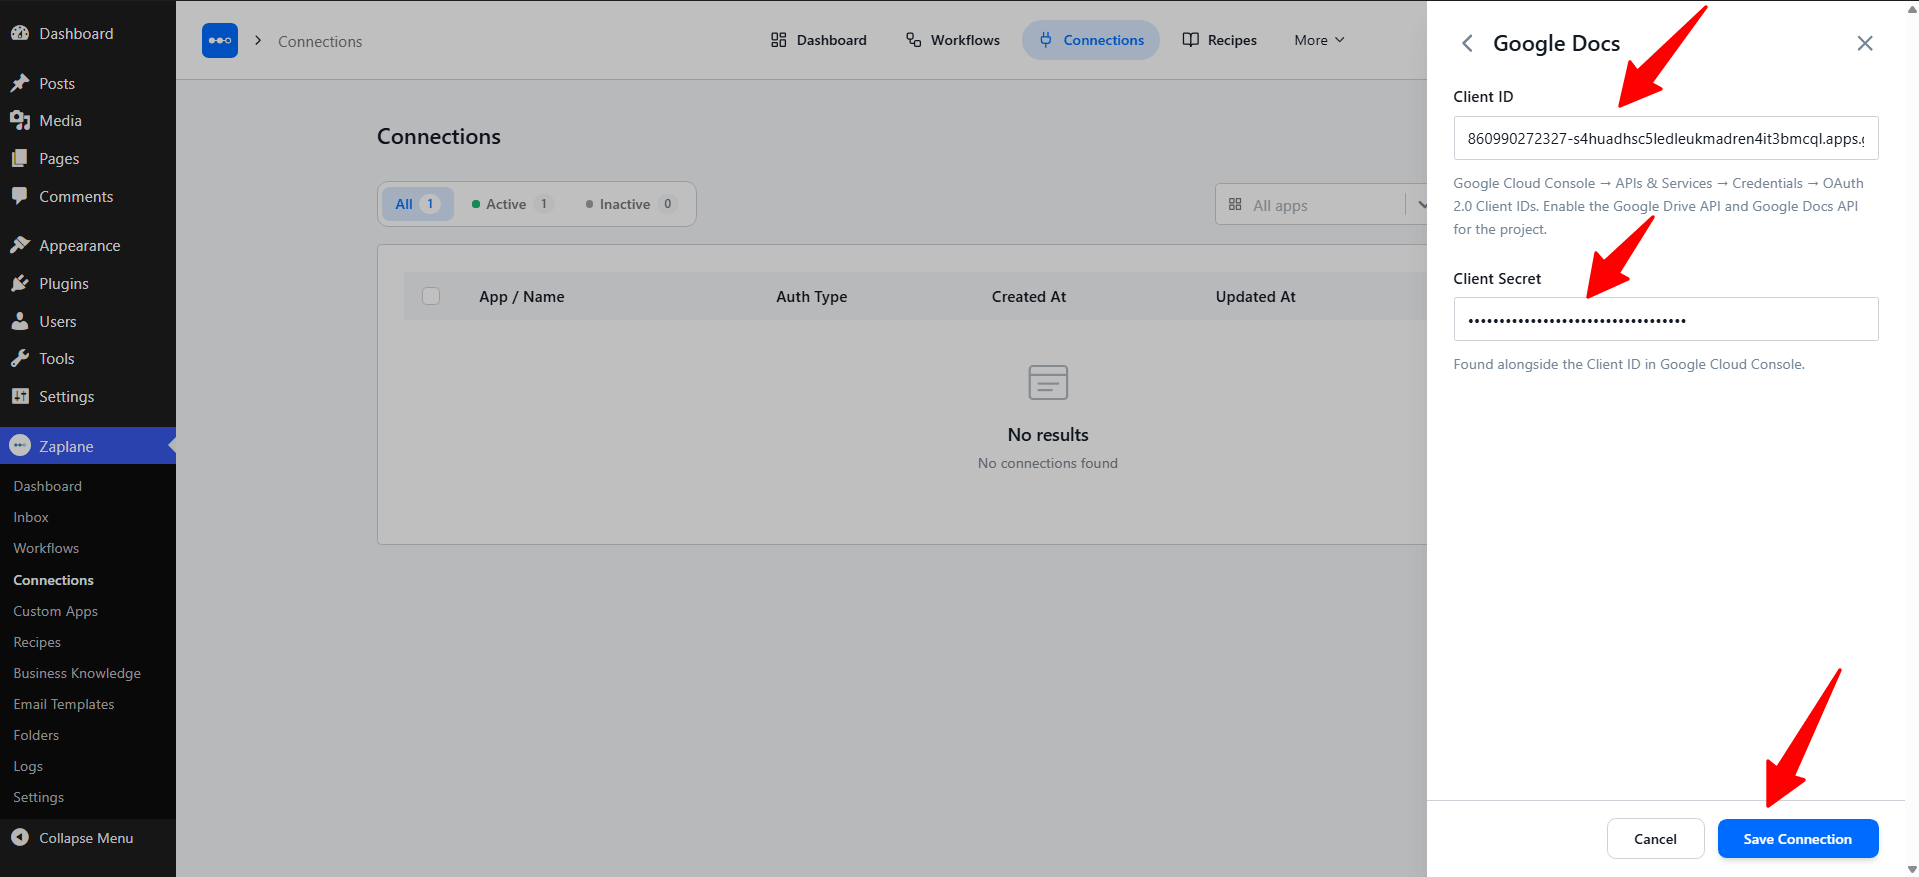
Step 4: Enter Your Client ID and Client Secret
Paste your Client ID and Client Secret into their fields, then click Save Connection.
Part 3: Add the Trigger to Your Workflow
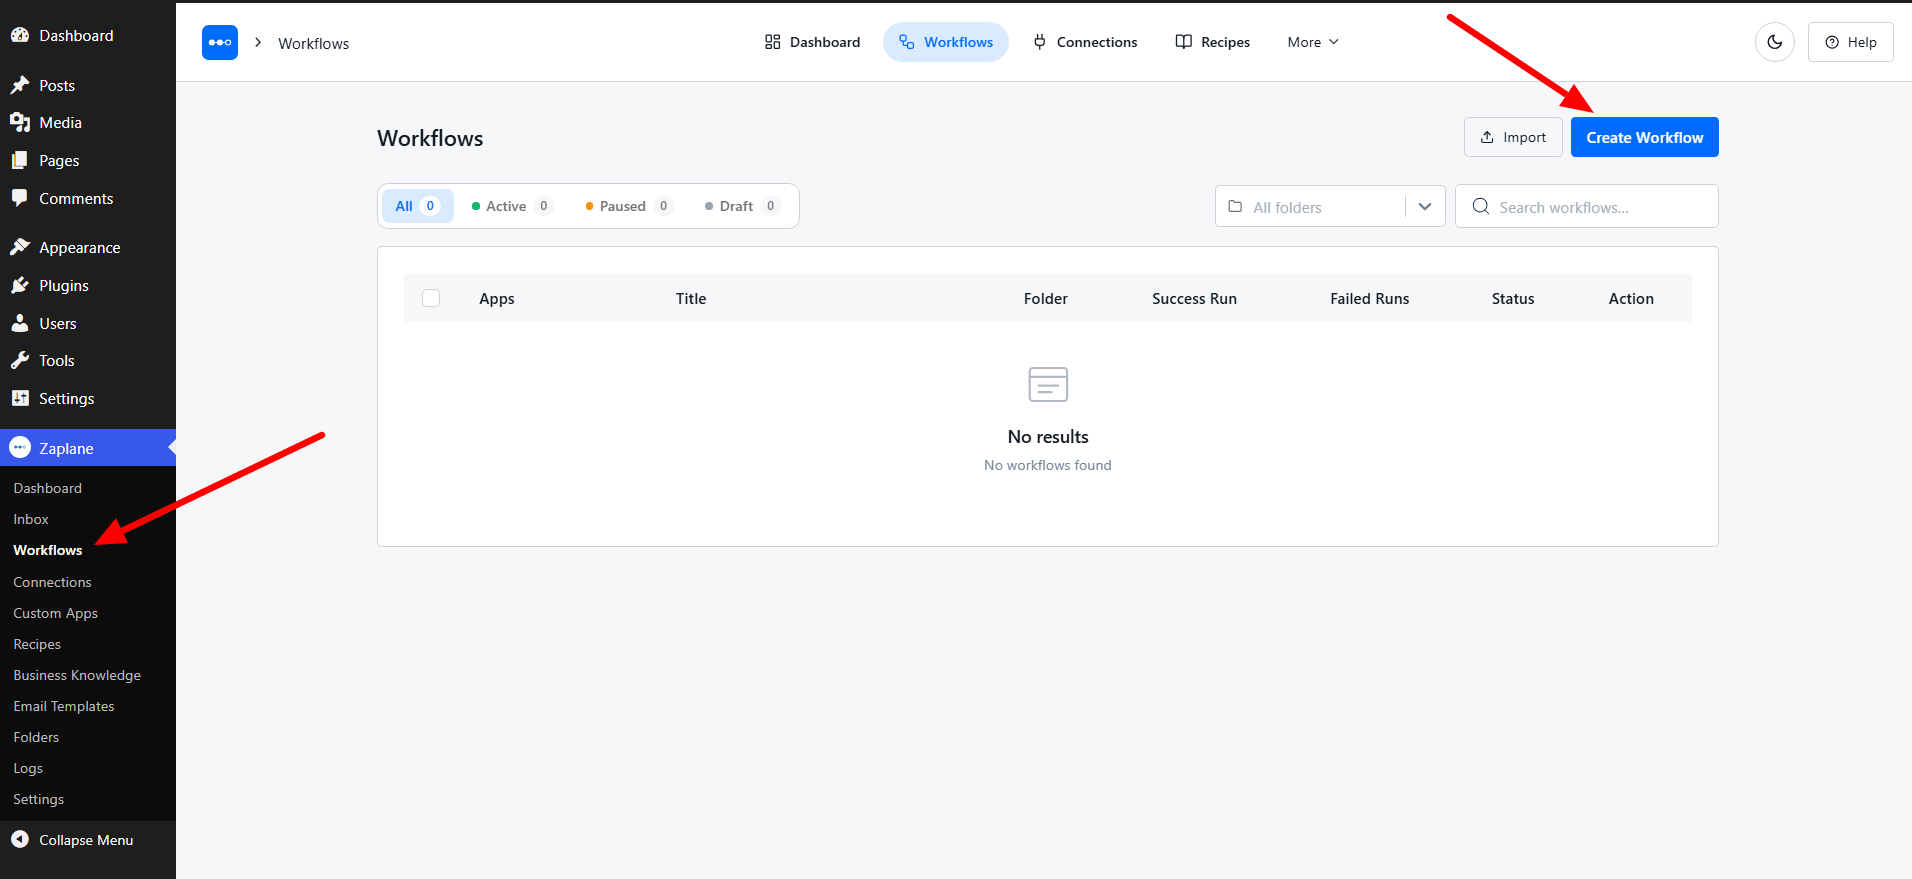
Step 5: Create a Workflow
Go to Zaplane > Workflows from your WordPress dashboard, then click Create Workflow to open the workflow editor.
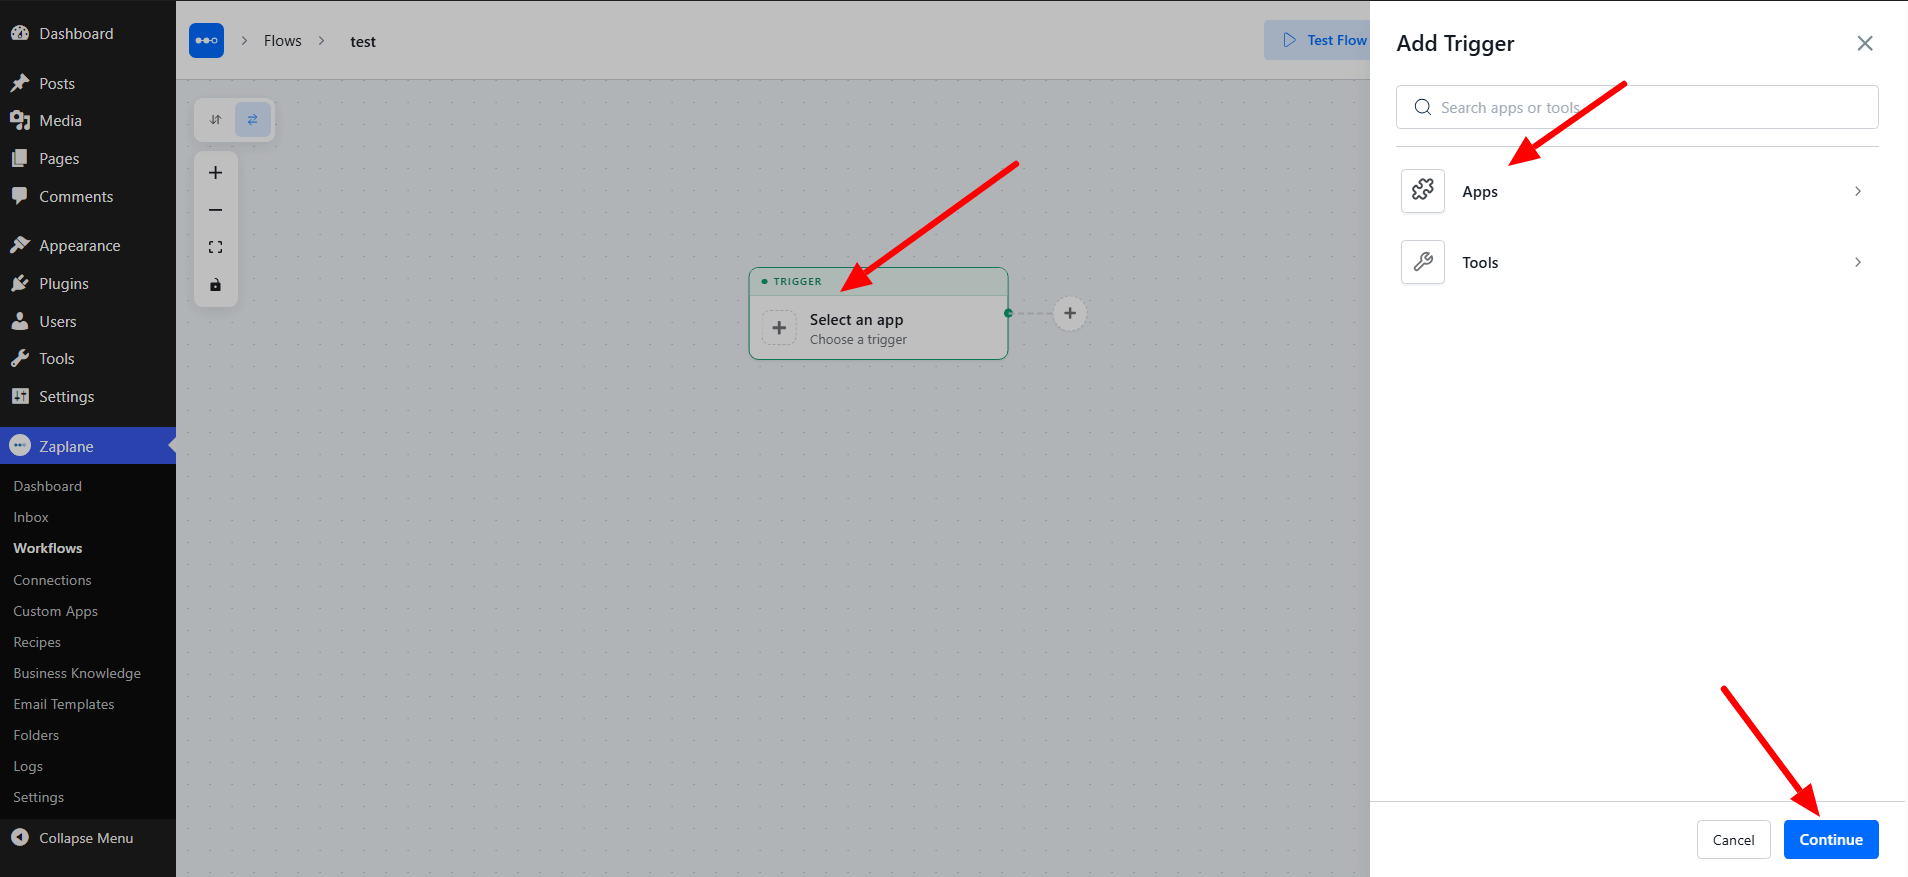
Step 6: Add the Trigger
Click Select an app in the Trigger box. In the Add Trigger panel, choose Apps.
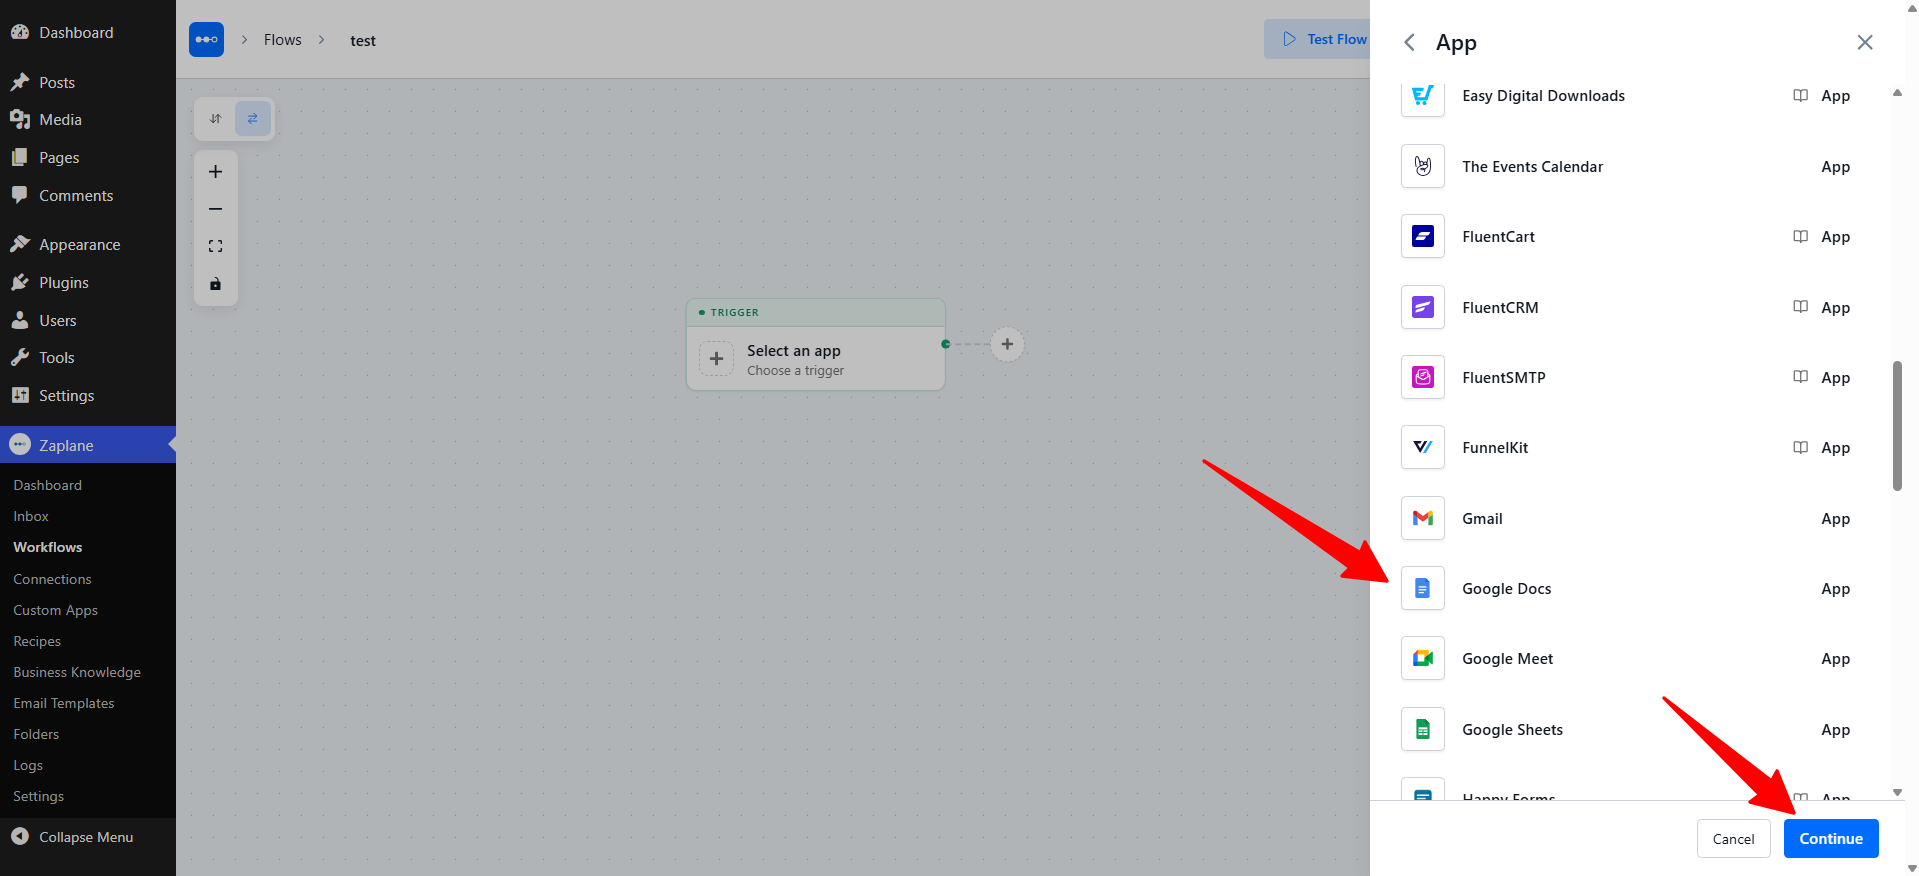
Step 7: Select the Google Docs App
Scroll through the app list, select Google Docs, then click Continue.
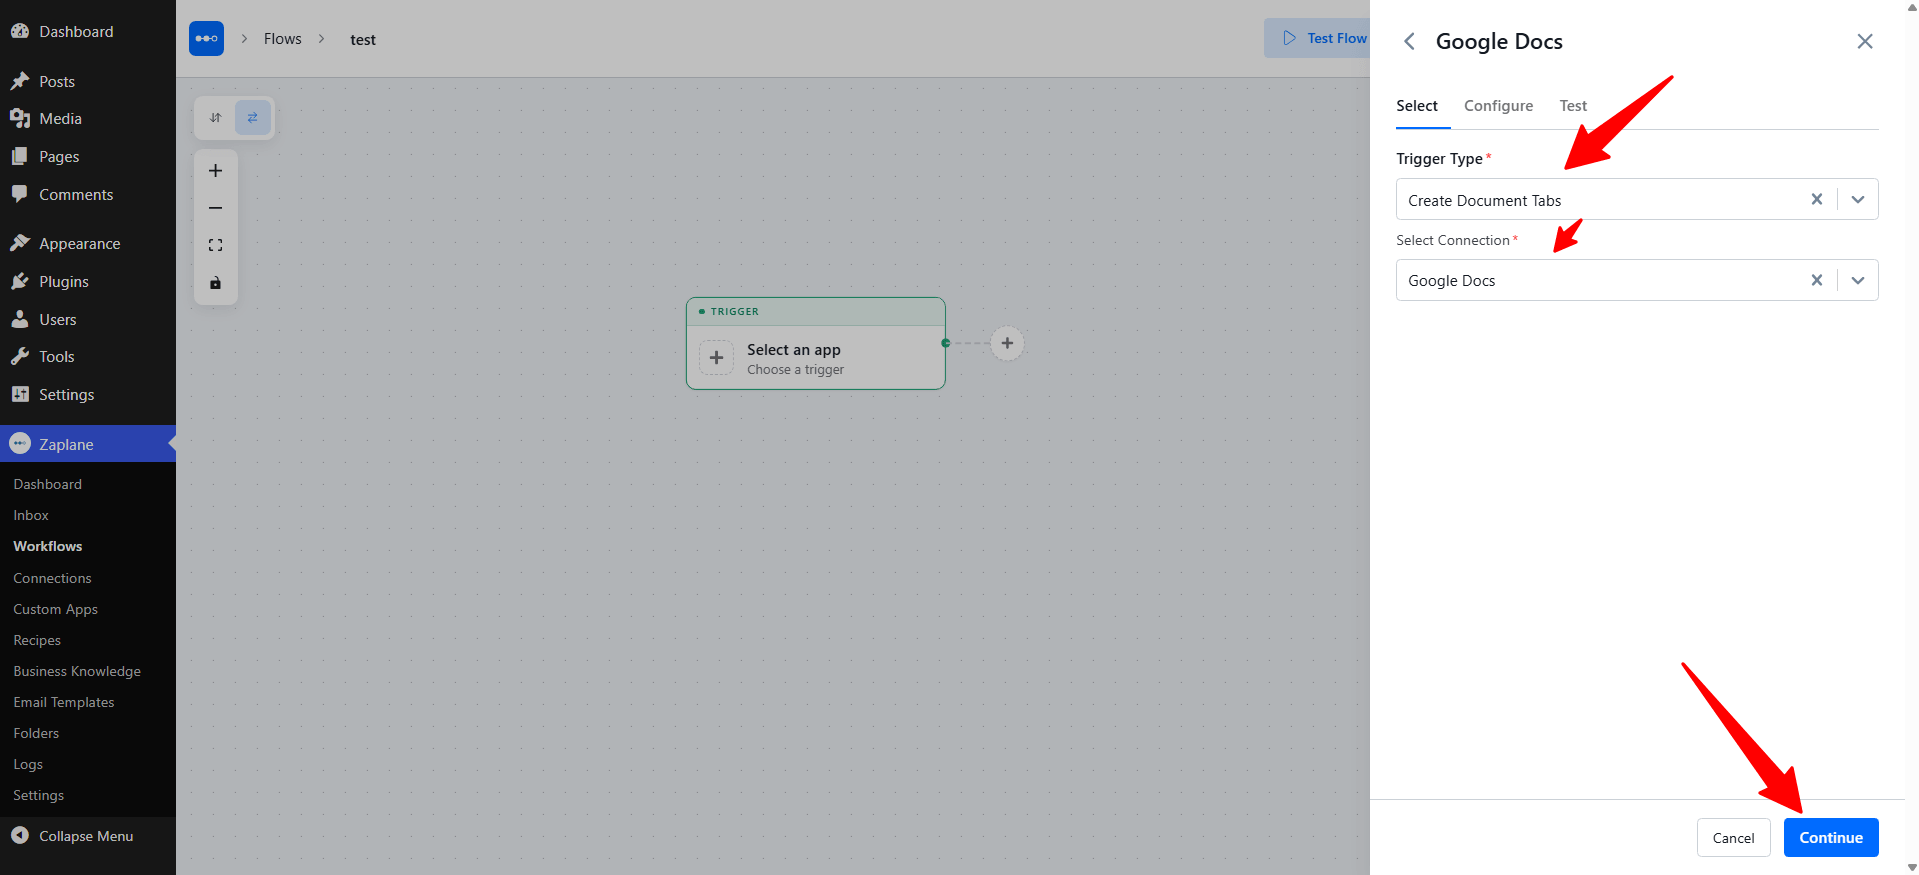
Step 8: Choose the Trigger Type
On the Select tab, choose Create Document Tabs from the Trigger Type dropdown. Then pick the connection you just created from the Select Connection dropdown and click Continue.
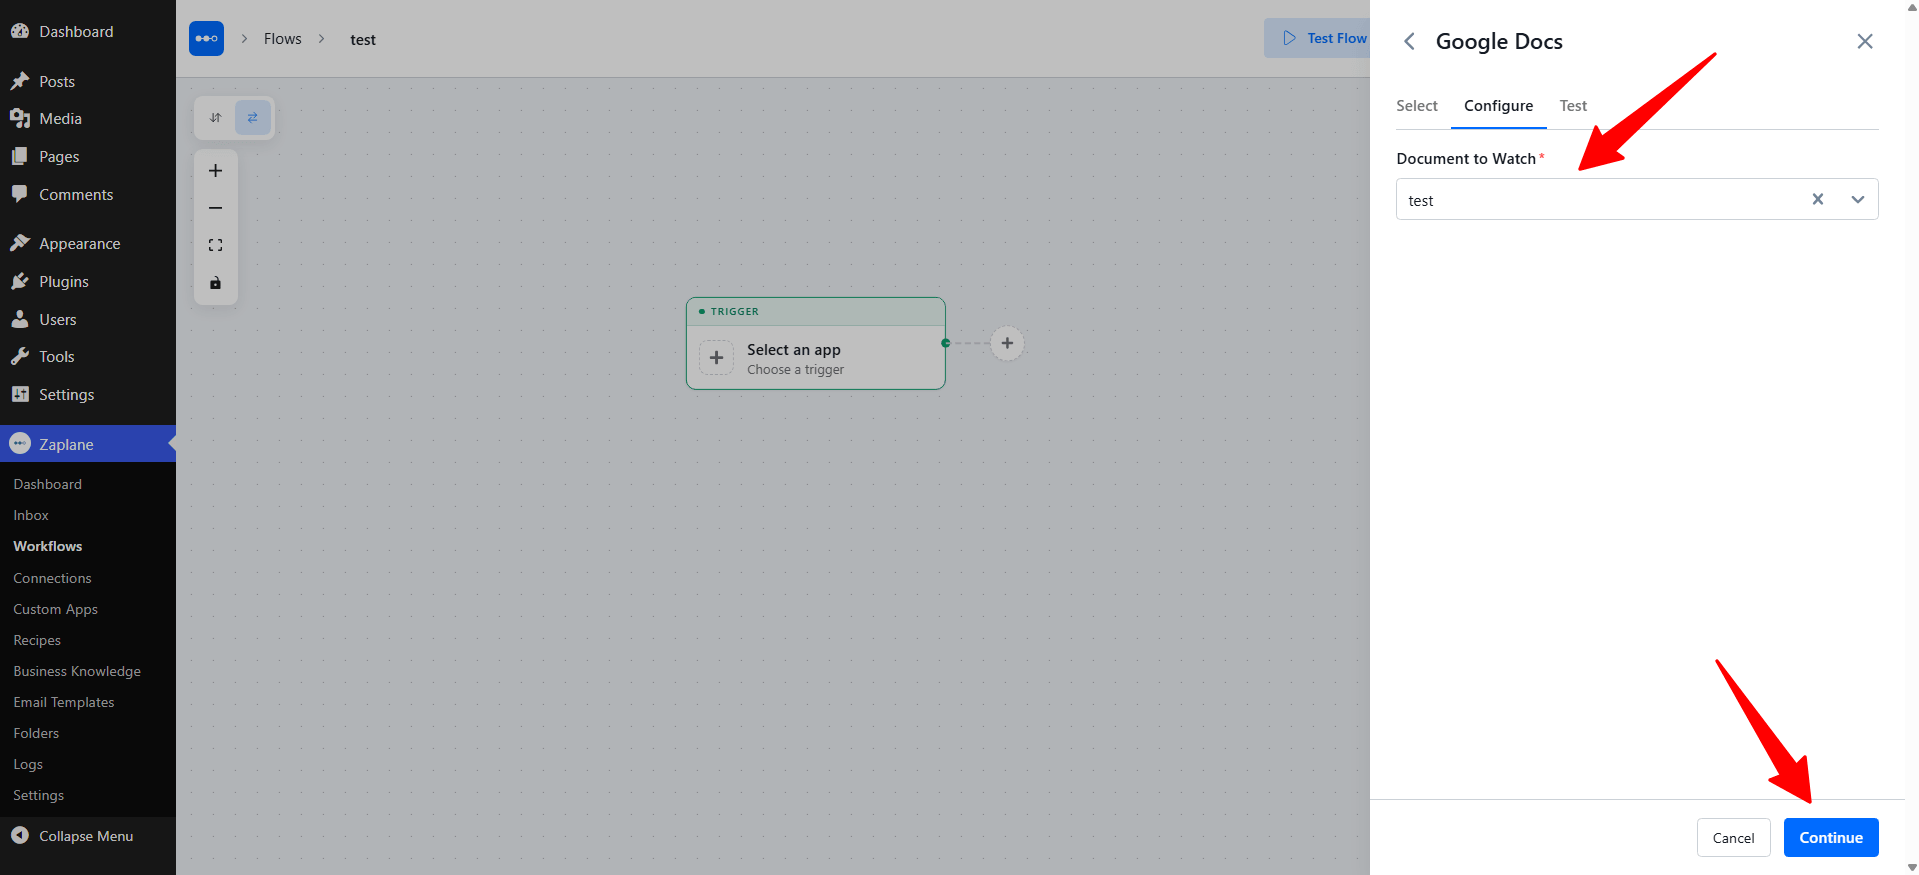
Step 9: Configure the Trigger
On the Configure tab, select the Google Doc you want to monitor in the Document to Watch field (required), then click Continue.
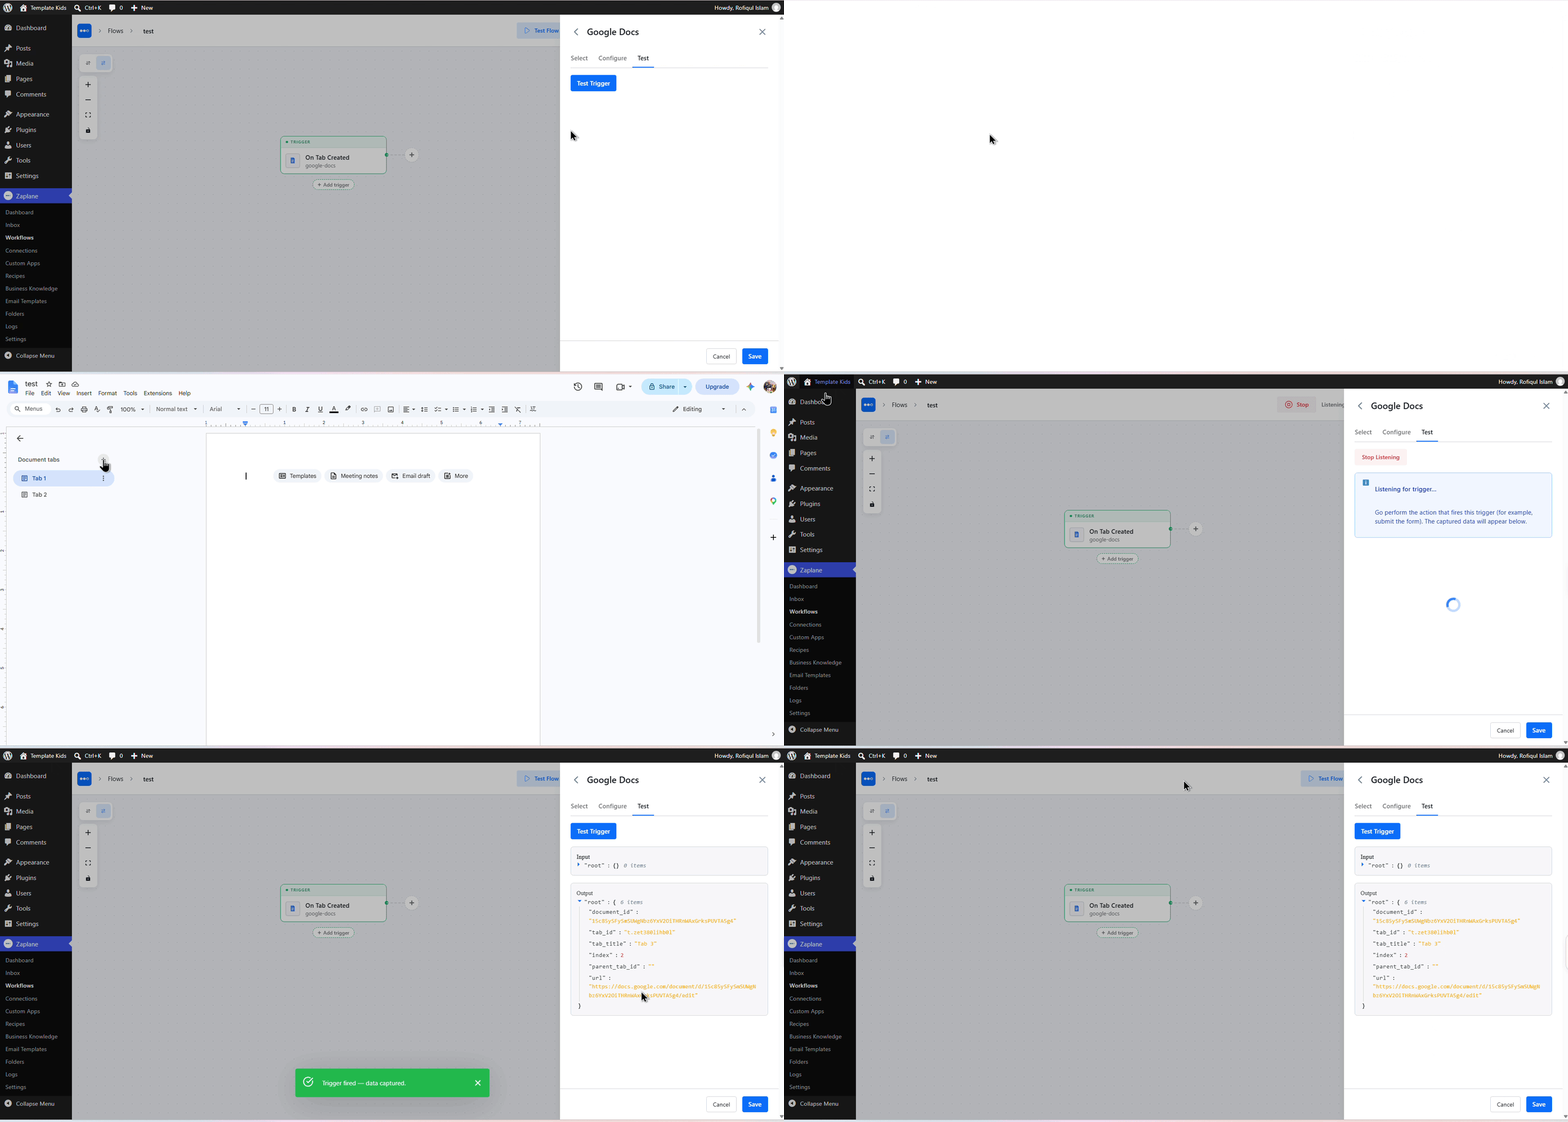
Step 10: Test and Save the Trigger
On the Test tab, click Test Trigger. Zaplane shows sample output such as the document ID, tab ID, tab title, and the document URL. Click Save to keep the trigger.
Step 11: Update and Activate the Workflow
Back on the workflow canvas, click Update at the top right to save your changes and make sure the workflow status is set to Active.
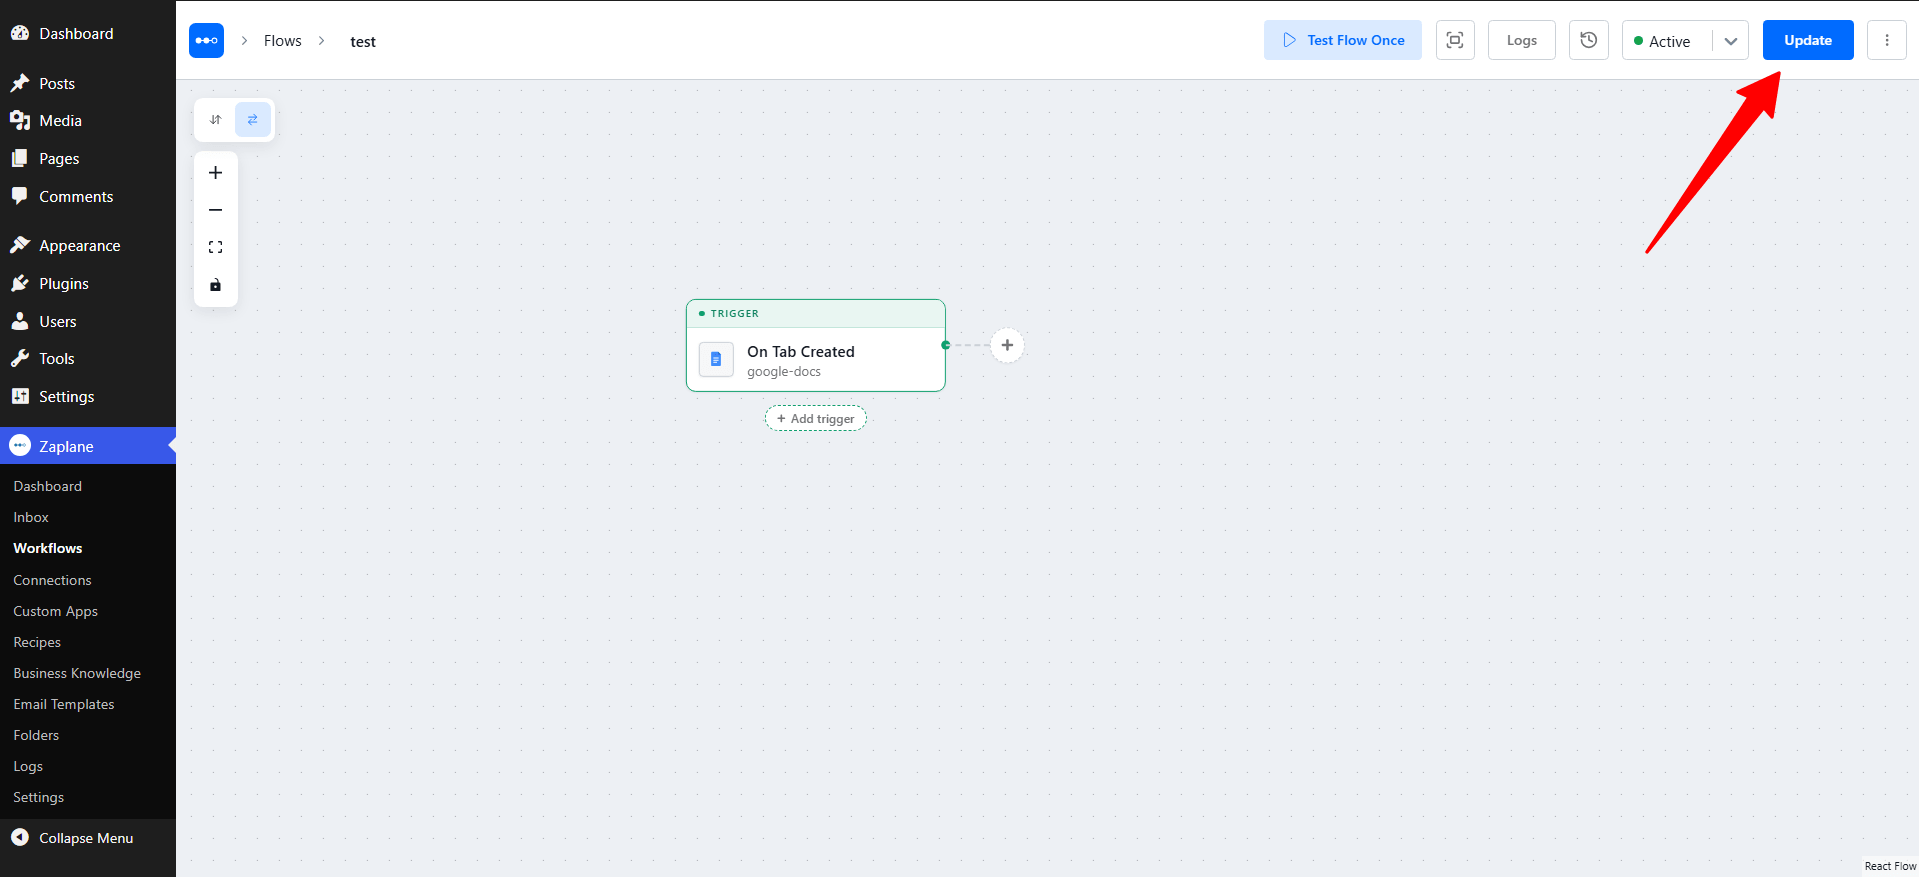
Every time a new tab is created in your Google Doc, Zaplane now starts this workflow automatically.
Done!
Google Docs is now connected to Zaplane, and your workflow will run whenever a new tab is created in your document.