

This guide walks you through adding a CoBlocks trigger to a Zaplane workflow, so your workflow runs automatically whenever someone submits a CoBlocks form. Let’s go through the process step by step.
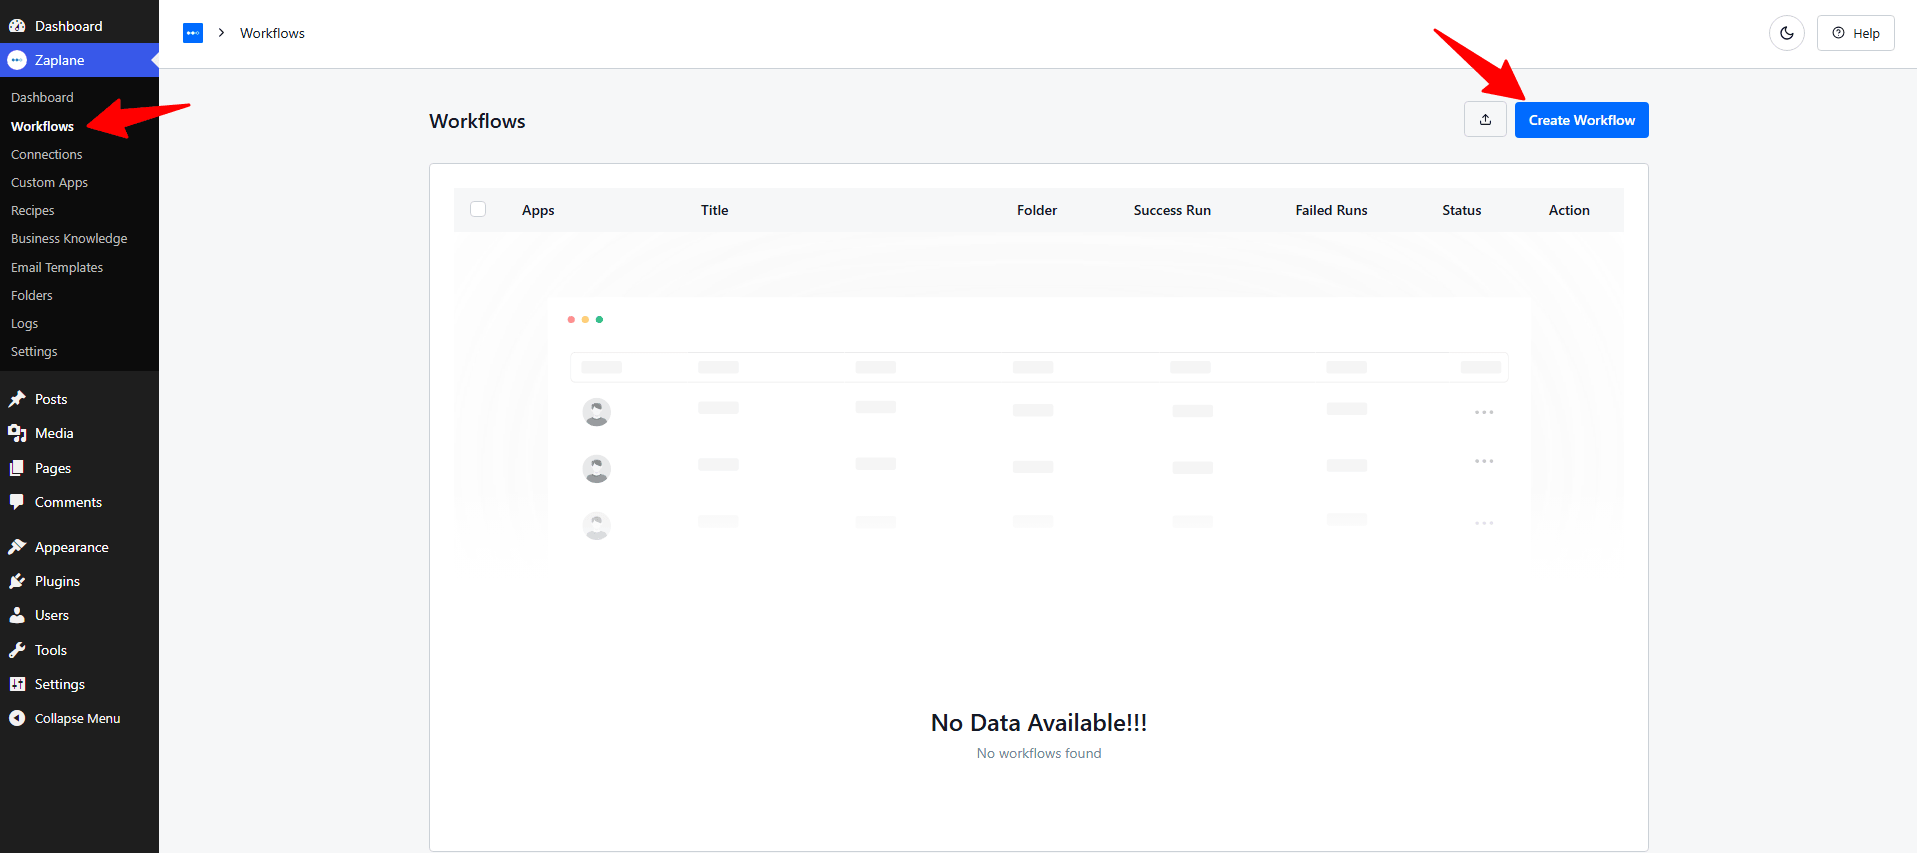
Step 1: Create a Workflow
- Go to Zaplane > Workflows, then click Create Workflow.
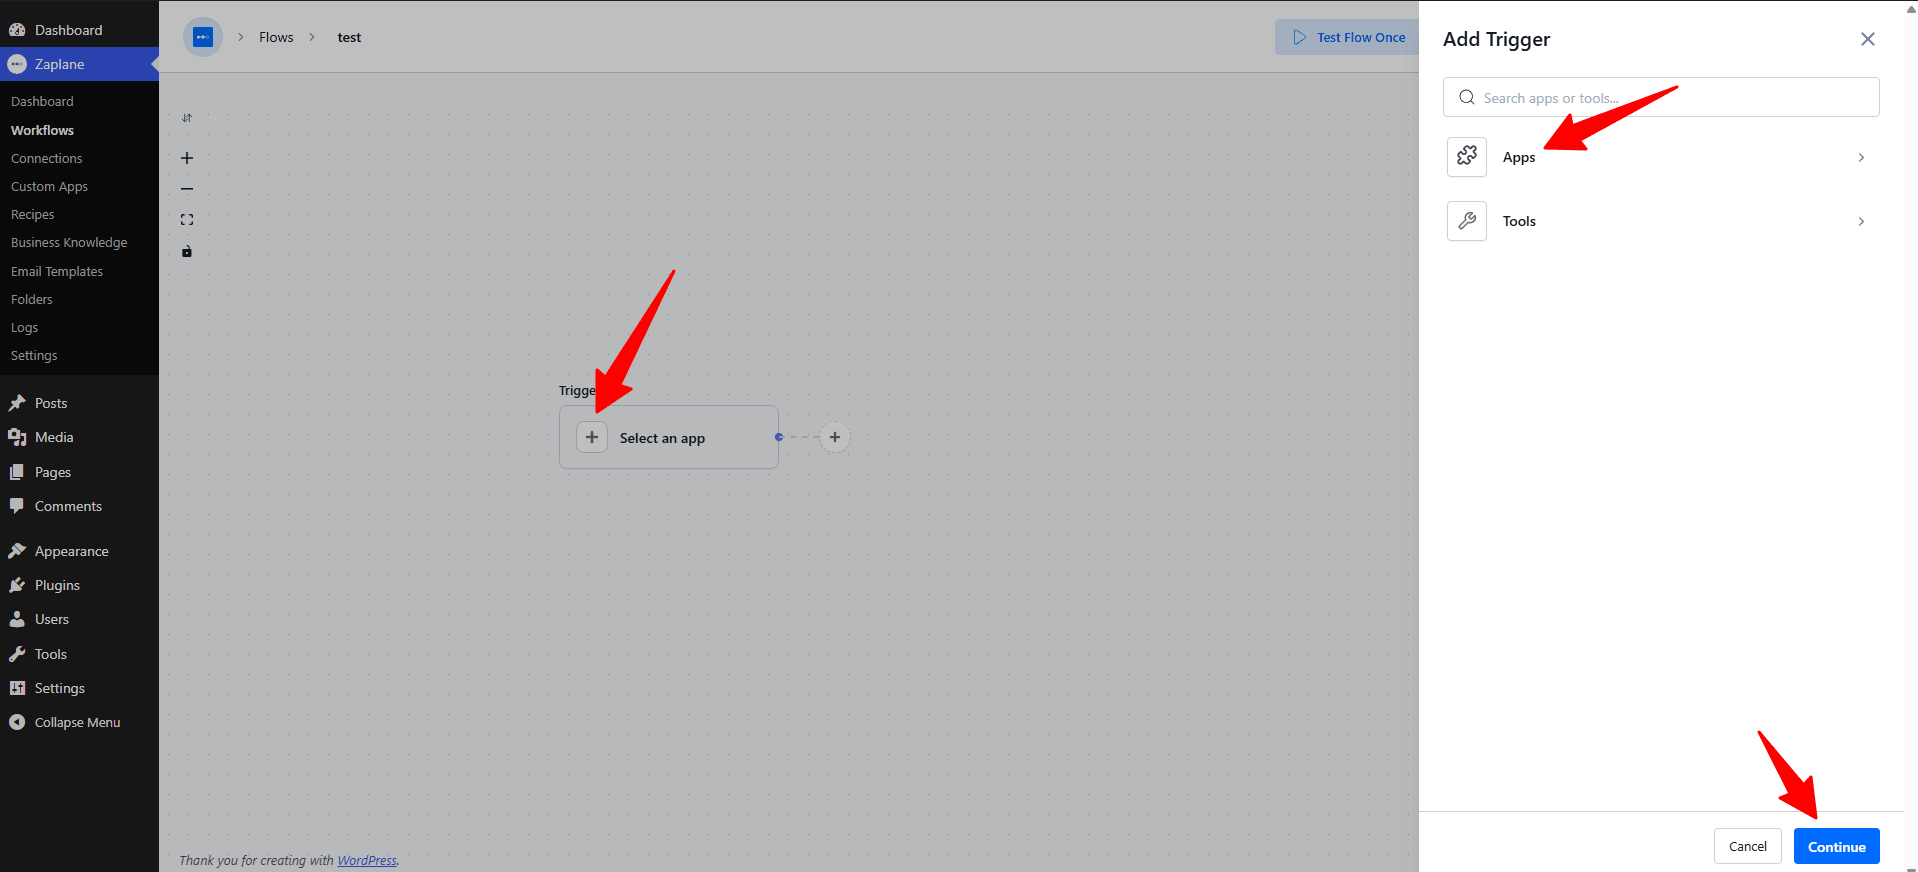
Step 2: Add a CoBlocks Trigger
- Inside the workflow editor, click Select an app under the Trigger box, then choose Apps.
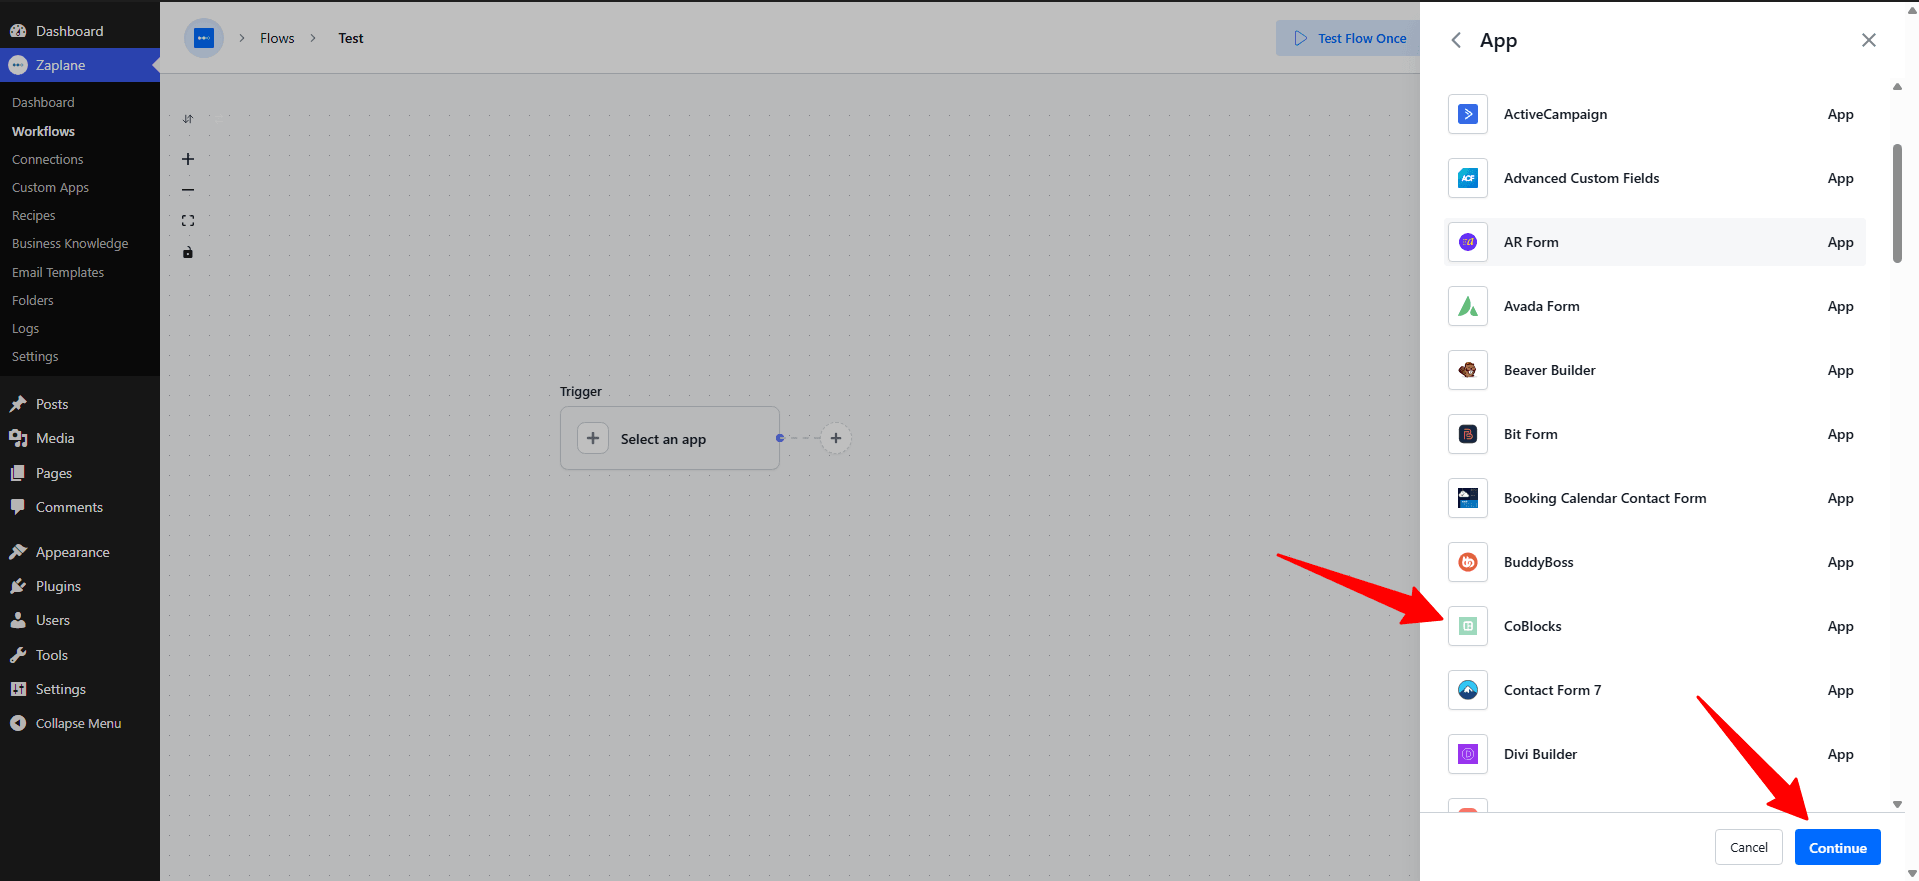
- Search for and select CoBlocks, then click Continue.
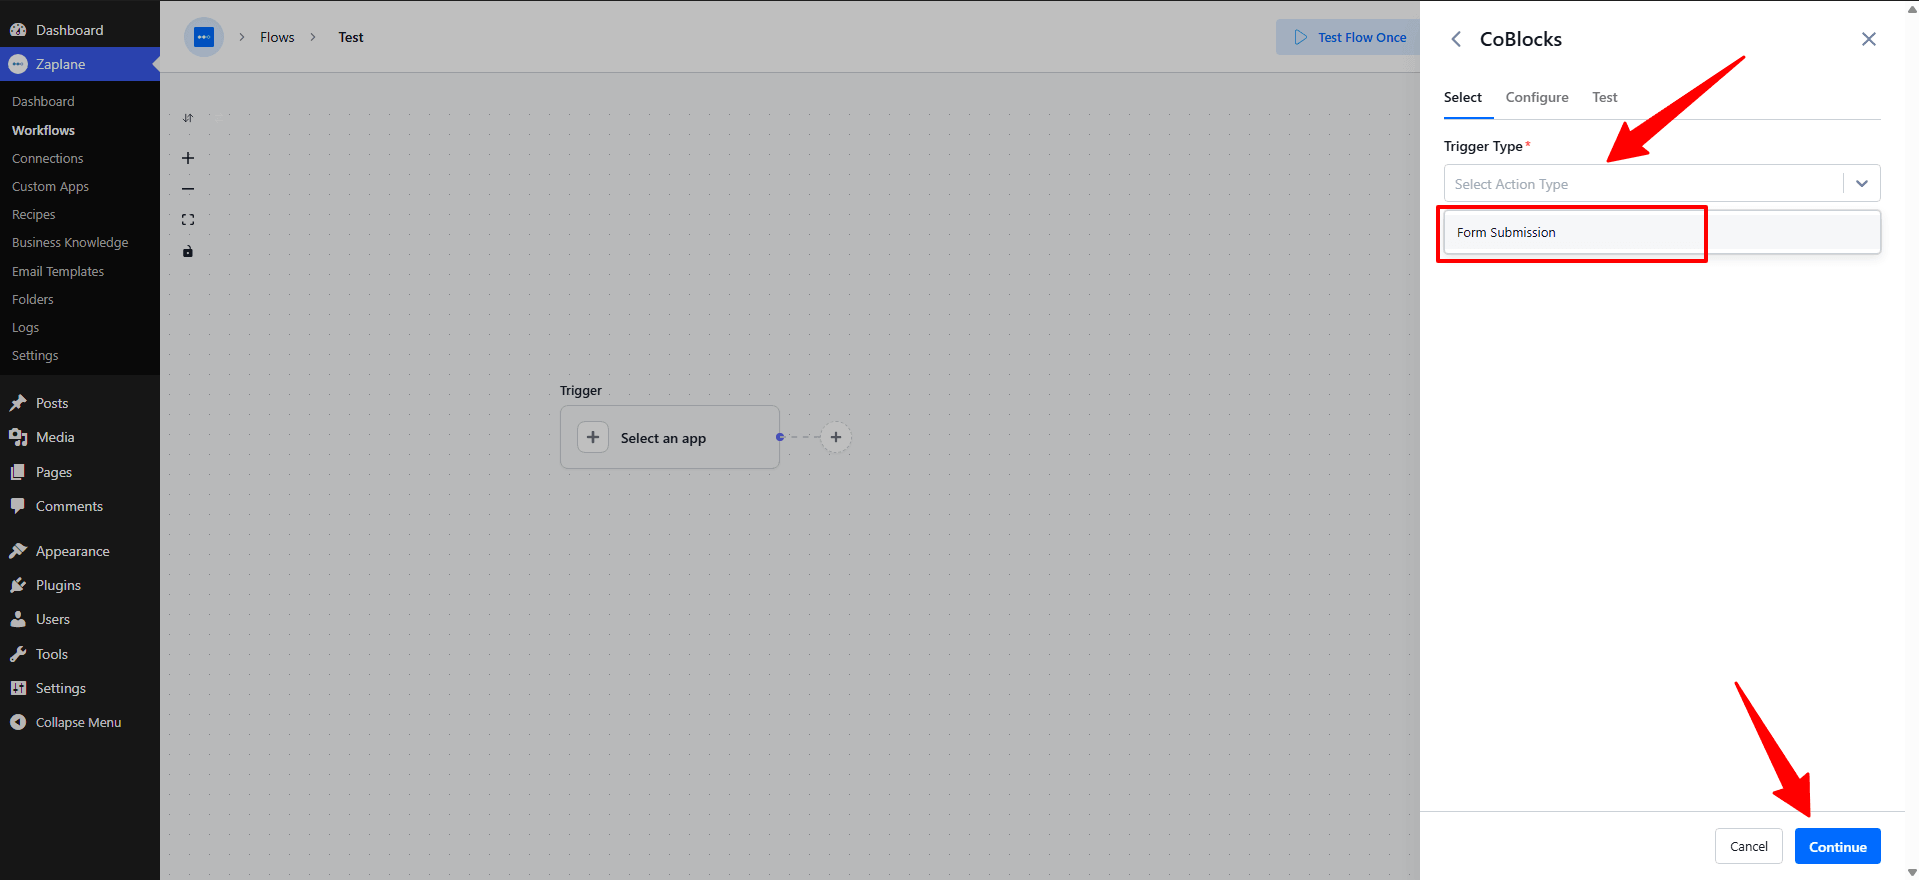
Step 3: Choose the Trigger Type
- On the Select tab, open the Trigger Type dropdown and choose Form Submission, then click Continue.
Step 4: Configure the Trigger
- On the Configure tab, there’s nothing to set up — this trigger doesn’t need any configuration. Just click Continue.
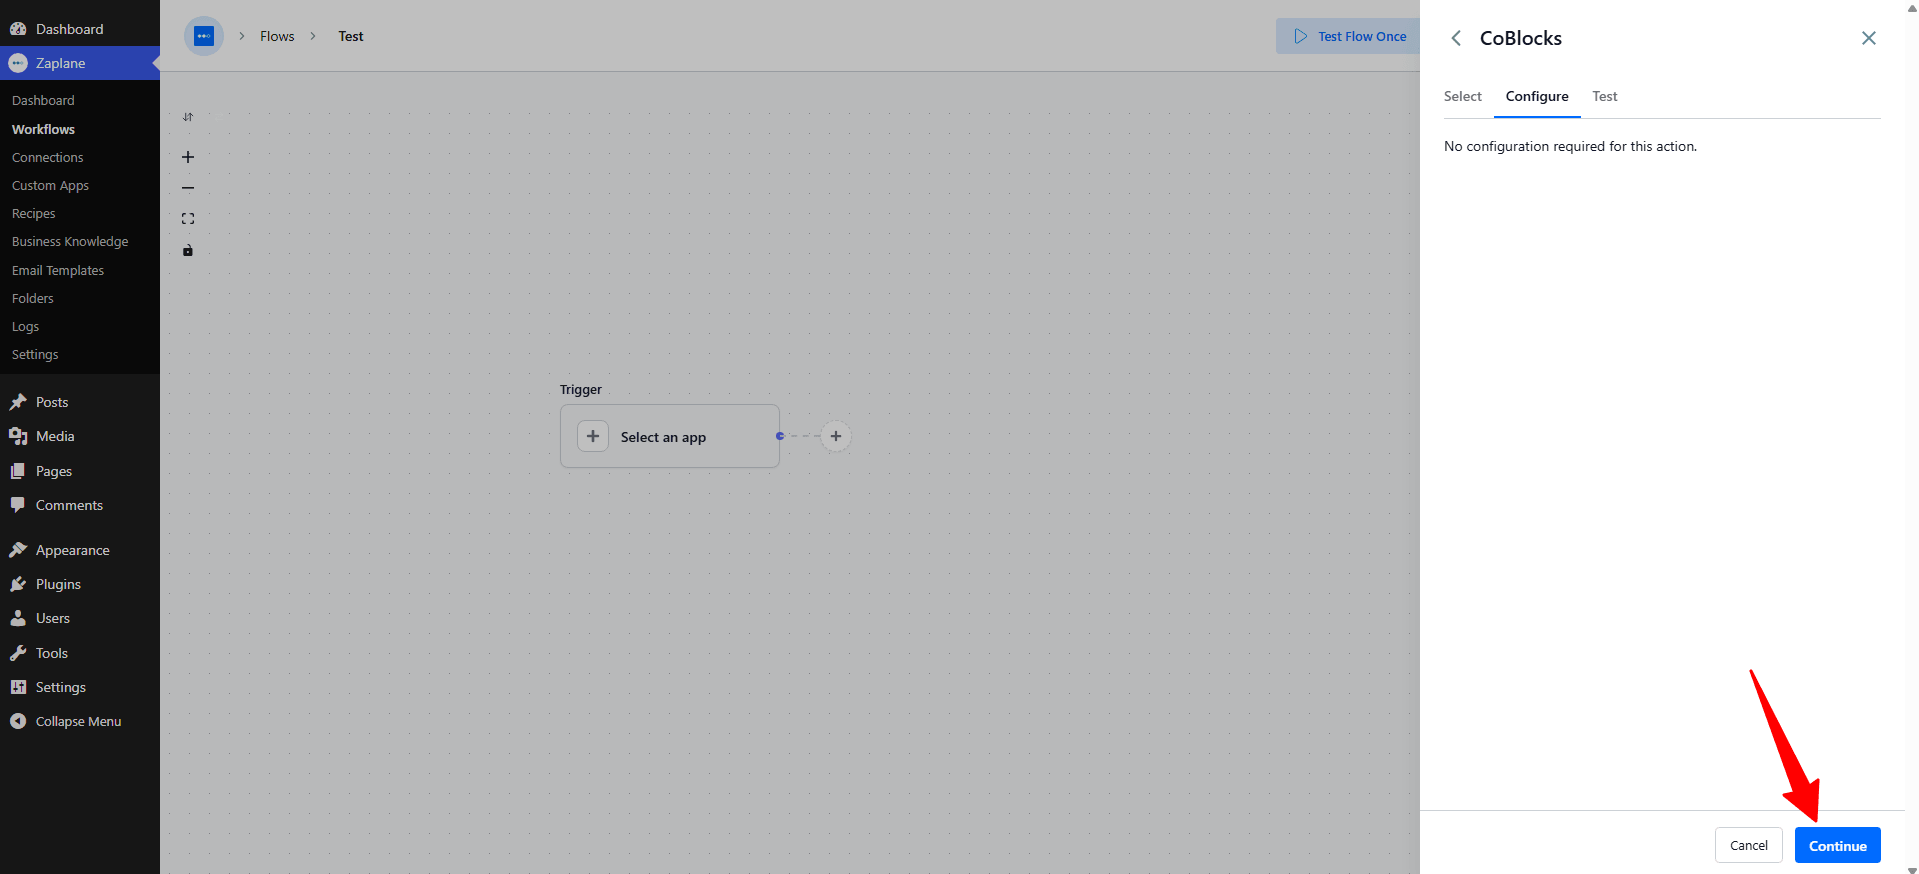
Step 5: Test and Activate the Workflow
- On the Test tab, click Test Trigger to confirm it’s picking up the CoBlocks form submission correctly, then click Save.
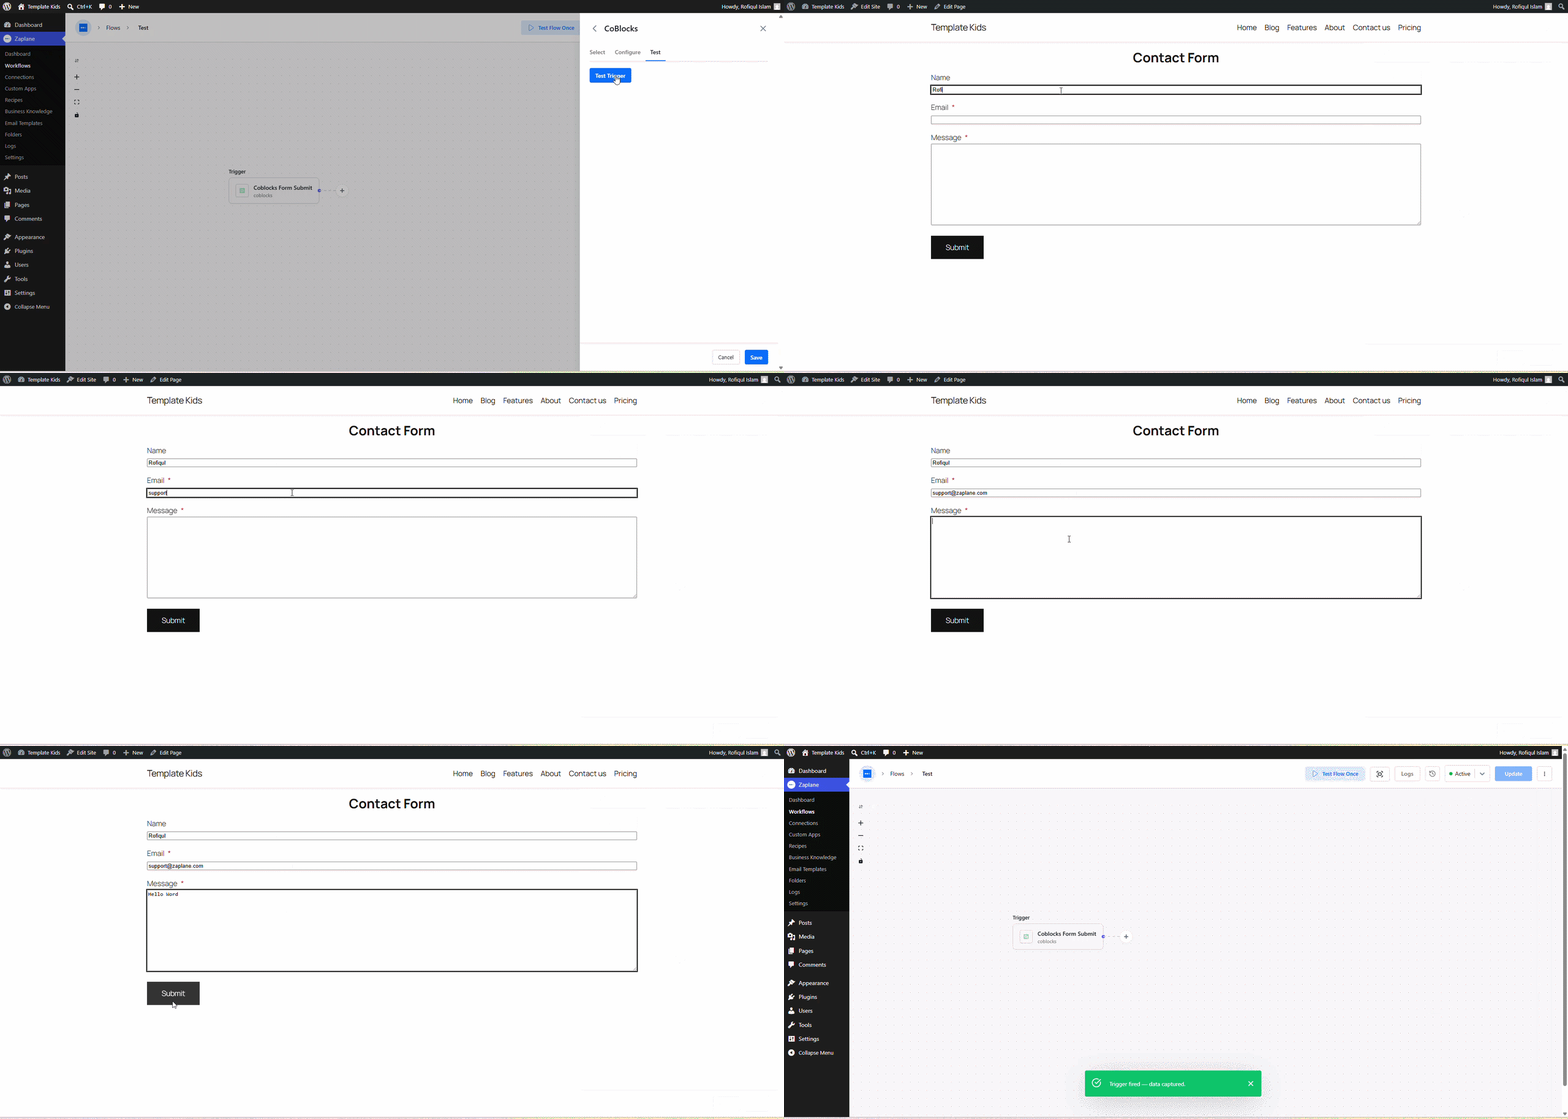
- Finally, toggle the workflow to Active and click Update to publish it.
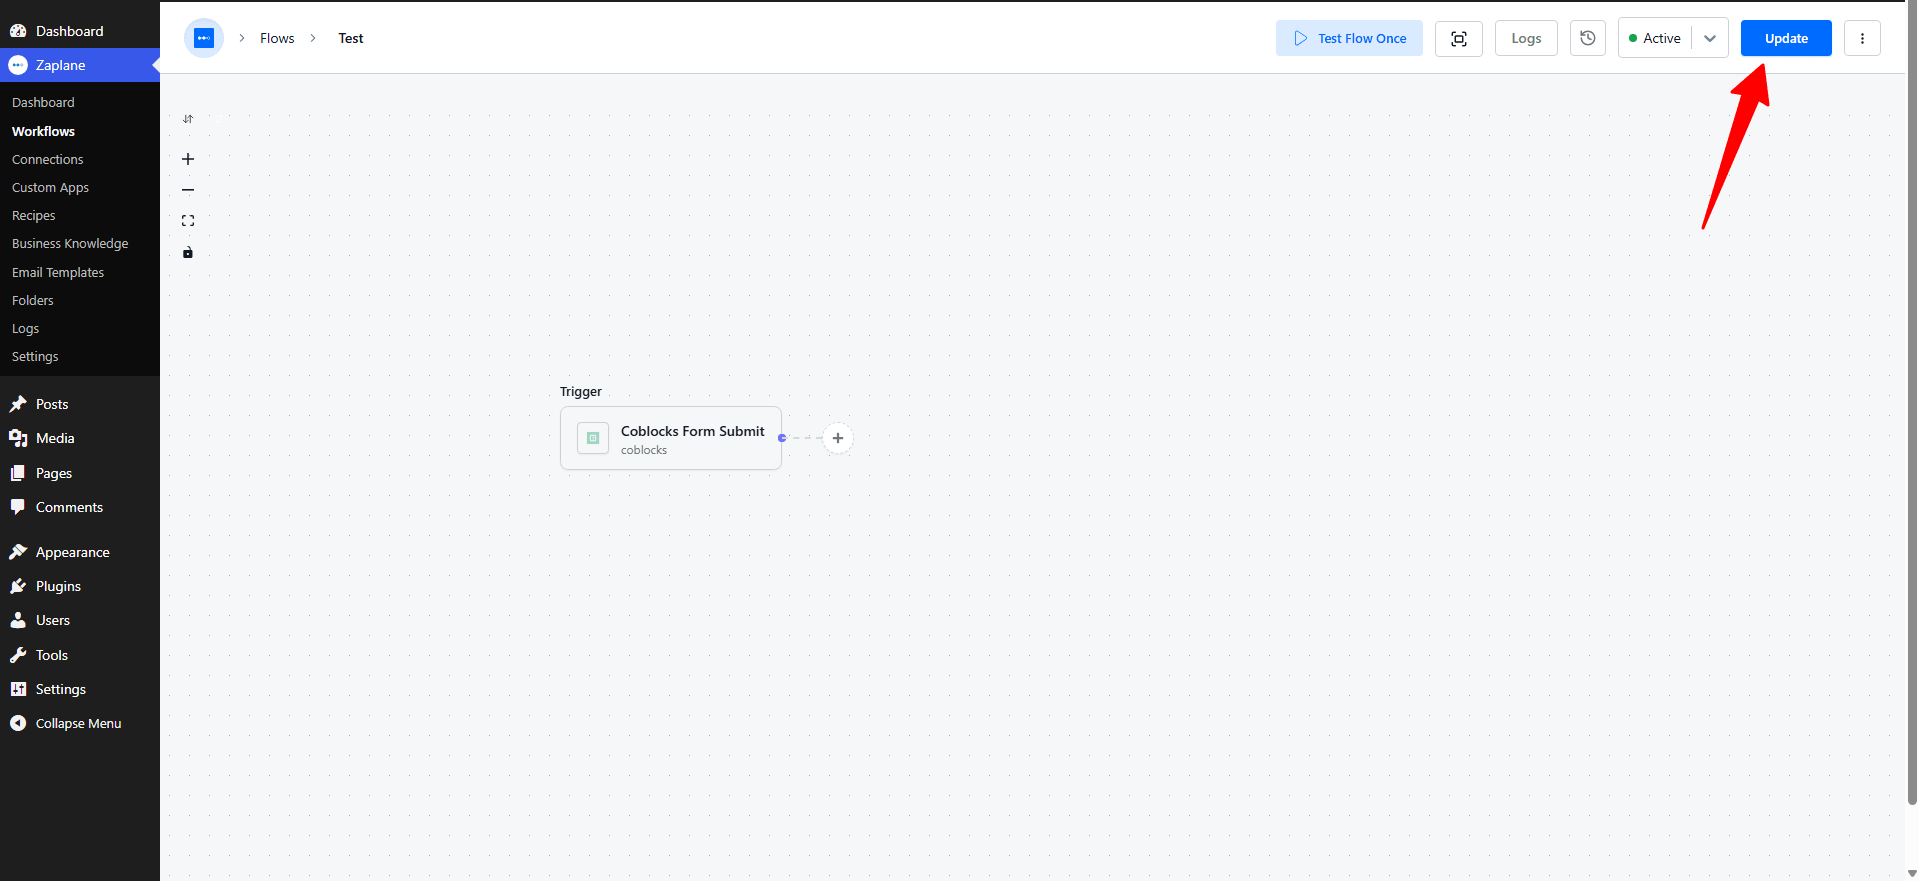
You’re all set
CoBlocks is now connected to Zaplane. Your workflow will run automatically every time someone submits a CoBlocks form on your site.