

Mailchimp connects to Zaplane with a simple API key — no OAuth flow needed. You’ll generate the key from your Mailchimp account, save it as a connection in Zaplane, and then add a Mailchimp action to a workflow. This guide walks through all three parts using a “add a subscriber when a form is submitted” workflow as the example.
Part 1: Create a Workflow
Go to Zaplane > Workflows from your WordPress dashboard, then click Create Workflow to open the workflow editor.
Before adding a Mailchimp action, you need to set up a trigger first. Here is how to do it quickly:
- Click Select an app under the Trigger box, then choose Apps.
- Search for and select your trigger app — in this example, we are using aBlocks Contact Form.
- Choose the Trigger Type that matches the event you want to watch for, then click Continue.
- On the Configure tab, set up any required options, then click Continue.
- On the Test tab, click Test Trigger to confirm it is working correctly, then click Save.
Once your trigger is saved, proceed to the next step to add the Mailchimp action.
Part 2: Get Your Mailchimp API Key
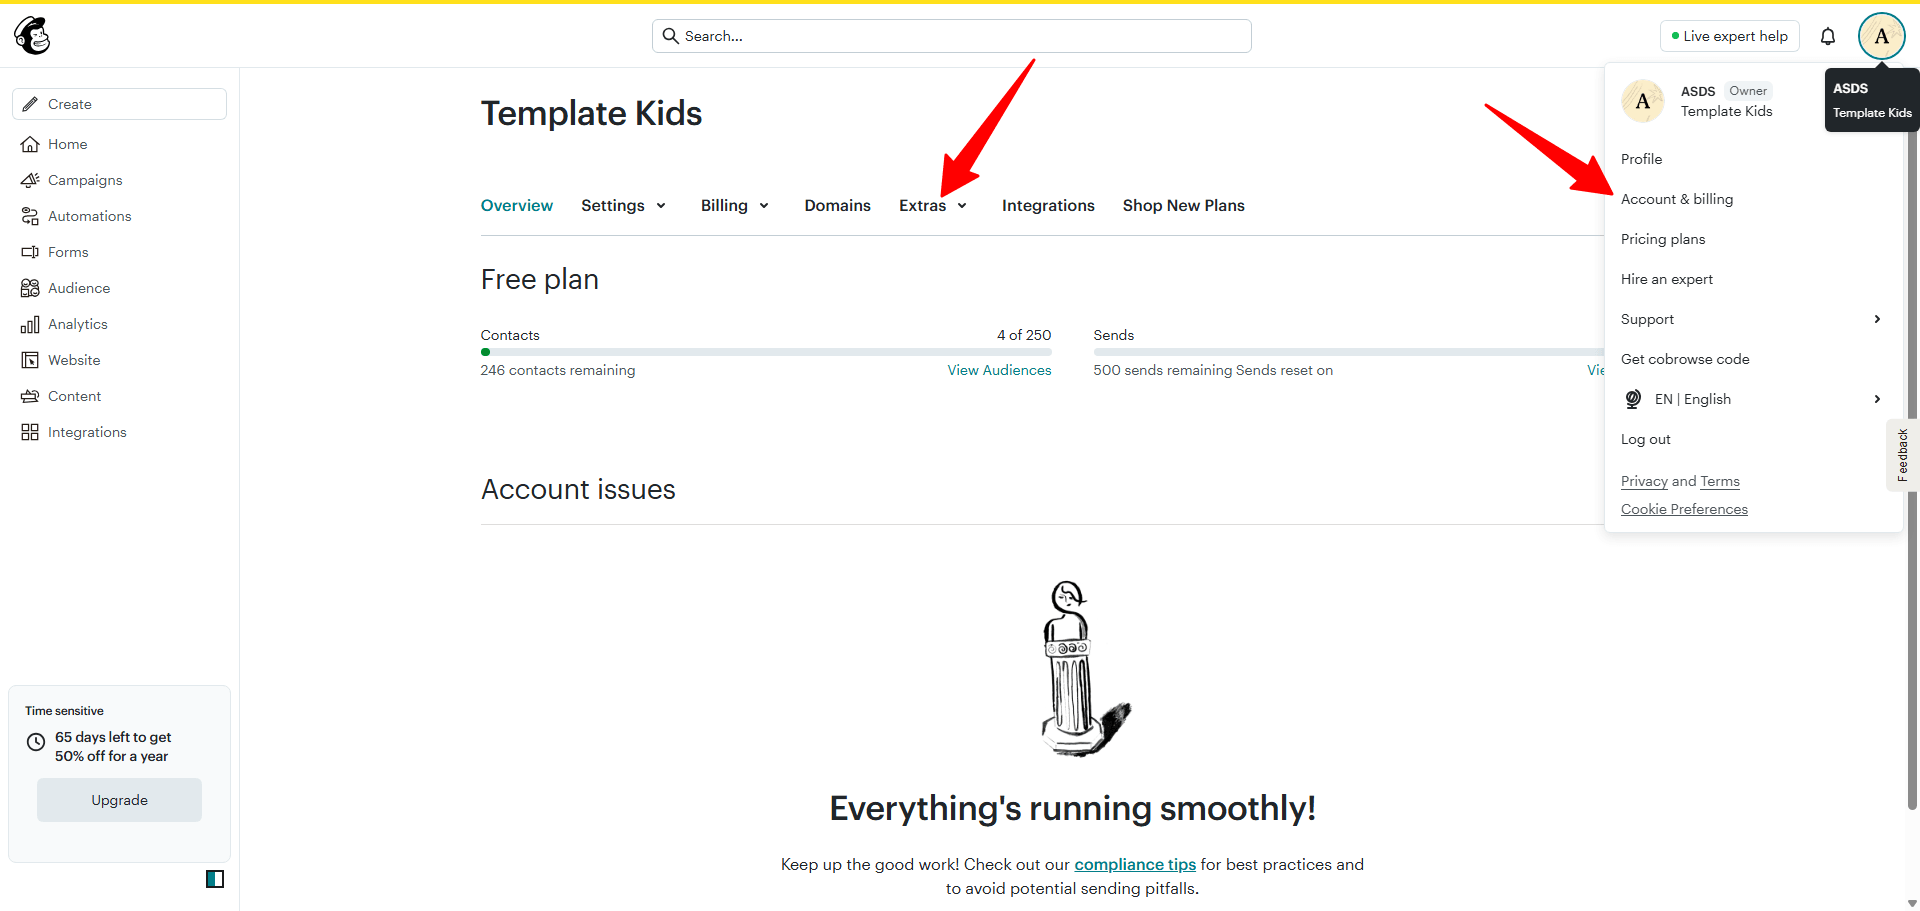
Step 1: Open Account & Billing
- In Mailchimp, click your profile icon, then go to Extras or your account menu and select Account & billing.
Step 2: Go to API Keys
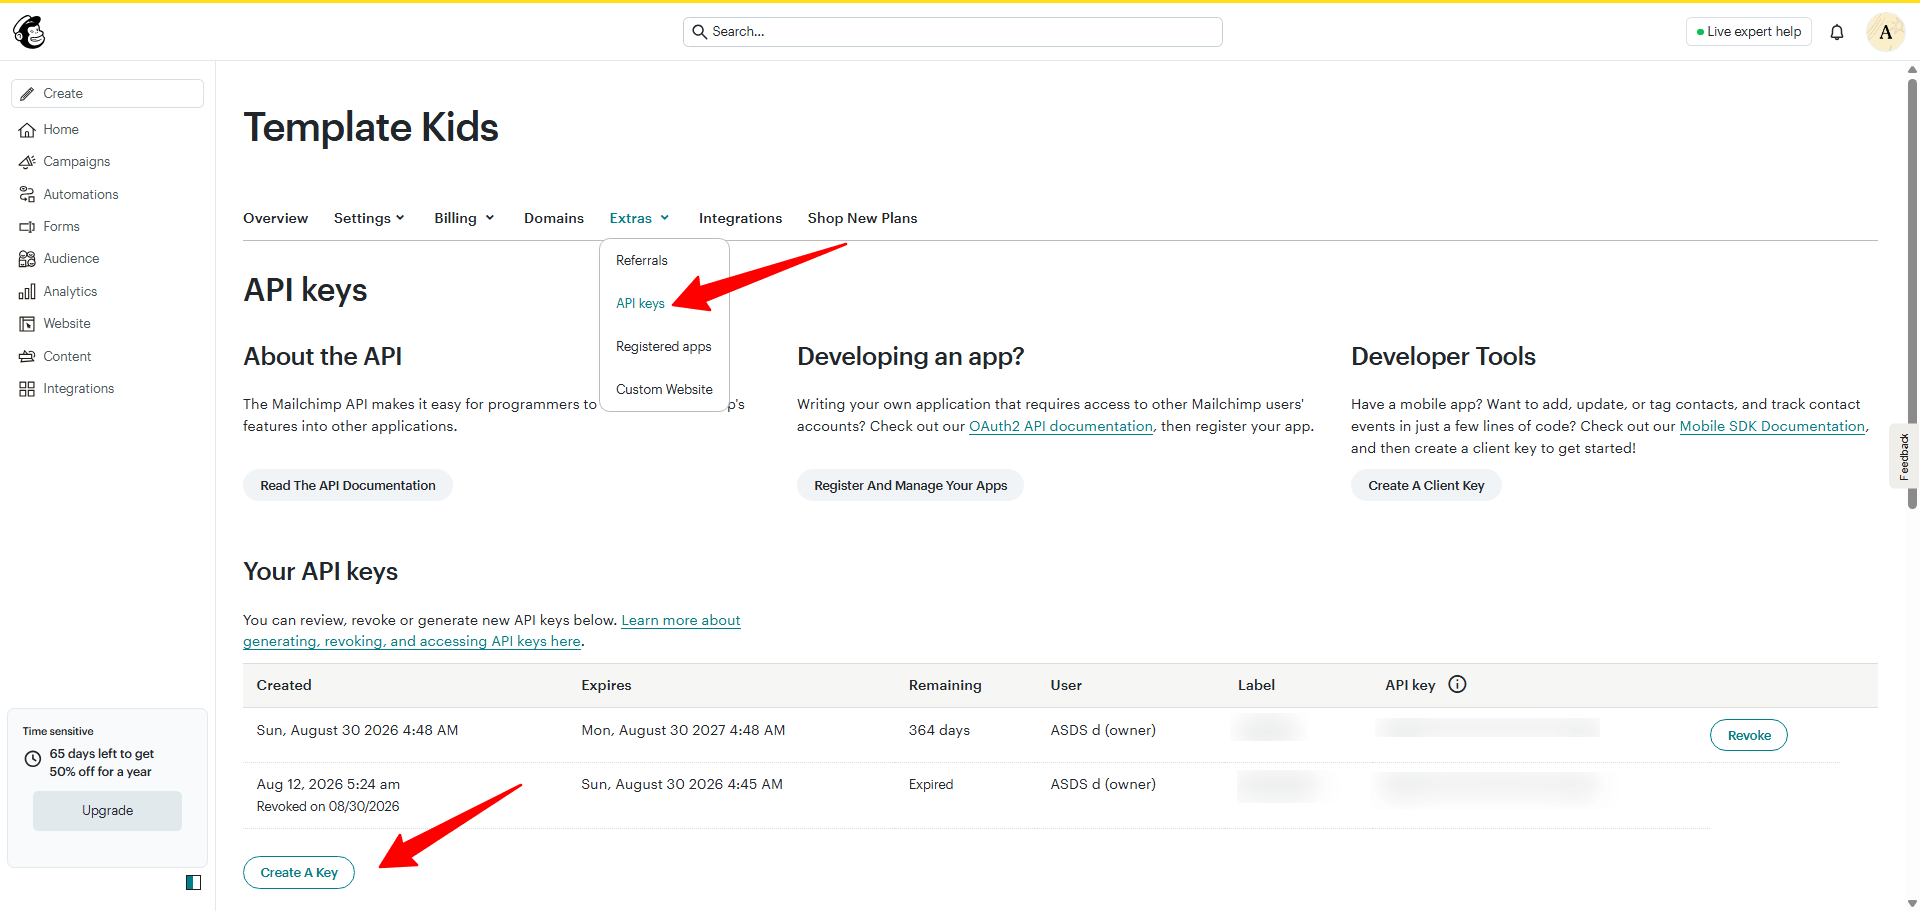
- Under Extras, click API keys, then click Create A Key.
Step 3: Name, Generate, and Copy the Key
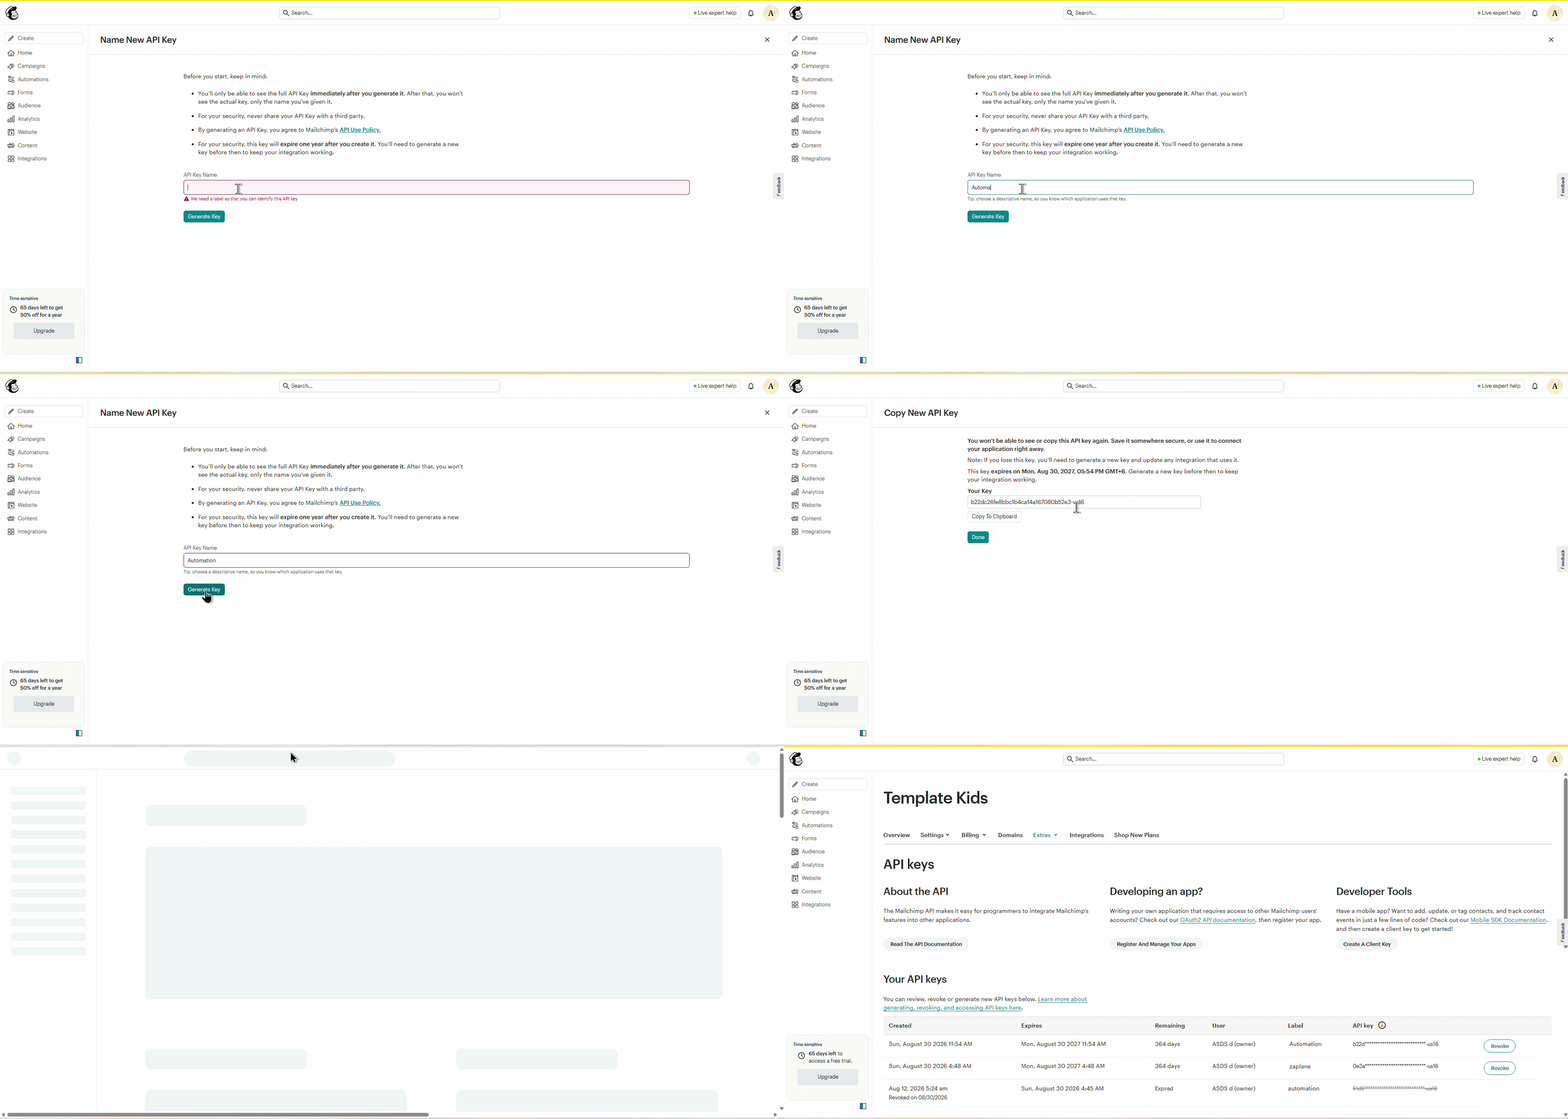
- Give the key a descriptive API Key Name (e.g. “Automation”) and click Generate Key. Mailchimp shows the full key only once — click Copy To Clipboard before leaving the page. Note that the key ends with your datacenter suffix (like -us16), which Zaplane needs as part of the key.
Part 3: Create the Connection in Zaplane
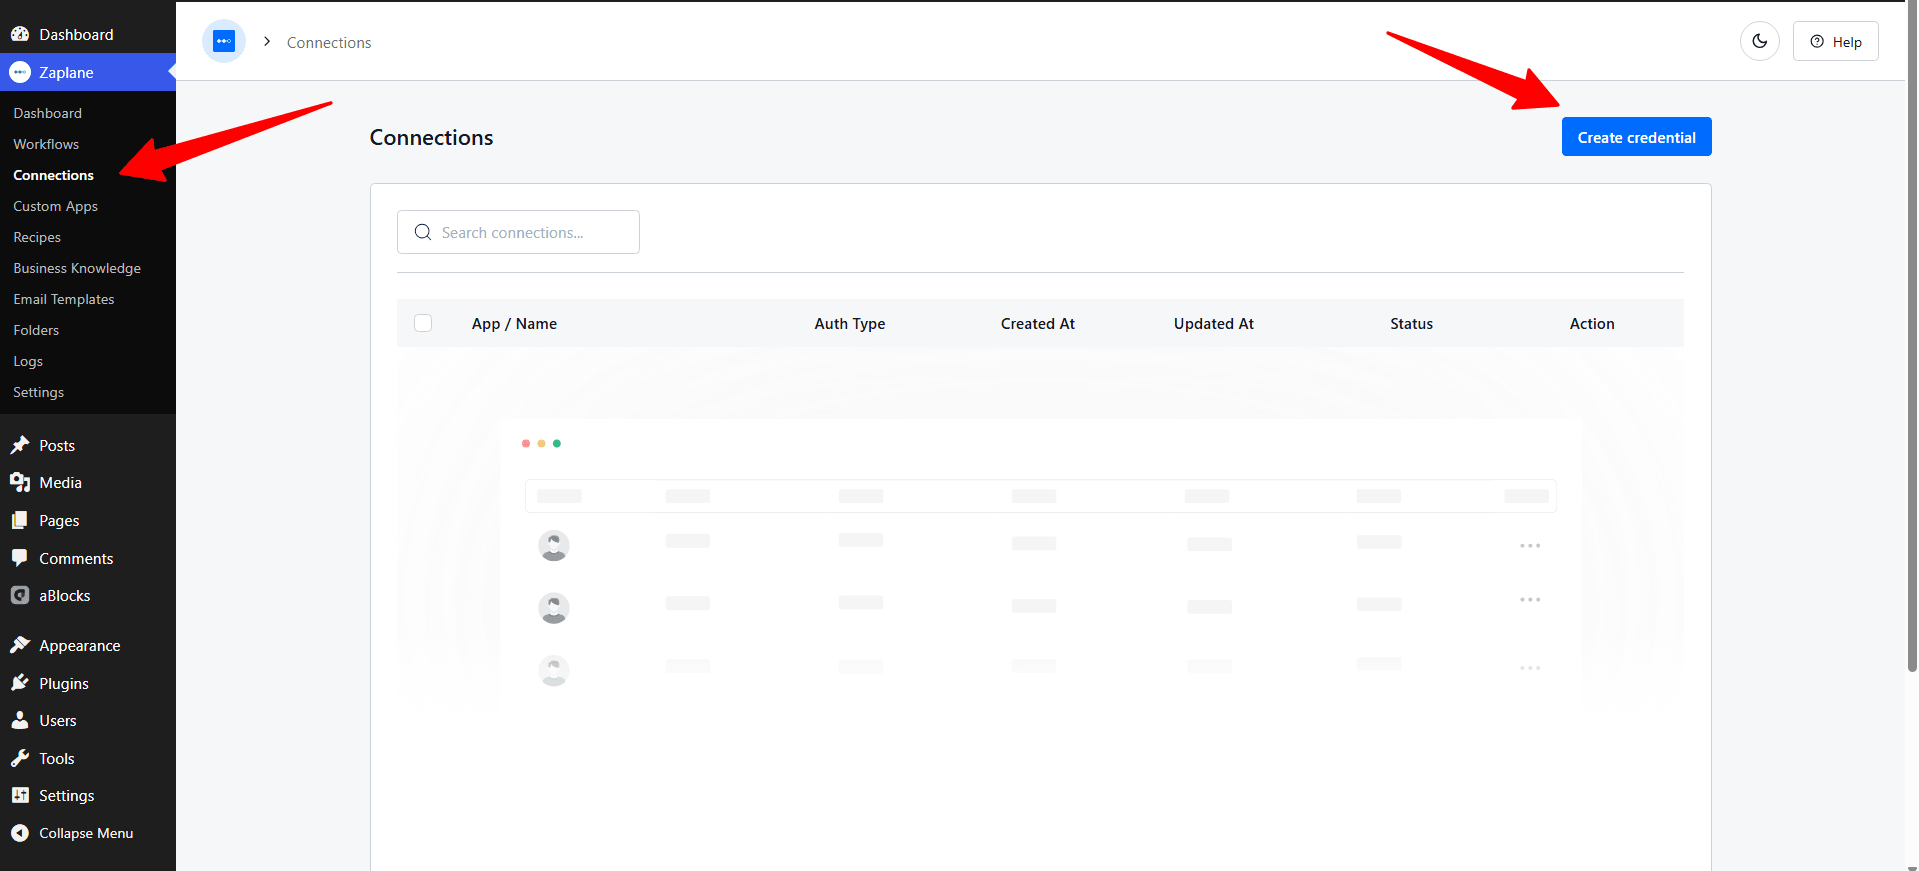
Step 4: Open Connections and Create a Credential
- In WordPress, go to Zaplane > Connections and click Create credential.
Step 5: Select Mailchimp
- From the Select an app list, choose Mailchimp.
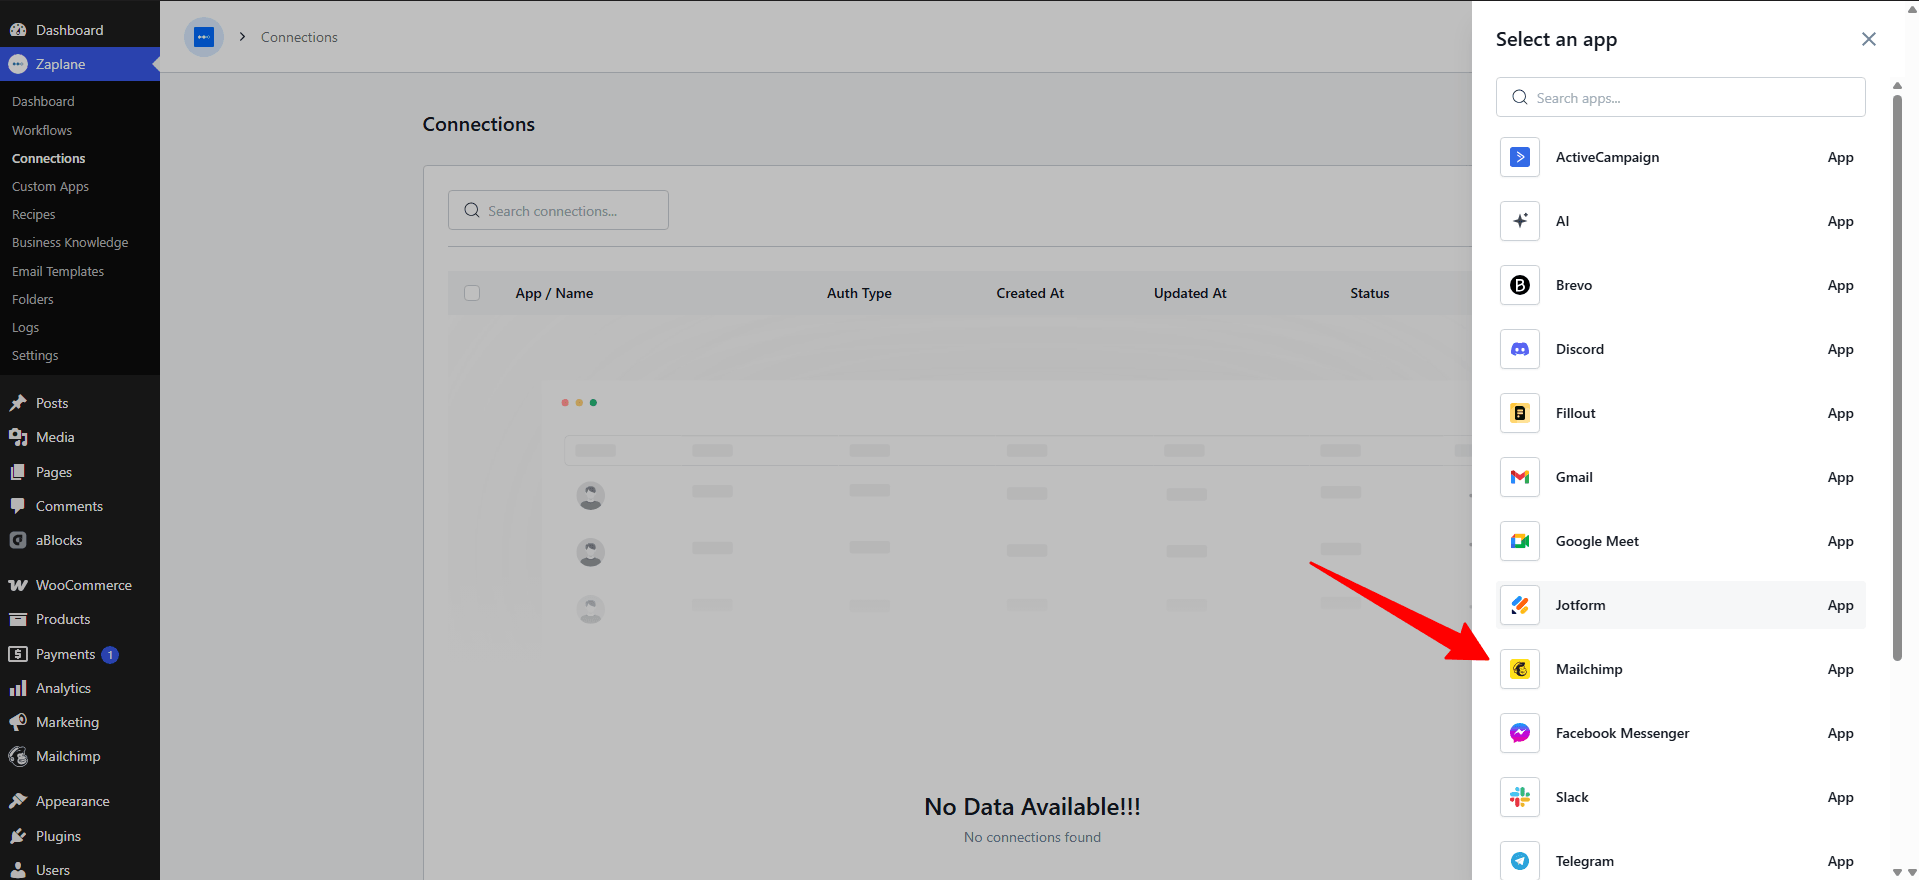
Step 6: Paste Your API Key and Save
- Paste the API Key you copied from Mailchimp, then click Save Connection.
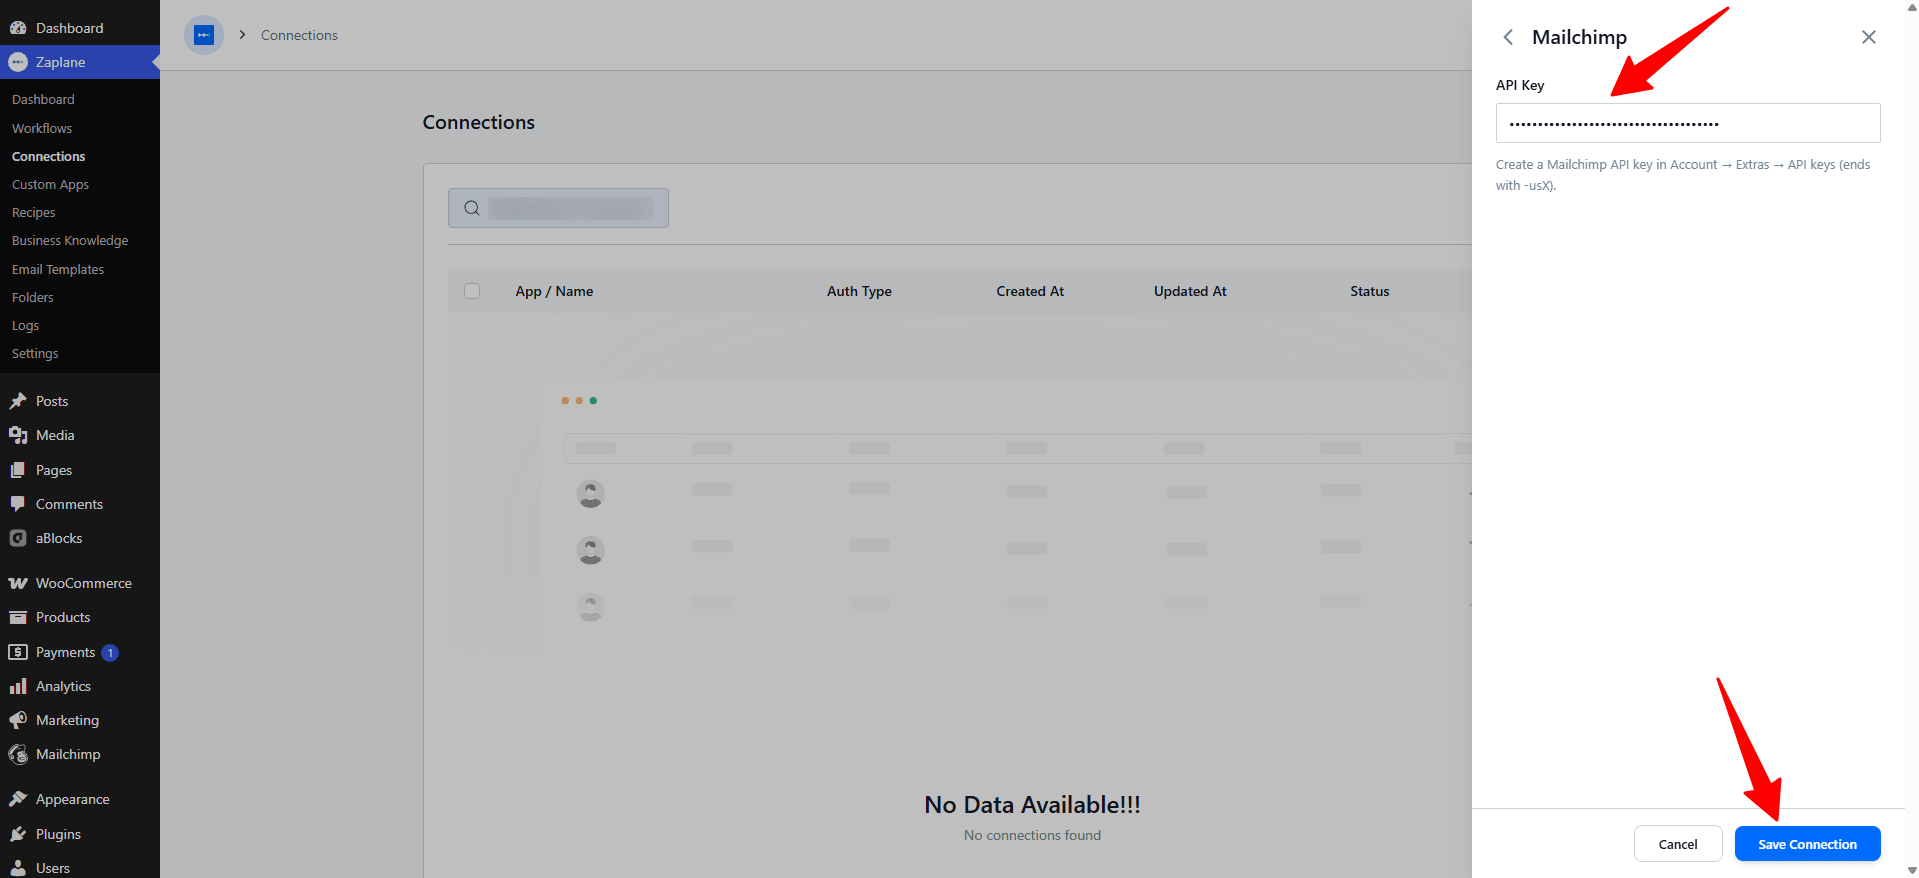
Part 4: Add the Action to Your Workflow
Step 7: Add an Action to Your Workflow
- On your workflow’s trigger, click the + icon, then choose Apps in the Add Action panel.
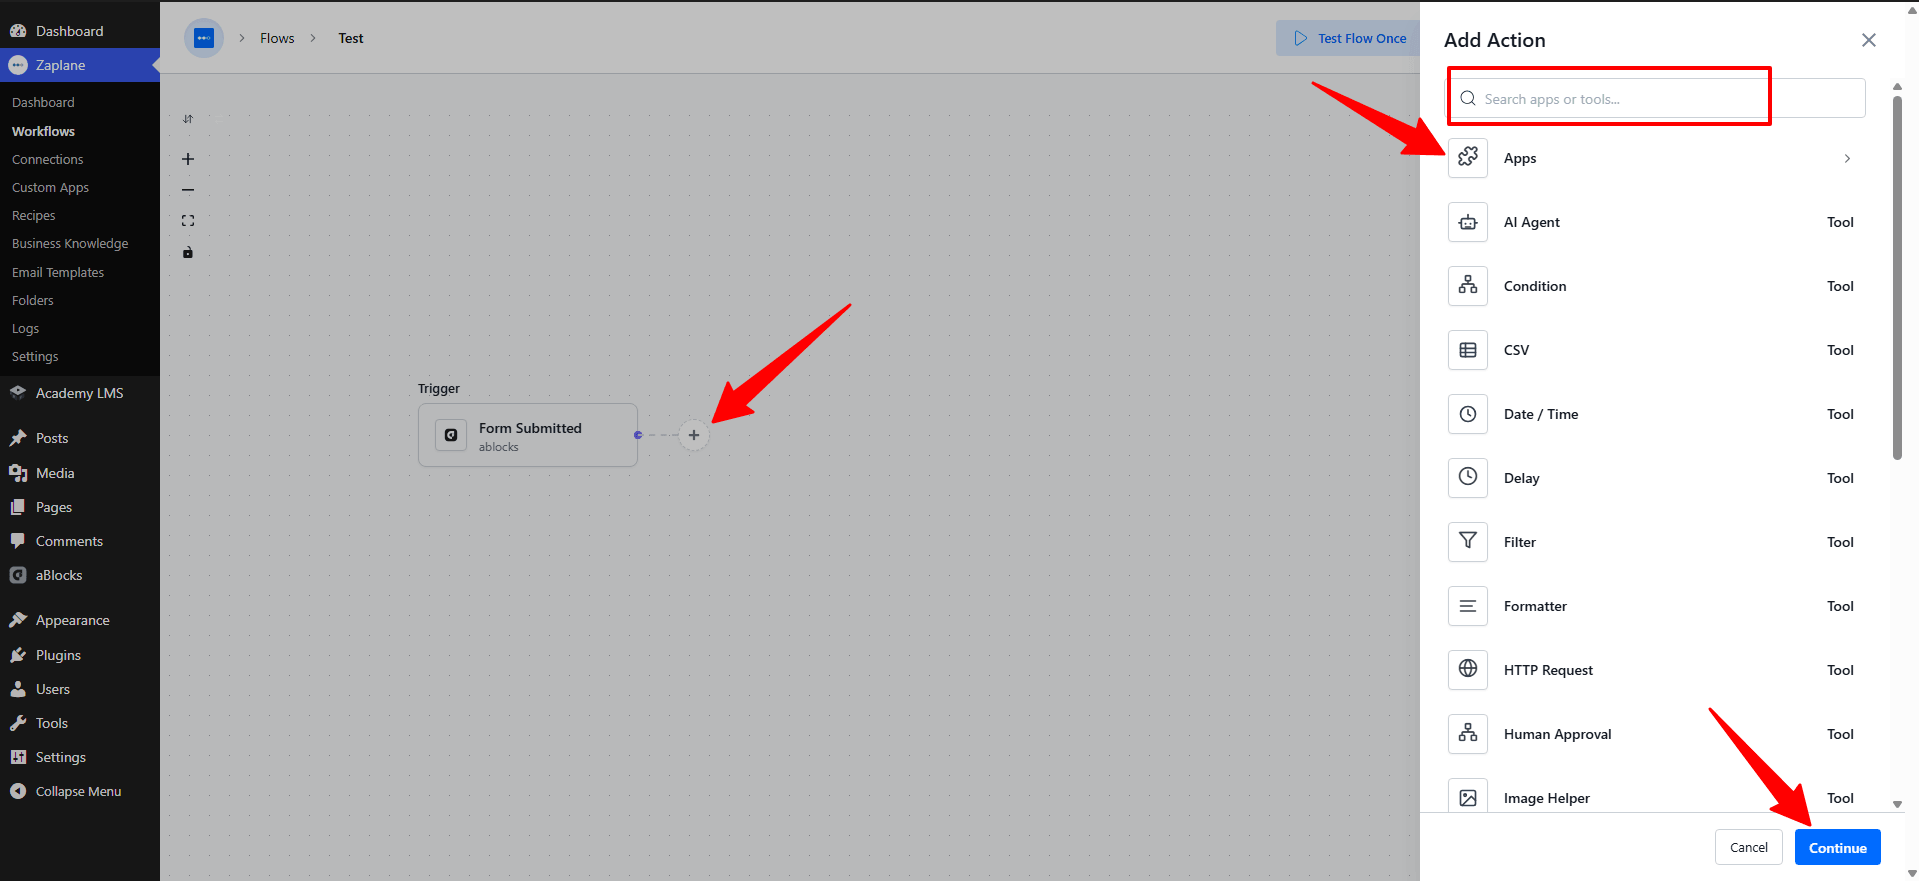
Step 8: Choose Mailchimp
- Search for and select Mailchimp from the app list, then click Continue.
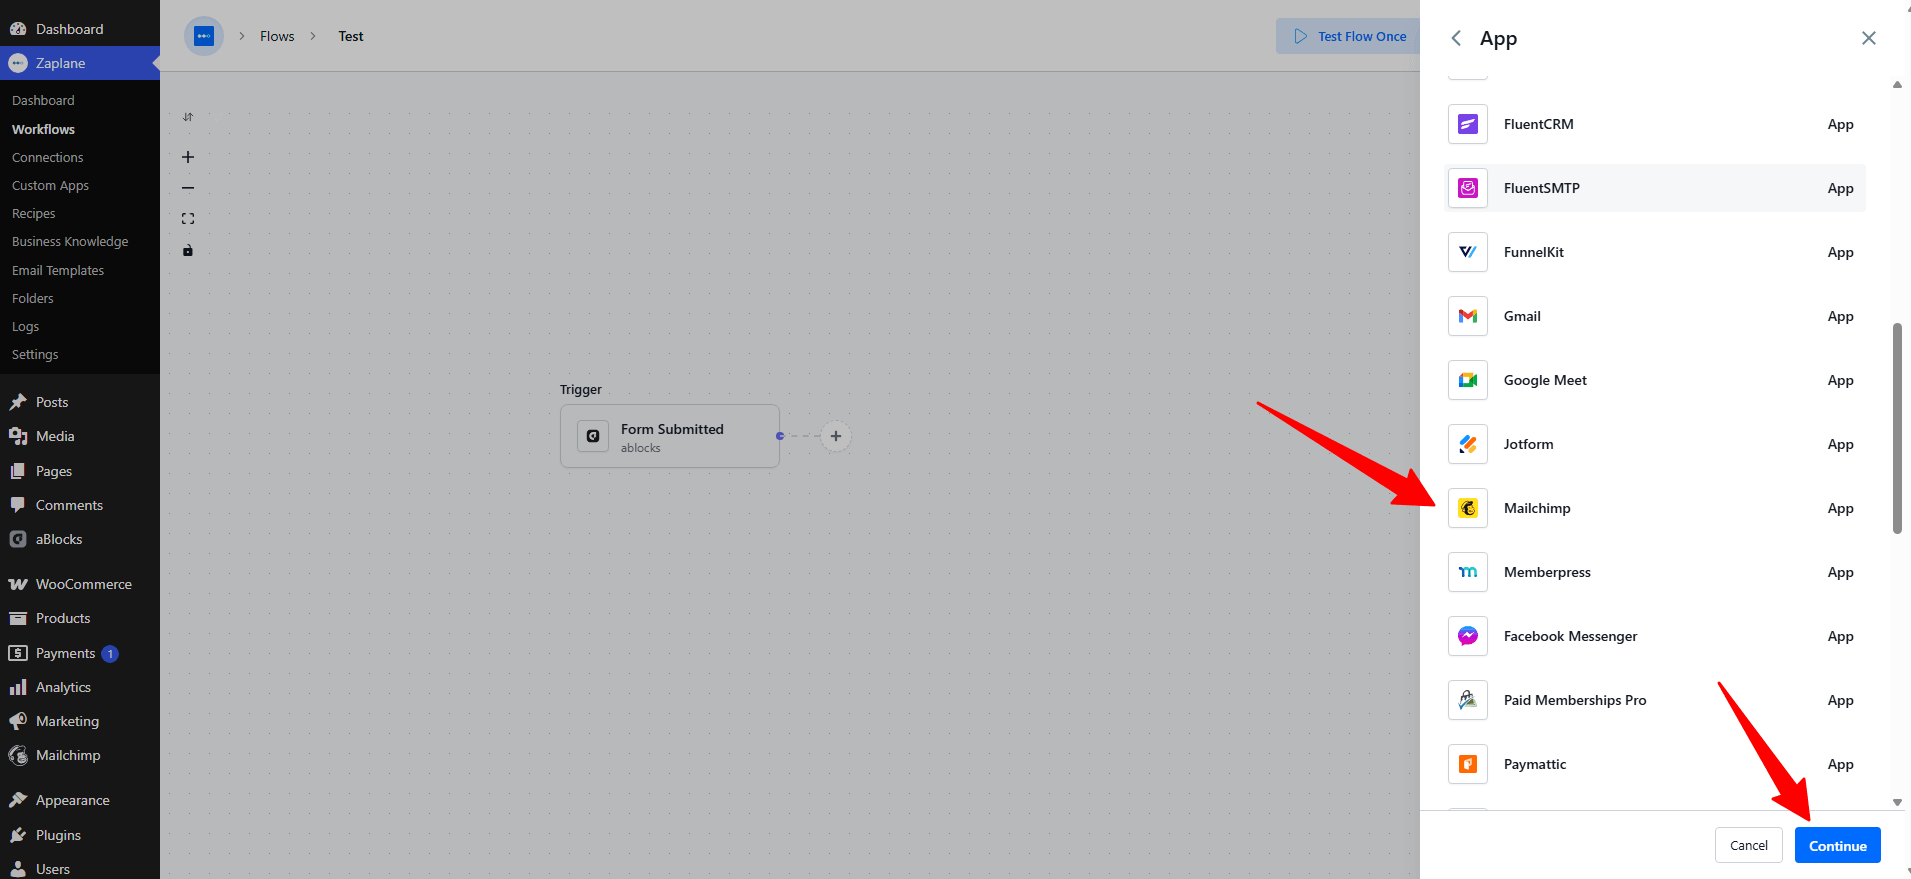
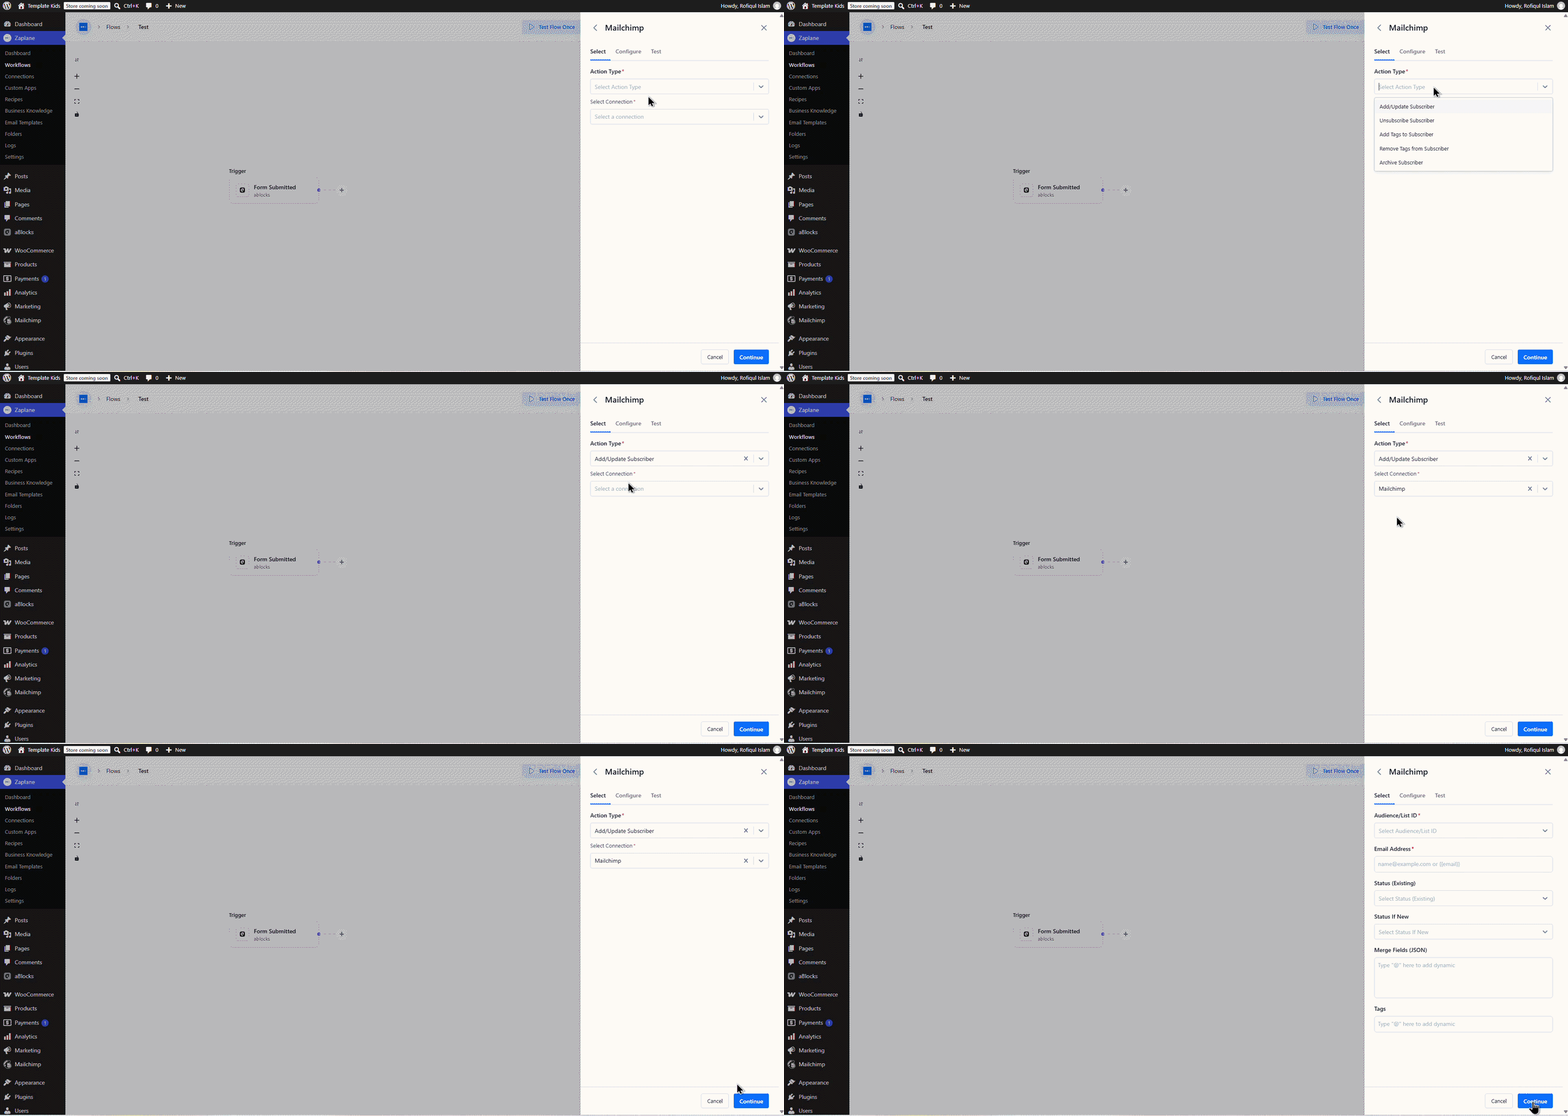
Step 9: Select the Action Type and Connection
- Set Action Type to Add/Update Subscriber (also shown as “Upsert Subscriber” on the workflow canvas), and pick your saved Mailchimp connection under Select Connection. Other available action types include Unsubscribe Subscriber, Add Tags to Subscriber, Remove Tags from Subscriber, and Archive Subscriber.
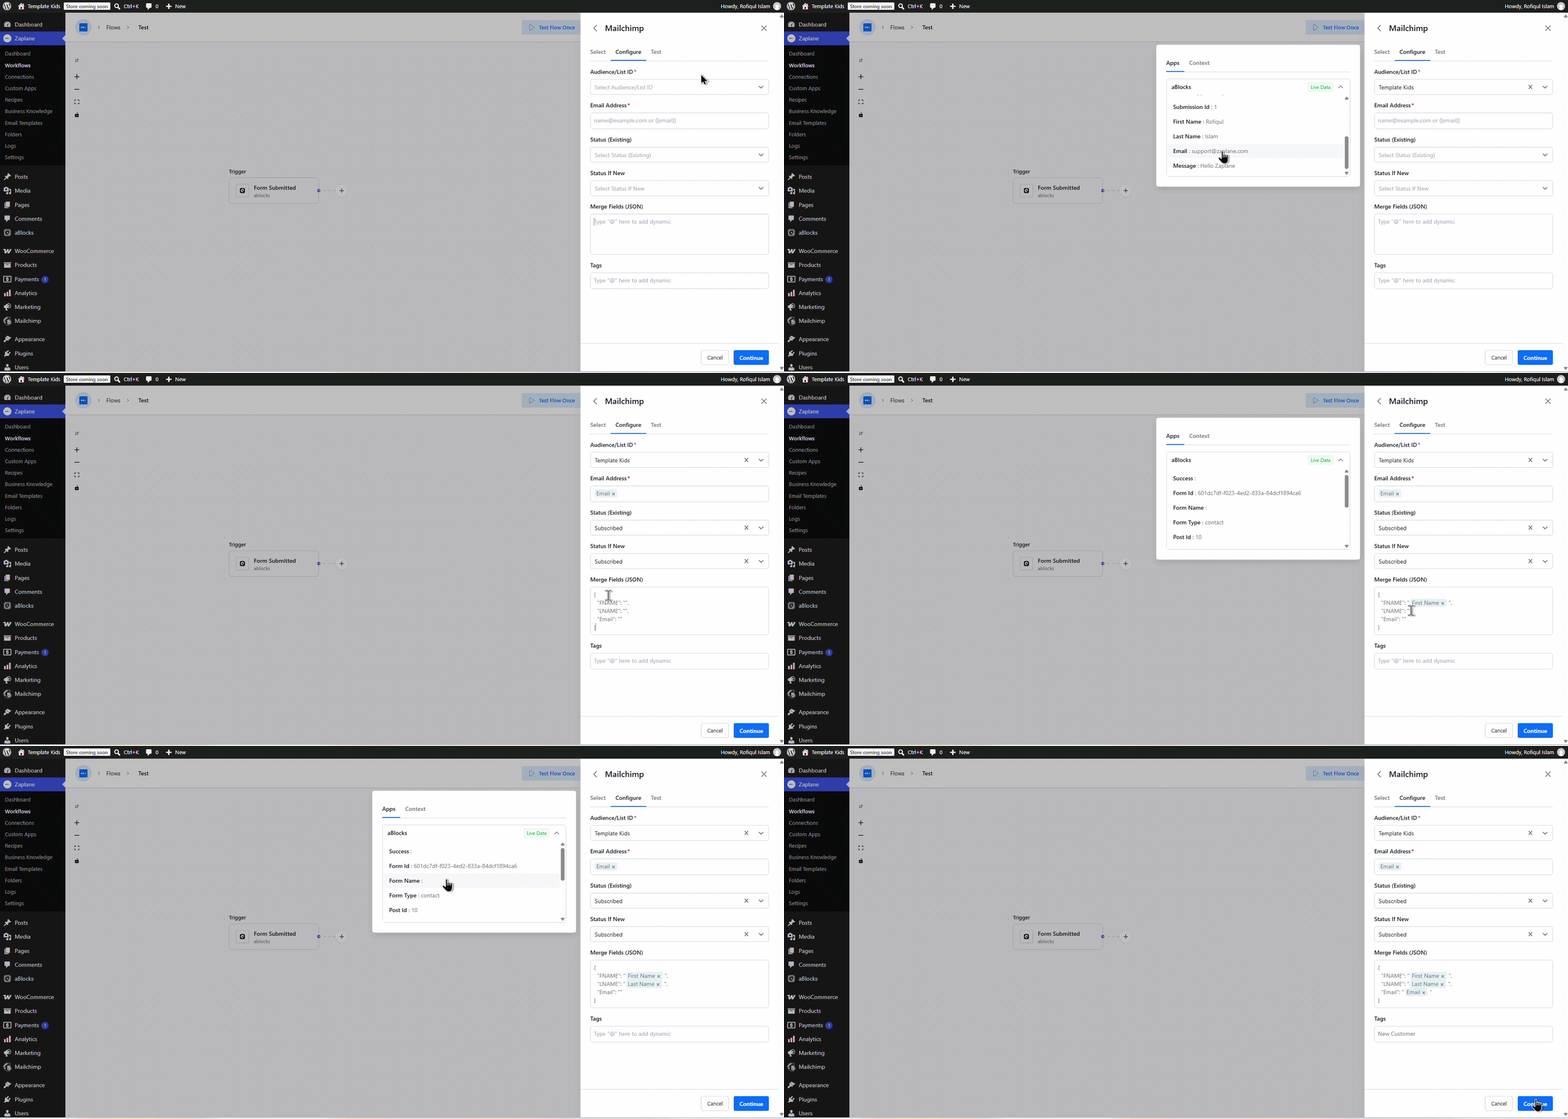
Step 10: Configure the Subscriber
- On the Configure tab, choose the Audience/List ID, map the Email Address to the trigger’s dynamic data, and set Status (Existing) and Status If New (e.g. both “Subscribed”). In Merge Fields (JSON), map fields like FNAME, LNAME, and Email to the matching dynamic values from the trigger.
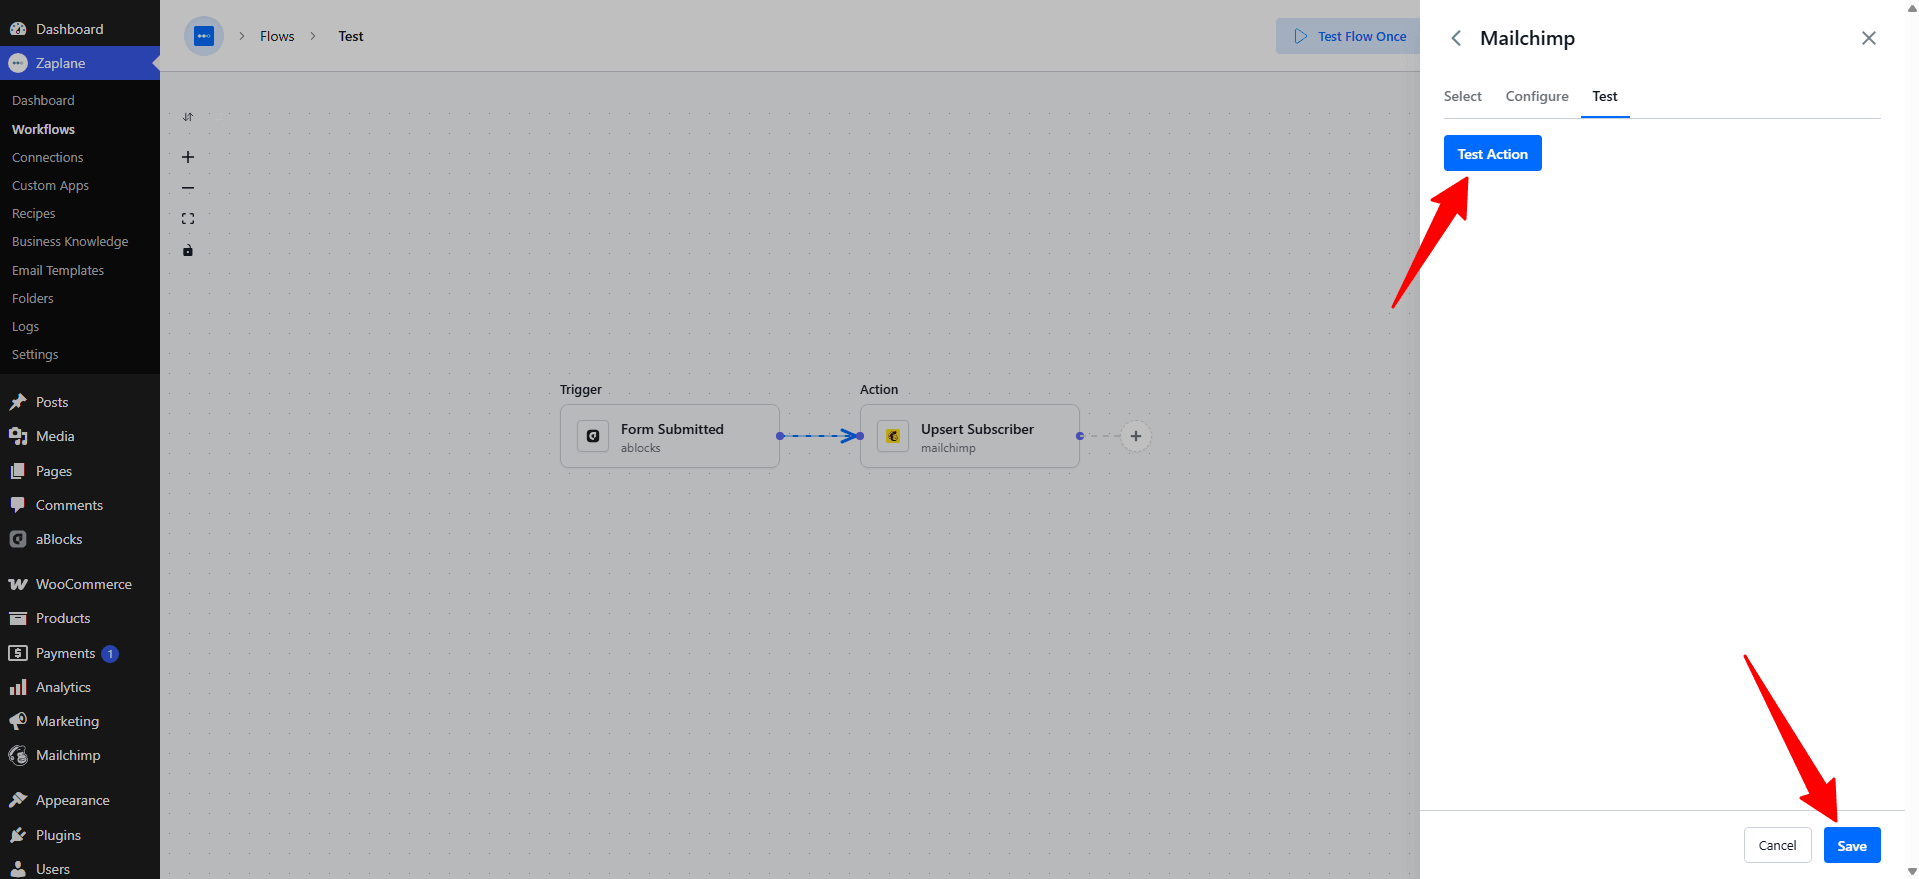
Step 11: Test the Action
- On the Test tab, click Test Action to confirm Zaplane can reach Mailchimp and create or update a real subscriber, then click Save.
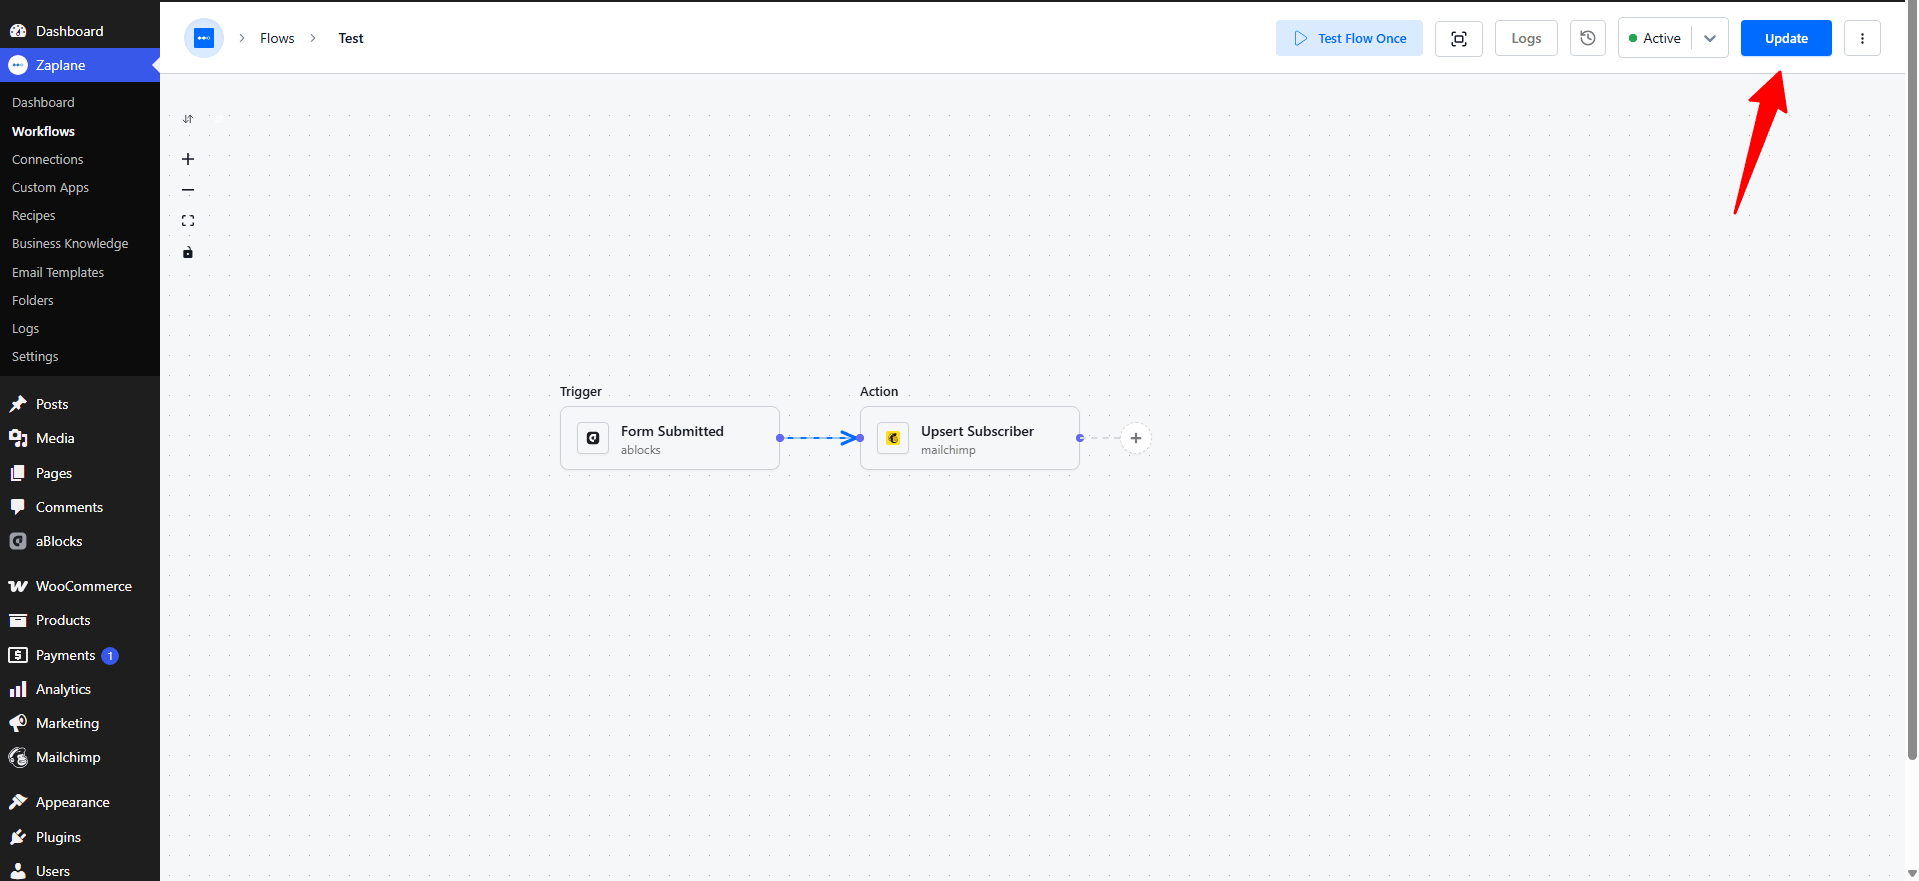
Step 12: Update and Activate the Workflow
- Click Update to save the workflow with the new action in place.
Step 13: Submit a Real Test Entry
- Submit the actual form on your site. In Log History, you’ll see both the trigger and the mailchimp upsert_subscriber action complete successfully — and the new contact will appear in Mailchimp’s Audience > Contacts list with the mapped name, email, and “Subscribed” status.
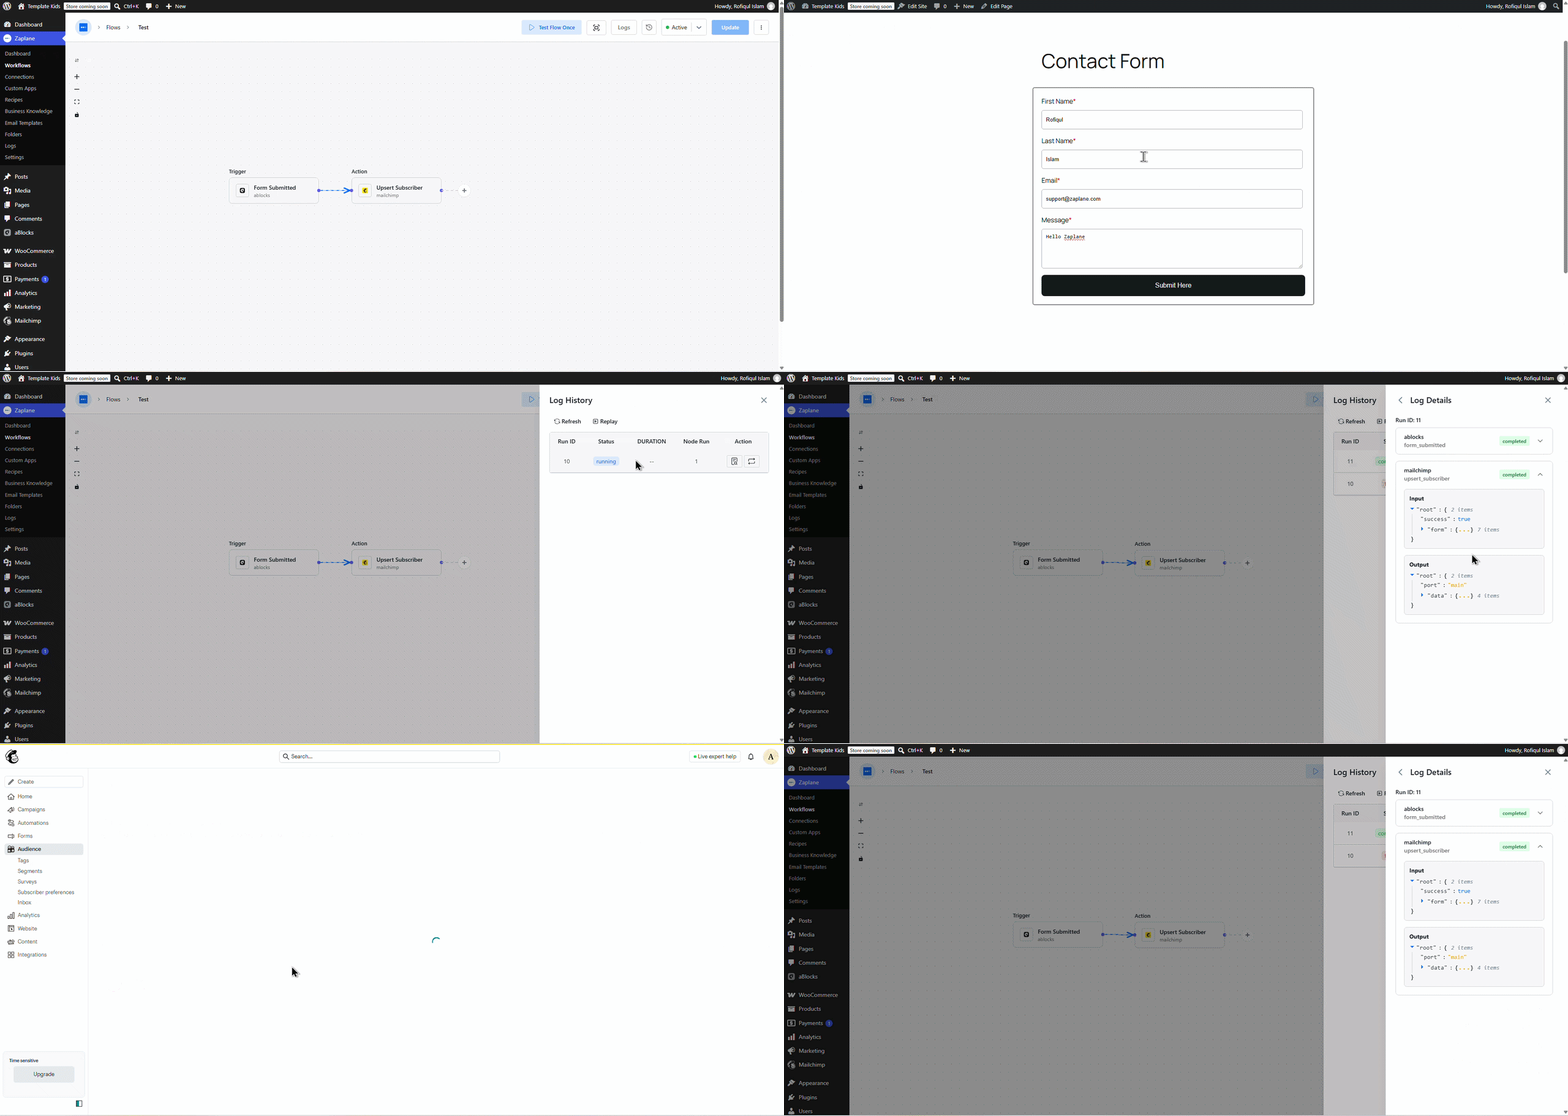
Your Zaplane workflow now adds or updates a real Mailchimp subscriber — complete with name, email, and tags — every time the trigger fires.
Done!
You’ve connected Mailchimp to Zaplane and automated subscriber management from your workflow.