

This guide shows you how to connect Shopify to Zaplane and use the Order Created trigger, so your workflow starts automatically whenever a new order is placed in your store. You will need a Shopify store and access to the Shopify Dev Dashboard.
Part 1: Create a Shopify App and Get Your Credentials
Step 1: Find Your Store Domain
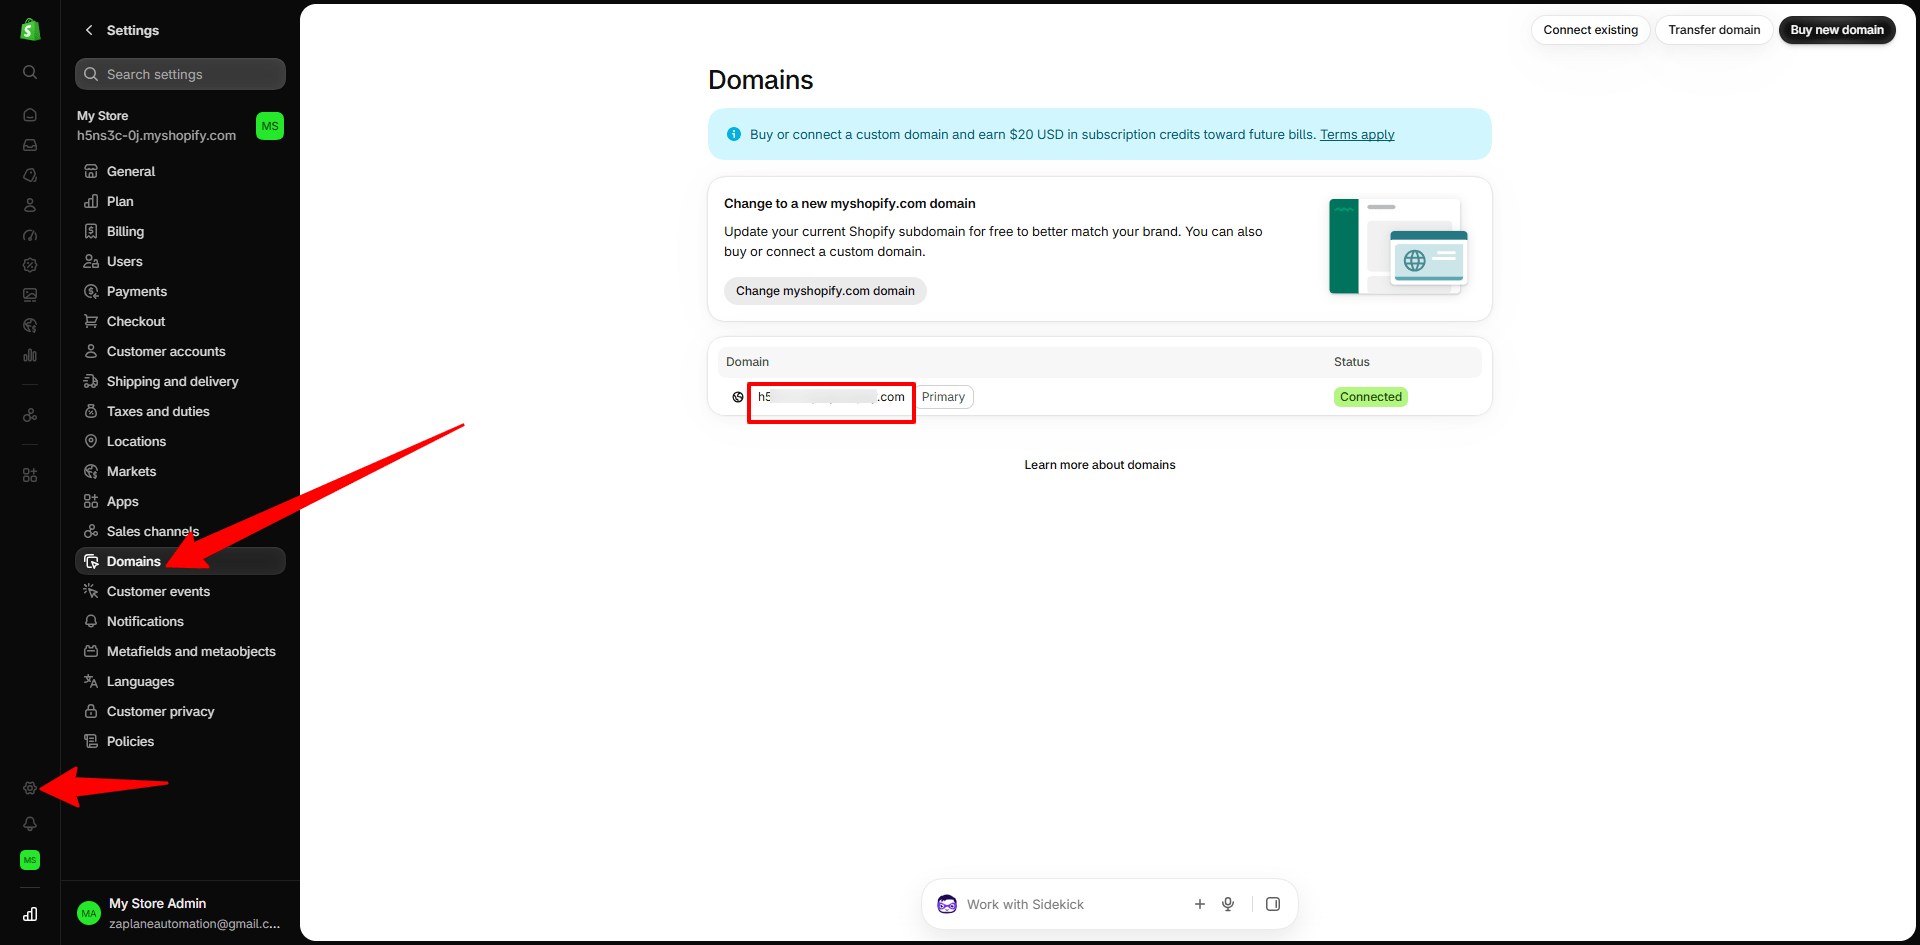
In your Shopify admin, click Settings at the bottom left, then open Domains. Note your store’s myshopify.com domain; you will need it when creating the connection in Zaplane.
Step 2: Open Develop Apps
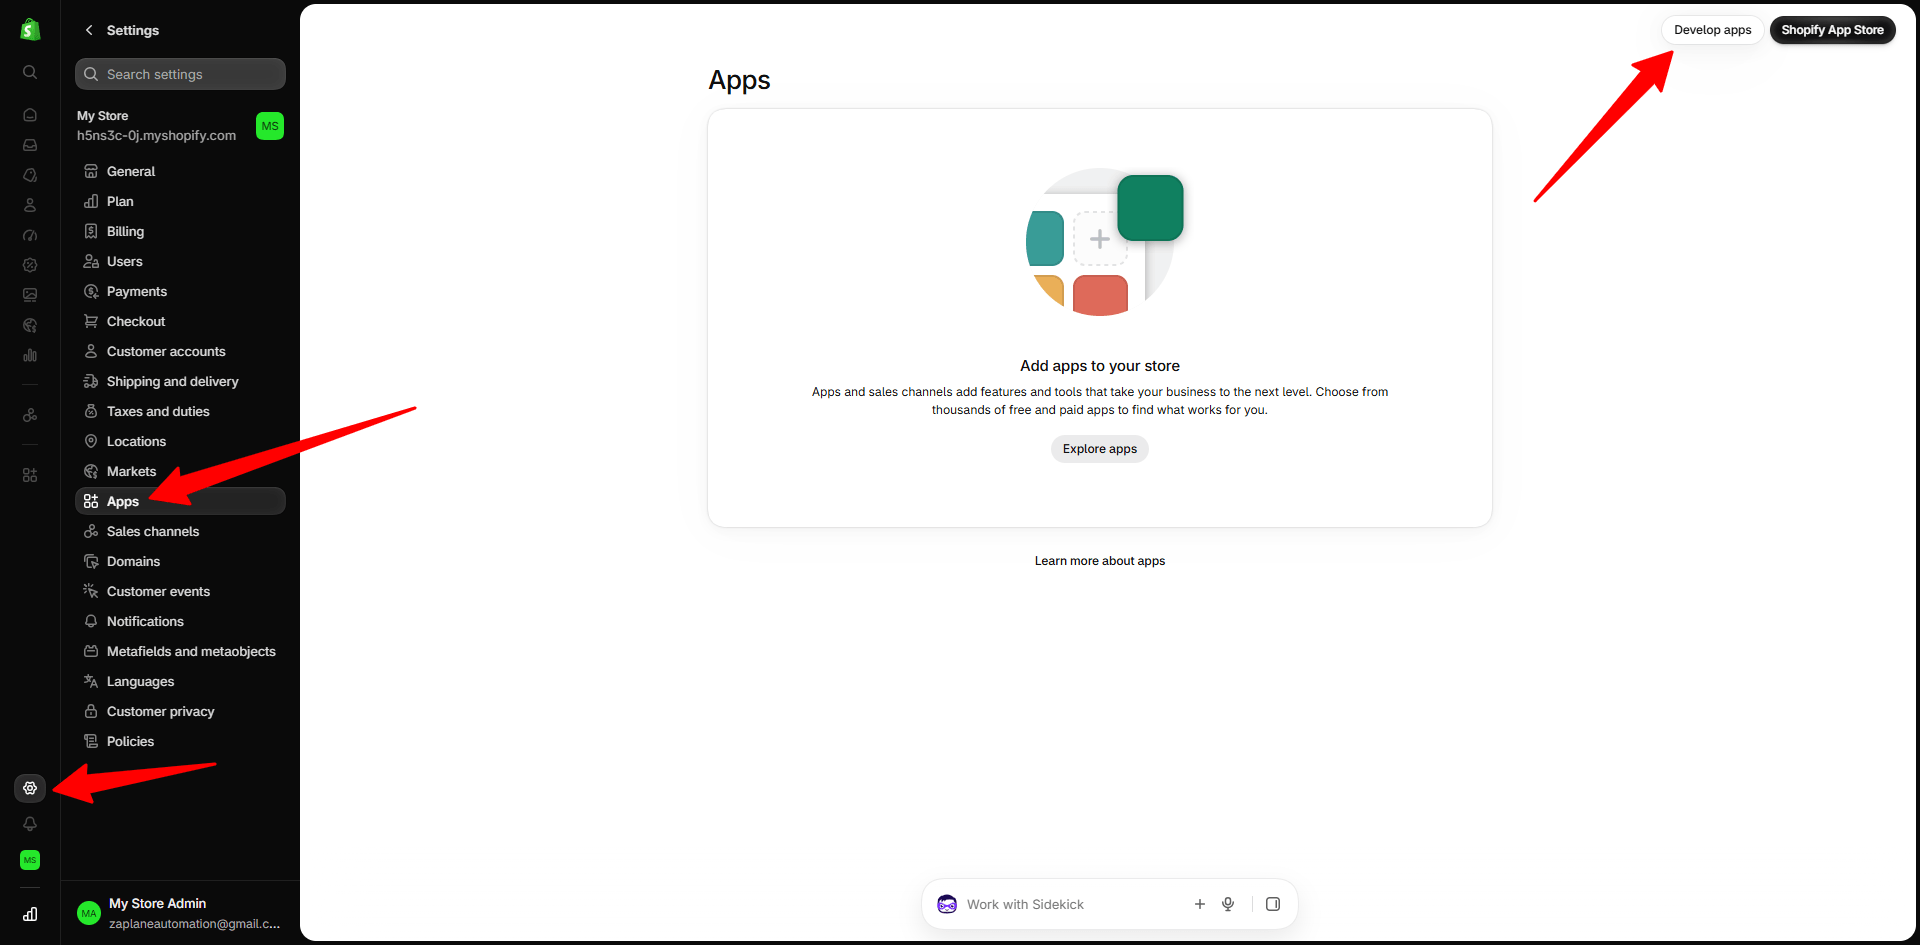
In Settings, go to Apps, then click Develop apps at the top right.
Step 3: Build Apps in Dev Dashboard
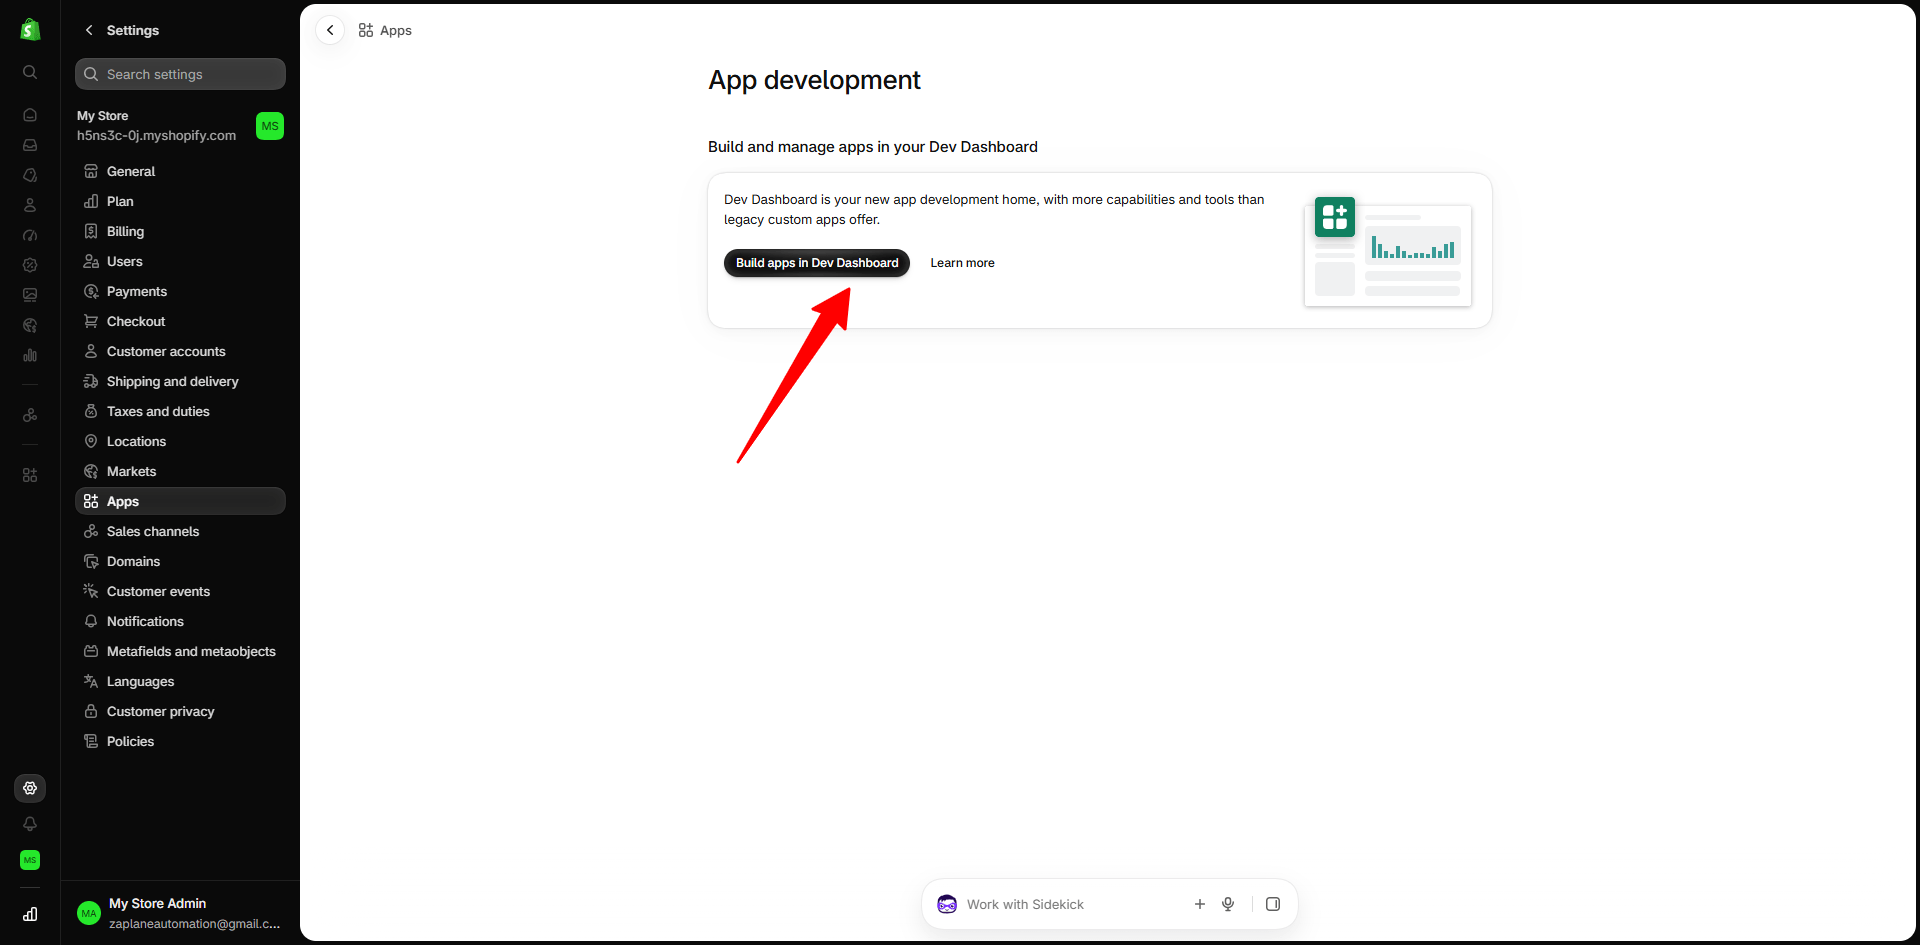
On the App development page, click Build apps in Dev Dashboard.
Step 4: Create an App
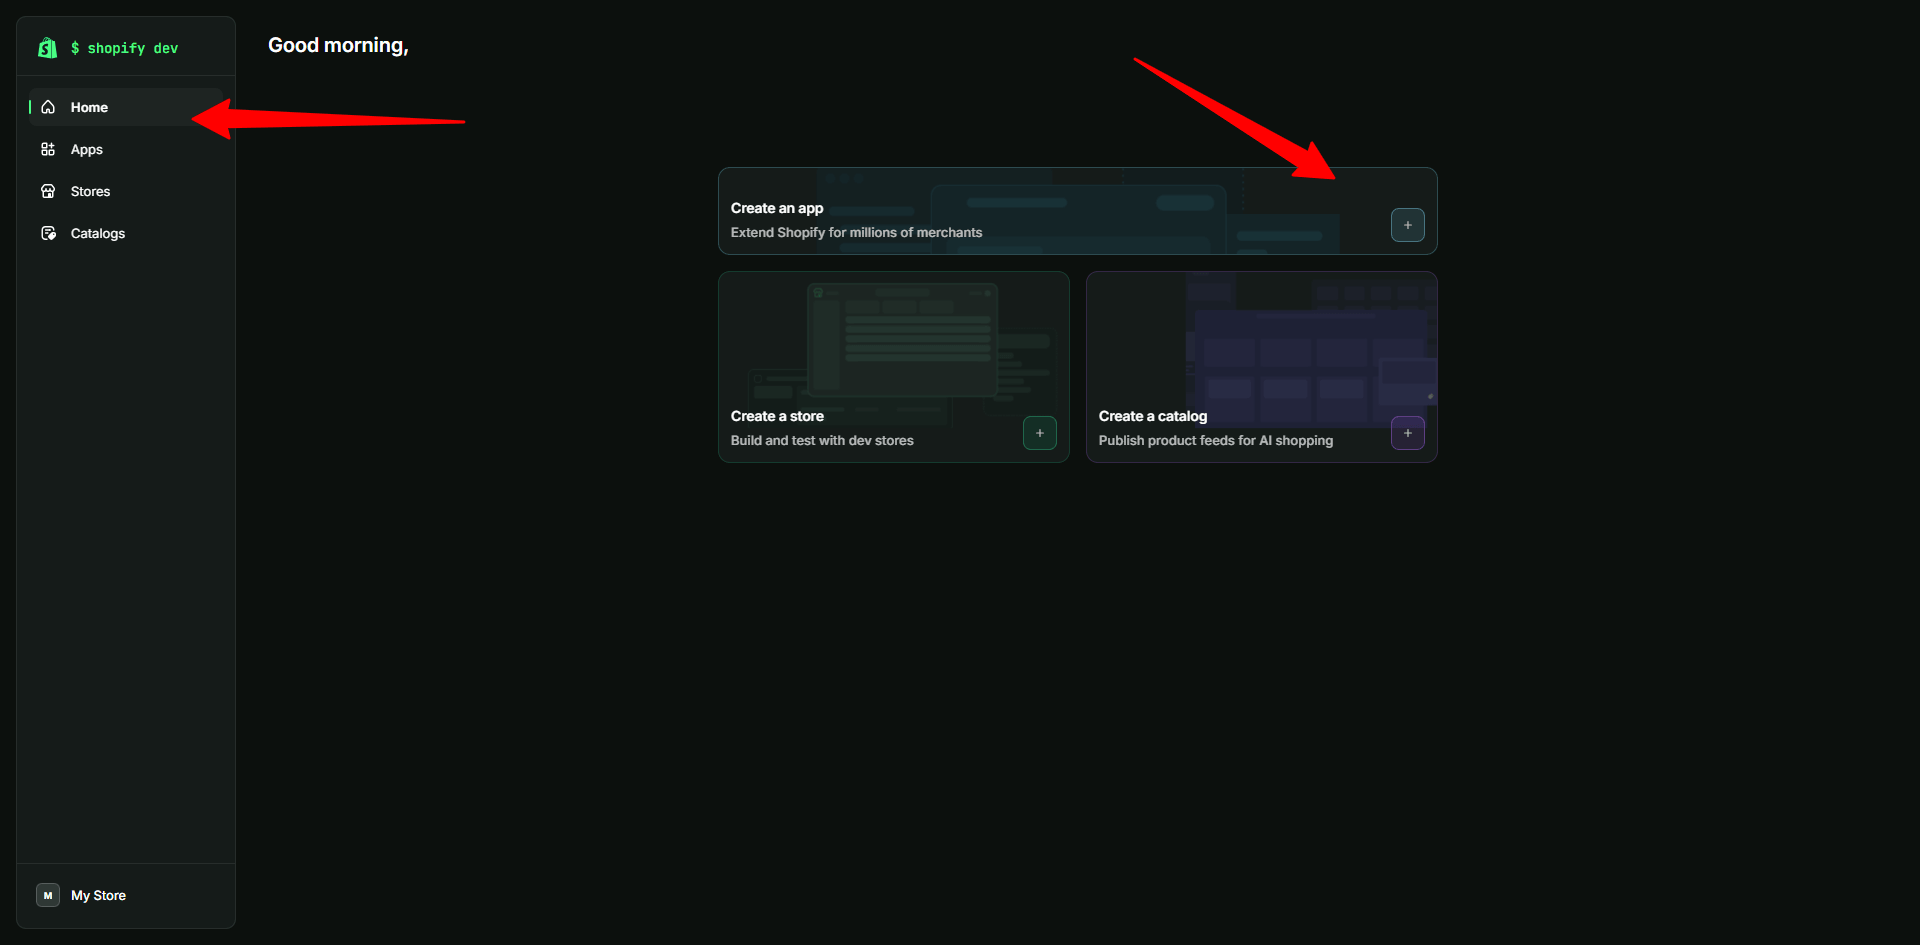
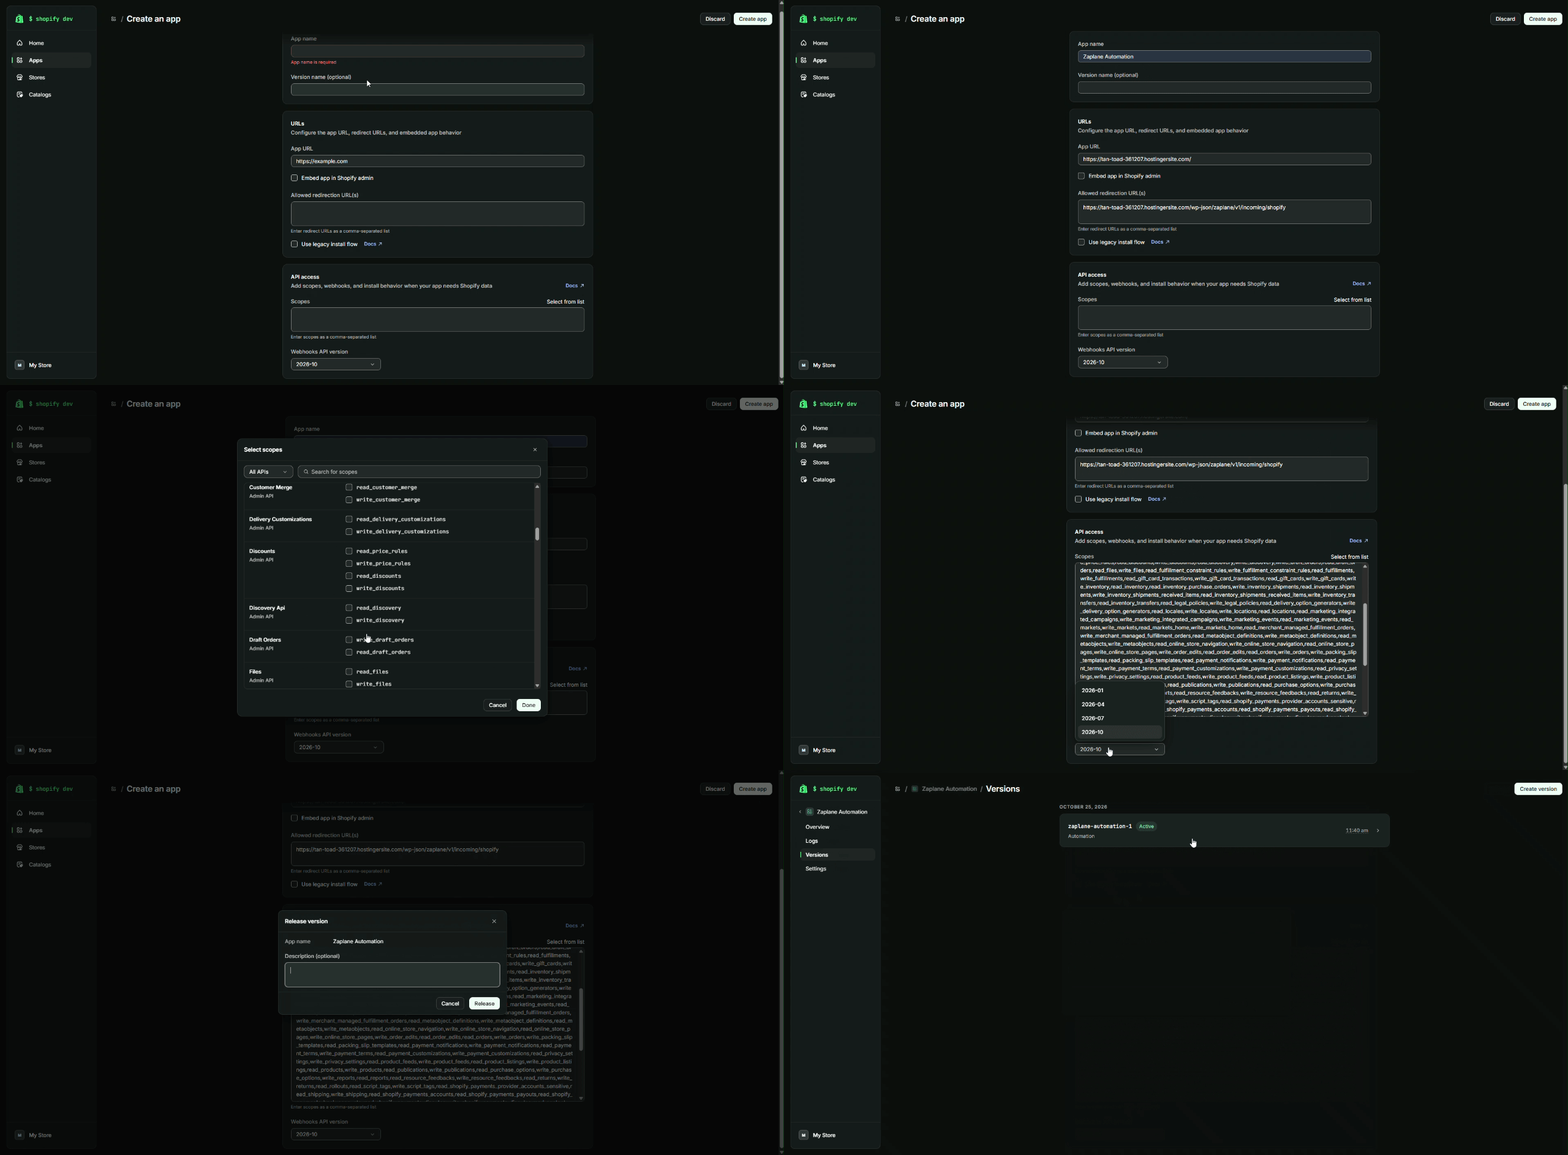
In the Dev Dashboard, open Home and click Create an app.
Step 5: Fill In the App Details
On the Create an app page, fill in the following:
Zaplane Automation.Then click Create app.
Step 6: Release a Version
In the Release version window, add an optional description and click Release. The version is now listed as Active.
Step 7: Install the App and Copy Your Credentials
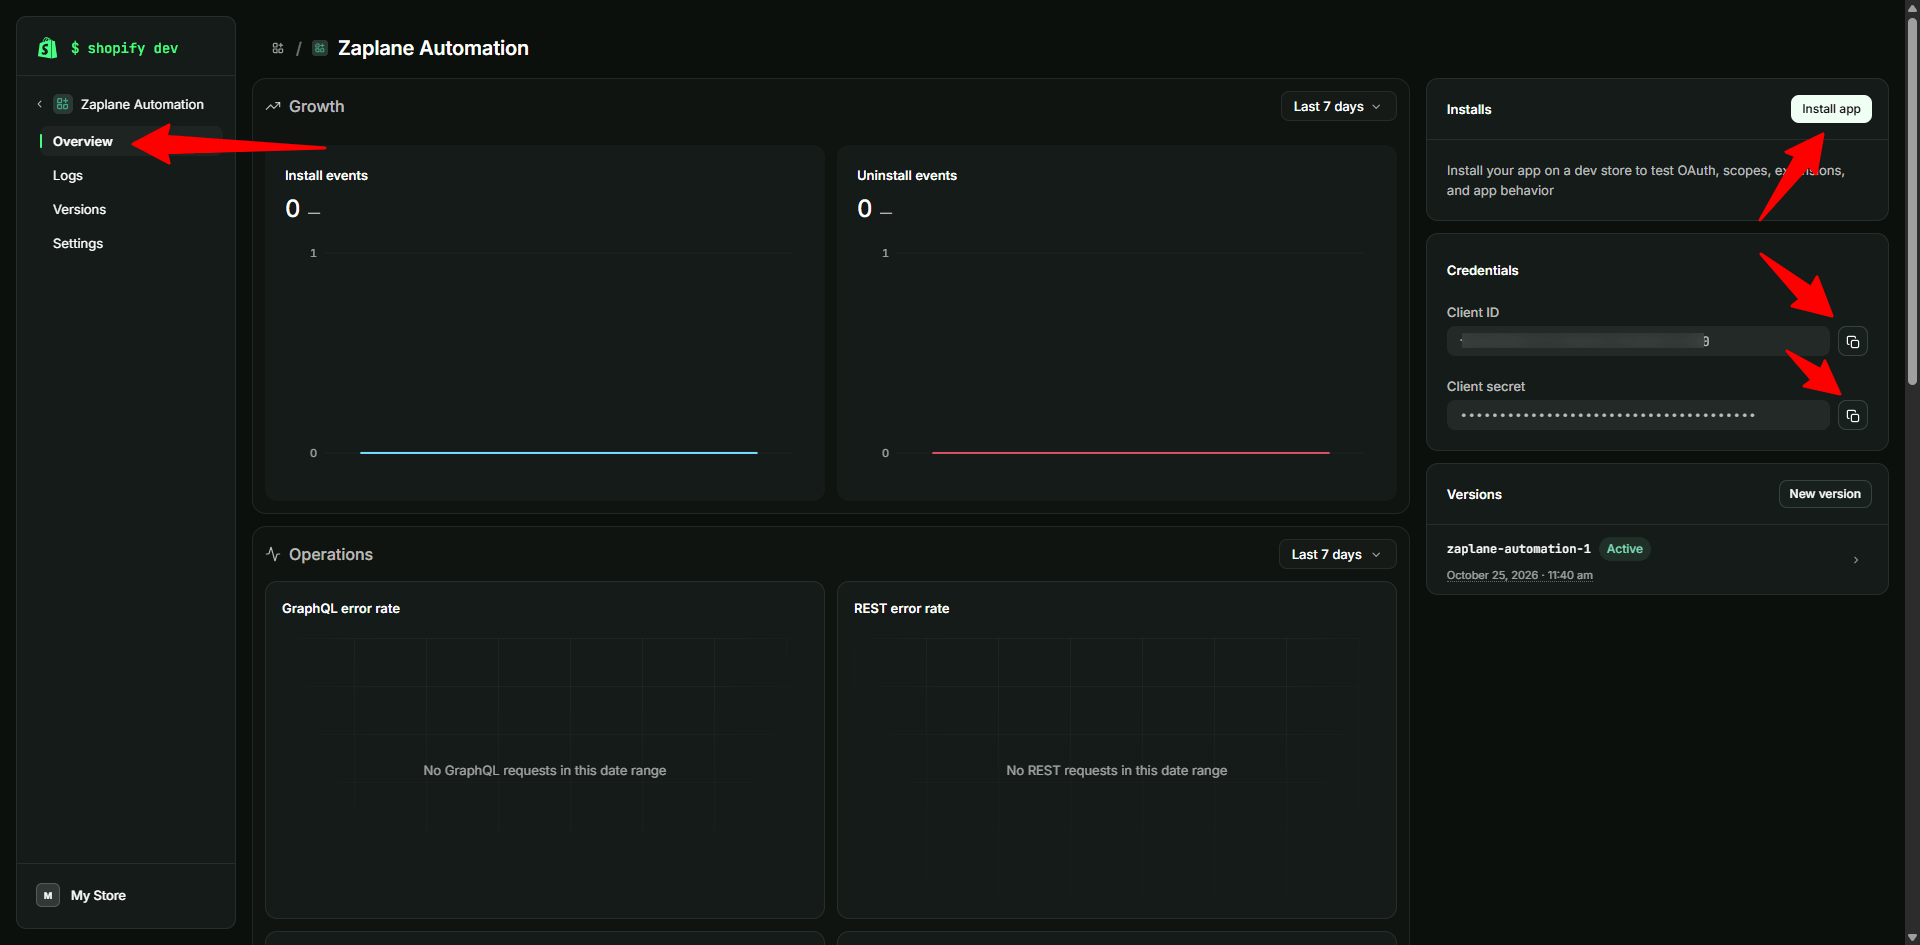
On your app’s Overview page, click Install app to install it on your store. Under Credentials, use the copy icons to copy your Client ID and Client Secret.
Part 2: Create the Connection in Zaplane
Step 8: Open Connections
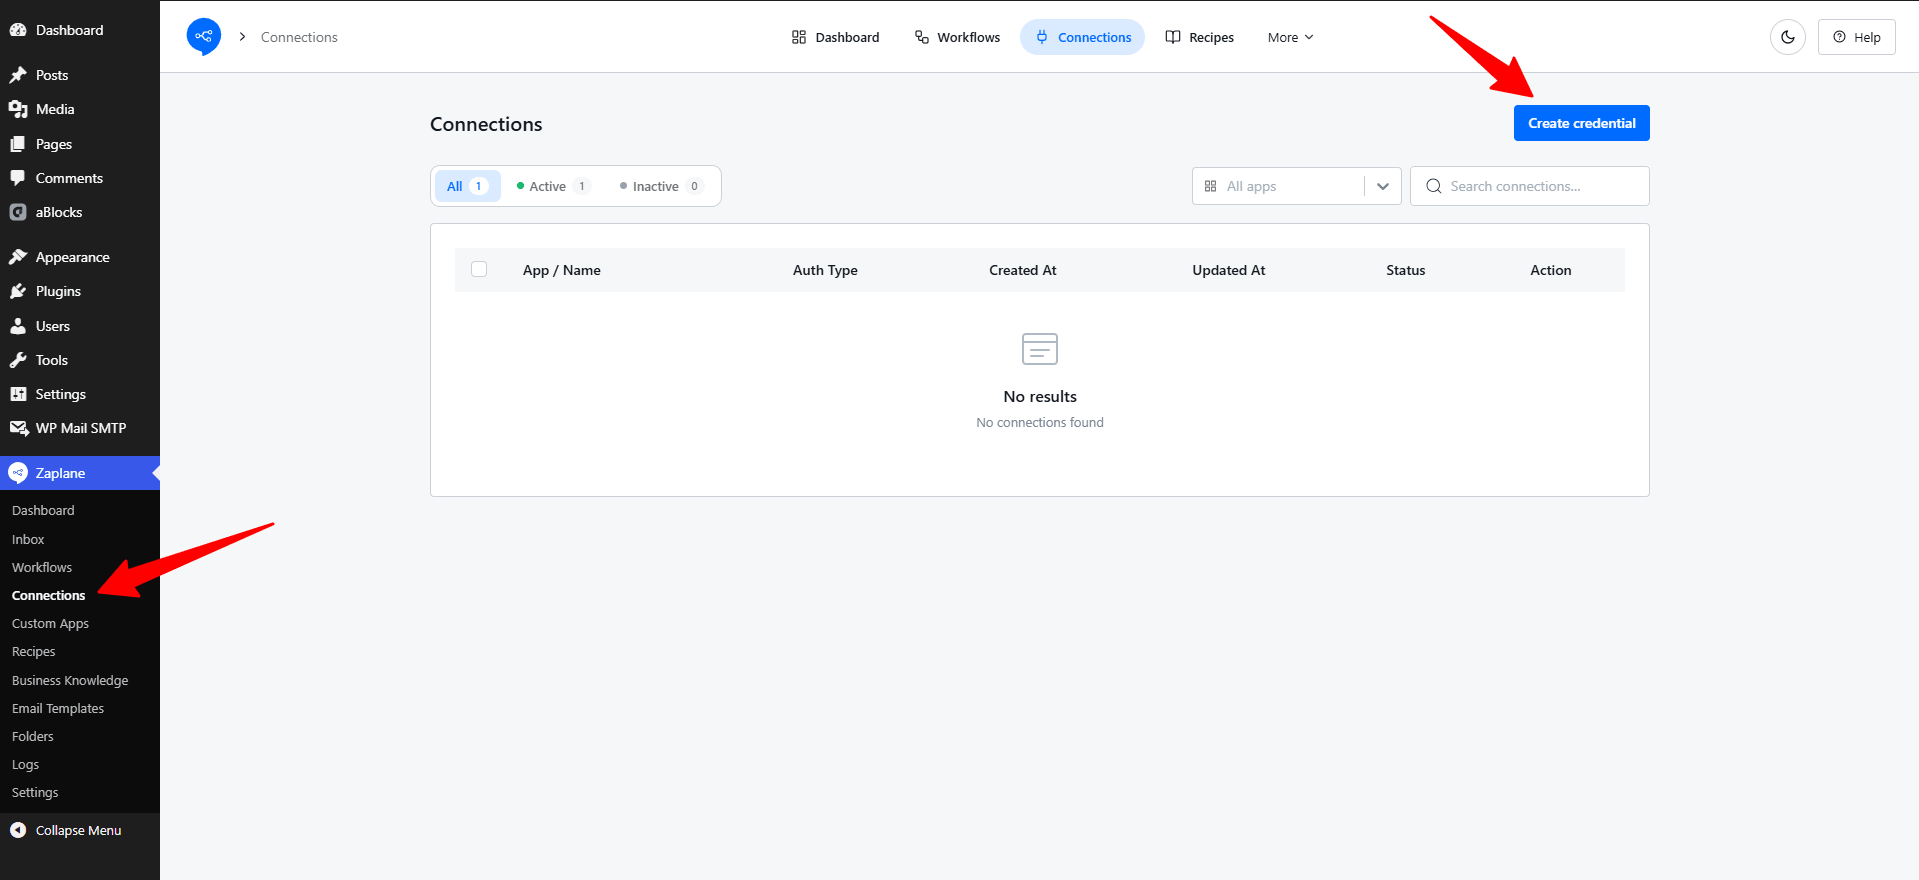
From your WordPress dashboard, go to Zaplane > Connections, then click Create credential.
Step 9: Select Shopify
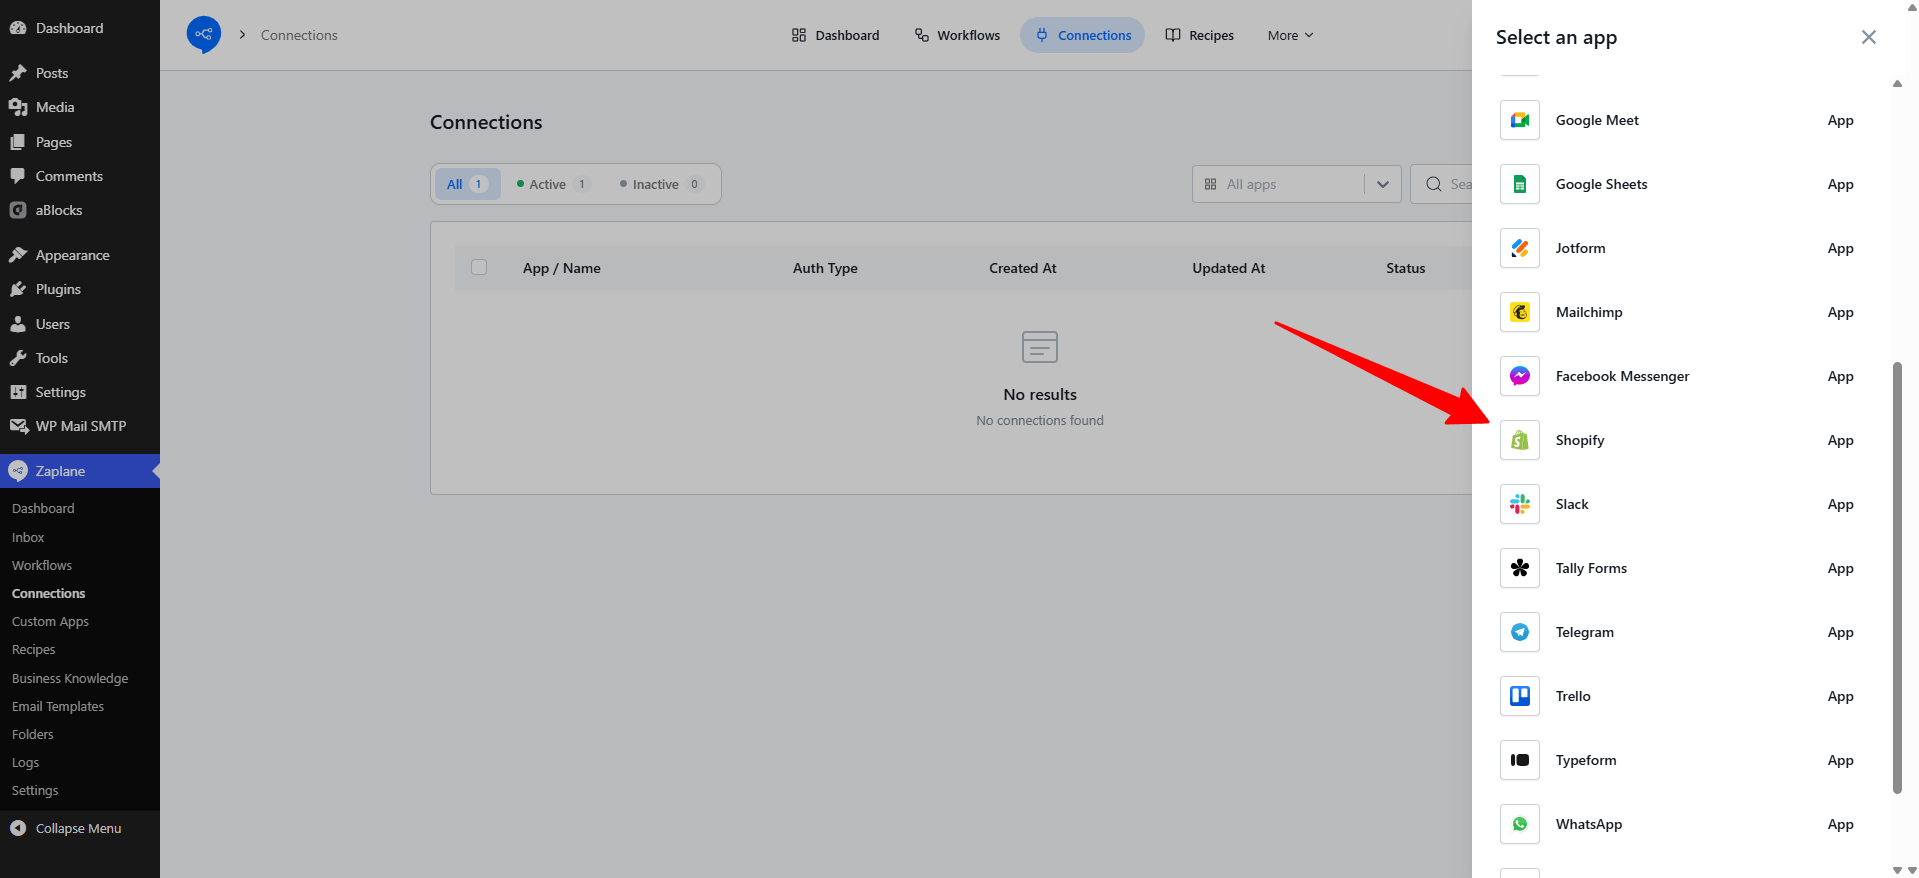
In the Select an app panel, find and select Shopify.
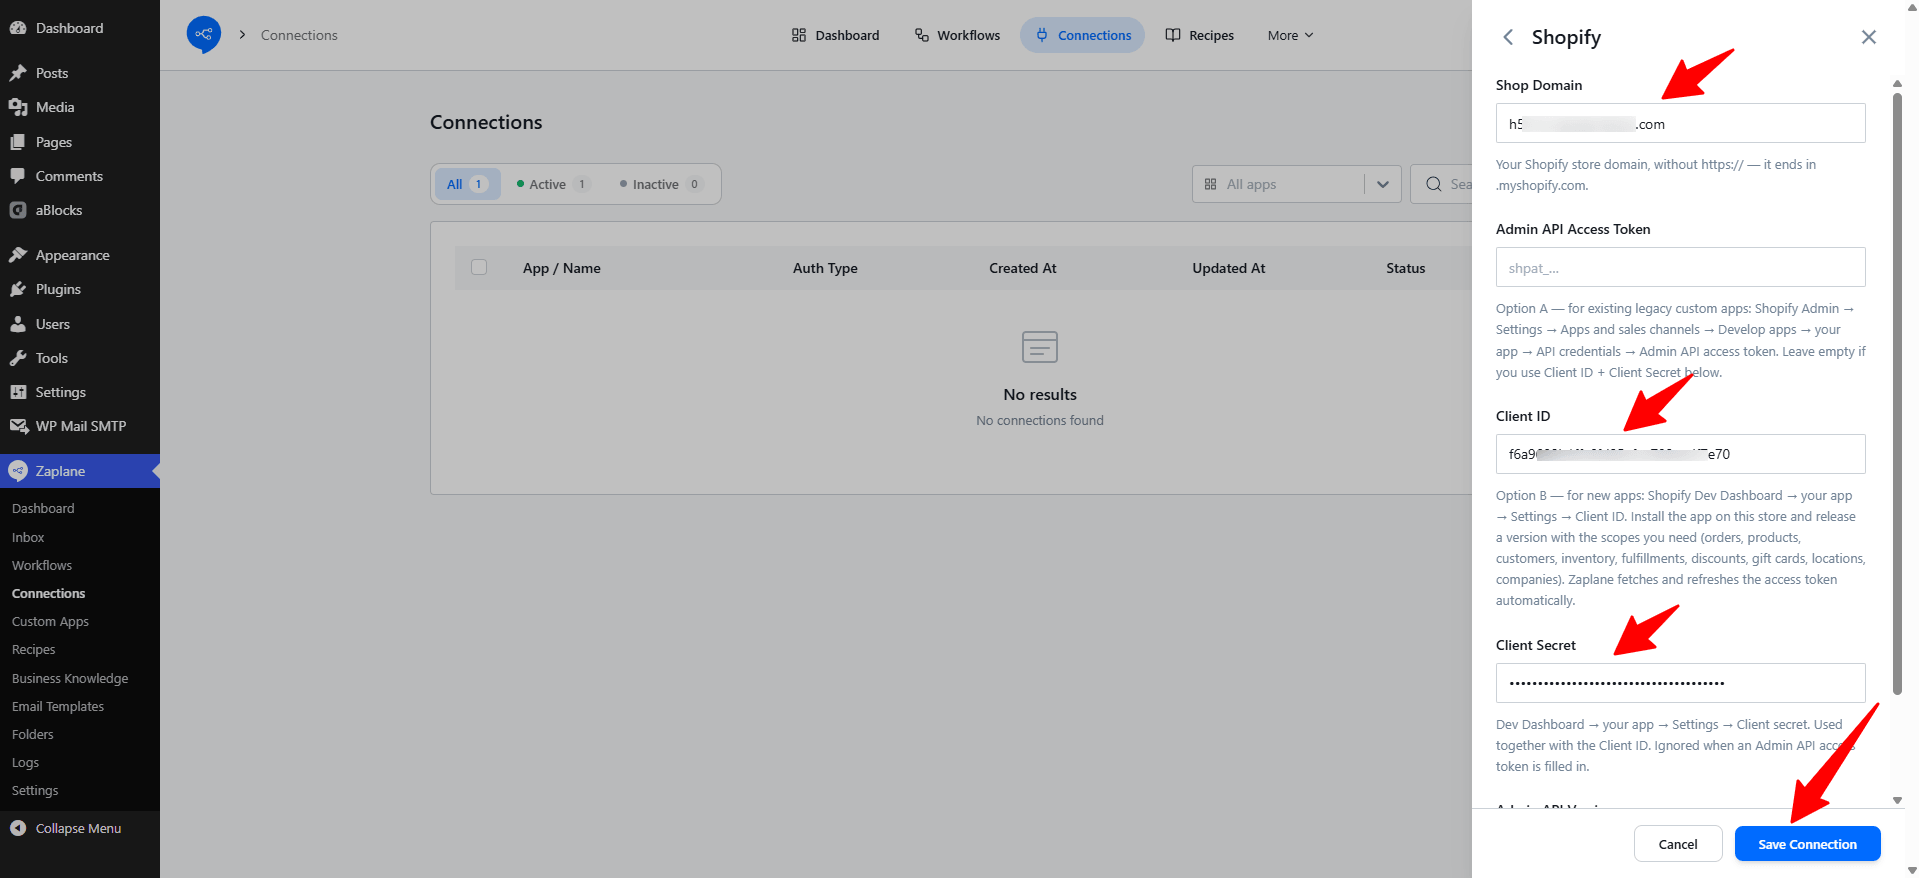
Step 10: Enter Your Shopify Details
Fill in the following fields, then click Save Connection:
https://.Leave Admin API Access Token empty when you use a Client ID and Client Secret. That field is only for existing legacy custom apps.
Part 3: Add the Trigger to Your Workflow
Step 11: Create a Workflow
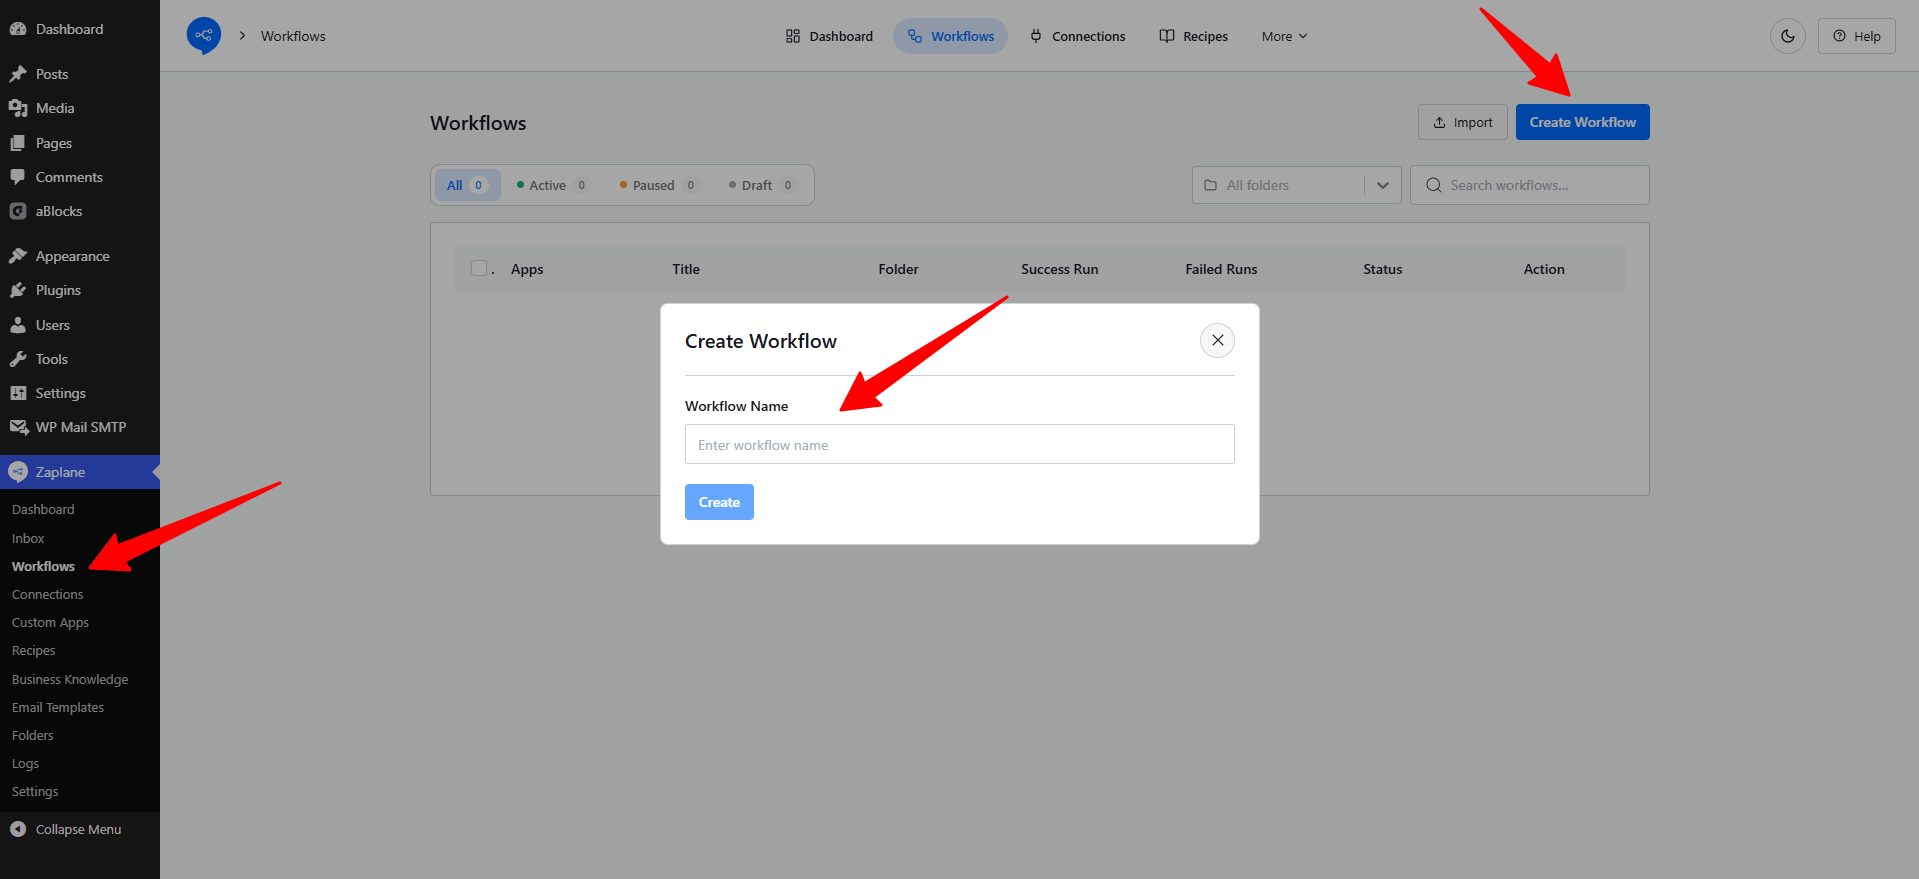
Go to Zaplane > Workflows from your WordPress dashboard, click Create Workflow, enter a name in the Workflow Name field, then click Create.
Step 12: Add the Trigger
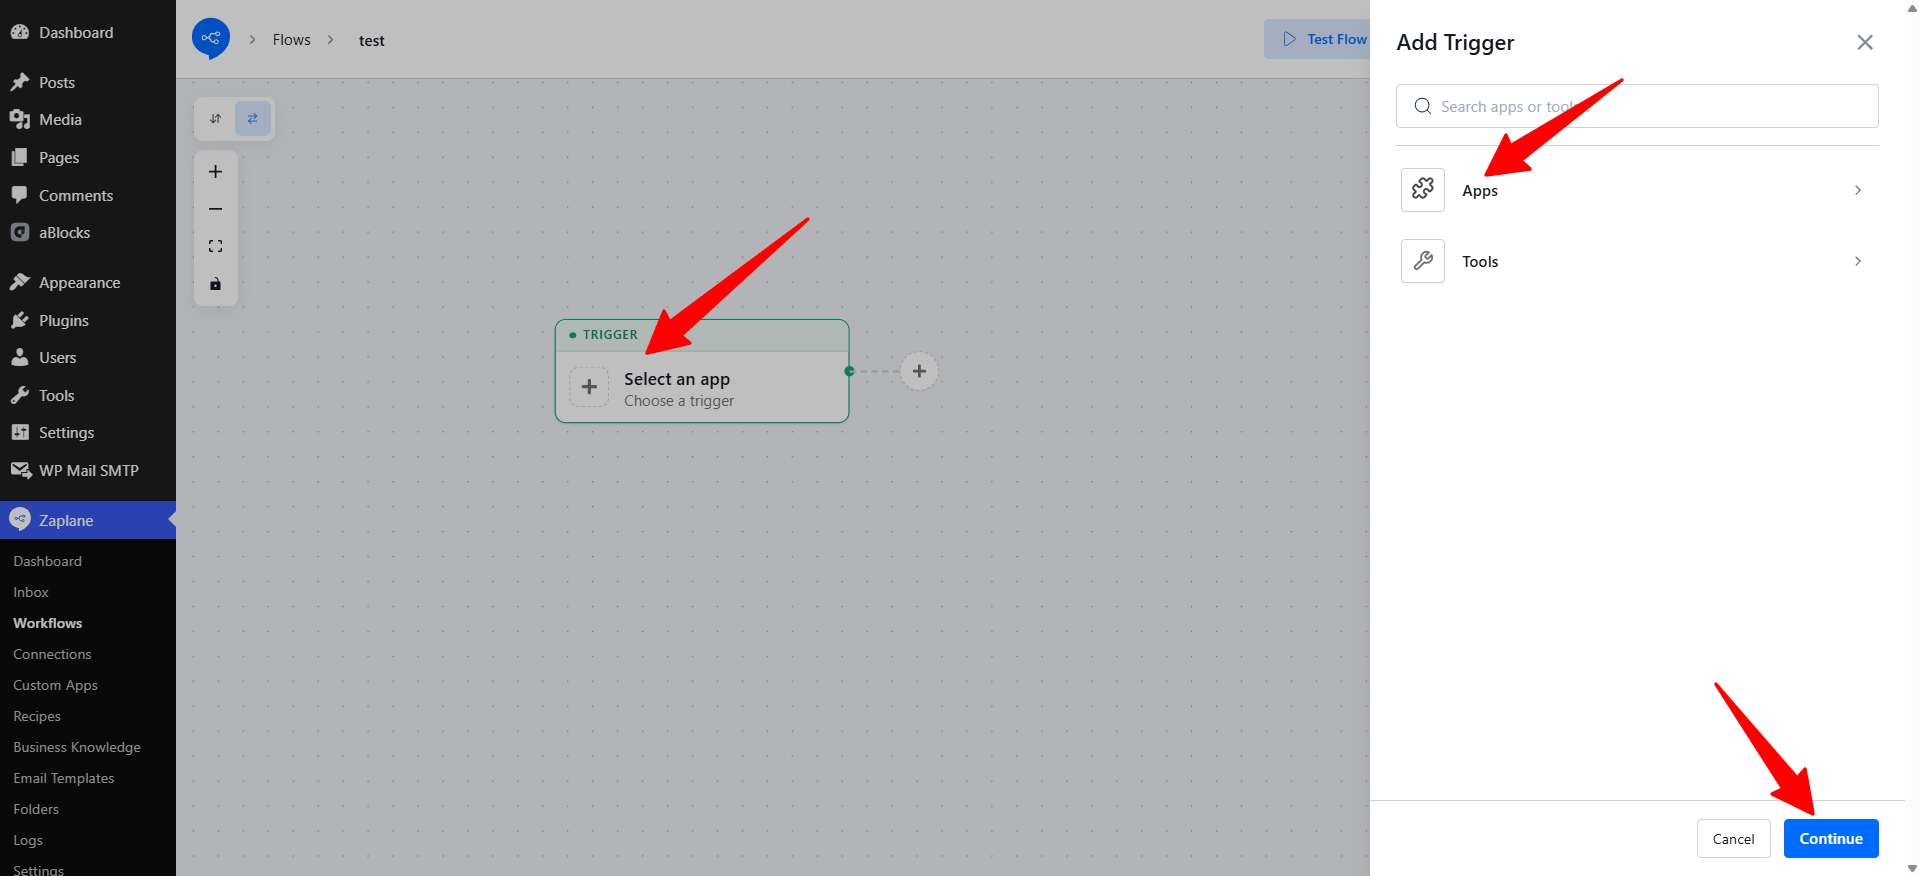
Click Select an app in the Trigger box. In the Add Trigger panel, choose Apps.
Step 13: Select the Shopify App
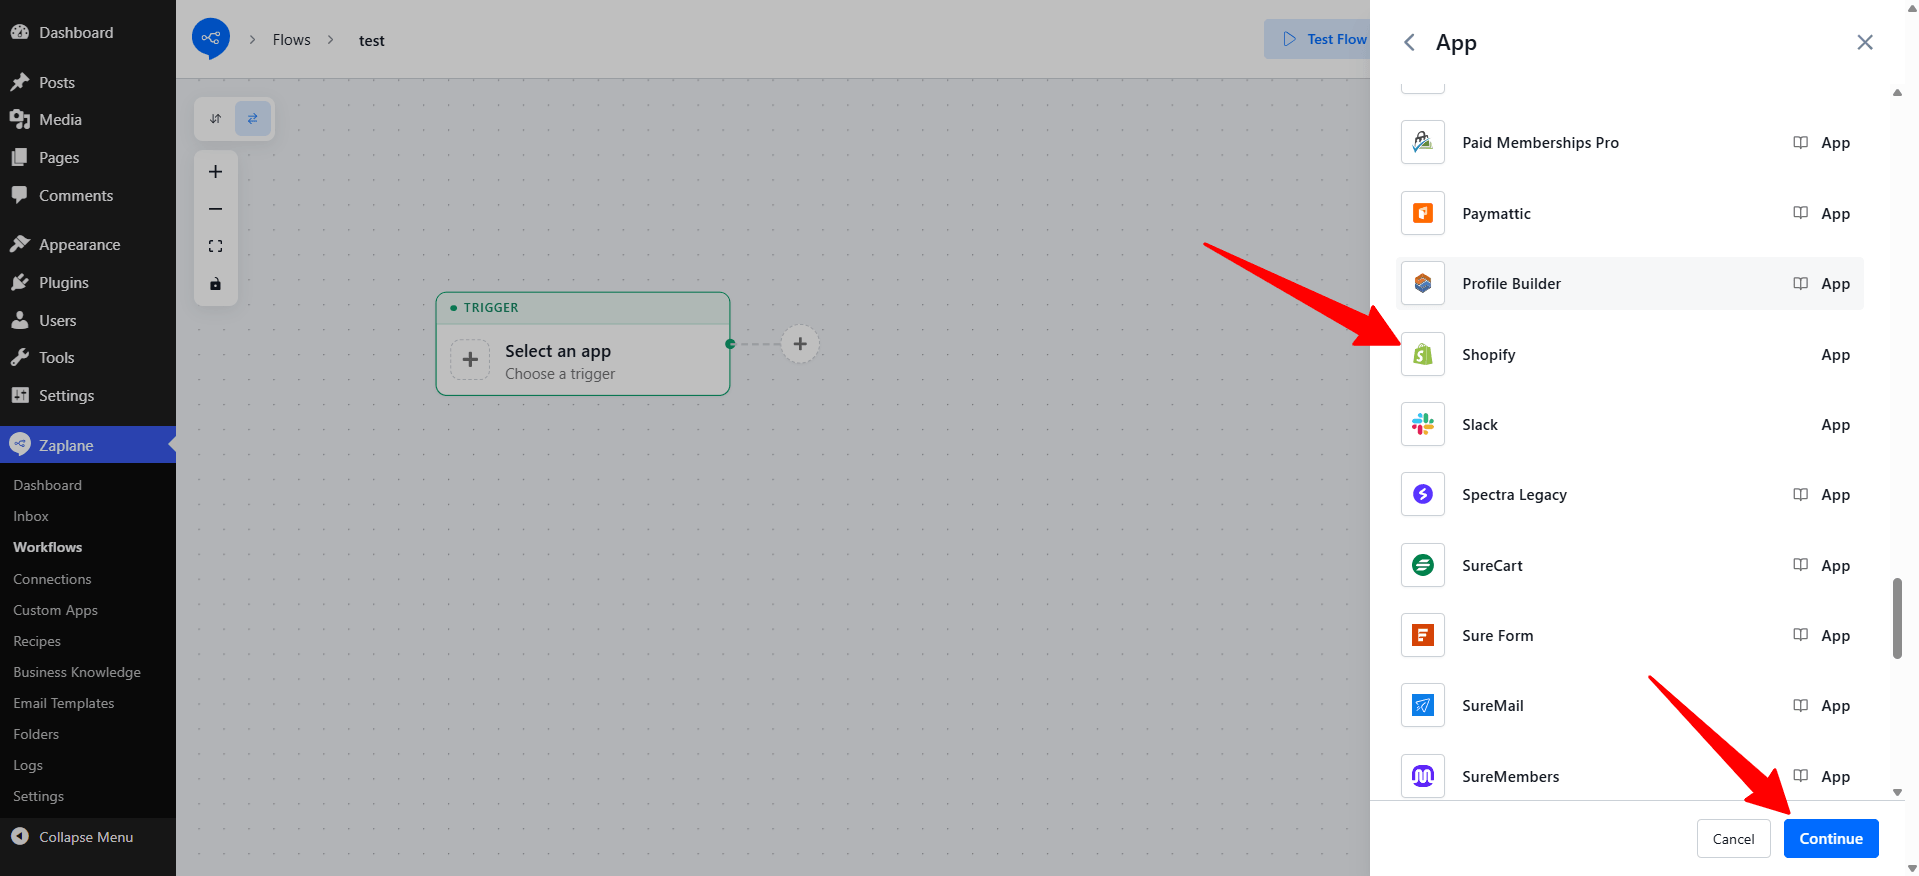
Scroll through the app list, select Shopify, then click Continue.
Step 14: Choose the Trigger Type
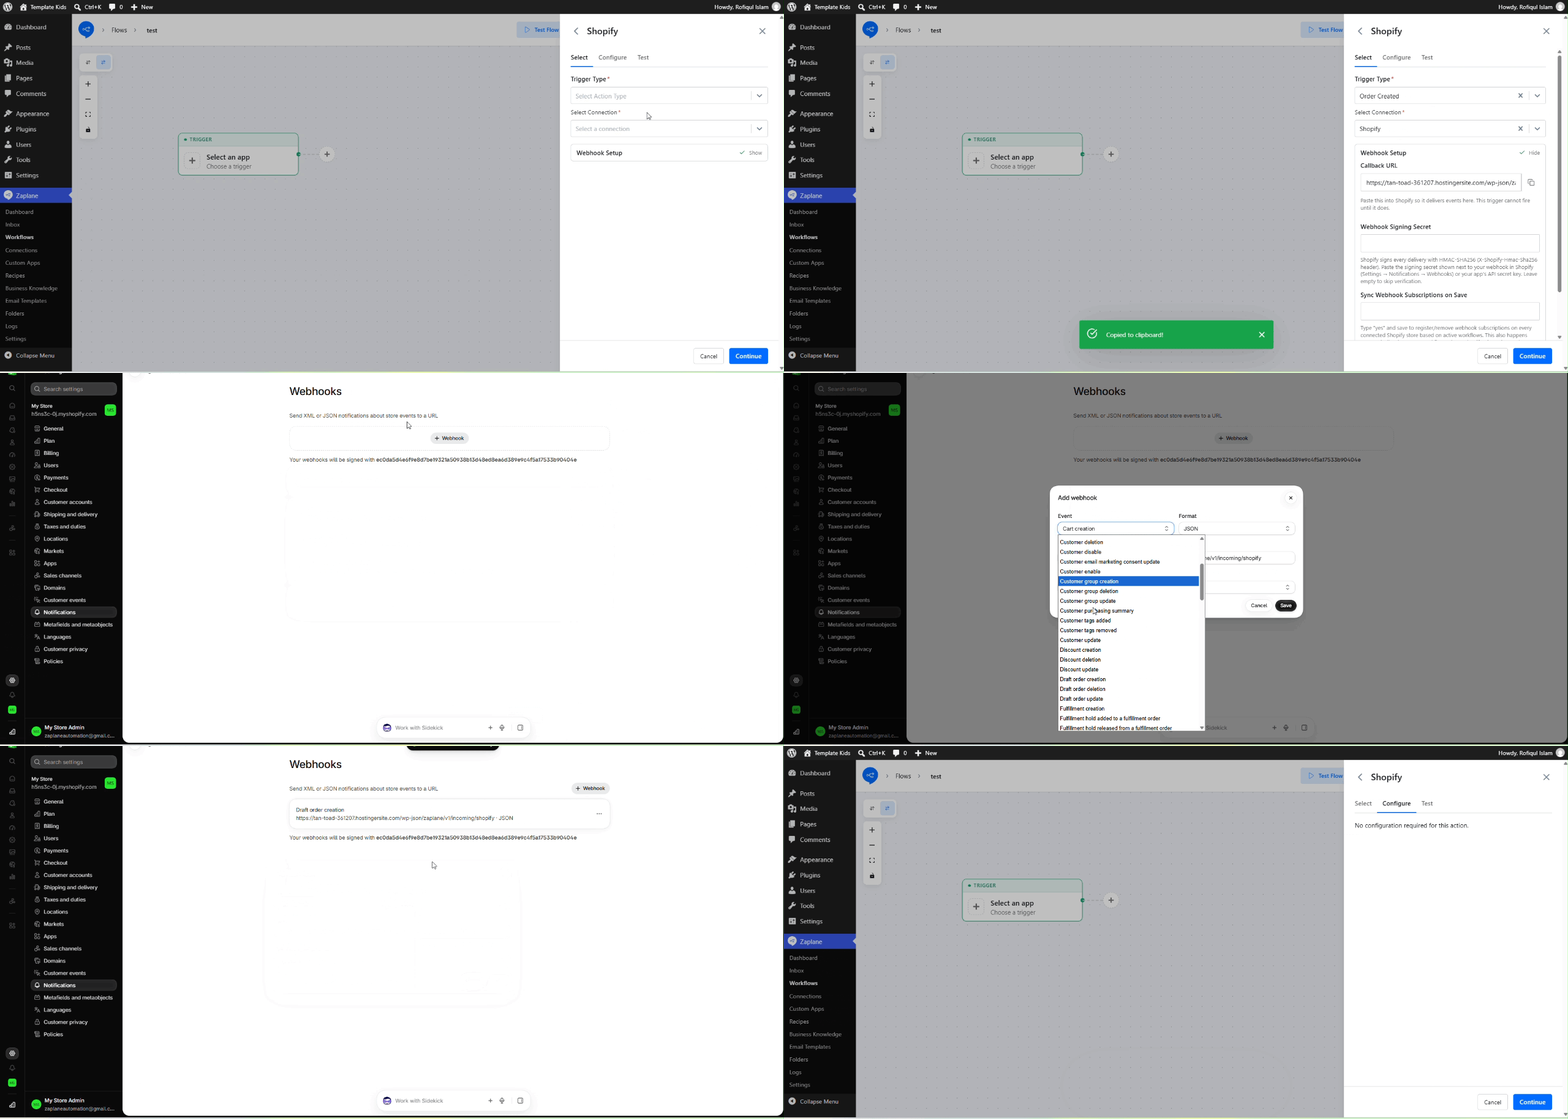
On the Select tab, choose Order Created from the Trigger Type dropdown. Then pick the Shopify connection you just created from the Select Connection dropdown. A Webhook Setup box appears below.
Step 15: Copy the Callback URL
In the Webhook Setup box, click the copy icon next to Callback URL. Shopify needs this URL to deliver events to Zaplane, and the trigger cannot fire until it does.
Step 16: Add the Webhook in Shopify
In your Shopify admin, go to Settings > Notifications > Webhooks and click the button to add a webhook. In the Add webhook window, choose the Event that matches your trigger, keep the Format as JSON, paste the Callback URL into the URL field, then click Save.
Step 17: Finish the Select Tab
Back in Zaplane, you can paste the signing secret shown next to your webhook in Shopify (or your app’s API secret key) into Webhook Signing Secret. Zaplane uses it to verify that events really come from Shopify. Leave it empty to skip verification. Then click Continue.
Step 18: Configure the Trigger
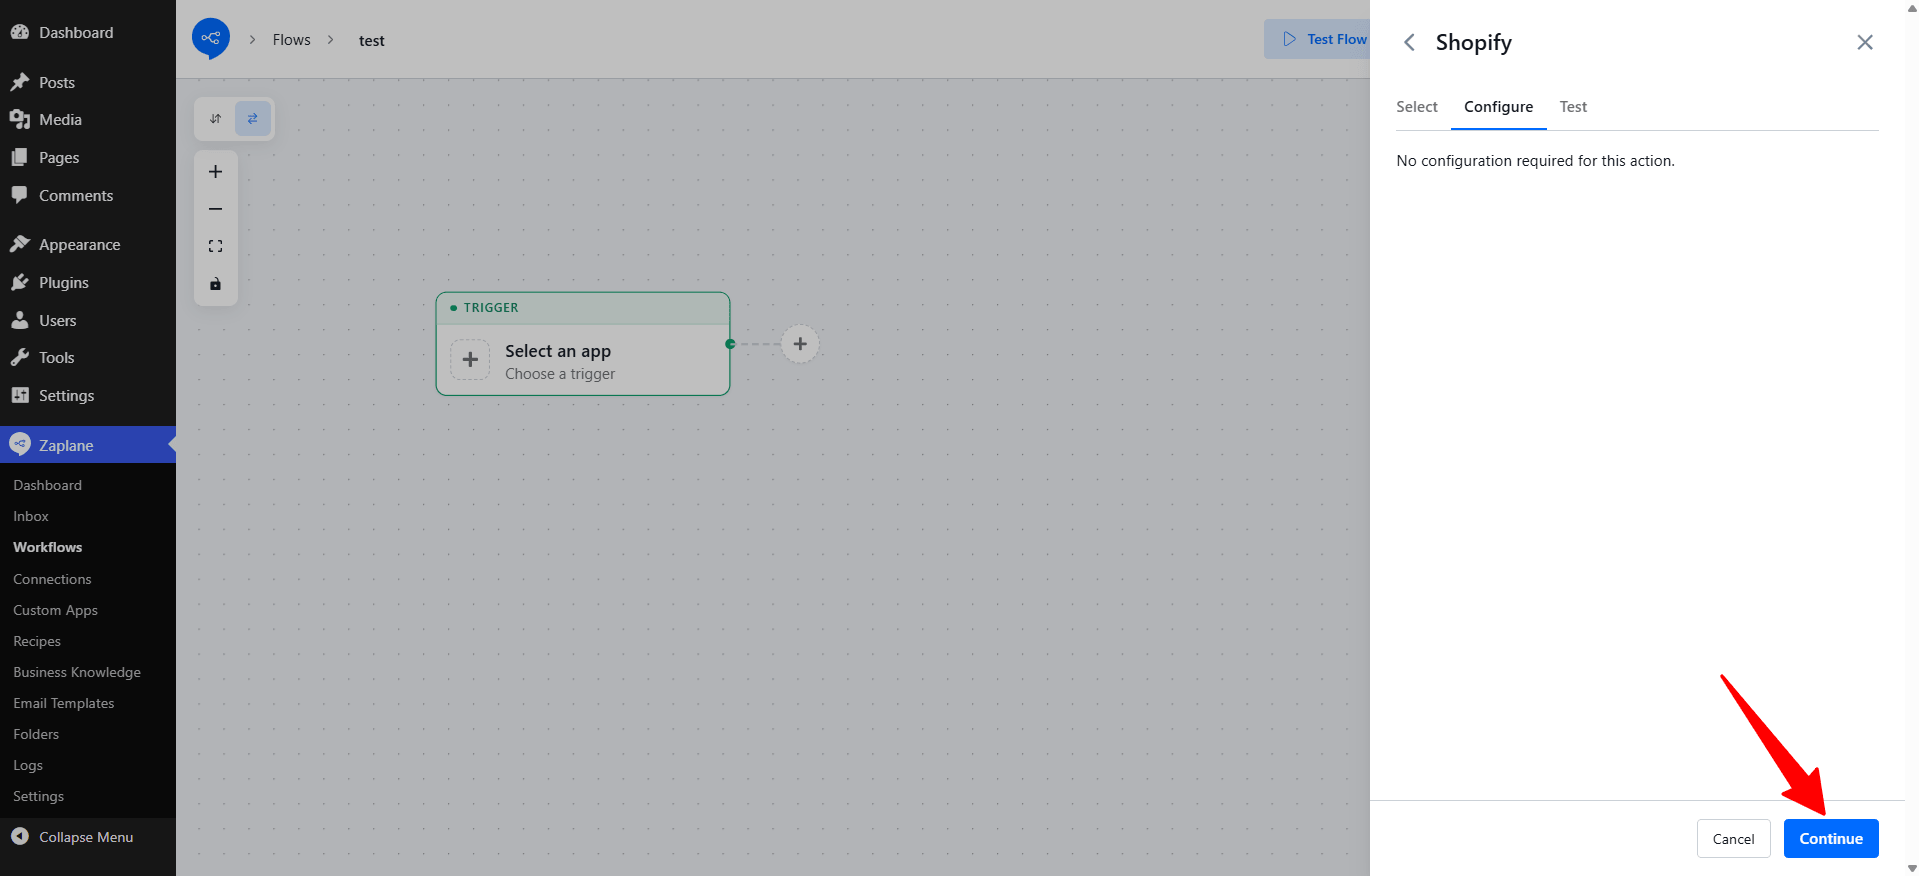
The Configure tab shows that nothing needs to be set up for this trigger. Click Continue.
Configure the trigger
Step 19: Test and Save the Trigger
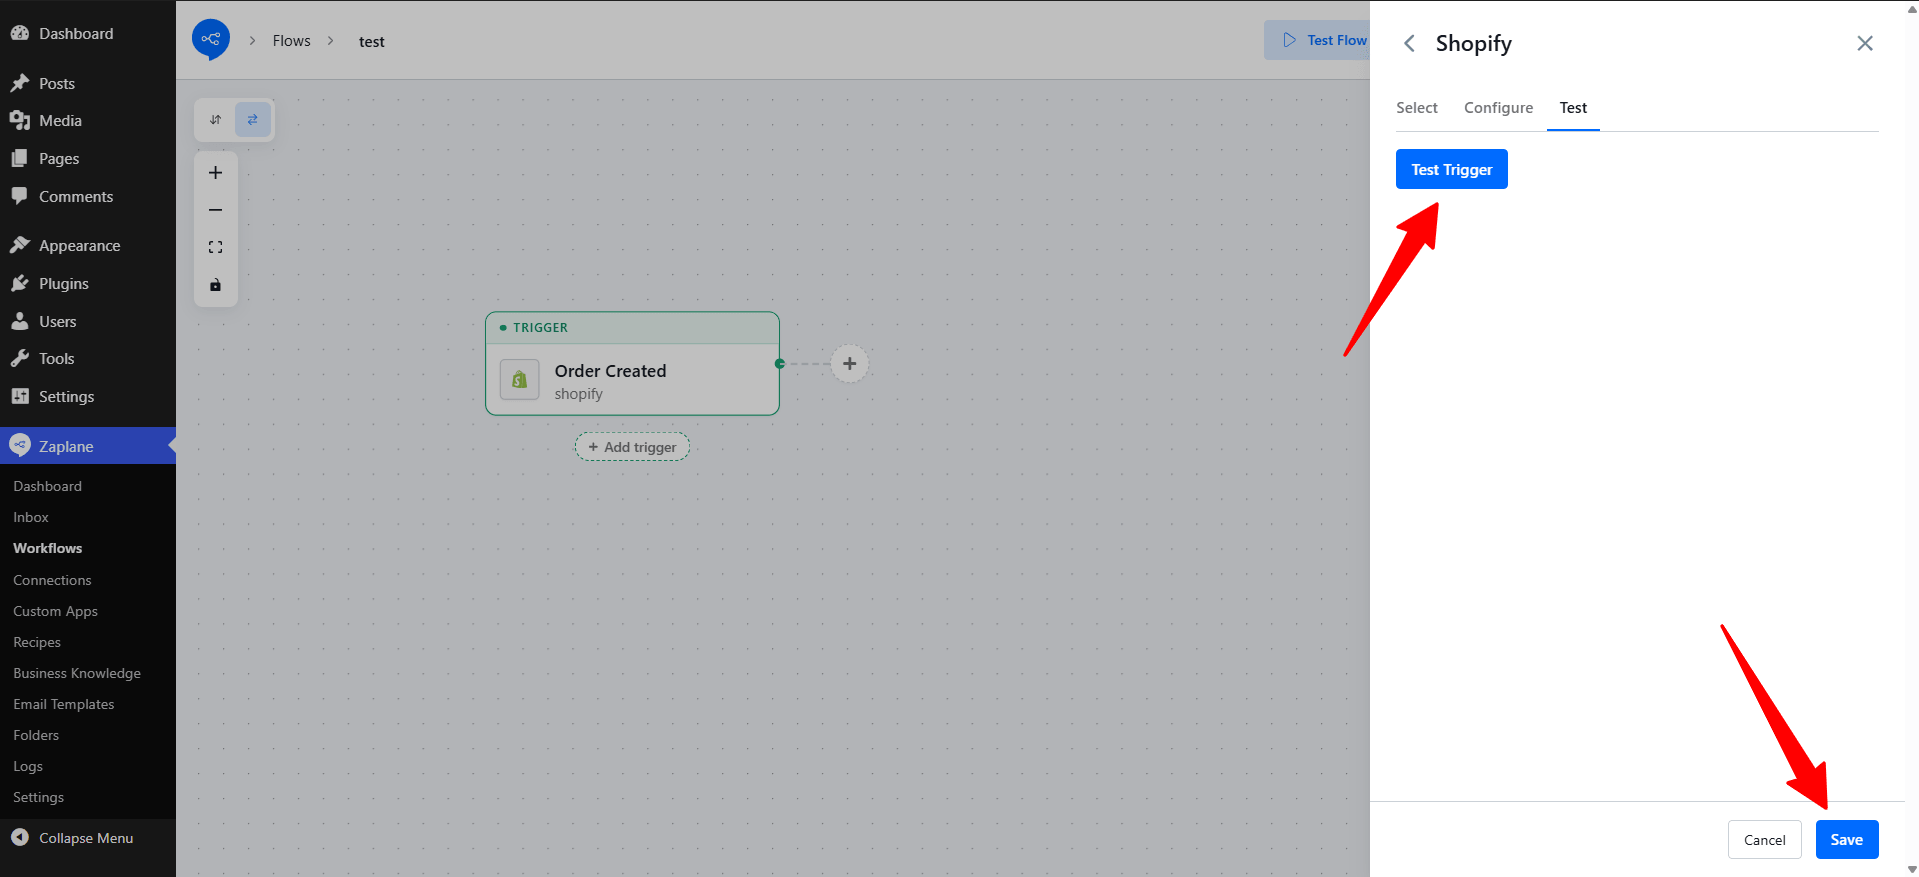
On the Test tab, click Test Trigger to confirm it works, then click Save.
Test and save the trigger.
Step 20: Update and Activate the Workflow
Back on the workflow canvas, click Update at the top right to save your changes and make sure the workflow status is set to Active.
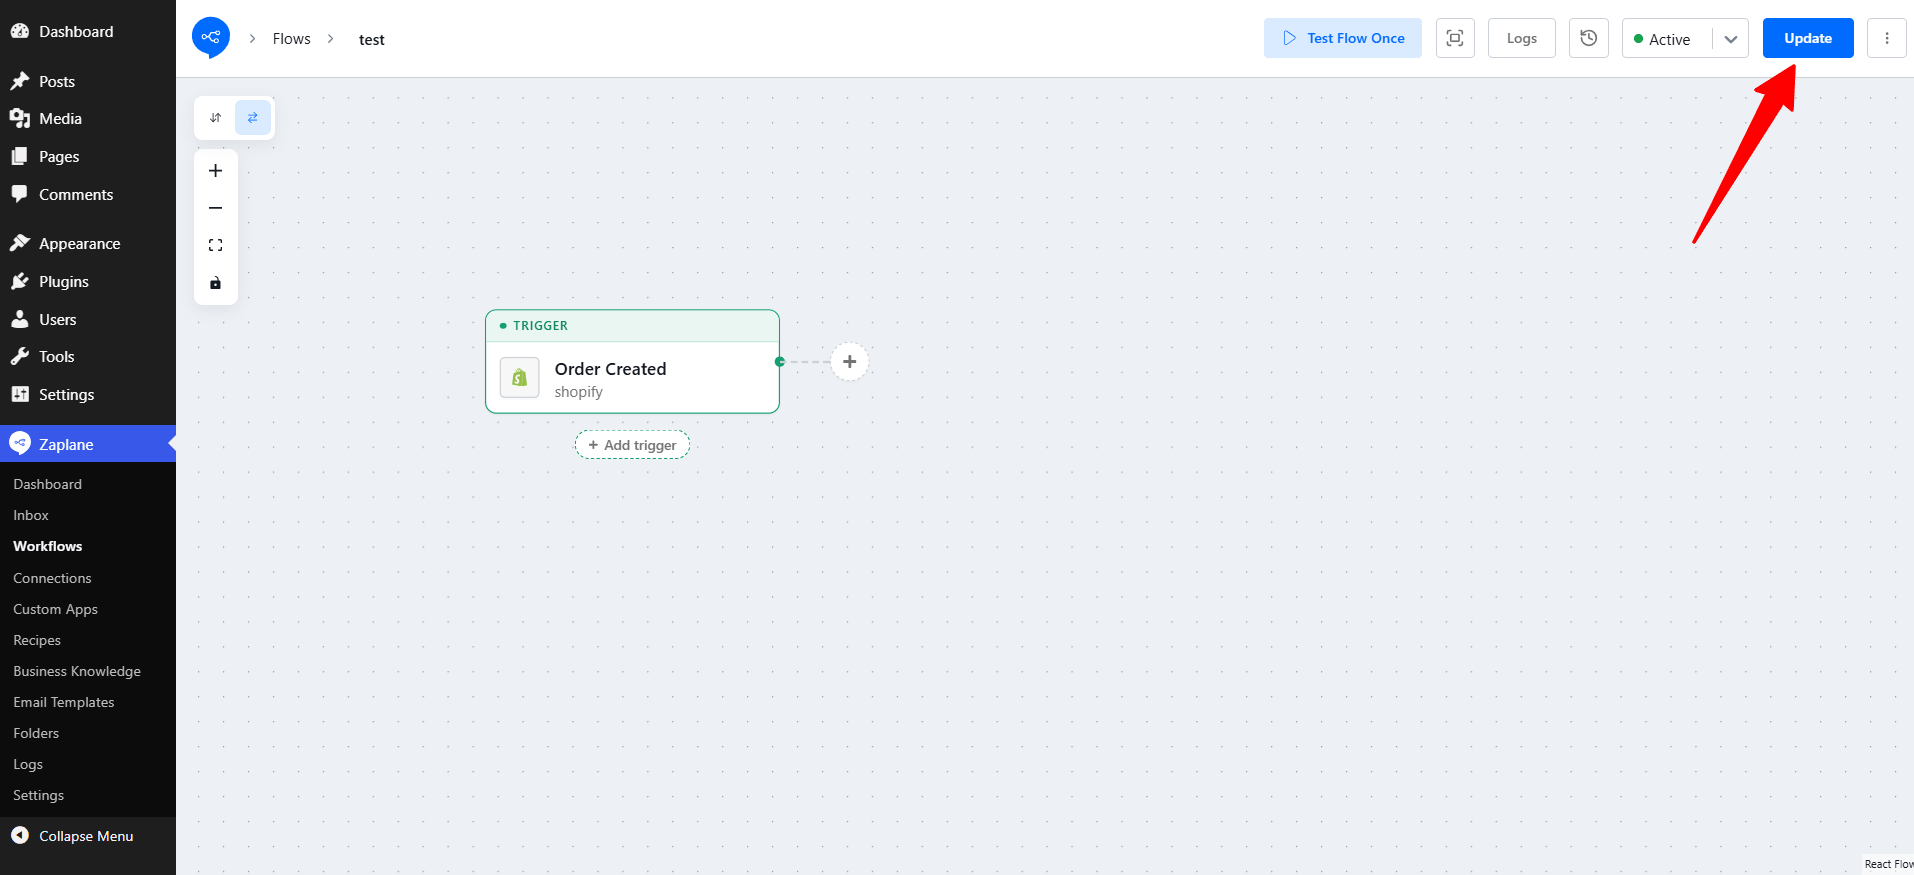
Every time a new order is created in your Shopify store, Zaplane now starts this workflow automatically.
Done!
Shopify is now connected to Zaplane, and your workflow will run whenever a new order is placed.