

How to add a Facebook Messenger action to your Zaplane workflow
This guide walks you through creating a Meta app, generating a Facebook Page Access Token, connecting it to Zaplane, and adding the Send Message action to your workflow. You will need a Facebook Page and a Meta developer account.
Part 1: Get your Page access token from Meta (one time)
Zaplane talks to Messenger through an app you create in Meta for Developers. You will need a Page access token with the pages_messaging permission.
Step 1: Open My Apps
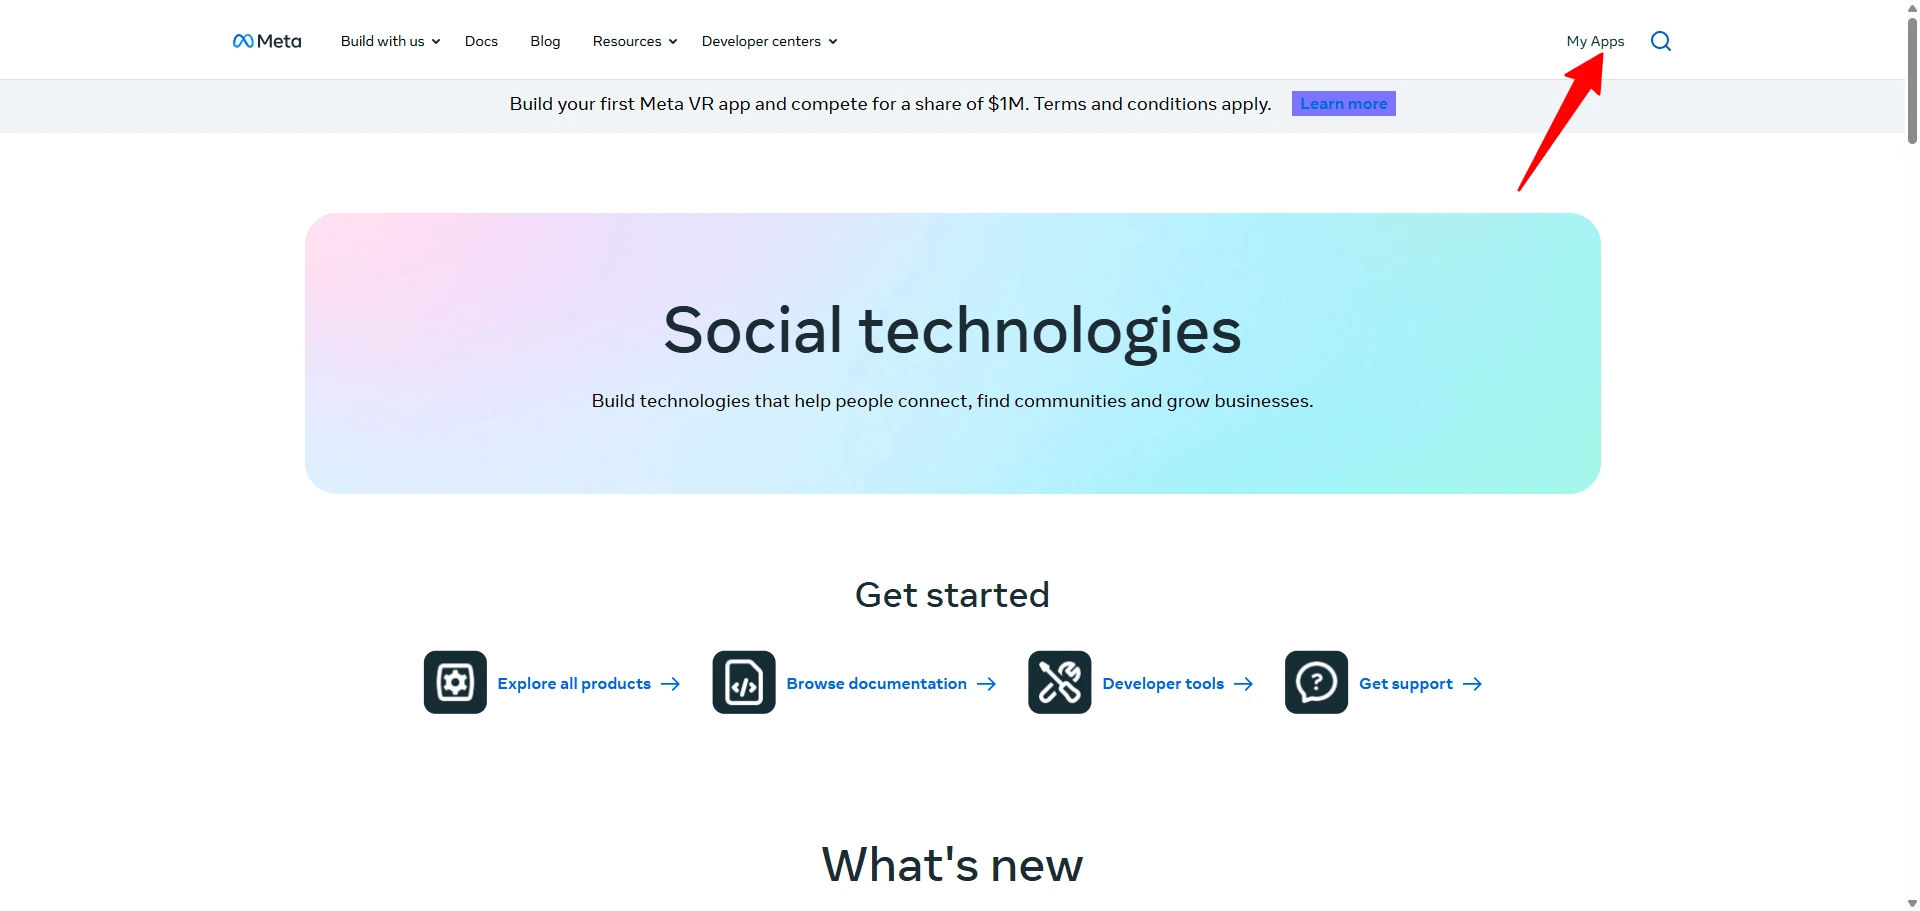
Go to Meta for Developers and sign in. In the top navigation, click My Apps.
Step 2: Create an app
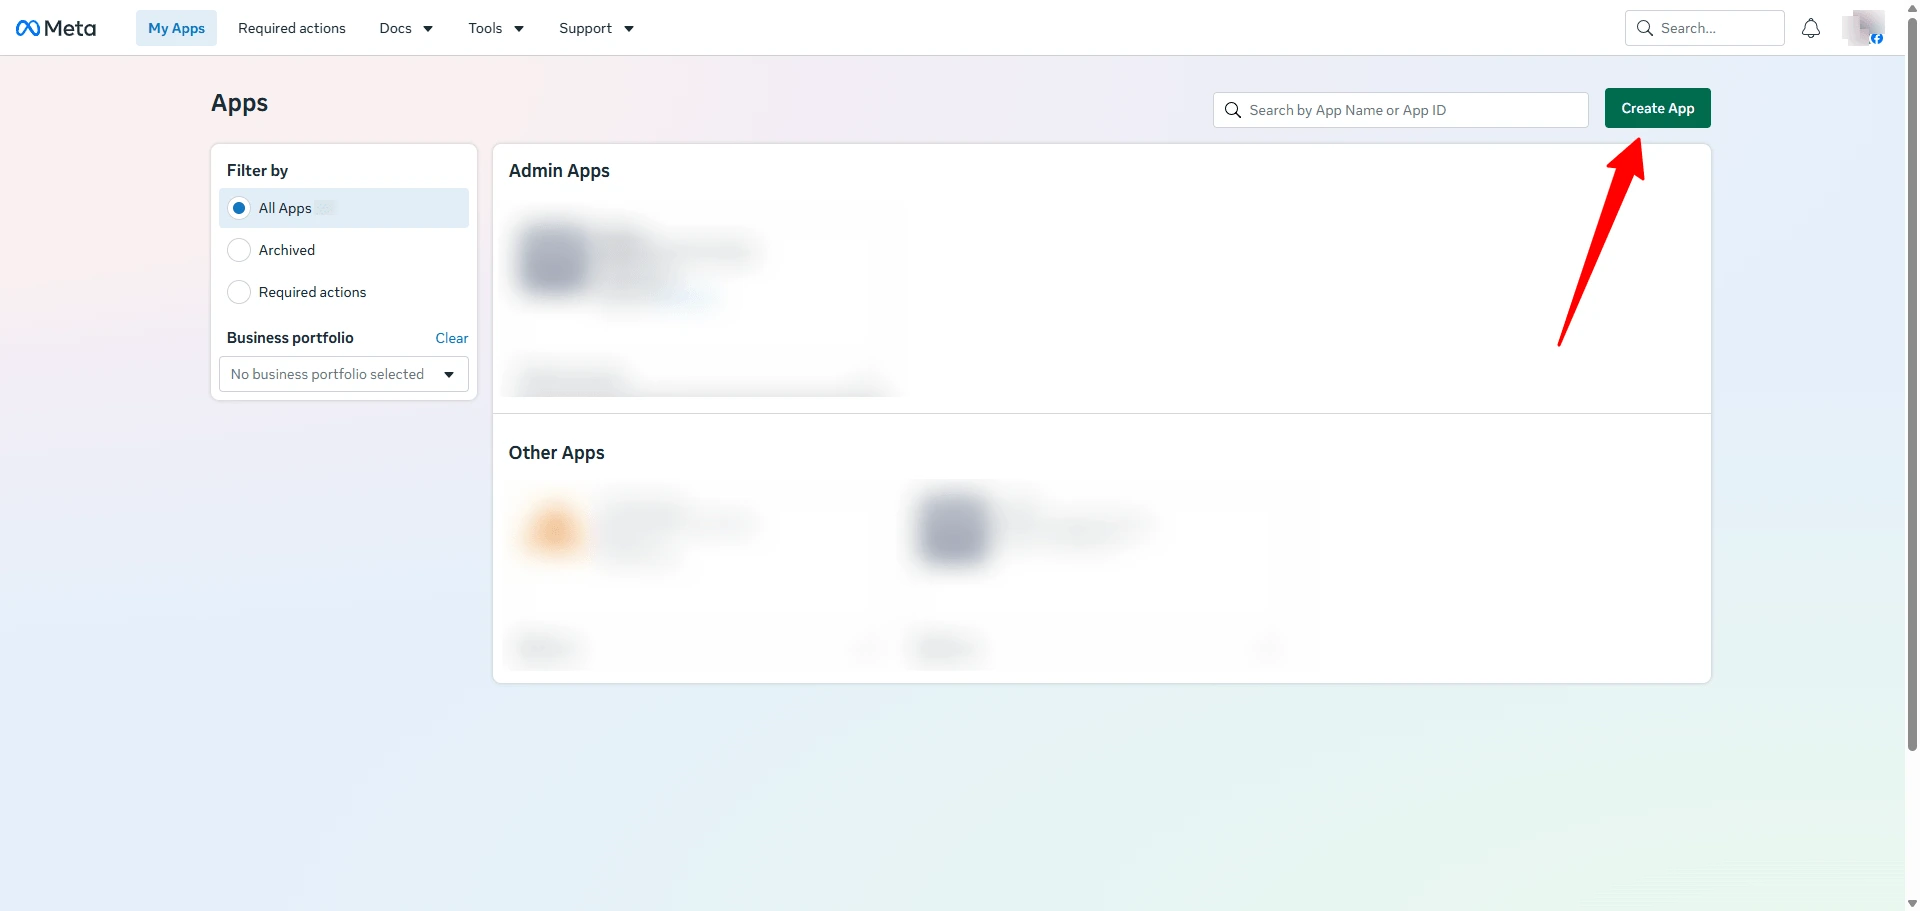
On the Apps page, click the green Create App button.
Step 3: Enter your app details
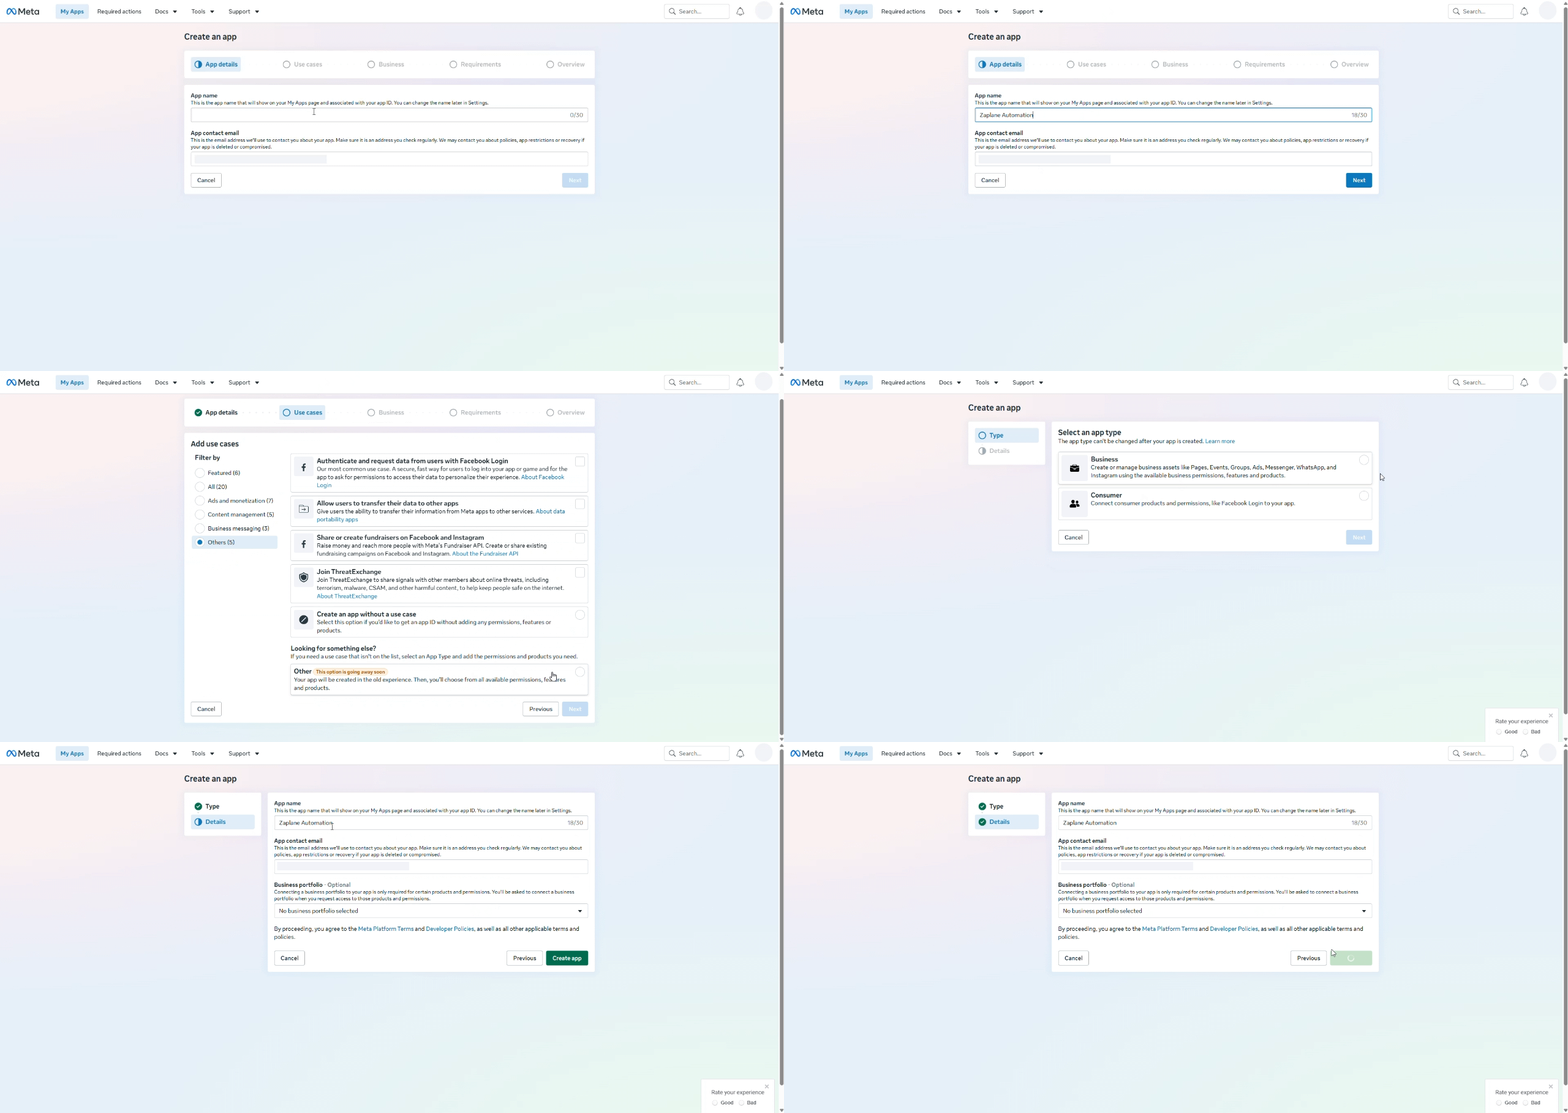
Enter an App name (up to 30 characters) and check the App contact email, then click Next. Meta guides you through the remaining steps: Use cases, Business, Requirements and Overview. Complete each one to create the app.
Step 4: Set up Messenger and copy your token
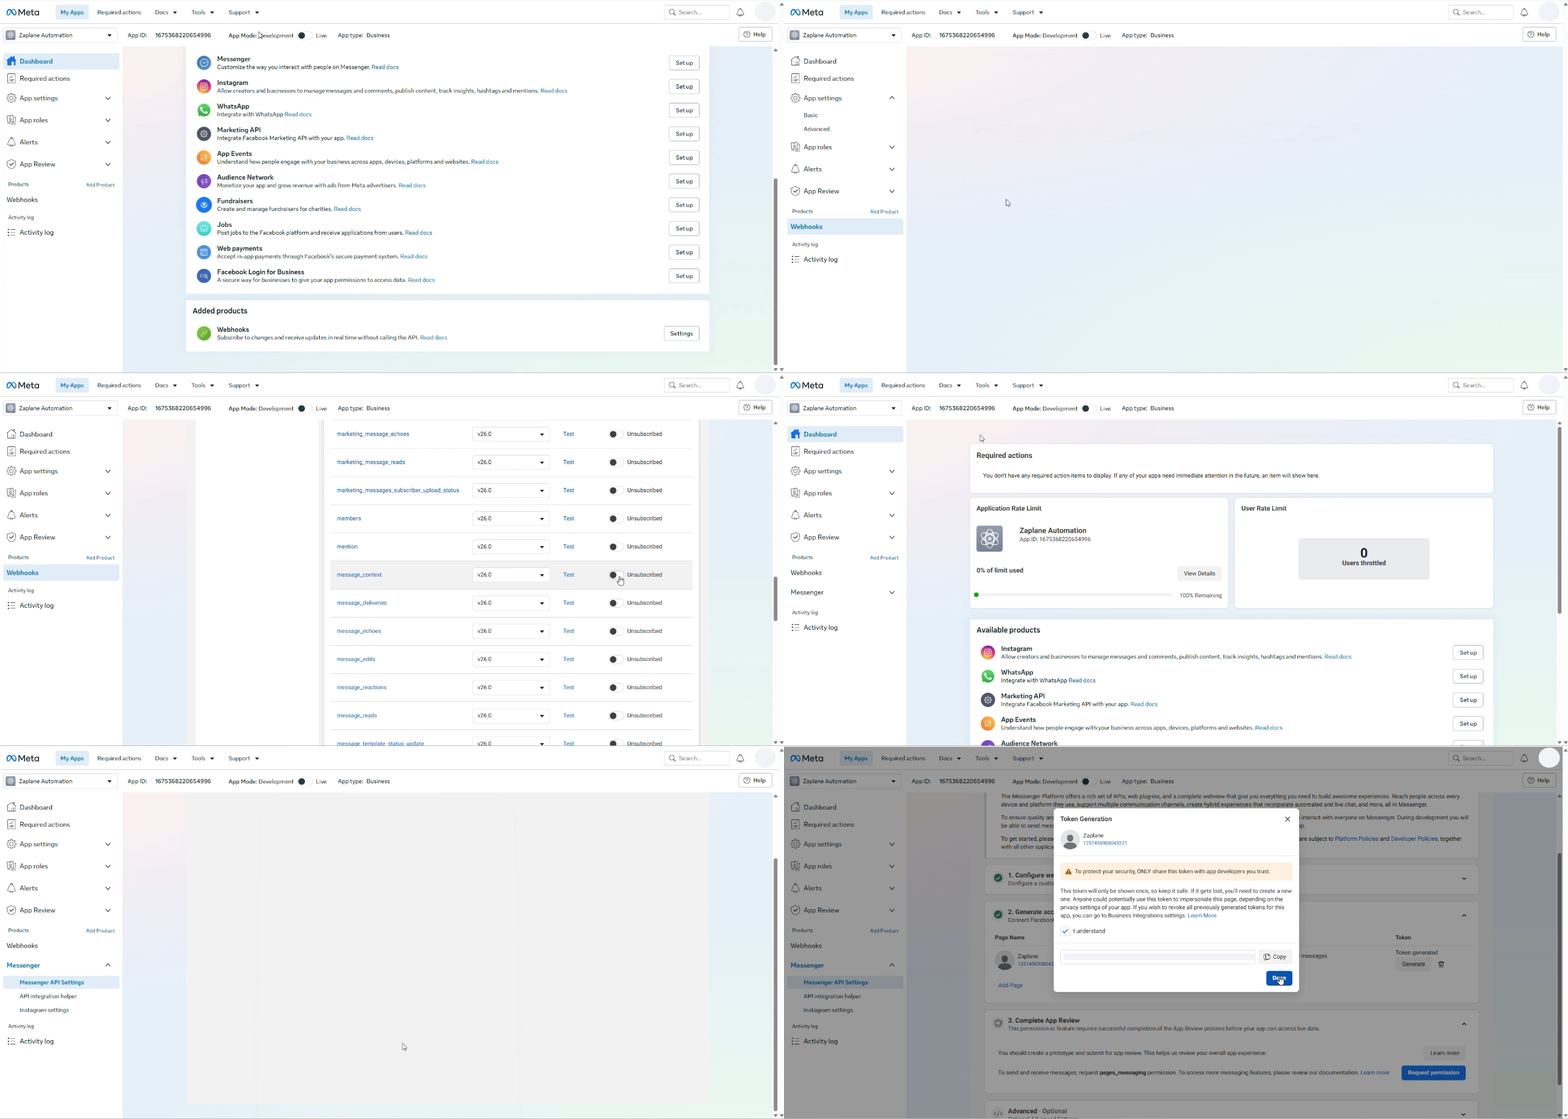
In your app’s Dashboard, find Messenger in the product list and click Set up. Make sure Webhooks are also added to your app. Then generate a Page access token for your Facebook Page and copy it. The screen recording below shows the whole process.
Part 2: Connect Messenger to Zaplane
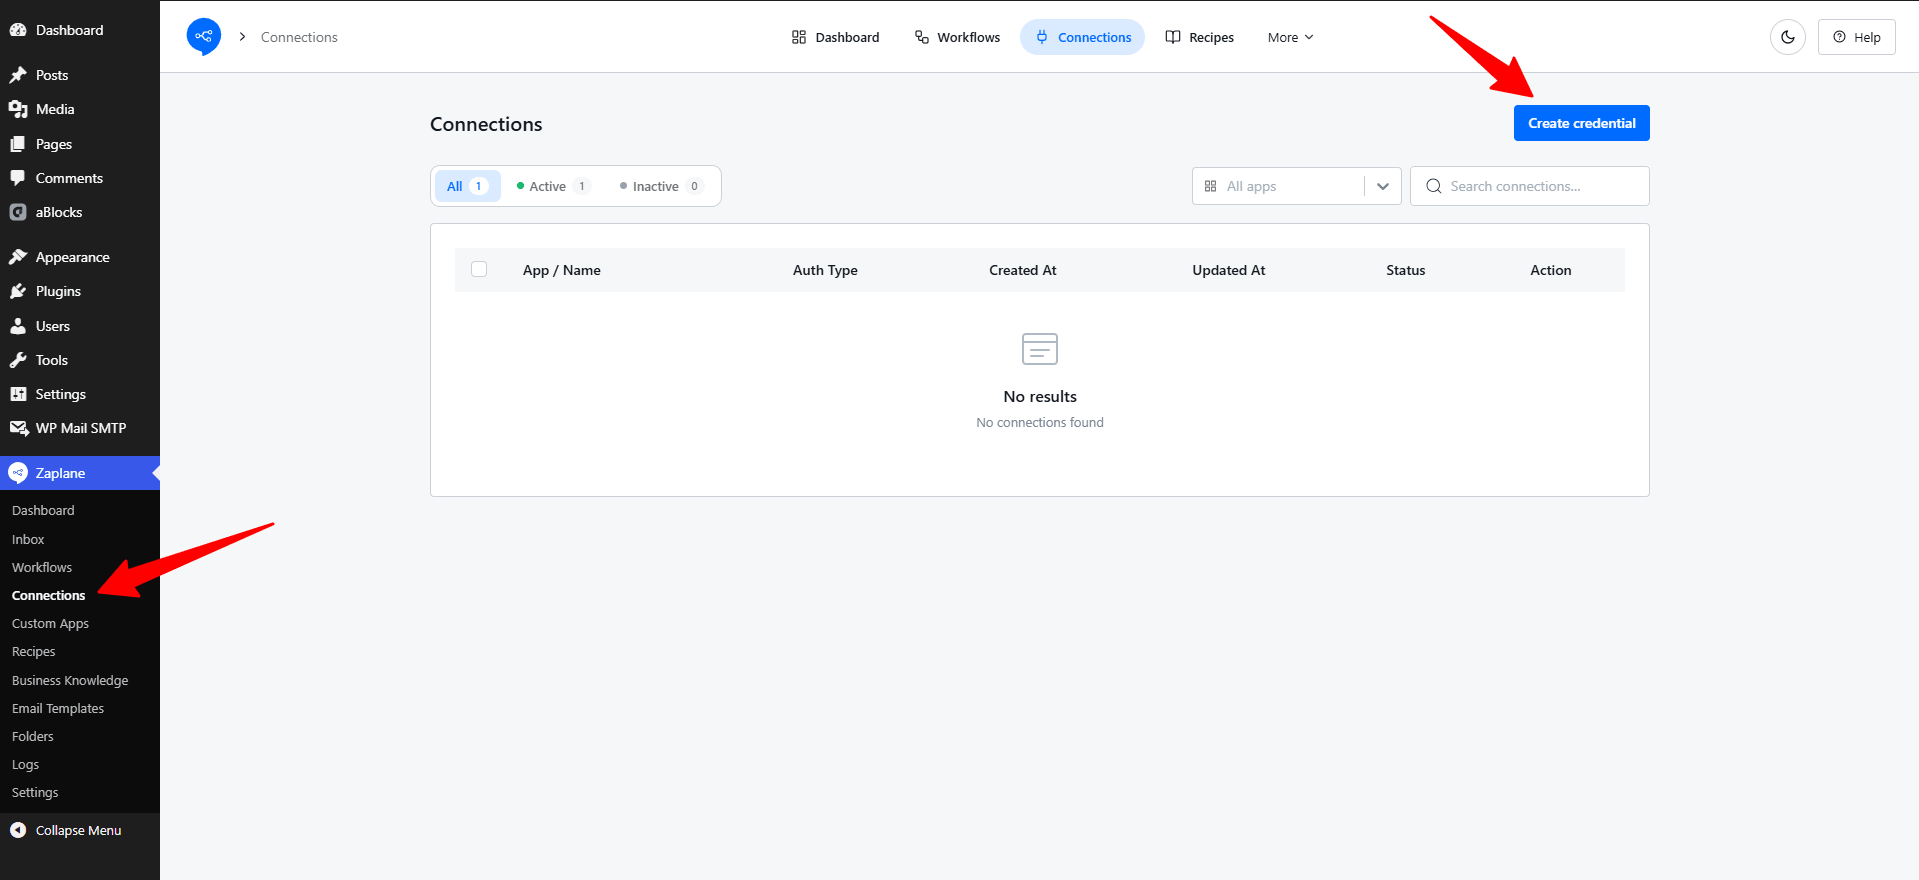
Step 5: Open Zaplane Connections
In your WordPress dashboard, go to Zaplane → Connections and click Create credential.
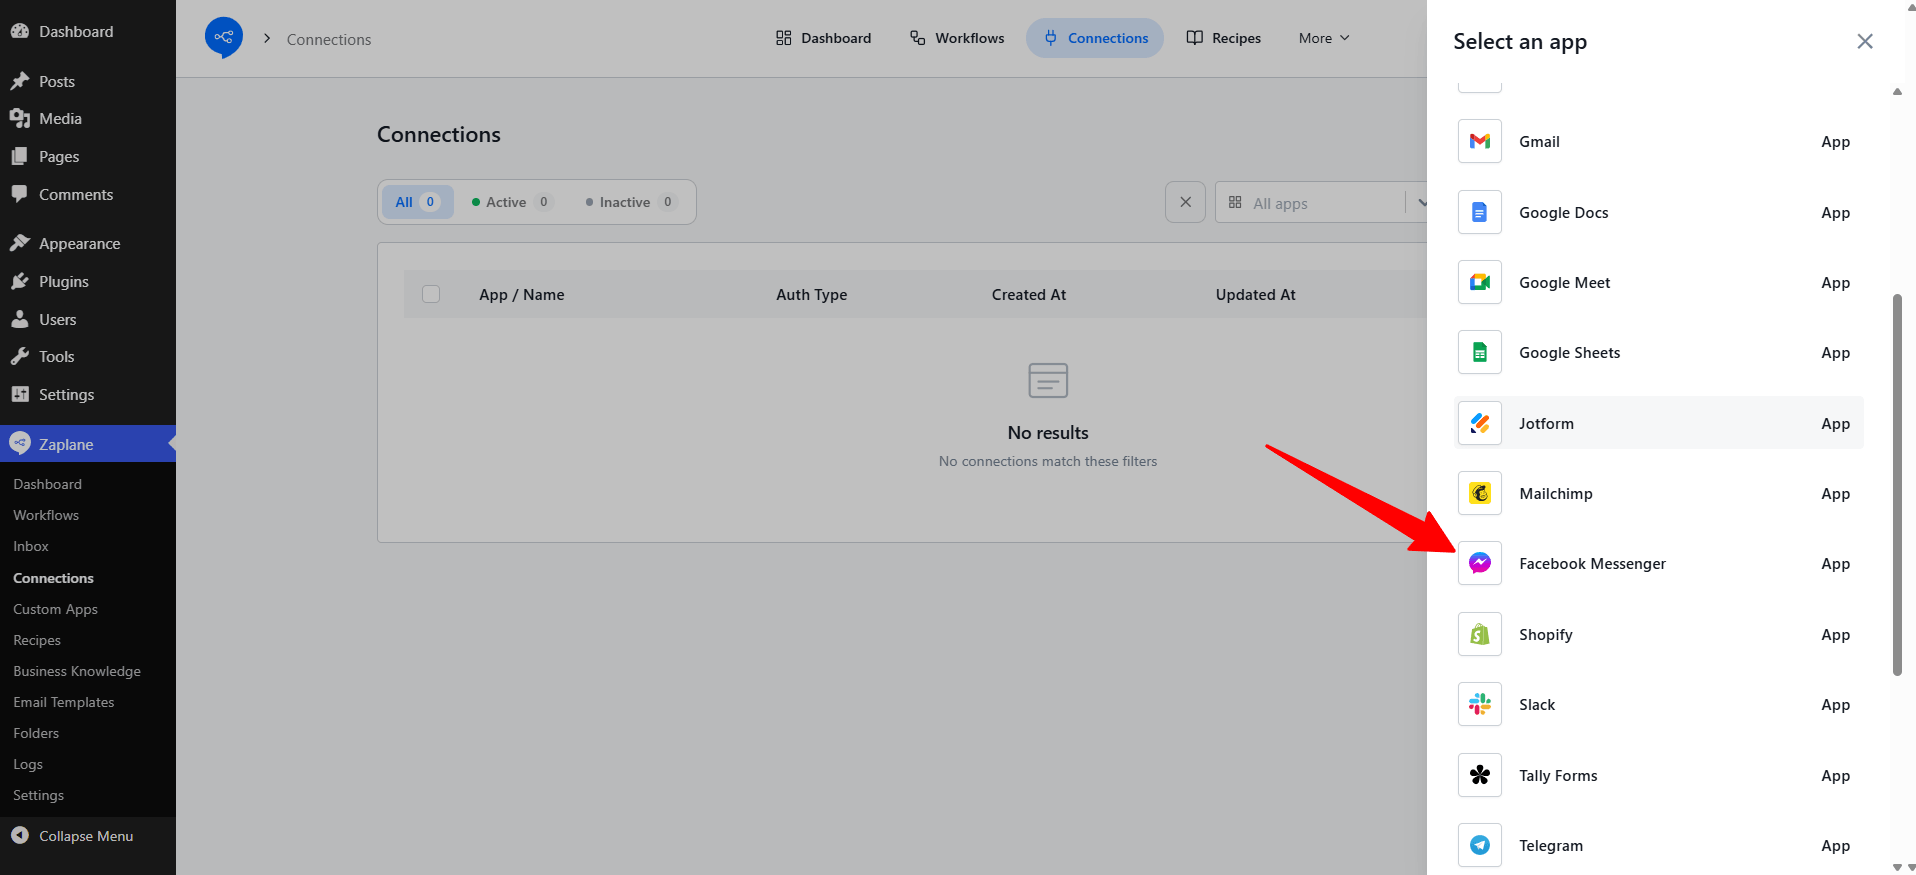
Step 6: Select Facebook Messenger
In the Select an app panel, choose Facebook Messenger.
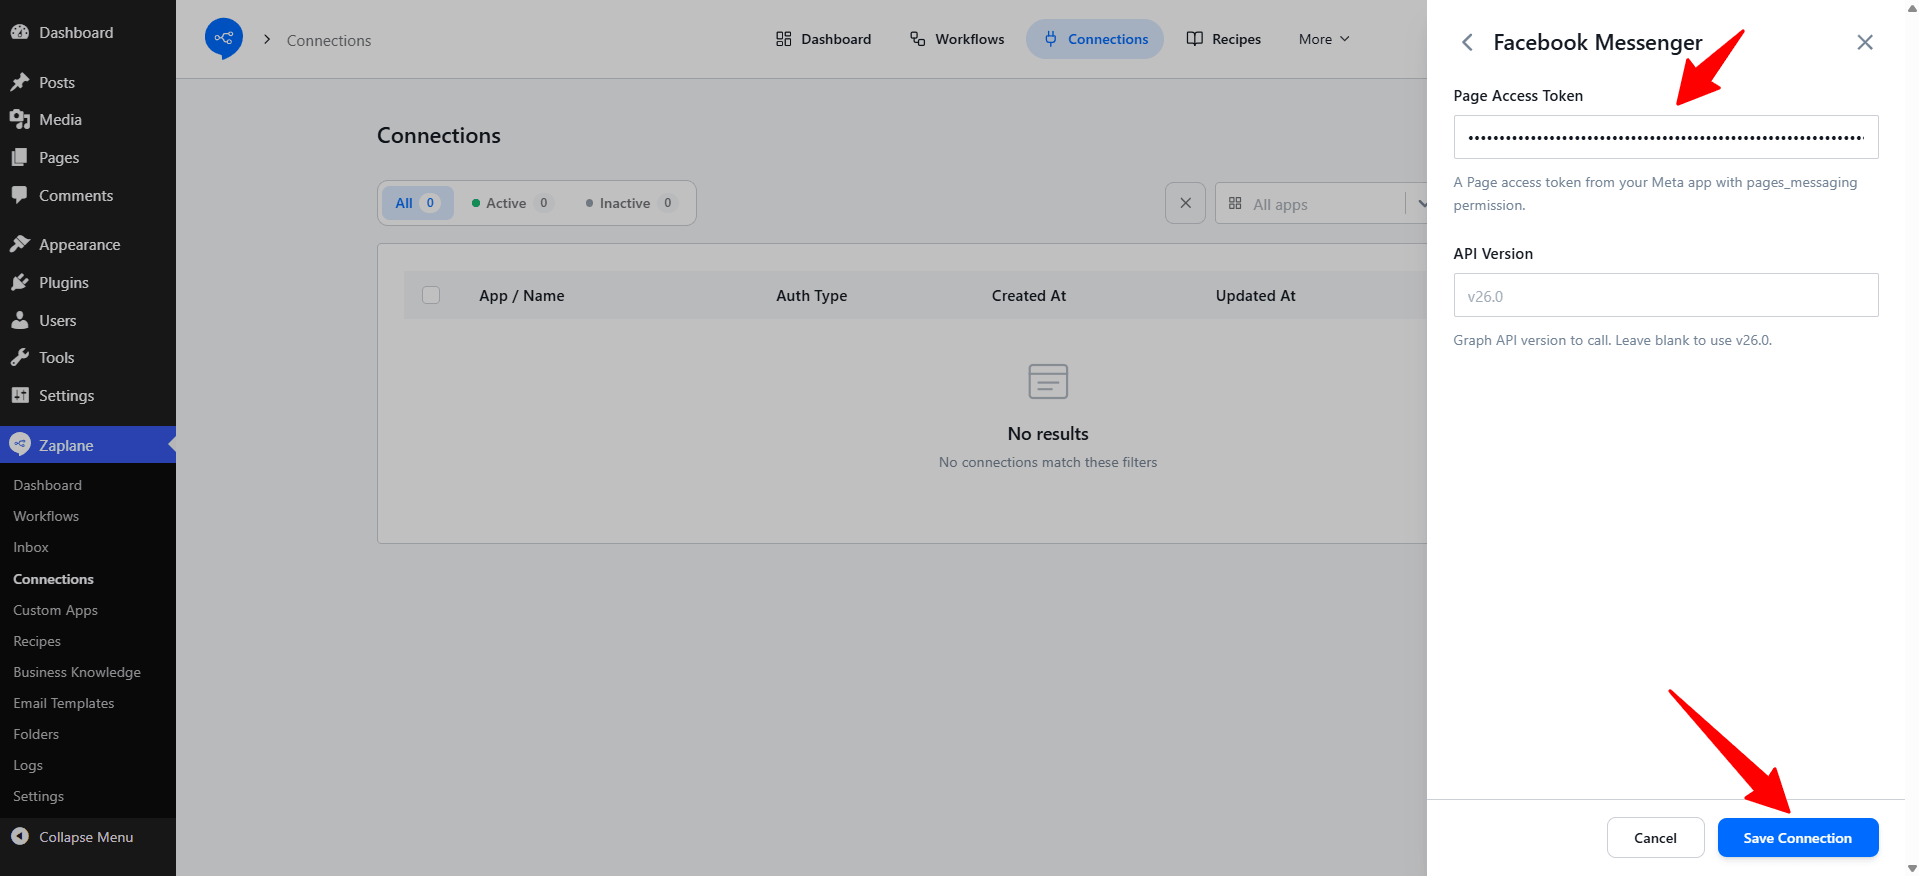
Step 7: Paste your token
Paste your token into the Page Access Token field. You can leave API Version empty to use the default (v26.0). Click Save Connection.
Part 3: Add the Action to Your Workflow
Step 15: Create a Workflow
Go to Zaplane > Workflows from your WordPress dashboard, then click Create Workflow to open the workflow editor.
Before adding a Facebook Messenger action, you need to set up a trigger first. Here is how to do it quickly:
Once your trigger is saved, proceed to the next step to add the Facebook Messenger action.
Step 16: Add an Action
Click the + button next to your trigger, then select Apps in the Add Action panel.
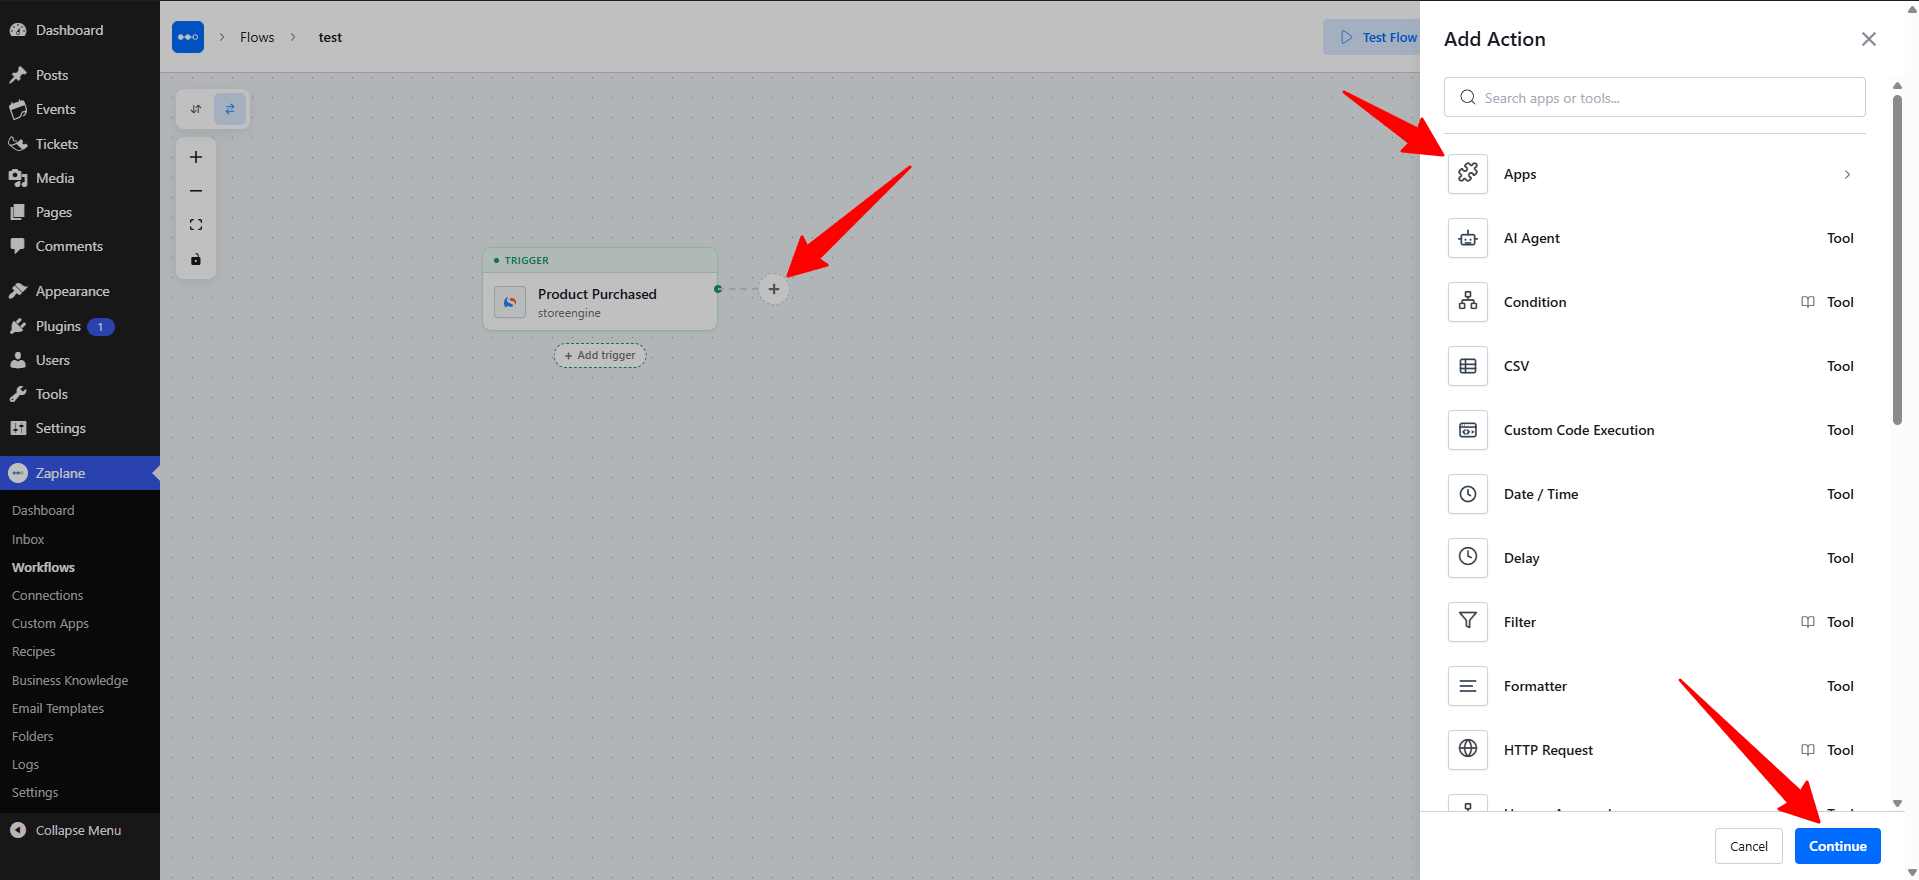
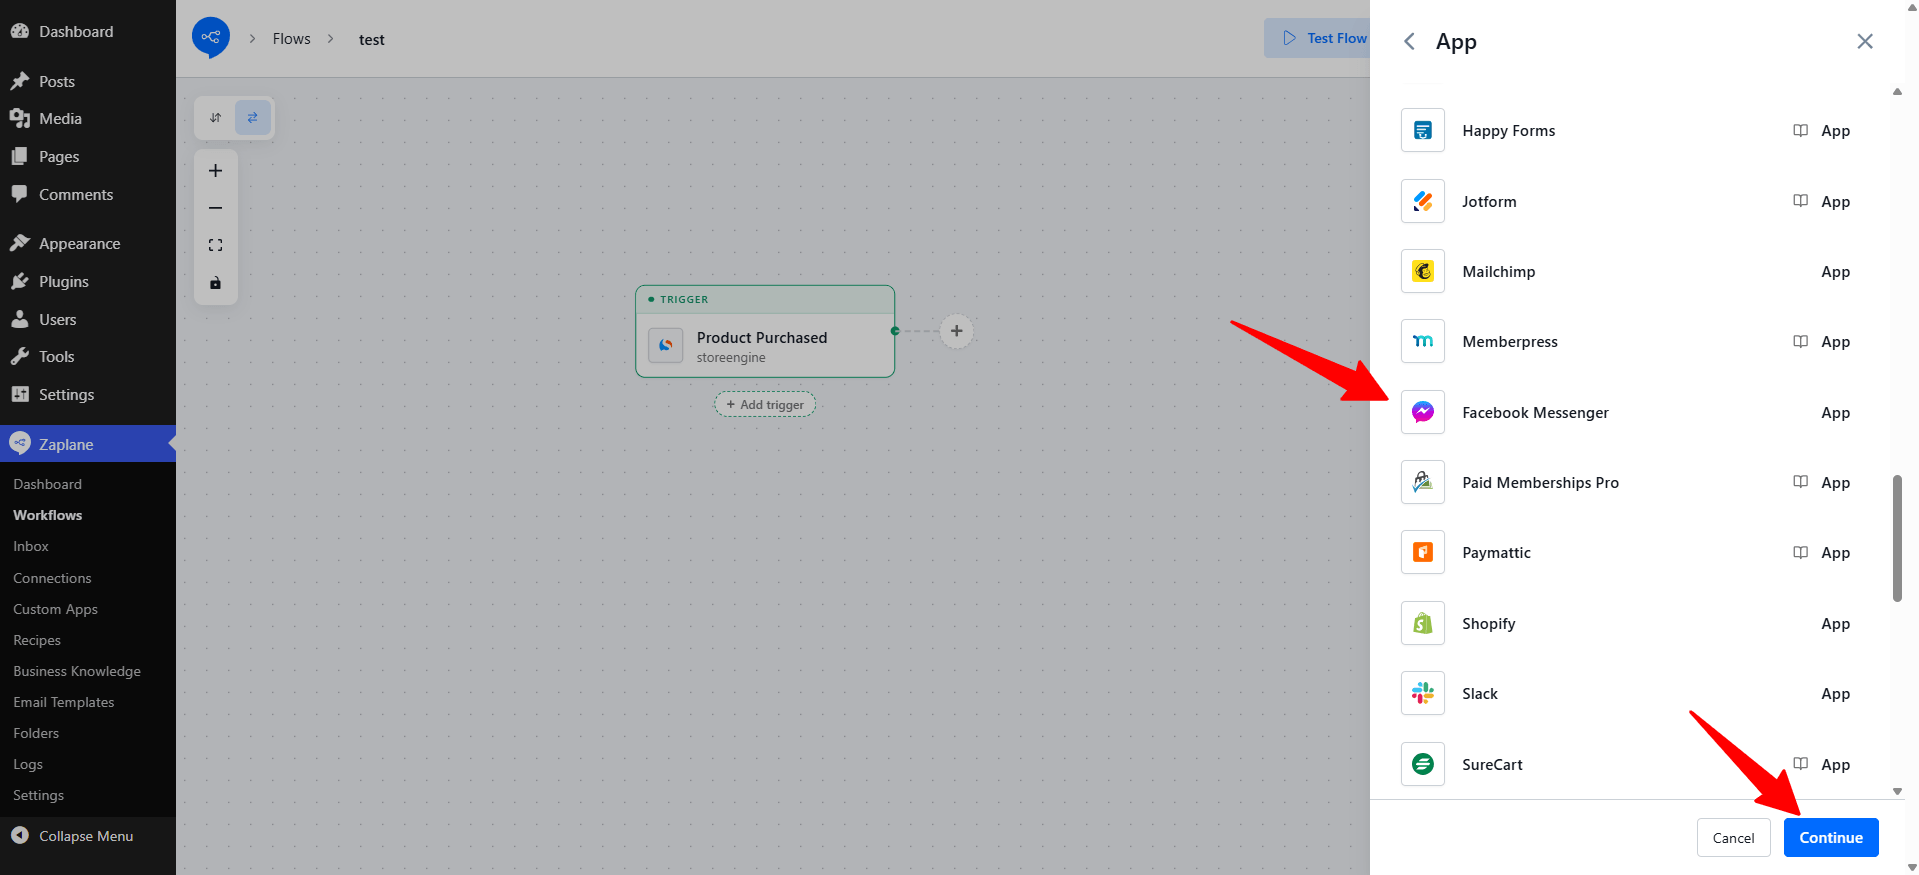
Step 17: Select the Facebook Messenger App
Find and select Facebook Messenger from the app list, then click Continue.
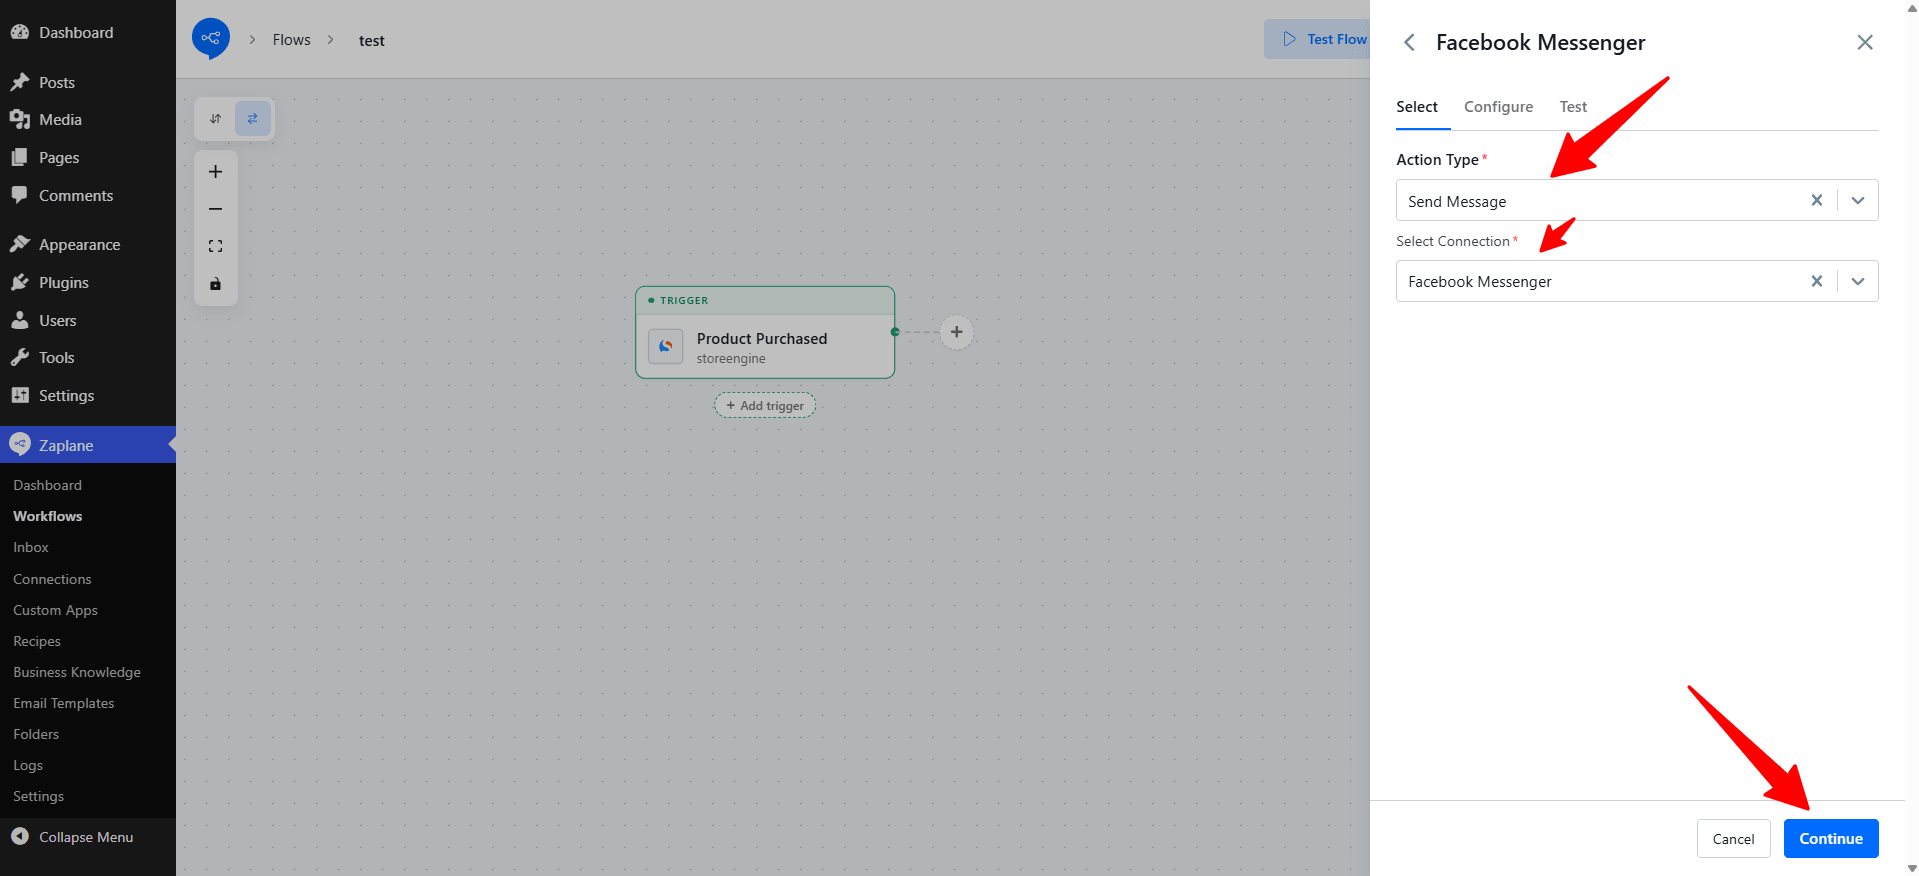
Step 18: Choose the Action Type
Set Action Type to Send Message, choose your Facebook Messenger connection under Select Connection, then click Continue.
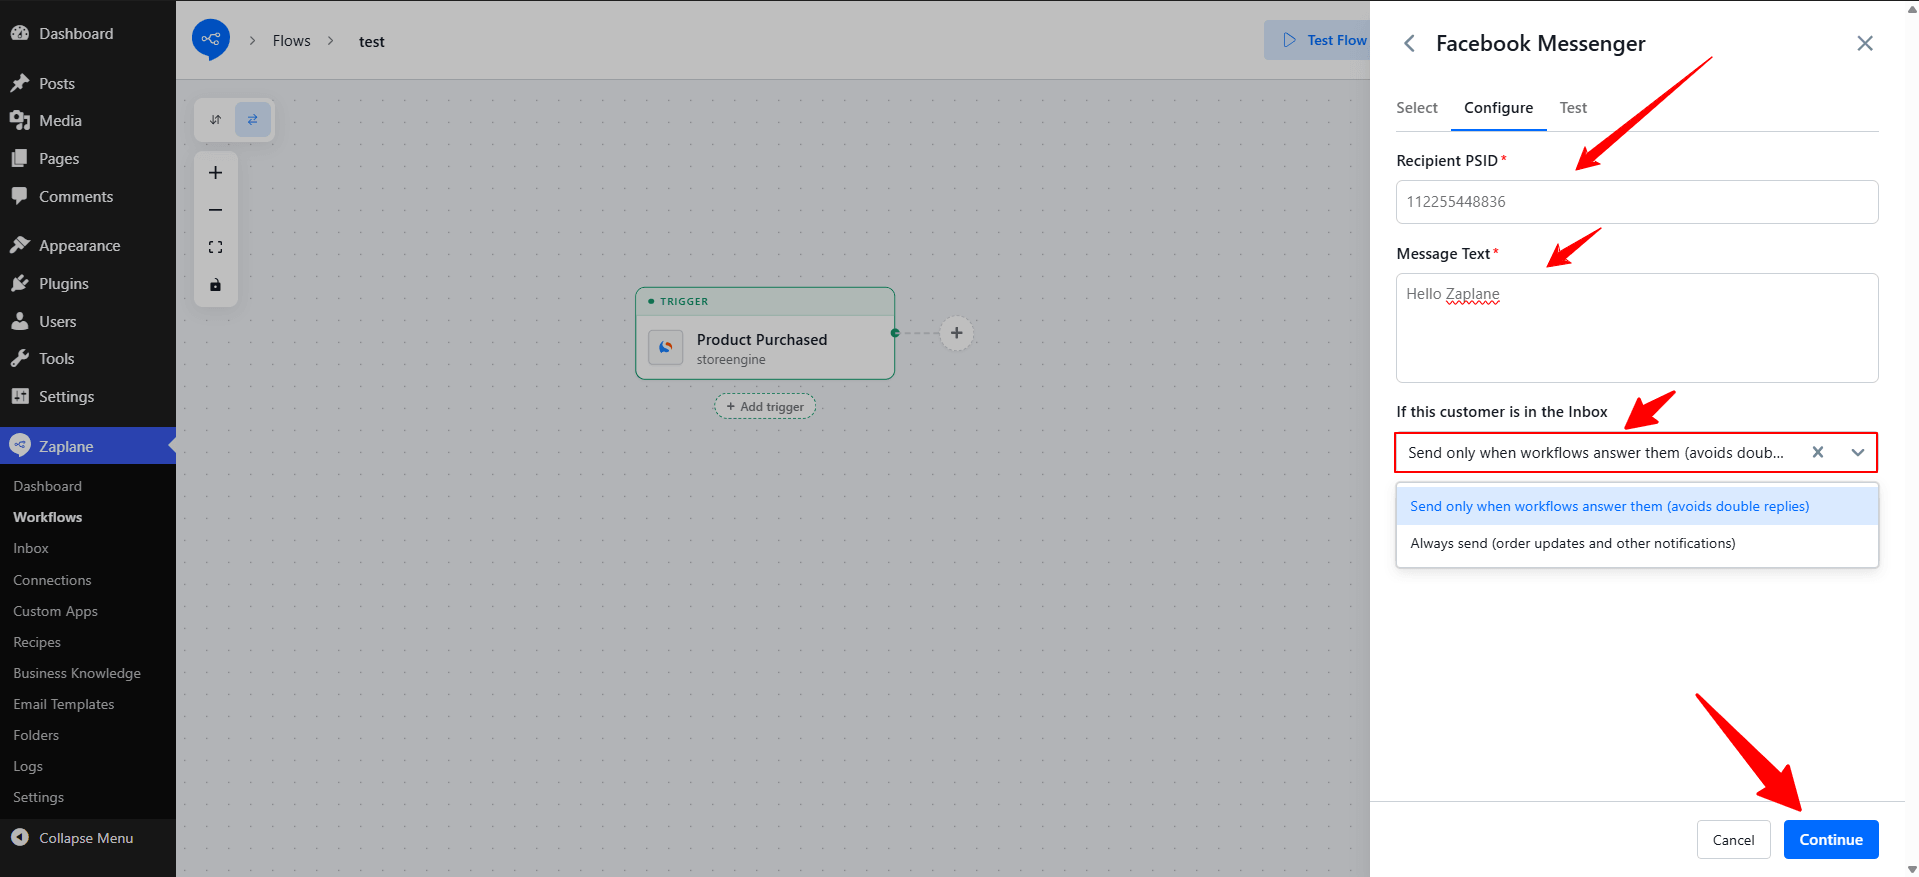
Step 19: Configure the Action
Fill in Recipient PSID (the recipient’s Page-scoped ID) and Message Text. Then use If this customer is in the Inbox to decide how the message is sent:
Click Continue when you are done.
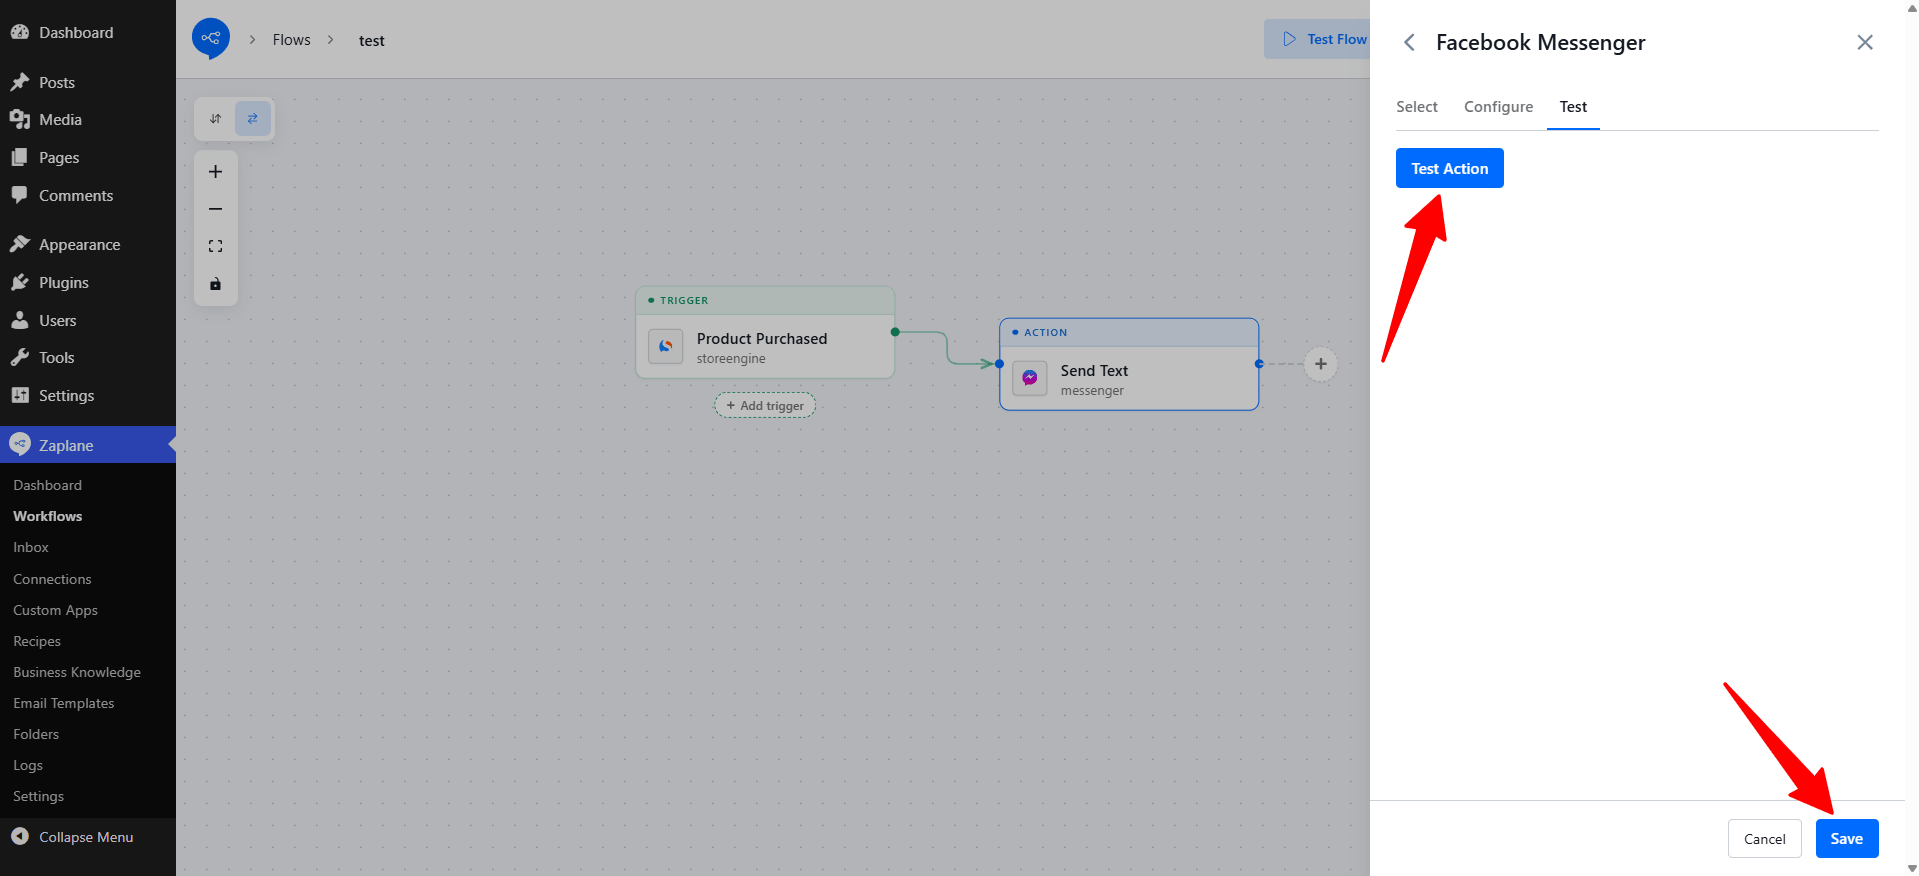
Step 20: Test the Action
Open the Test tab and click Test Action to send a sample message. If it works, click Save.
Step 21: Update and Activate the Workflow
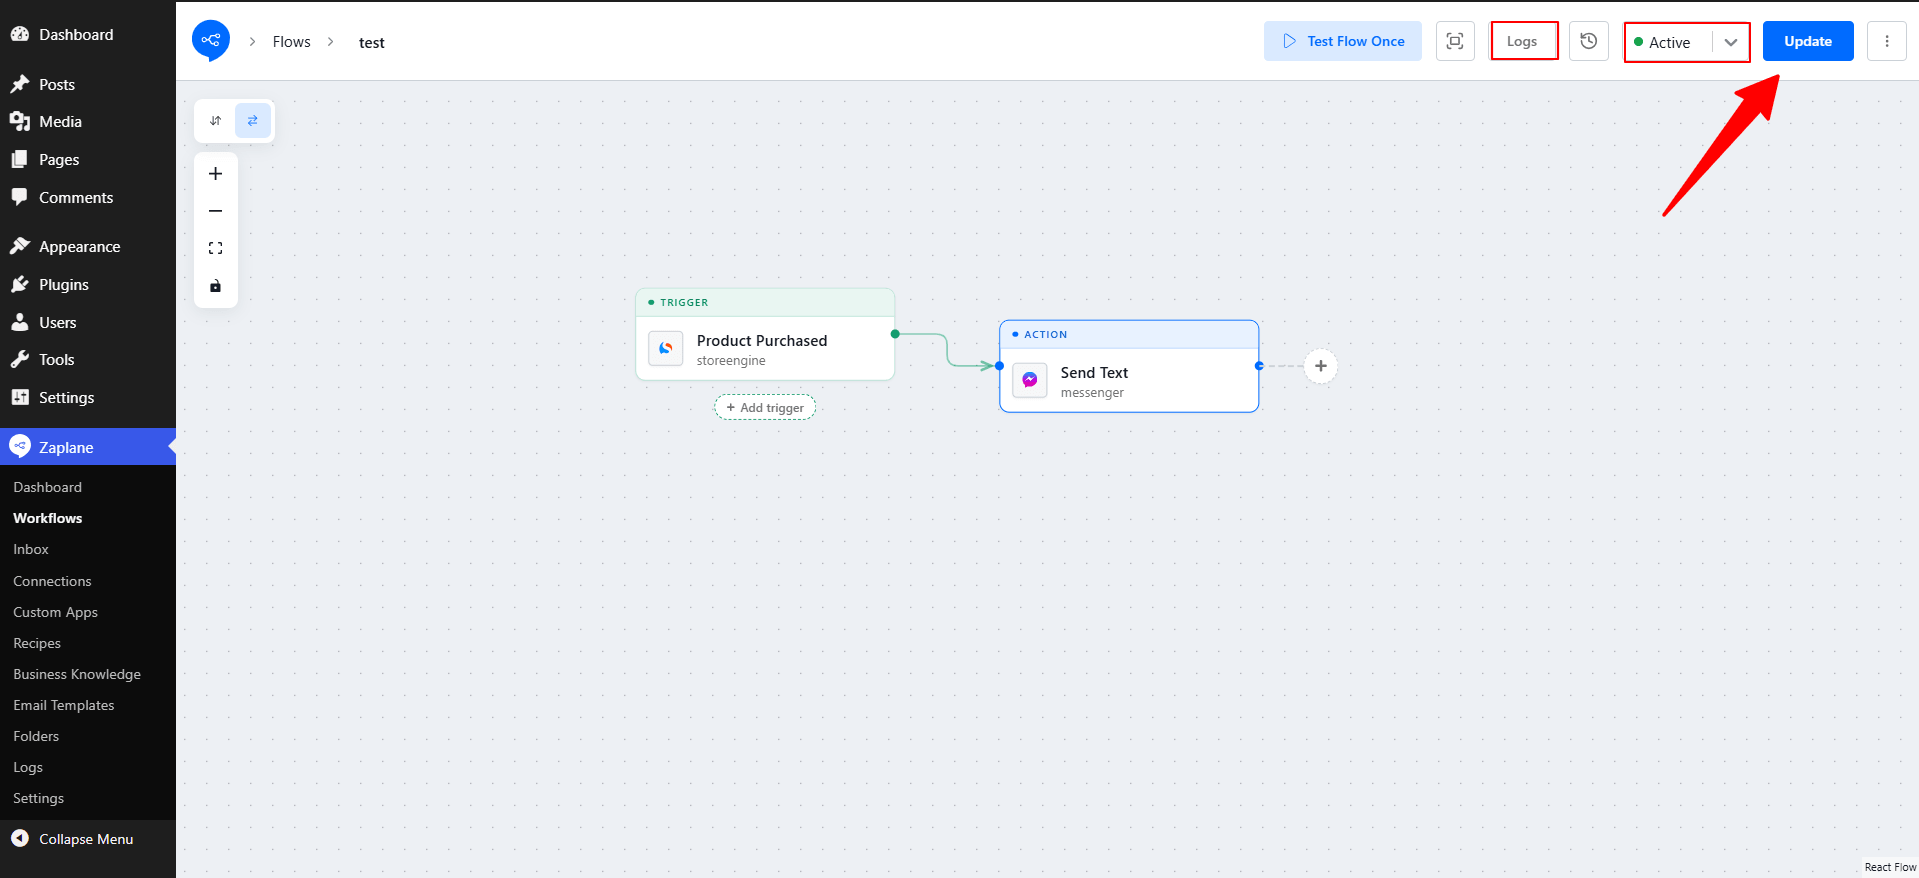
Back on the canvas, click Update to save your changes and make sure the status is set to Active. Every time your trigger fires, Zaplane now sends a Facebook Messenger message automatically.
Done!
Your Facebook Messenger action is connected and ready to go.