

This guide shows you how to connect Google Sheets to Zaplane and use the New Row Added trigger, so your workflow starts automatically whenever a new row is added to your spreadsheet. You will need a Google account and a Google Cloud project to get started.
Part 1: Get Your Google OAuth Client ID and Secret
Step 1: Create a Google Cloud Project
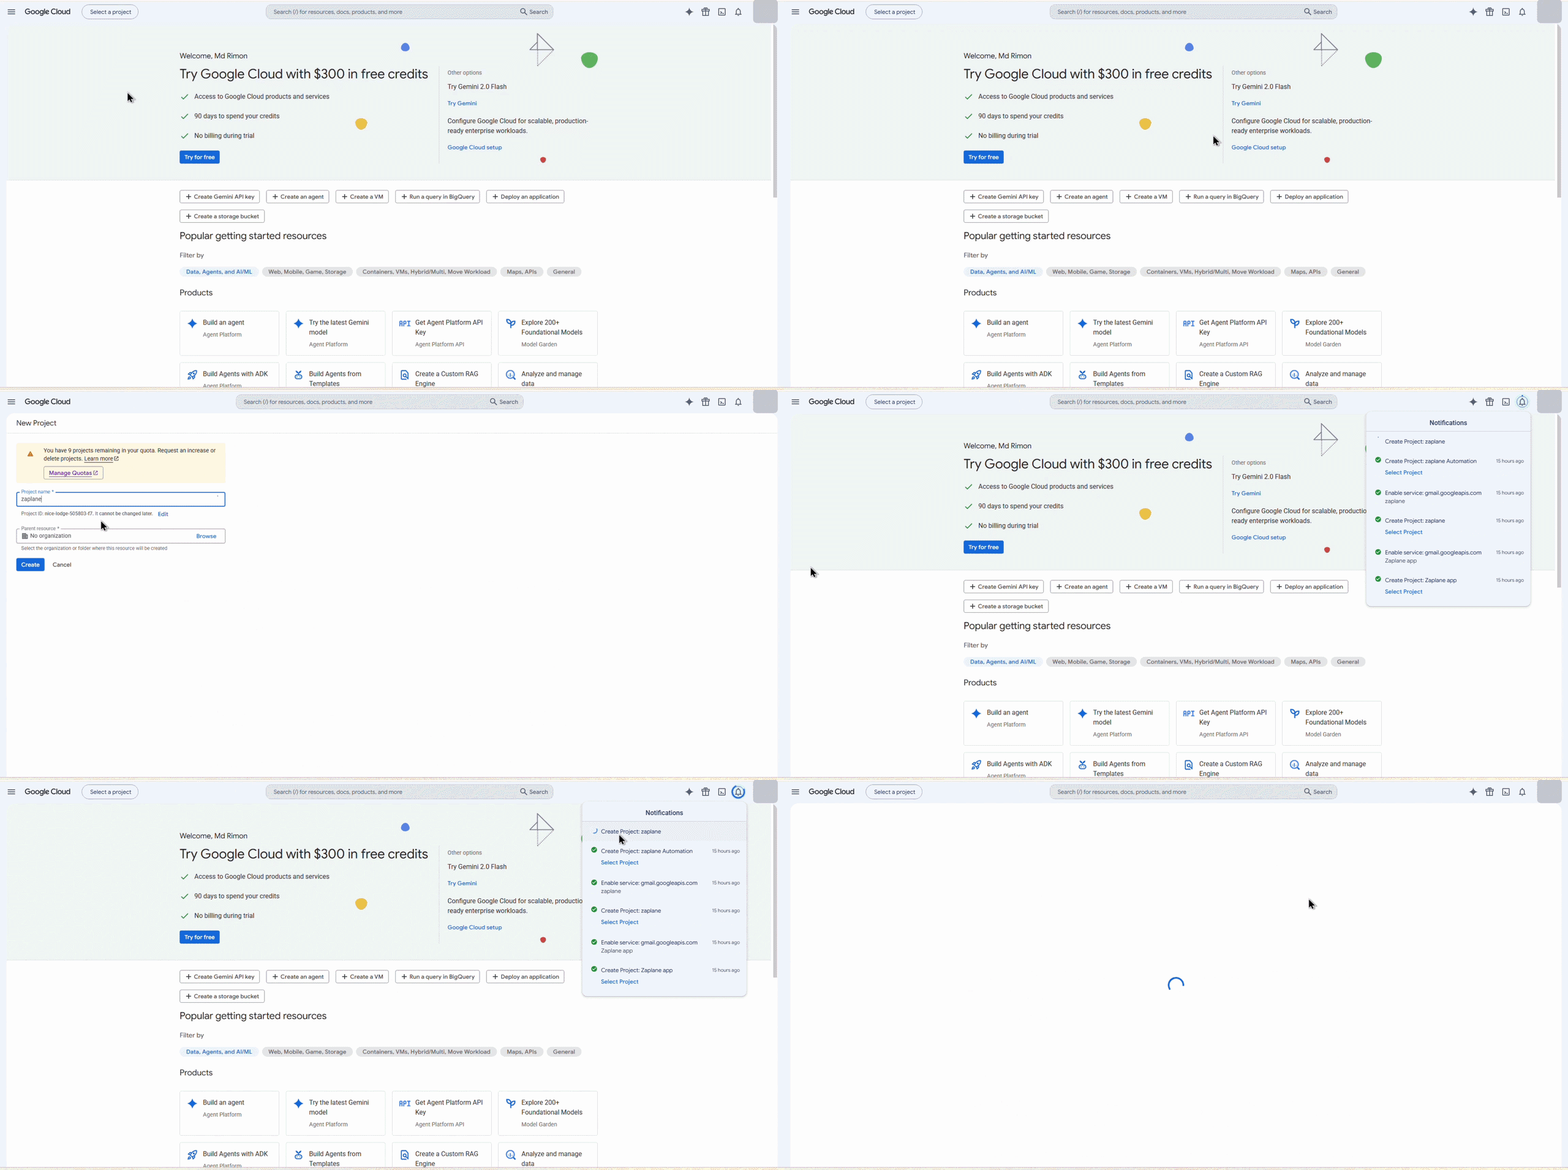
In the Google Cloud Console, click Select a project > New Project, enter a Project name (e.g. “zaplane”), and click Create.
Step 2: Start Creating an OAuth Client ID
Go to APIs & Services > Credentials, click + Create credentials, and choose OAuth client ID.
Step 3: Complete the OAuth Consent Screen Setup
Click Configure consent screen, then Get started, and fill in the wizard: App Information (app name and support email), Audience (choose External), and Contact Information. Check I agree to the Google API Services: User Data Policy and click Continue to finish.
Step 4: Publish the App to Production
On the Audience page, click Publish app, then confirm by clicking Confirm on the “Push to production?” dialog.
Step 5: Create the OAuth Client ID
Back on Clients > Create OAuth client ID, set Application type to Web application, enter a Name, and add your site’s URL under Authorized redirect URIs. Click Create.
Step 6: Copy Your Client ID and Client Secret
In the OAuth client created dialog, copy the Client ID and Client secret — you’ll need both in Zaplane, and you won’t be able to view the secret again once you close this dialog.
https://drive.google.com/file/d/1drcxhXFY9k0jTT6_VuQvR9EYx5Kuf8Tk/view?usp=sharing
Part 2: Create the Connection in Zaplane
Step 7: Open Connections
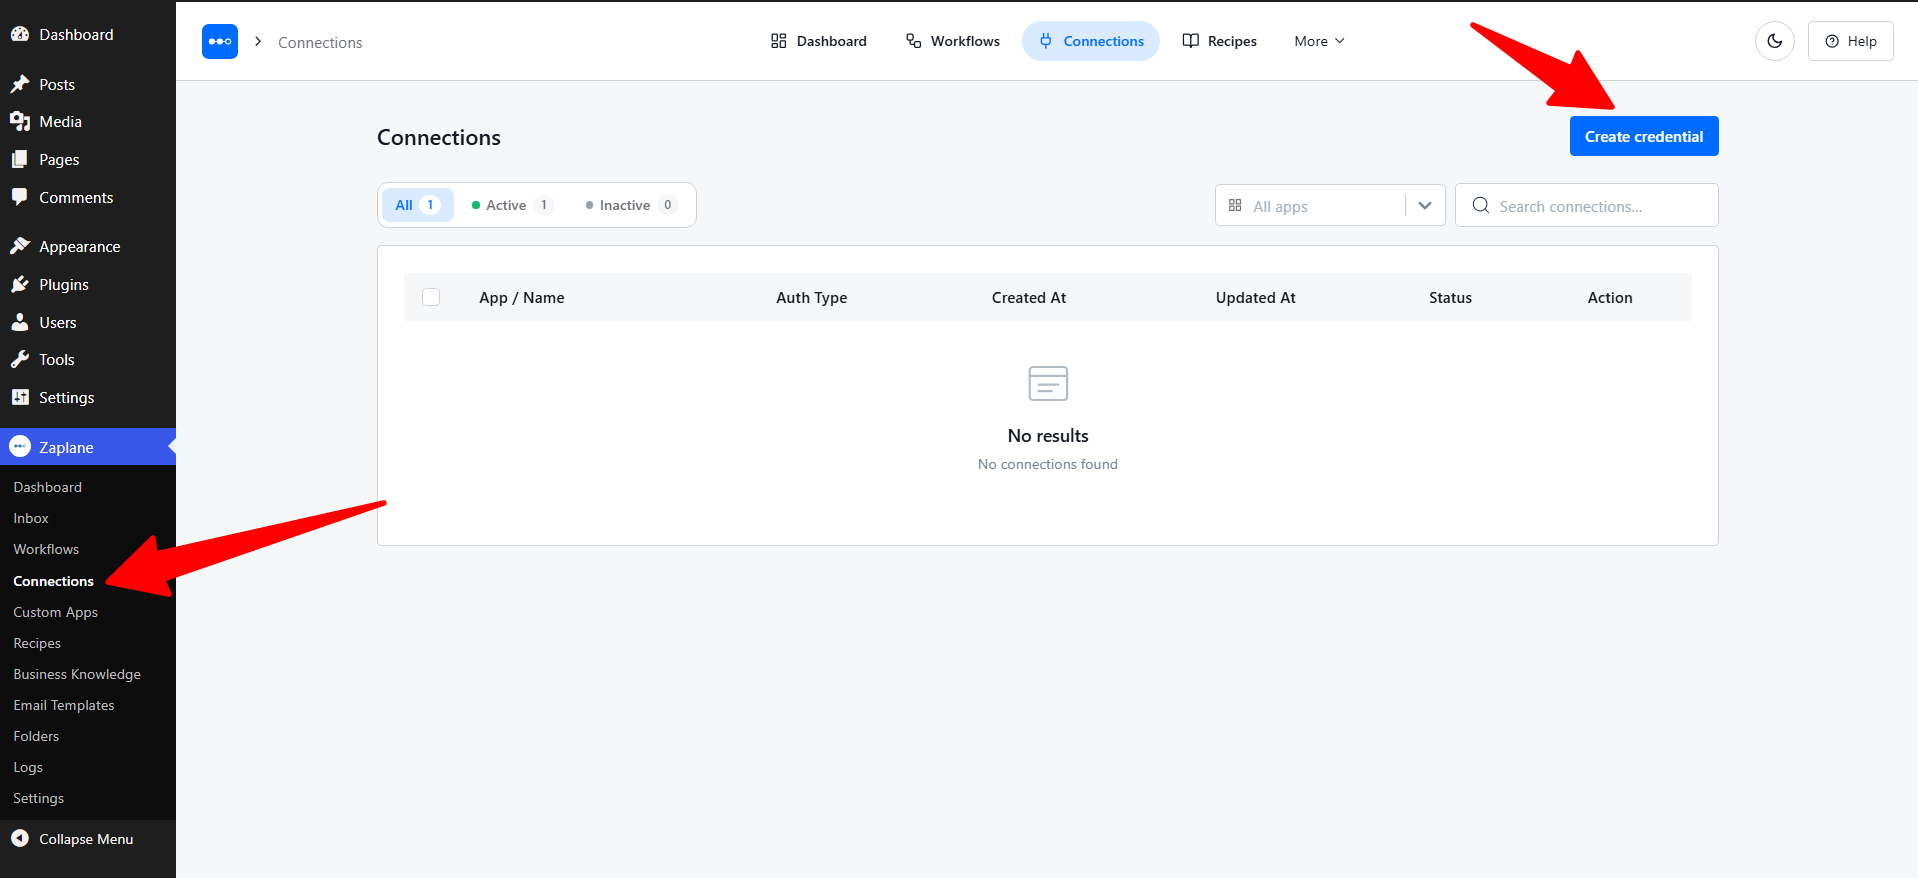
From your WordPress dashboard, go to Zaplane > Connections, then click Create credential.
Step 8: Select Google Sheets
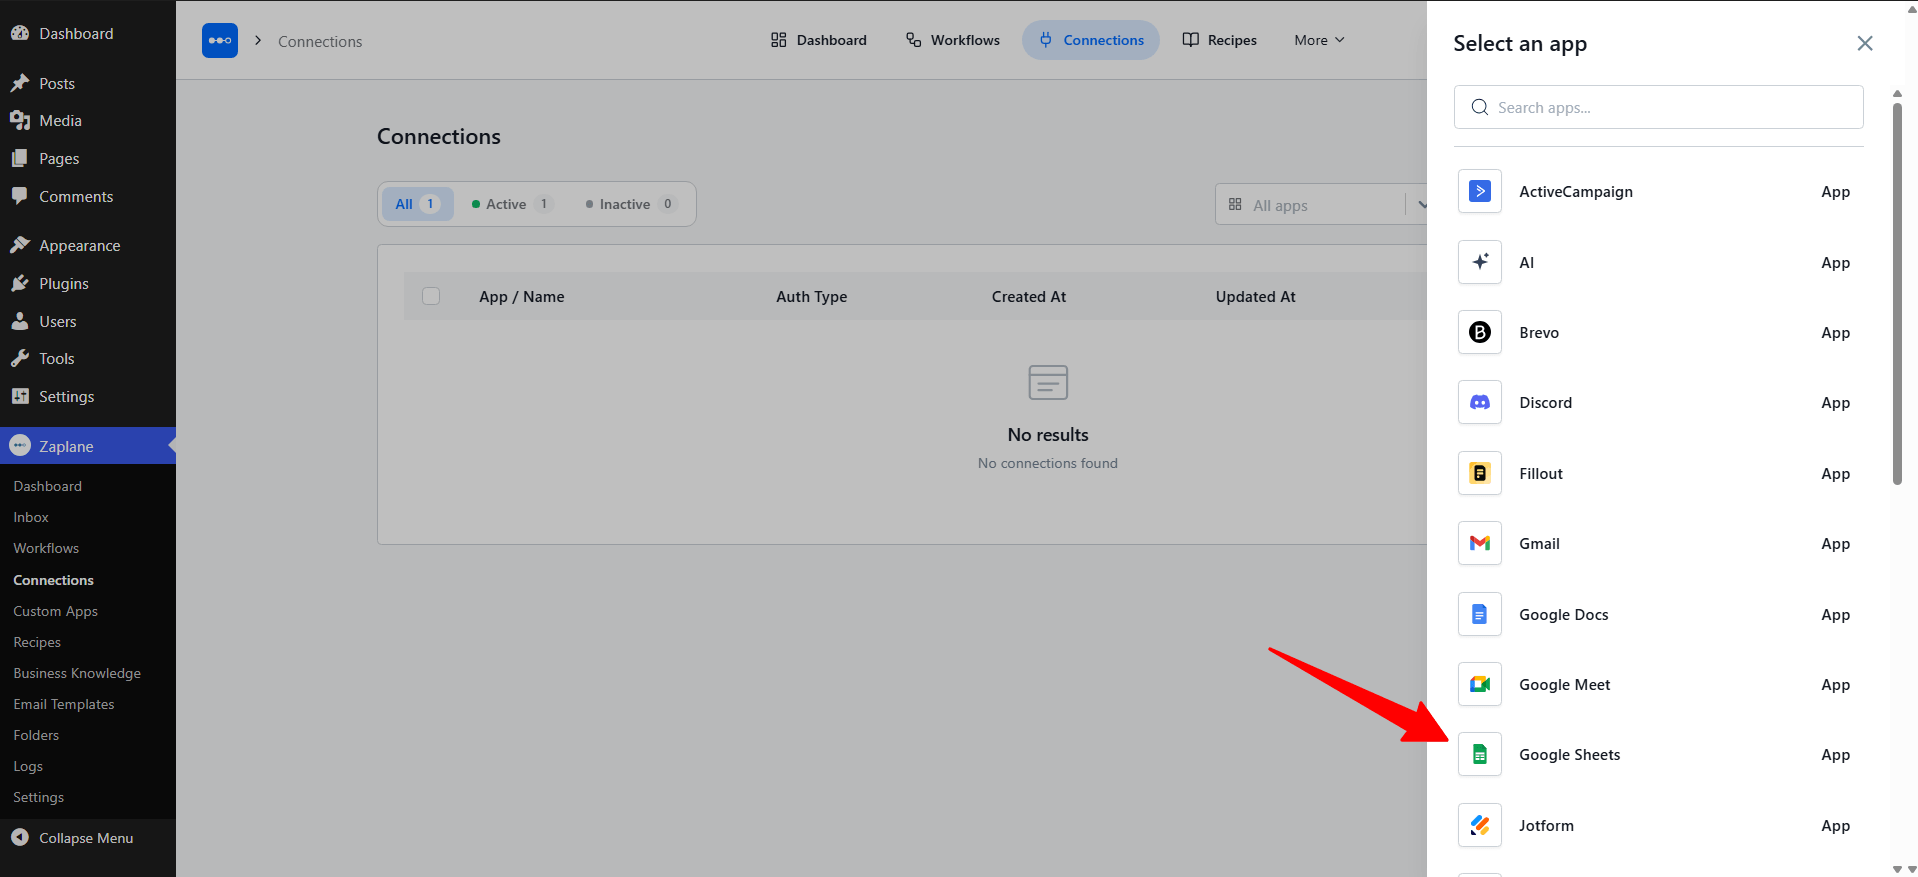
In the Select an app panel, find and select Google Sheets.
Step 9: Enter Your Client ID and Client Secret
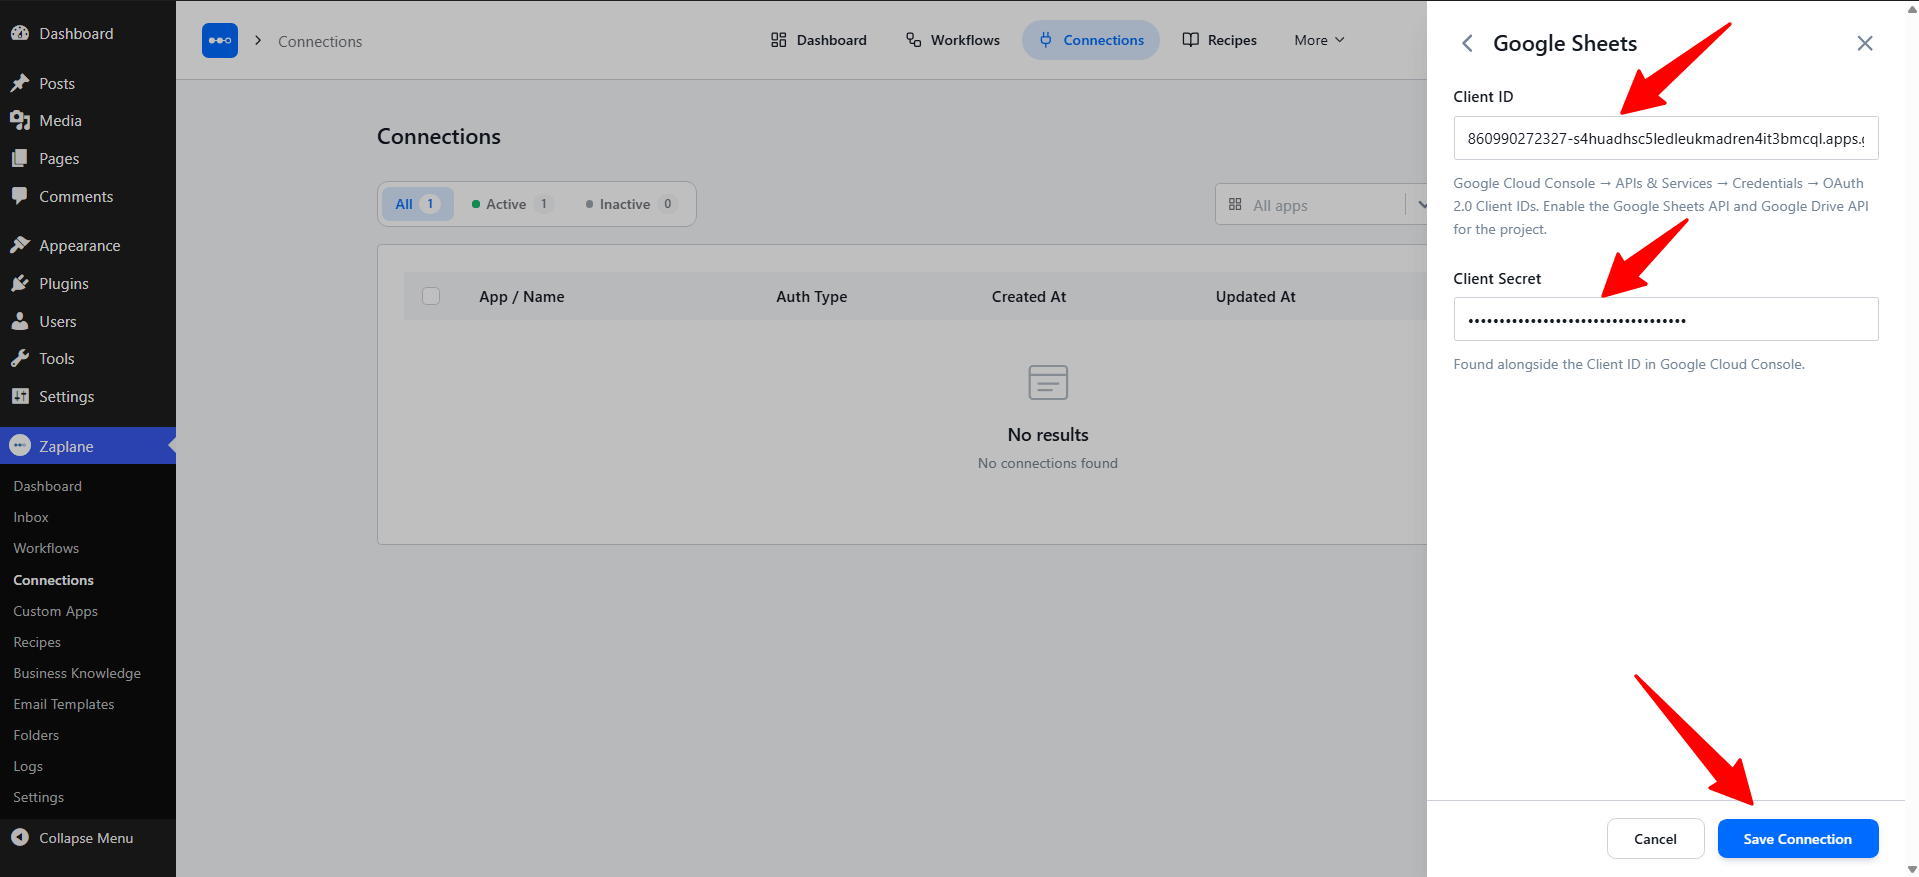
Paste your Client ID and Client Secret into their fields, then click Save Connection.
Part 3: Add the Trigger to Your Workflow
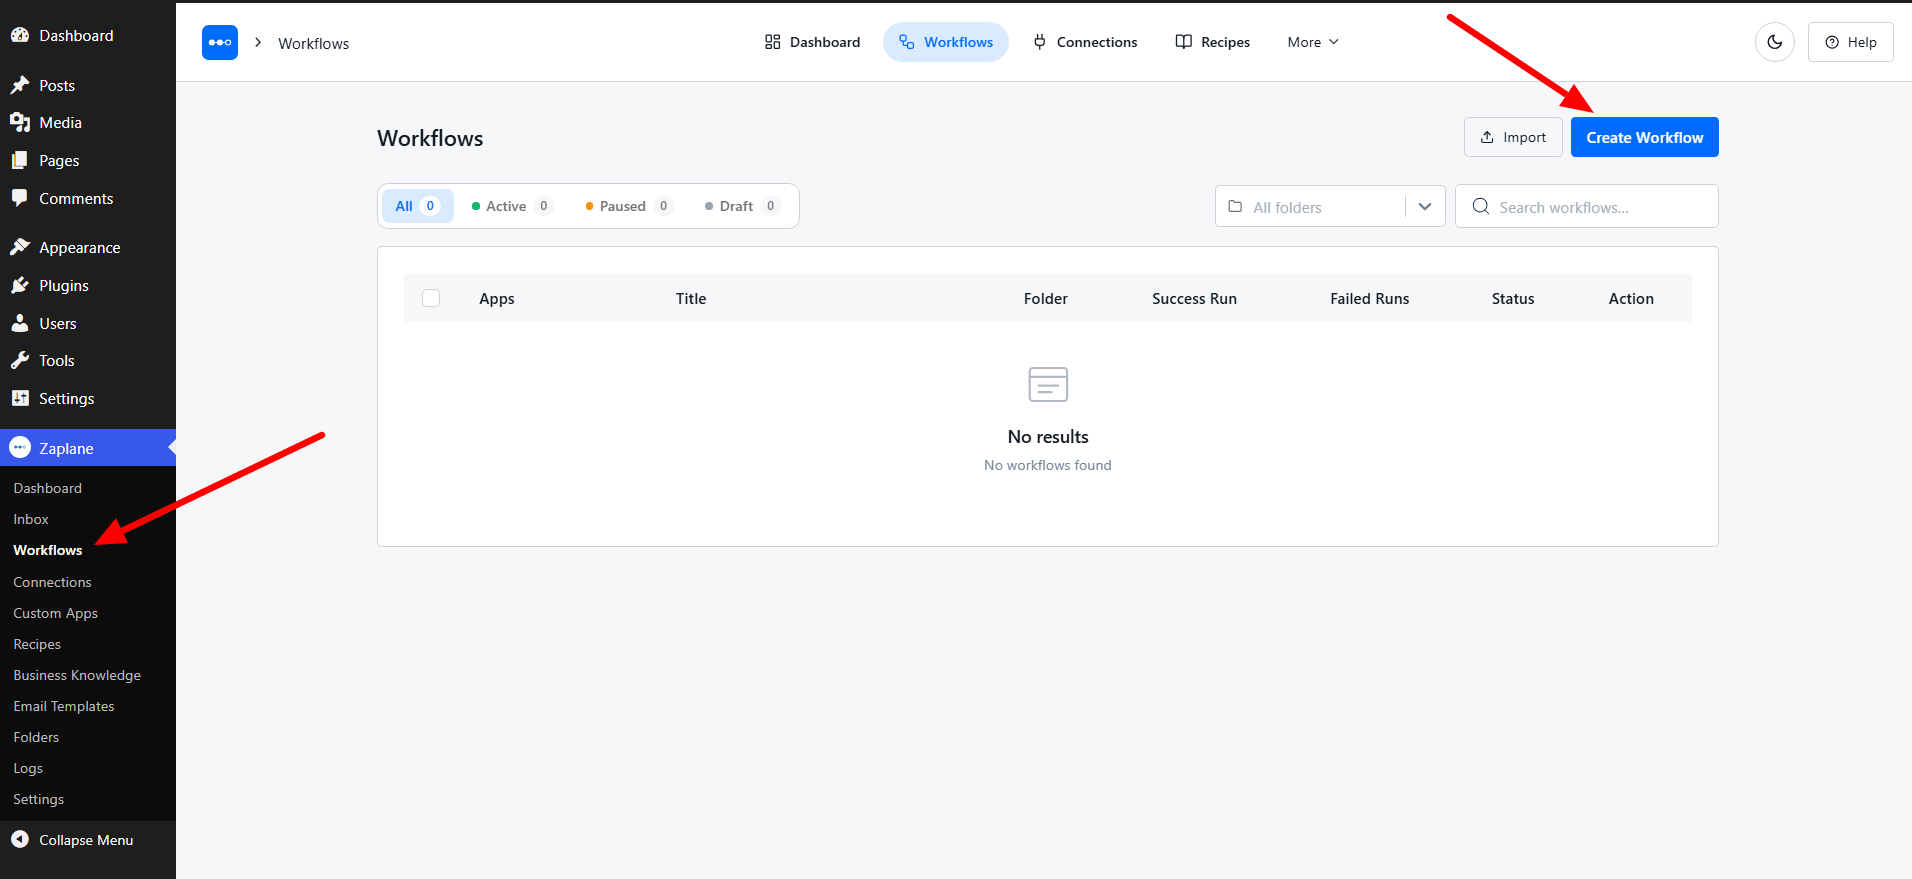
Step 10: Create a Workflow
Go to Zaplane > Workflows from your WordPress dashboard, then click Create Workflow to open the workflow editor.
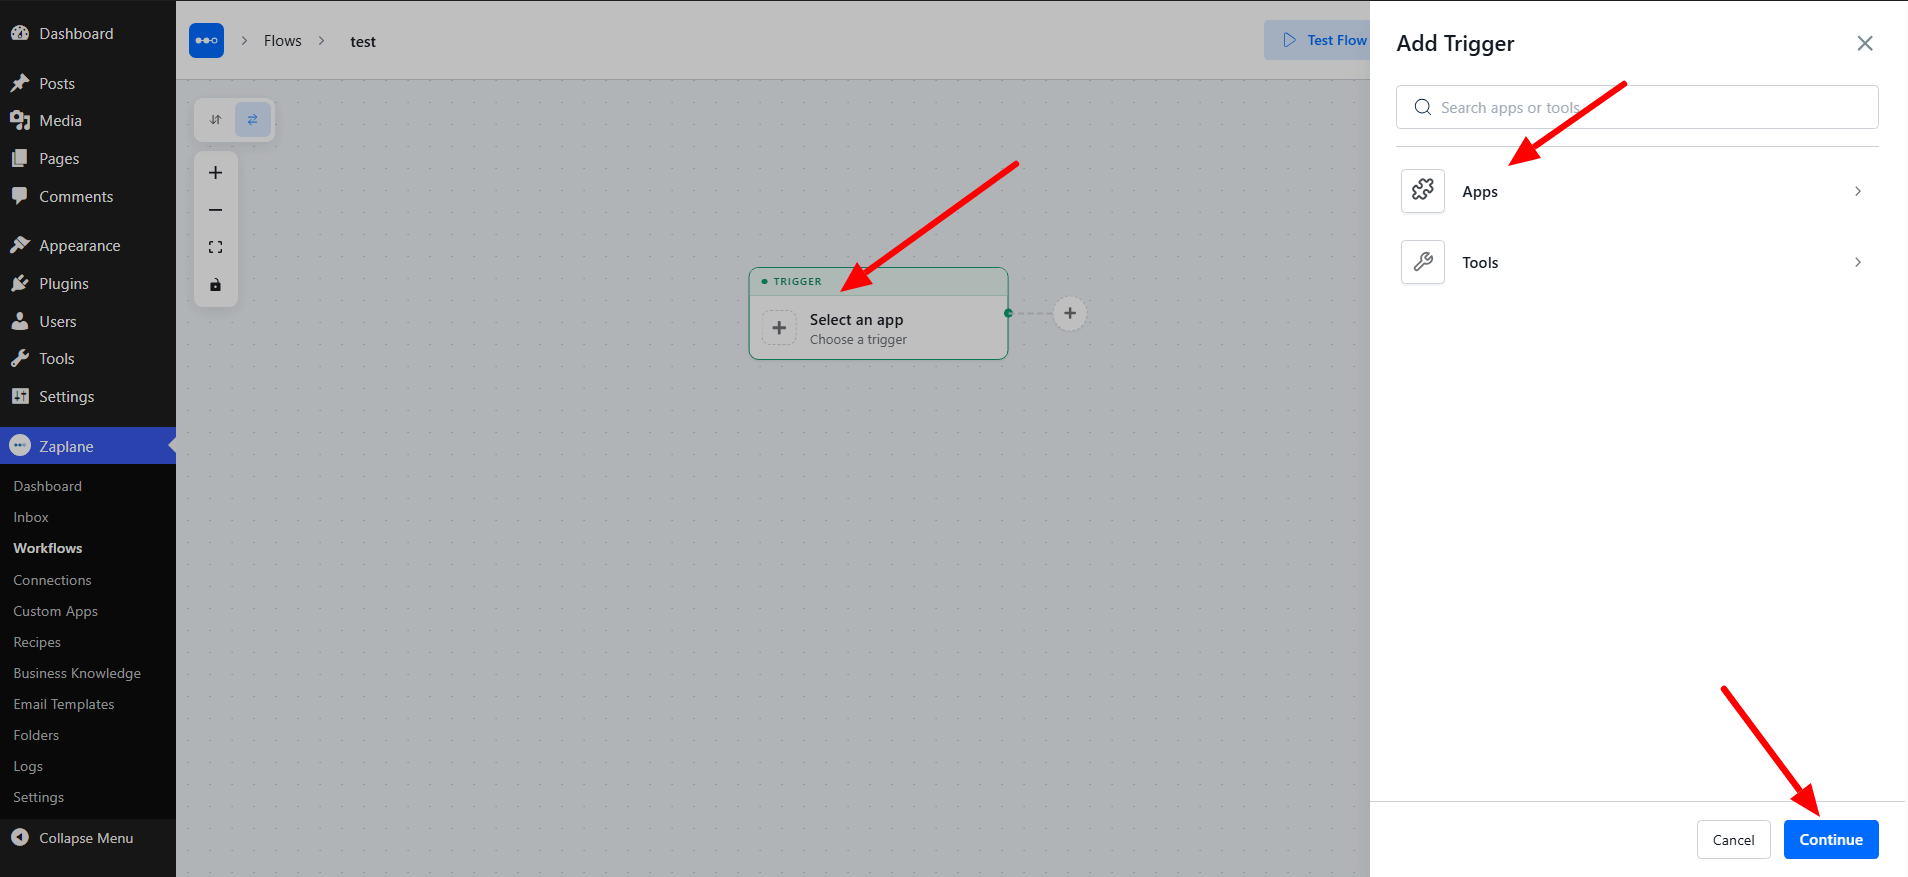
Step 11: Add the Trigger
Click Select an app in the Trigger box. In the Add Trigger panel, choose Apps.
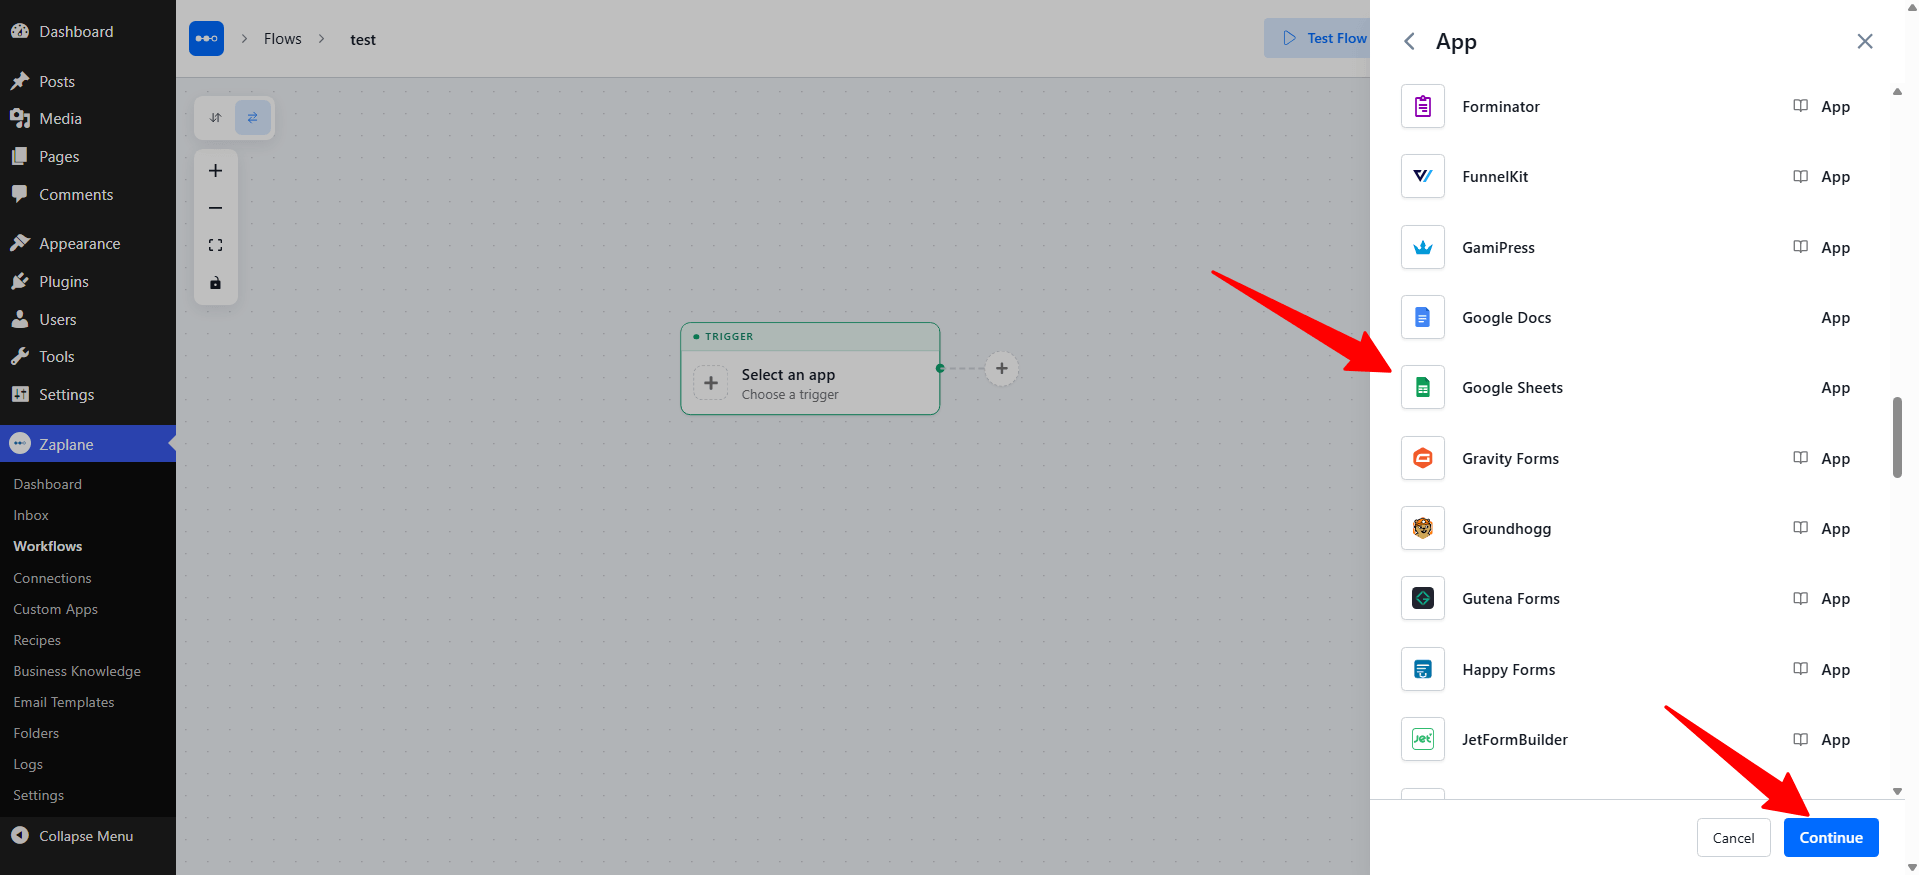
Step 12: Select the Google Sheets App
Scroll through the app list, select Google Sheets, then click Continue.
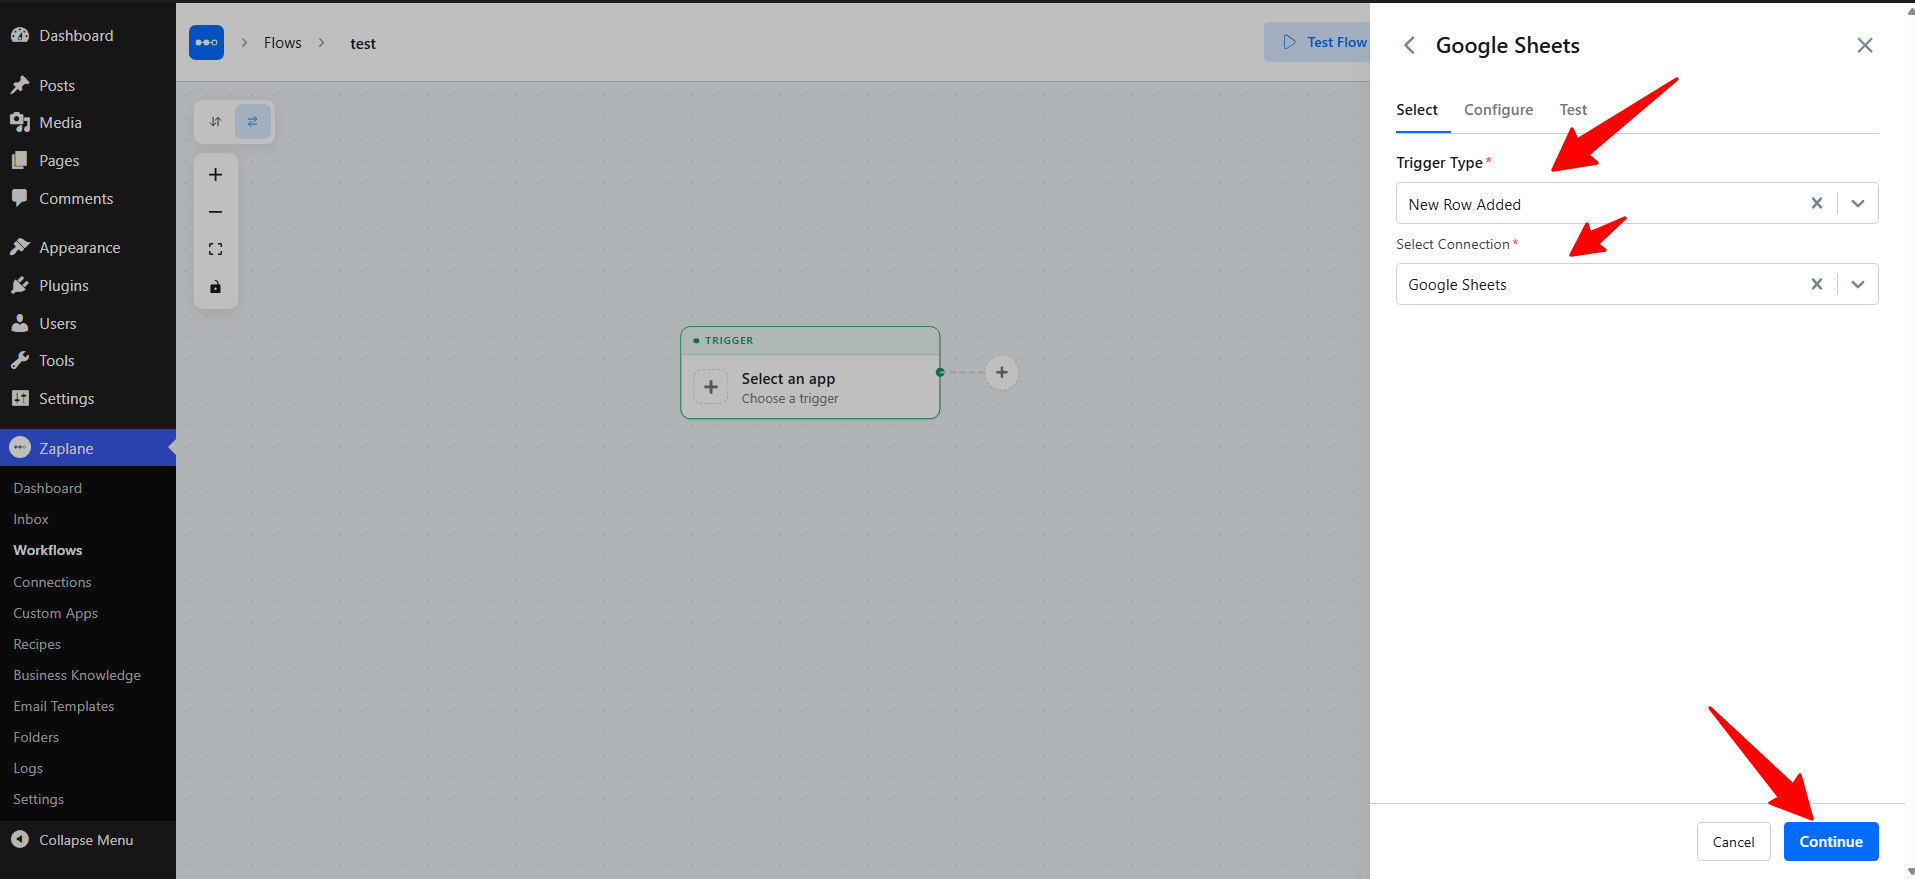
Step 13: Choose the Trigger Type
On the Select tab, choose New Row Added from the Trigger Type dropdown. Then pick the connection you just created from the Select Connection dropdown and click Continue.
Step 14: Configure the Trigger
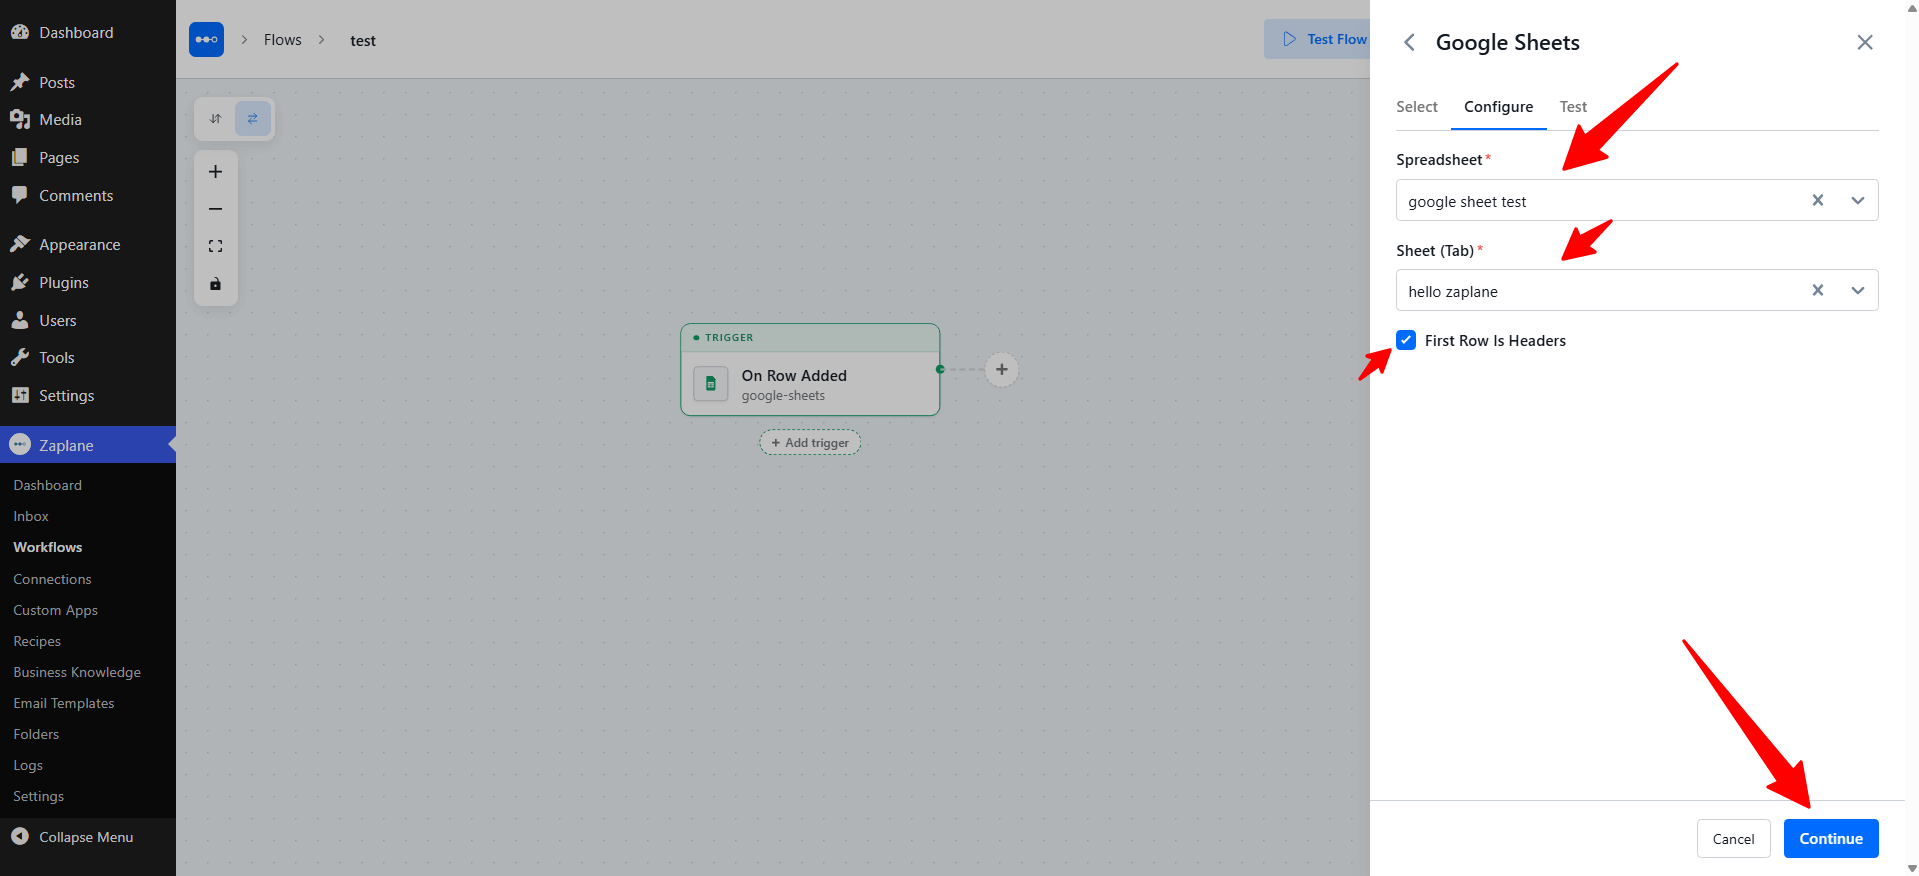
On the Configure tab, fill in the following fields, then click Continue:
Spreadsheet (required): select the spreadsheet you want to watch.
Sheet (Tab) (required): select the tab inside that spreadsheet.
First Row Is Headers: keep this checked if the first row of your sheet contains column names.
Step 15: Test and Save the Trigger
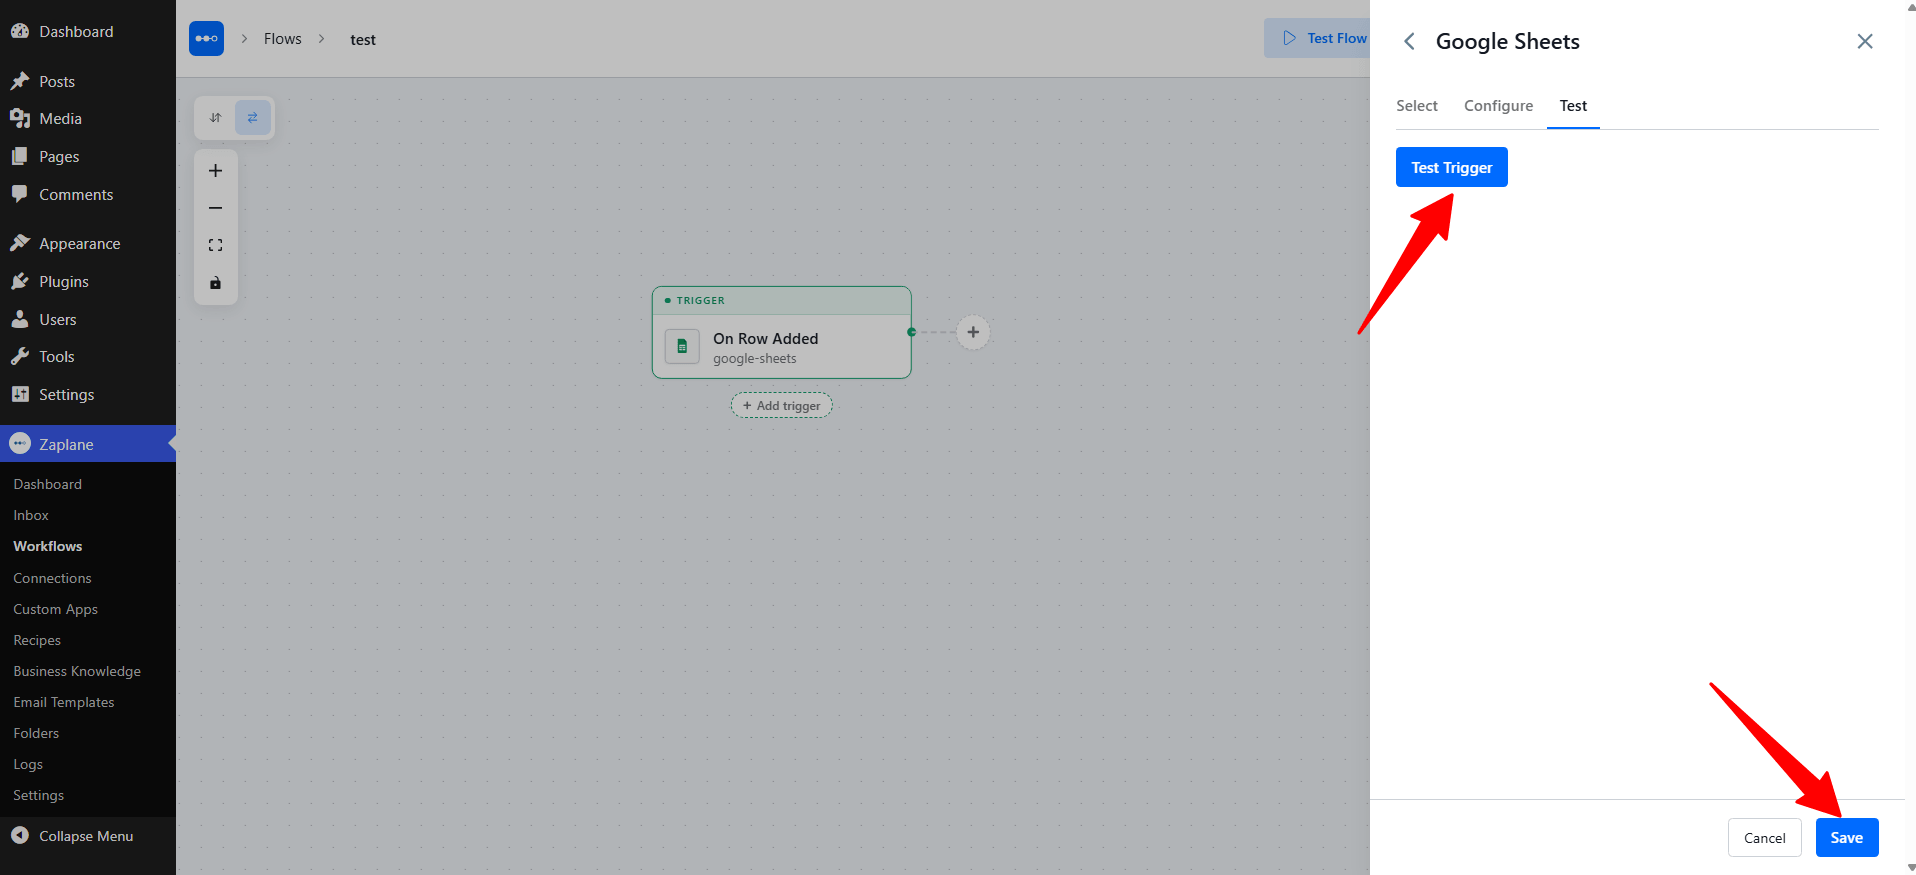
On the Test tab, click Test Trigger to confirm Zaplane can read your sheet, then click Save.
Step 16: Update and Activate the Workflow
Back on the workflow canvas, click Update at the top right to save your changes and make sure the workflow status is set to Active.
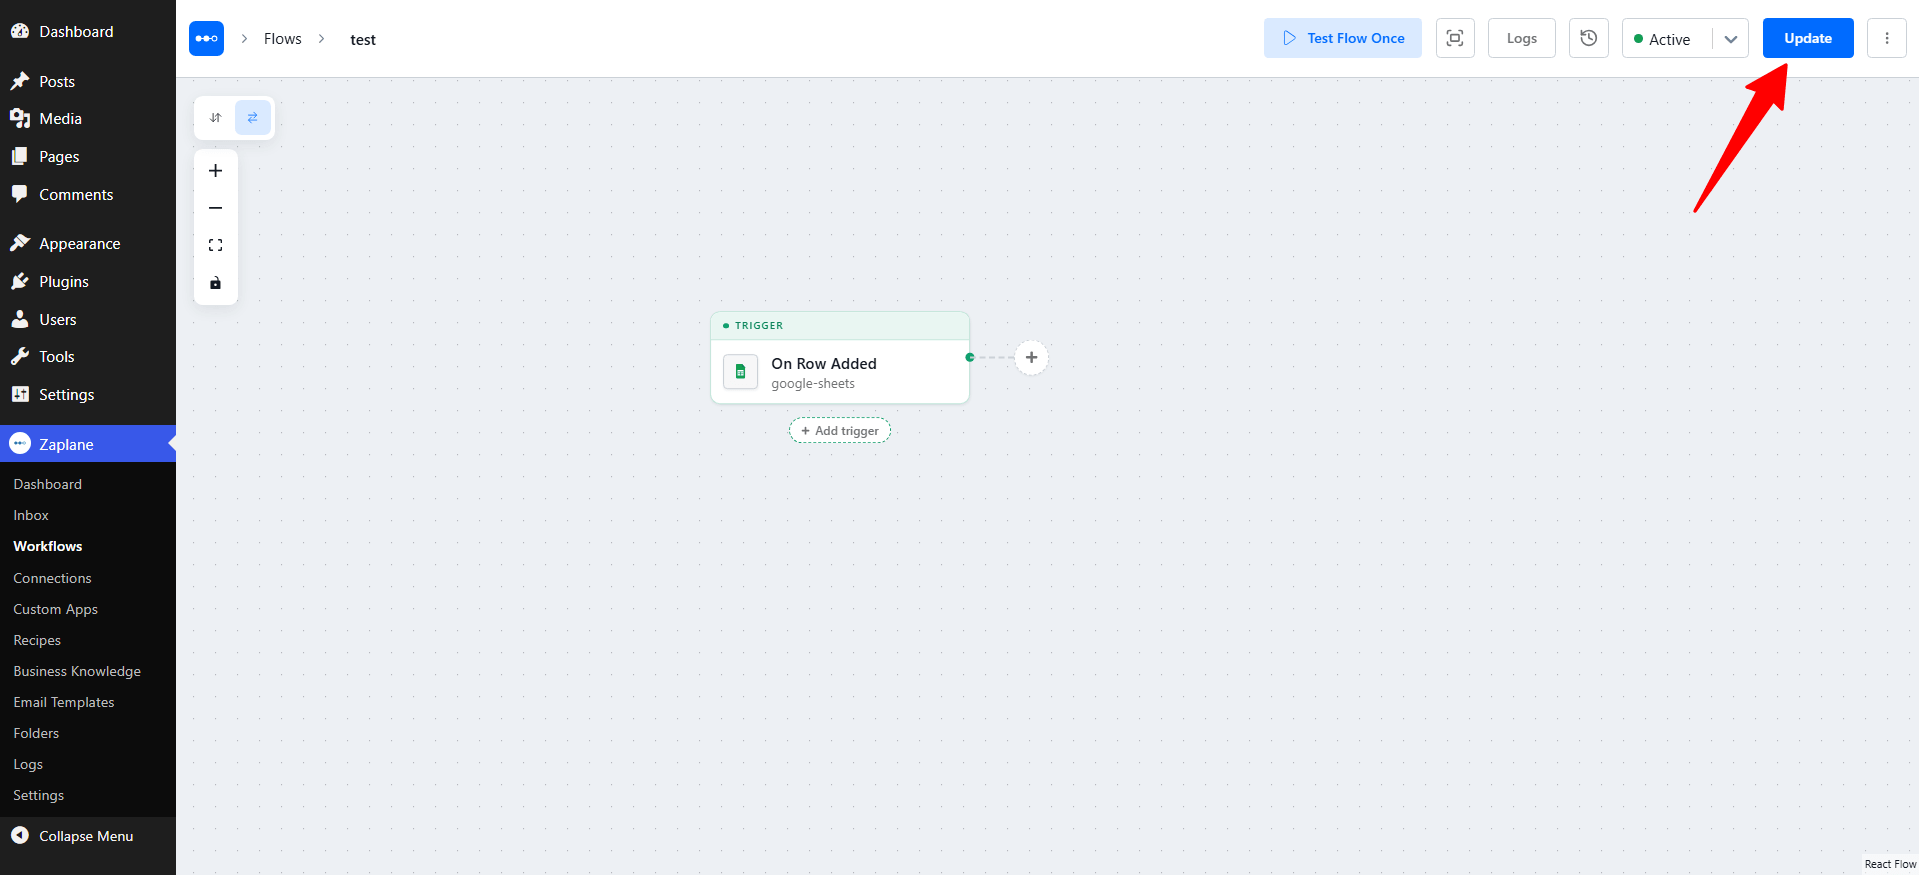
Every time a new row is added to your sheet, Zaplane now starts this workflow automatically.
Done!
Google Sheets is now connected to Zaplane, and your workflow will run whenever a new row is added.