

This guide shows you how to automatically add a new subscriber to MailPoet, or update an existing one, from a Zaplane workflow. For example, you can subscribe a customer to your newsletter whenever they purchase a product. MailPoet runs inside WordPress, so there is no API key or connection to set up. It takes about three minutes and needs no code.
Before you begin: make sure the Zaplane and MailPoet plugins are installed and active, and that you have a workflow with a trigger already added. This guide uses a Product Purchased trigger as the example, but any trigger works.
Step 1: Create a Workflow
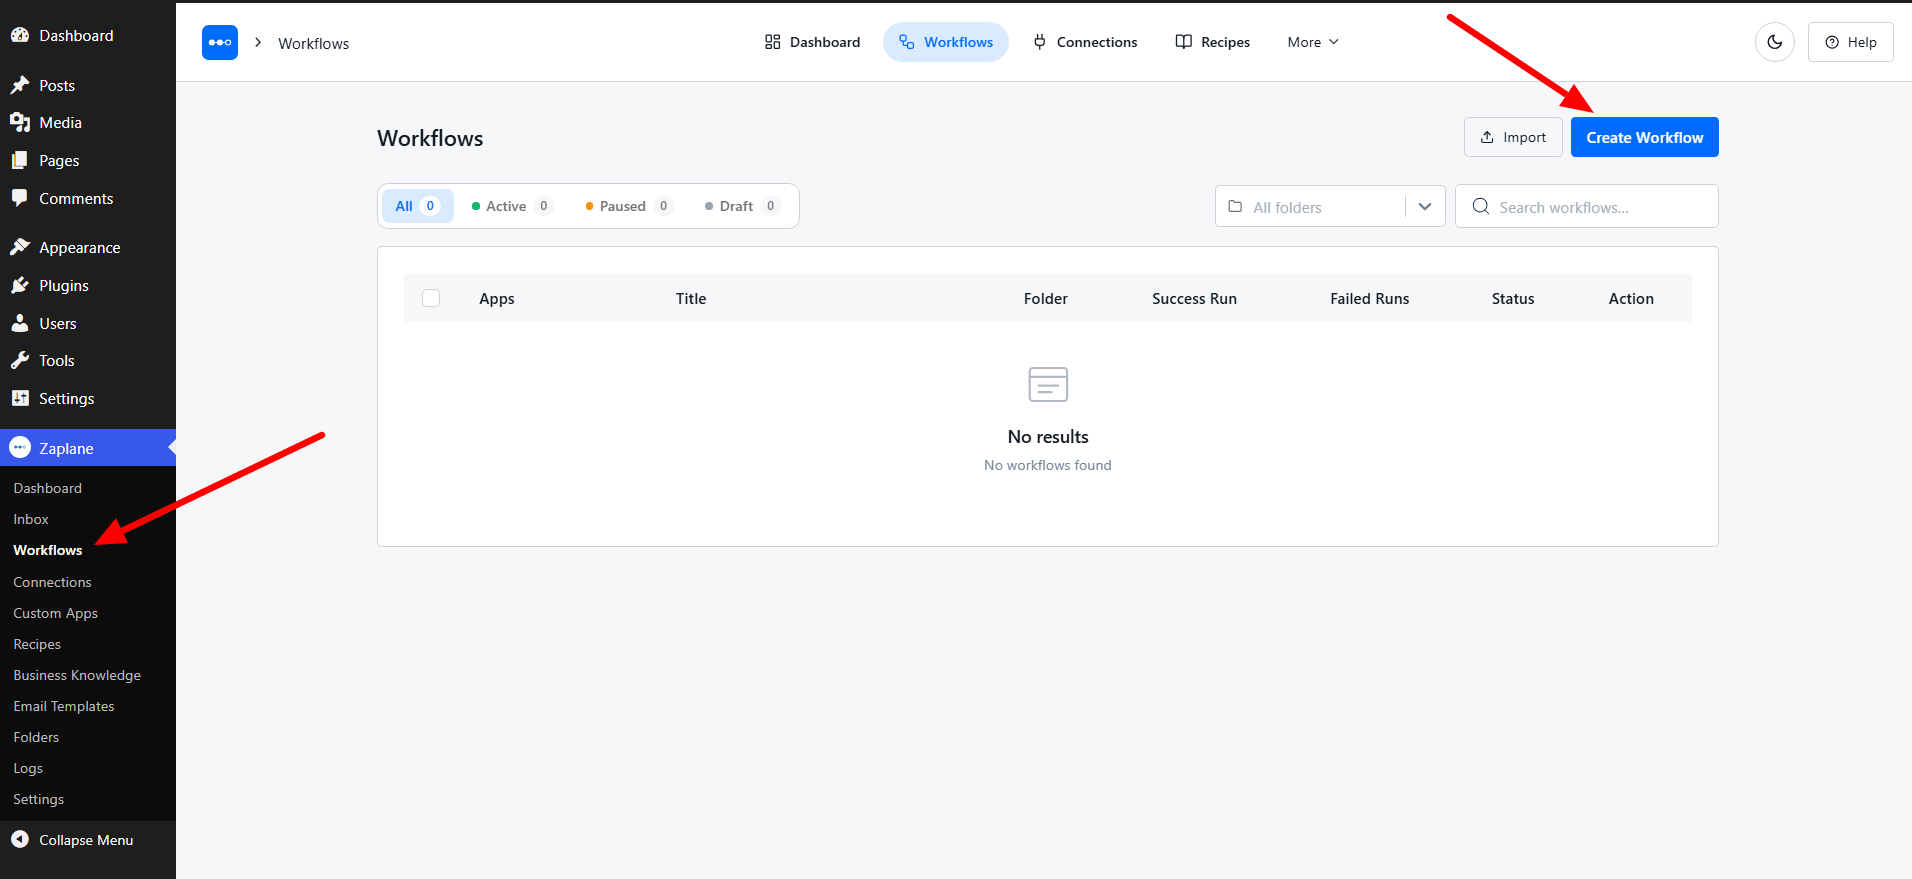
Before adding a MailPoet action, you need to set up a trigger first. Here is how to do it quickly:
Once your trigger is saved, proceed to the next step to add the MailPoet action.
Step 2: Add an action
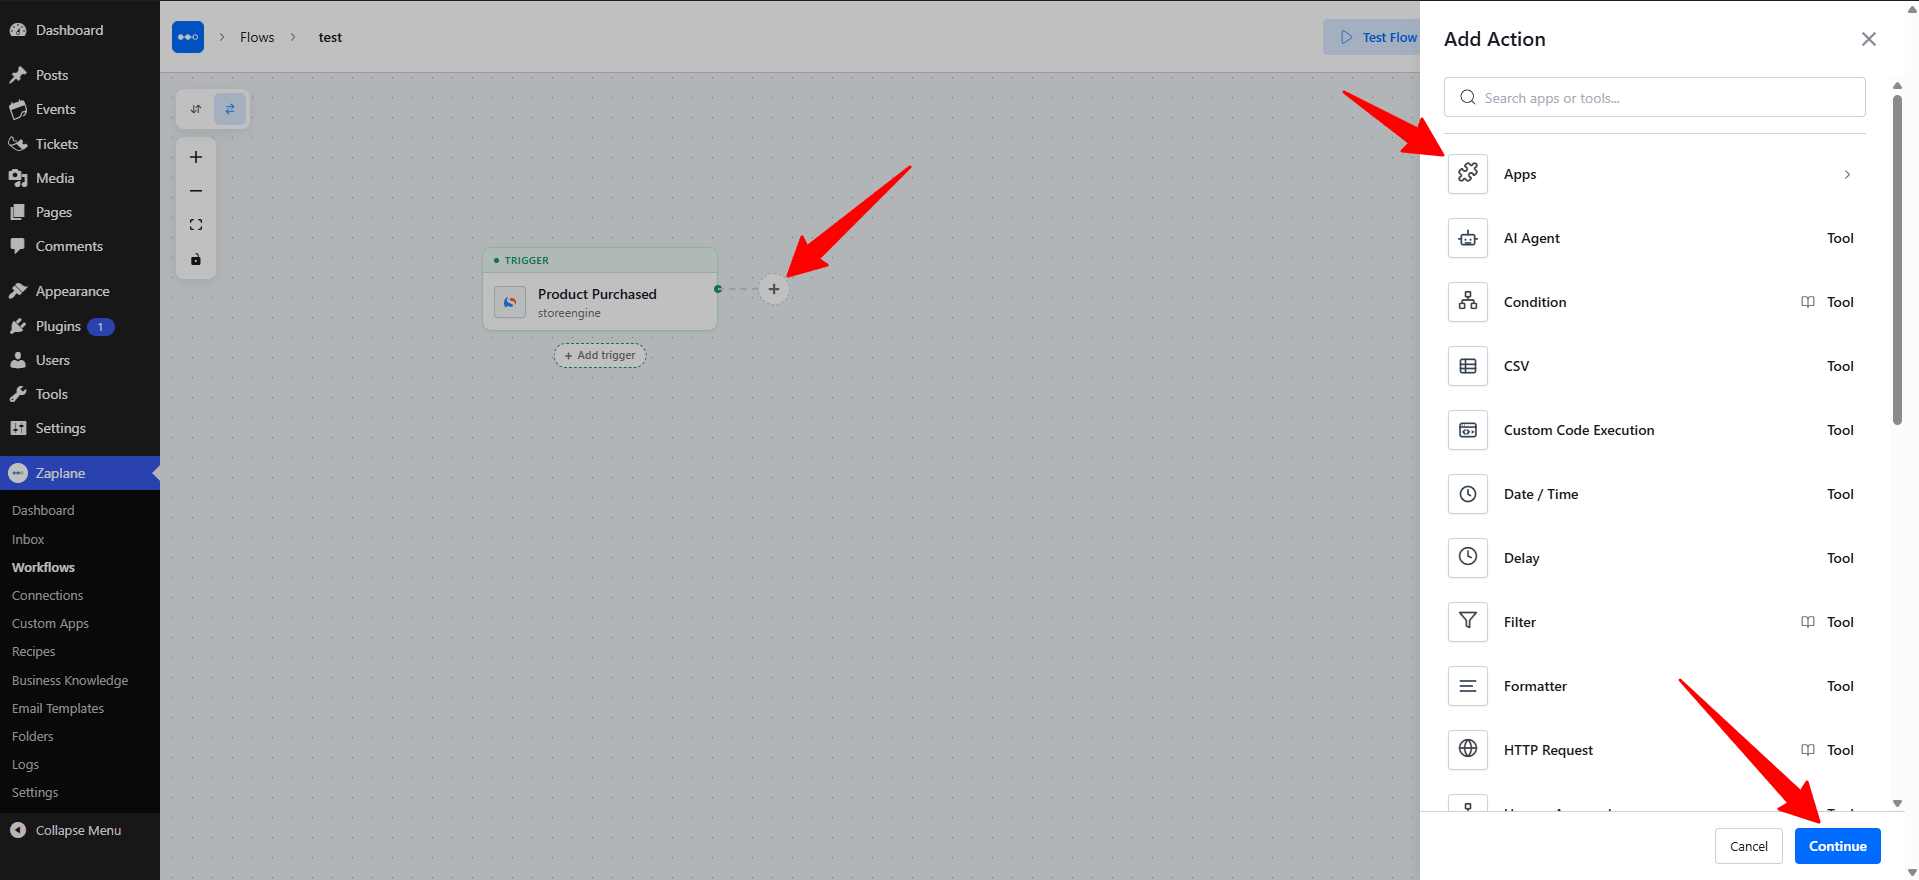
Open your workflow in Zaplane → Workflows. Click the + button next to your trigger. The Add Action panel opens on the right. Choose Apps and click Continue.
Step 3: Choose MailPoet
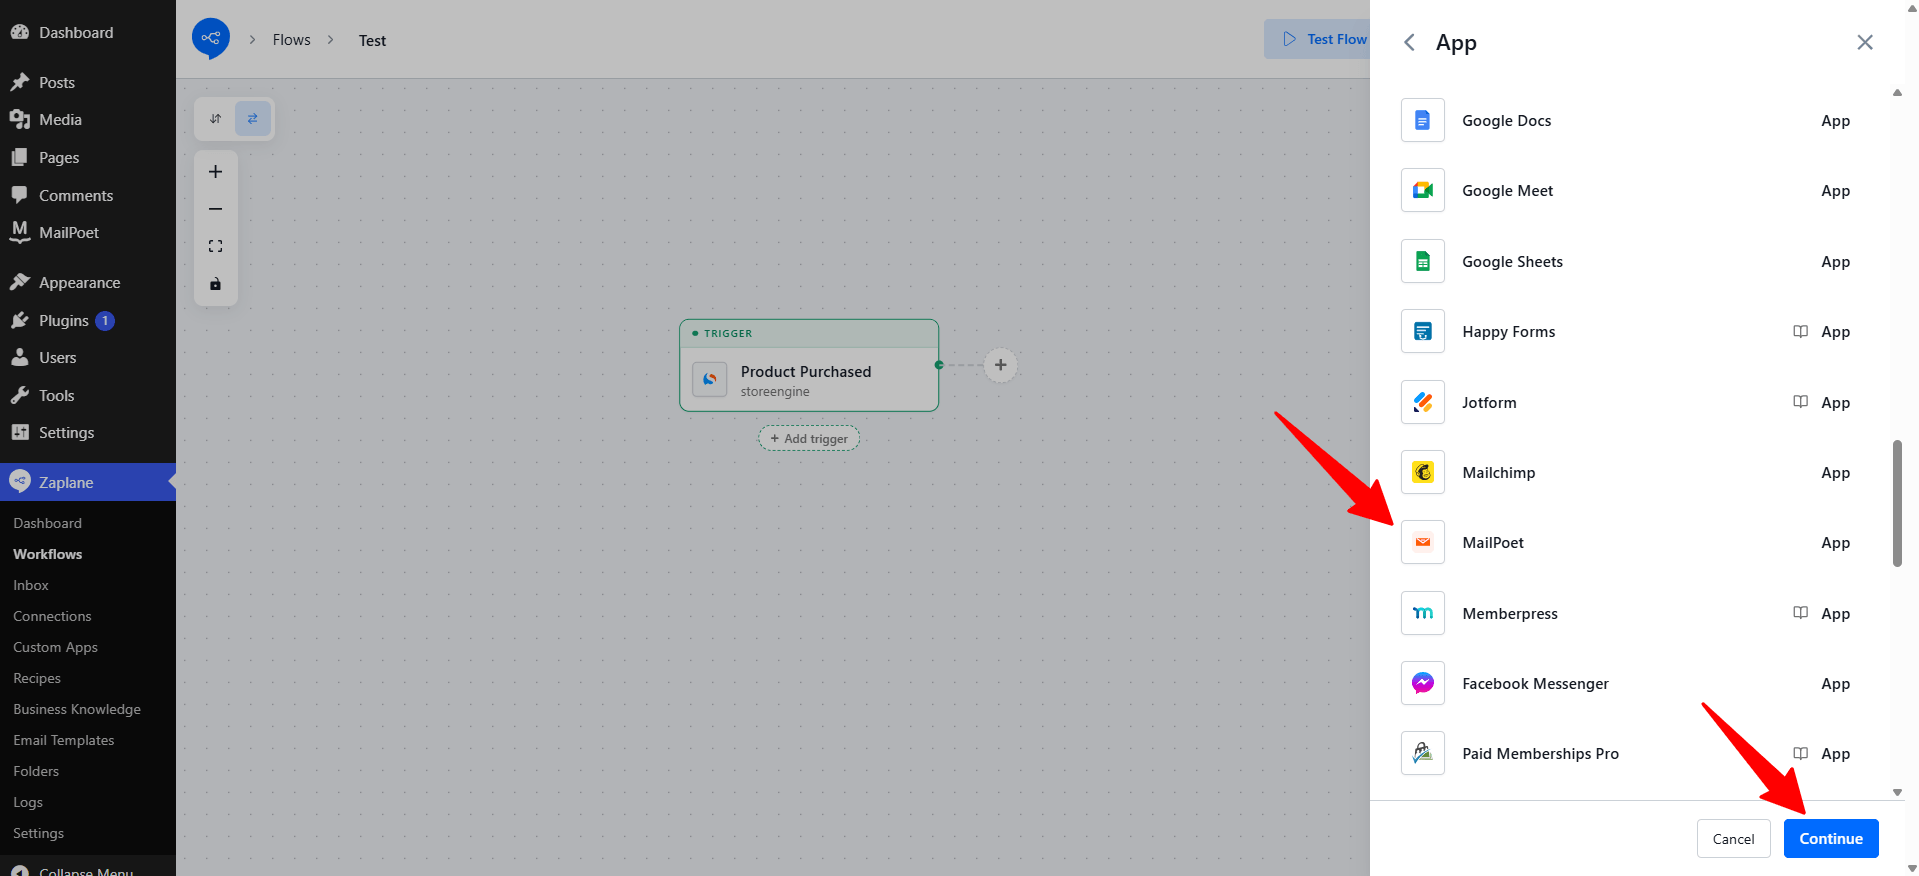
Scroll through the app list, select MailPoet, and click Continue.
Step 4: Select the action type
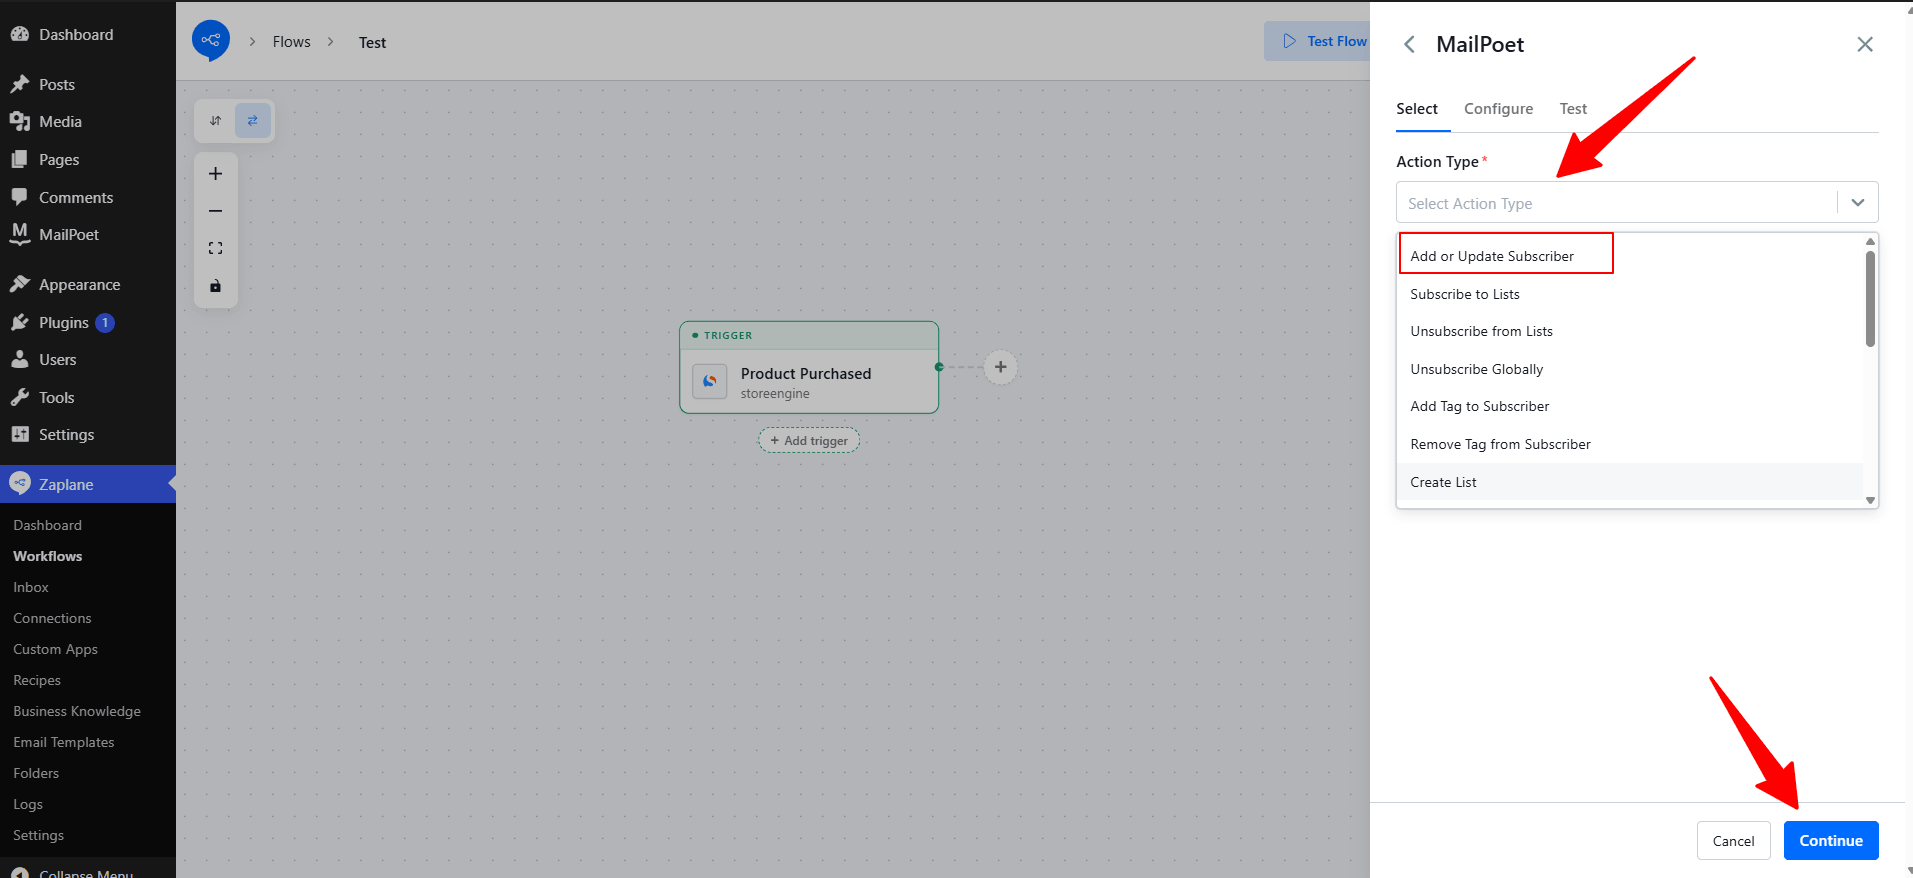
Open the Action Type dropdown and pick Add or Update Subscriber. Click Continue.
MailPoet has more actions you can use in other workflows. Scroll the list to see them all, including Subscribe to Lists, Unsubscribe from Lists, Unsubscribe Globally, Add Tag to Subscriber, Remove Tag from Subscriber, and Create List.
Step 5: Configure the subscriber
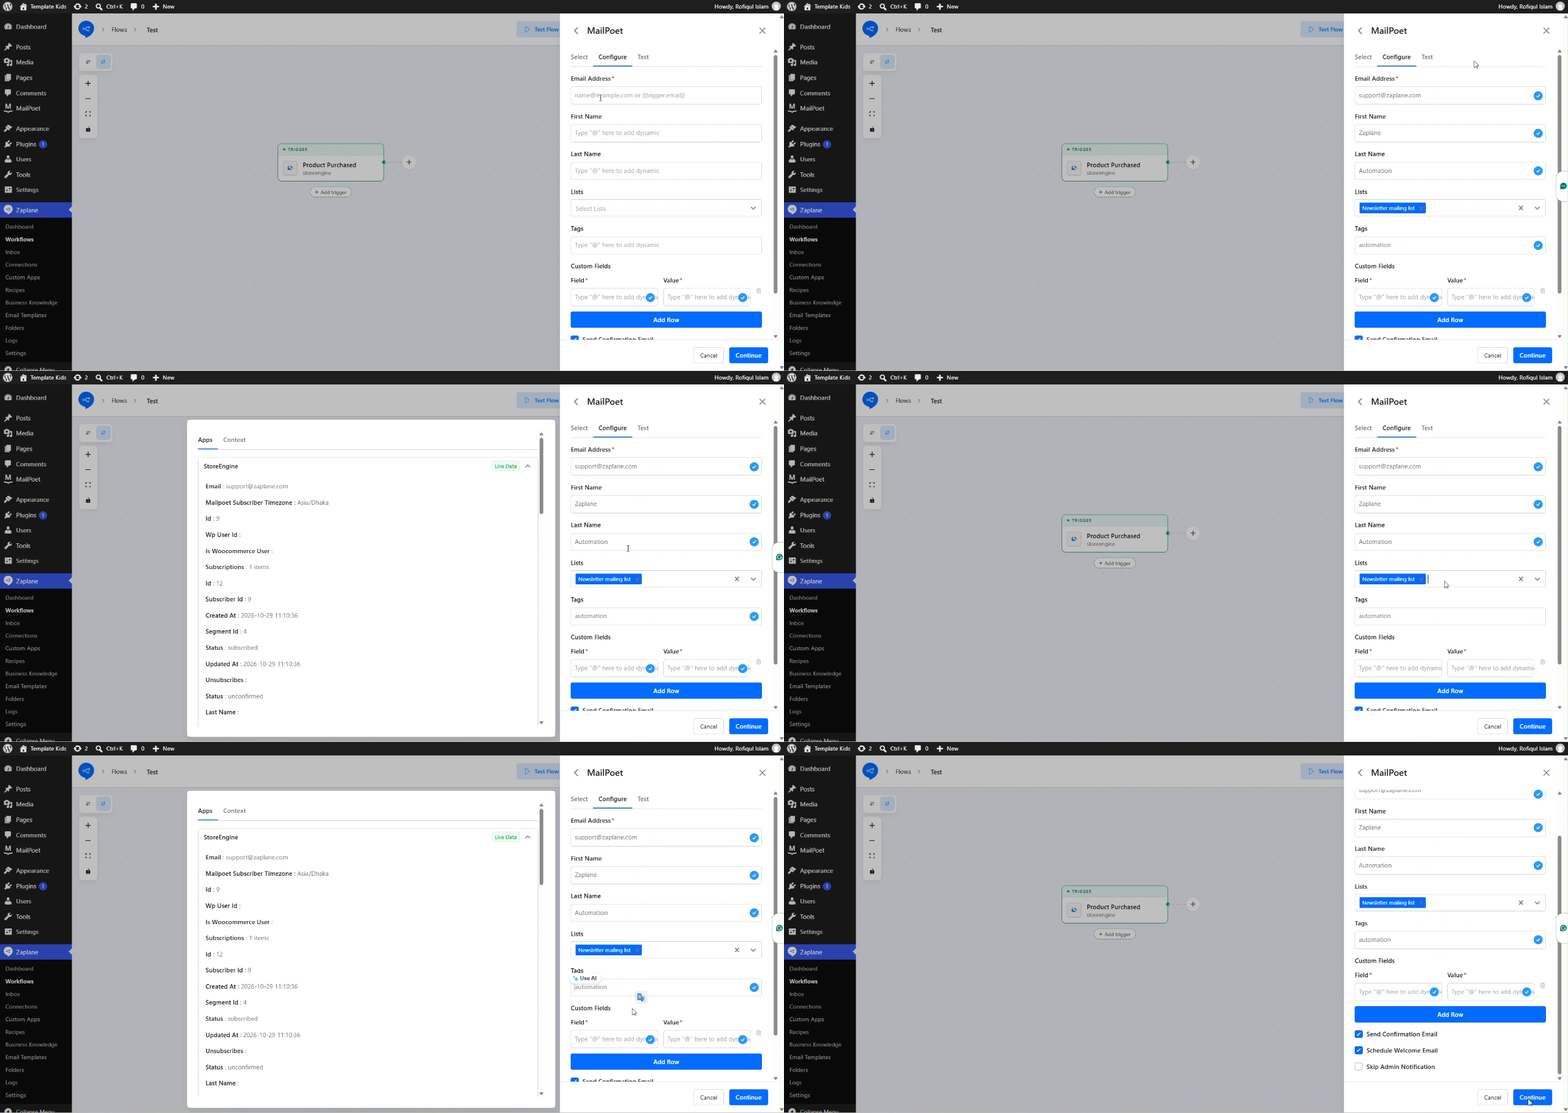
On the Configure tab, fill in the subscriber’s details:
{{trigger.email}}.In most fields, type @ to insert dynamic data from earlier steps, such as the buyer’s name or email. Scroll the panel to see every option, then click Continue.
Step 6: Test the action
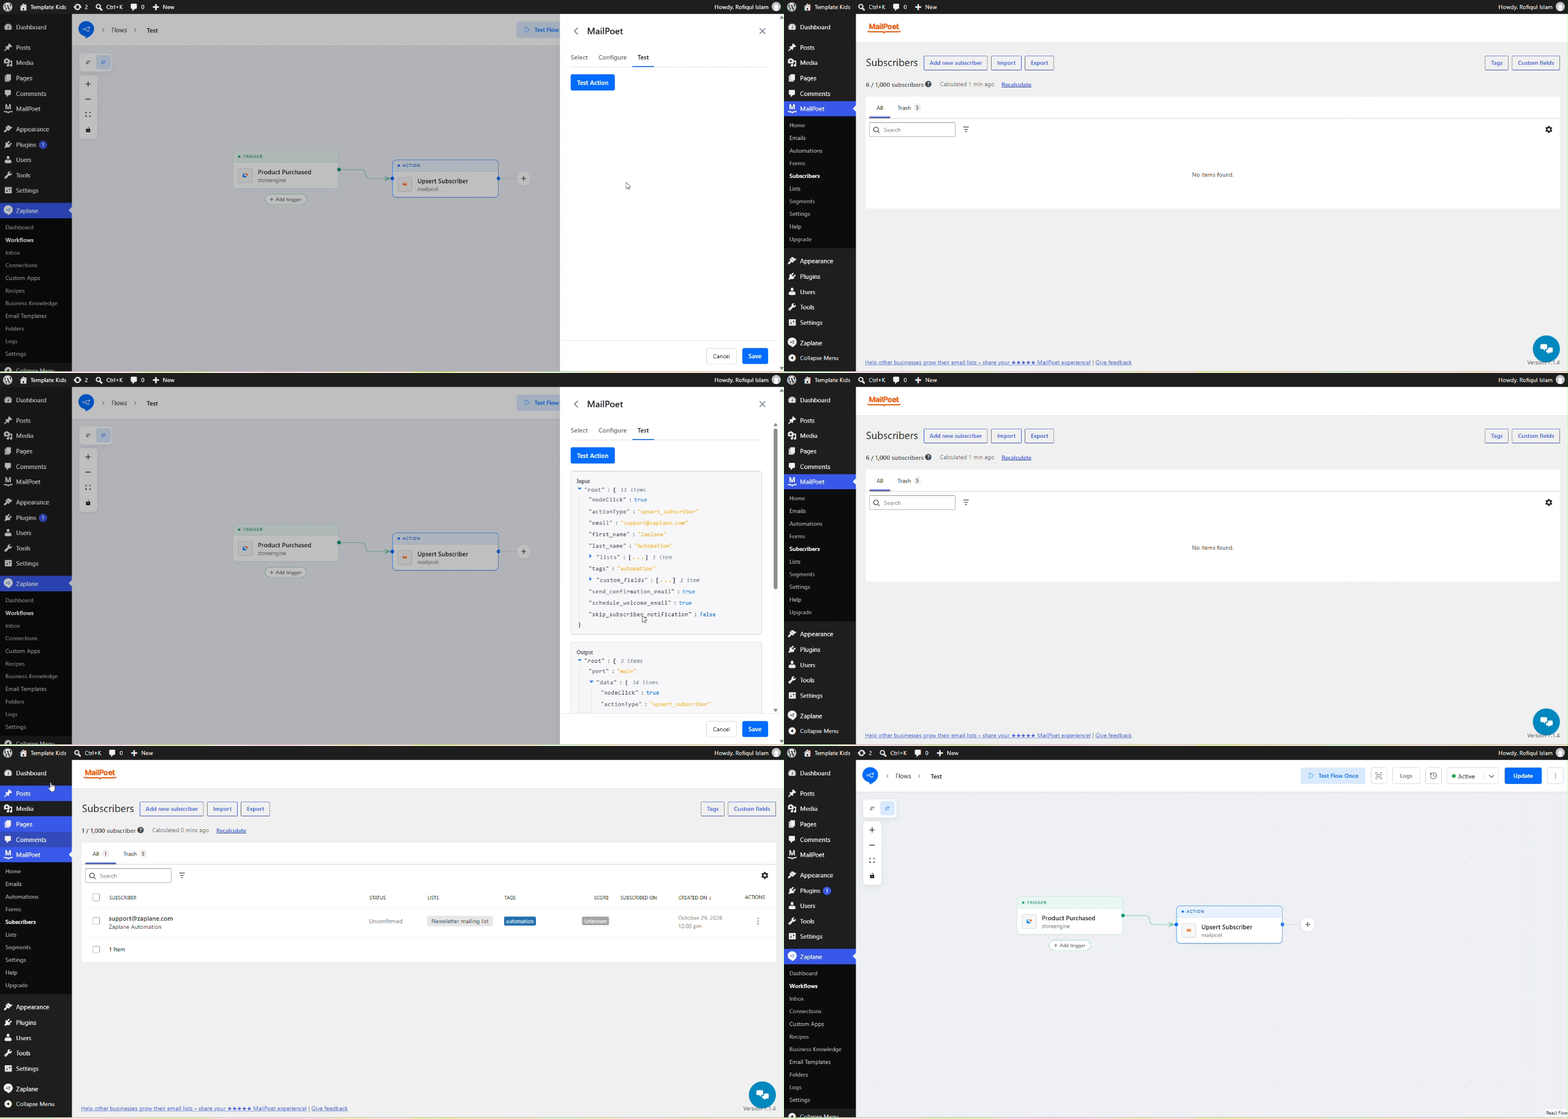
Open the Test tab and click Test Action. Check your MailPoet subscribers list to confirm the subscriber was added or updated, then click Save.
Heads up: testing runs the action for real, so it can add or change a real subscriber in MailPoet. Use a test email address if you do not want to affect your live list.
Step 7: Save and activate your workflow
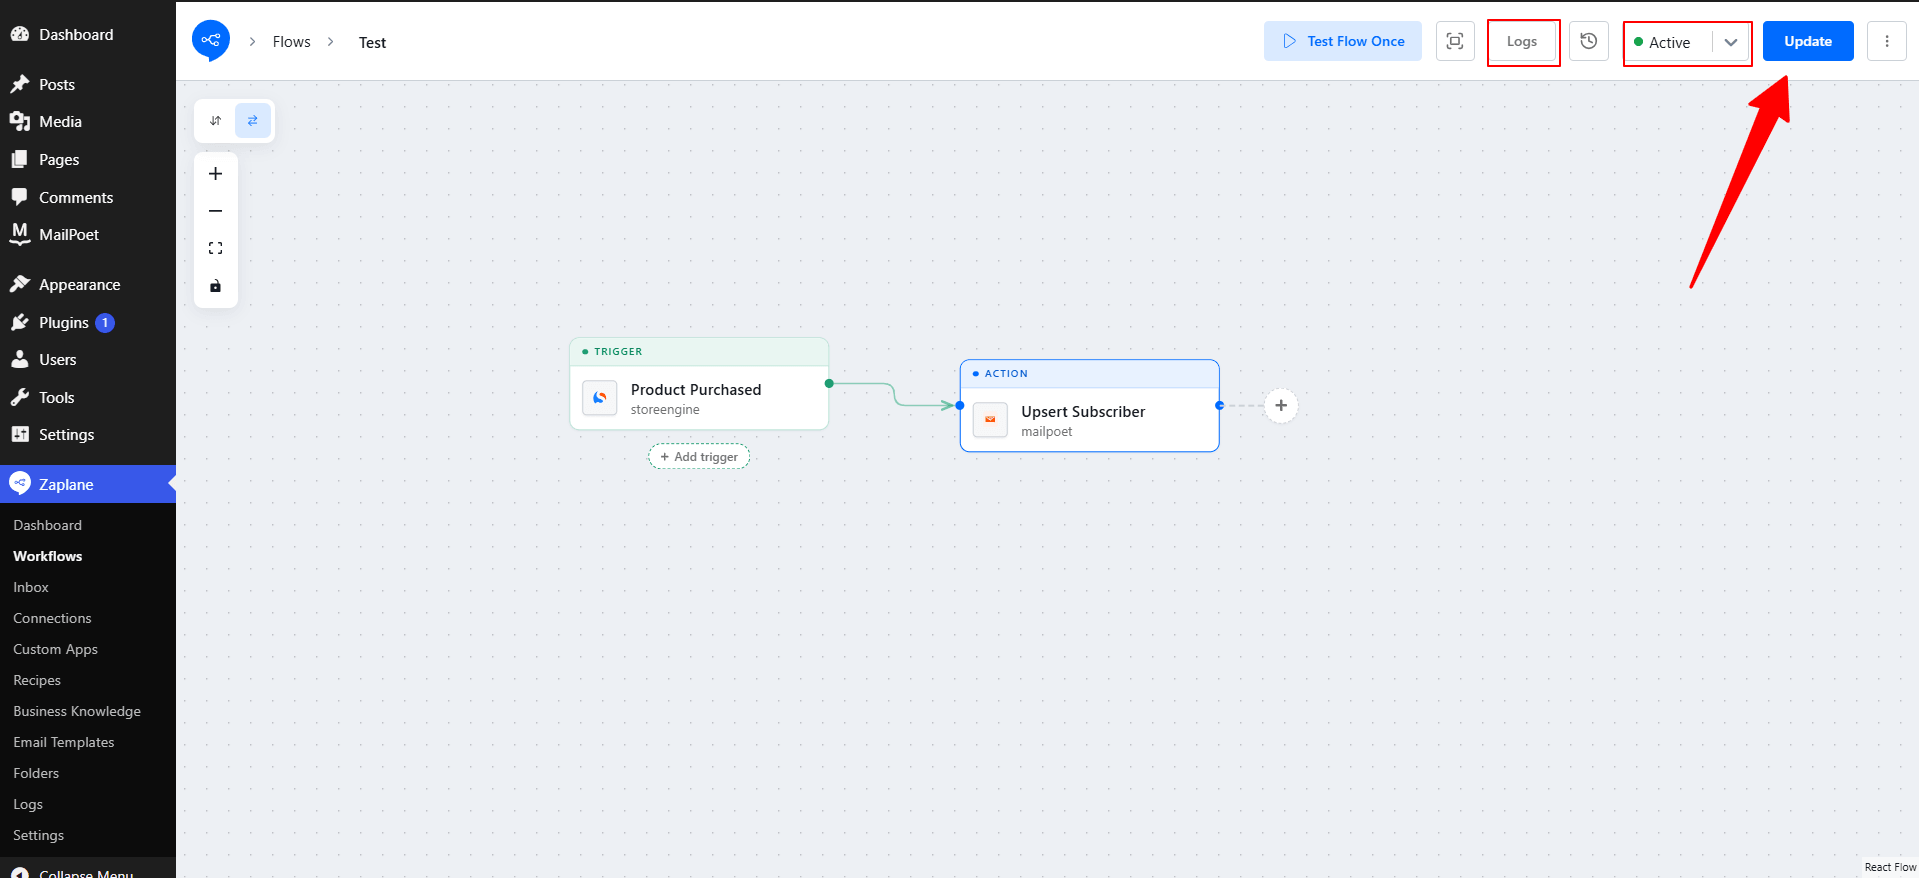
Your workflow now shows your trigger followed by an Upsert Subscriber (MailPoet) action. Before you finish:
What’s next?
Click the + button after the action to add more steps, such as sending a welcome email or notifying your team on Slack.