

This guide shows you how to start an automation in Zaplane every time someone submits a Tally form. It has two parts: a one-time connection to your Tally account, then building the workflow. The whole setup takes about five minutes and needs no code.
Before you begin: you need a Tally account with at least one form, and the Zaplane plugin installed and active on your WordPress site.
Part 1: Connect your Tally account
Step 1: Create an API key in Tally
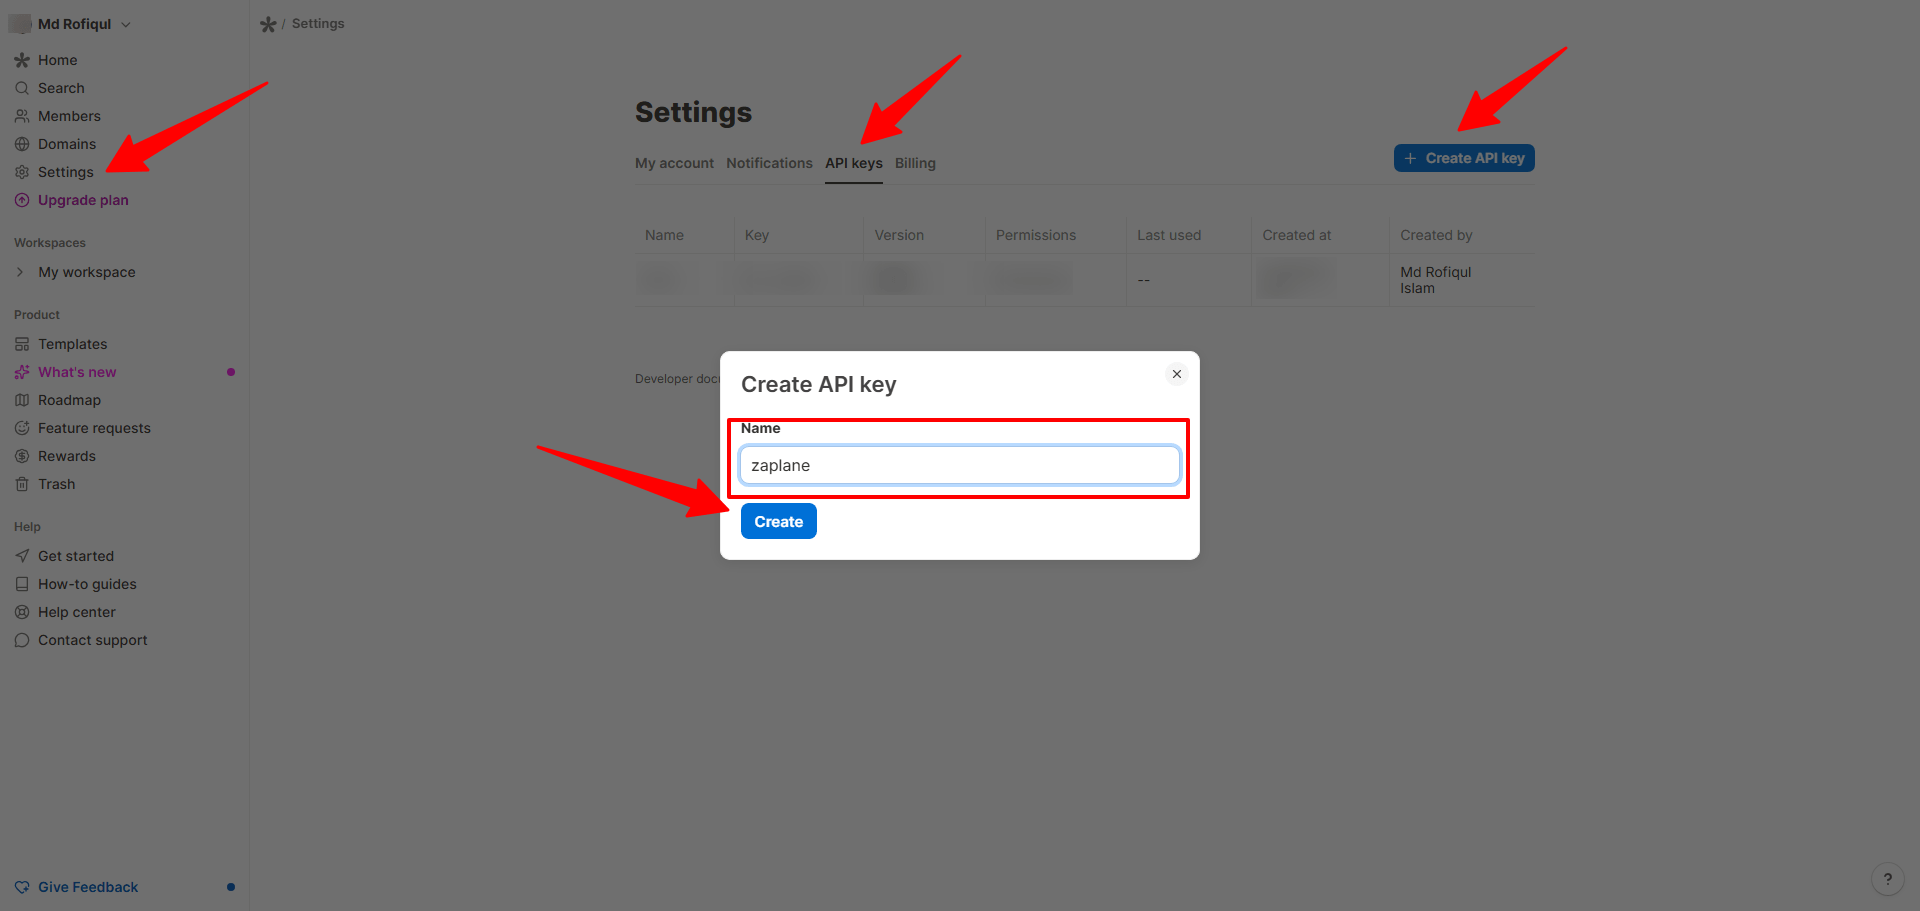
In Tally, open Settings, go to the API keys tab, and click Create API key. Enter a name you will recognize (for example, zaplane) and click Create.
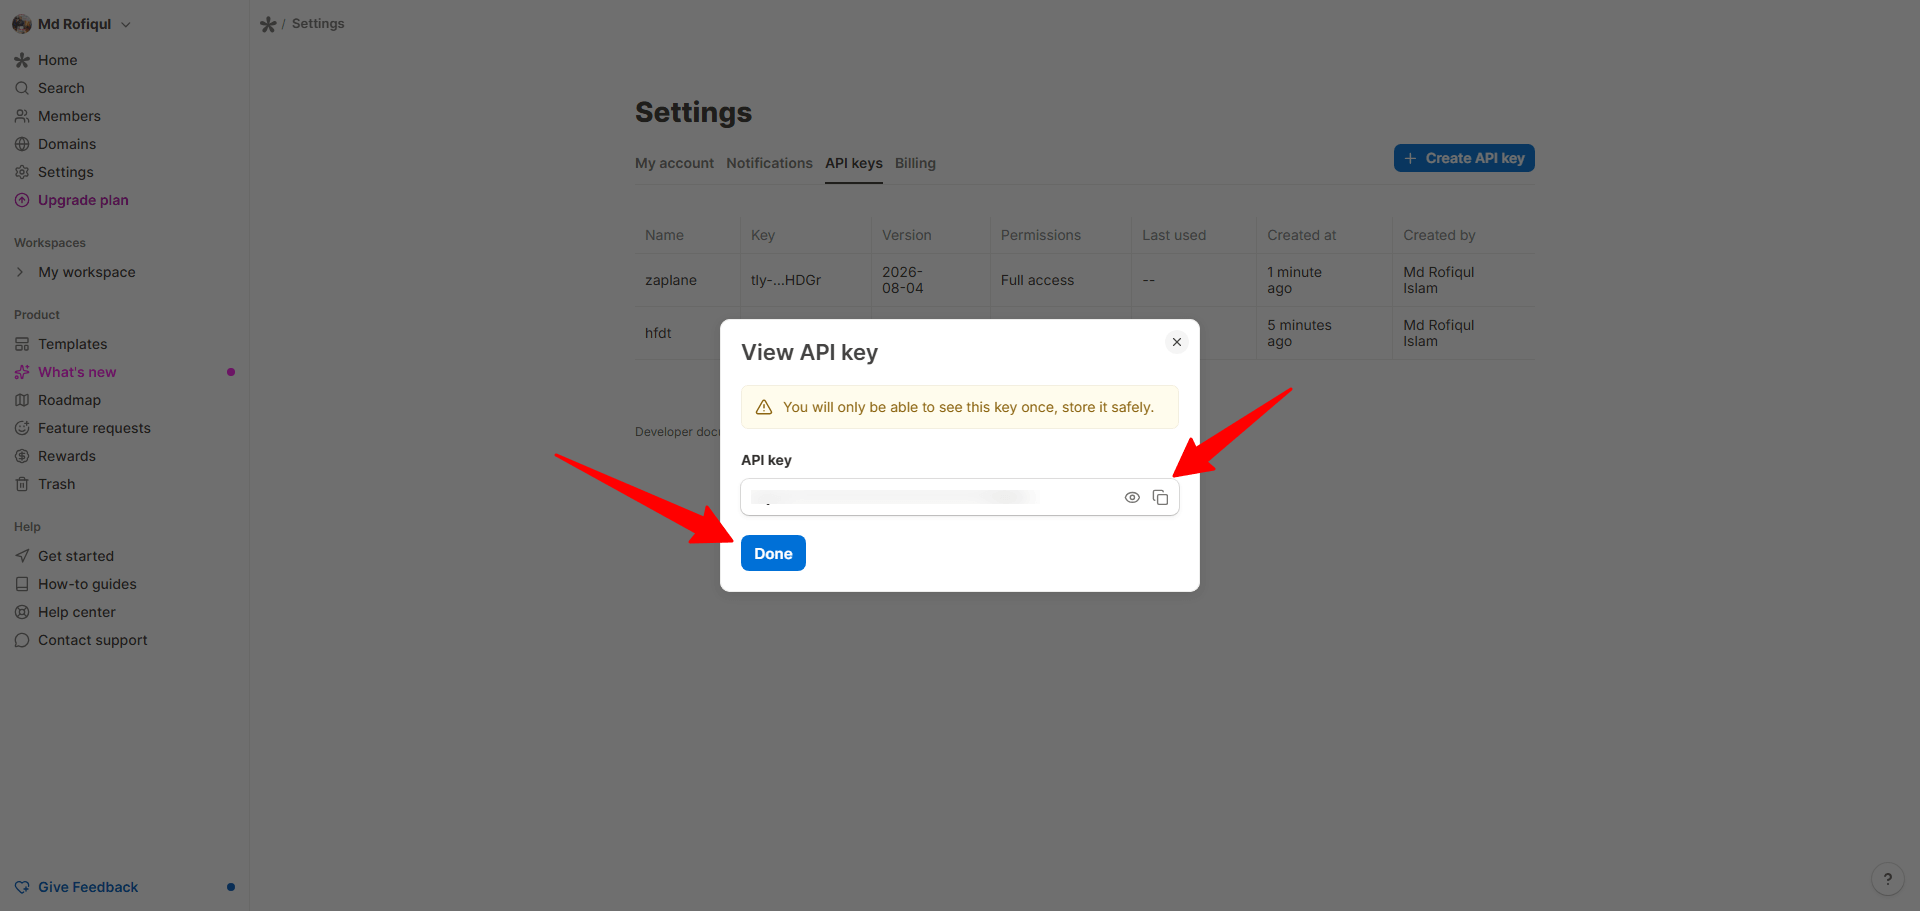
Step 2: Copy your API key
Tally shows the key only once. Click the copy icon, store it somewhere safe, then click Done.
Keep it private: treat your API key like a password. Do not share it or post it publicly.
Step 3: Open Zaplane Connections
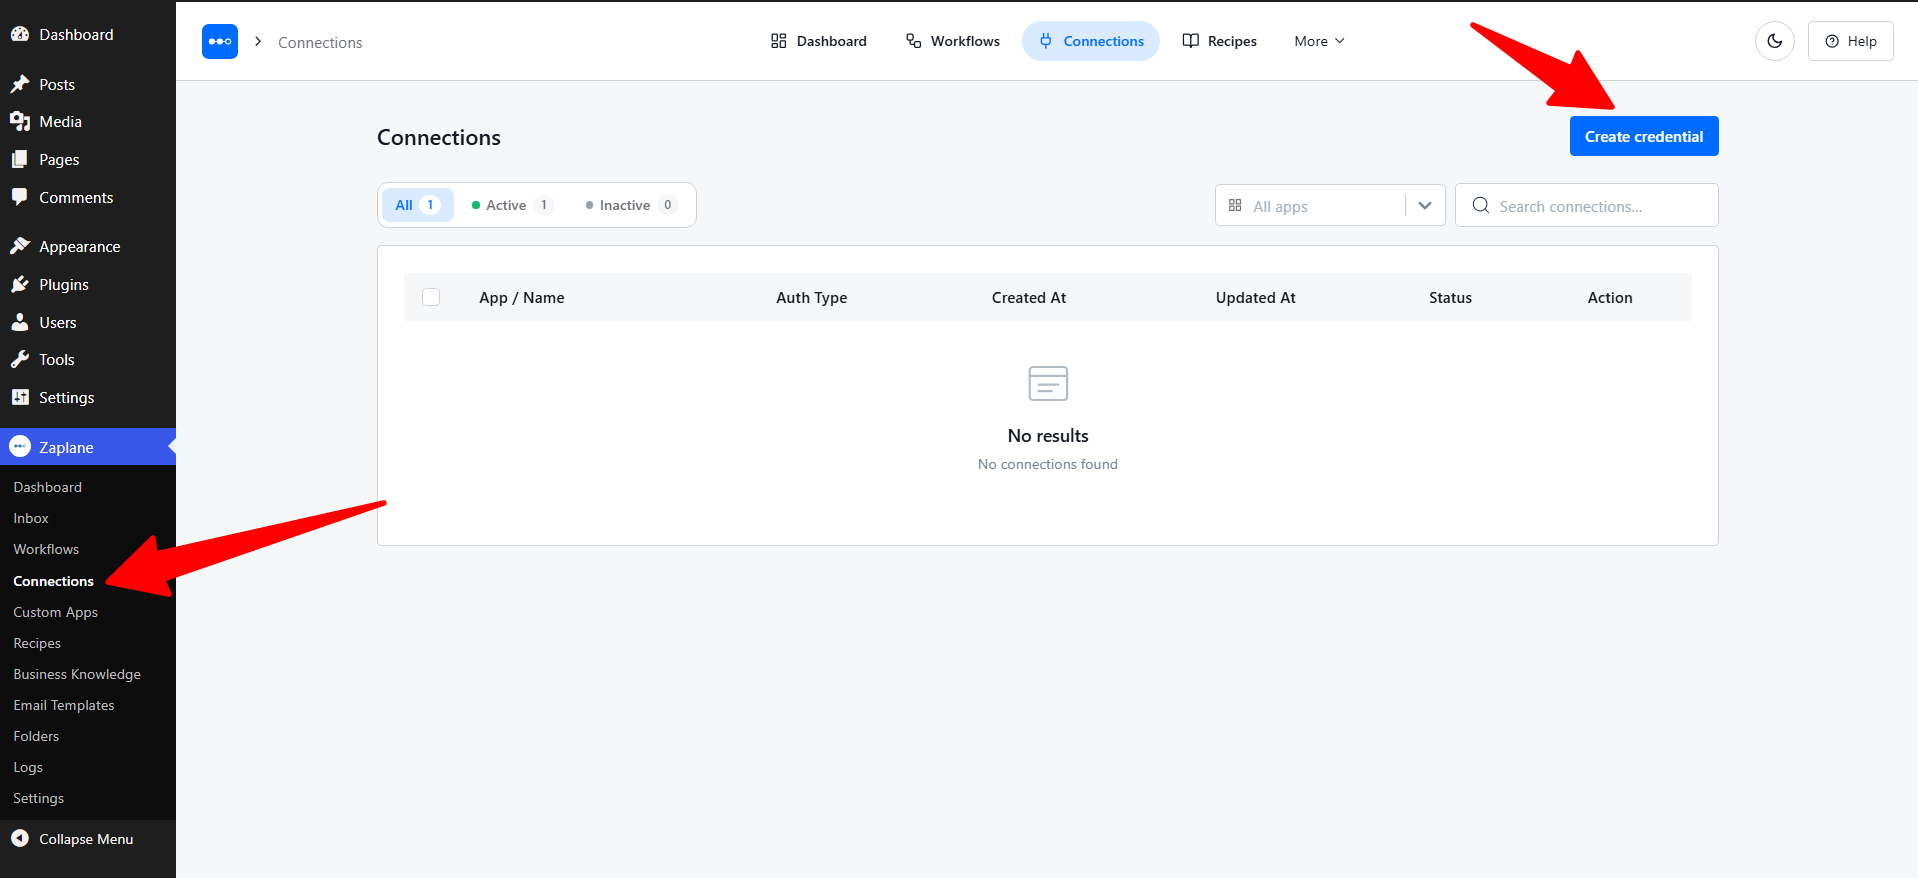
In your WordPress dashboard, go to Zaplane → Connections and click Create credential.
Step 4: Select Tally Forms
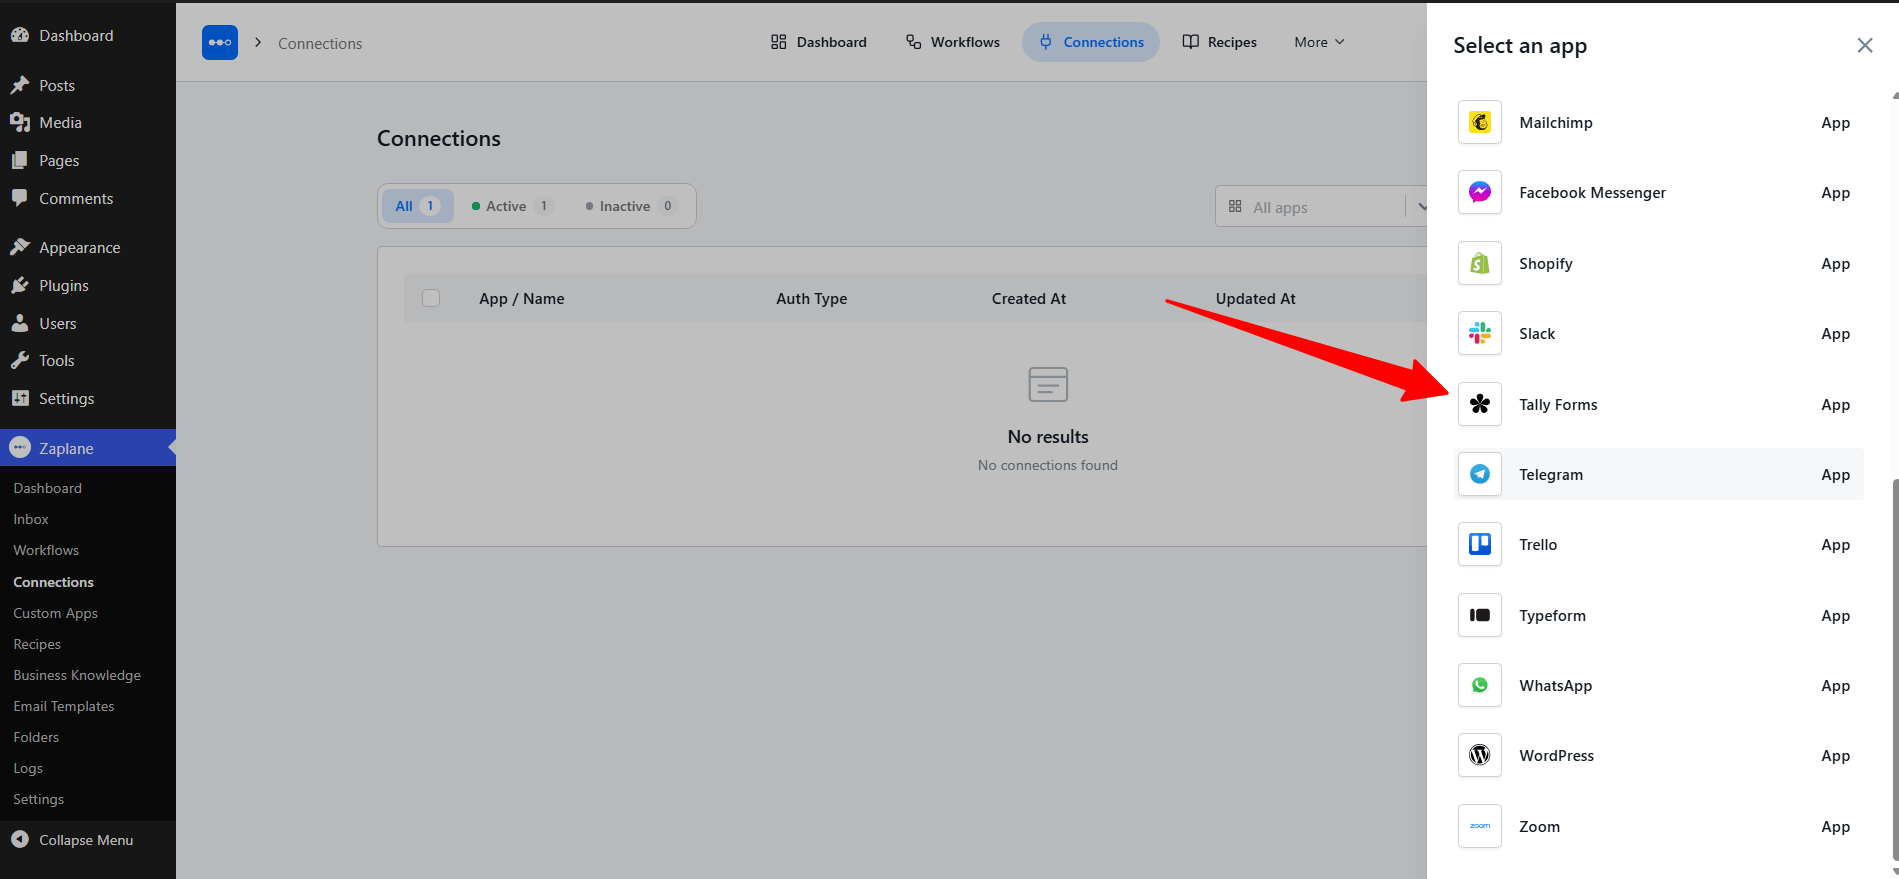
In the Select an app panel, choose Tally Forms.
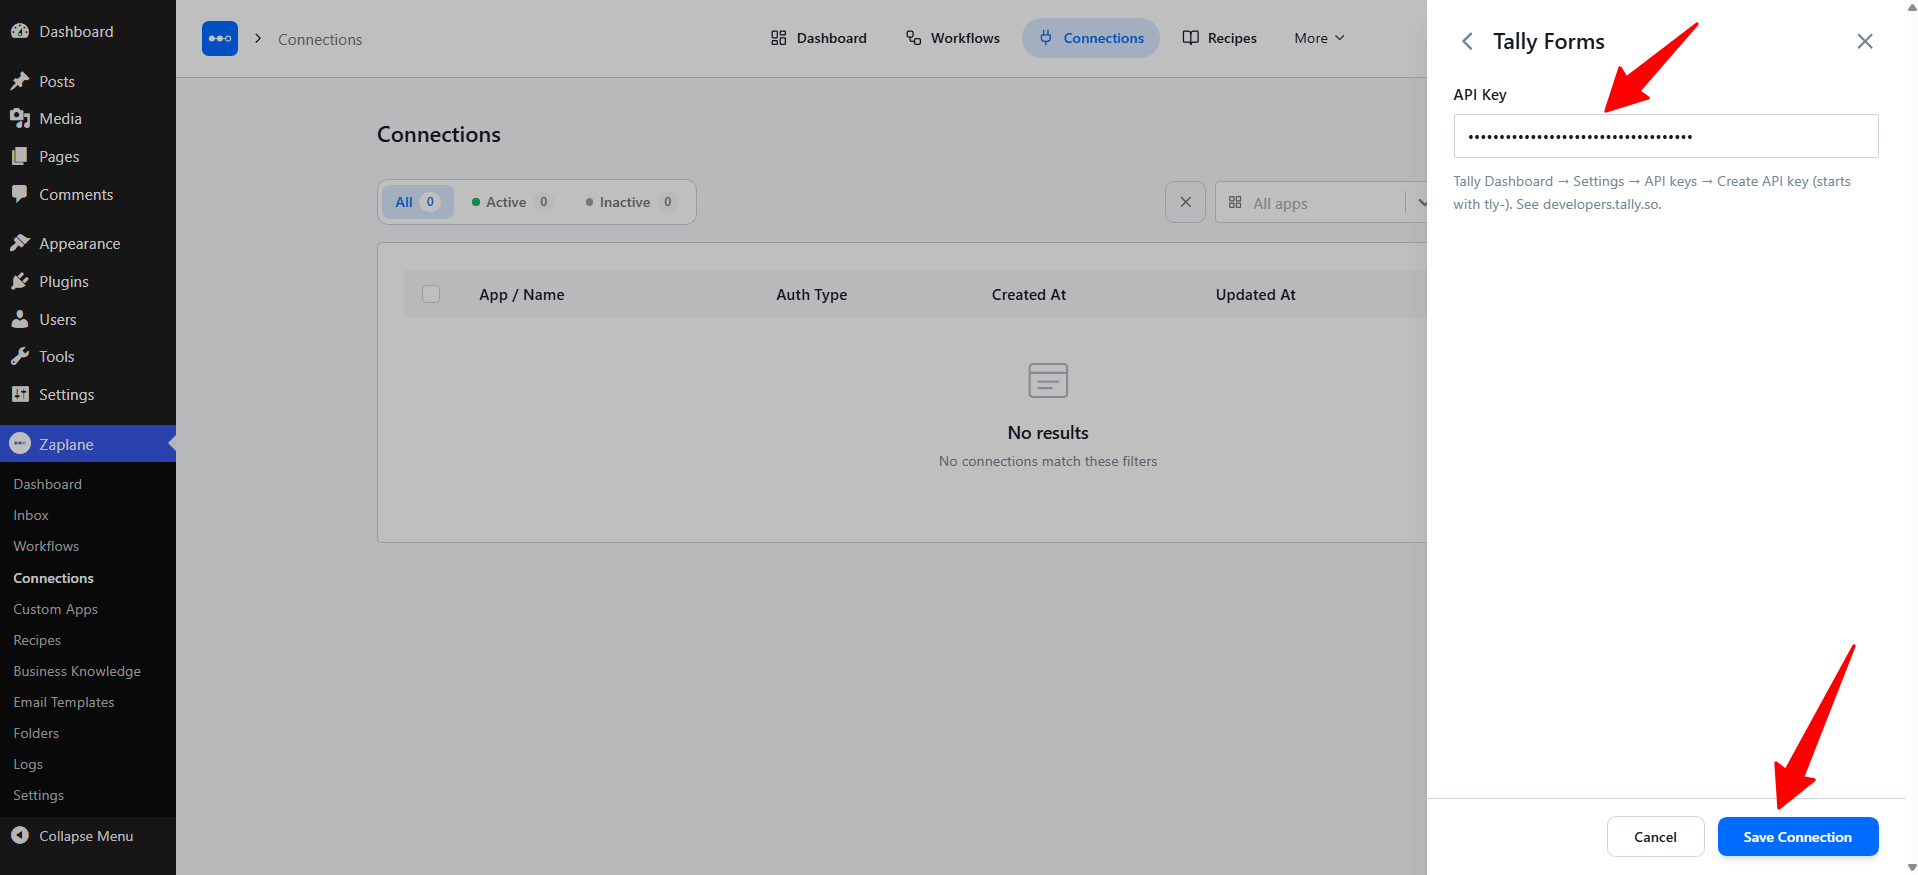
Step 5: Paste your API key
Paste the key into the API Key field and click Save Connection. Your connection now appears in the Connections list and is ready to use.
Part 2: Build the workflow
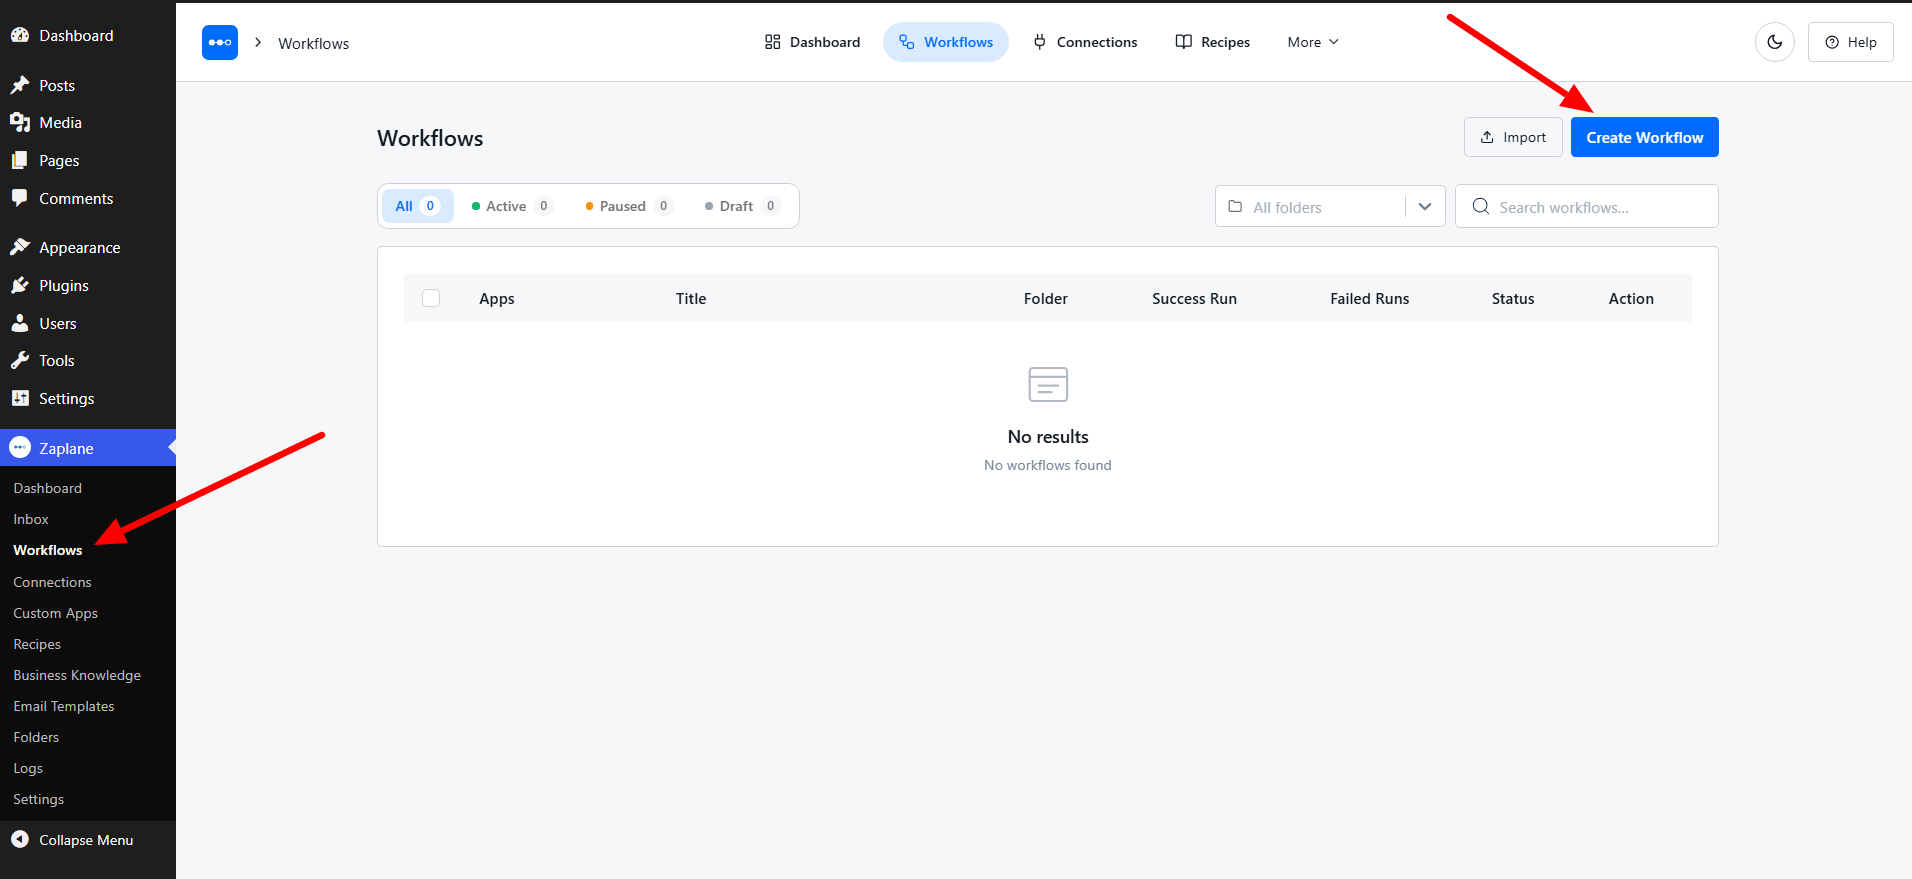
Step 6: Create a new workflow
Go to Zaplane → Workflows and click the blue Create Workflow button.
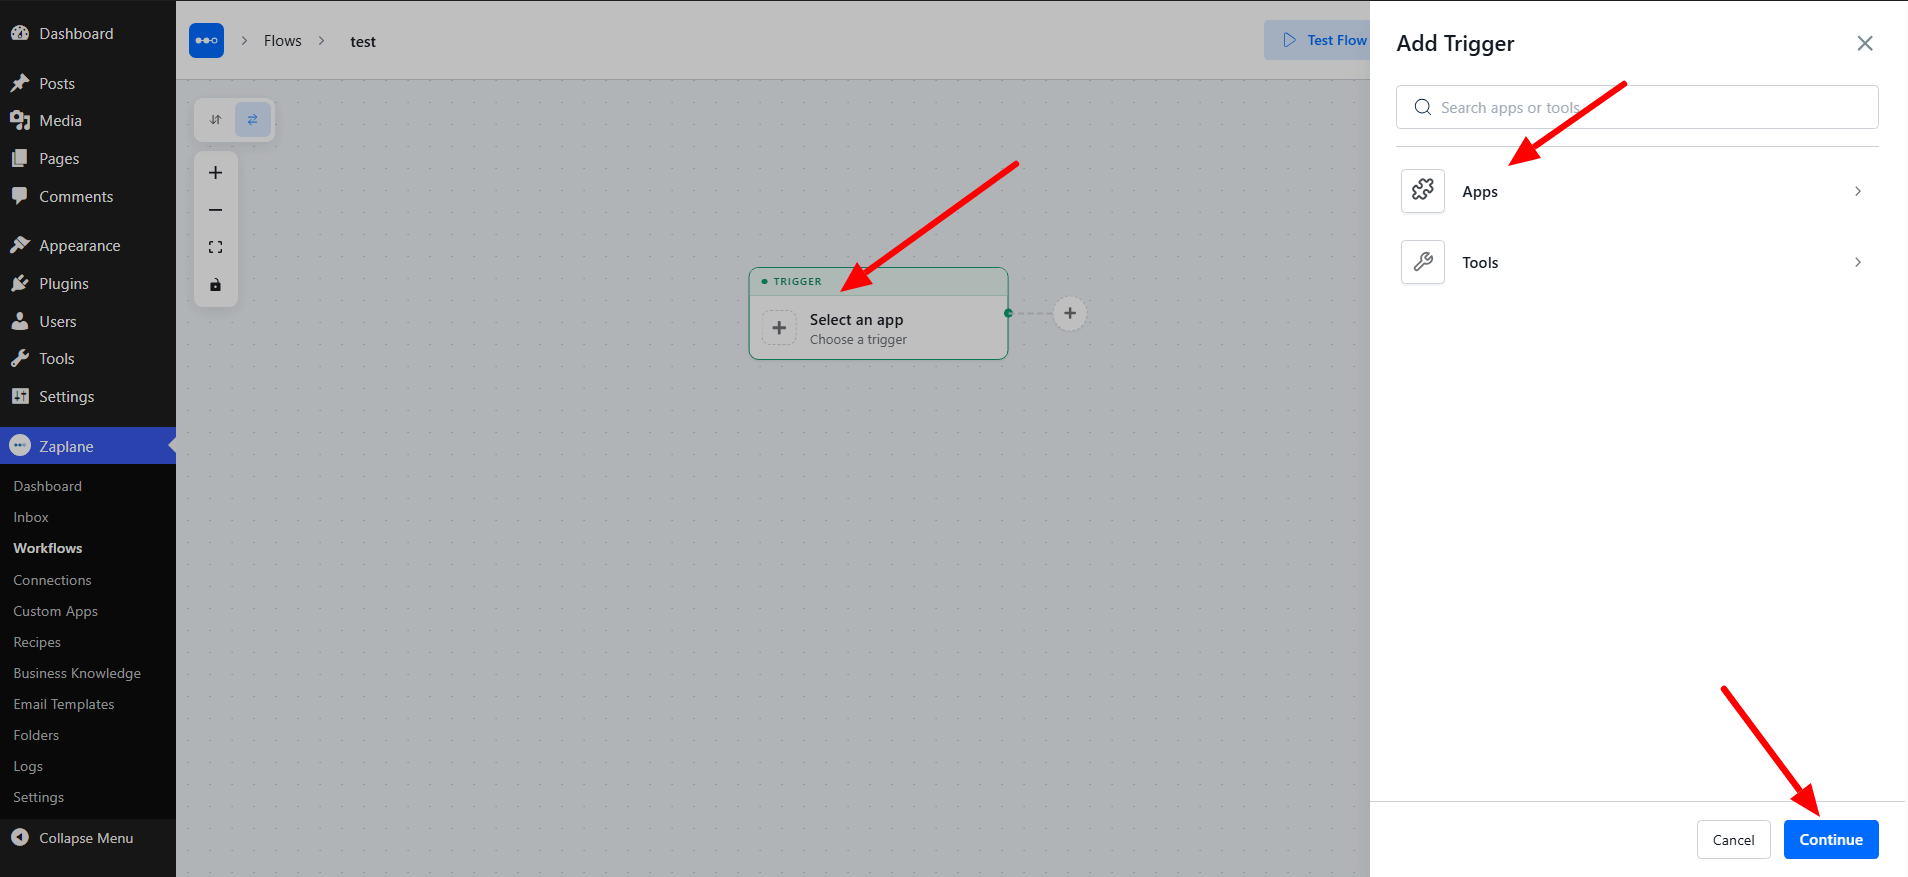
Step 7: Add a trigger
Click the Select an app trigger card. In the Add Trigger panel, choose Apps and click Continue.
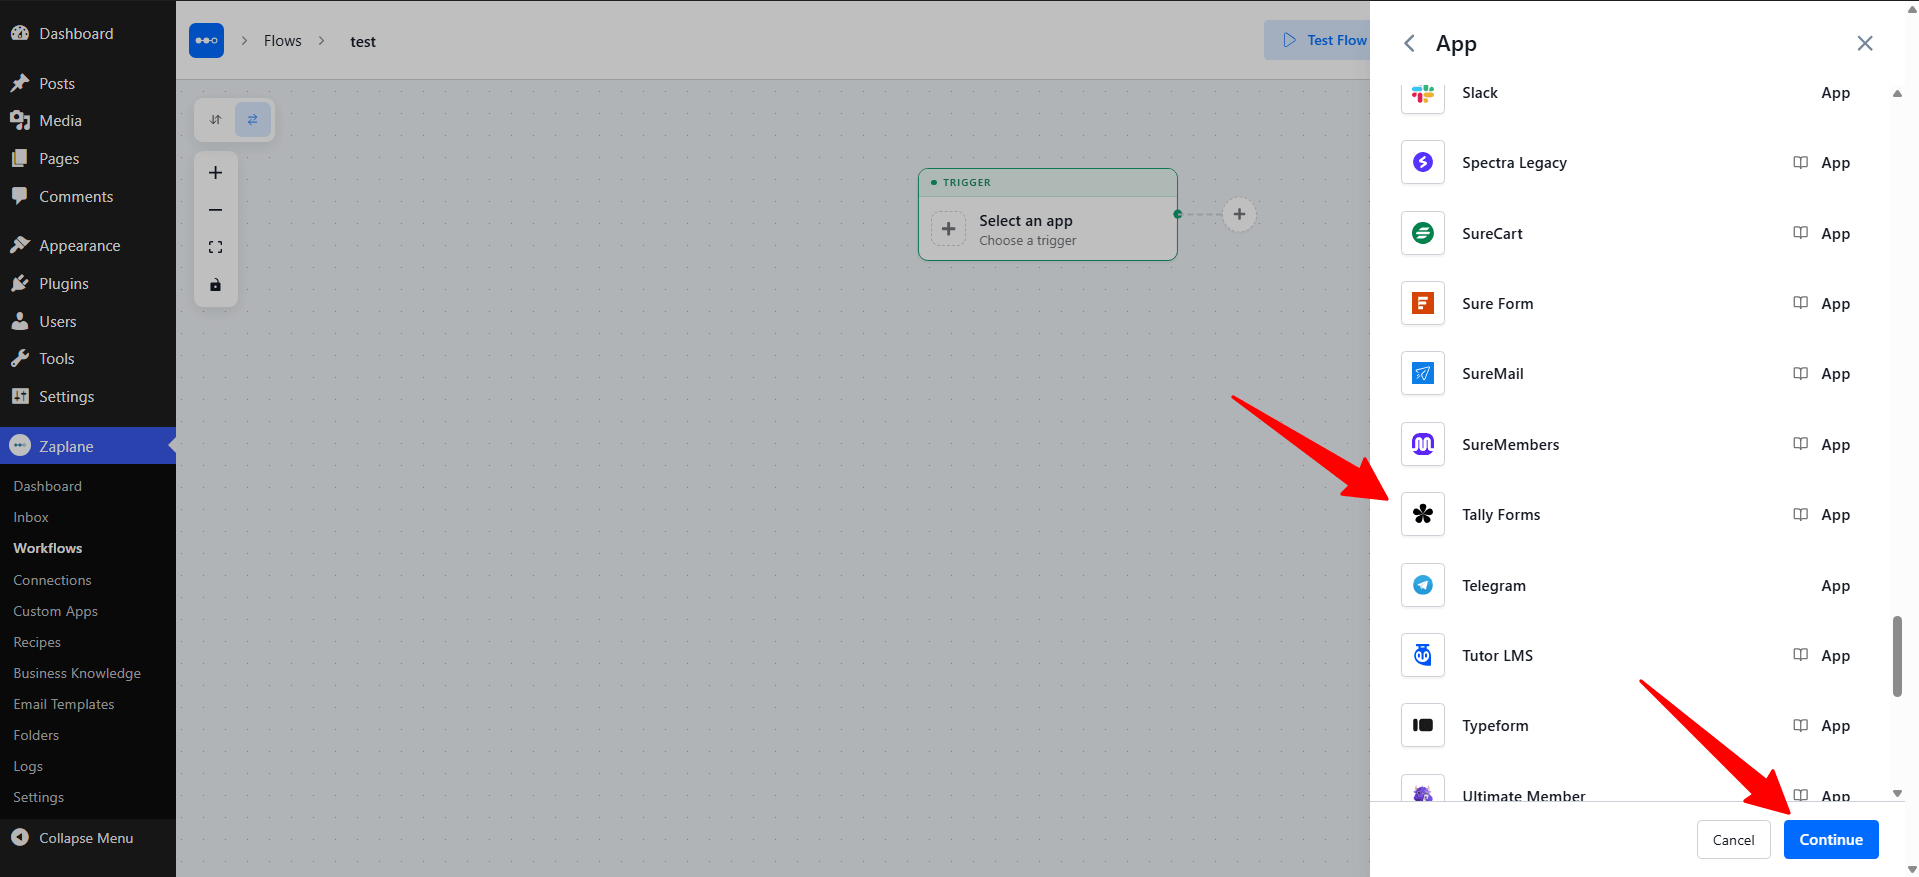
Step 8: Choose Tally Forms
Scroll the app list, select Tally Forms, and click Continue.
Step 9: Select the trigger and your connection
On the Select tab, choose the Trigger Type (for example, Form Submitted) and pick the connection you created in Part 1. A Webhook Setup box is also shown on this tab. Click Continue.
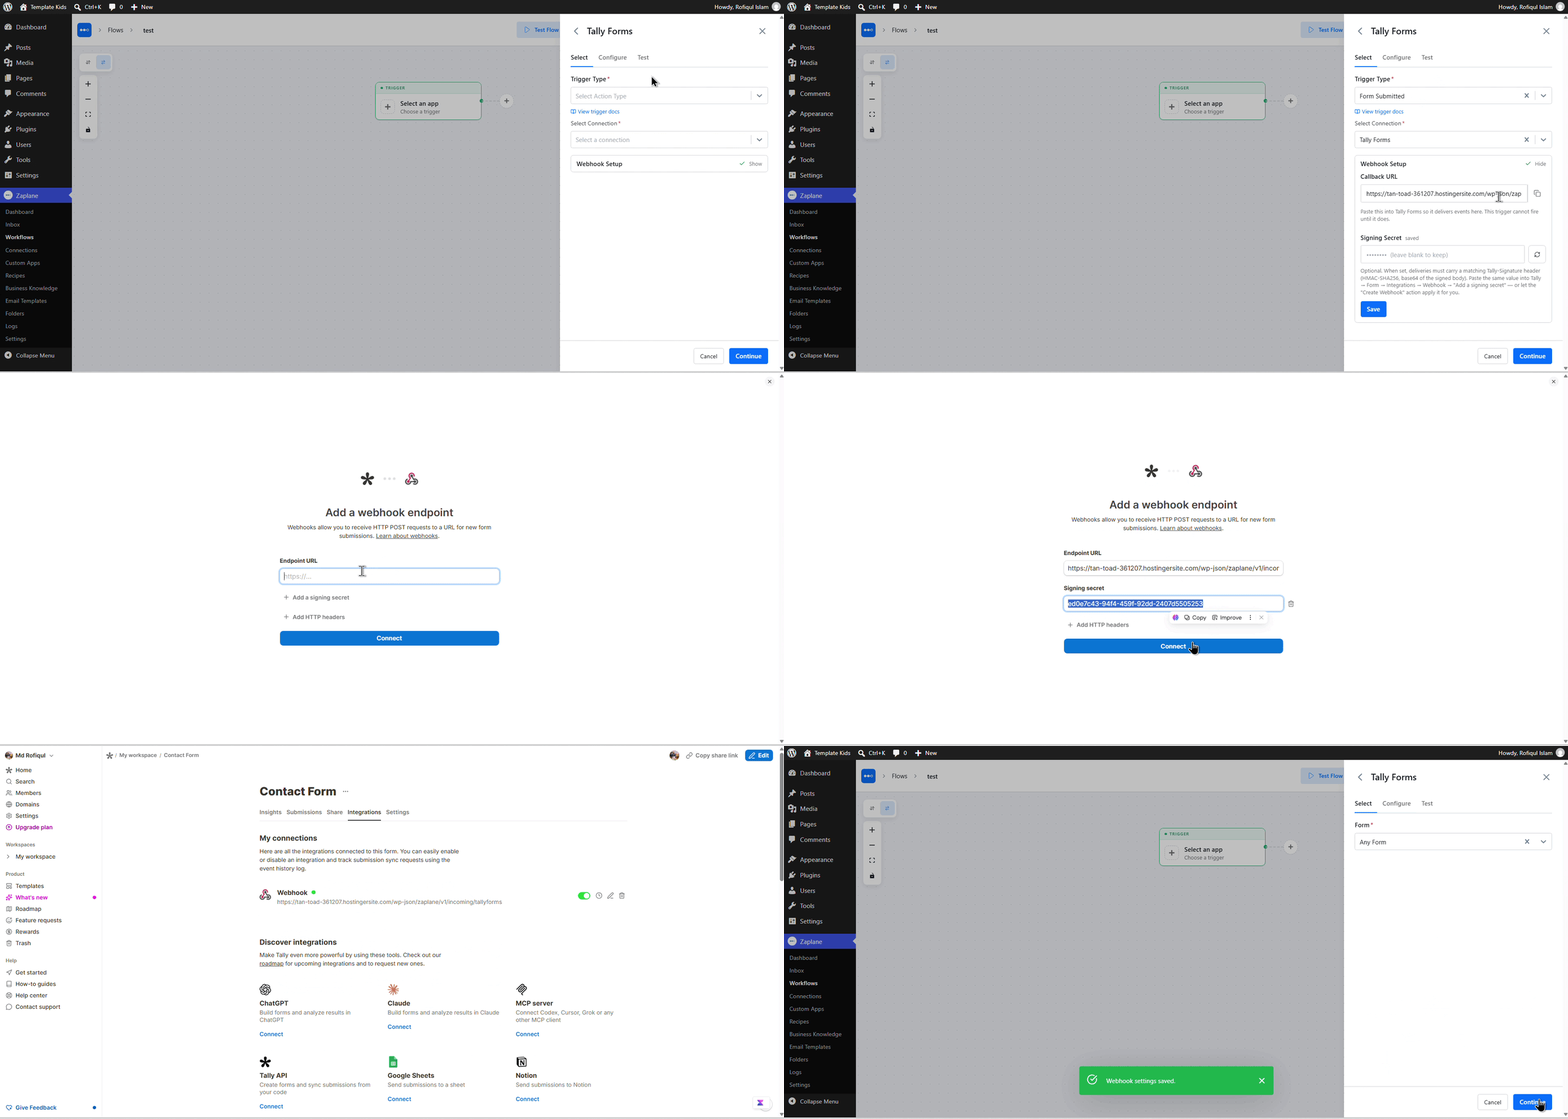
Step 10: Configure the form
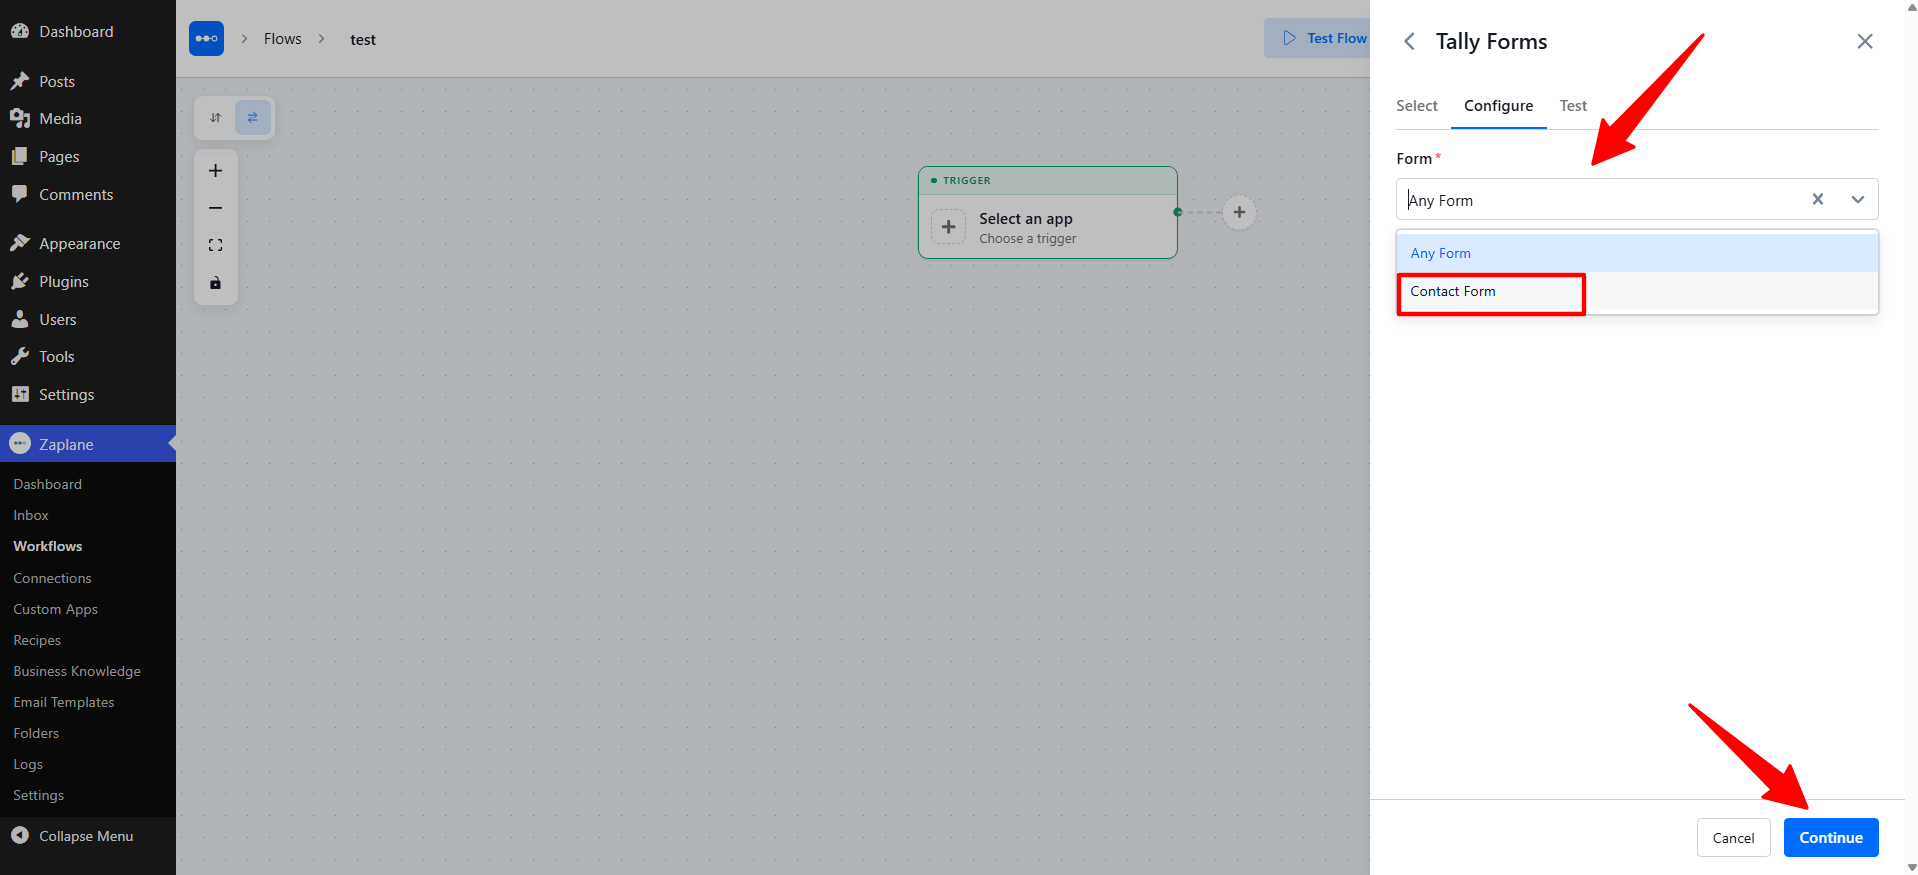
On the Configure tab, open the Form dropdown and choose which form should start this workflow:
Then click Continue.
Step 11: Test the trigger
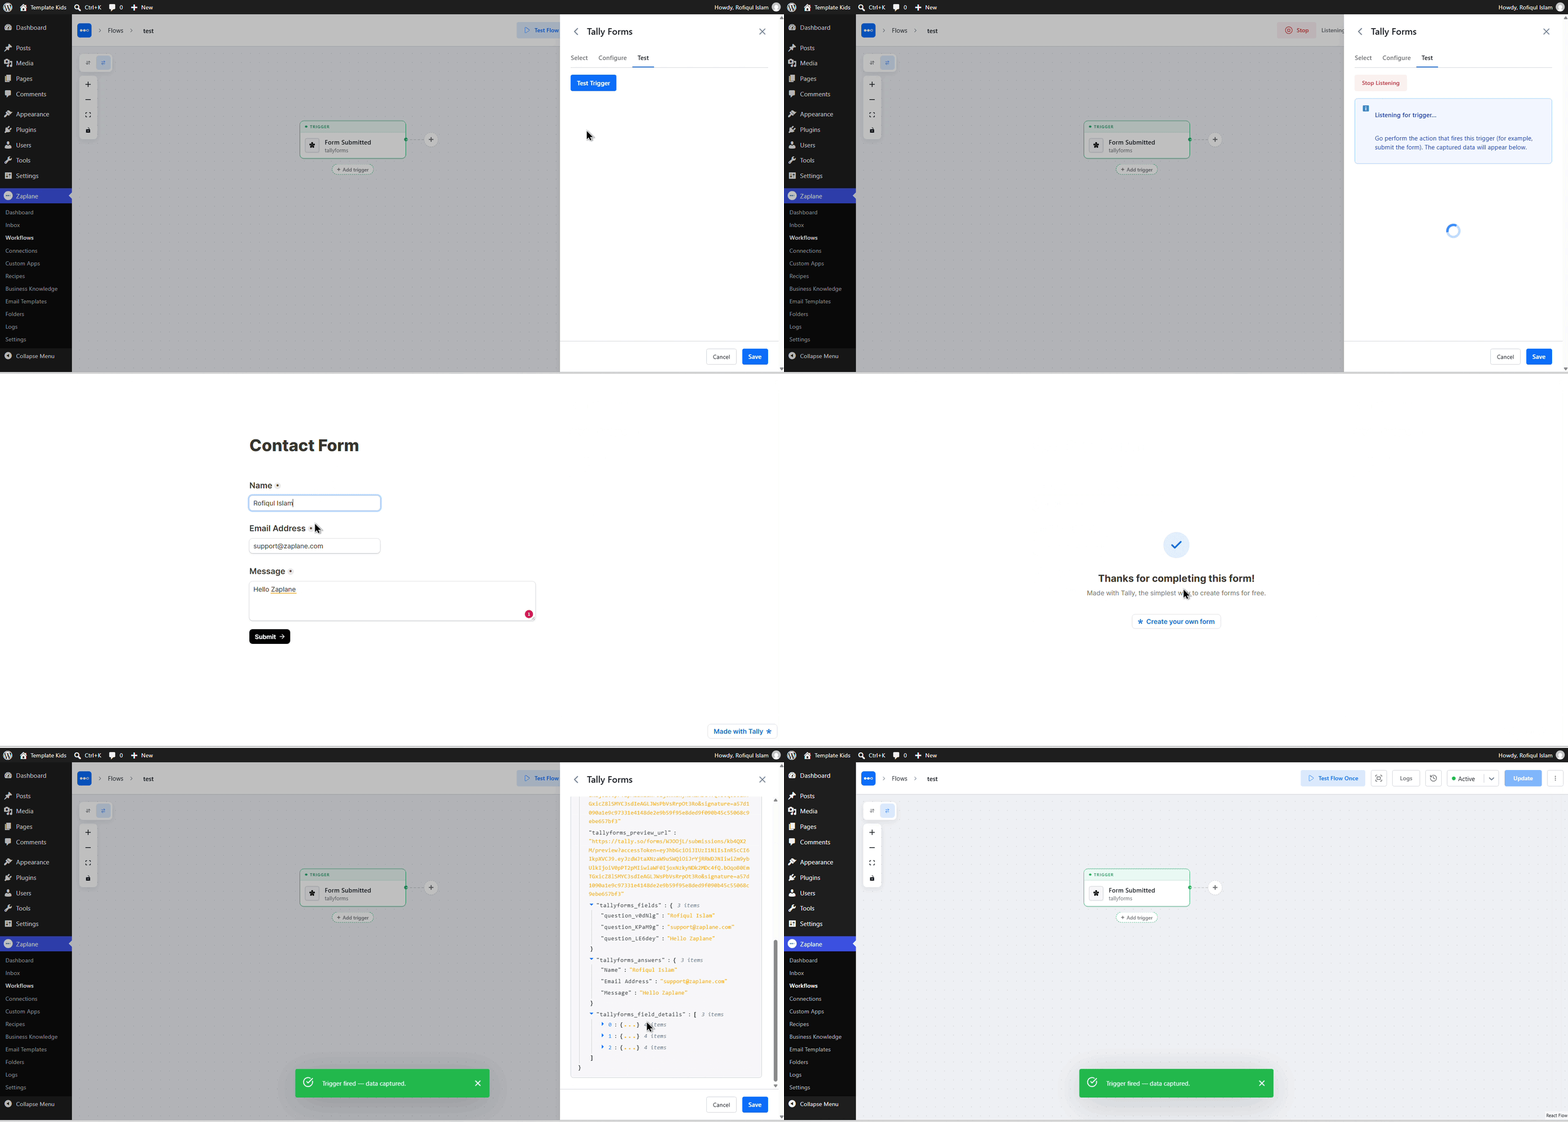
Open the Test tab and click Test Trigger. Submit your Tally form once so Zaplane can capture sample data, then click Save.
Step 12: Save and activate your workflow
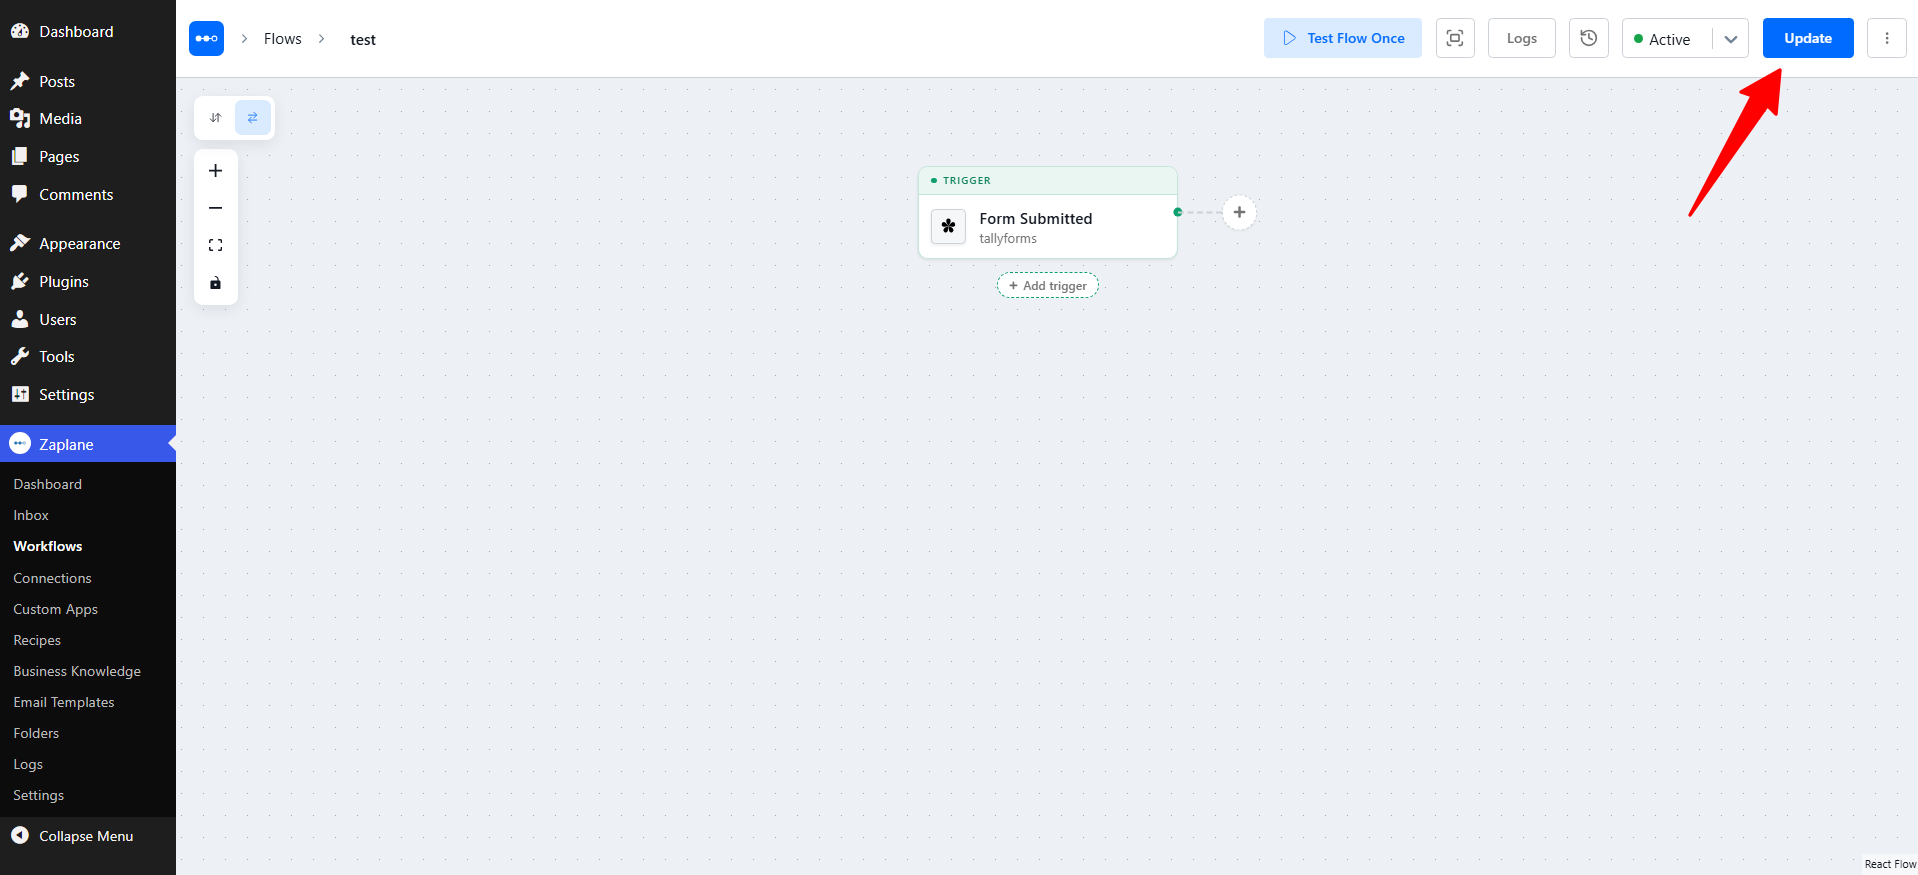
Your trigger now shows as Form Submitted (tallyforms). Make sure the status is Active, then click Update in the top-right corner. You can also use Test Flow Once to run the whole workflow manually.
What’s next?
Click the + button next to your trigger to add actions, such as sending an email, adding a row to Google Sheets, or notifying your team. Form answers from each submission are available in every following step.