

This guide shows you how to create a Zaplane workflow that starts whenever something happens in Easy Content Manager (ECM), such as a new content item being created. Make sure the Easy Content Manager plugin is installed and active on your site before you begin.
Step 1: Create a Workflow
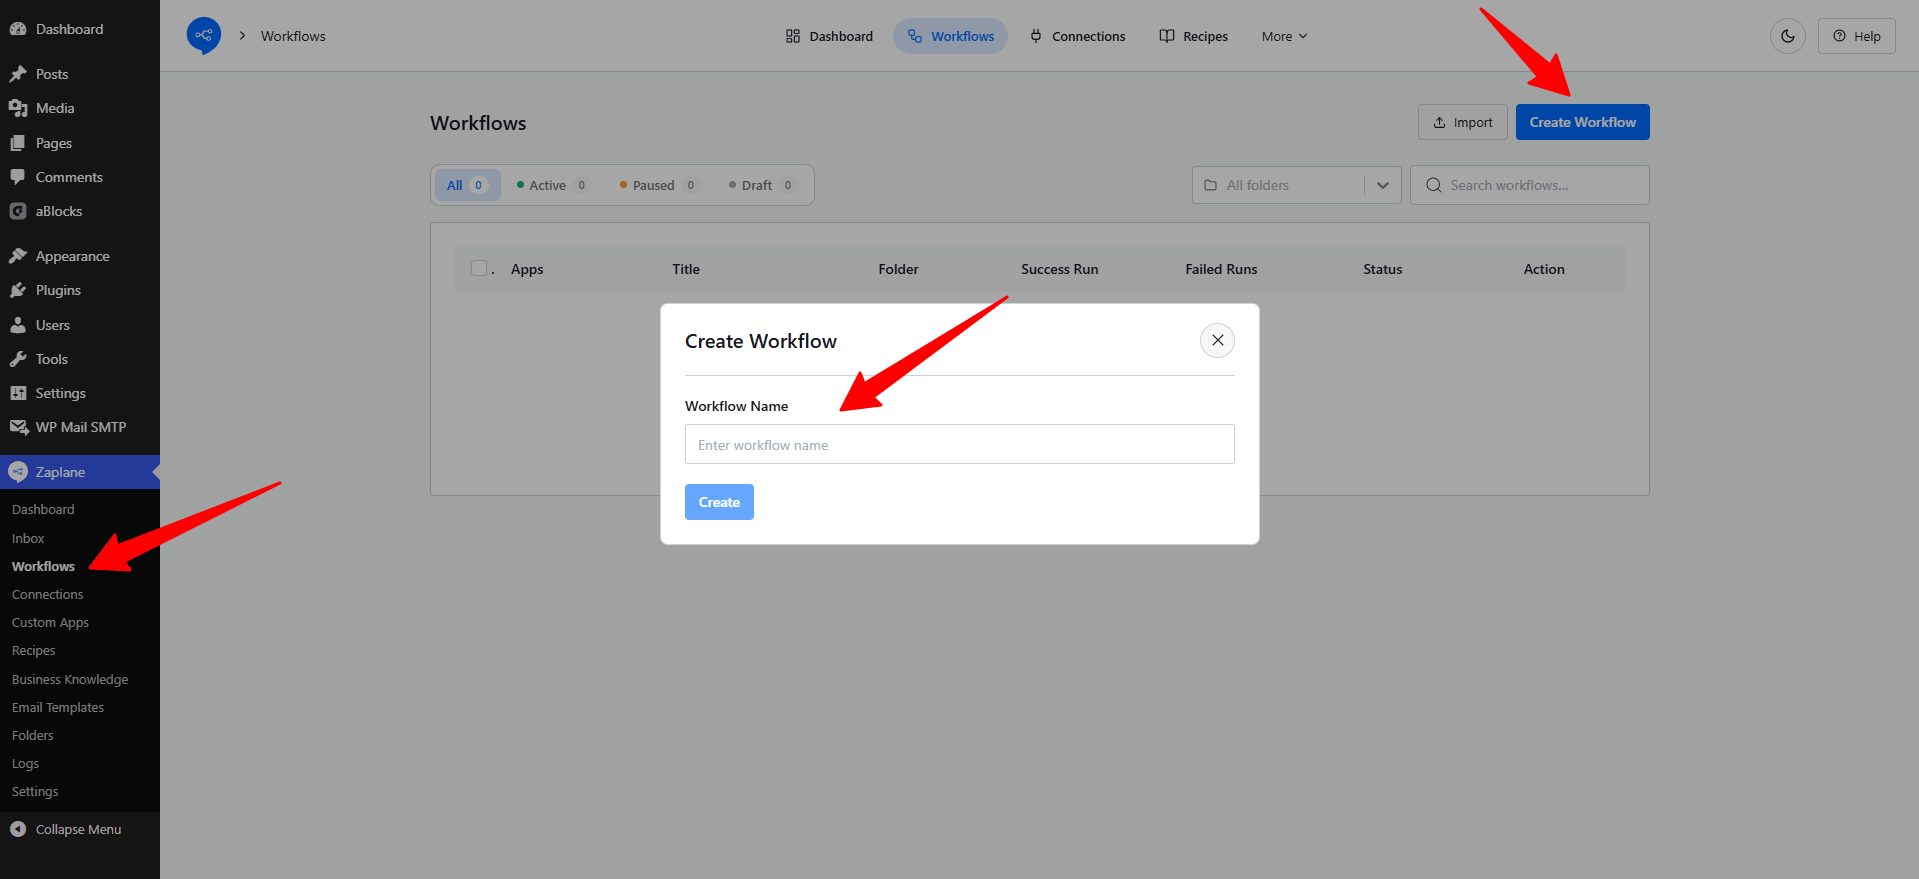
Go to Zaplane > Workflows from your WordPress dashboard, then click Create Workflow. Enter a name in the Workflow Name field and click Create to open the workflow editor.
Step 2: Add the Easy Content Manager (ECM) Trigger
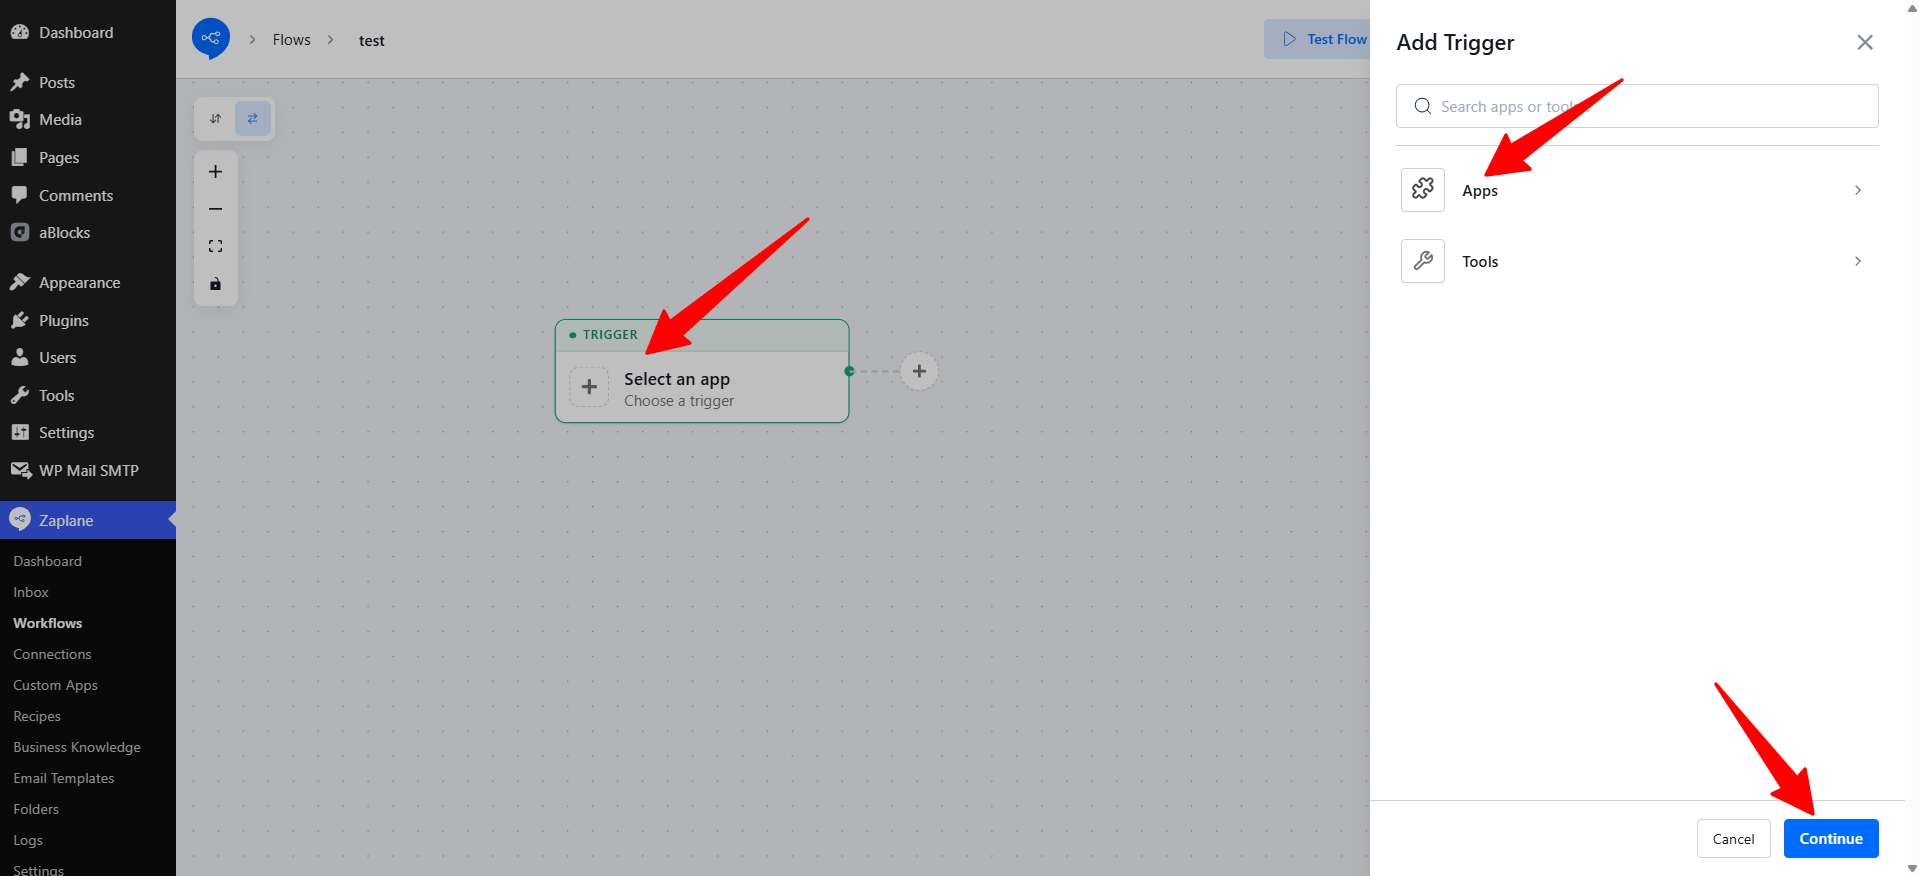
In the workflow editor, click Select an app inside the Trigger box. In the Add Trigger panel, choose Apps.
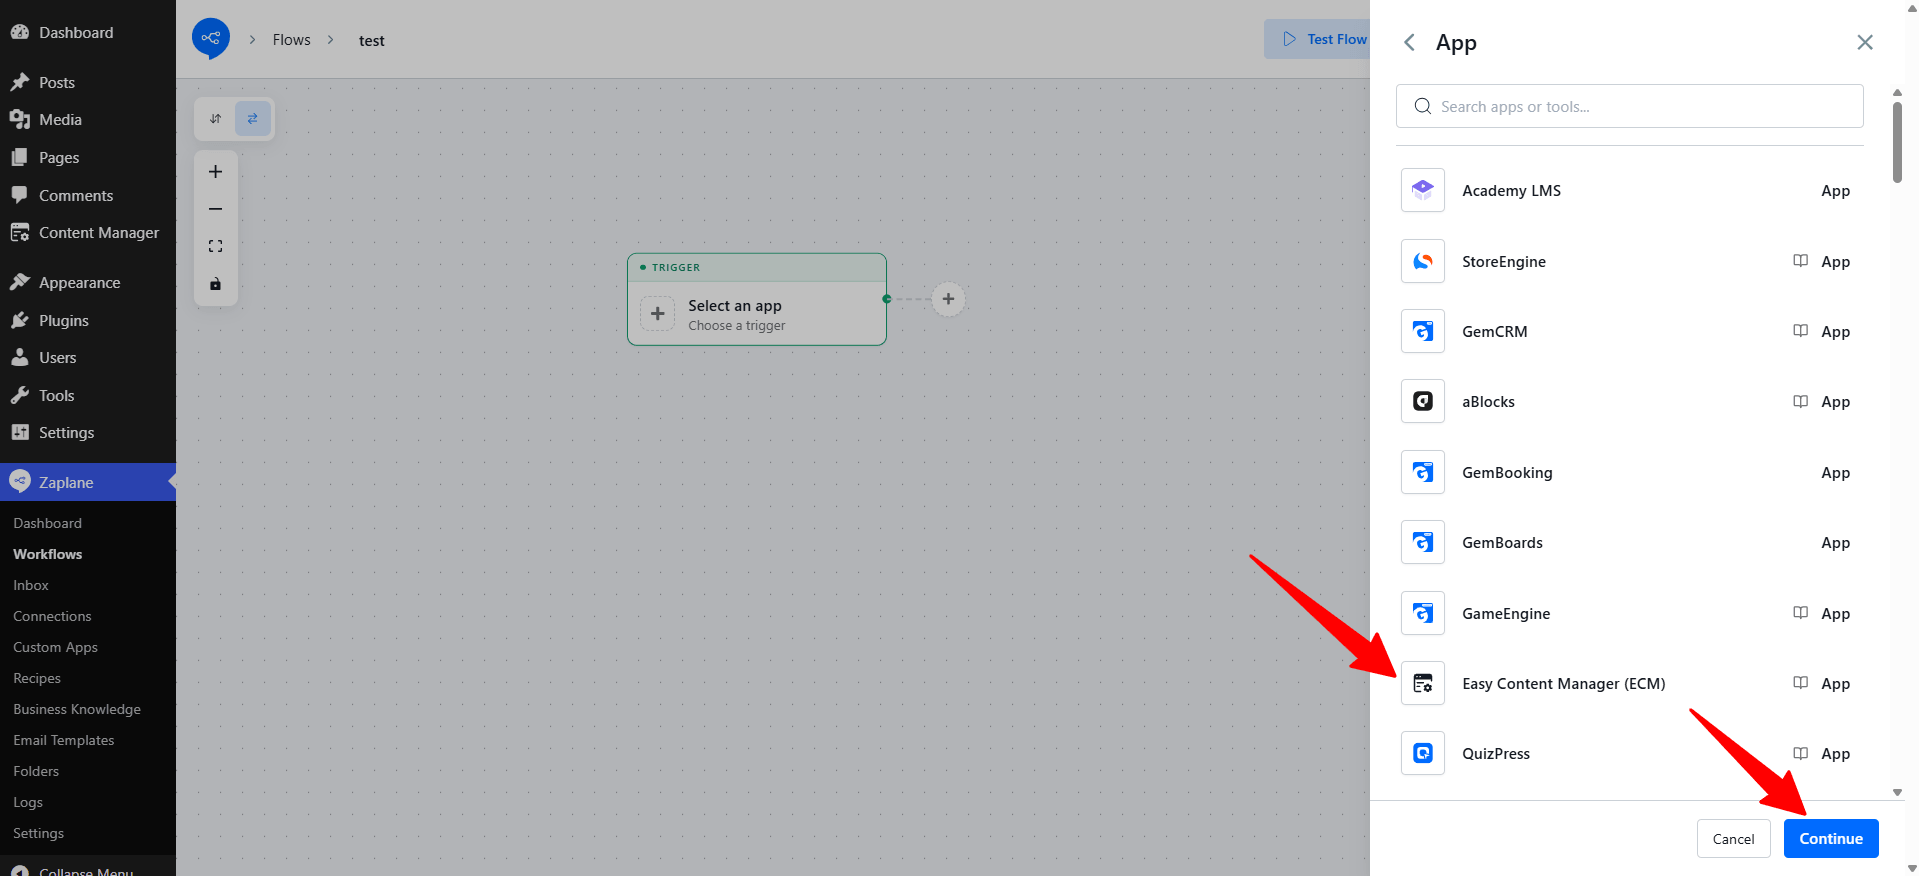
Find Easy Content Manager (ECM) in the app list, select it, and click Continue.
Step 3: Choose the Trigger Type
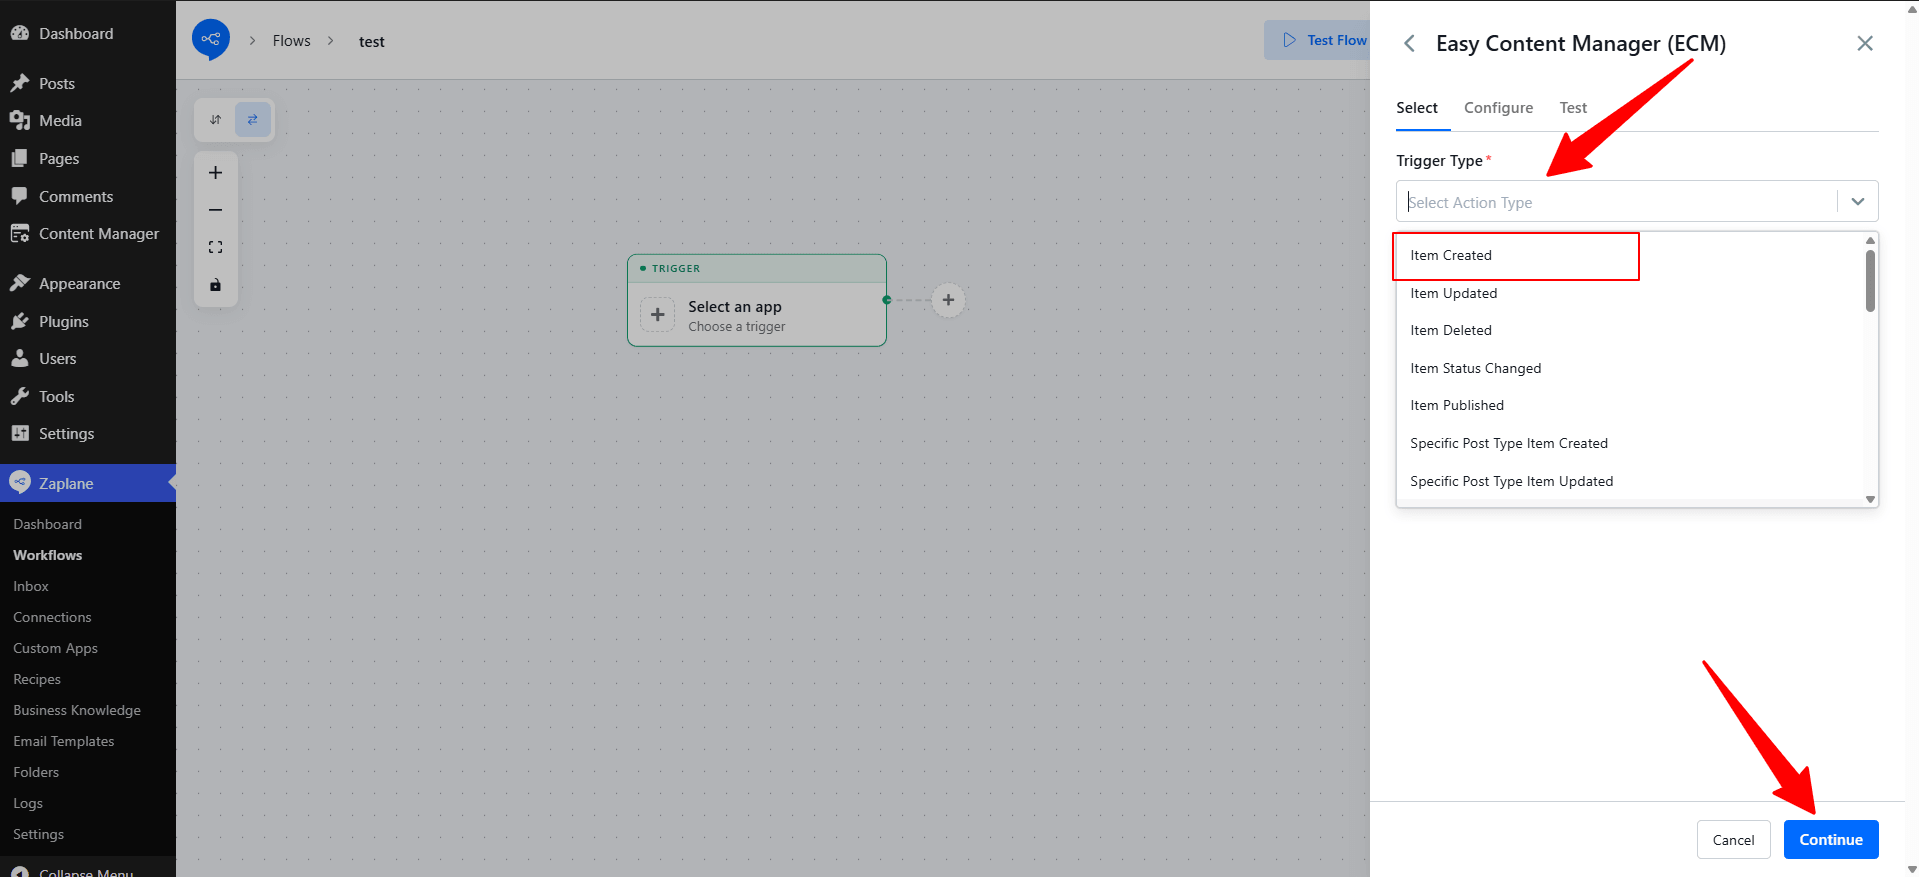
On the Select tab, open the Trigger Type dropdown and pick the event that should start your workflow. Easy Content Manager (ECM) offers several trigger types. In this example we choose Item Created. Then click Continue.
Step 4: Configure the Trigger
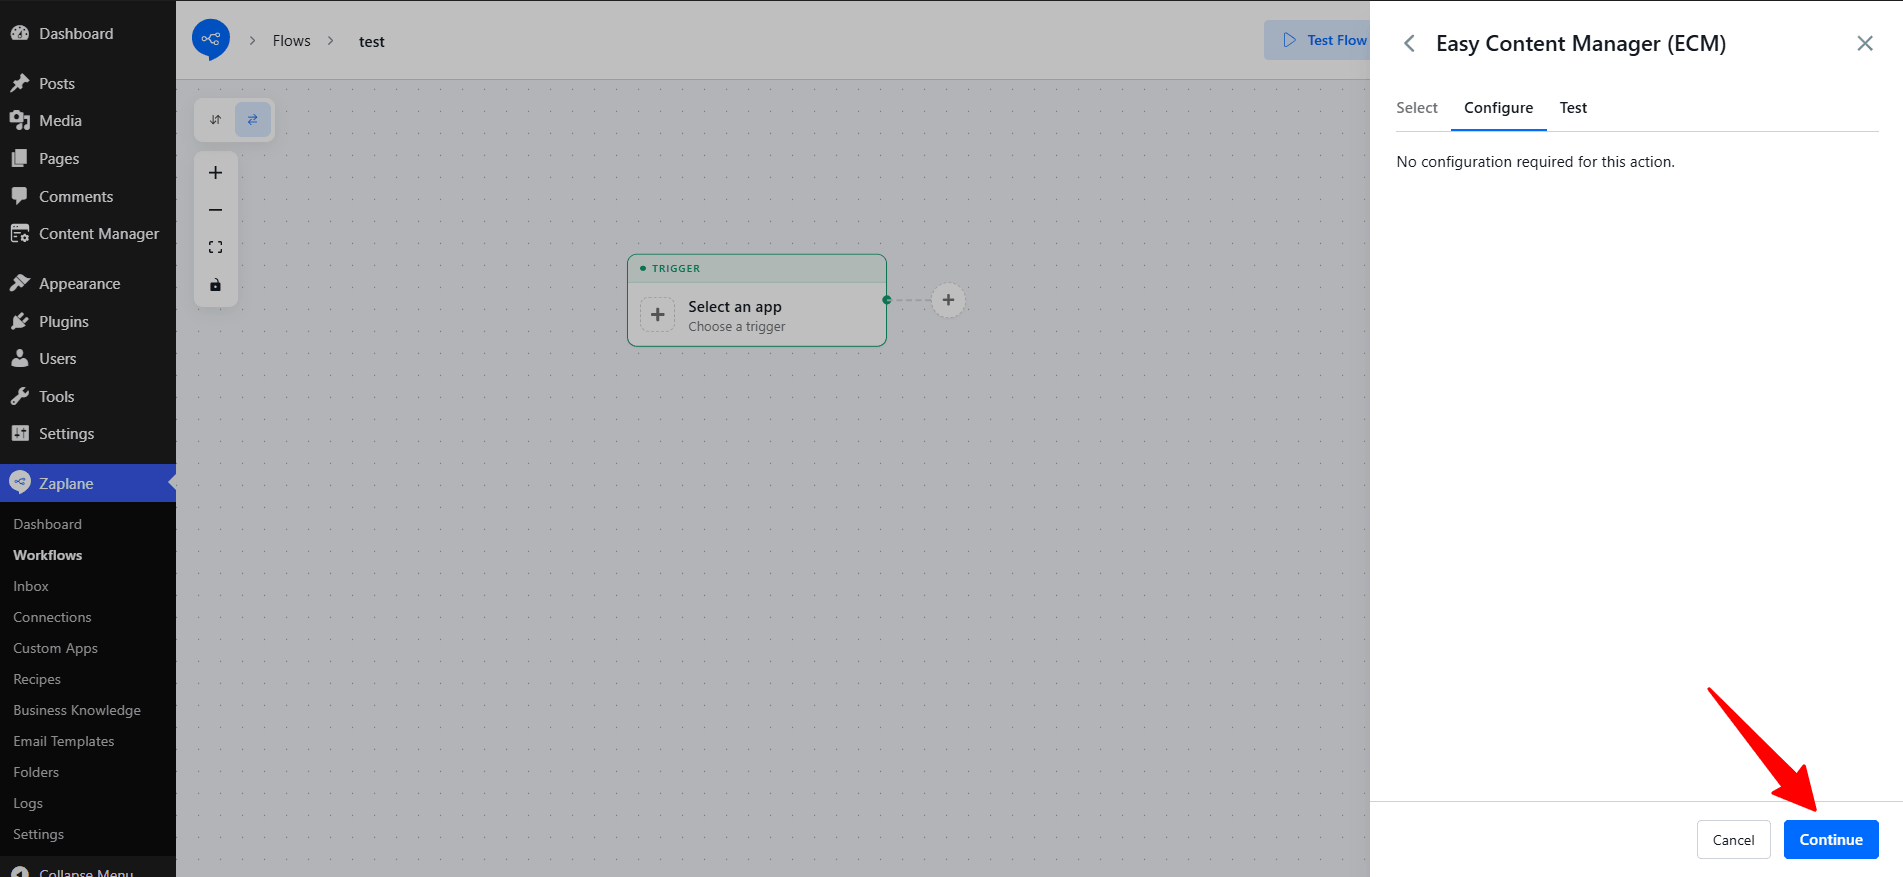
On the Configure tab, Zaplane shows “No configuration required for this action.” Click Continue to move on.
Step 5: Test and Activate the Workflow
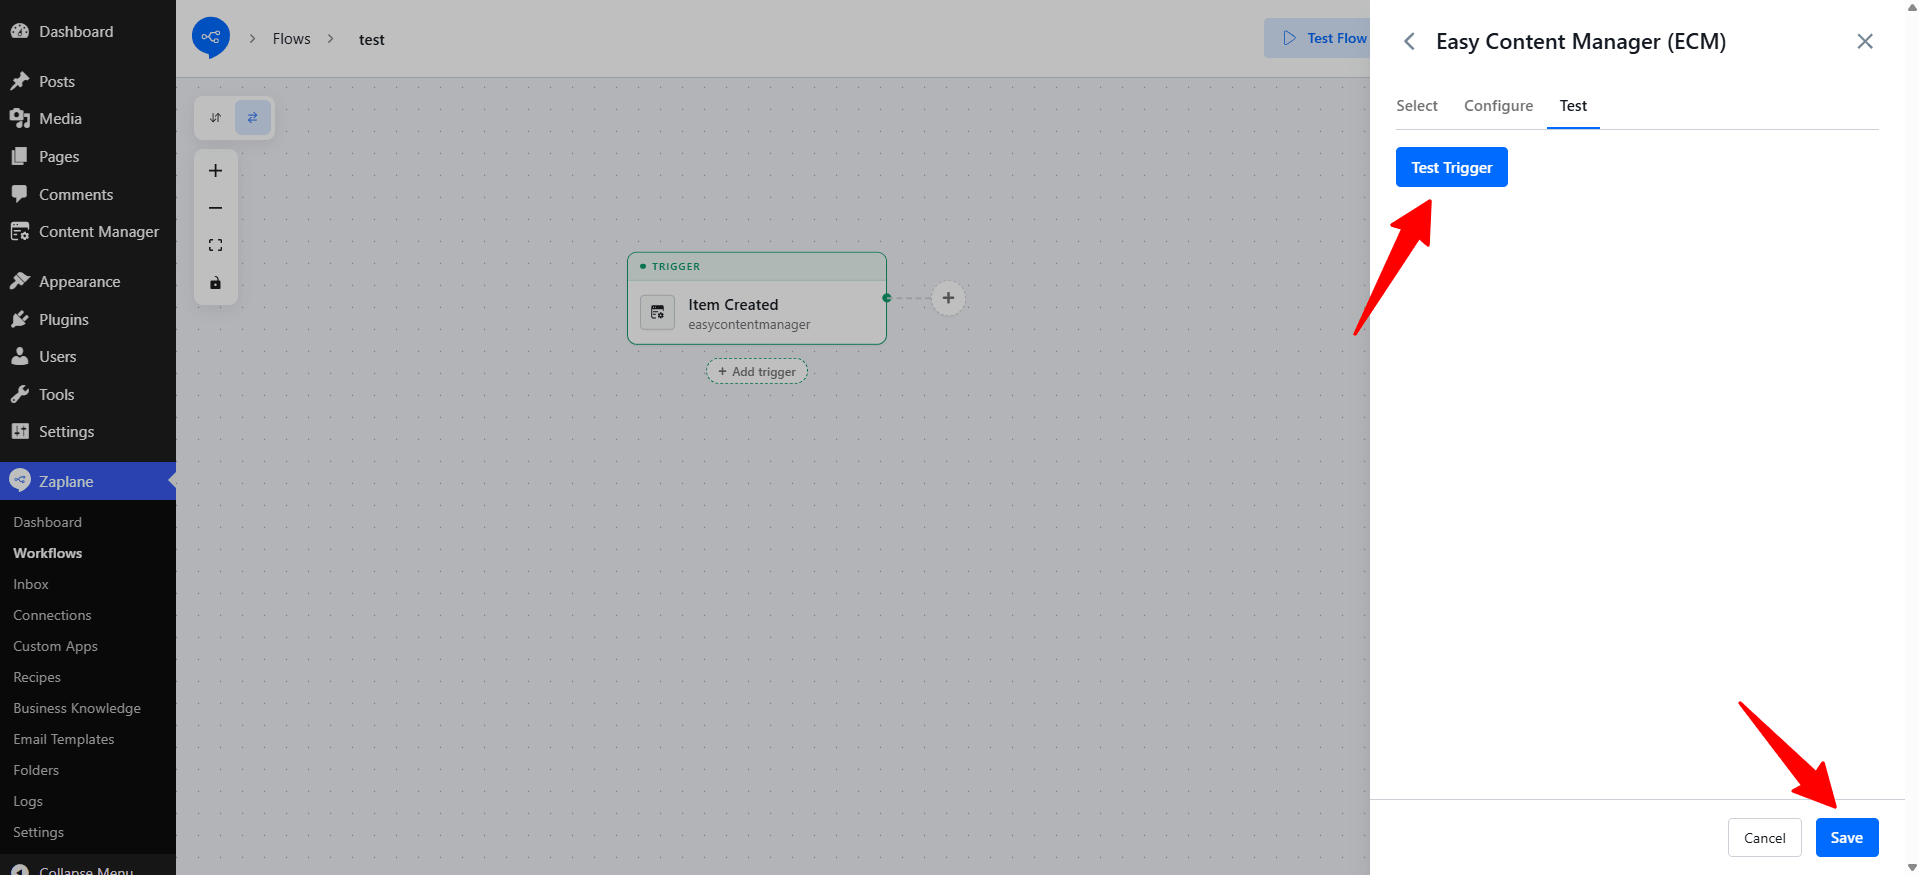
On the Test tab, click Test Trigger to check that Zaplane can receive data from Easy Content Manager (ECM), then click Save.
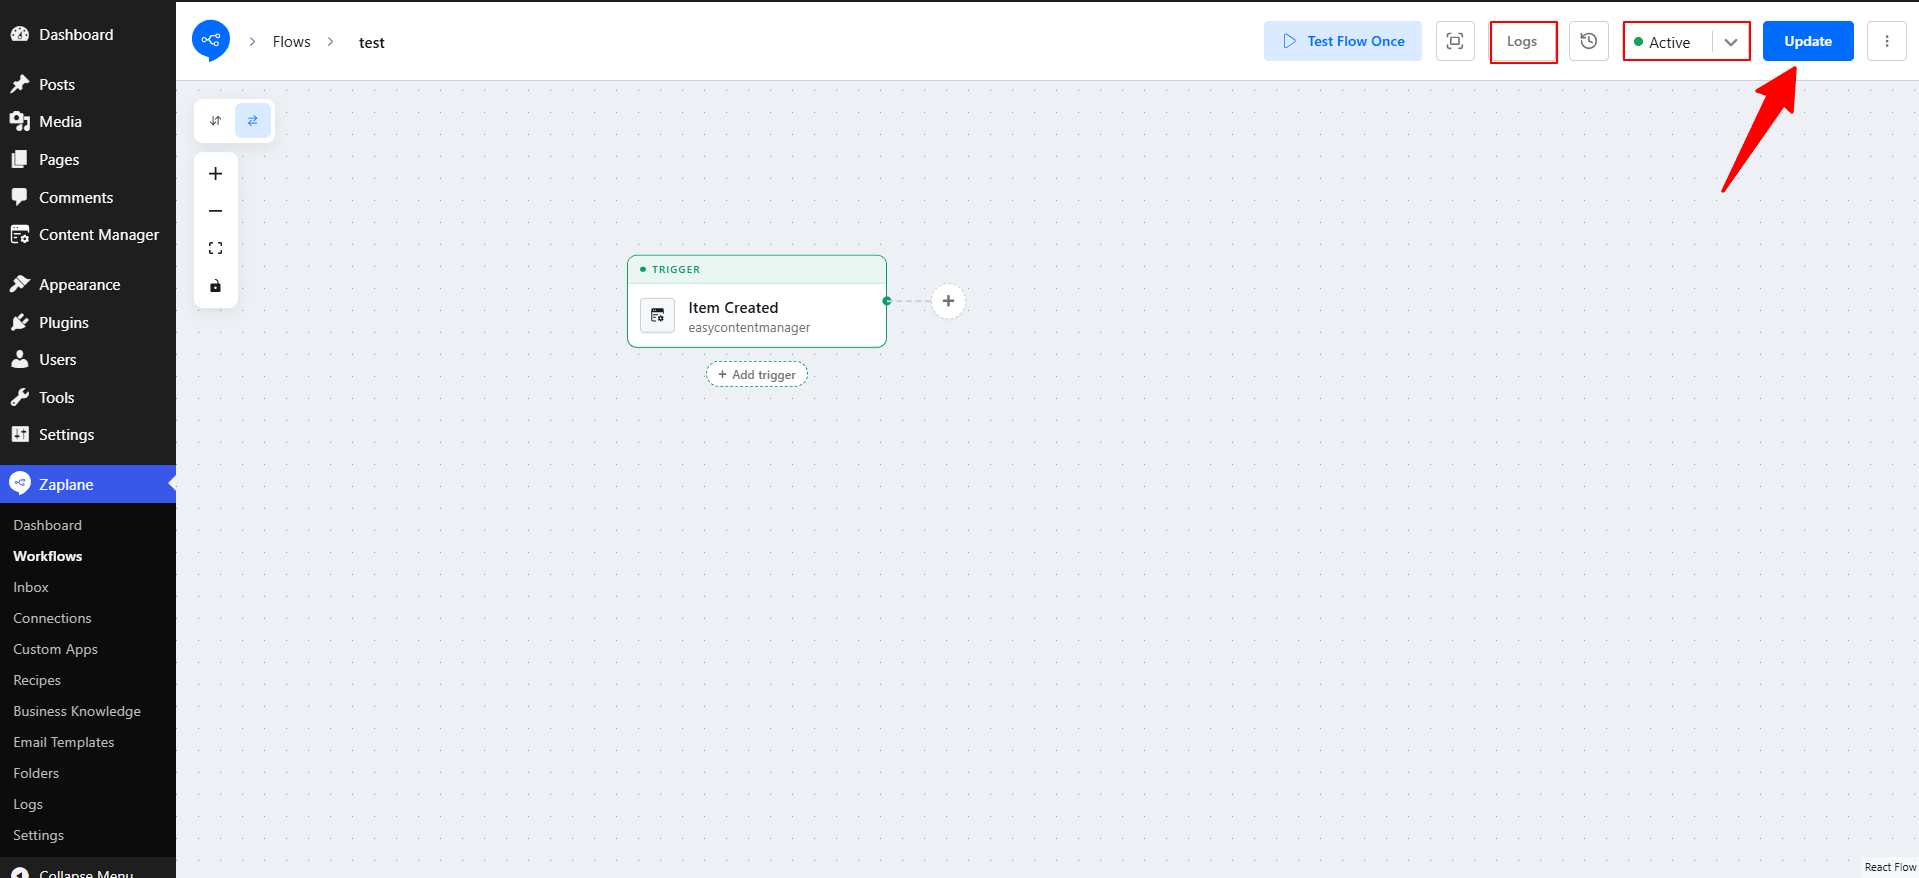
Back in the workflow editor, set the workflow status to Active and click Update to publish your changes. You can also use Logs to review every run.
Done!
Easy Content Manager (ECM) is now connected to Zaplane. Every time your selected trigger event happens, your workflow will run automatically.