

This guide walks you through adding an ActiveCampaign action to a Zaplane workflow, so that whenever your trigger runs, Zaplane can automatically add or update a contact in ActiveCampaign. Make sure your workflow already has a trigger set up before starting these steps.
Step 1: Copy your API URL and API Key
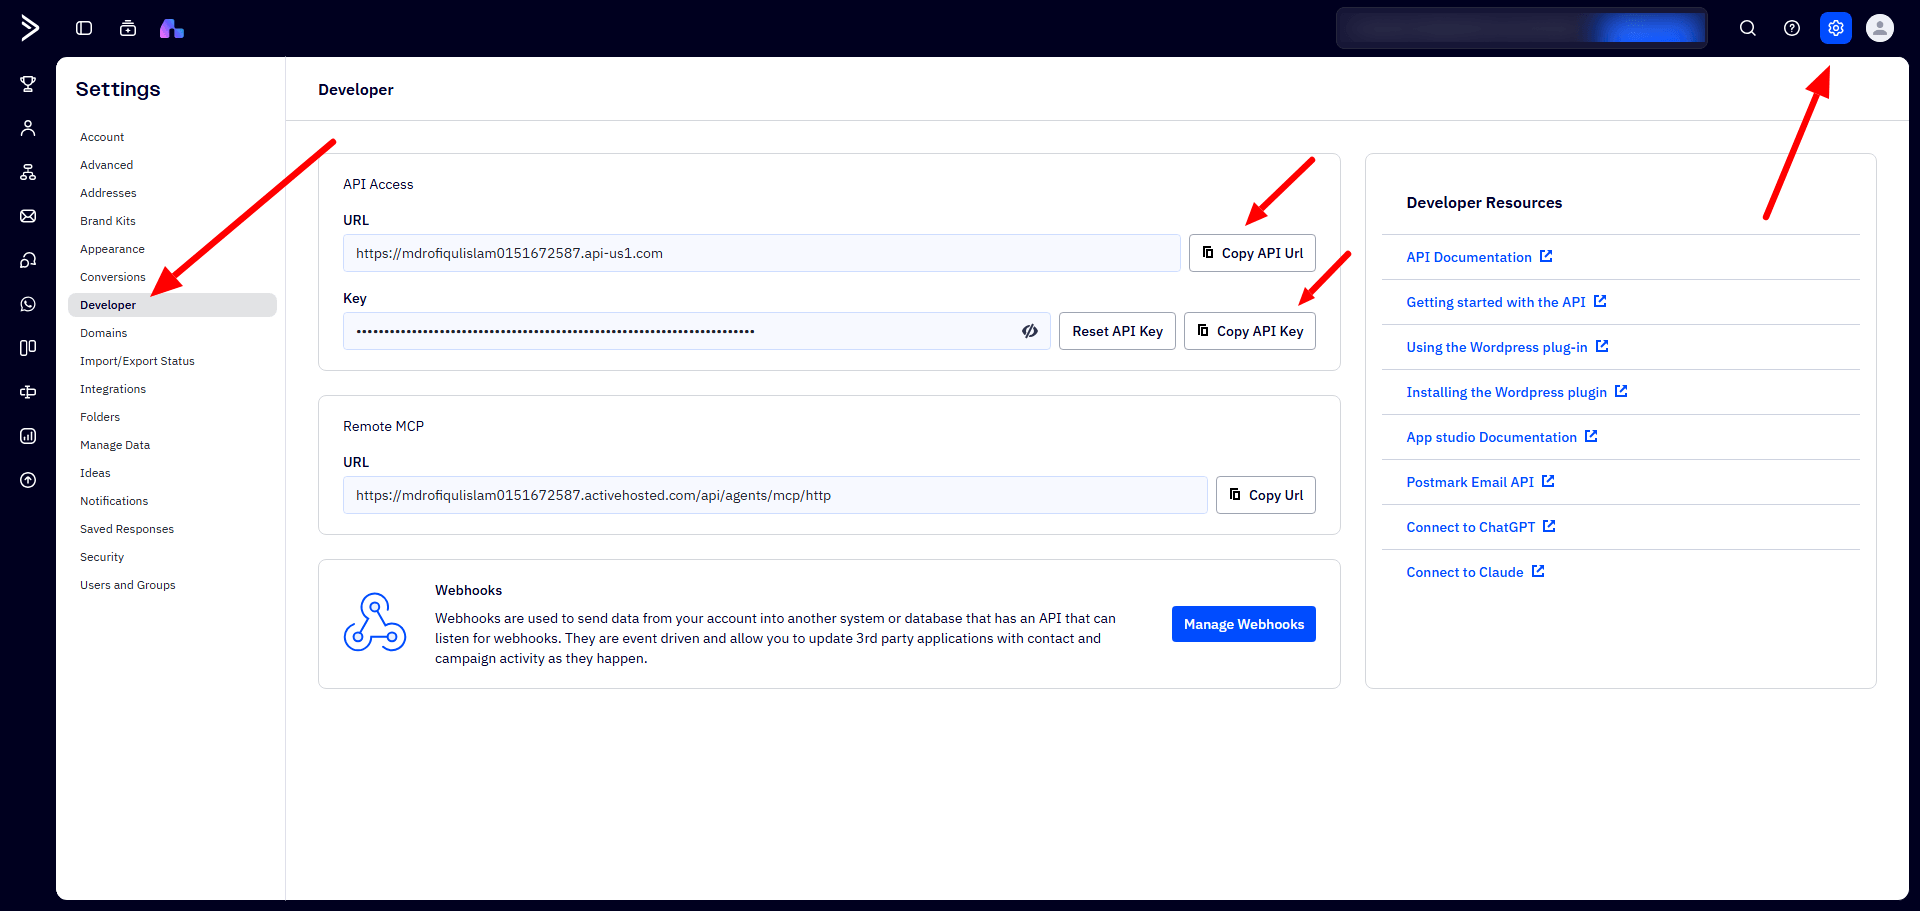
In ActiveCampaign, click the Settings gear icon in the top-right corner and open Developer. Under API Access, you will see your URL and your Key. Use the Copy API Url and Copy API Key buttons to copy each one.
Keep it private: treat your API key like a password. Do not share it or post it publicly.
Step 2: Open Zaplane Connections
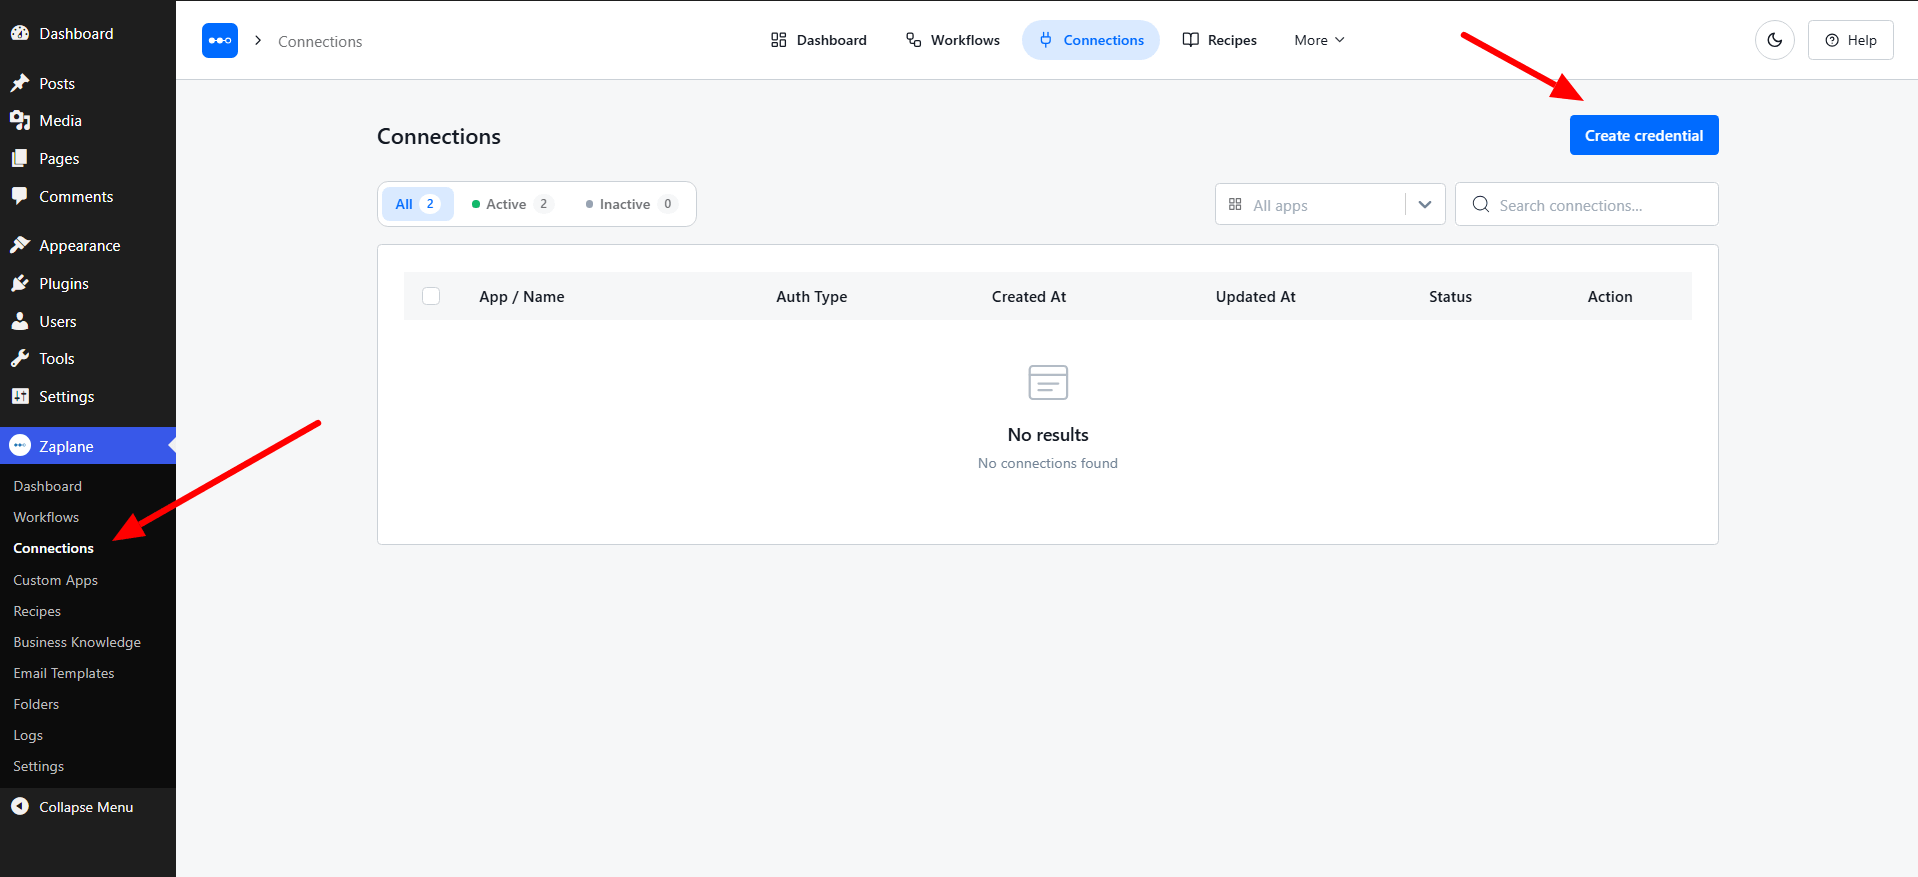
In your WordPress dashboard, go to Zaplane → Connections and click Create credential.
Step 3: Select ActiveCampaign
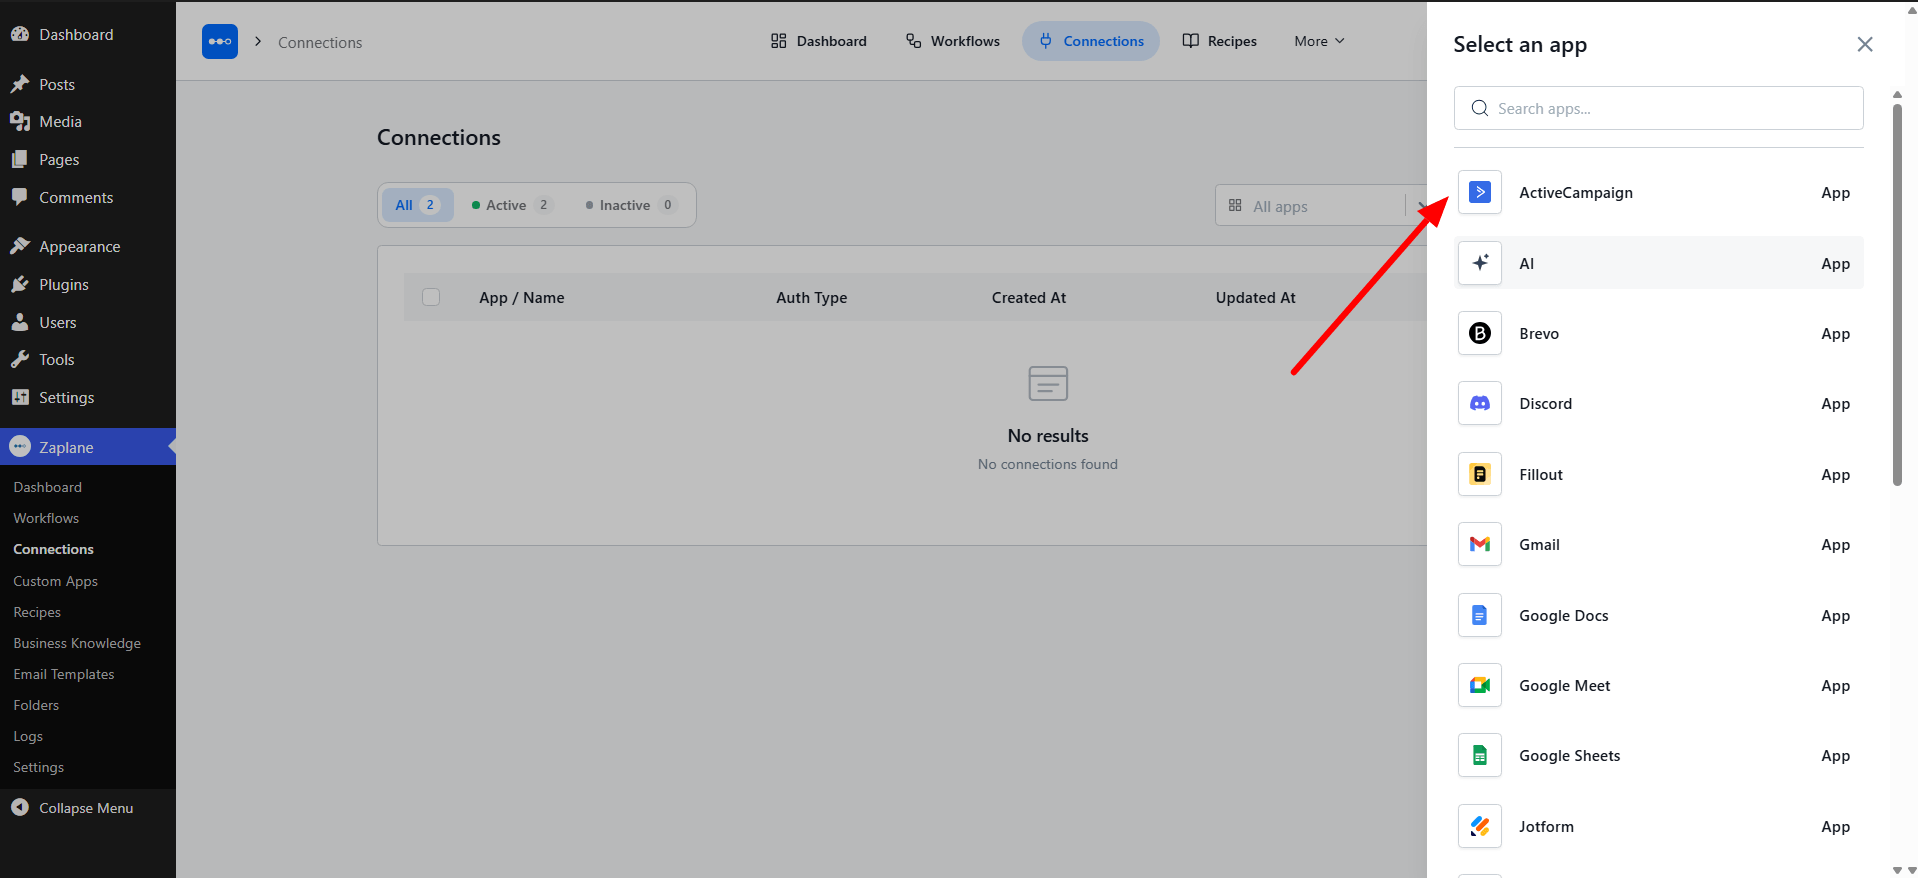
In the Select an app panel, choose ActiveCampaign.
Step 4: Paste your credentials
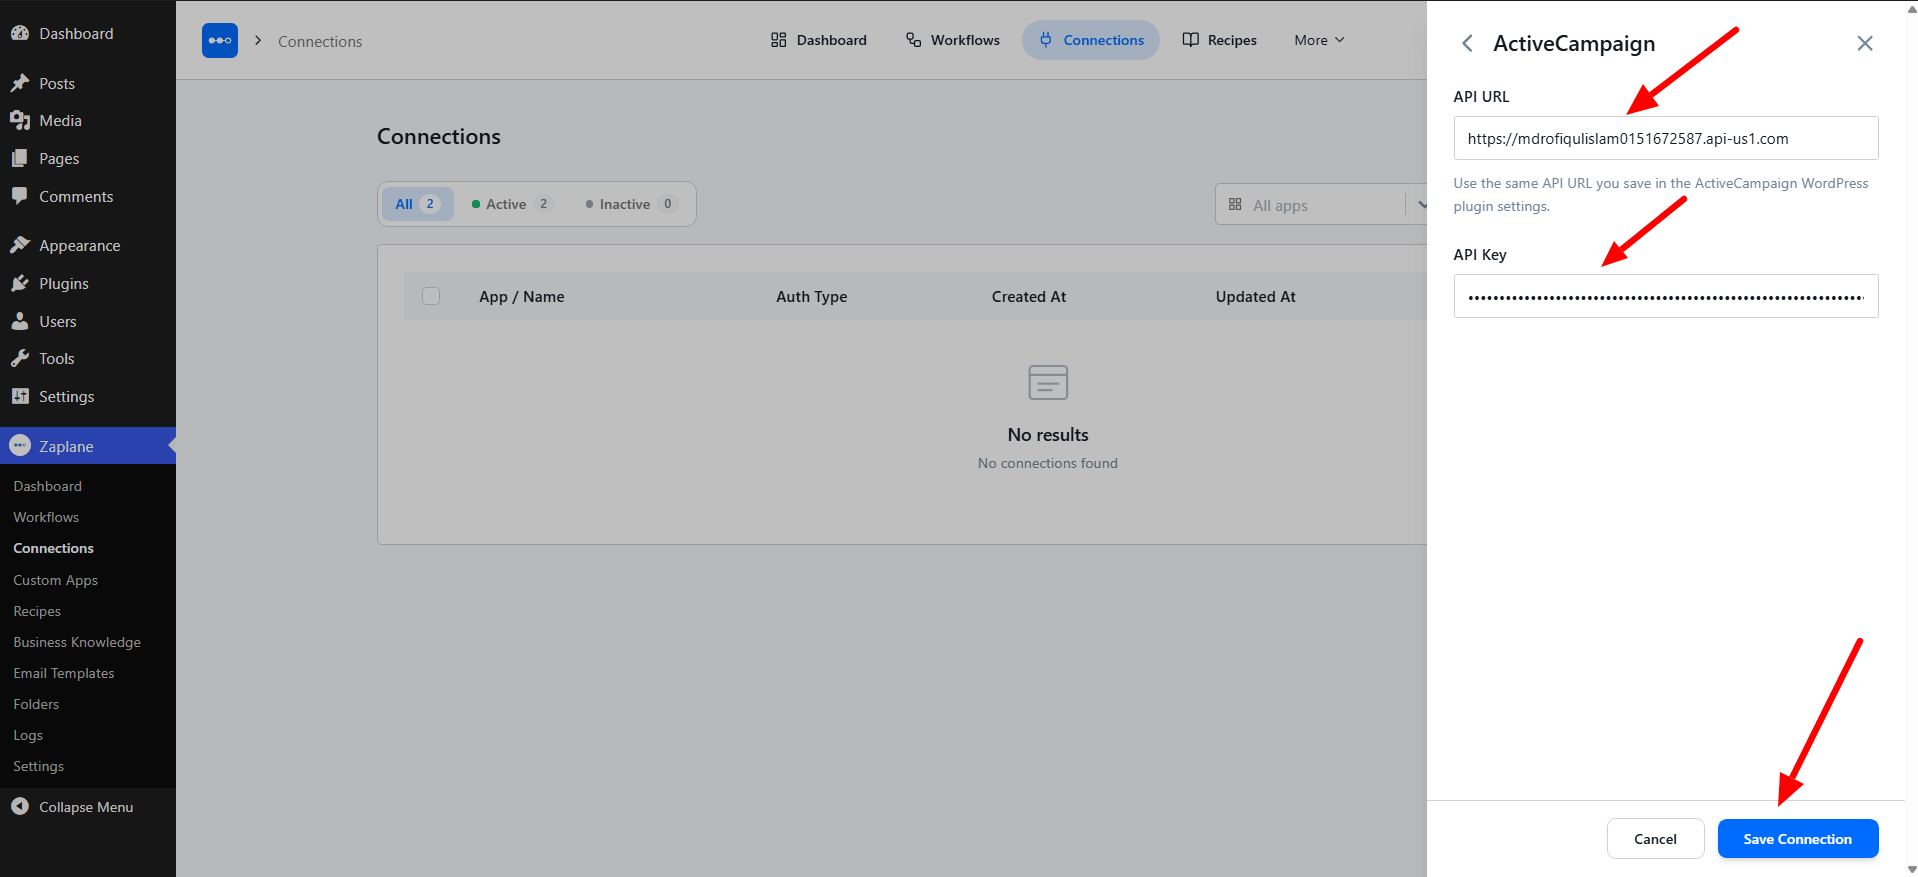
Paste the API URL and the API Key you copied in Step 1, then click Save Connection. Your connection is now ready to use.
Step 5: Create a Workflow
Go to Zaplane > Workflows from your WordPress dashboard, then click Create Workflow to open the workflow editor.
Before adding an ActiveCampaign action, you need to set up a trigger first. Here is how to do it quickly:
Once your trigger is saved, proceed to the next step to add the ActiveCampaign action.
Step 6: Add an Action
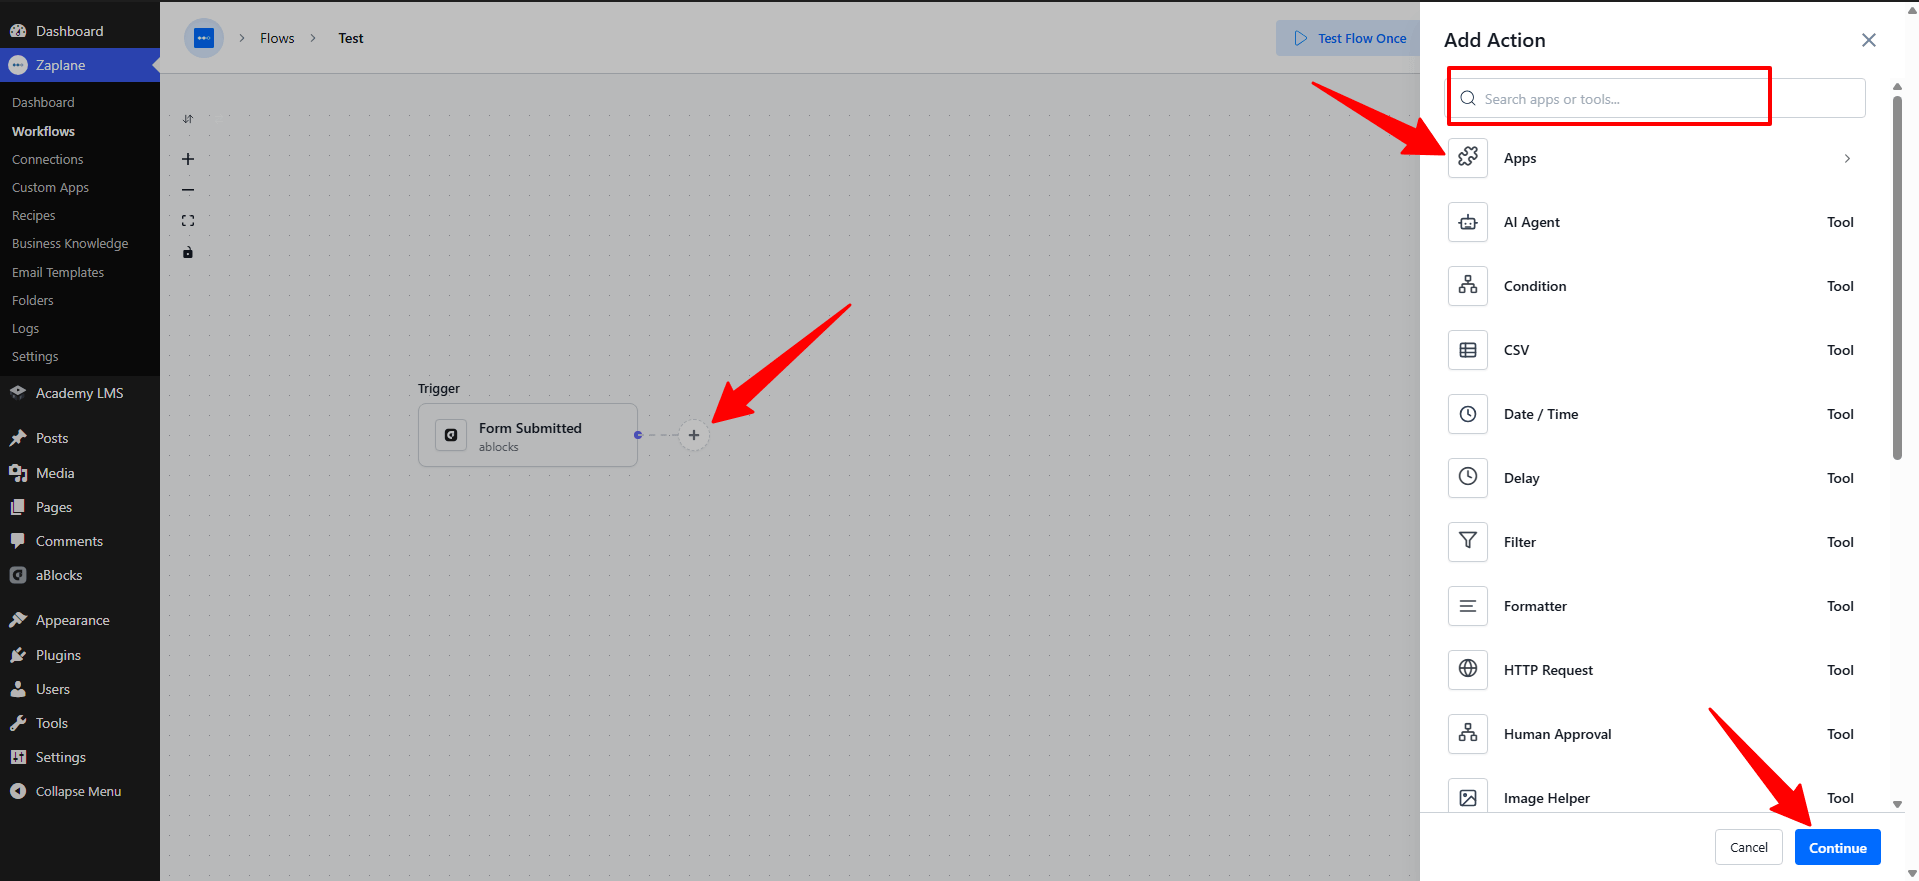
On your workflow canvas, click the + icon next to your trigger to open the Add Action panel.
Step 7: Select the App
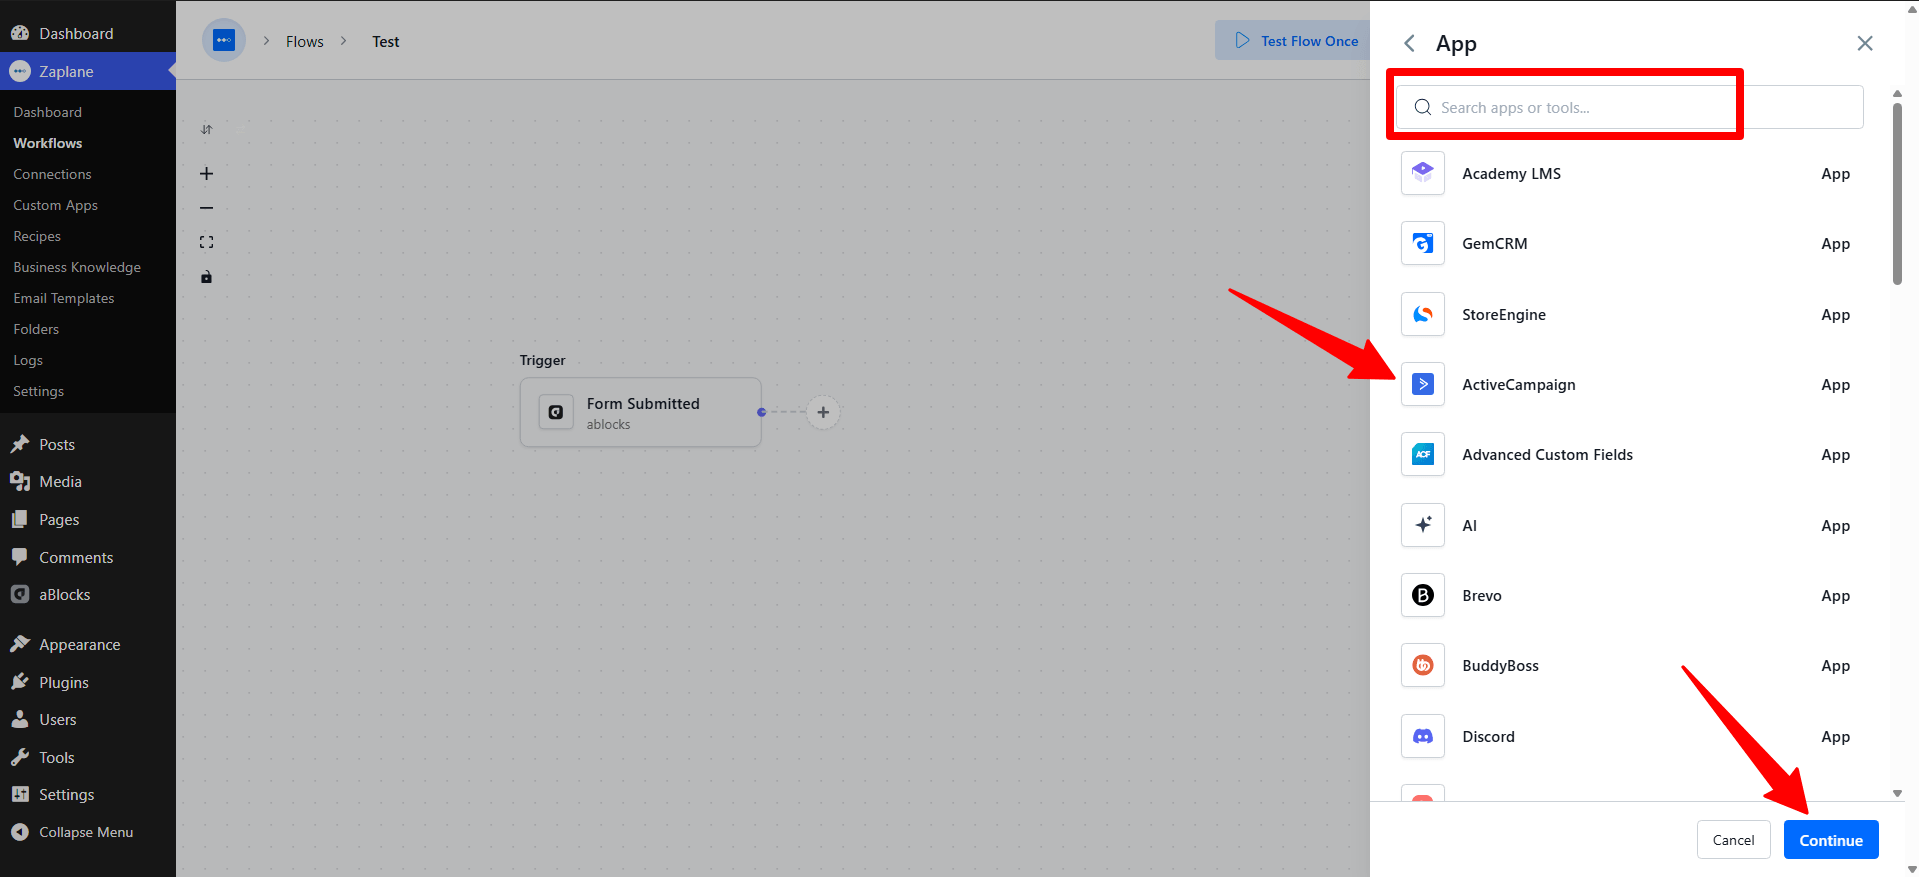
Click Apps to browse available apps, then search for and select ActiveCampaign from the list.
Step 8: Choose the Action Type
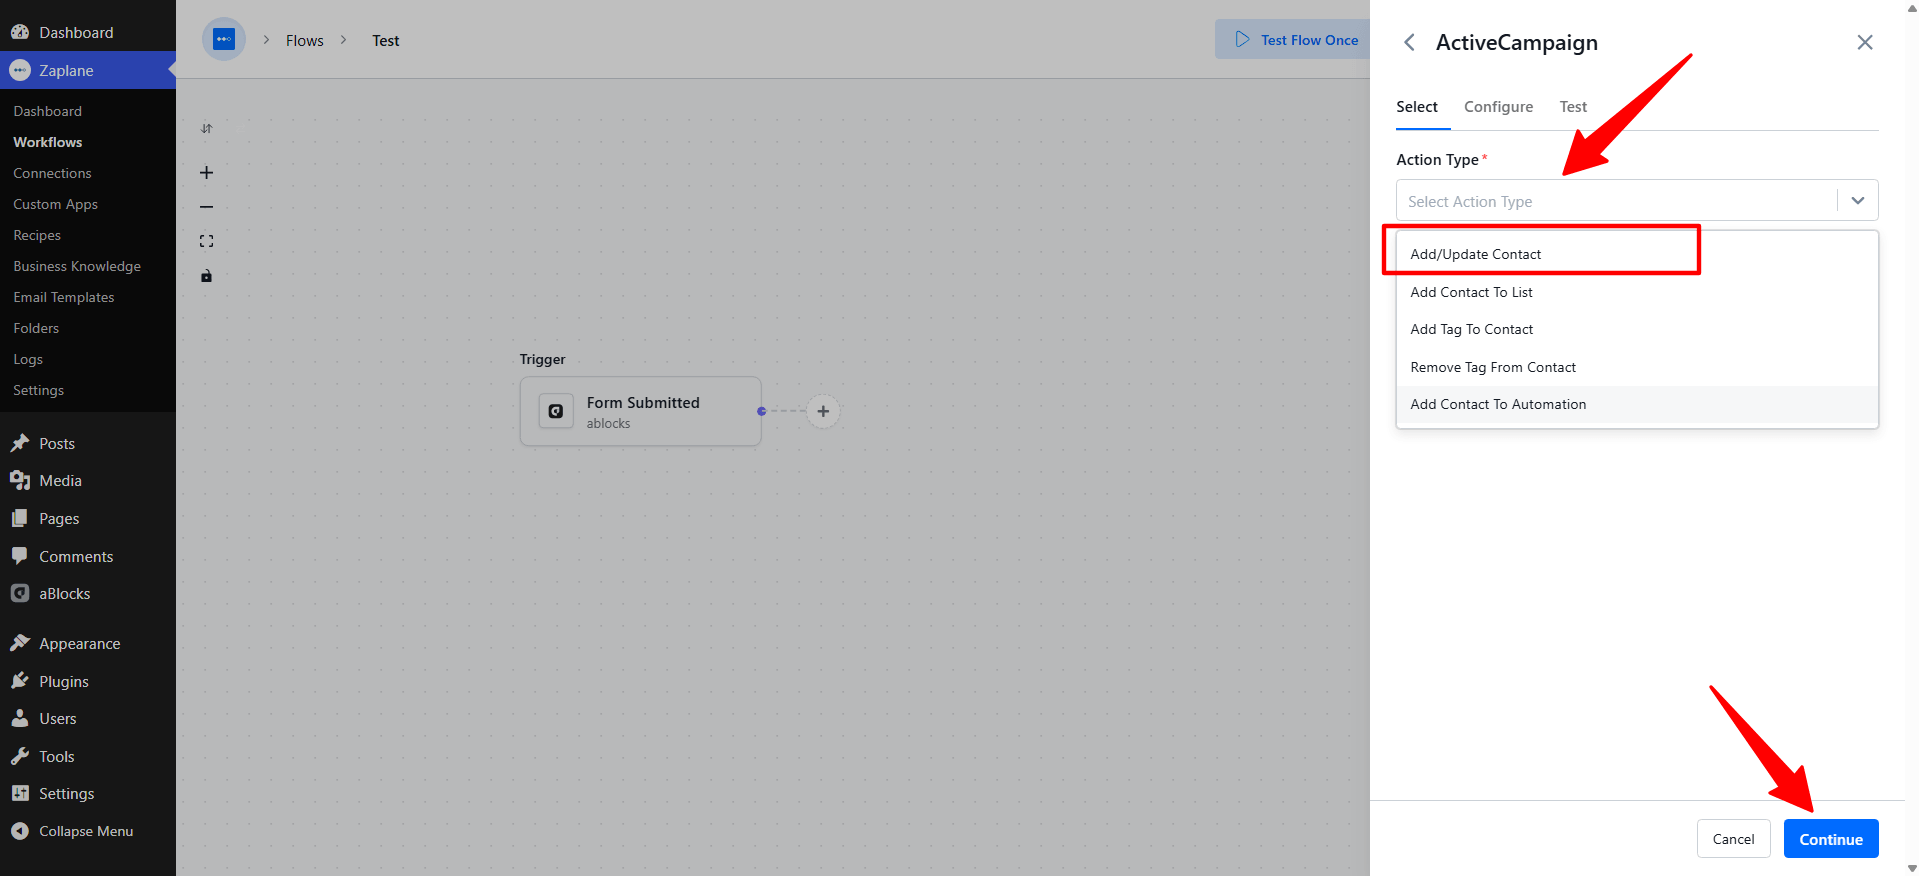
Several action types are available for ActiveCampaign. For this guide, select Add/Update Contact, then click Continue.
Step 9: Configure the Action
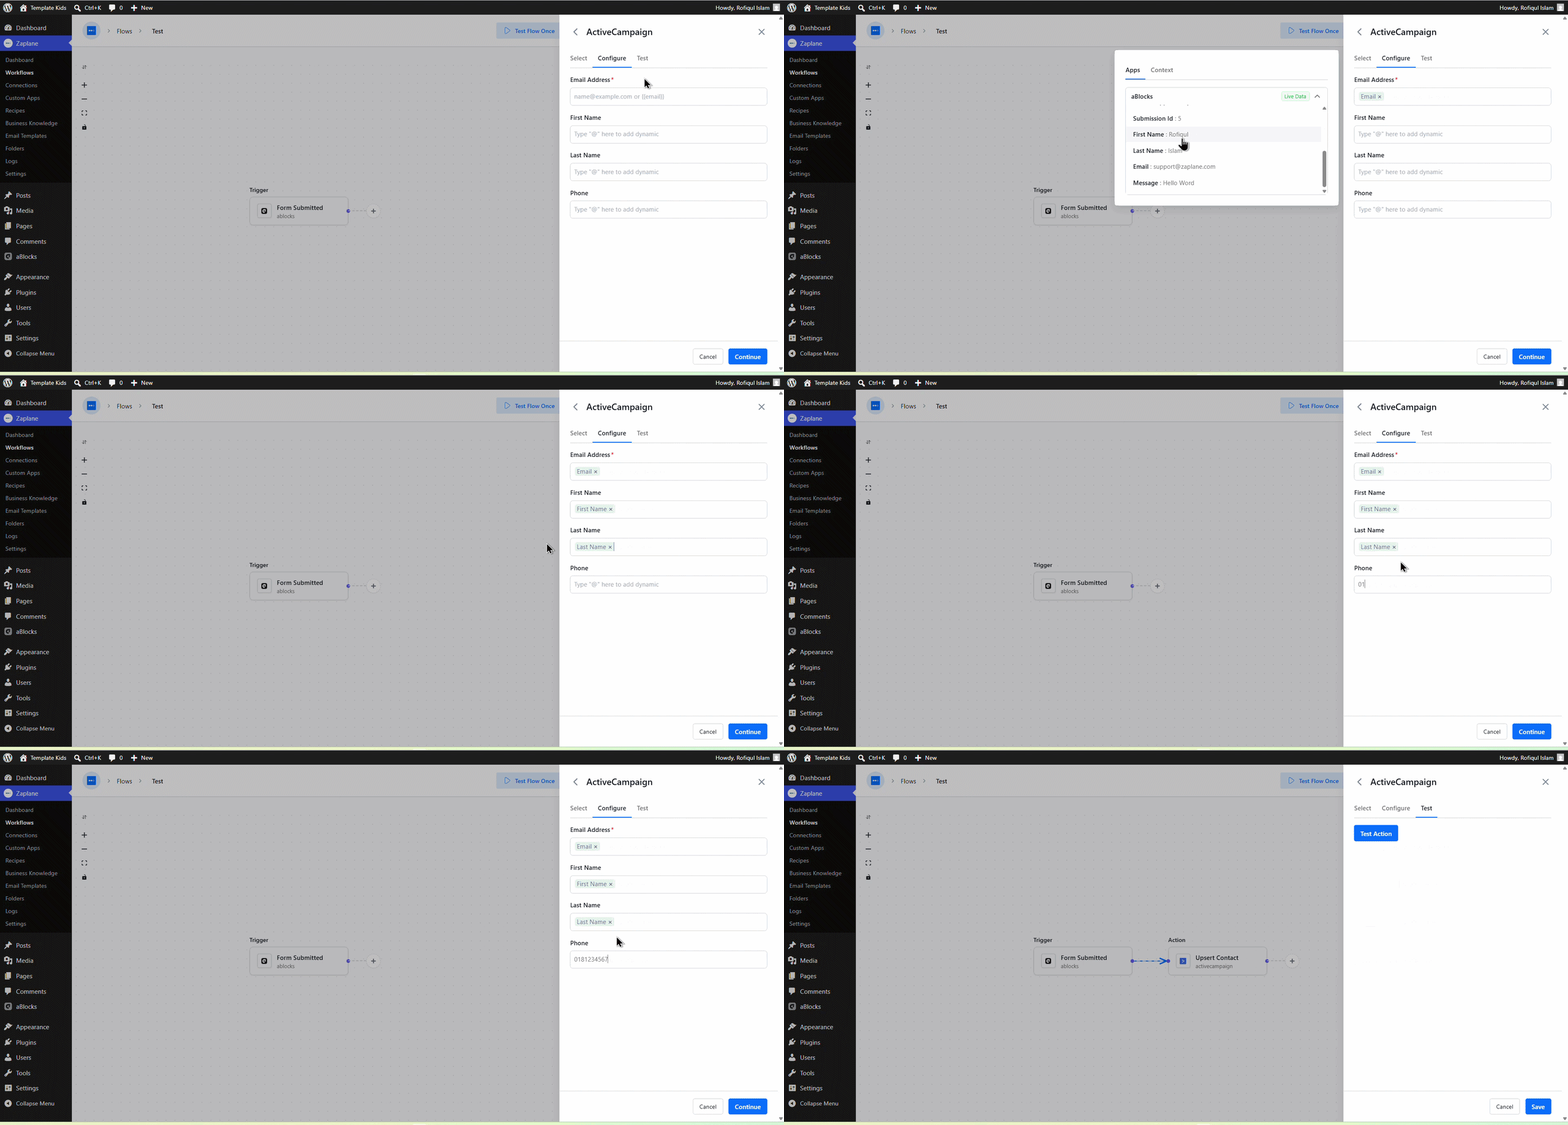
On the Configure tab, map the Email Address field to the email data coming from your trigger, and fill in First Name, Last Name, and Phone as needed — either with static text or by mapping dynamic data from earlier steps. Click Continue when done.
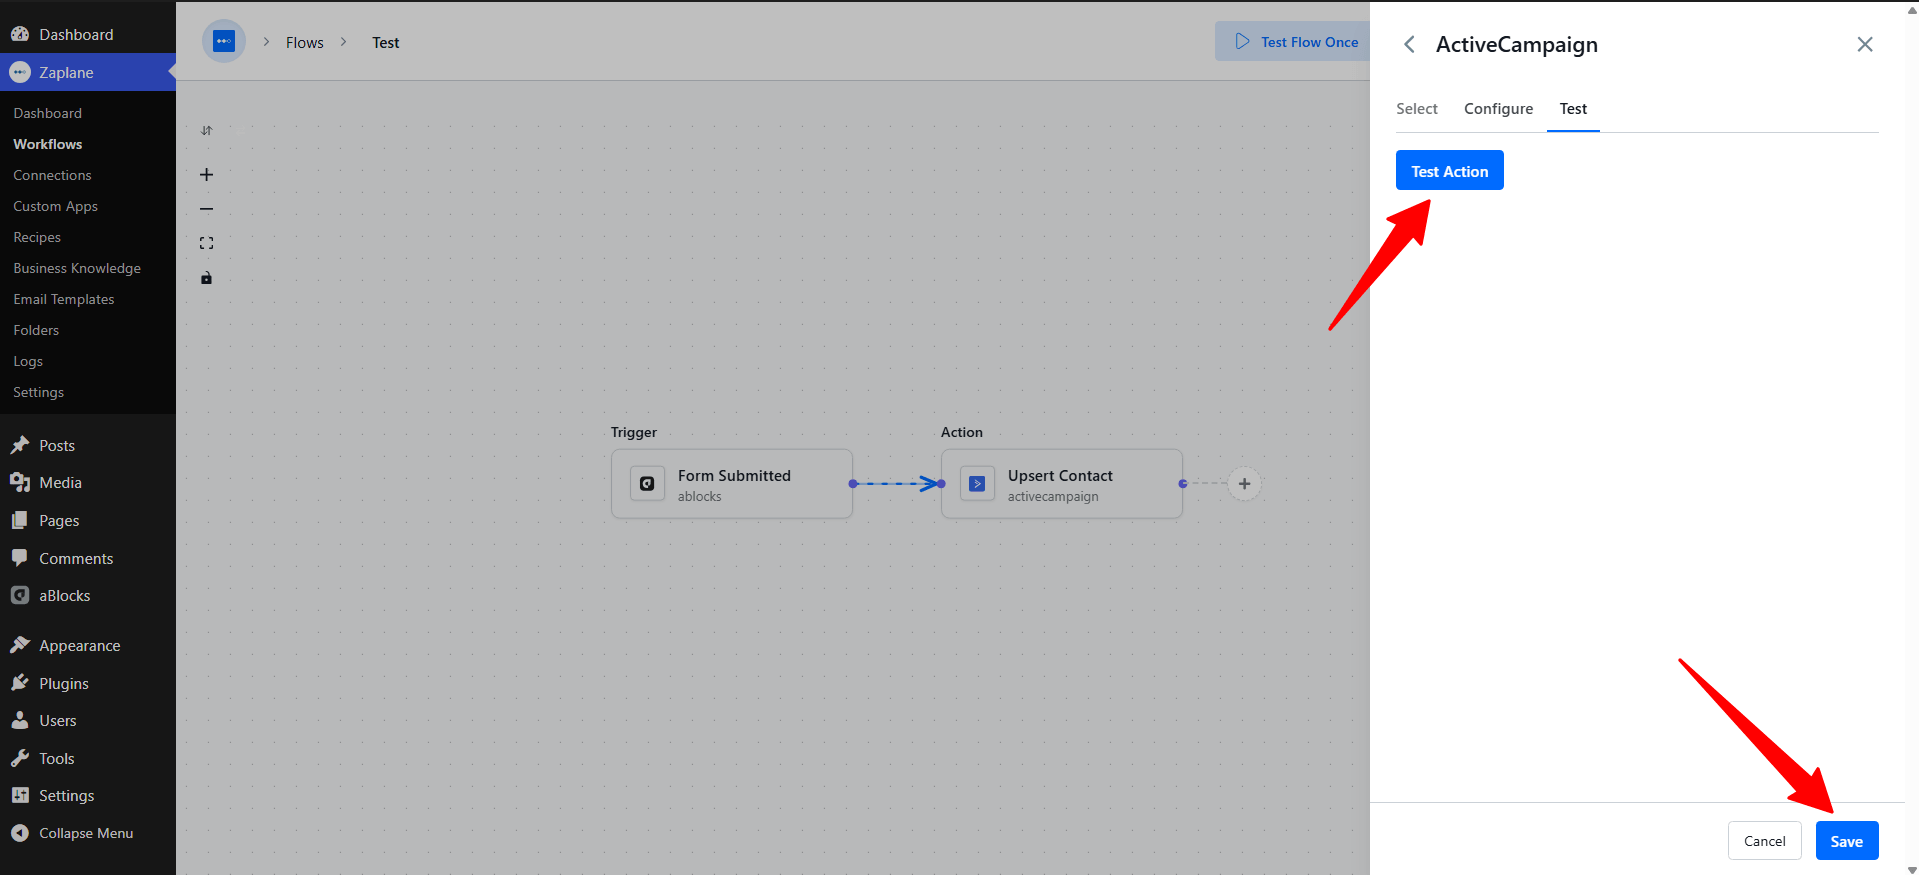
Step 10: Test the Action
On the Test tab, click Test Action to run the action with sample data and confirm it works as expected. Once the test succeeds, click Save.
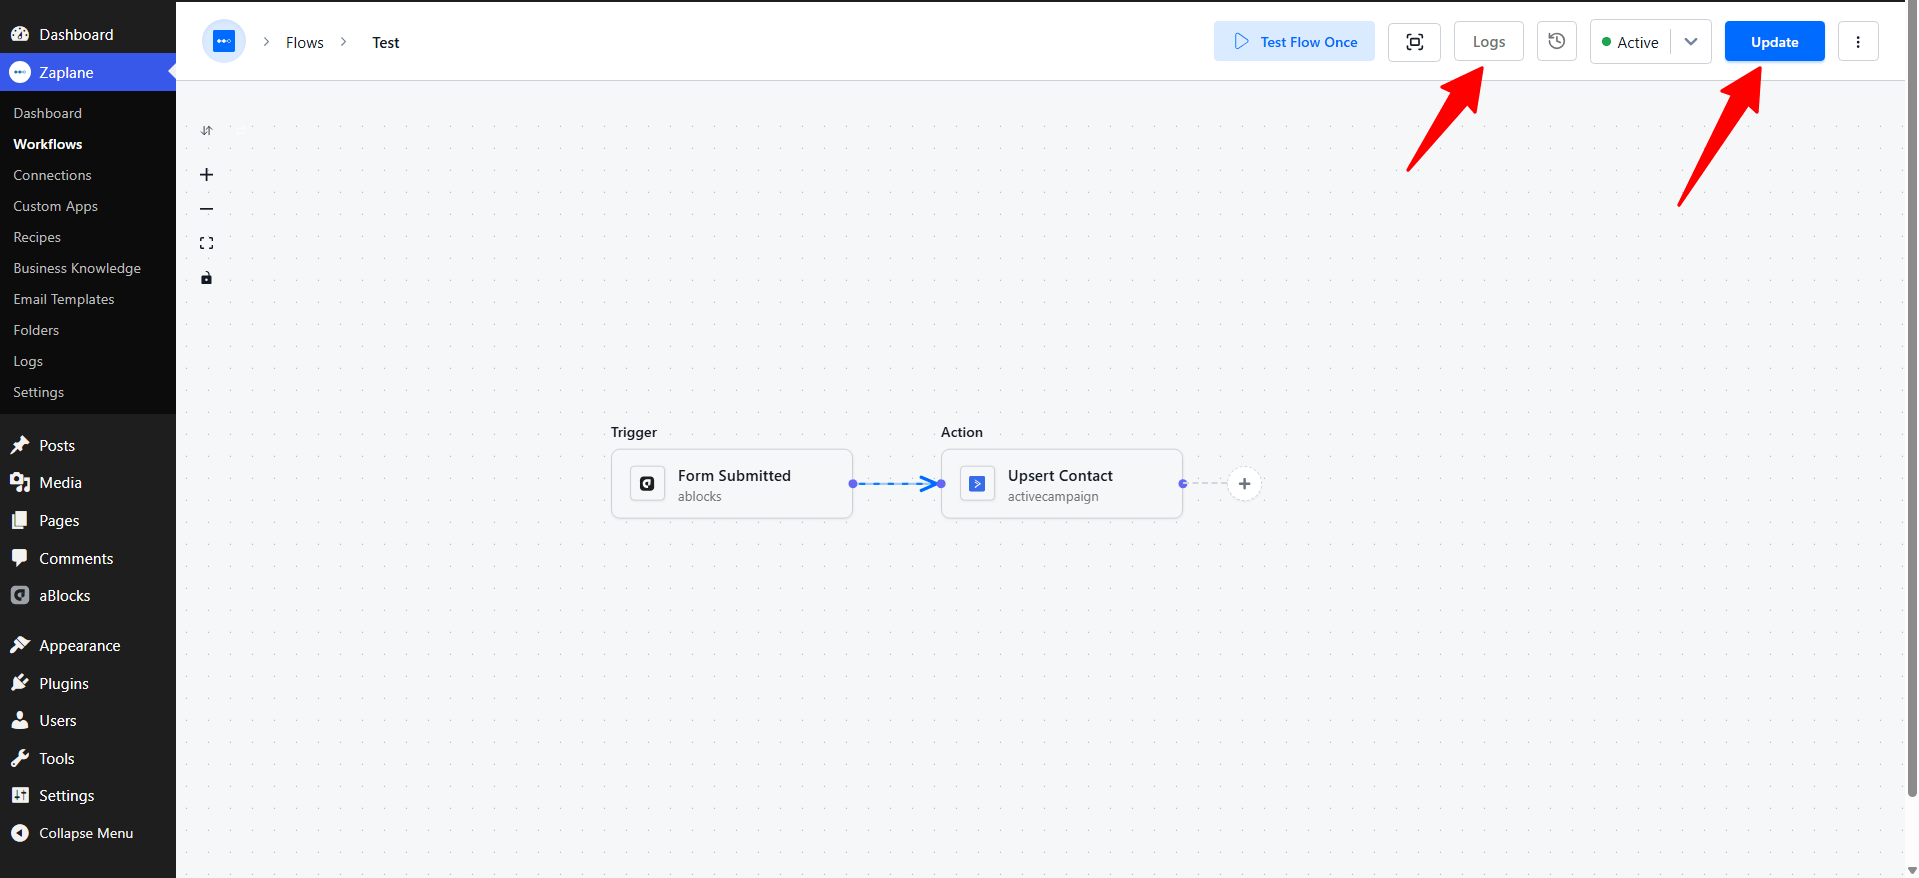
Step 11: Update and Activate the Workflow
Back on the workflow canvas, click Update to save your changes, and make sure the workflow status is set to Active. You can view execution results anytime from the Logs.
Done!
Your Zaplane workflow is now connected to ActiveCampaign. Every time the trigger runs, the contact will be automatically added or updated in ActiveCampaign.