

This guide shows you how to automatically create a new order in your Shopify store from a Zaplane workflow. For example, you can create a Shopify order whenever a product is purchased on your WordPress site. It has three parts: getting your Shopify credentials, connecting Shopify to Zaplane, and adding the action to a workflow.
Part 1: Create a Shopify App and Get Your Credentials
Step 1: Find Your Store Domain
In your Shopify admin, click Settings at the bottom left, then open Domains. Note your store’s myshopify.com domain; you will need it when creating the connection in Zaplane.
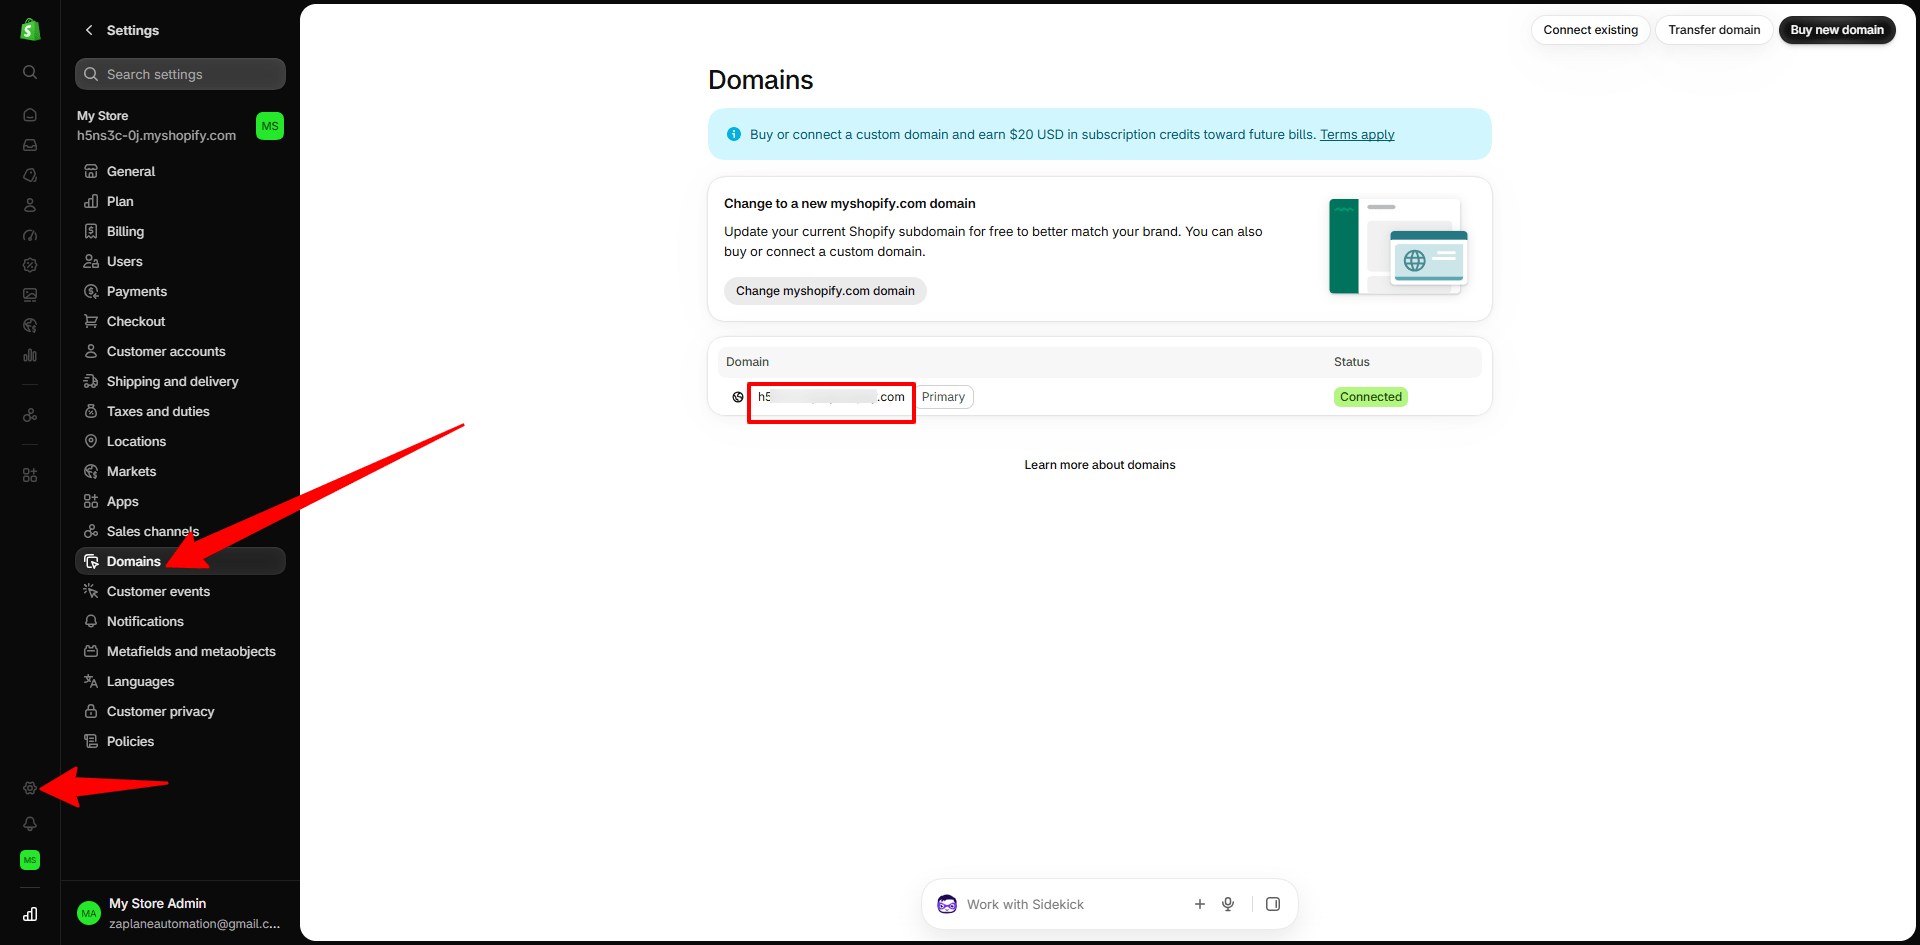
Step 2: Open Develop Apps
In Settings, go to Apps, then click Develop apps at the top right.
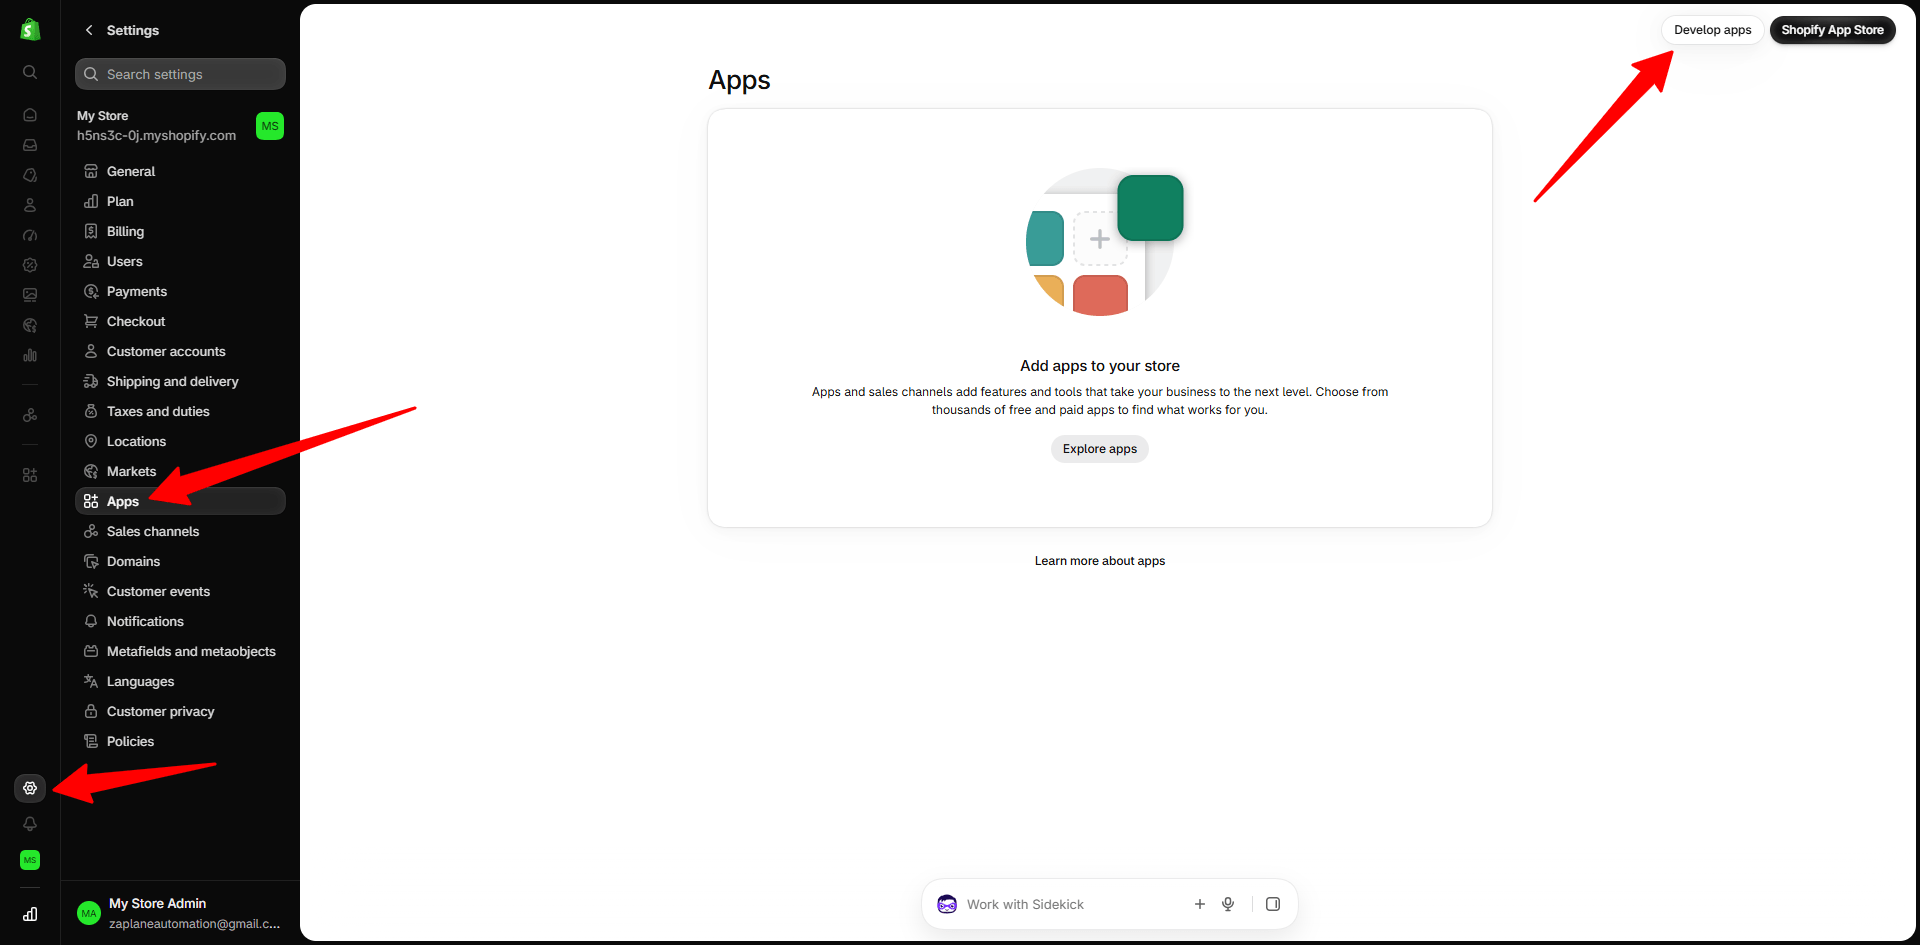
Step 3: Build Apps in Dev Dashboard
On the App development page, click Build apps in Dev Dashboard.
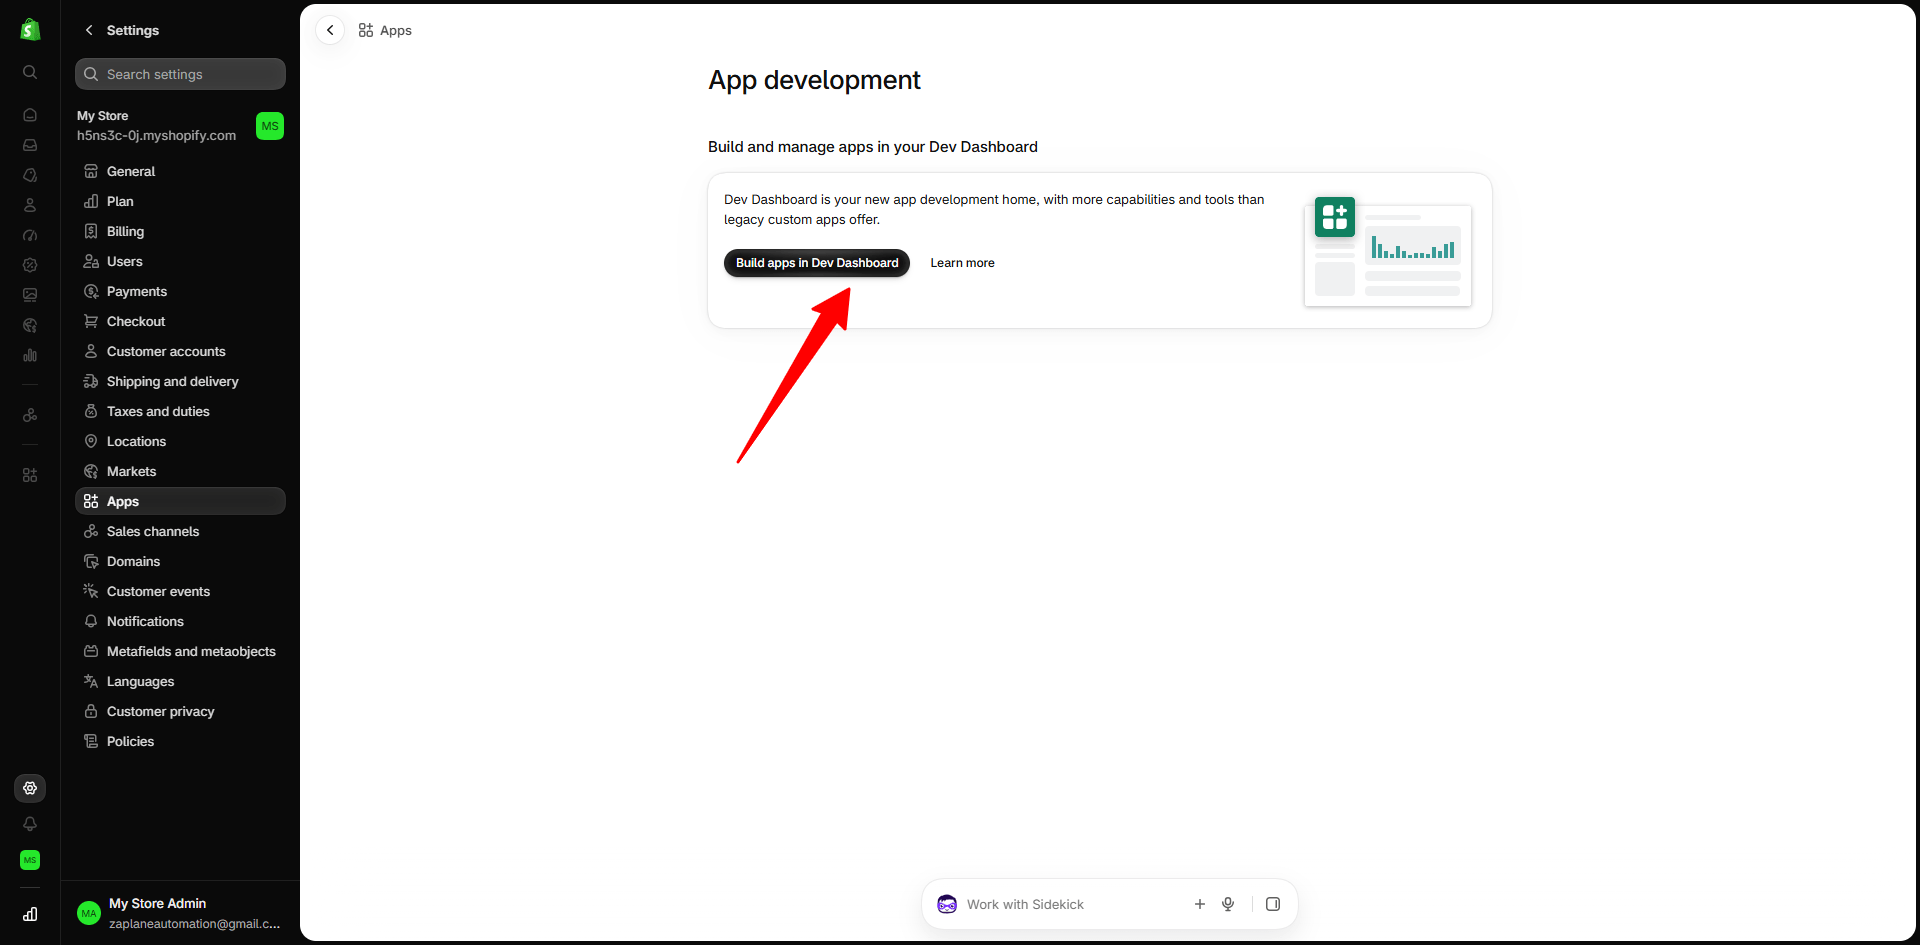
Step 4: Create an App
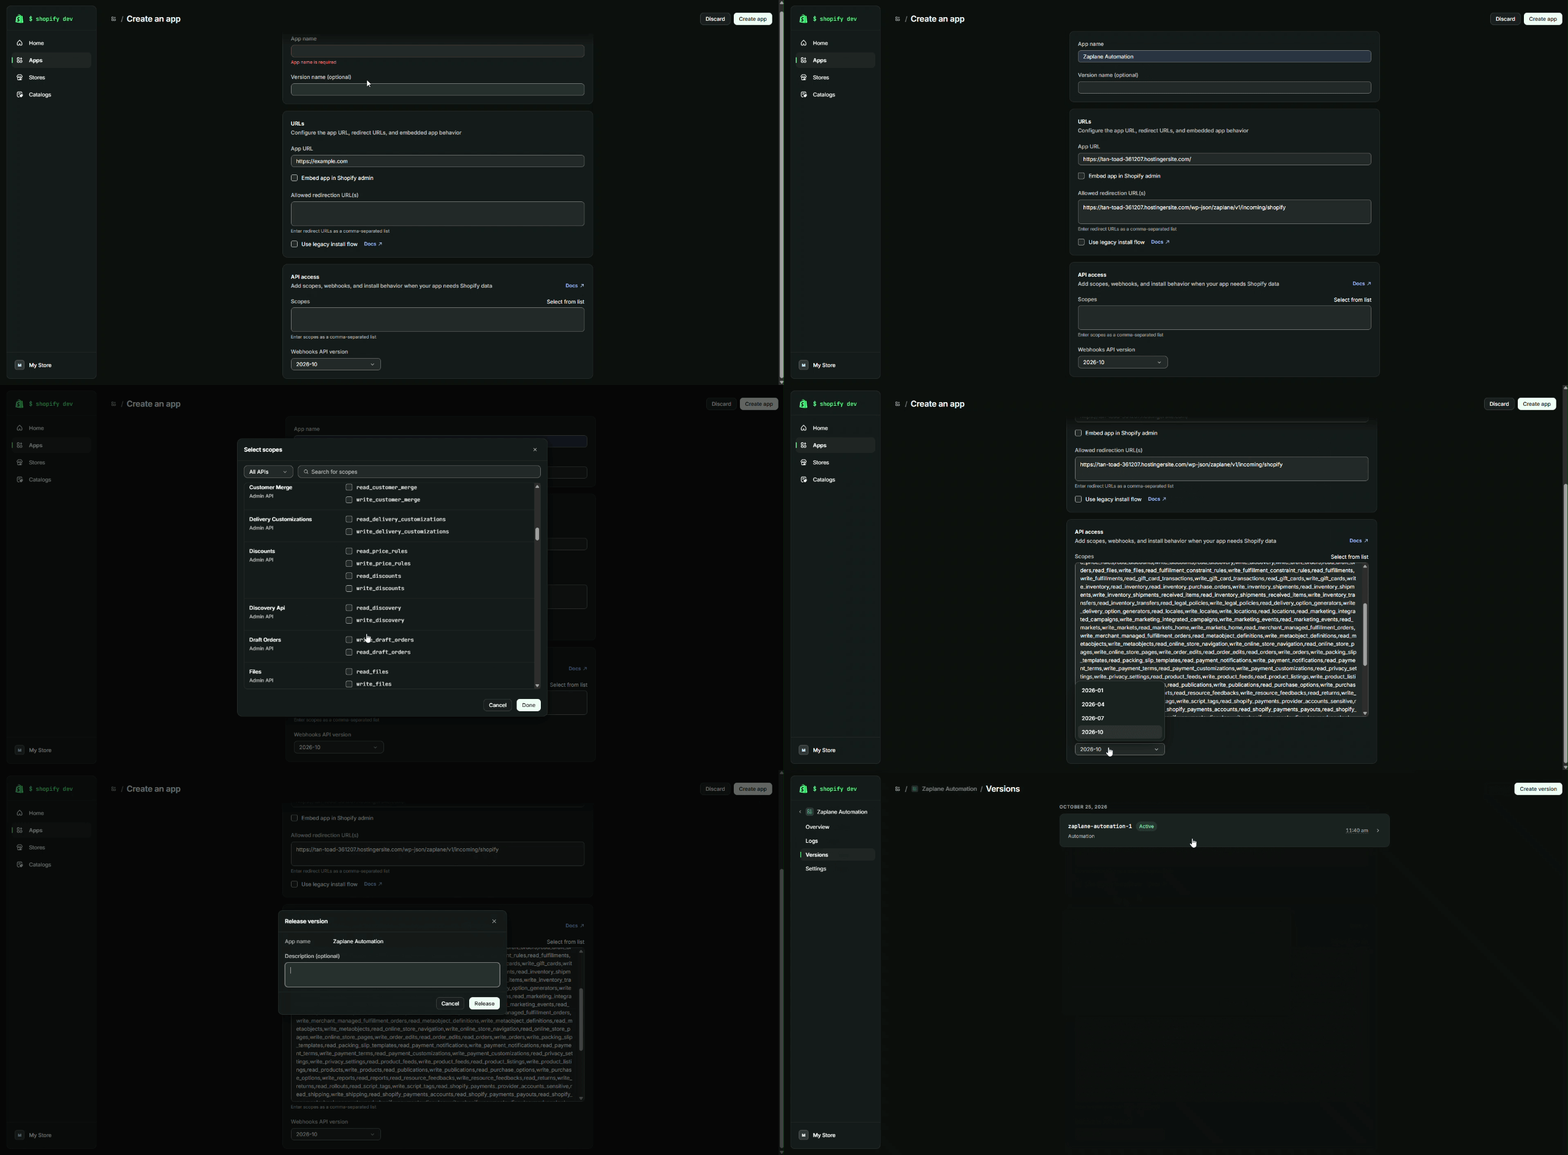
In the Dev Dashboard, open Home and click Create an app.
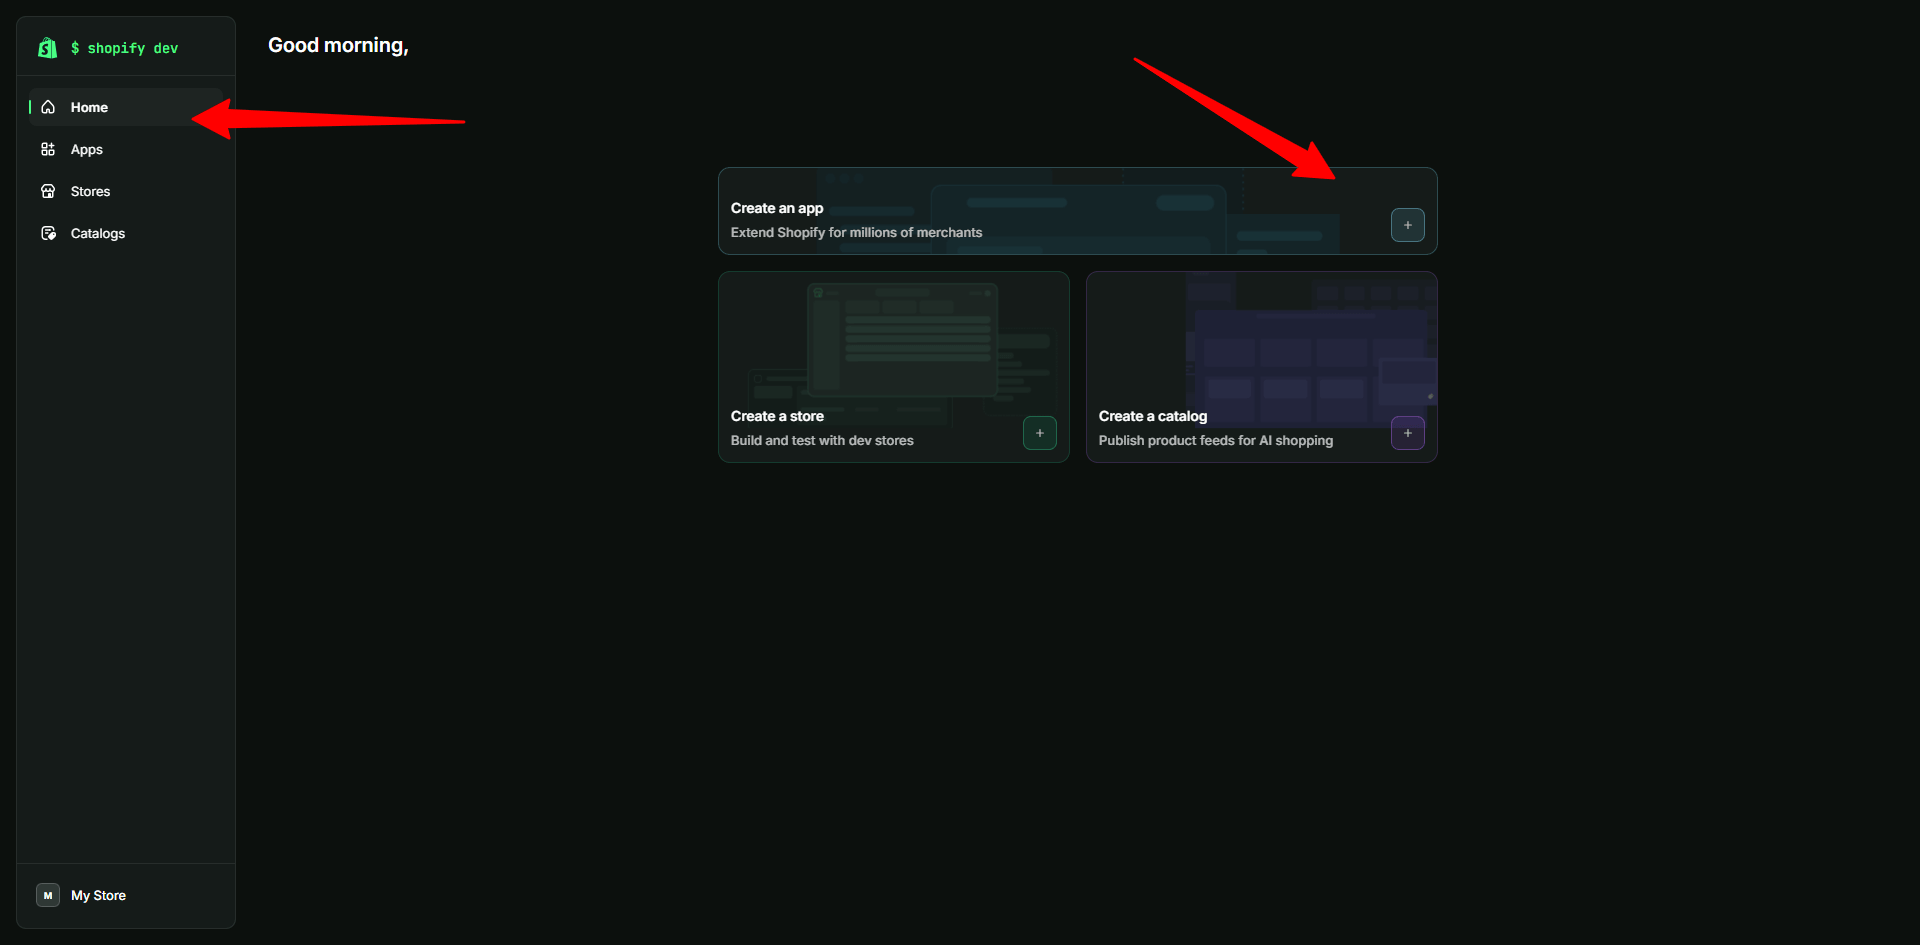
Step 5: Fill In the App Details
On the Create an app page, fill in the following:
Zaplane Automation.Then click Create app.
Step 6: Release a Version
In the Release version window, add an optional description and click Release. The version is now listed as Active.
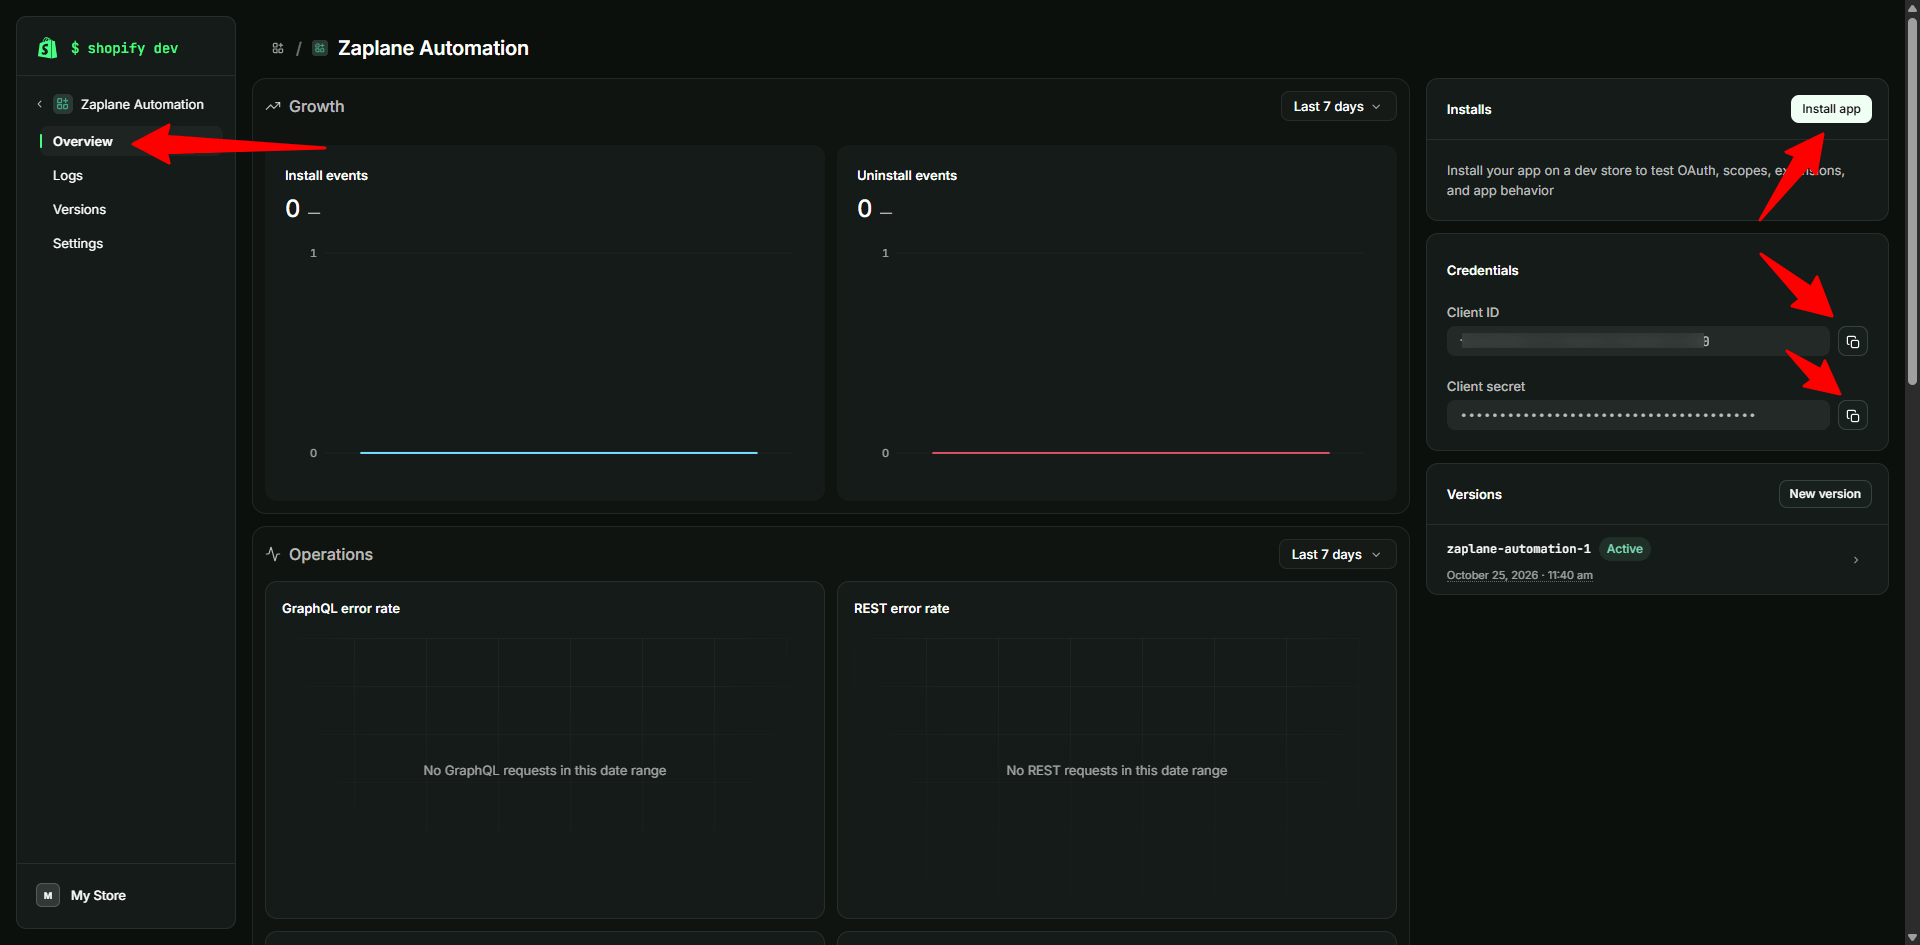
Step 7: Install the App and Copy Your Credentials
On your app’s Overview page, click Install app to install it on your store. Under Credentials, use the copy icons to copy your Client ID and Client Secret.
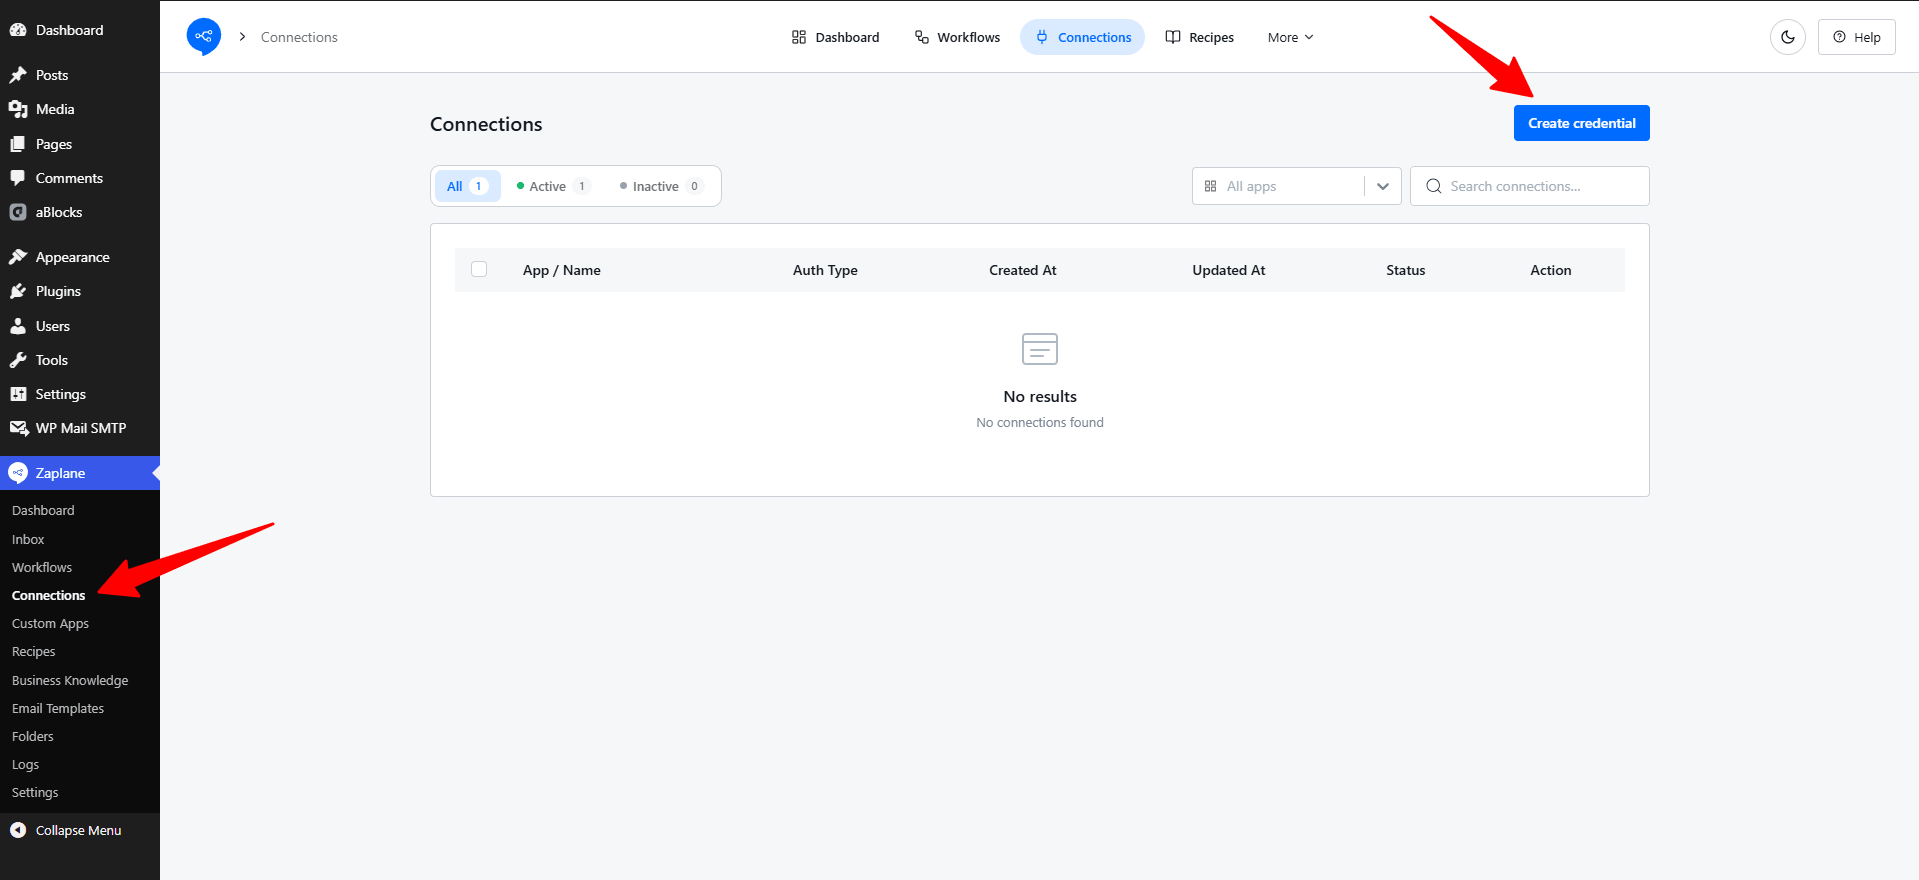
Part 2: Create the Connection in Zaplane
Step 8: Open Connections
From your WordPress dashboard, go to Zaplane > Connections, then click Create credential.
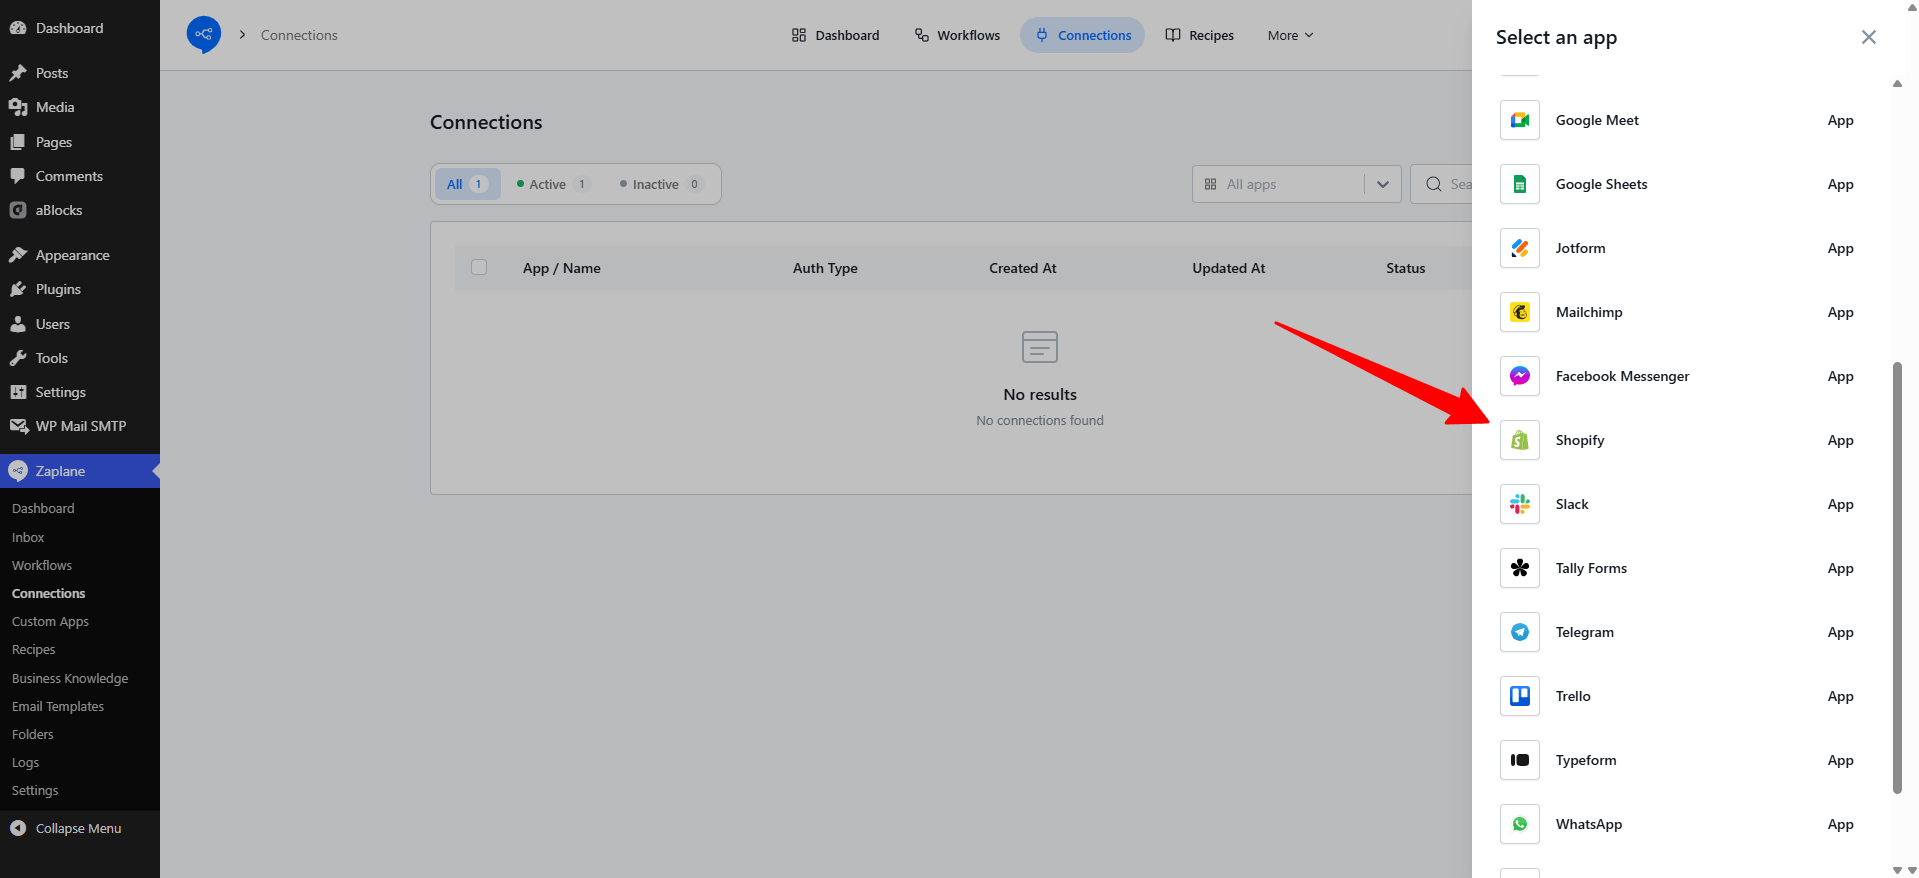
Step 9: Select Shopify
In the Select an app panel, find and select Shopify.
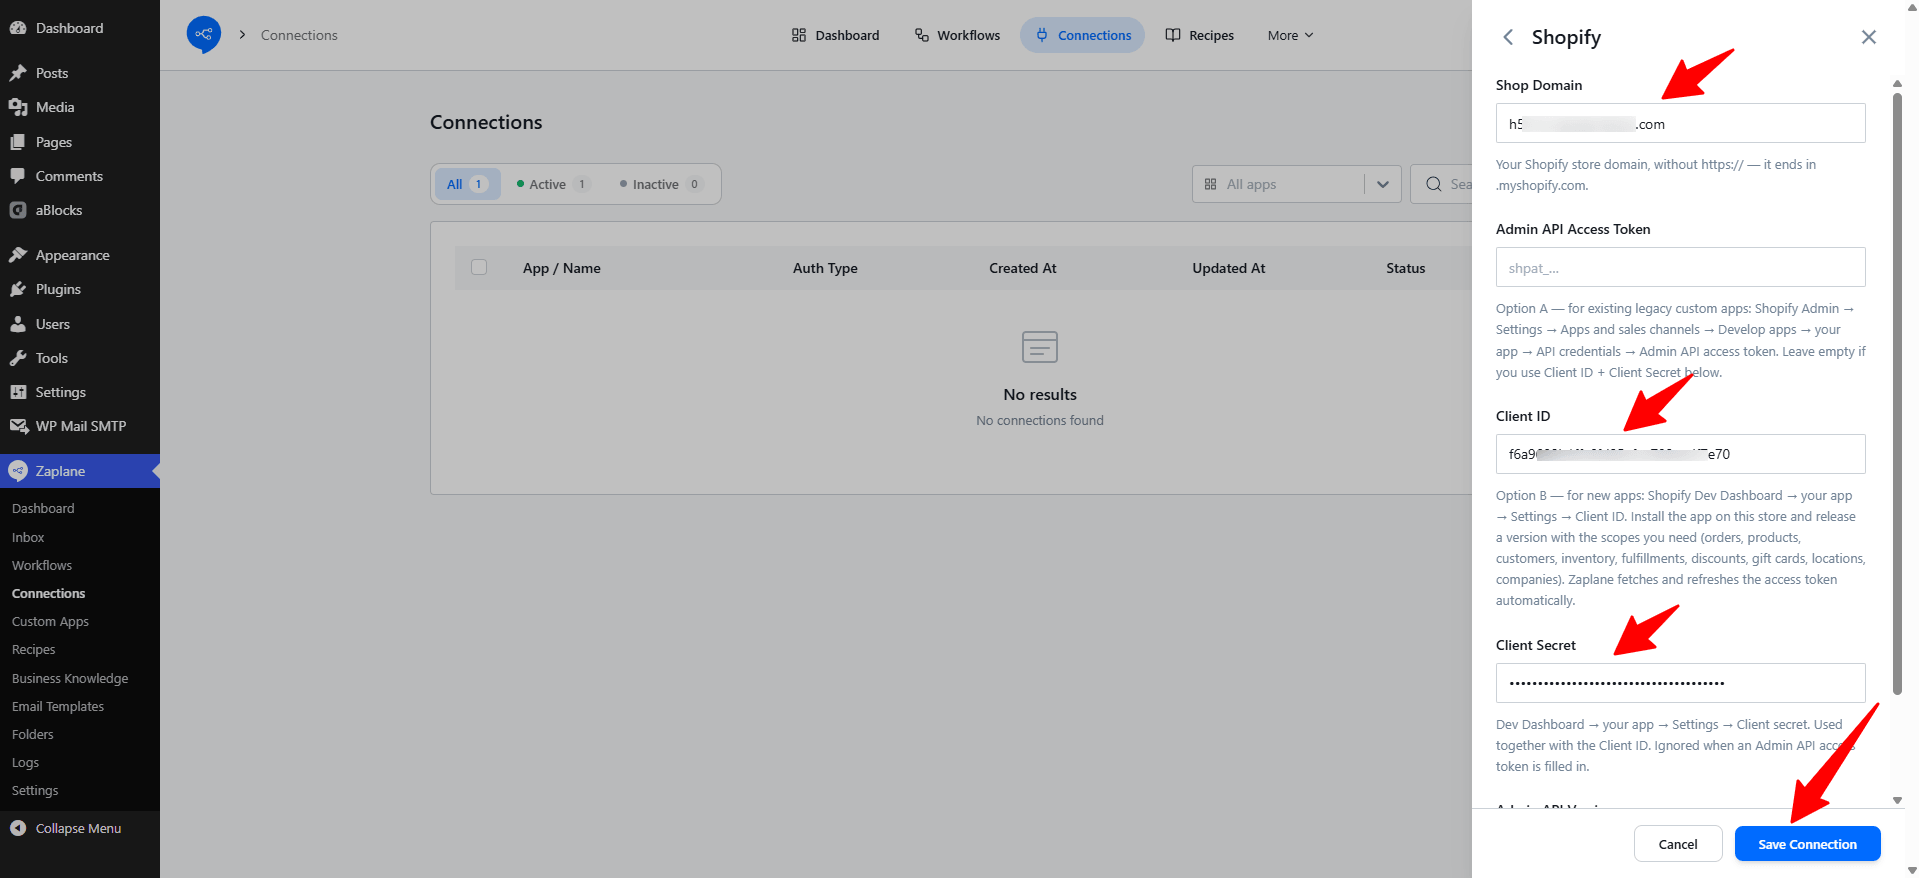
Step 10: Enter Your Shopify Details
Fill in the following fields, then click Save Connection:
https://.Leave Admin API Access Token empty when you use a Client ID and Client Secret. That field is only for existing legacy custom apps.
Part 3: Add the Create Order action
Step 11: Create a Workflow
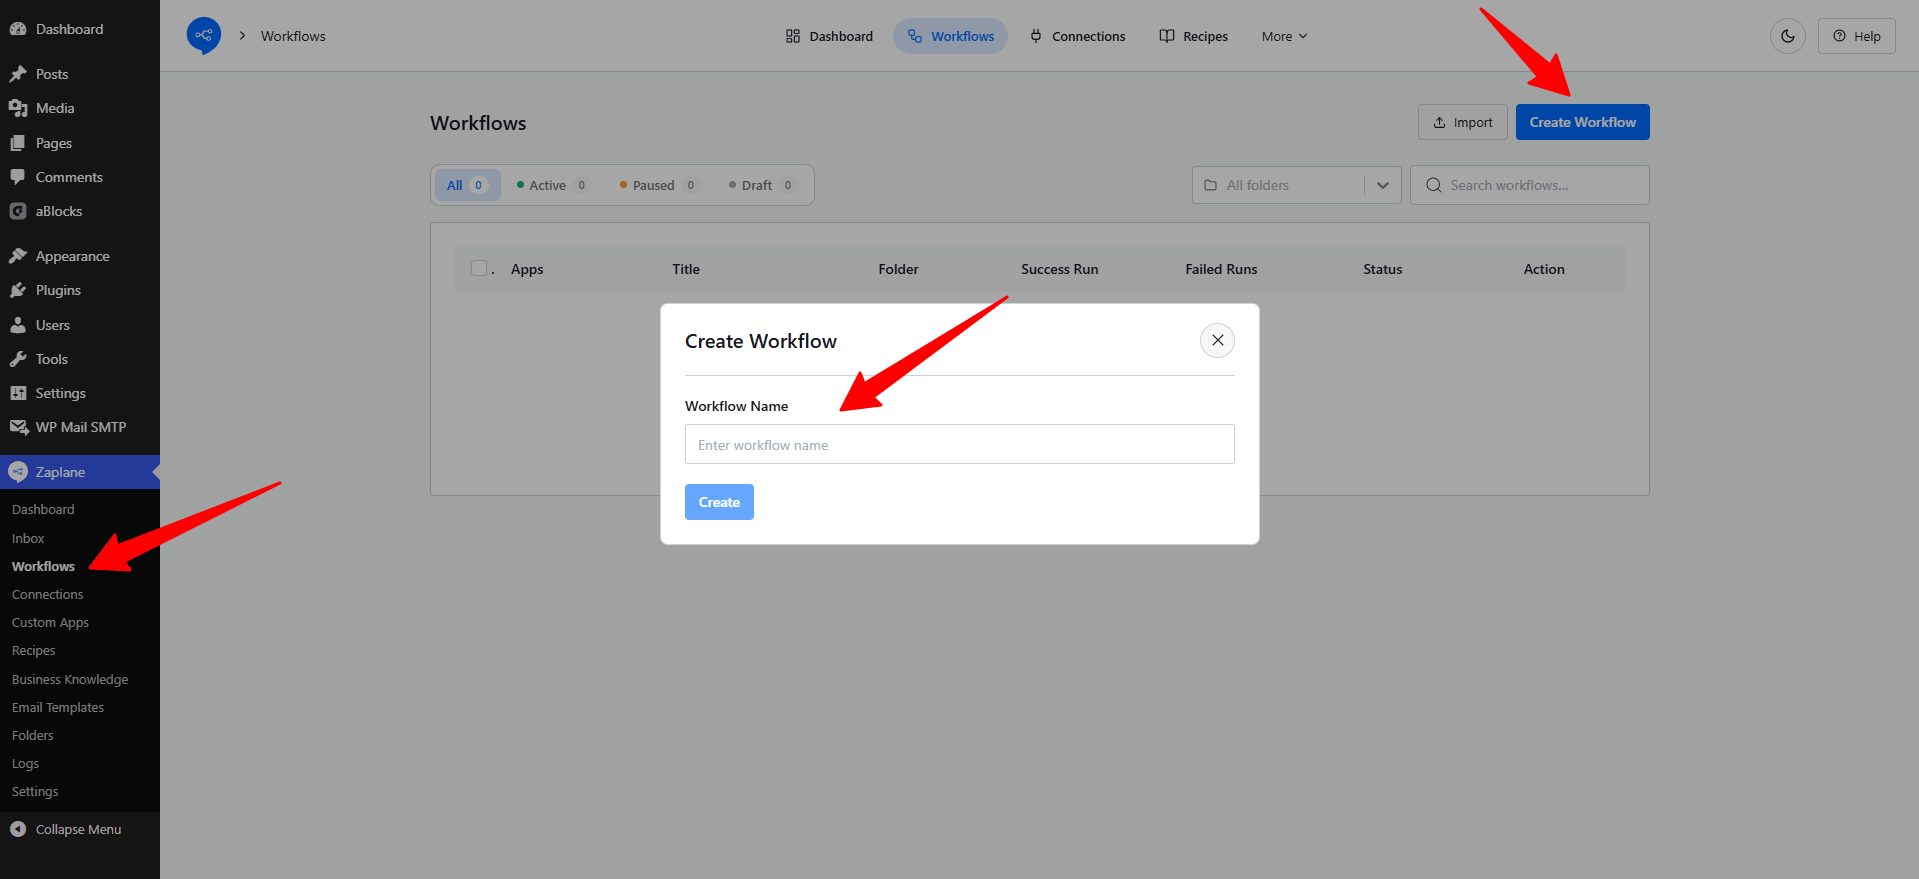
Go to Zaplane > Workflows from your WordPress dashboard, then click Create Workflow to open the workflow editor.
Before adding a Shopify action, you need to set up a trigger first. Here is how to do it quickly:
Step 12: Add an action
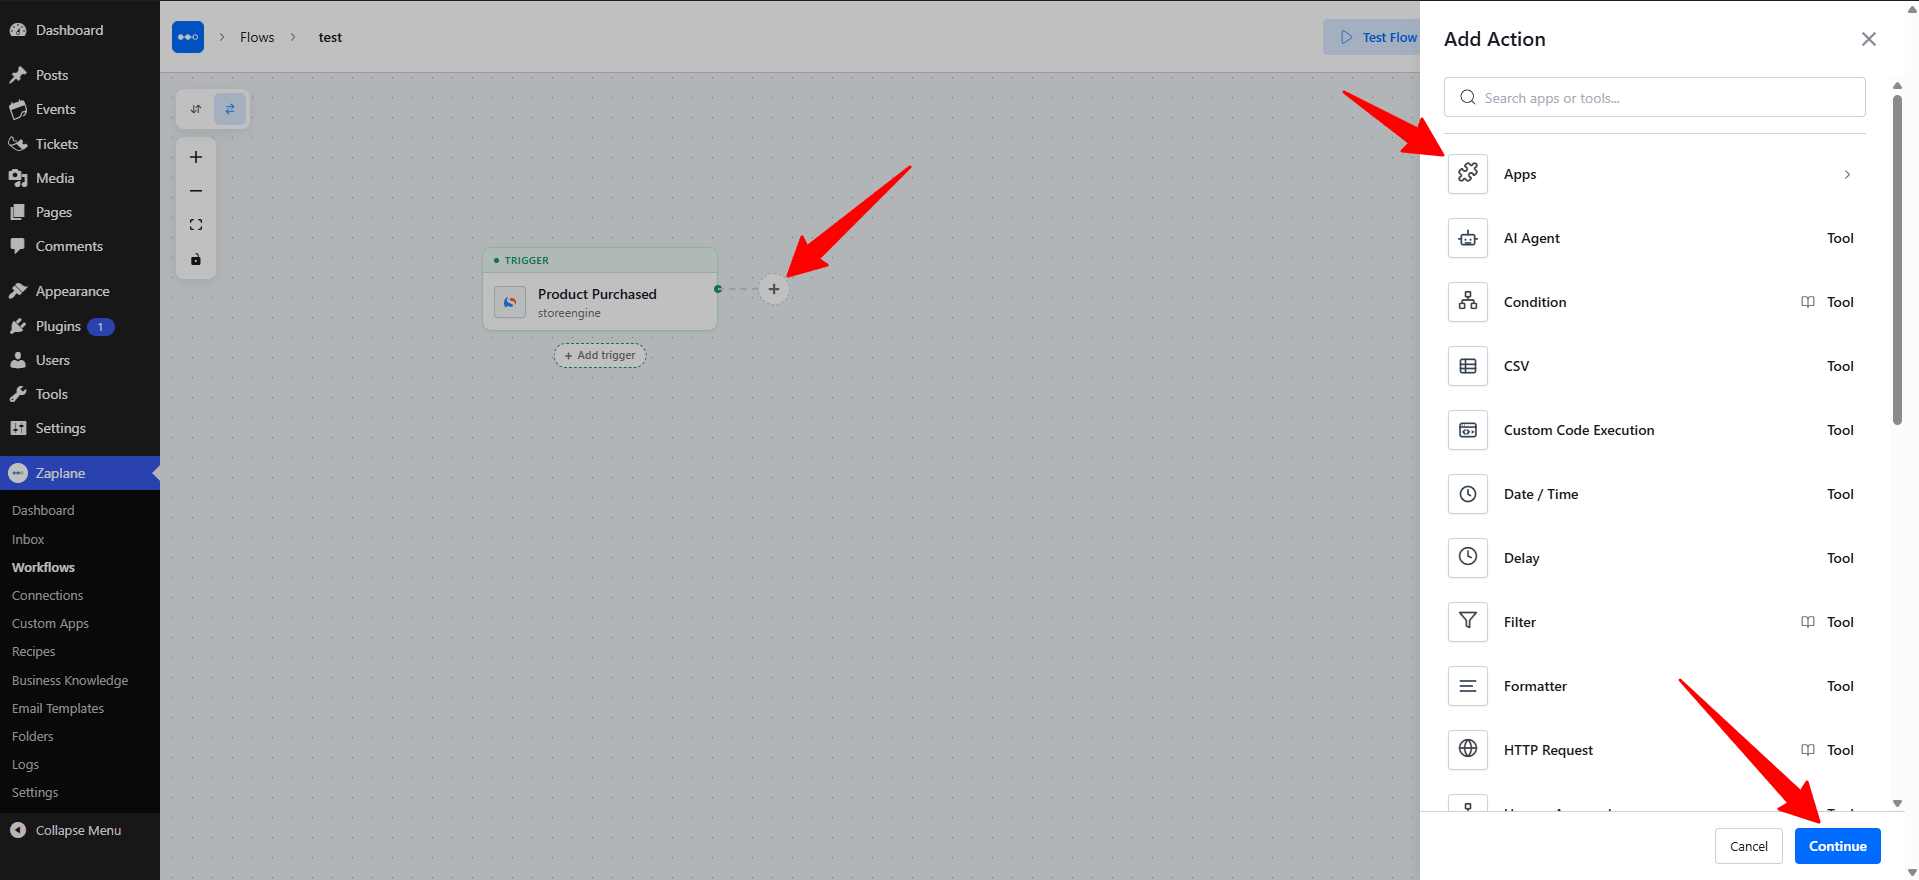
Open your workflow in Zaplane → Workflows. Click the + button next to your trigger. In the Add Action panel, choose Apps and click Continue.
Step 13: Choose Shopify
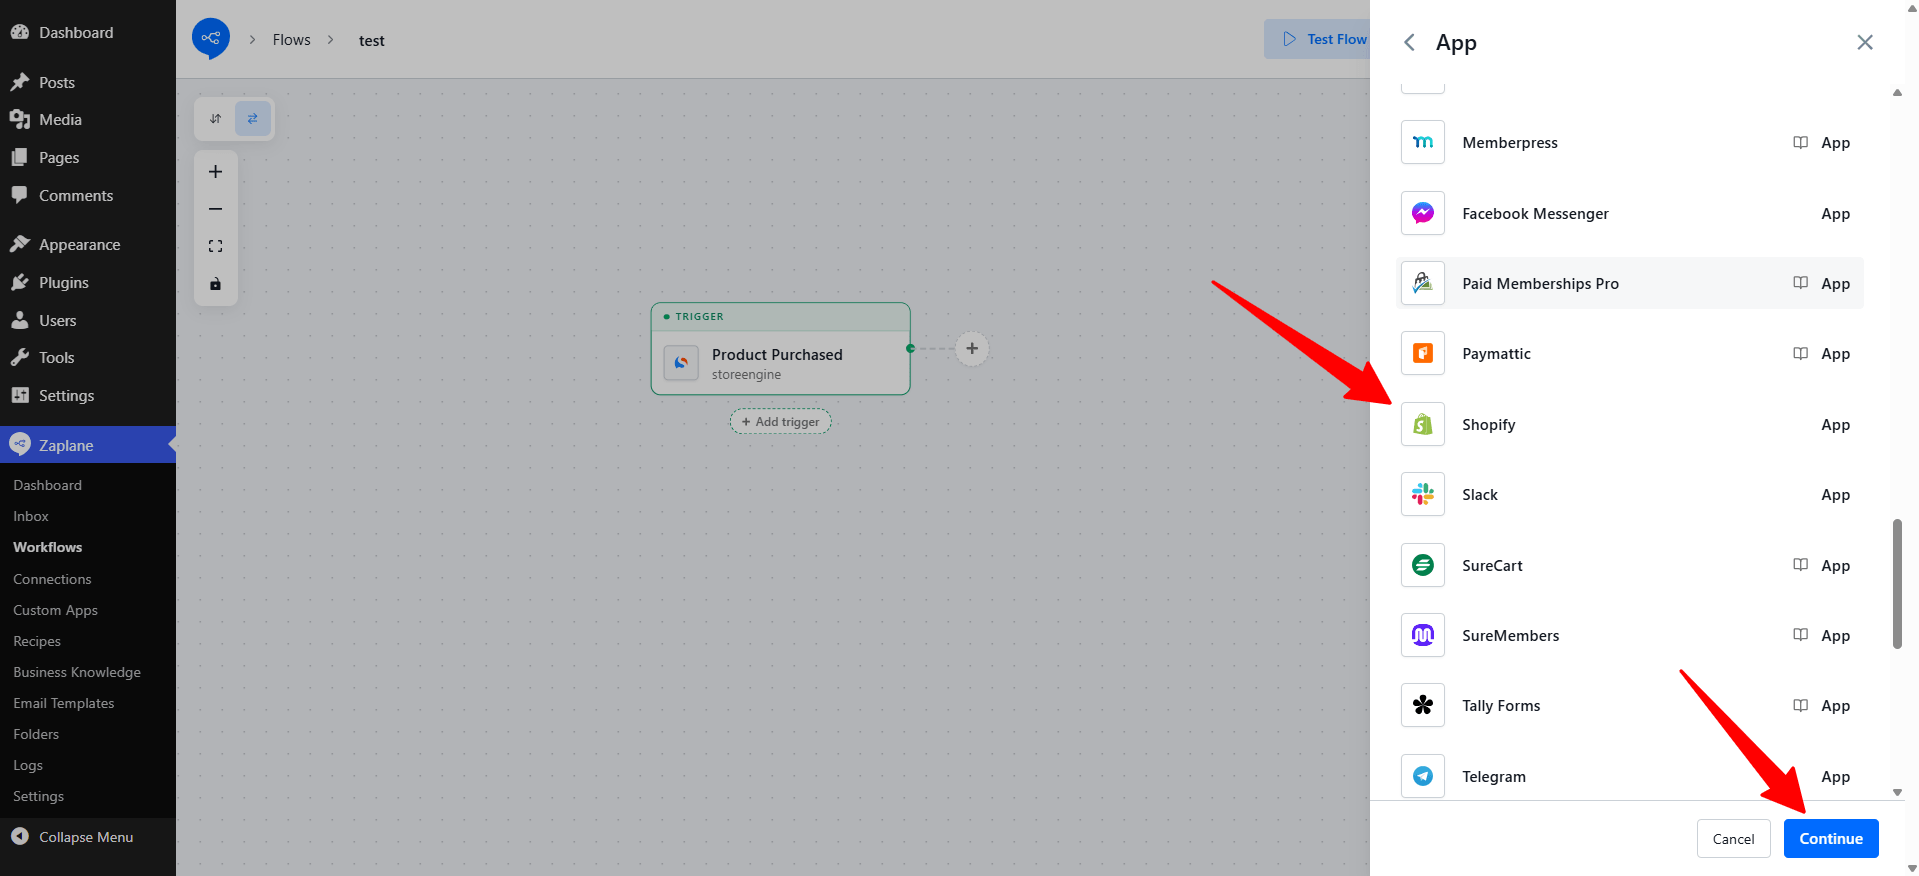
Scroll the app list, select Shopify, and click Continue.
Step 14: Select the action and your connection
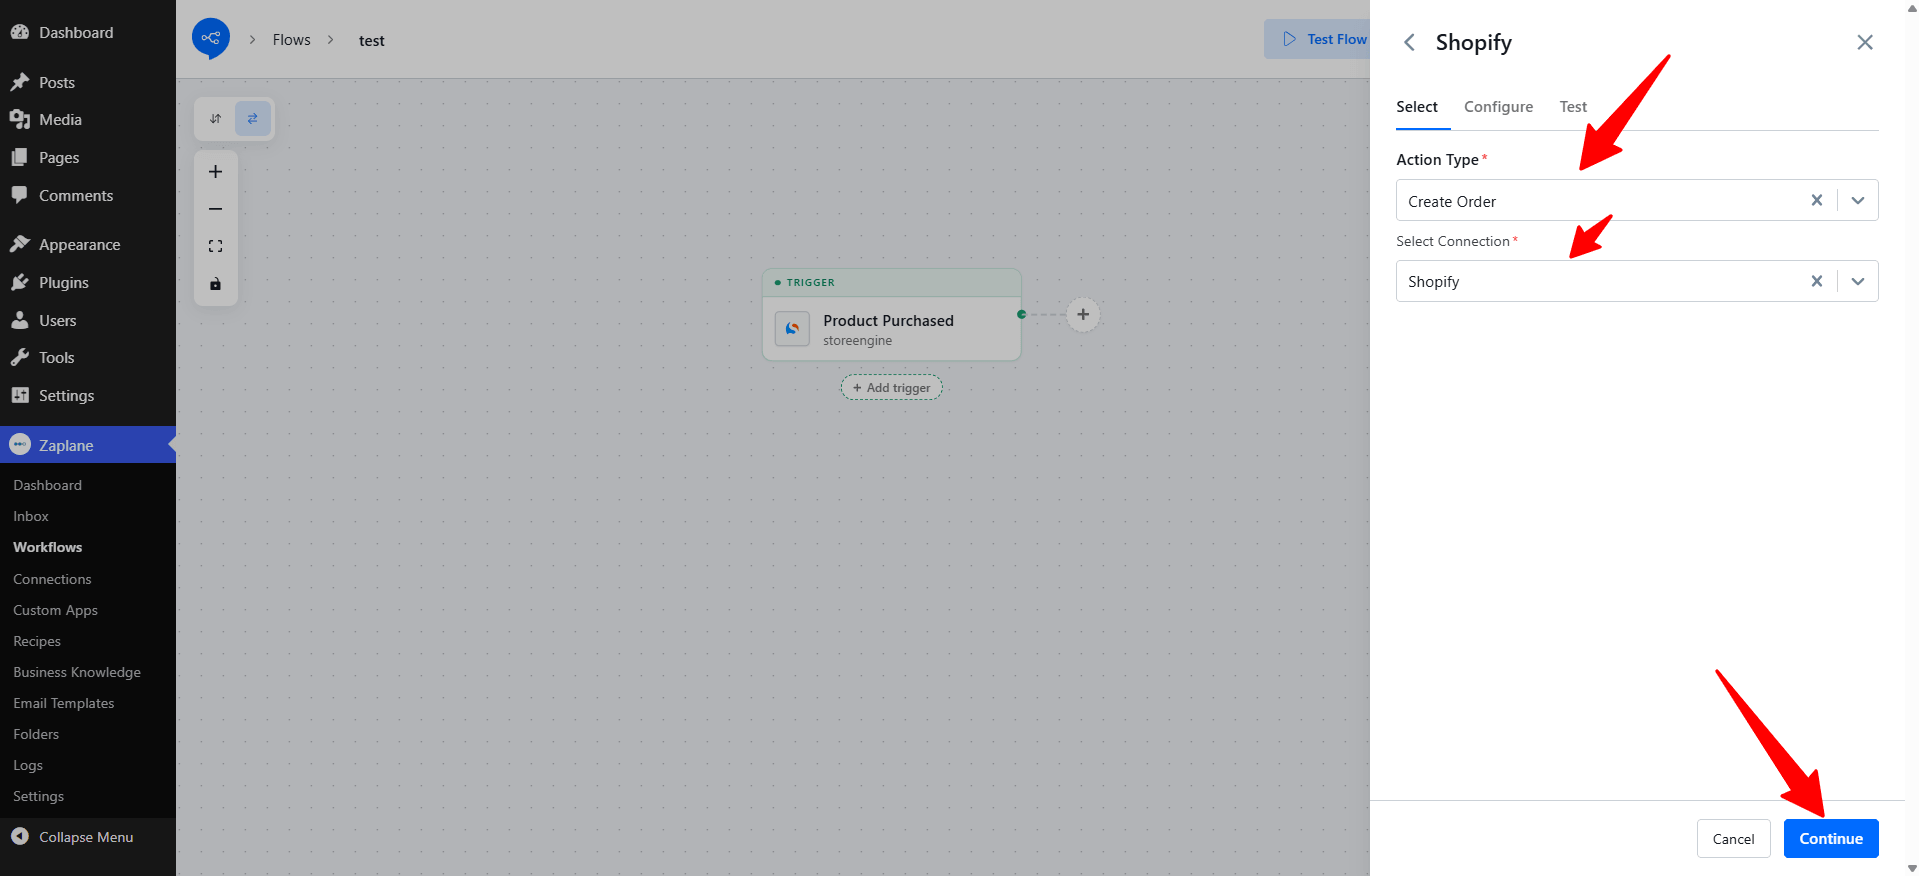
On the Select tab, set Action Type to Create Order and select Connection to the Shopify connection you saved in Part 2. Then click Continue.
Step 15: Configure the order
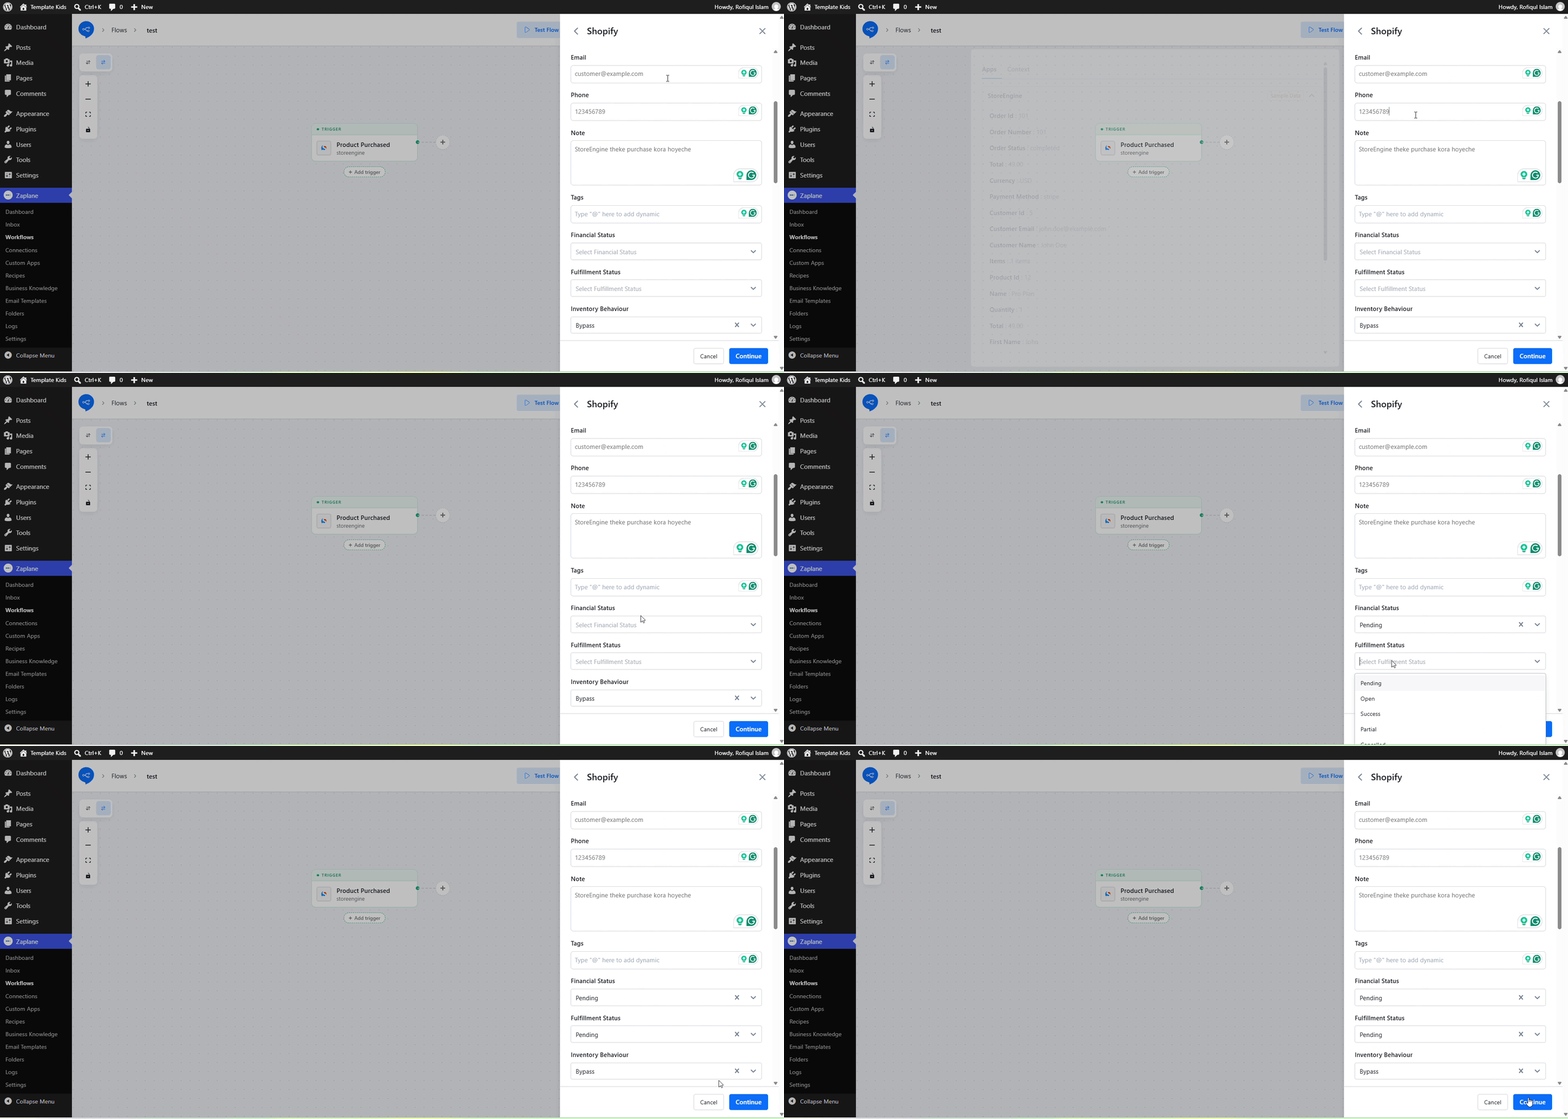
On the Configure tab, fill in the order details, for example:
Fields that show a data icon accept values from earlier steps, so you can fill them with the buyer’s details from your trigger. Type @ in a field to insert dynamic data. Scroll the panel to see every field, then click Continue.
Step 16: Test the action
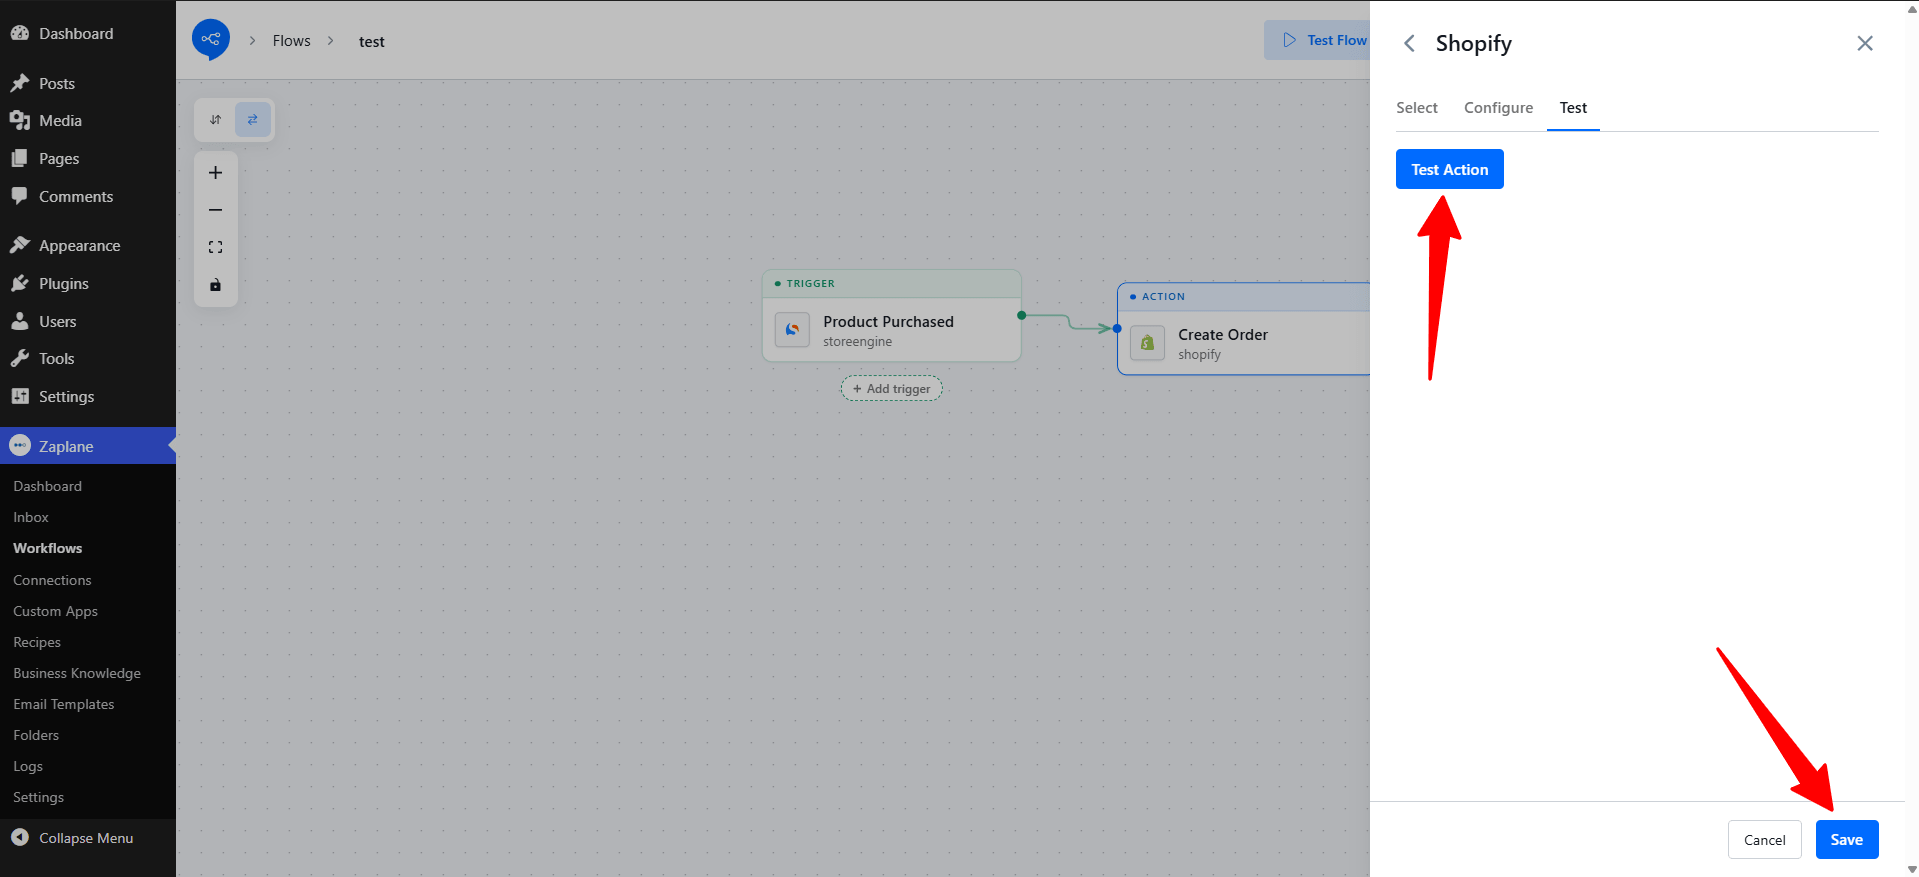
Open the Test tab and click Test Action. Check your Shopify admin to confirm the order was created, then click Save.
Step 17: Save and activate your workflow
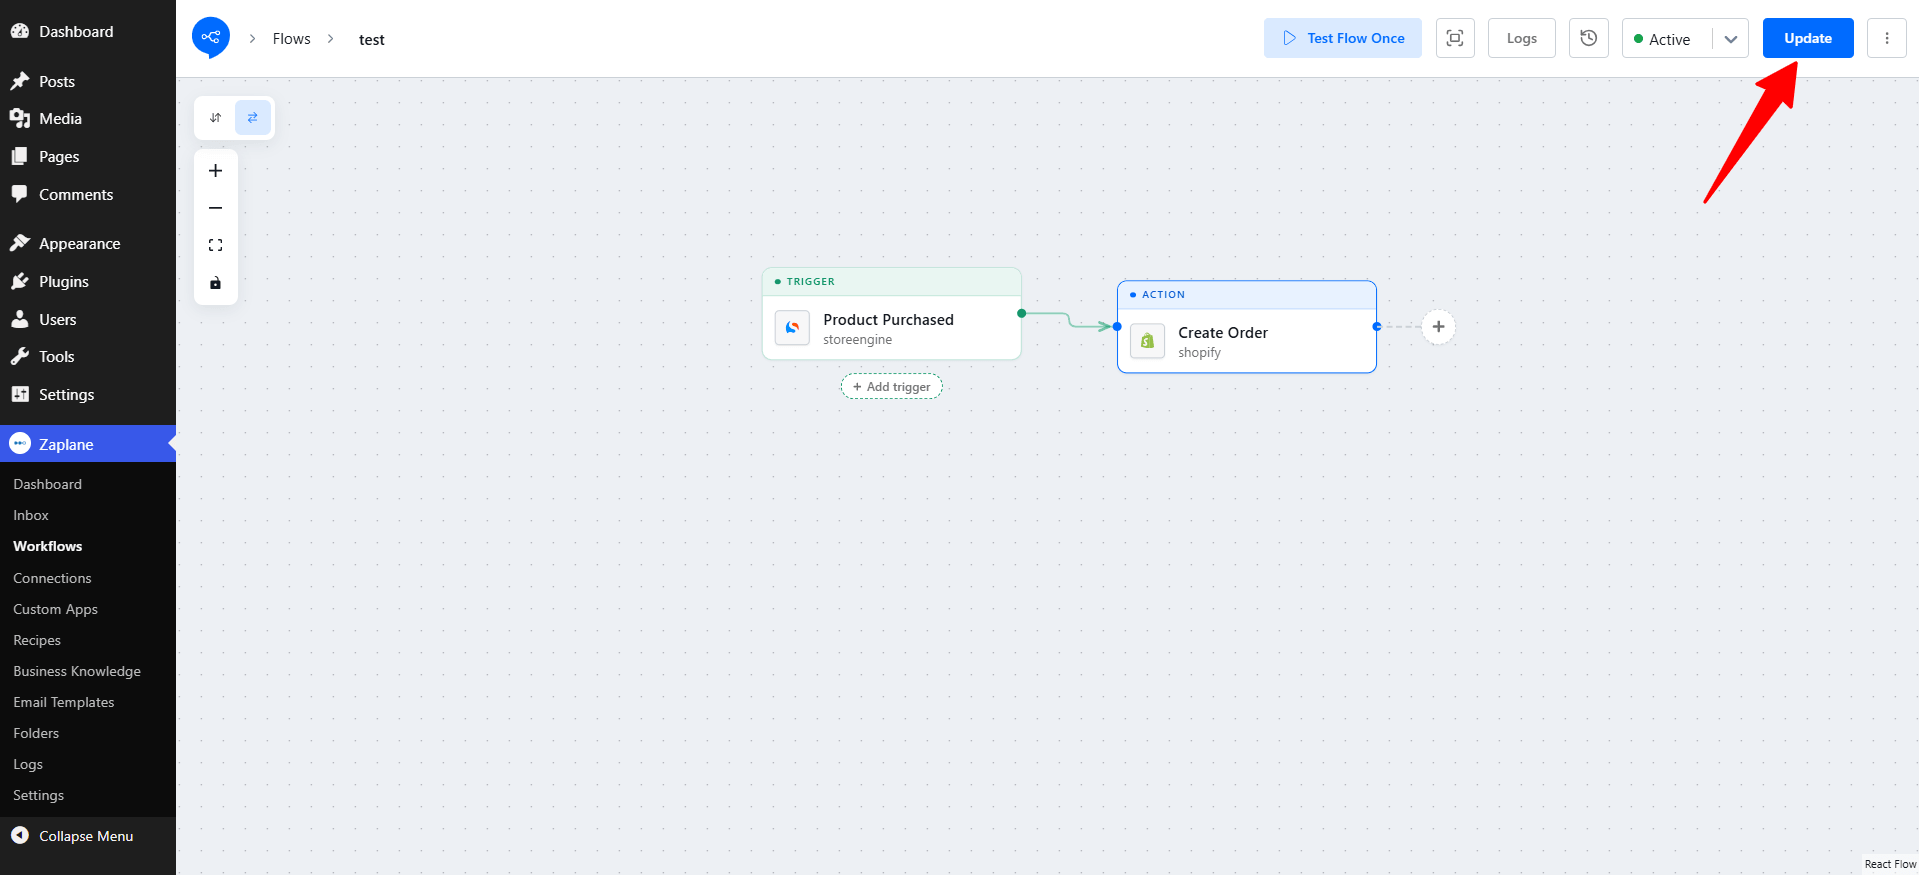
Your workflow now shows your trigger followed by a Create Order (Shopify) action. Make sure the status is Active, then click Update in the top-right corner. You can also use Test Flow Once to run the whole workflow manually.
What’s next?
Click the + button after the action to add more steps, such as sending a confirmation email or notifying your team on Slack.
Troubleshooting
.myshopify.com and has no https://, and that the Client ID and Client Secret are copied in full.