

This guide walks you through adding a FluentCRM action to a Zaplane workflow, so that whenever your trigger runs, Zaplane can automatically create a contact. Make sure your workflow already has a trigger set up before starting these steps.
Step 1: Add an Action
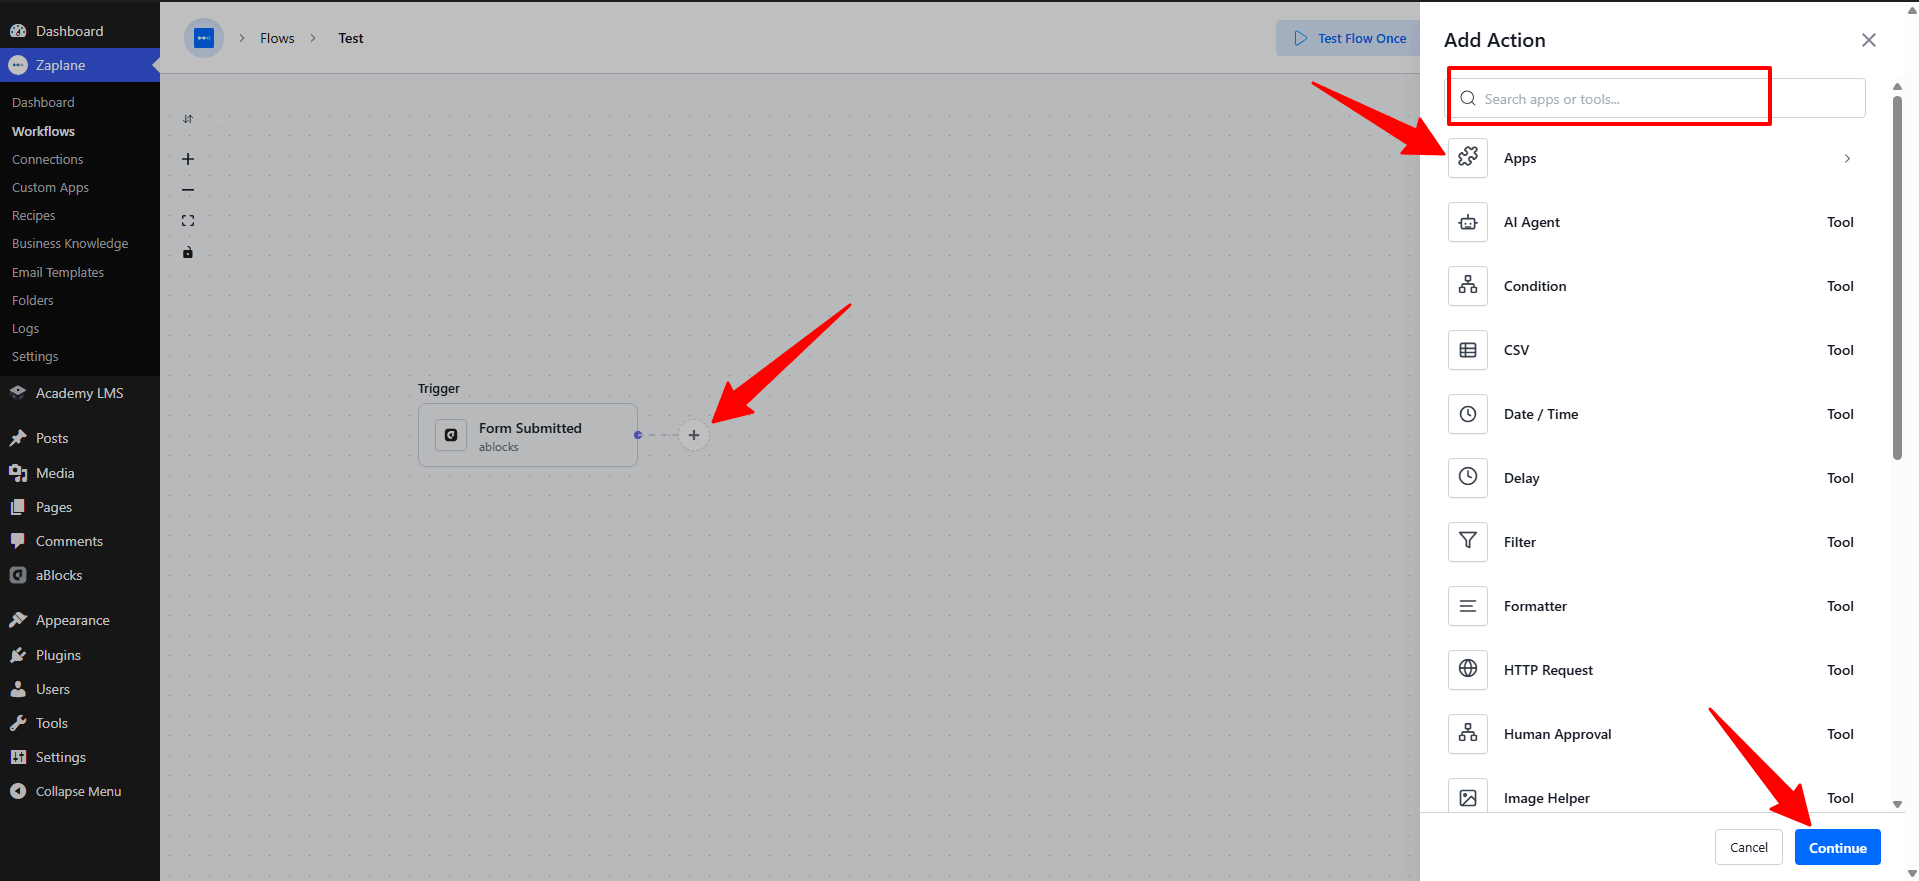
On your workflow canvas, click the + icon next to your trigger to open the Add Action panel.
Step 2: Select the App
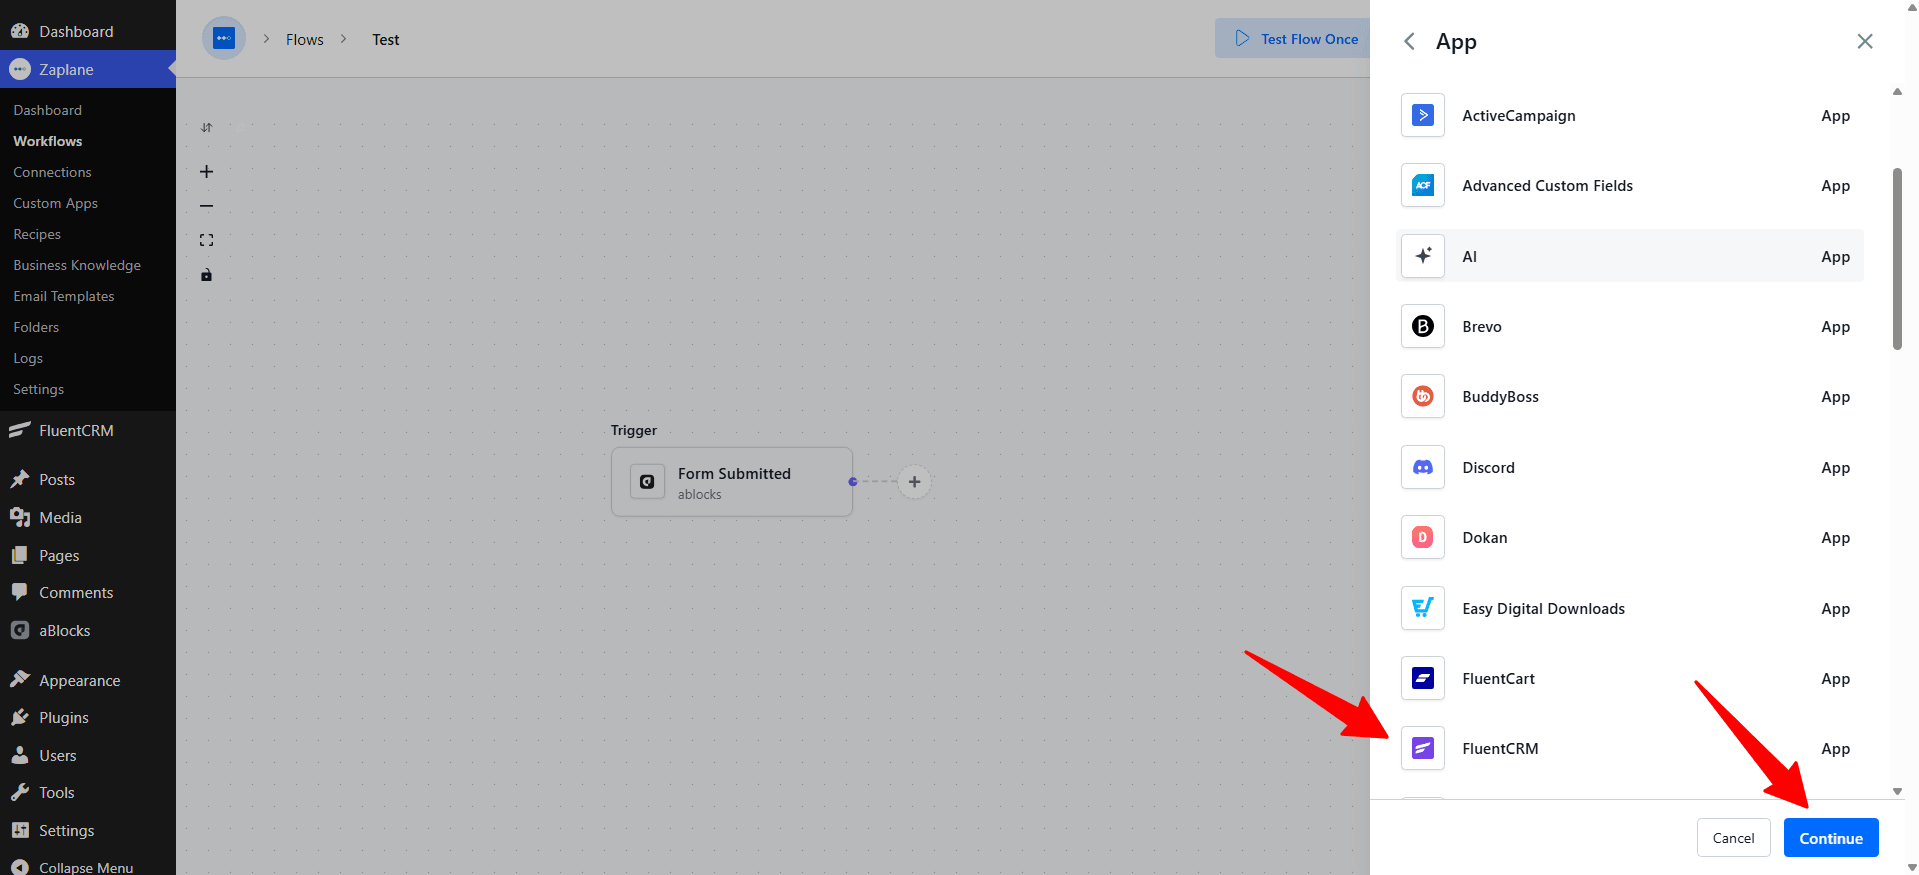
Click Apps to browse available apps, then search for and select FluentCRM from the list.
Step 3: Choose the Action Type
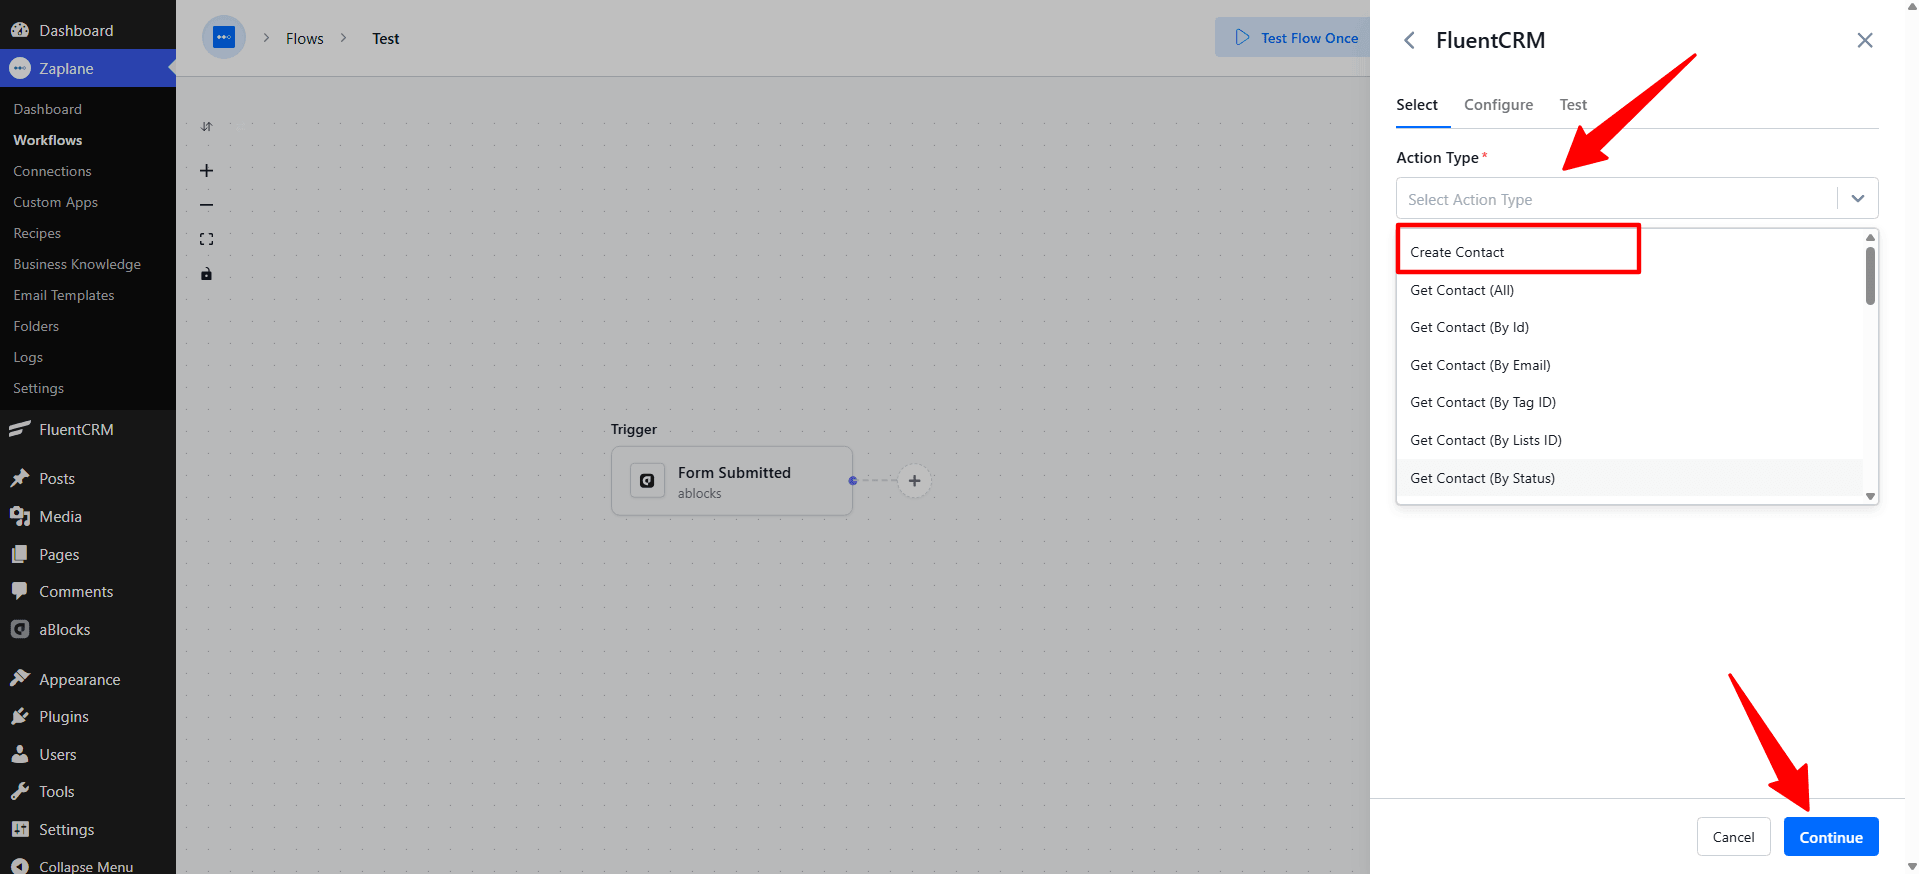
Several action types are available for FluentCRM. For this guide, select Create Contact, then click Continue.
Step 4: Configure the Action
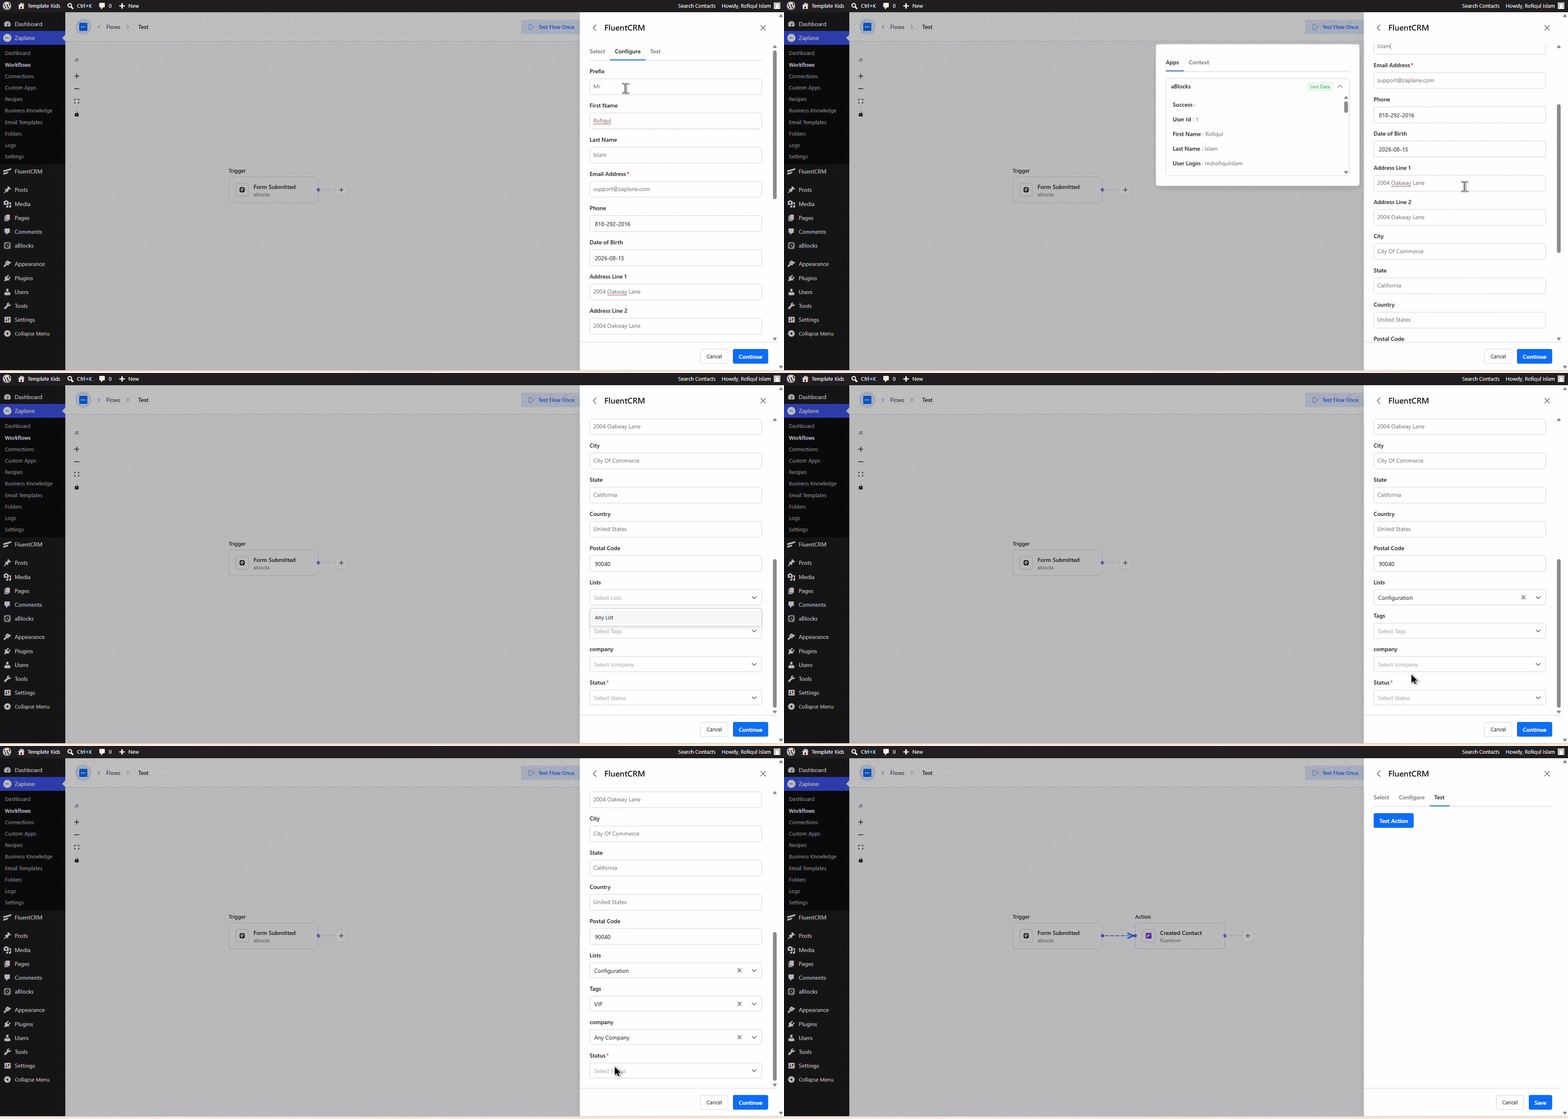
On the Configure tab, fill in the contact’s details — Prefix, First Name, Last Name, Email Address, Phone, Date of Birth, and address fields like Address Line 1 and Address Line 2 — either with static text or by mapping dynamic data from your trigger. Click Continue when done.
Step 5: Test the Action
On the Test tab, click Test Action to run the action with sample data. You’ll see the Input and Output for the run, confirming the contact was created successfully. Once you’re satisfied, click Save.
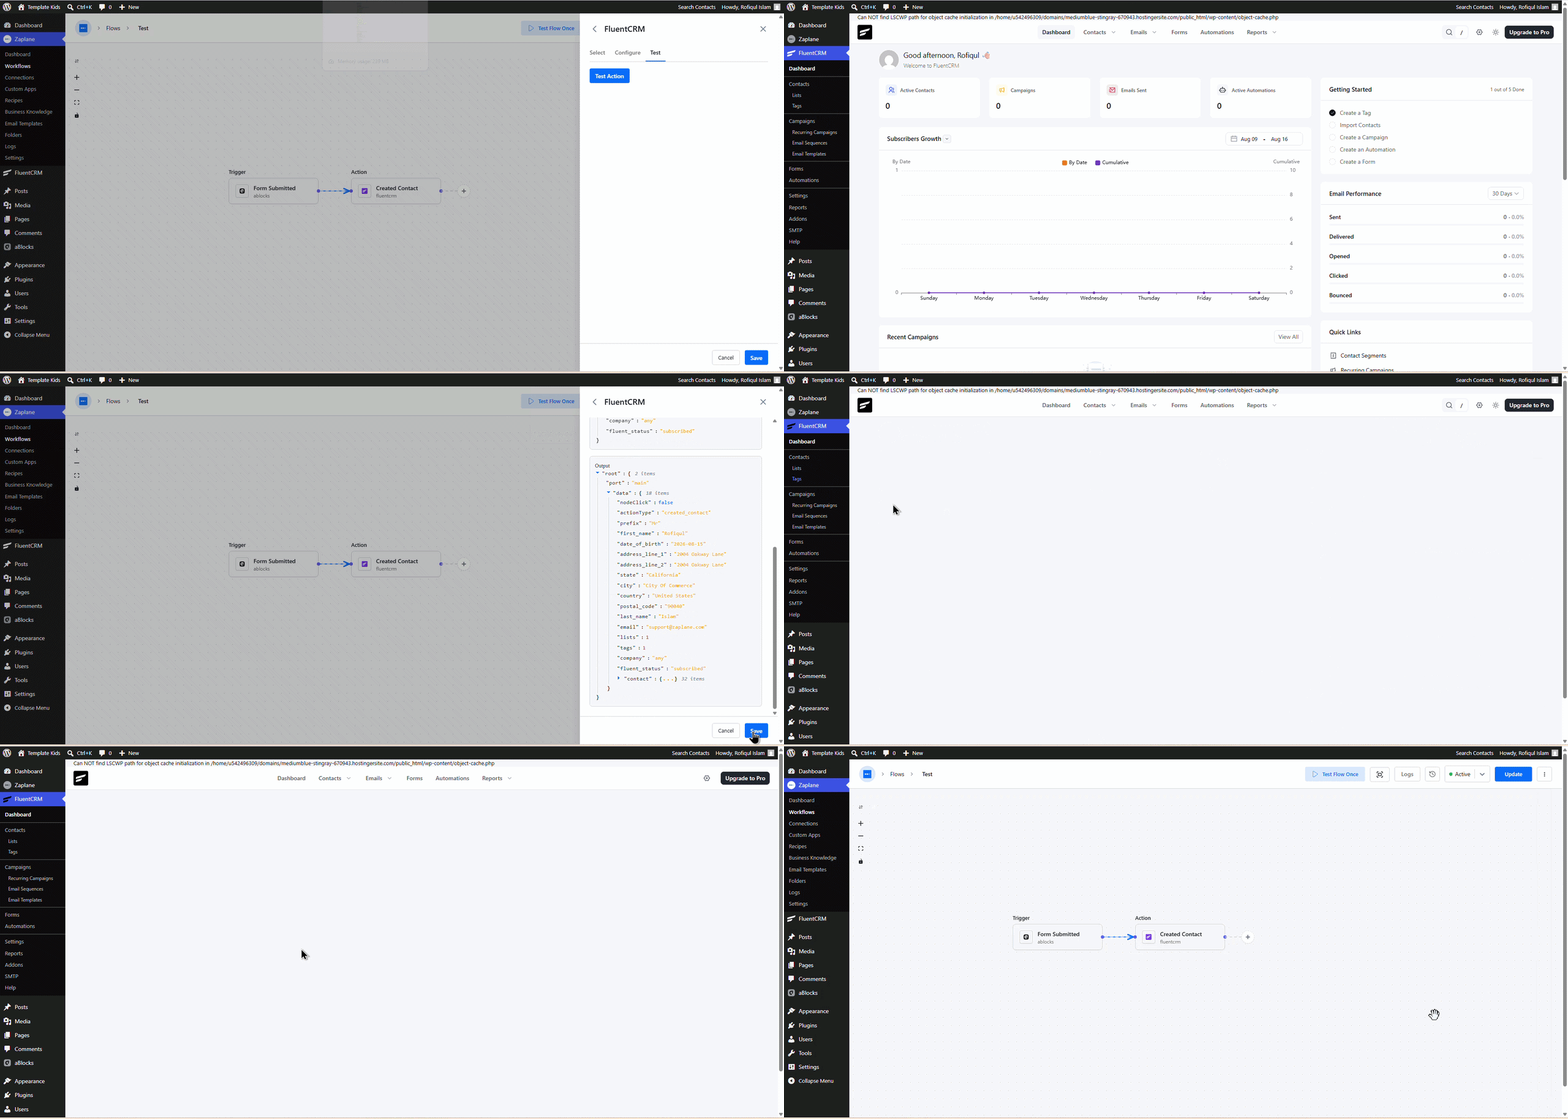
Step 6: Update and Activate the Workflow
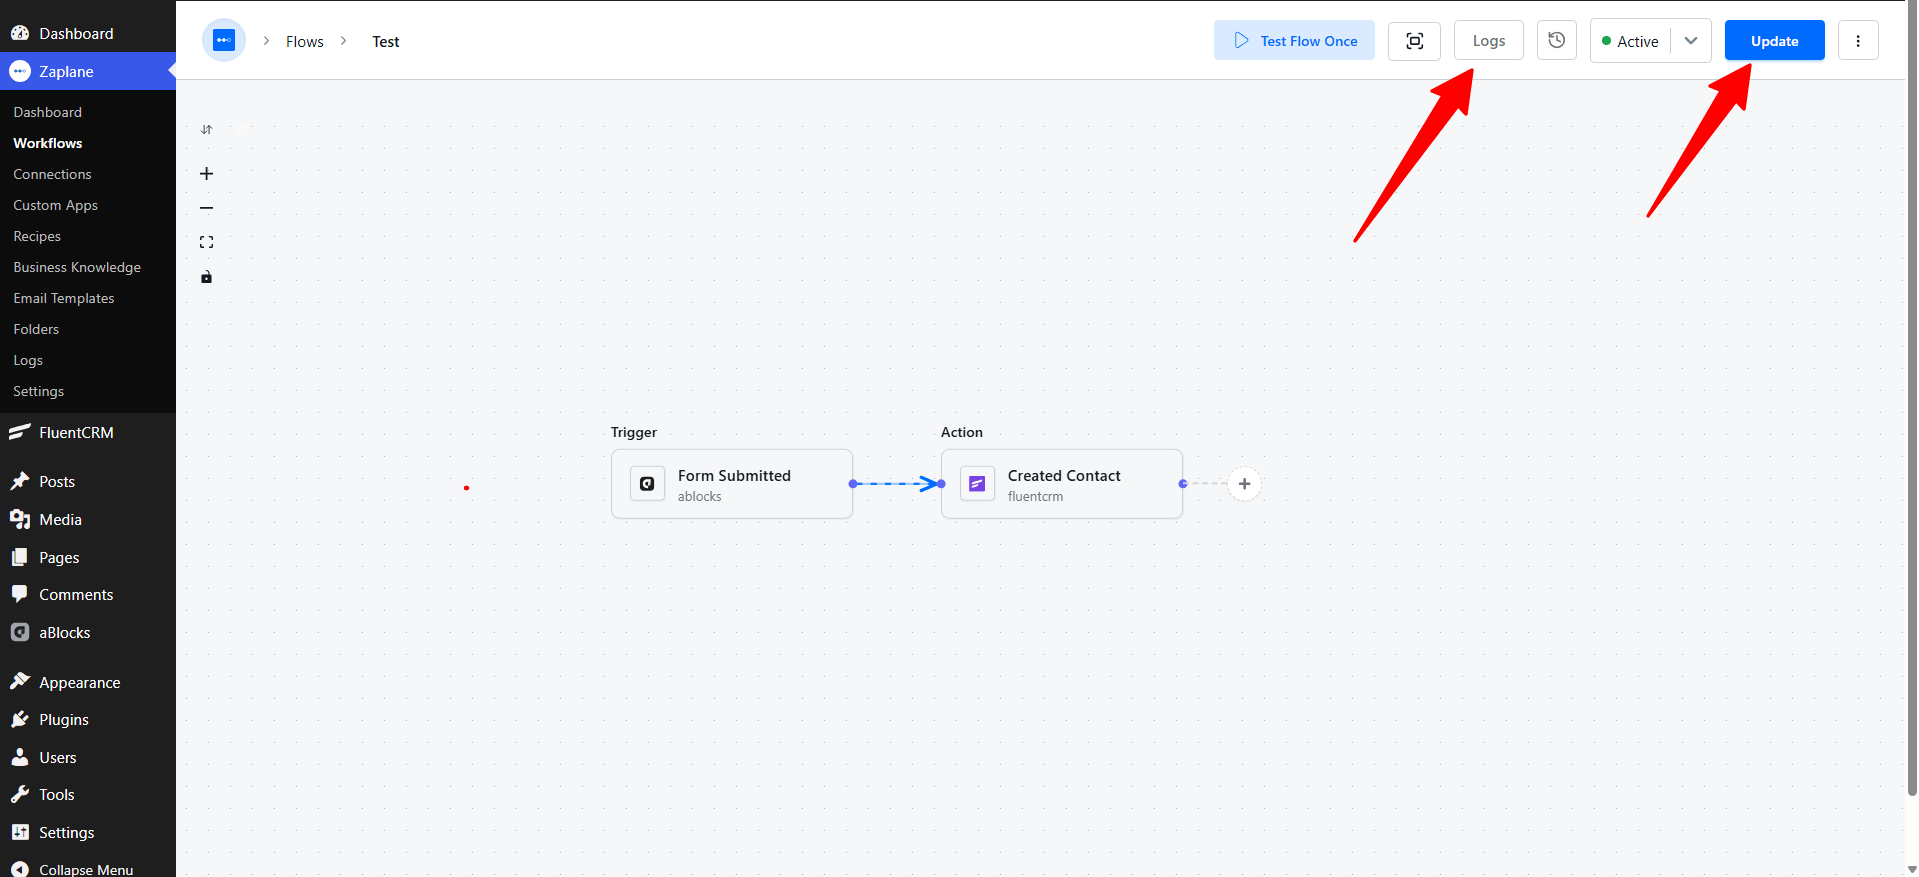
Back on the workflow canvas, click Update to save your changes, and make sure the workflow status is set to Active. You can view execution results anytime from the Logs.
Done!
Your Zaplane workflow is now connected to FluentCRM. Every time the trigger runs, a new contact will be automatically created.