

This guide walks you through adding a Manual trigger to a Zaplane workflow. Unlike other triggers, Manual doesn’t connect to an outside app or fire on its own — it only starts when you run it yourself, either from the Workflows list or programmatically. This is useful for on-demand jobs and for testing a workflow while you’re building it. Let’s go through the process step by step.
Step 1: Create a Workflow
- Go to Zaplane > Workflows, then click Create Workflow.
Step 2: Add a Manual Trigger
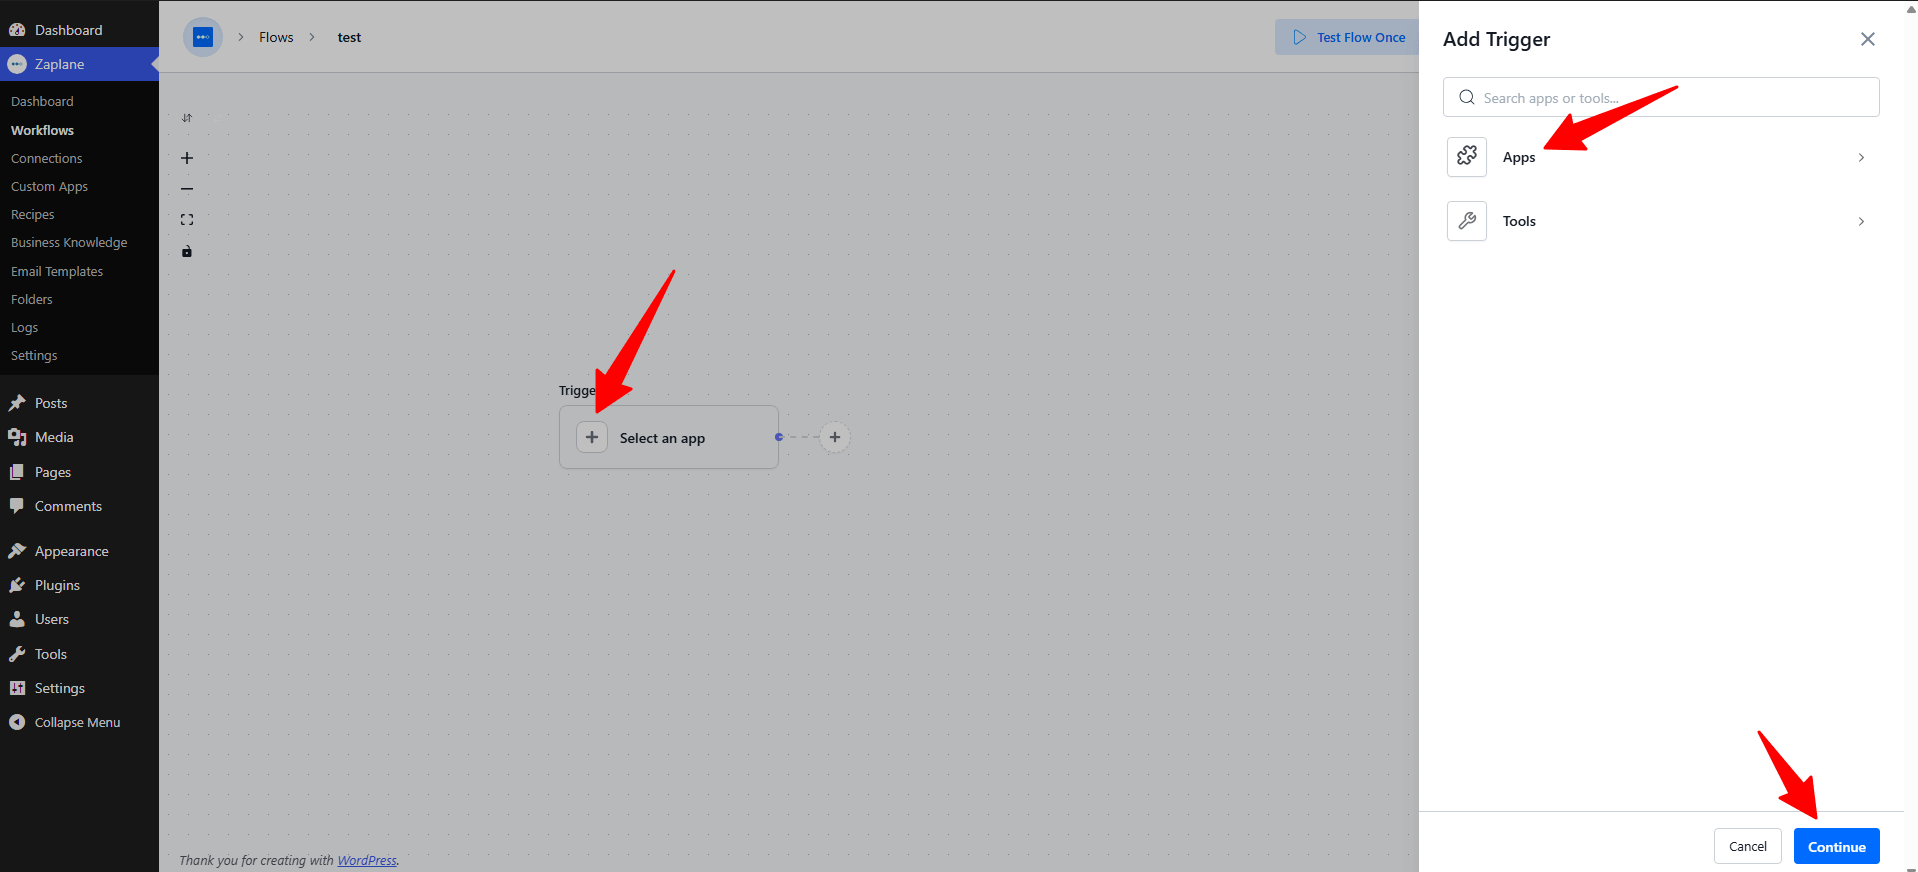
- Inside the workflow editor, click Select an app under the Trigger box, then choose Apps.
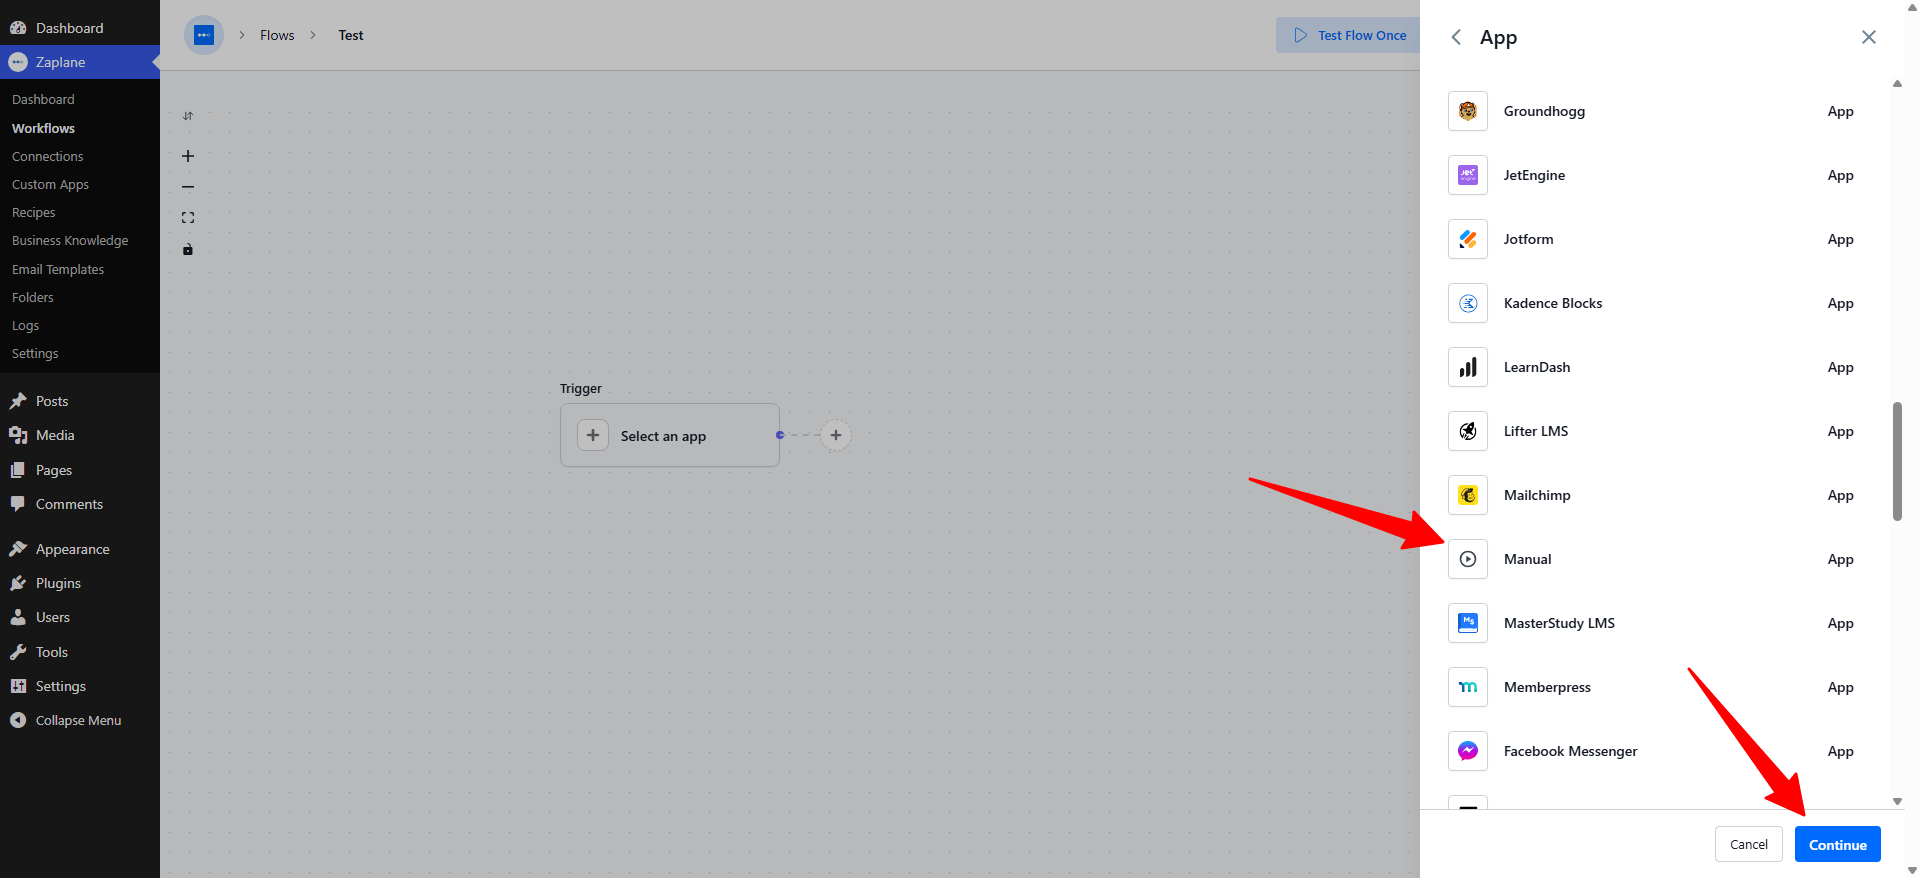
- Search for and select Manual, then click Continue.
Step 3: Choose the Trigger Type
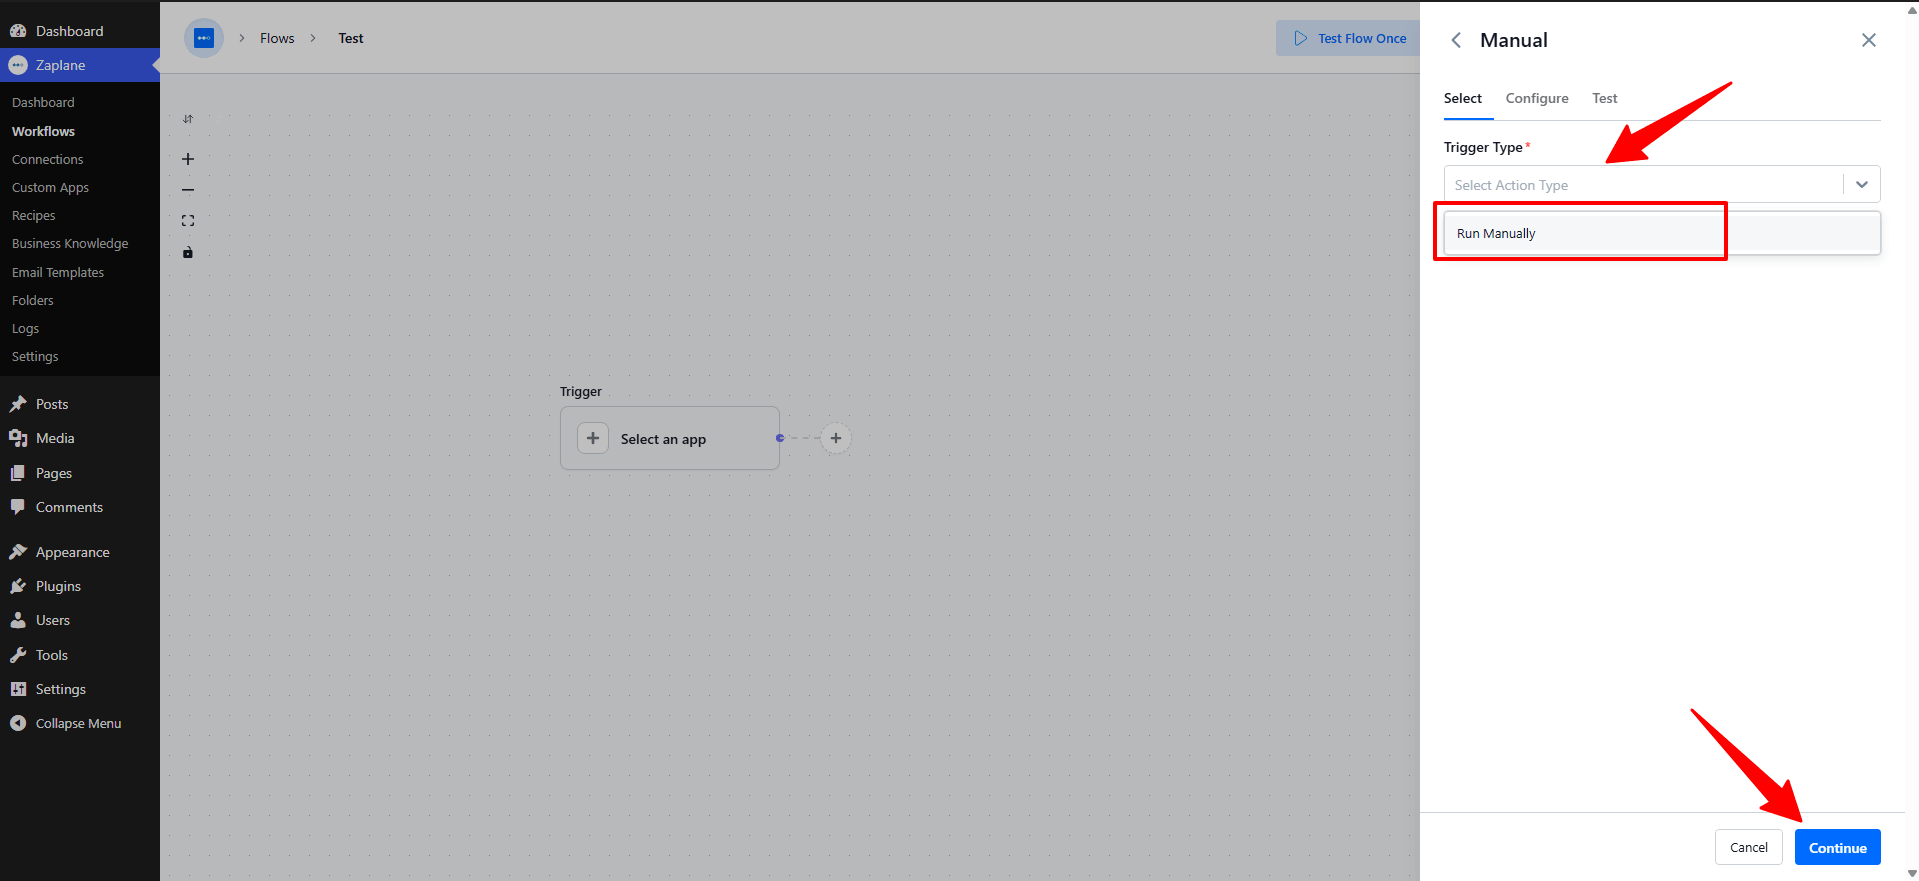
- On the Select tab, open the Trigger Type dropdown and choose Run Manually, then click Continue.
Step 4: Review the Configuration
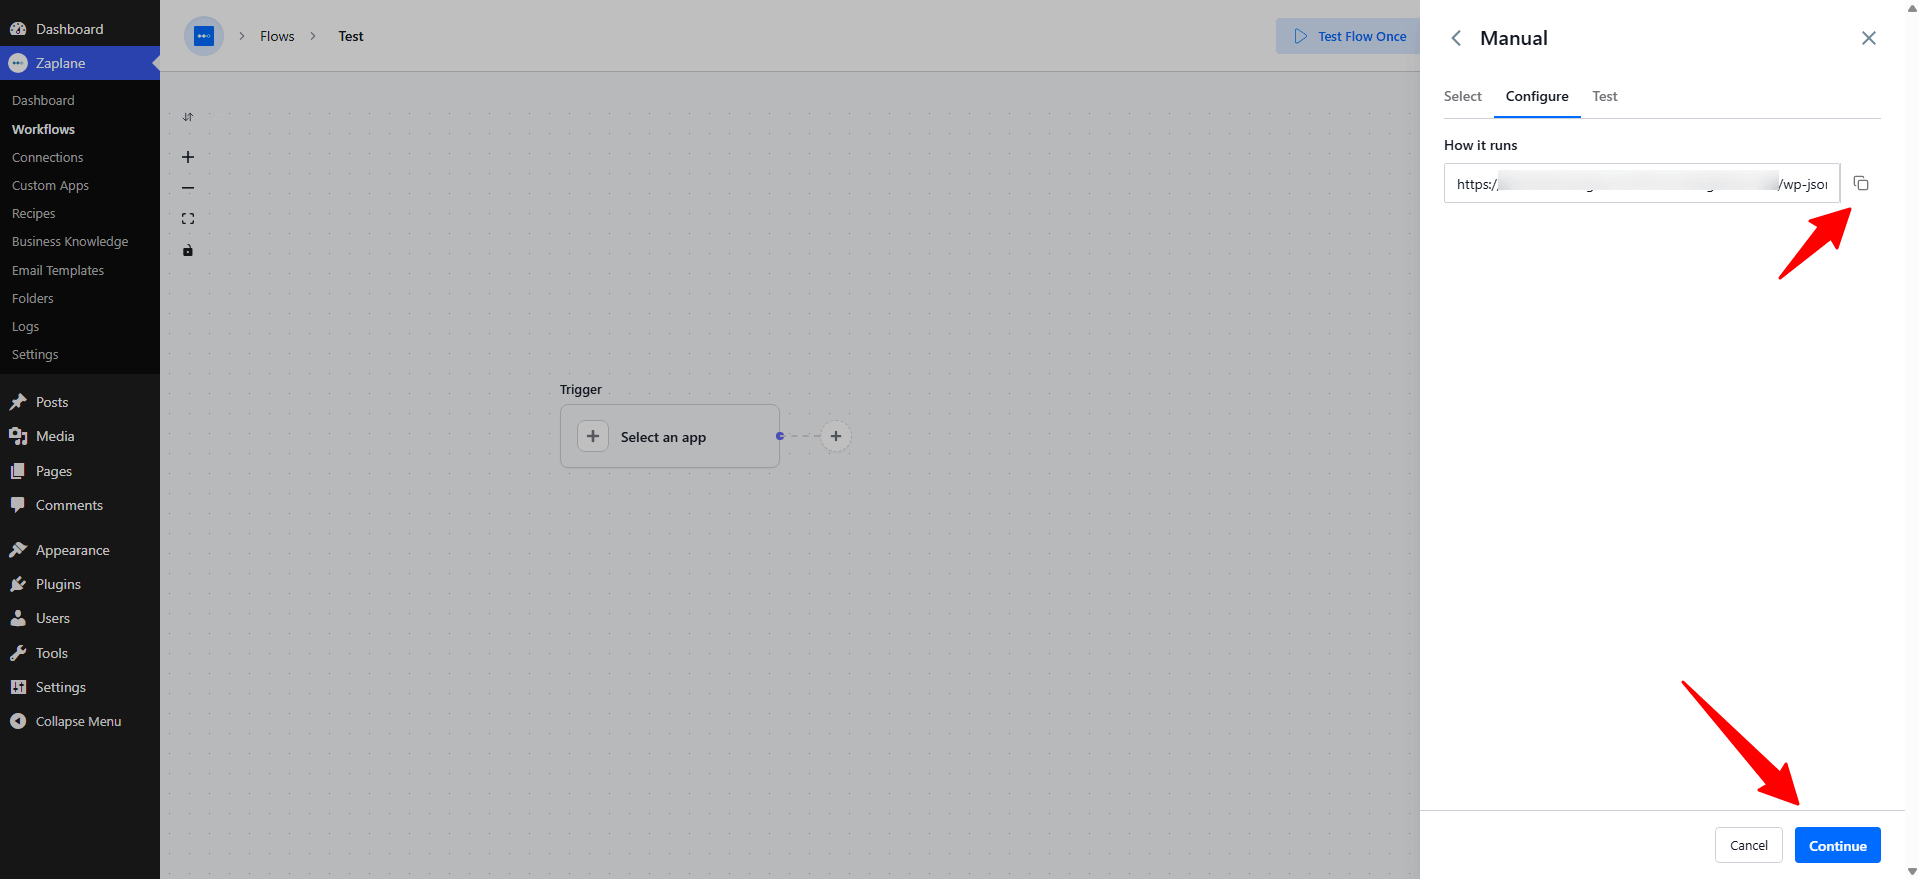
- On the Configure tab, you’ll see a reference URL under “How it runs” — this shows how the workflow can be triggered programmatically. No fields need to be filled in here; just click Continue.
Step 5: Test and Activate the Workflow
- On the Test tab, click Test Trigger to confirm the trigger works, then click Save.
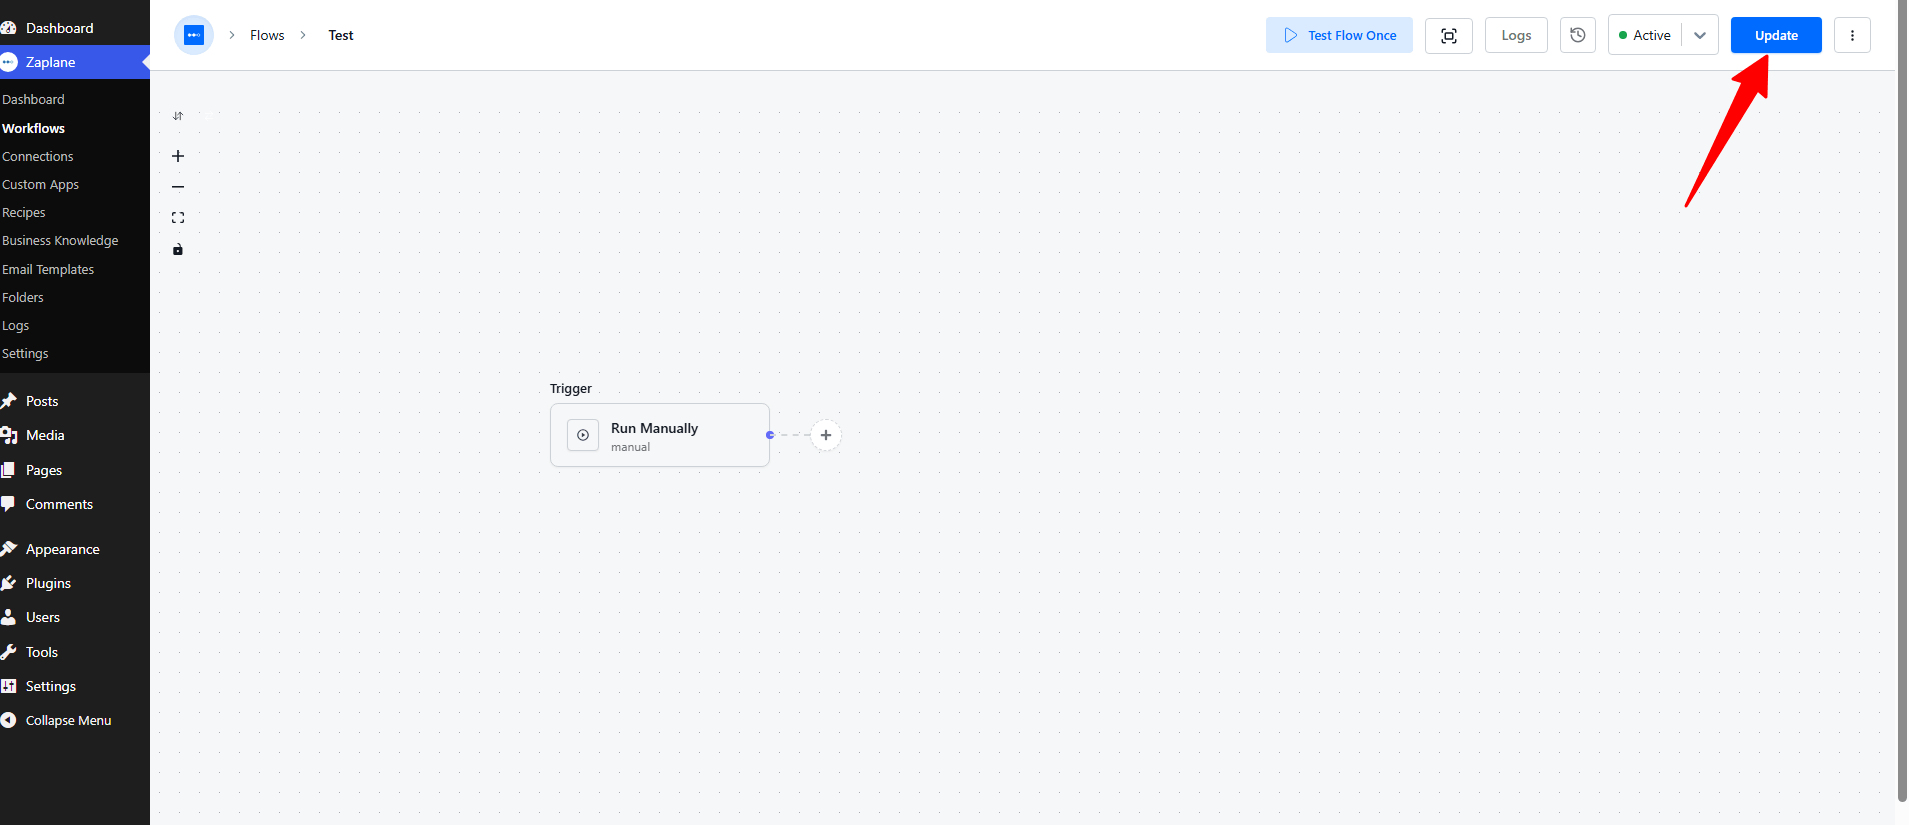
- Finally, toggle the workflow to Active and click Update to publish it.
Step 6: Run the Workflow
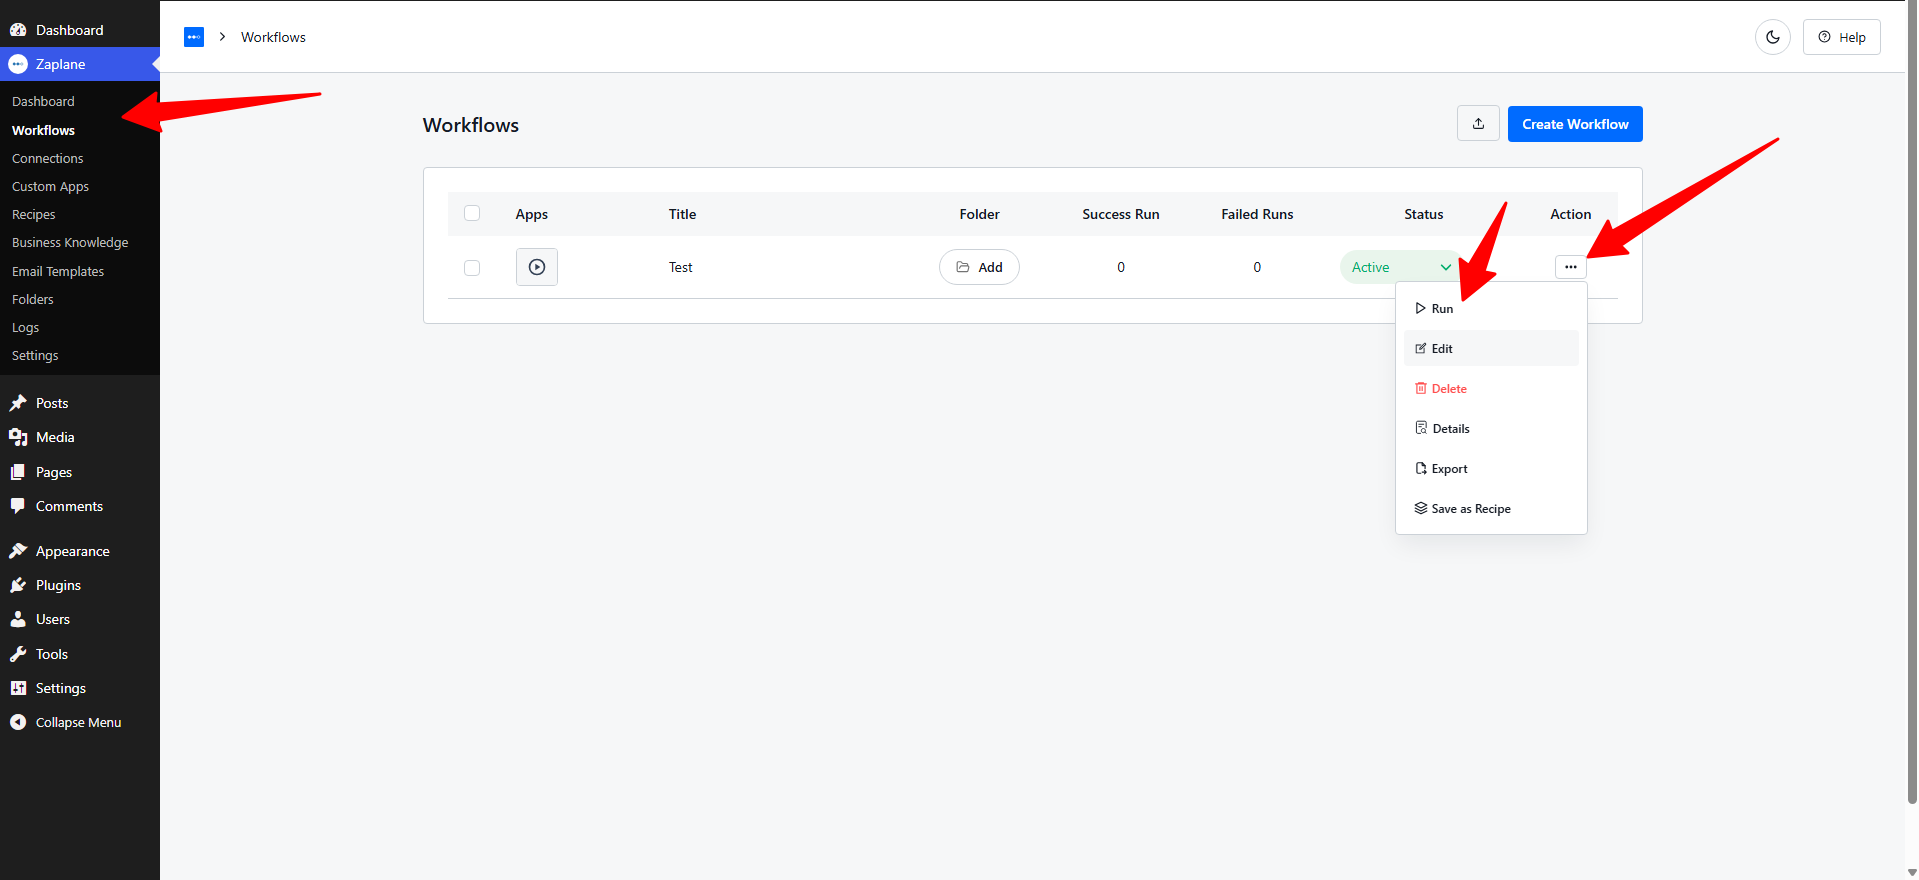
- Go back to Zaplane > Workflows, click the ••• action menu next to your workflow, then choose Run to start it.
You’re all set
Your Manual trigger workflow is ready. It will only run when you start it yourself — from the Workflows list action menu, or programmatically by calling zaplane_run_workflow().