

This guide shows you how to start an automation in Zaplane when something happens in your ActiveCampaign account, for example when a contact subscribes or a form is submitted. It has two parts: a one-time connection to your ActiveCampaign account, then building the workflow. Setup takes about five minutes and needs no code.
Part 1: Connect your ActiveCampaign account (one time)
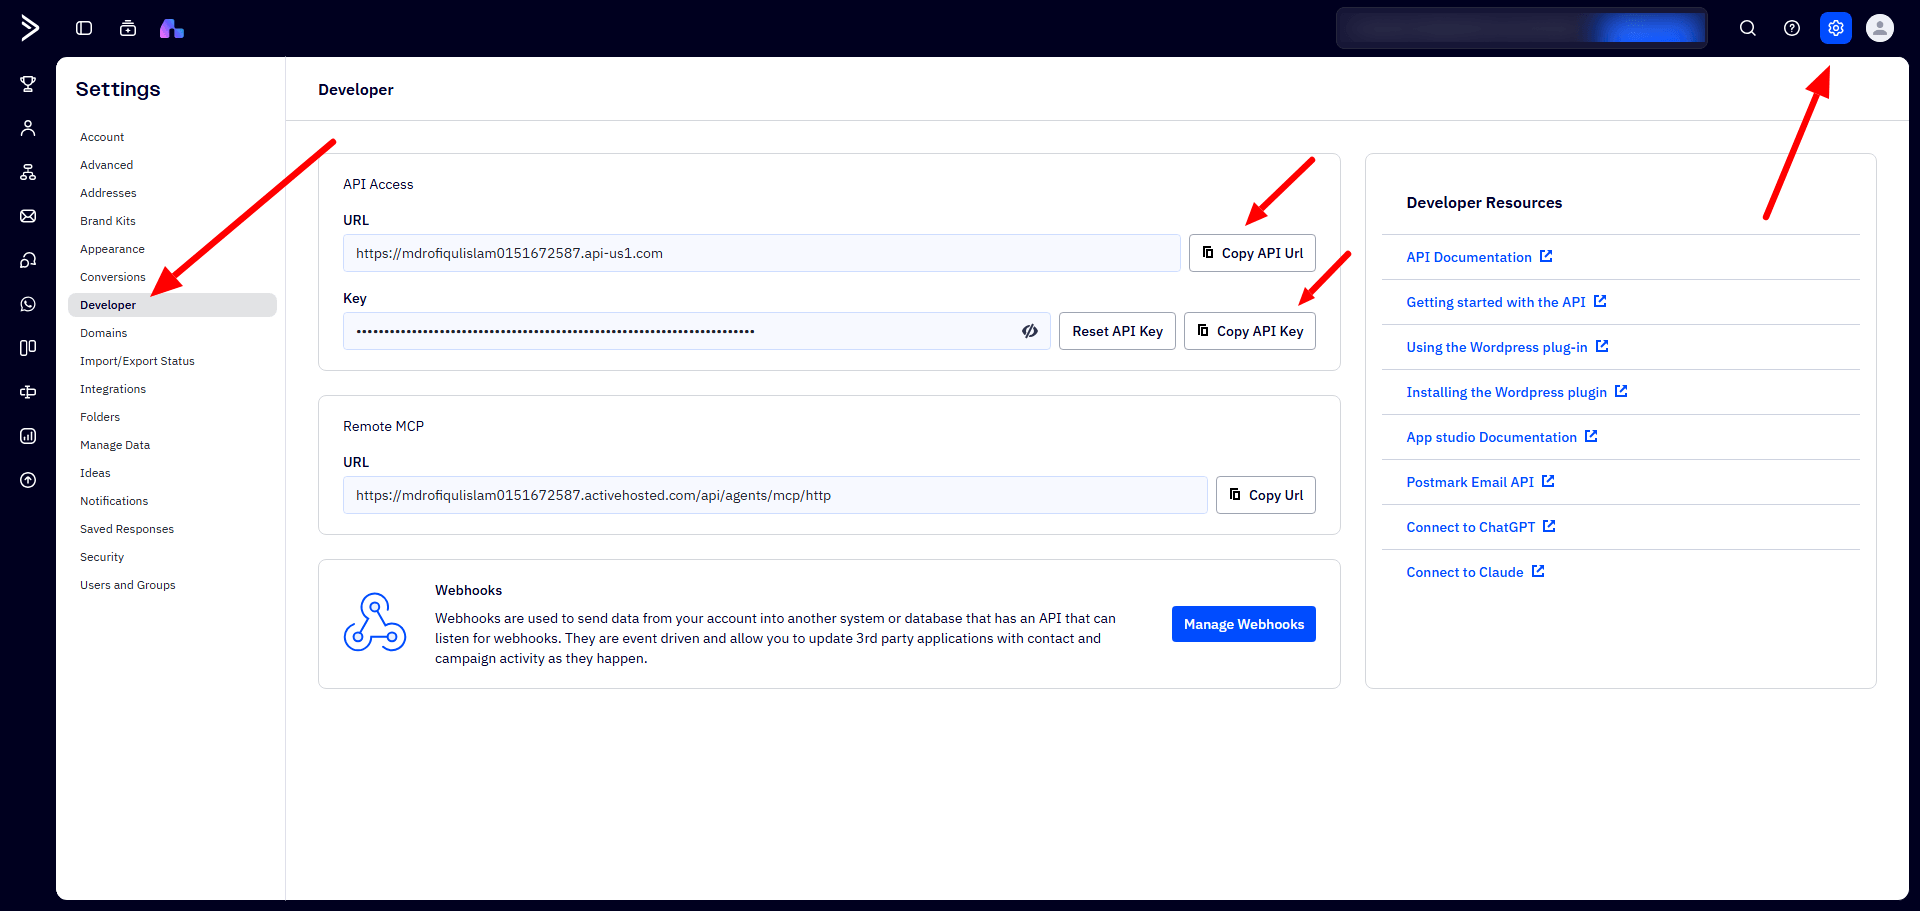
Step 1: Copy your API URL and API Key
In ActiveCampaign, click the Settings gear icon in the top-right corner and open Developer. Under API Access you will see your URL and your Key. Use the Copy API Url and Copy API Key buttons to copy each one.
Keep it private: treat your API key like a password. Do not share it or post it publicly.
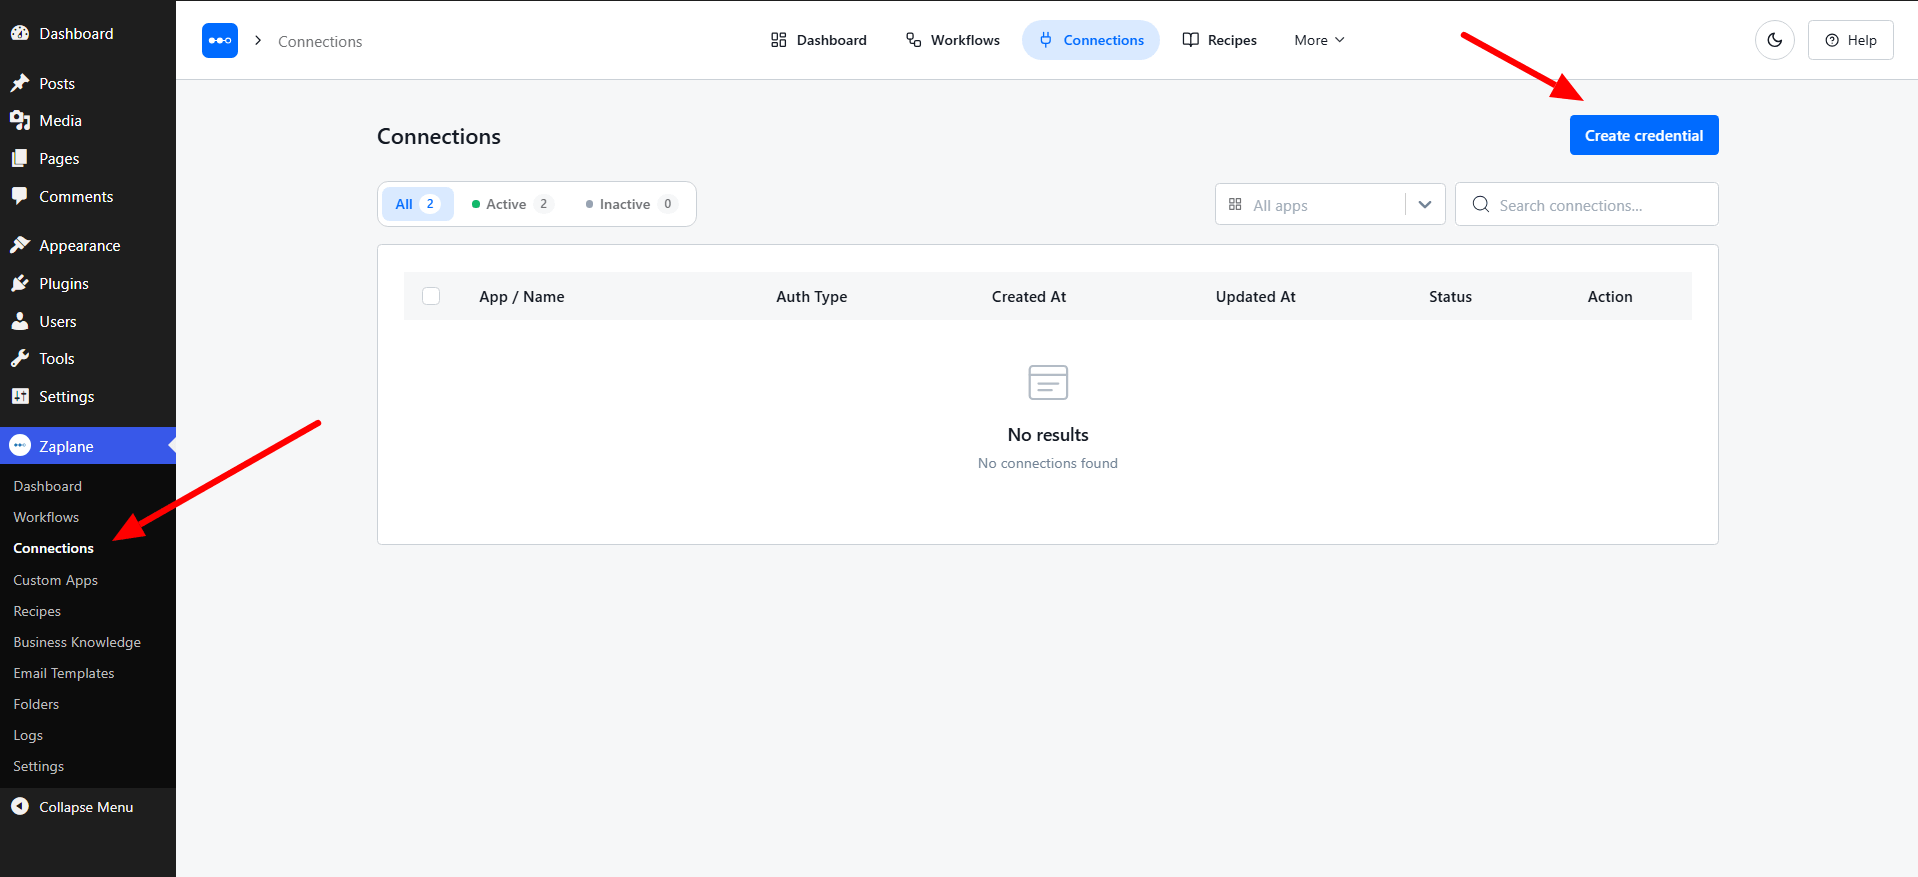
Step 2: Open Zaplane Connections
In your WordPress dashboard, go to Zaplane → Connections and click Create credential.
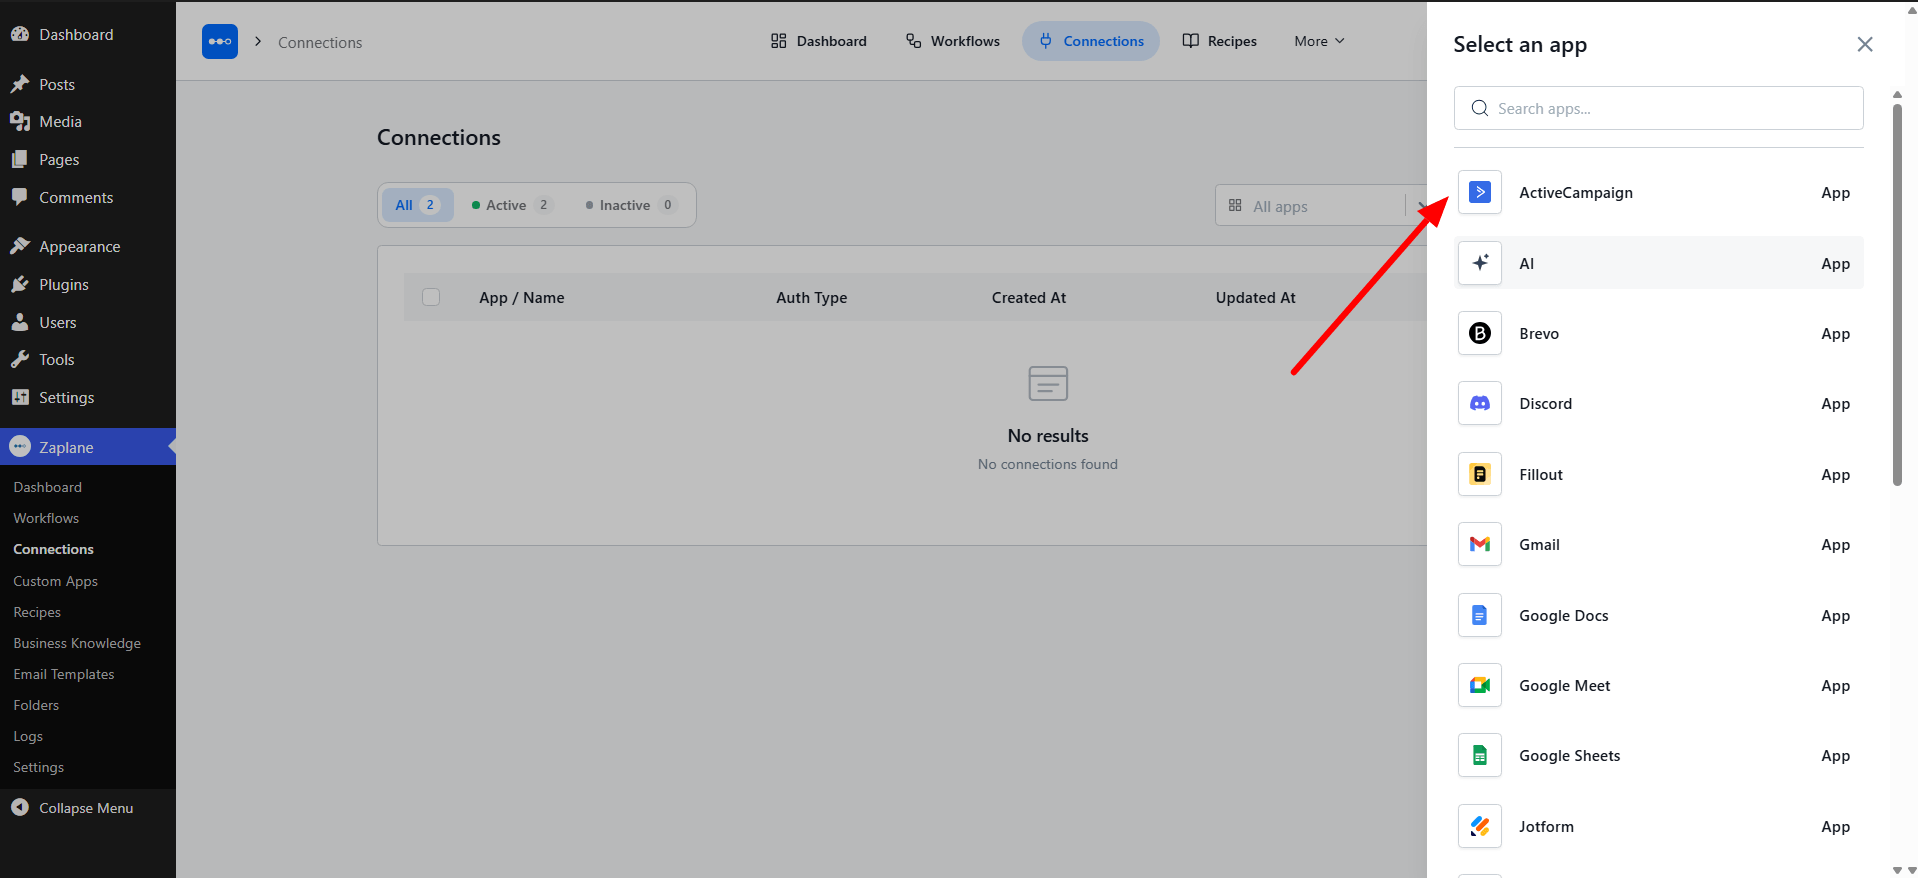
Step 3: Select ActiveCampaign
In the Select an app panel, choose ActiveCampaign.
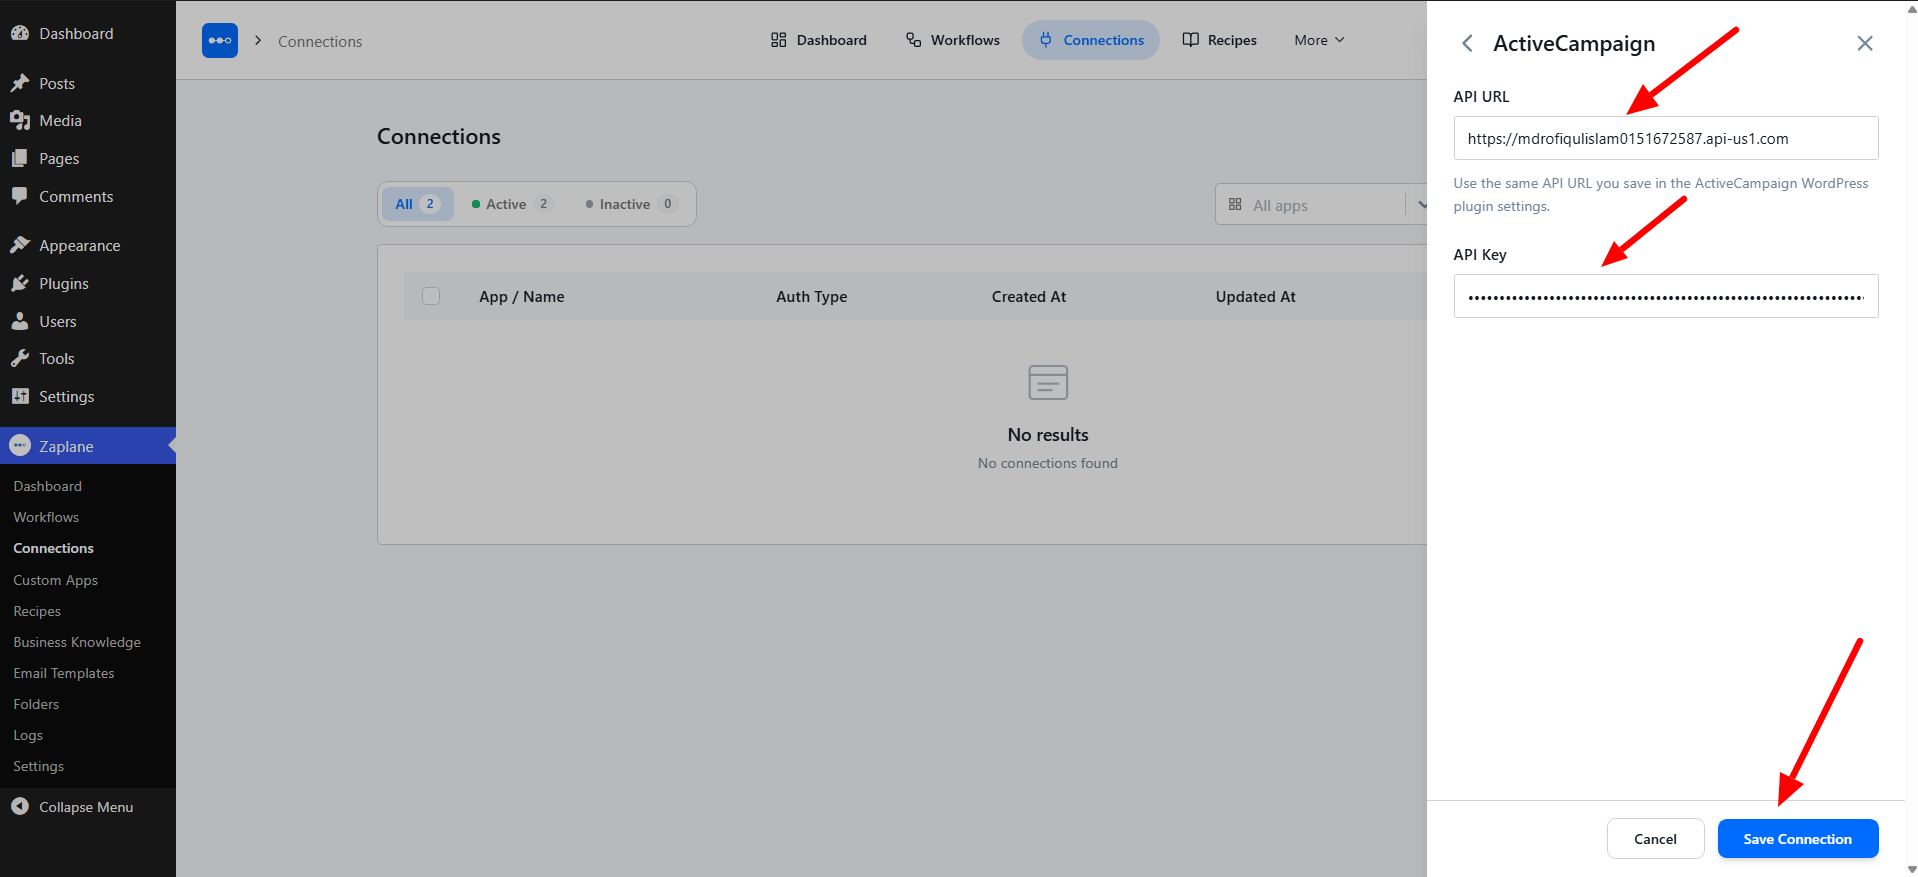
Step 4: Paste your credentials
Paste the API URL and the API Key you copied in Step 1, then click Save Connection. Your connection is now ready to use.
Part 2: Build the workflow
Step 5: Create a new workflow
Go to Zaplane → Workflows and click Create Workflow. Enter a Workflow Name and click Create.
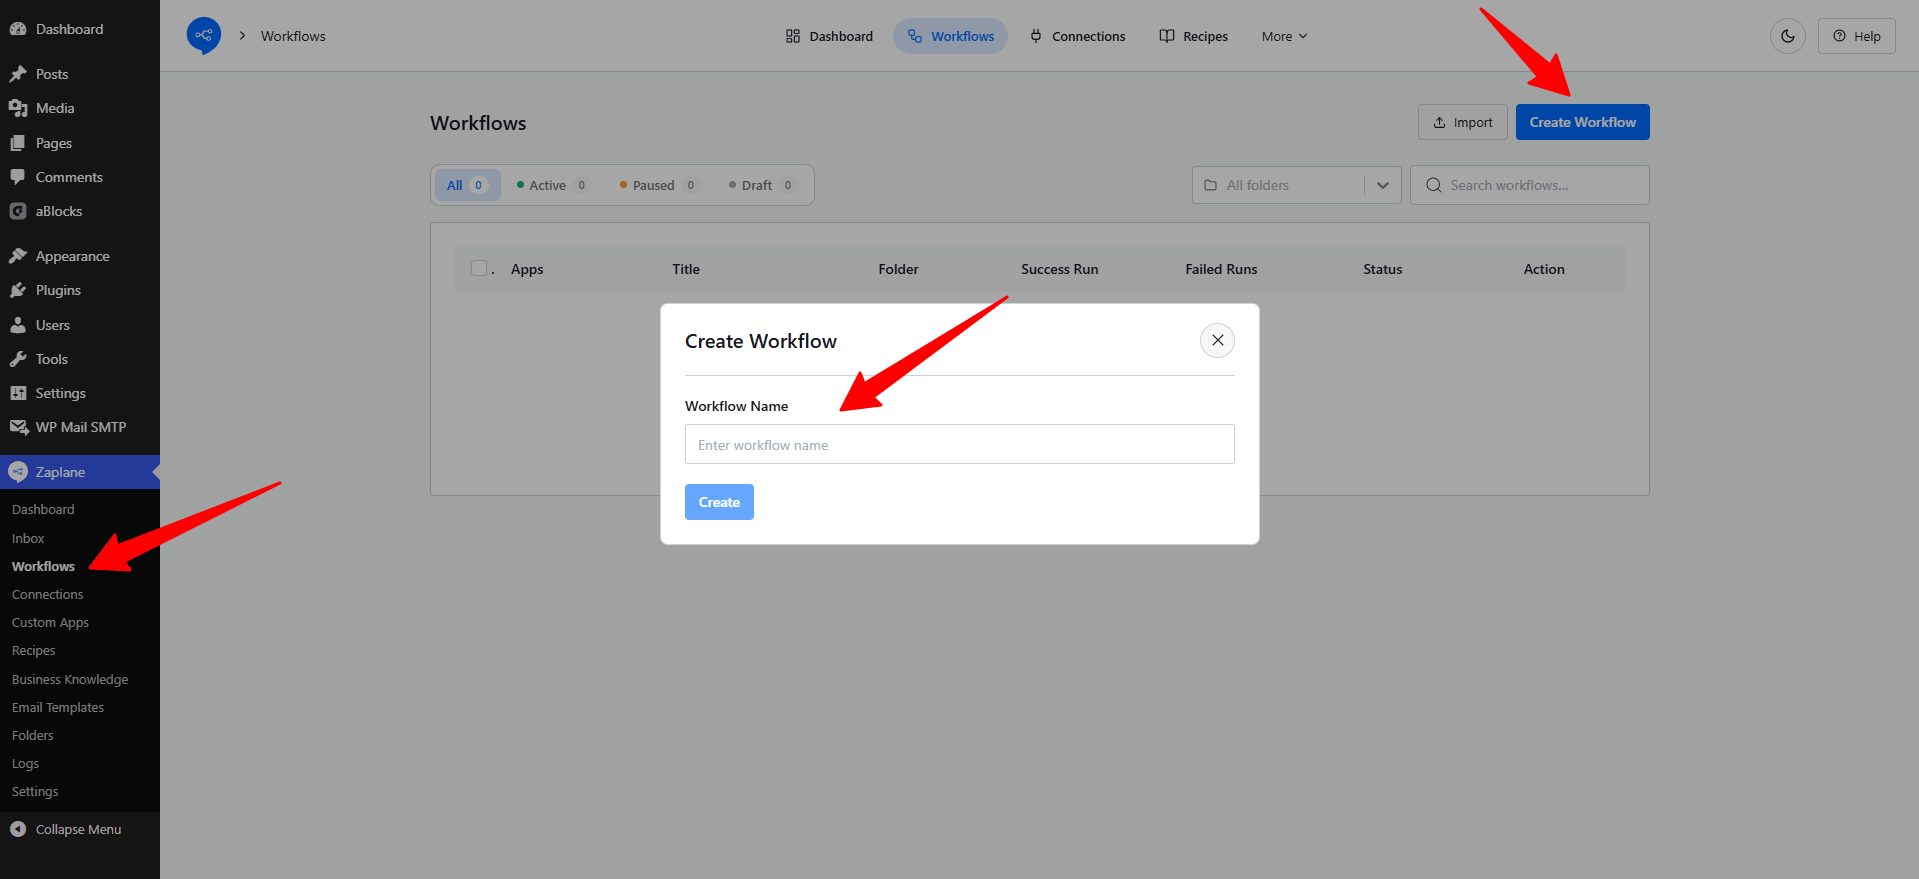
Step 6: Add a trigger
In the workflow editor, click the Select an app trigger card. In the Add Trigger panel, choose Apps and click Continue.
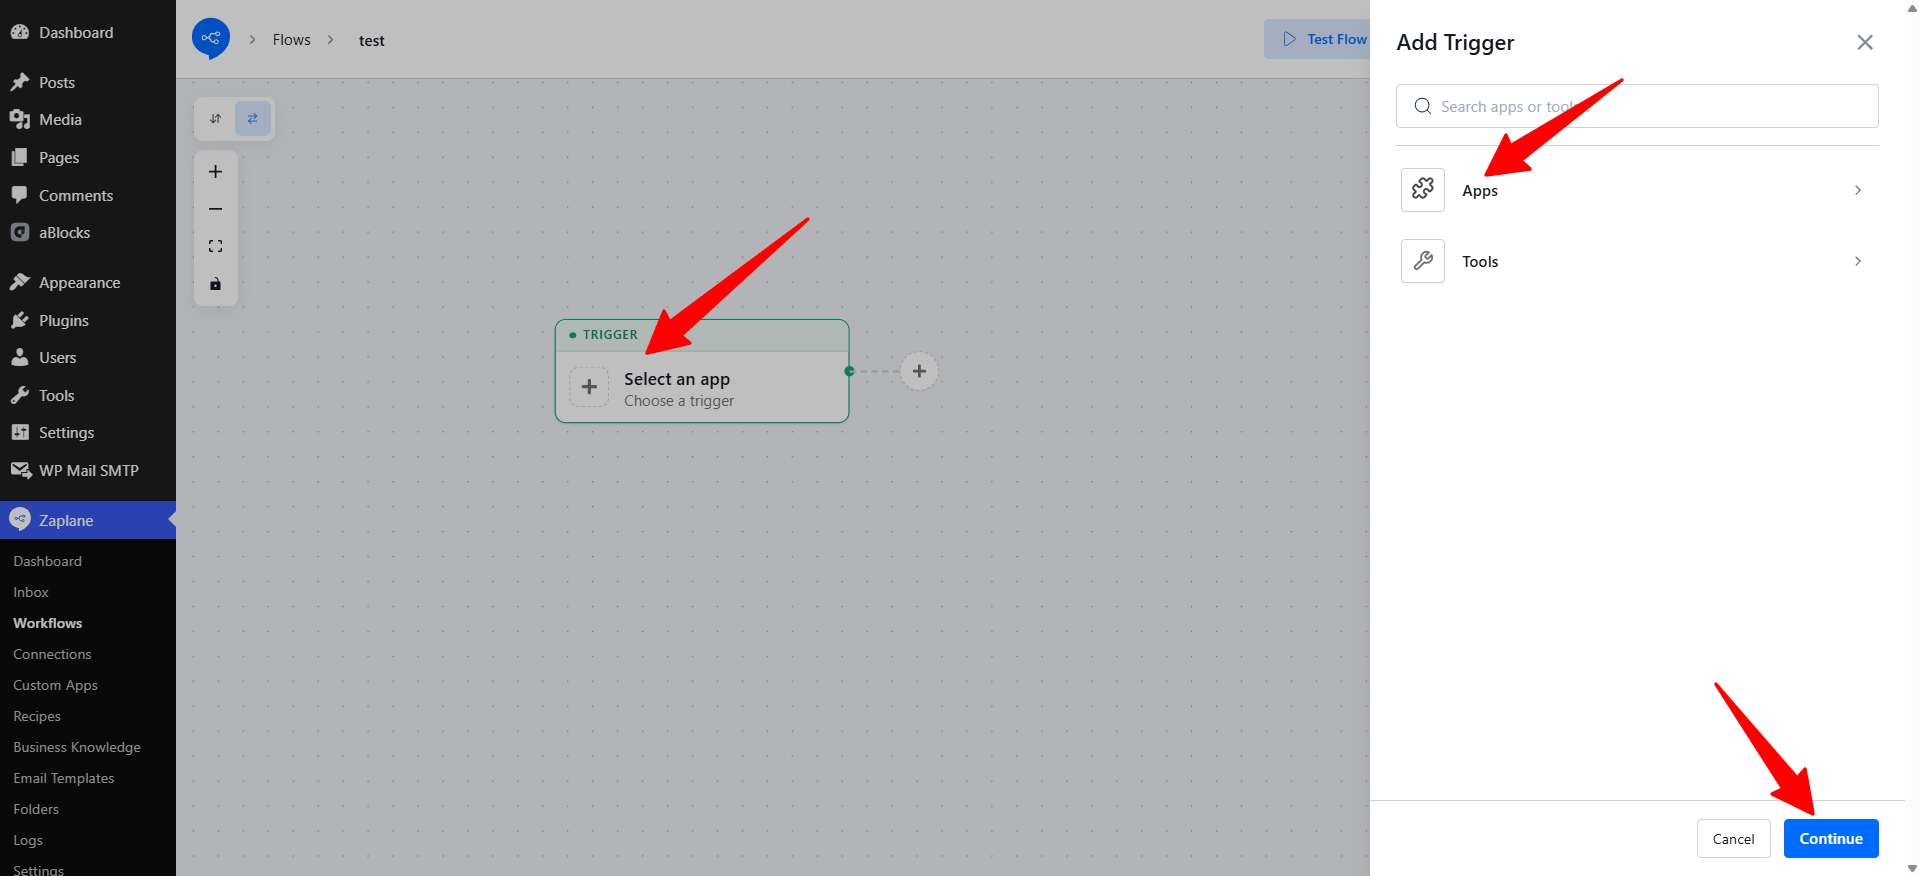
Step 7: Choose ActiveCampaign
Scroll the app list, select ActiveCampaign, and click Continue.
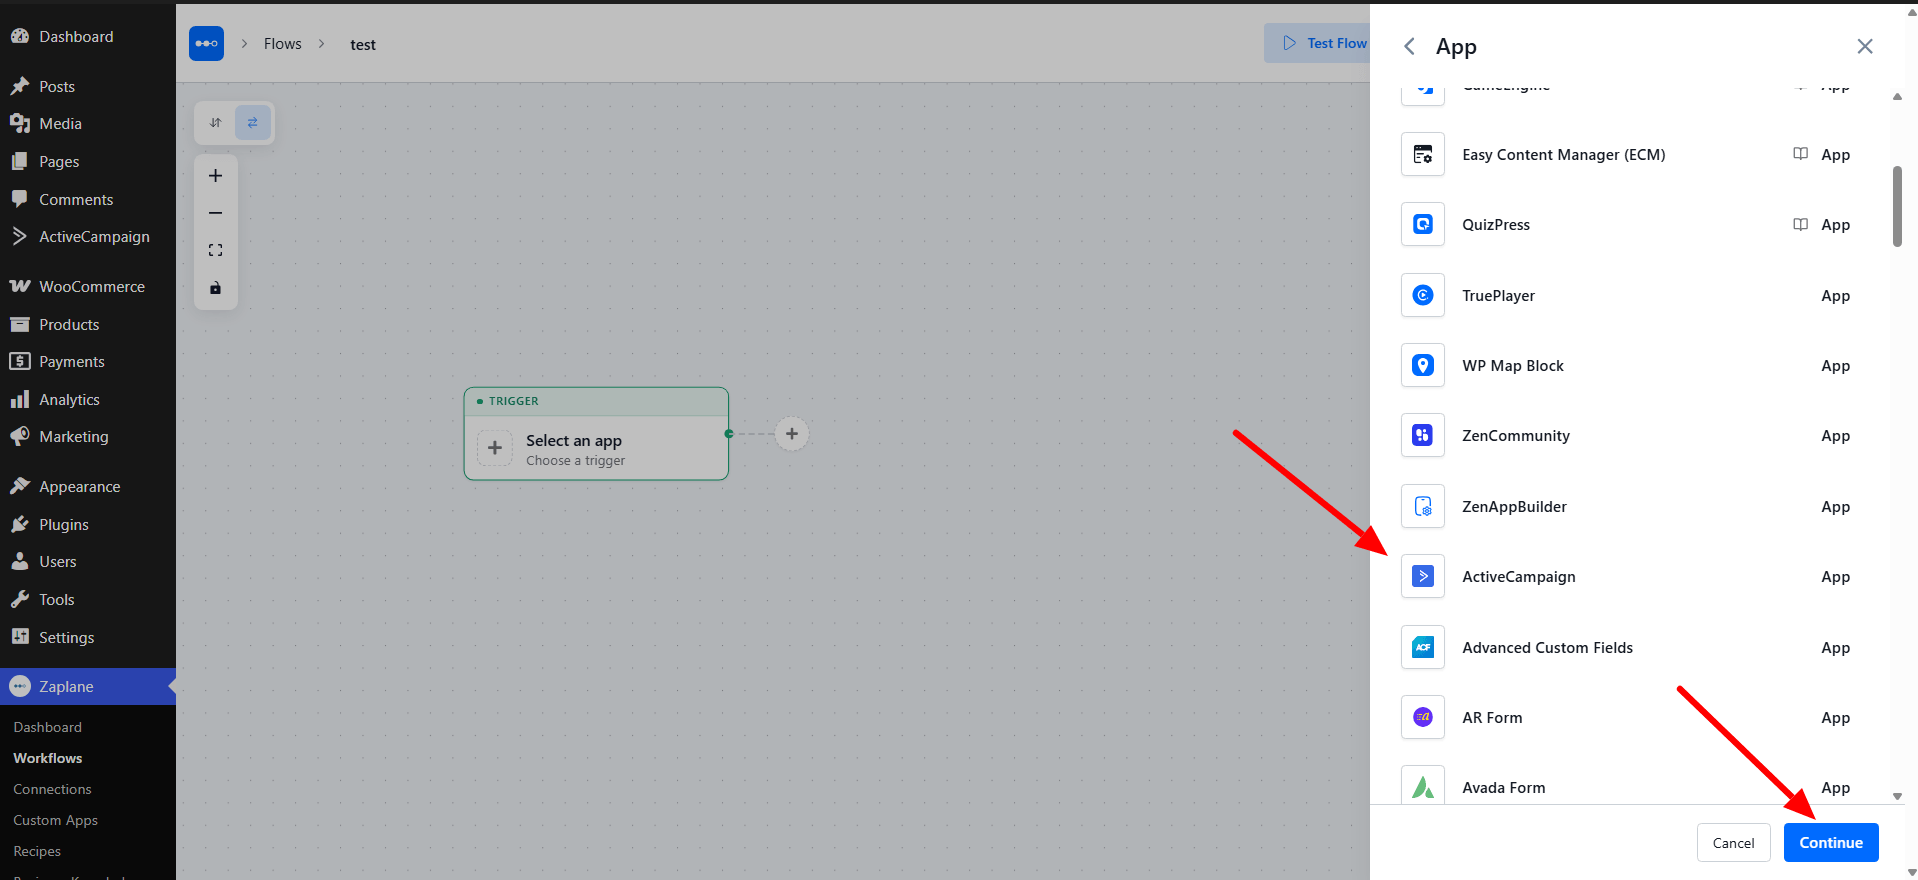
Step 8: Select the trigger type
On the Select tab, open the Trigger Type dropdown and pick the event that should start your workflow, such as Form Submitted or Contact Subscribed. Choose the ActiveCampaign connection you saved in Part 1 if you are asked for one, then click Continue.
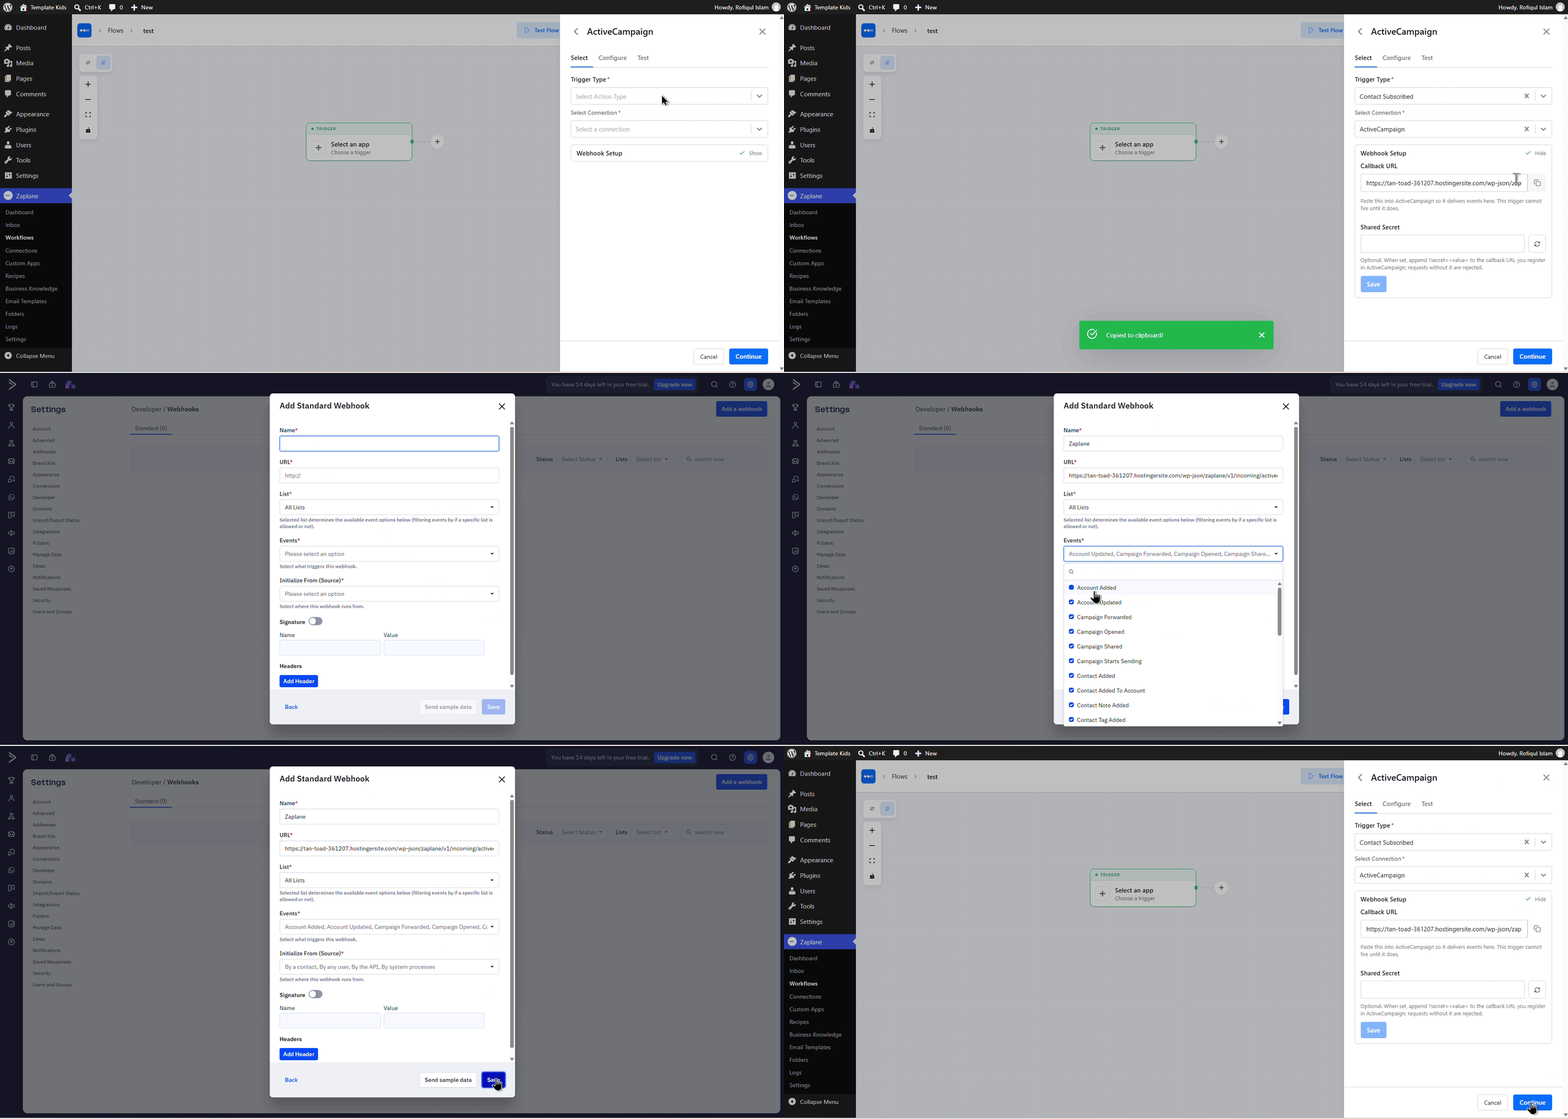
Step 9: Configure the trigger
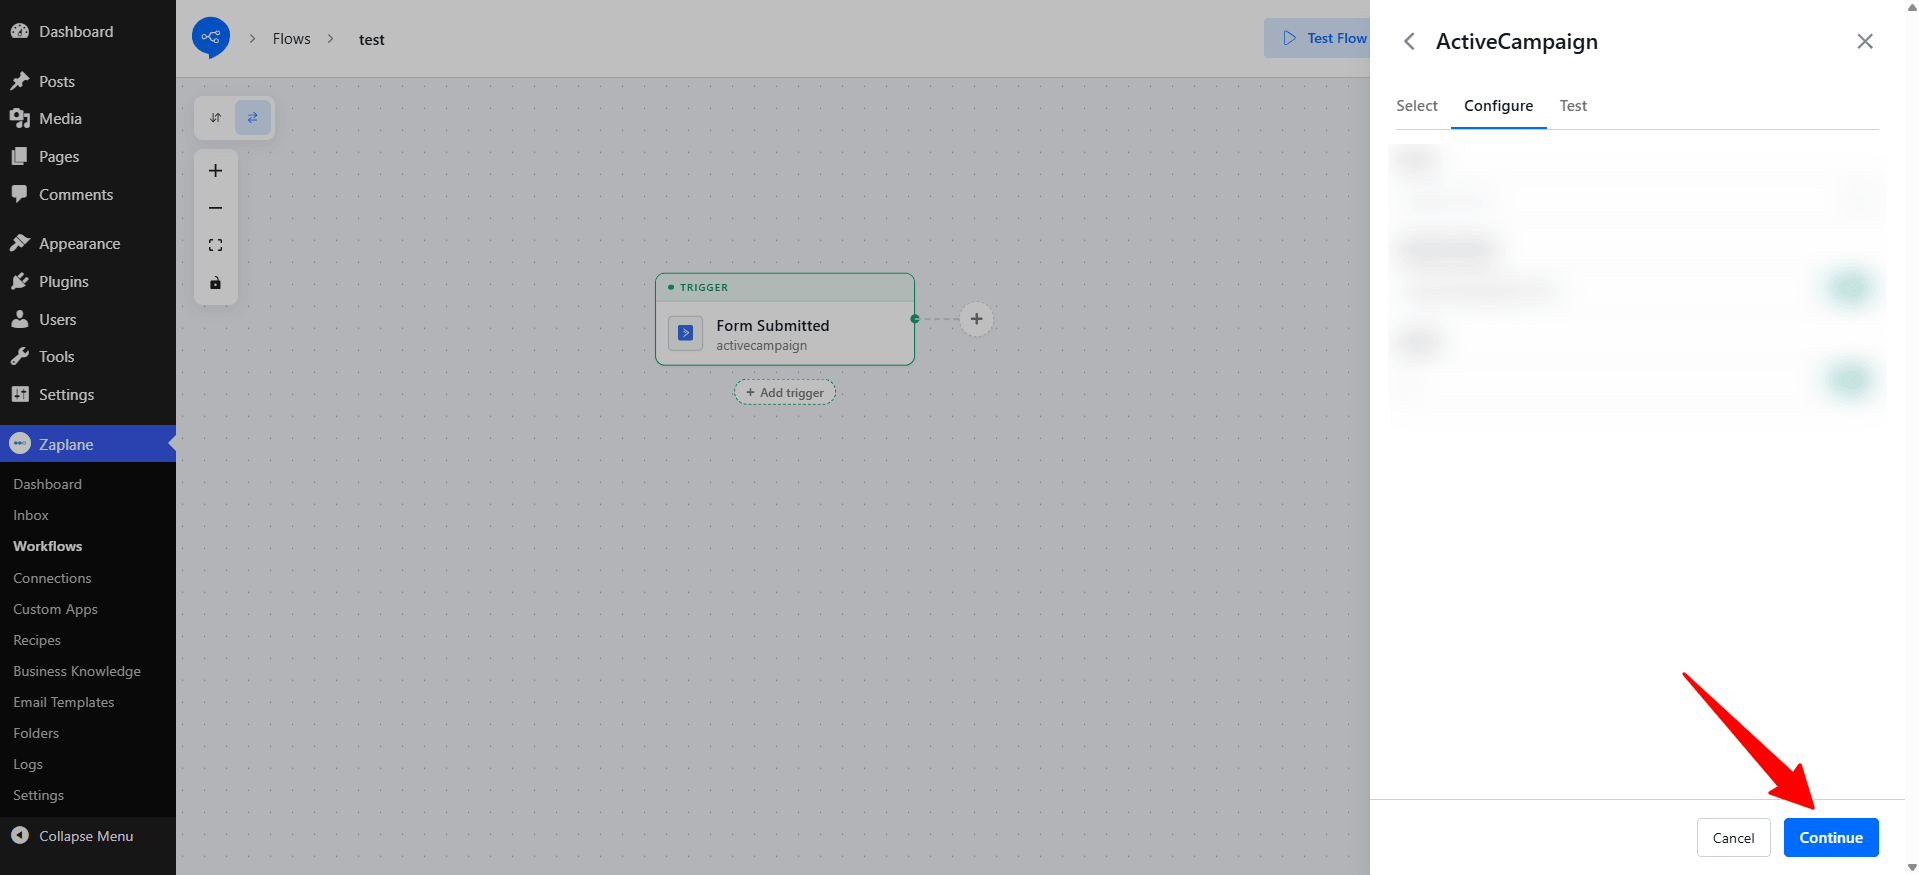
On the Configure tab, fill in the options shown for your chosen trigger type, then click Continue.
Step 10: Test the trigger
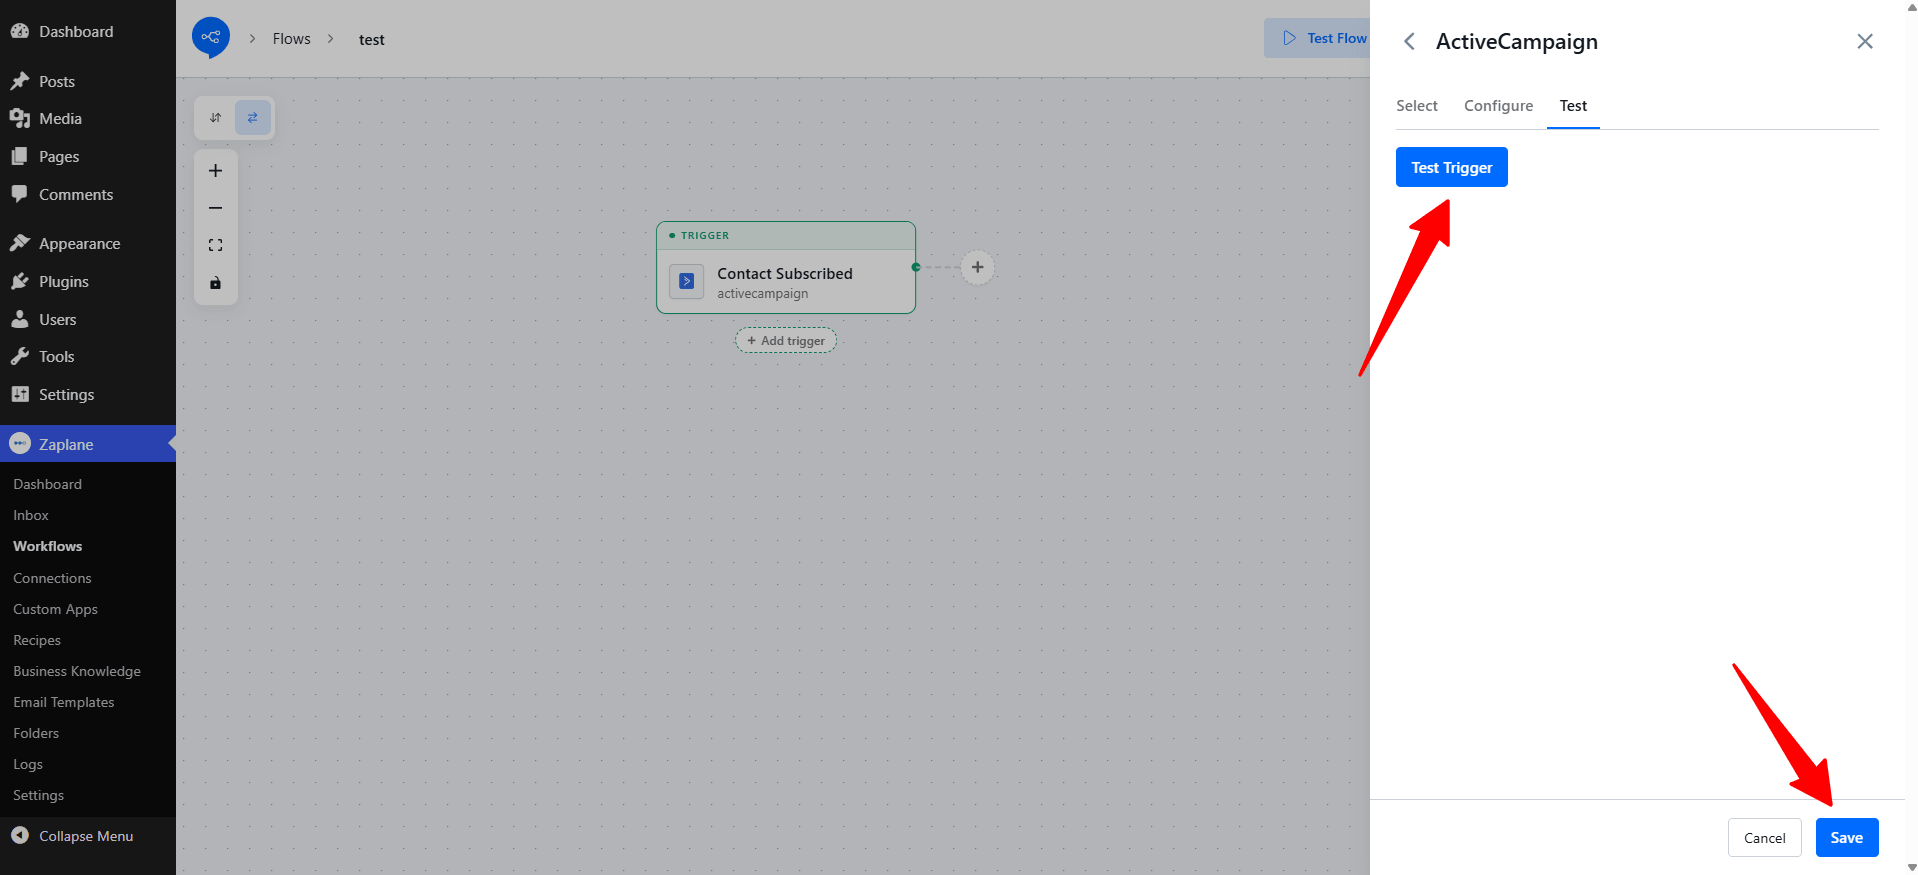
Open the Test tab and click Test Trigger. Then perform the event in ActiveCampaign once so Zaplane can capture sample data. When the test succeeds, click Save.
Step 11: Save and activate your workflow
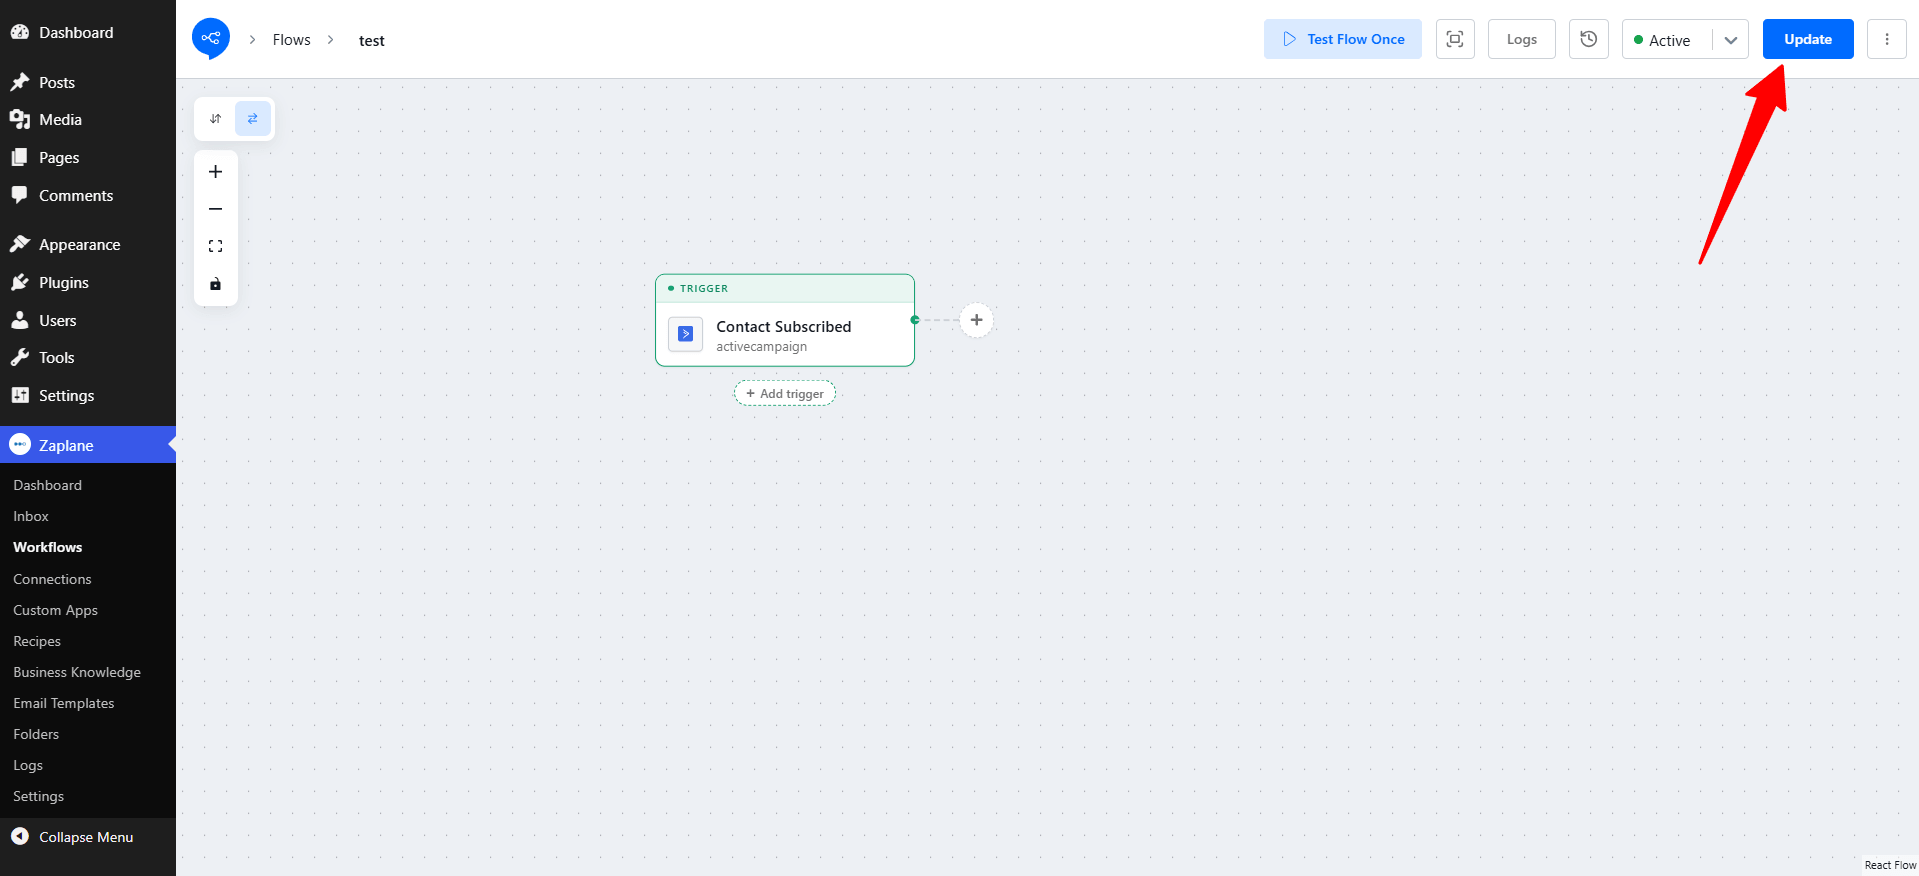
Your trigger now appears on the canvas, for example Contact Subscribed (activecampaign). Make sure the status is Active, then click Update in the top-right corner. You can also use Test Flow Once to run the whole workflow manually.
What’s next?
Click the + button next to your trigger to add actions, such as sending an email, adding a row to Google Sheets, or notifying your team. Data from the ActiveCampaign event is available in every following step.