

This guide shows how to start a Zaplane workflow whenever something happens in Slack, such as a new message in a channel. You will create a Slack app, connect it to Zaplane, and then add it as a trigger. Make sure you have access to a Slack workspace before you begin.
Step 1: Open Your Apps in Slack
Go to
https://api.slack.com/apps and click Create New App (or Manage Apps from the developer docs homepage).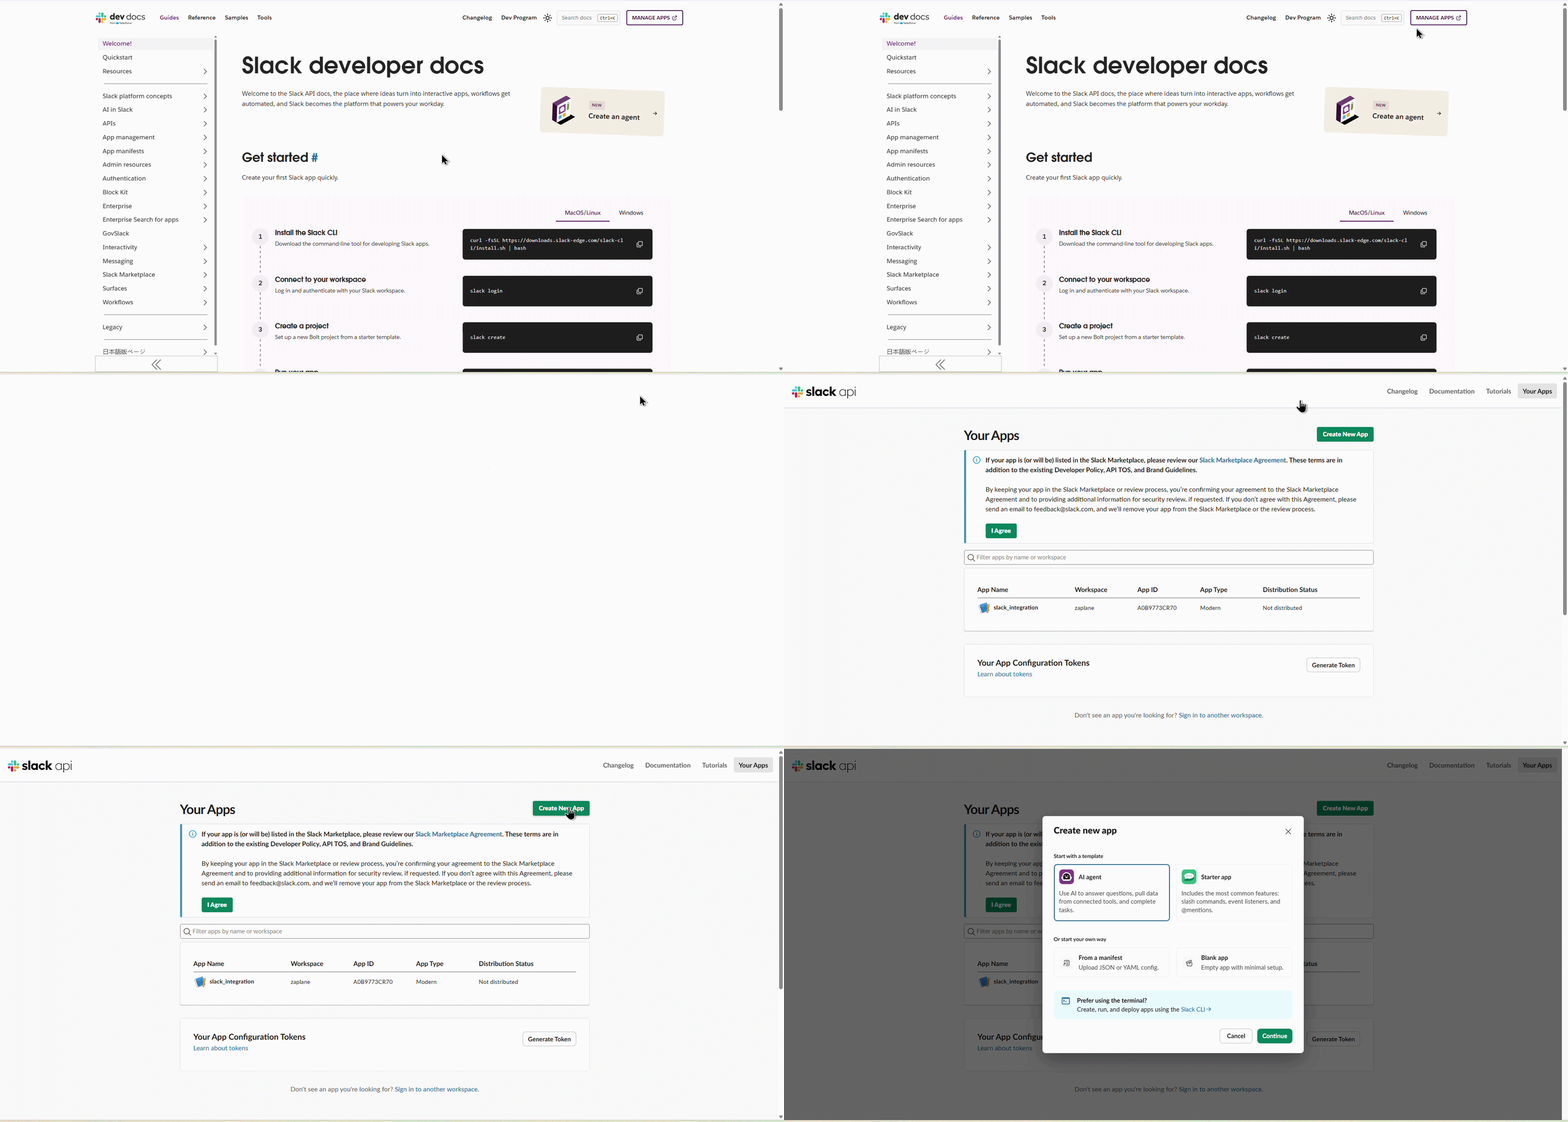
Step 2: Start from a Blank App
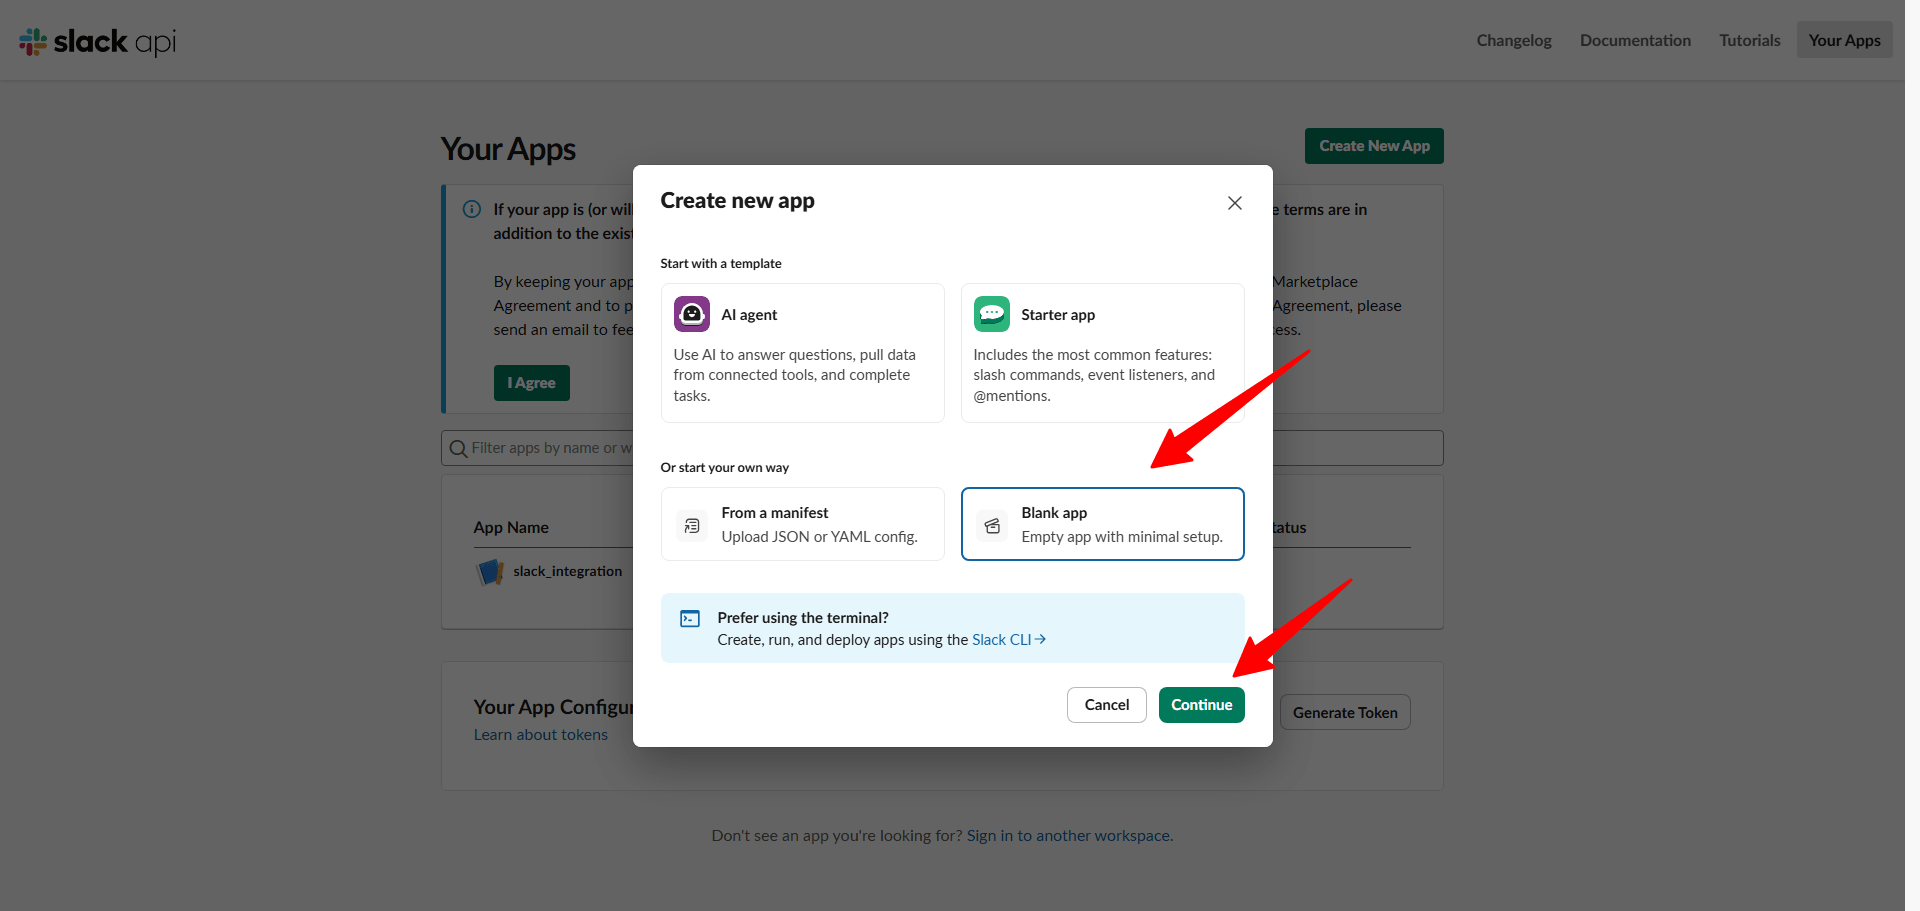
In the Create new app window, choose Blank app, then click Continue.
Step 3: Name Your App and Choose a Workspace
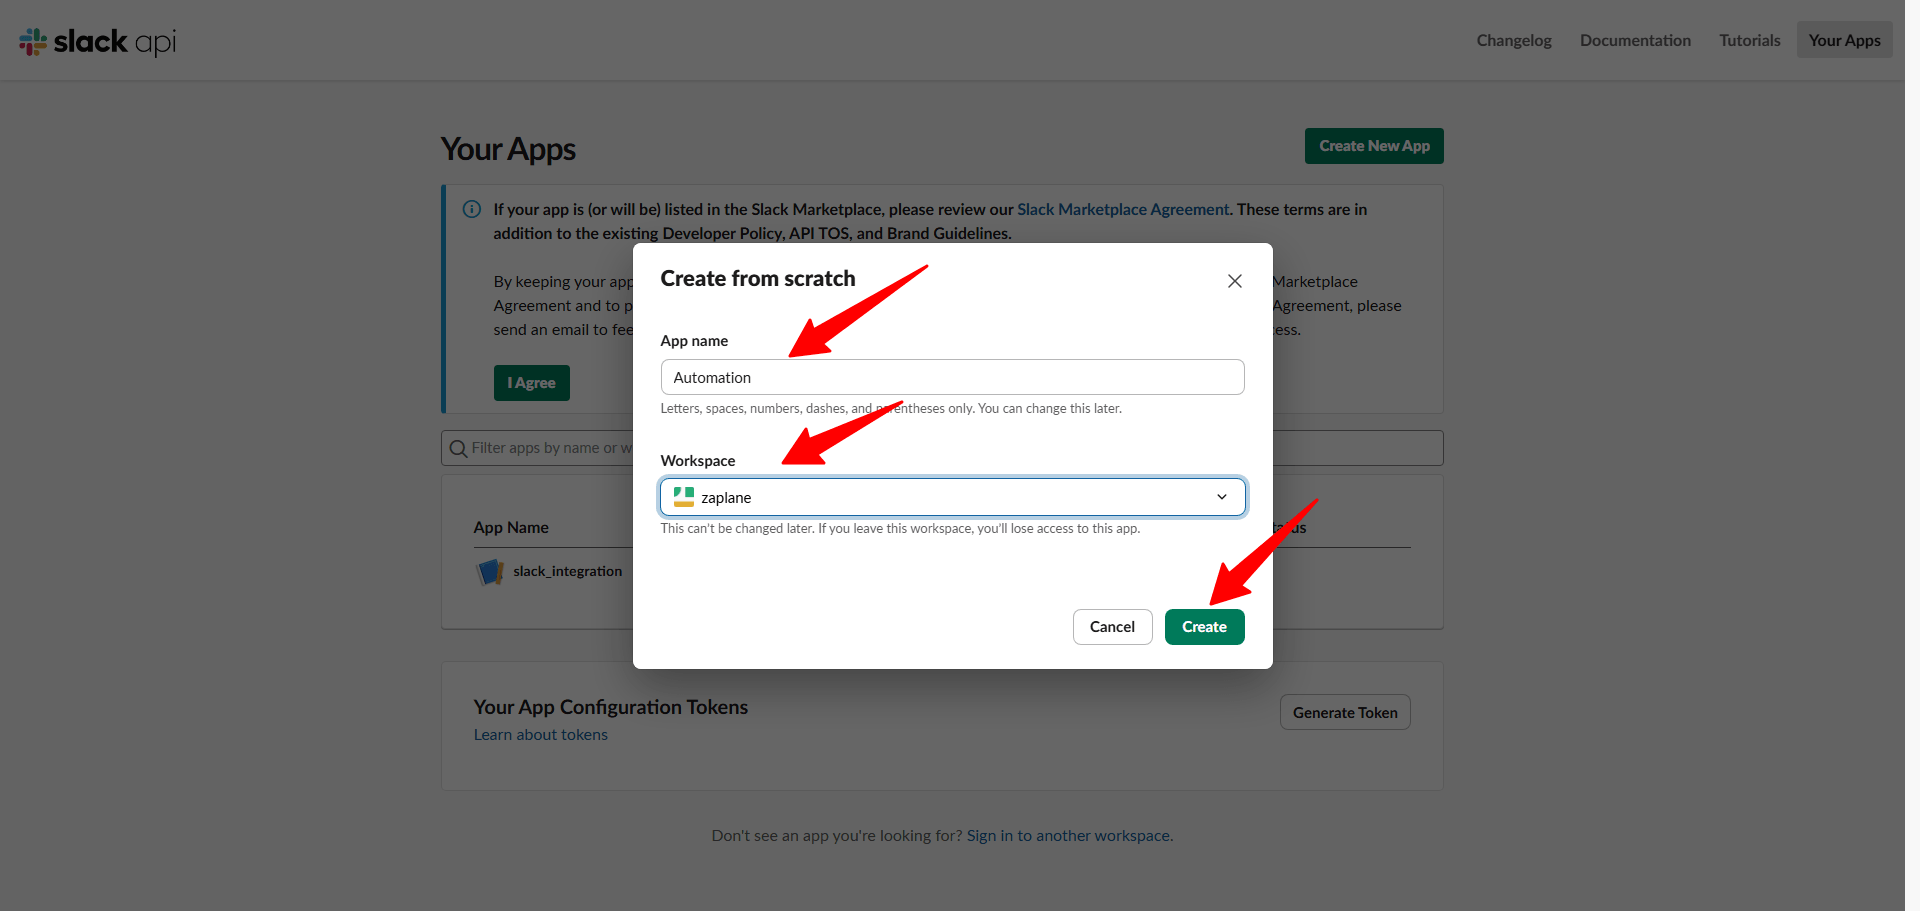
Enter an App name, select the Workspace where you want to use the app, then click Create.
Step 4: Add OAuth Scopes
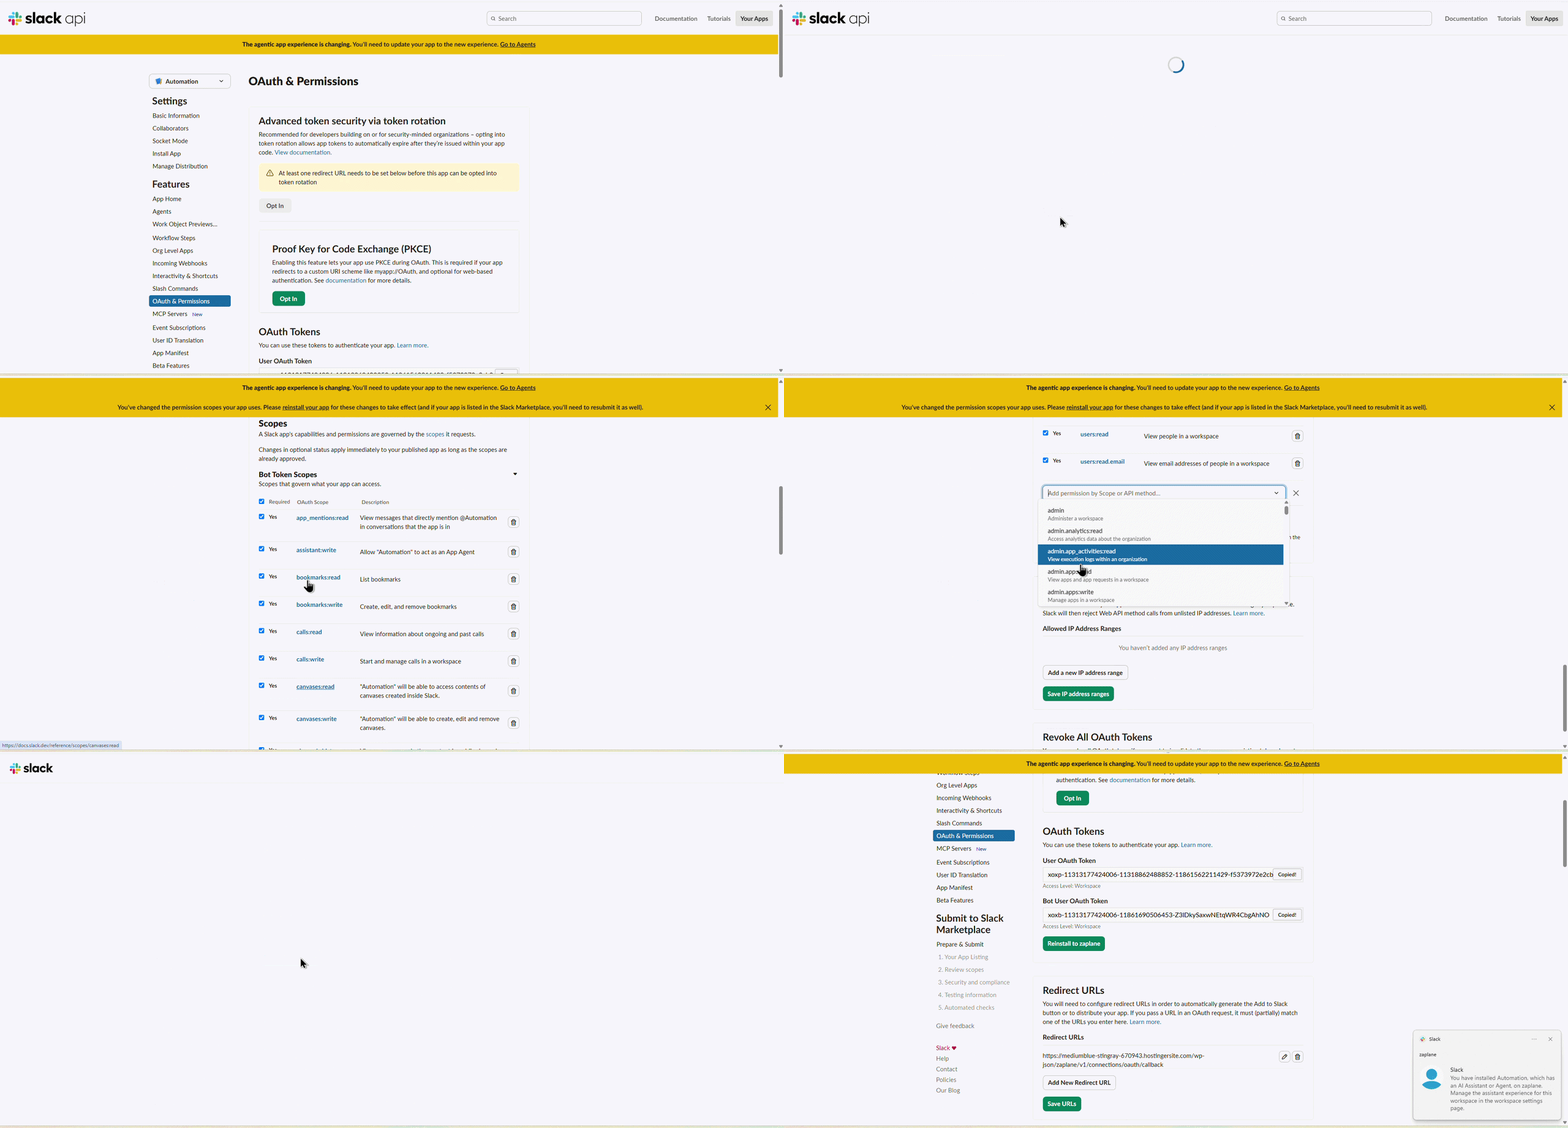
In your app settings, open OAuth & Permissions and scroll to the Scopes section. Click Add an OAuth Scope to add the permissions your workflows need, under Bot Token Scopes and User Token Scopes.
After you change scopes, Slack asks you to reinstall your app for the changes to take effect.
Step 5: Open Connections and Create a Credential
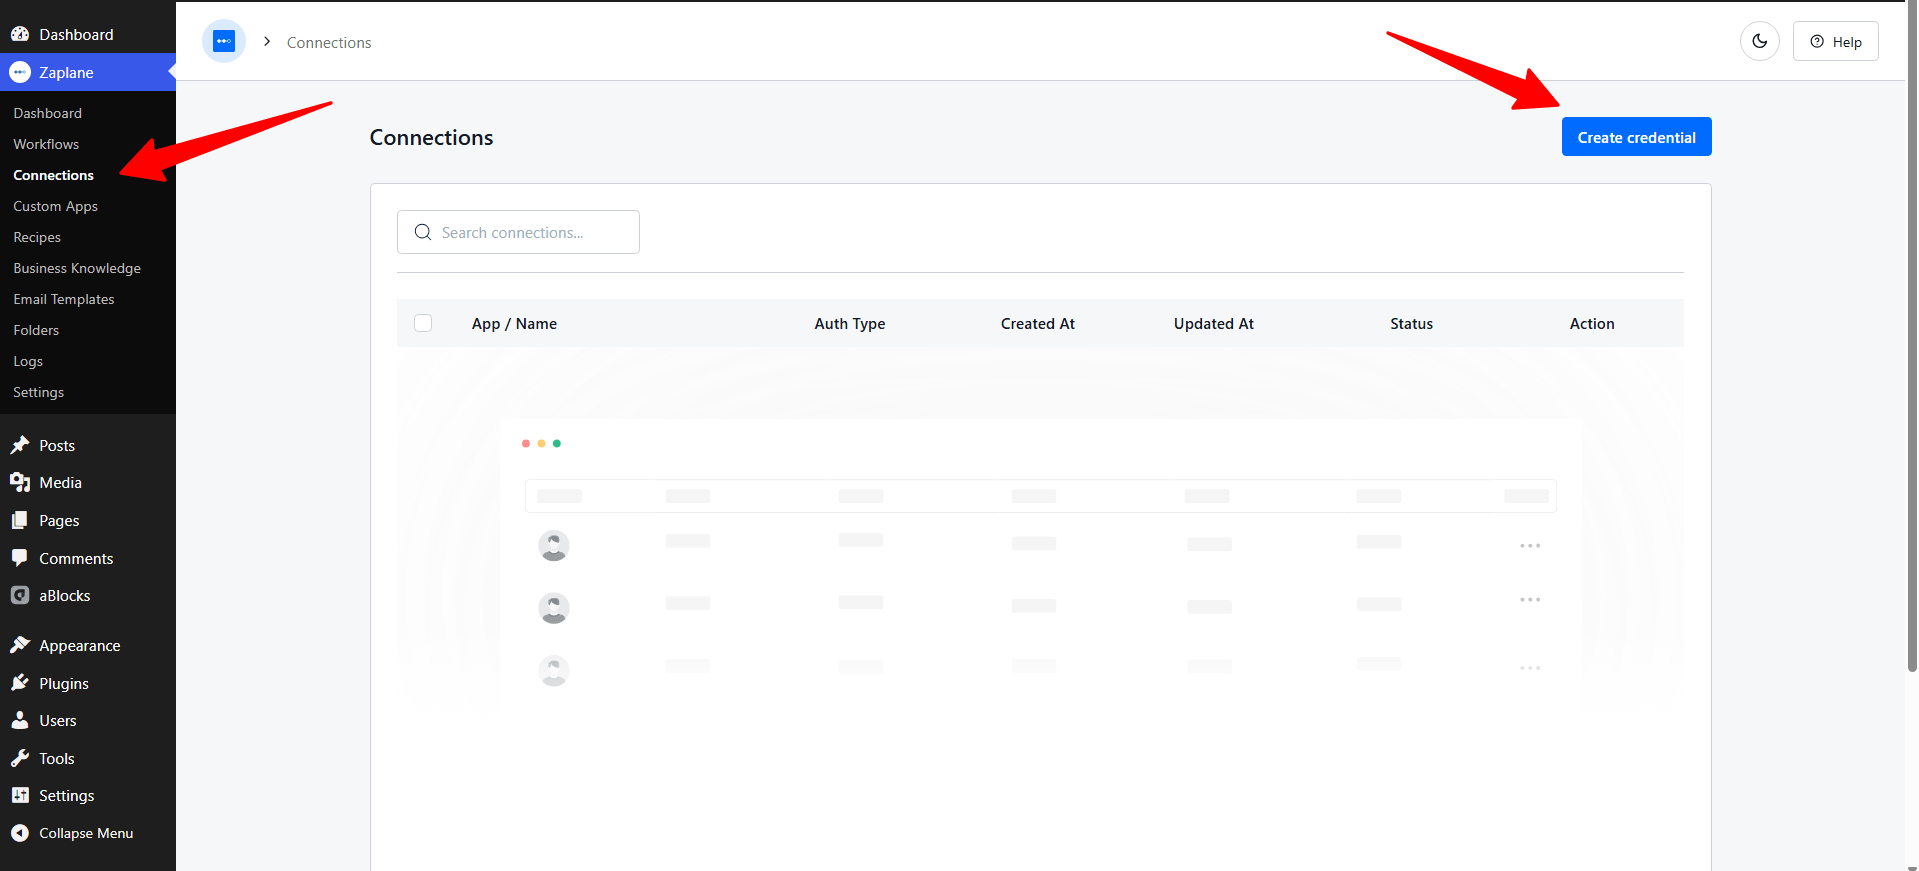
In your WordPress dashboard, go to Zaplane > Connections and click Create credential.
Step 6: Select Slack
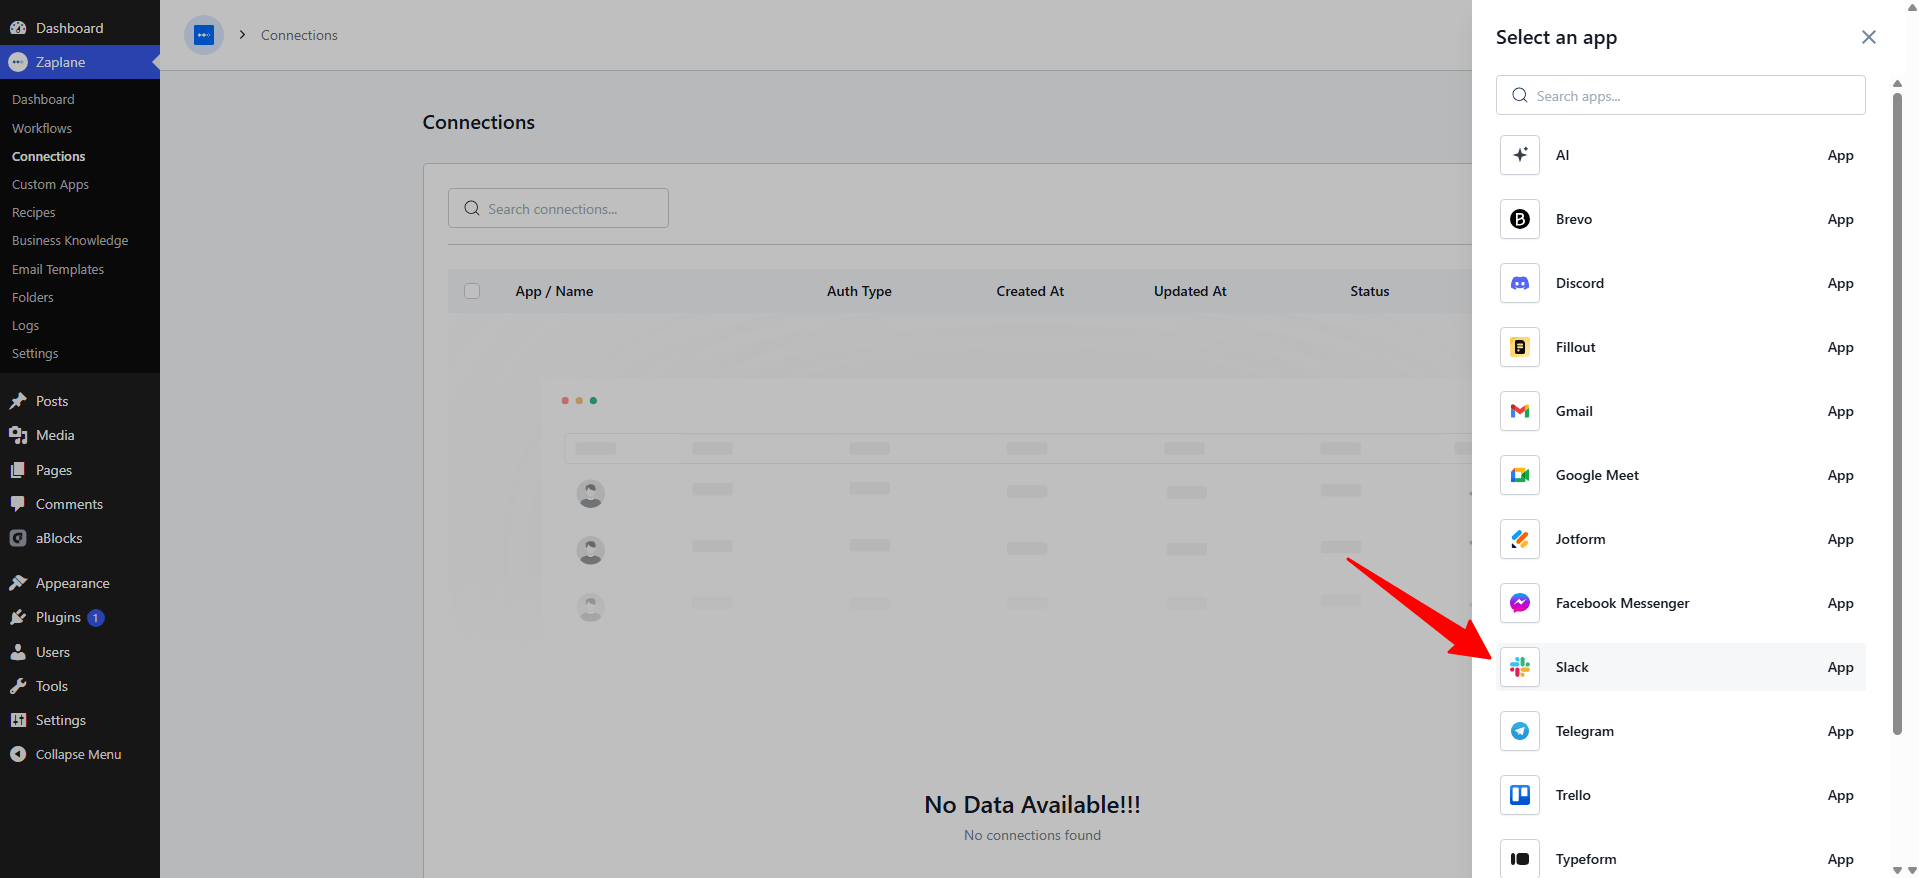
In the Select an app panel, choose Slack from the list.
Step 7: Enter Your Credentials
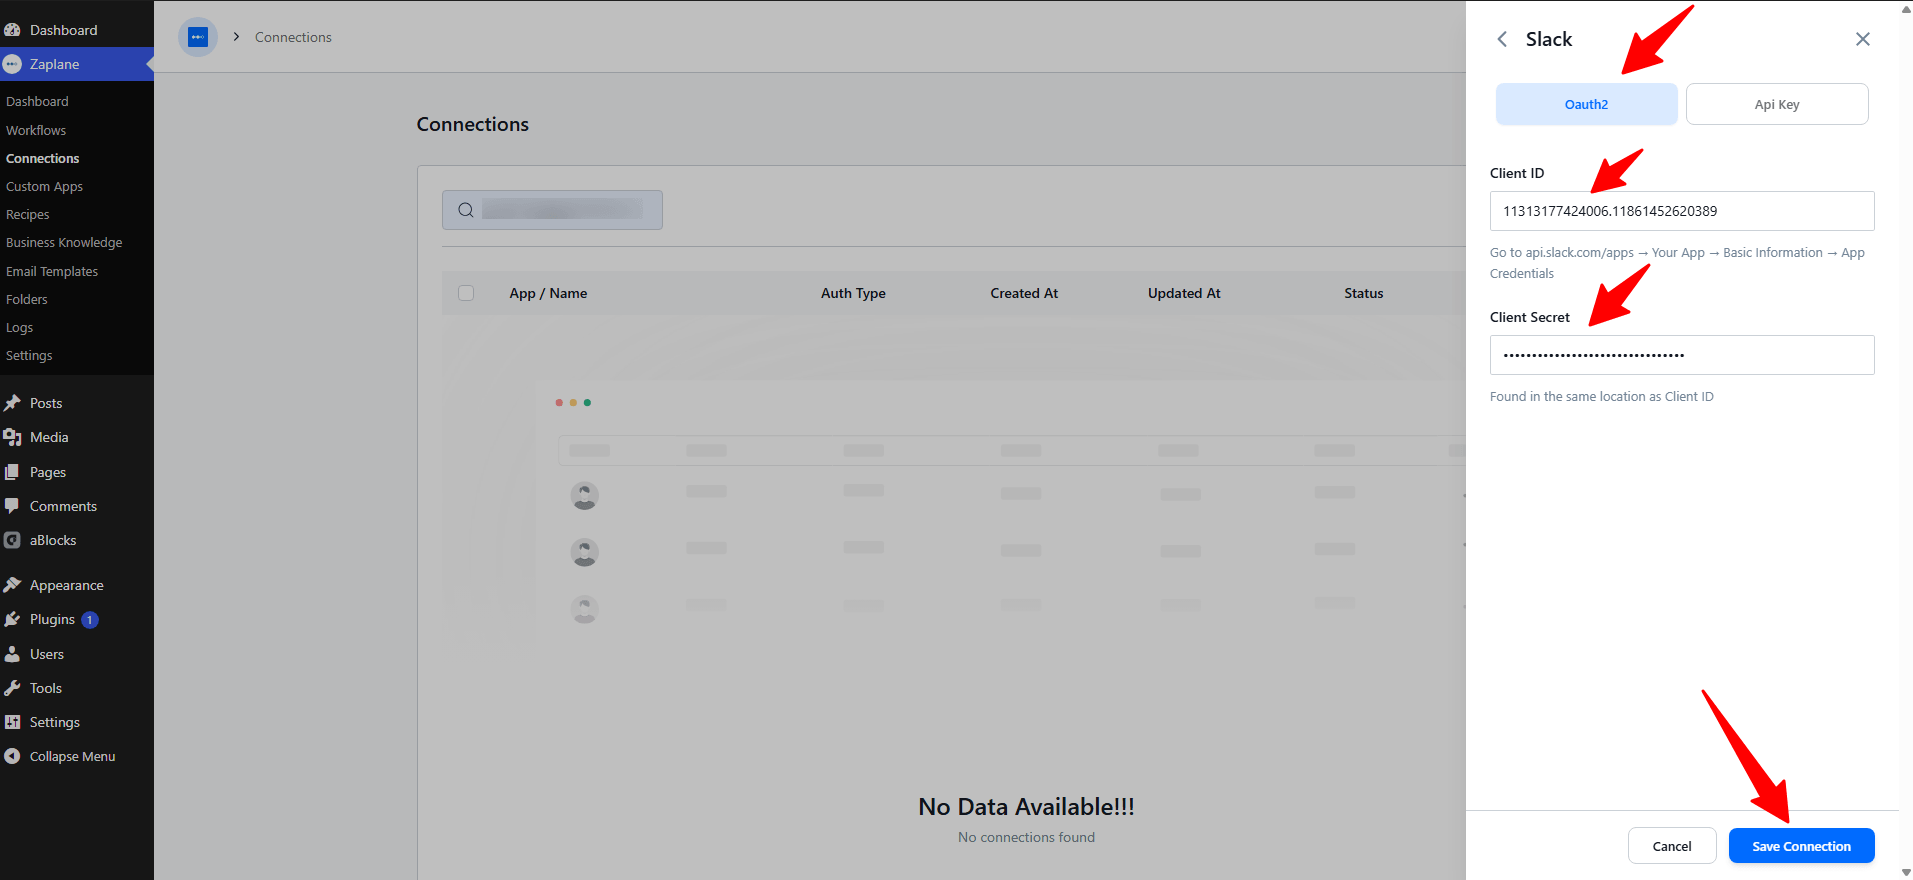
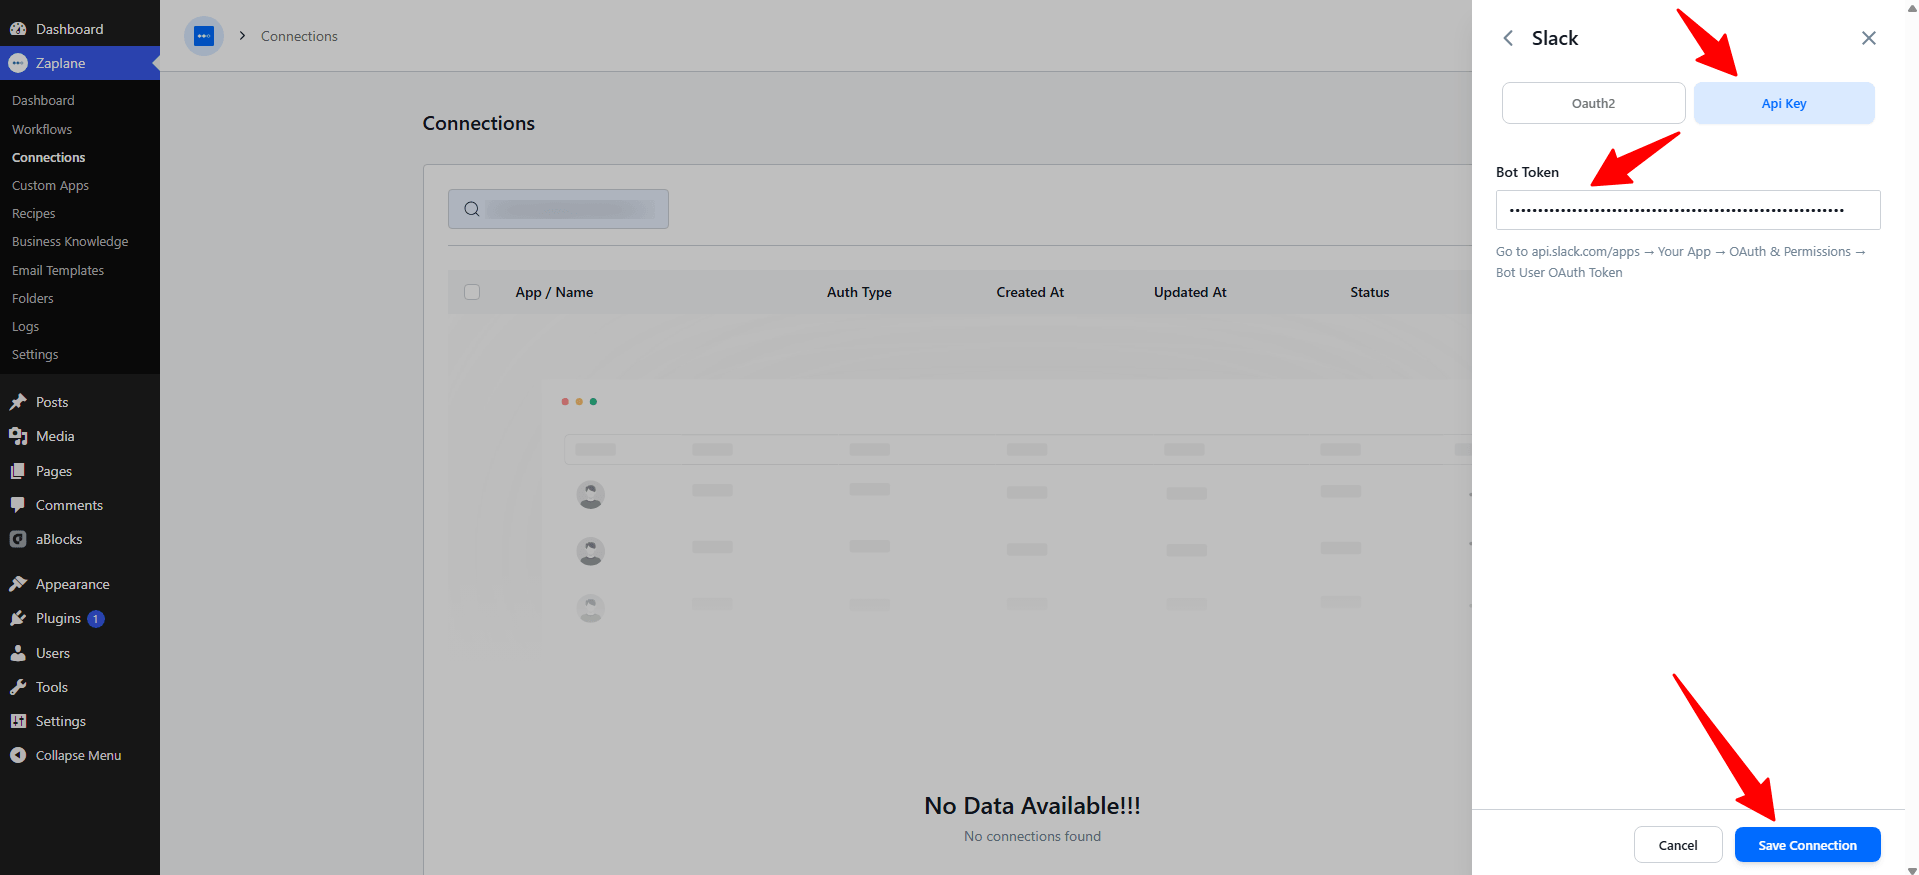
Slack offers two ways to connect. Choose one, then click Save Connection.
Option A: OAuth2. Enter your Client ID and Client Secret. You can find both at api.slack.com/apps > Your App > Basic Information > App Credentials.
Option B: API Key. Enter your Bot Token. You can find it at api.slack.com/apps > Your App > OAuth & Permissions > Bot User OAuth Token.
Step 8: Create a Workflow
Go to Zaplane > Workflows, then click Create Workflow to open the workflow builder.
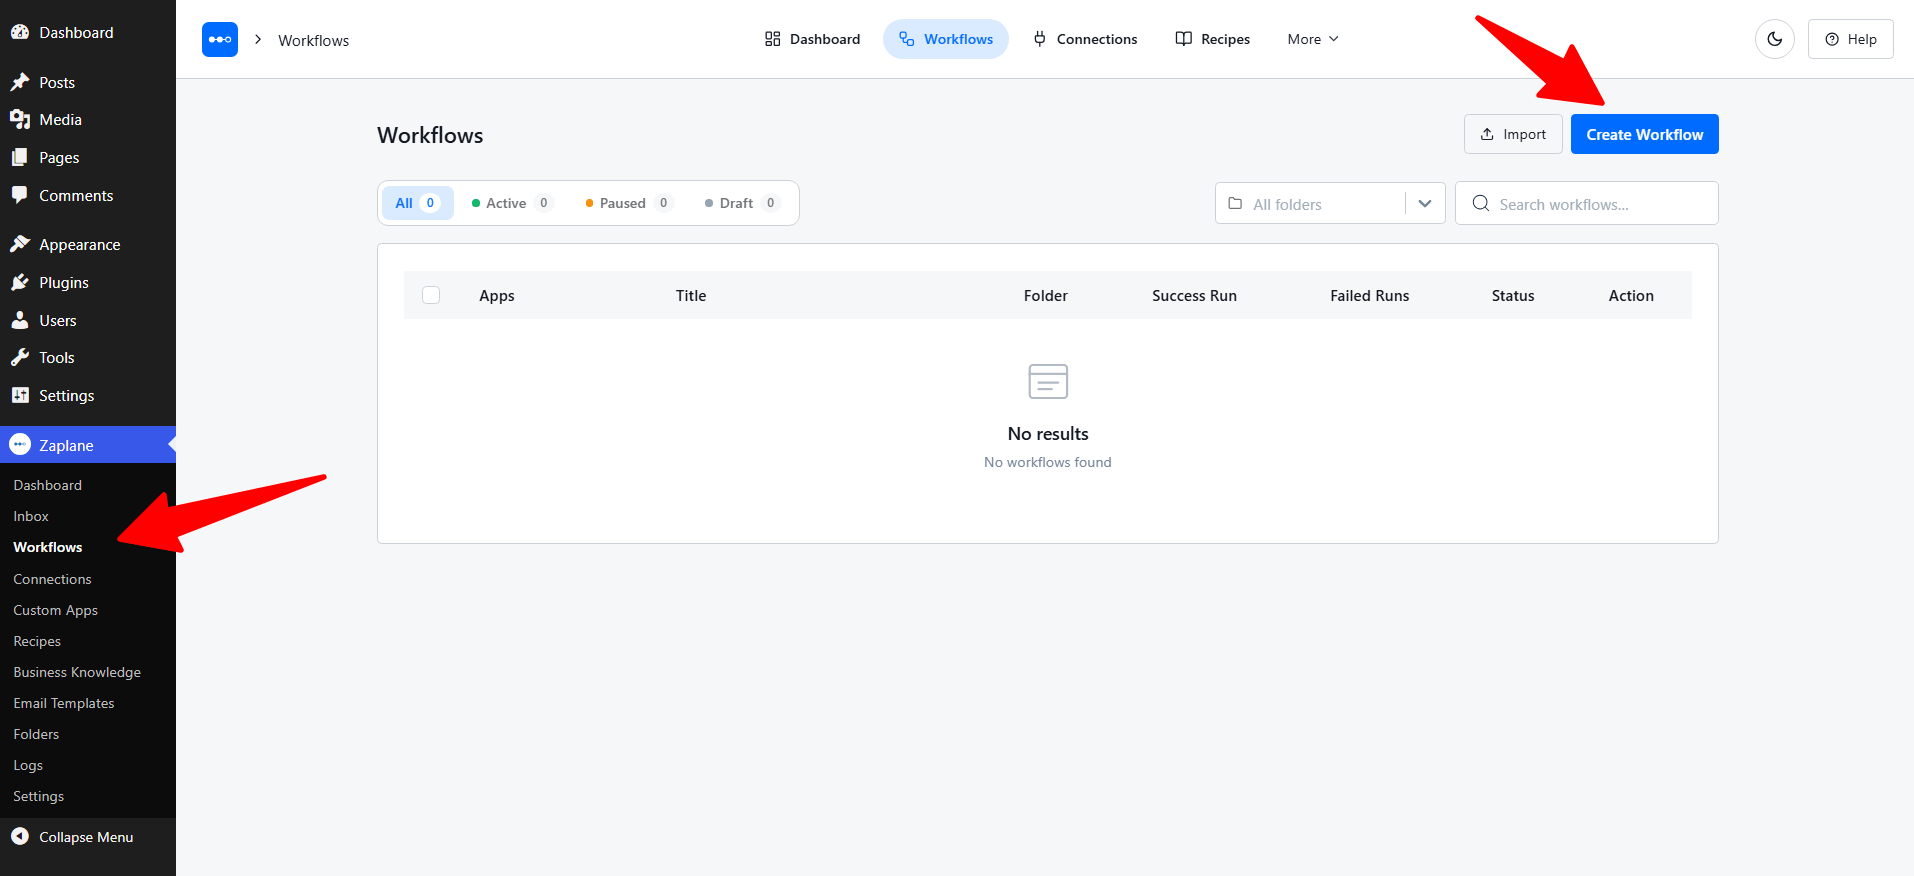
Step 9: Add the Slack Trigger
Click the Select an app trigger node on the canvas. In the Add Trigger panel, choose Apps.
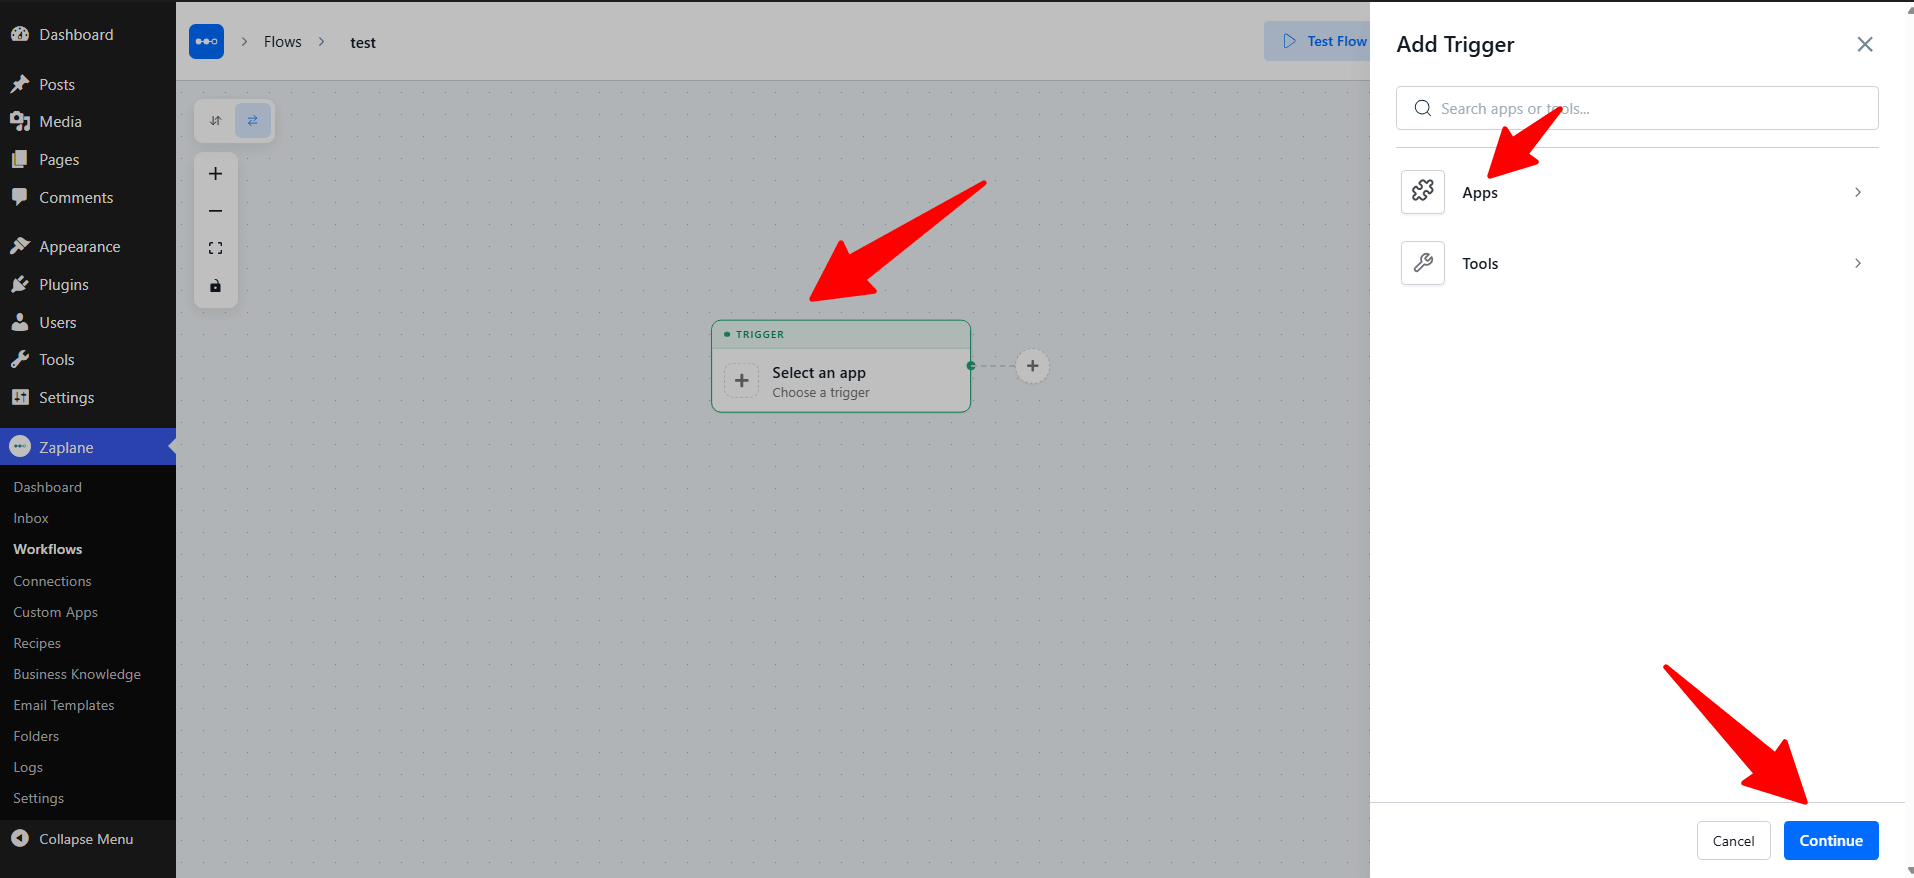
Select Slack from the app list and click Continue.
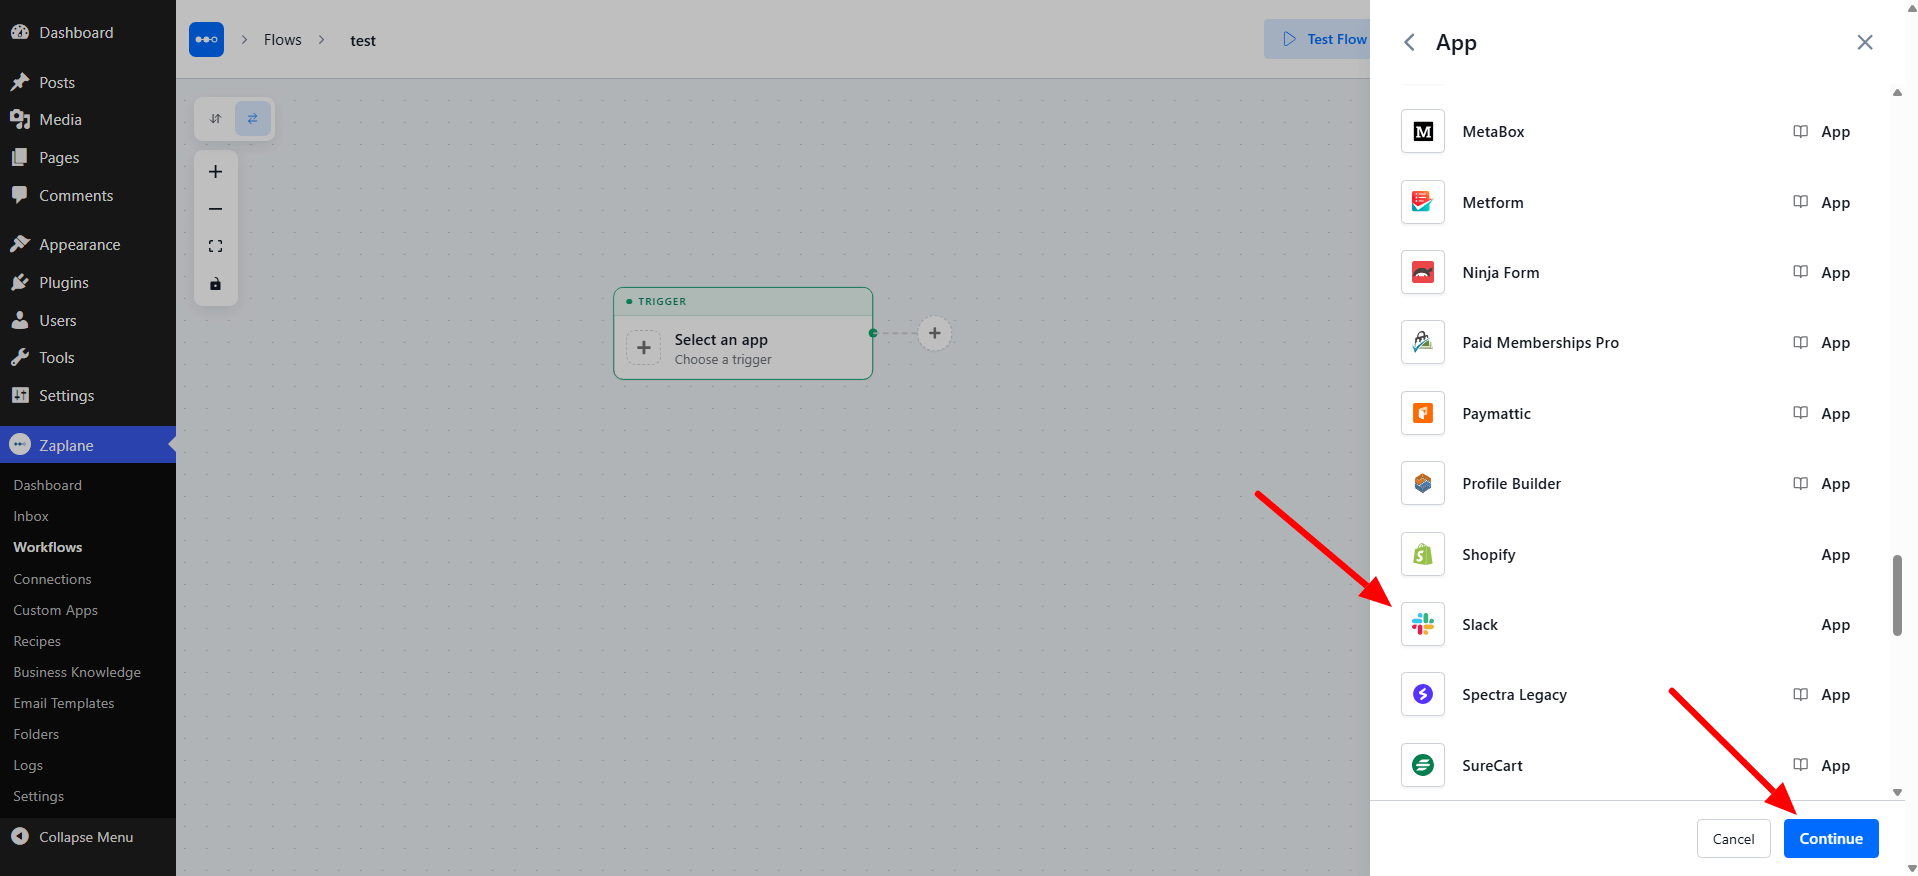
Step 10: Choose the Trigger Type and Connection
Open the Trigger Type dropdown and pick the event that should start your workflow: Message Received, App Mentioned, Reaction Added, Channel Created or File Shared. Here we use Message Received. Then, in Select Connection, choose the Slack connection you created in Step 7. You can also click Create new connection here. Click Continue.
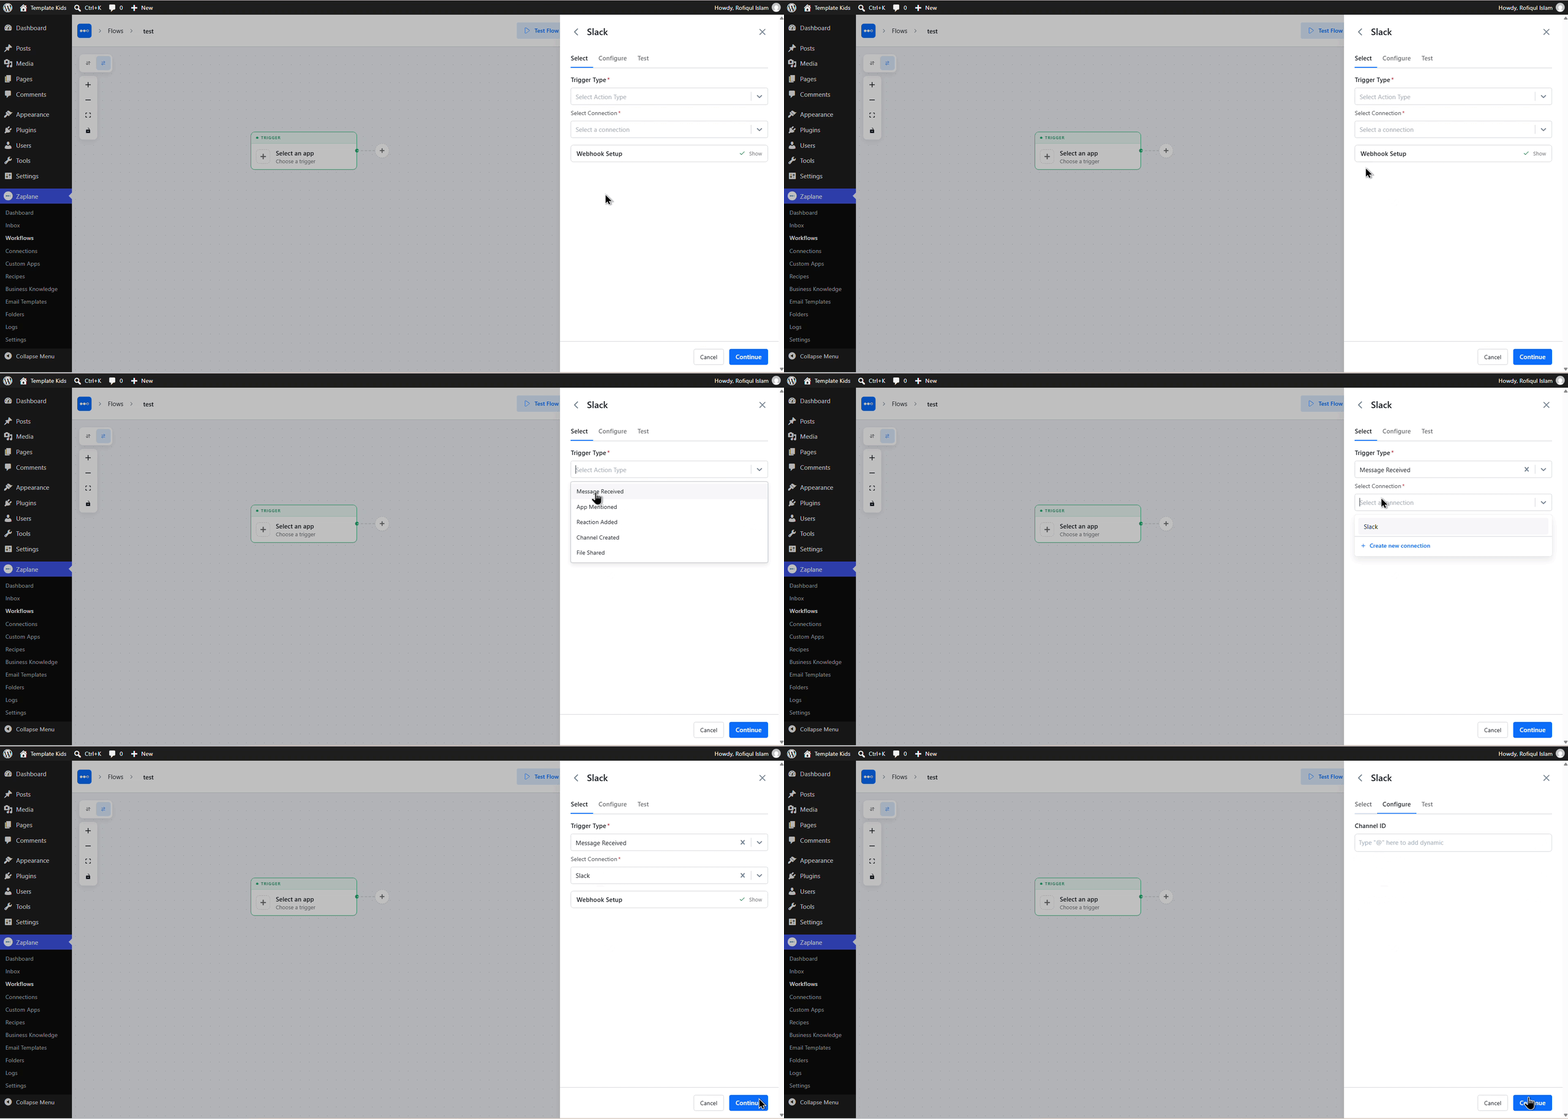
Step 11: Configure the Trigger
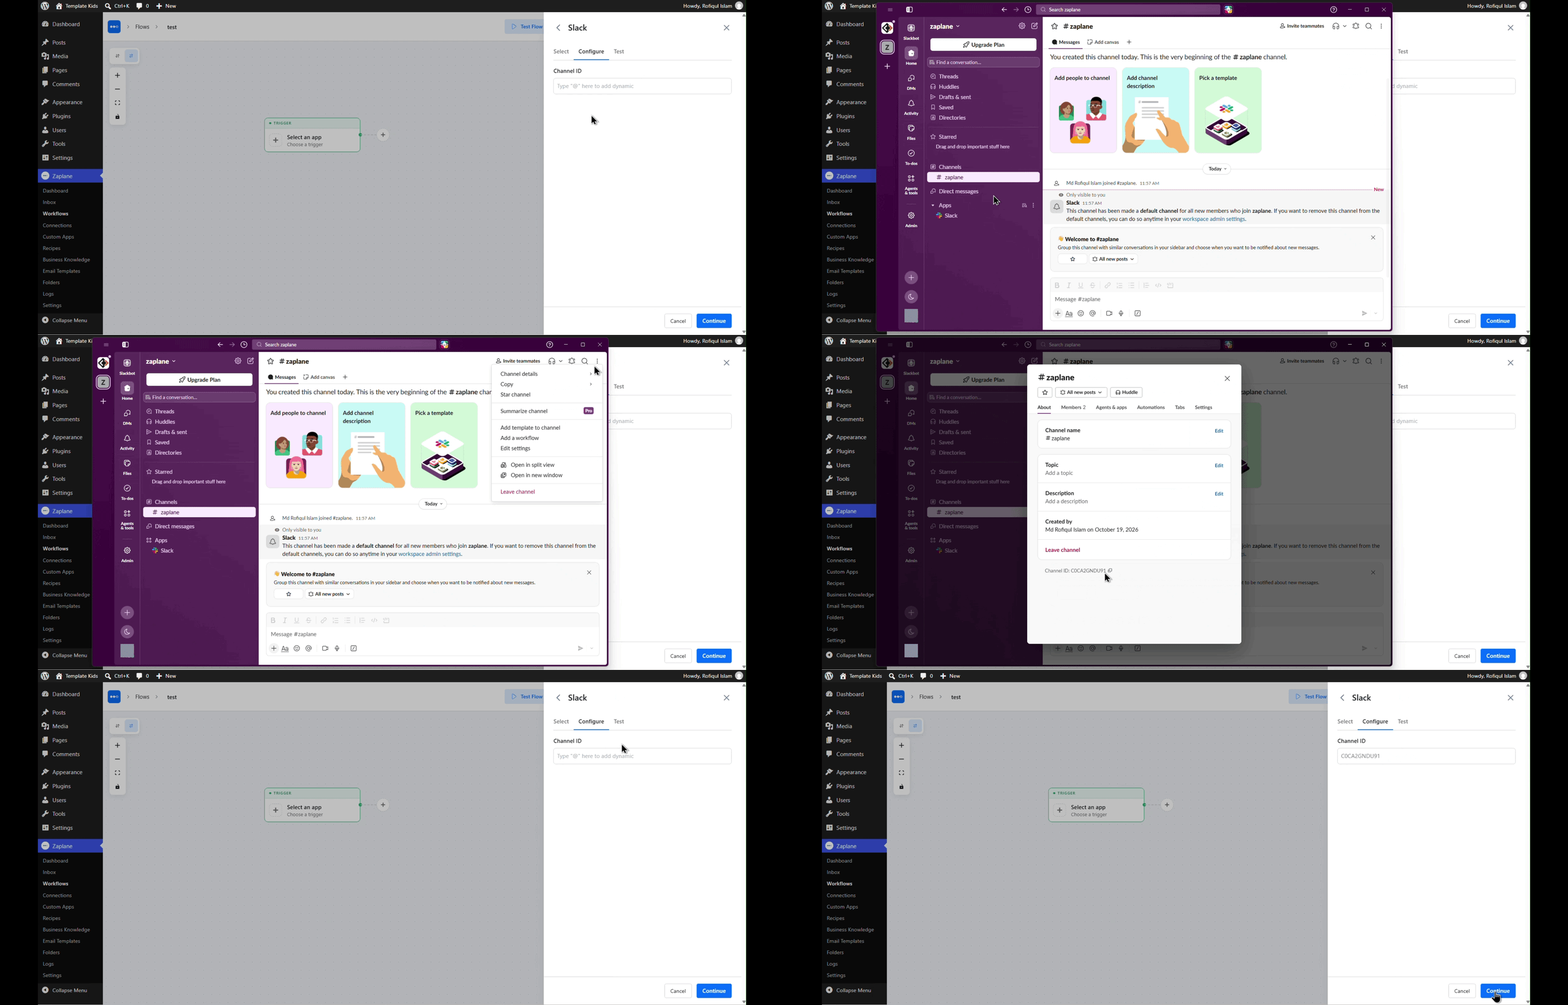
On the Configure tab, enter the Channel ID of the Slack channel you want to use. To find it, open the channel in Slack, click the three-dot menu in the top-right corner, and choose Channel details. Copy the Channel ID from the details window, paste it into the field, then click Continue.
Step 12: Test and Activate the Workflow
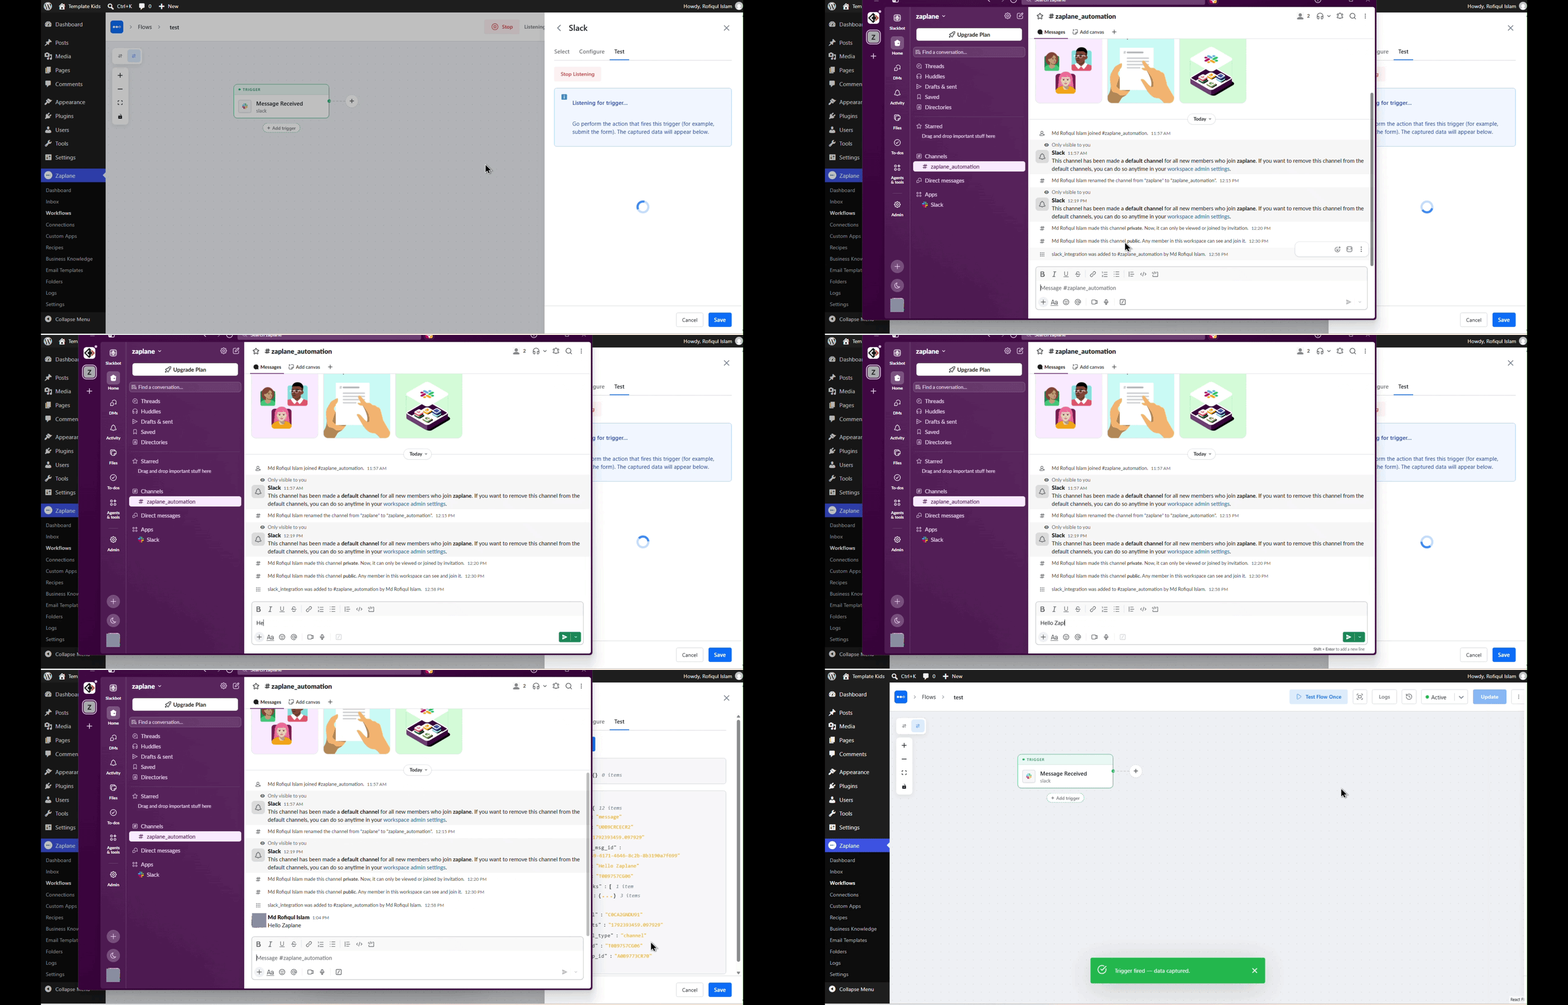
On the Test tab, click Test Trigger. Zaplane starts listening for the trigger. Go to your Slack channel and send a message. Zaplane captures it and shows the data in the Output section. Click Save.
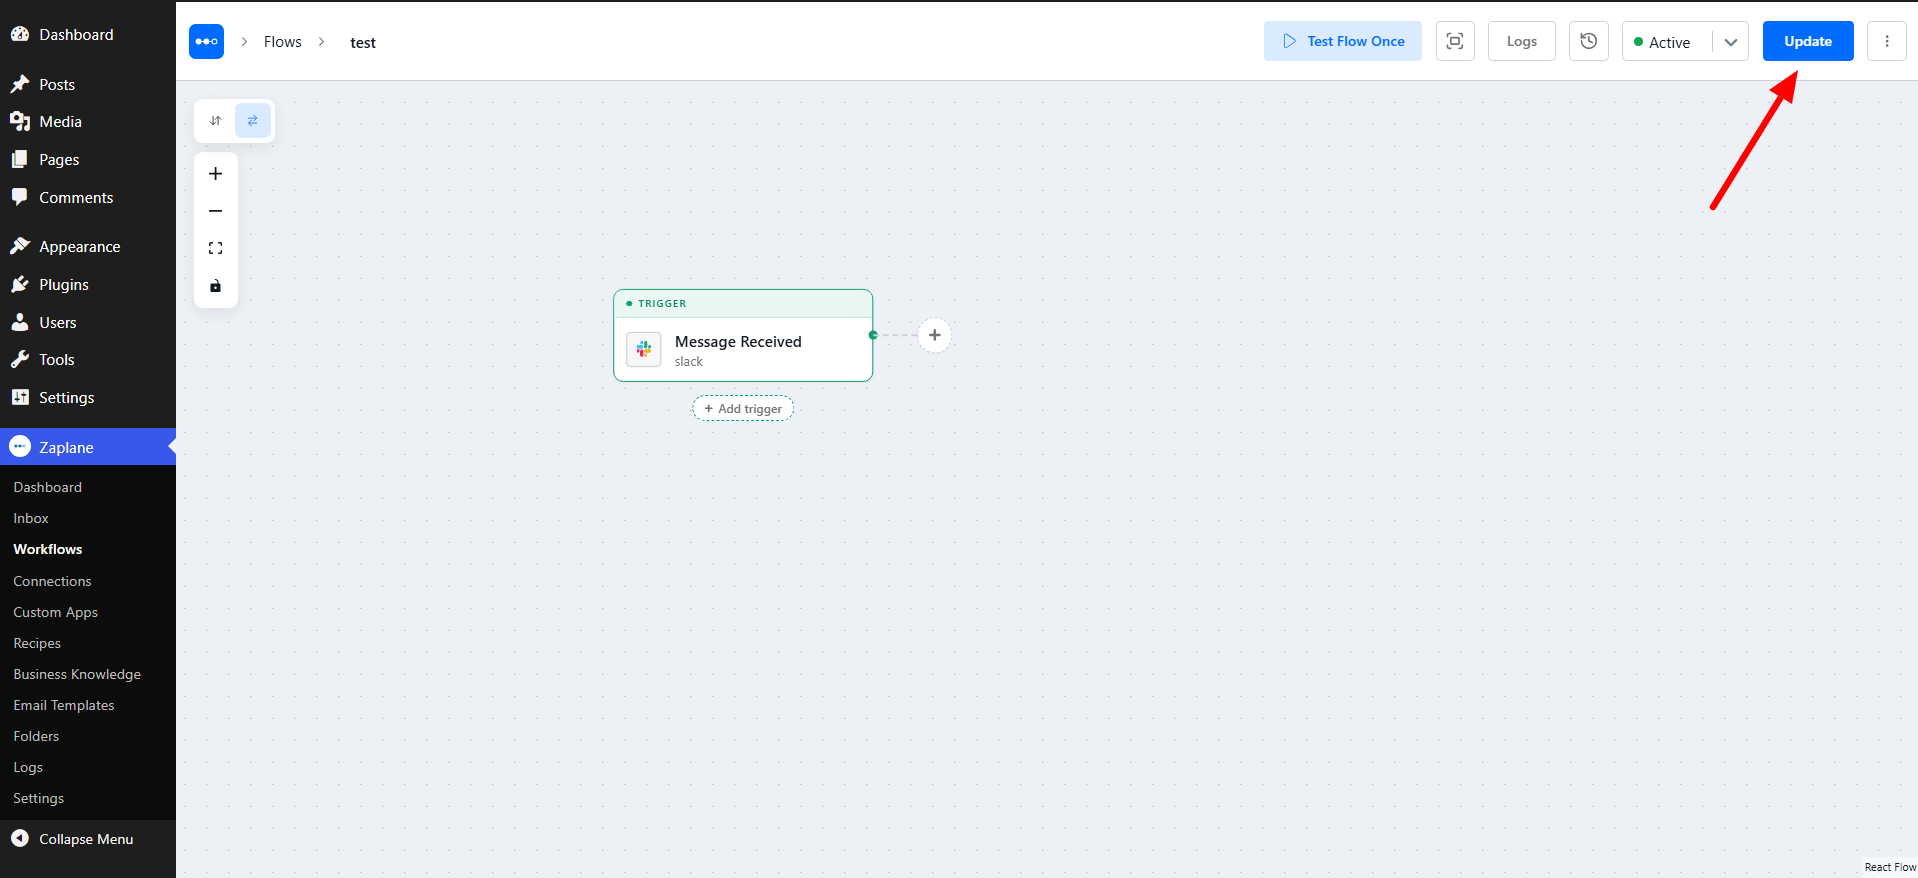
Your trigger node now shows Message Received. Make sure the workflow status is Active, then click Update in the top-right corner to save and activate the workflow.
Done!
Slack is now connected to Zaplane. From now on, every time a new message arrives in your channel, your workflow runs automatically.