

Zaplane’s Custom Apps builder lets you connect any REST API that isn’t available as a built-in integration. This guide walks through getting a personal access token from Typeform, building a custom Typeform app in Zaplane with a Create Form action, and then connecting and testing it inside a workflow.
Part 1: Build the Custom Typeform App in Zaplane
Step 1: Start a New Custom App
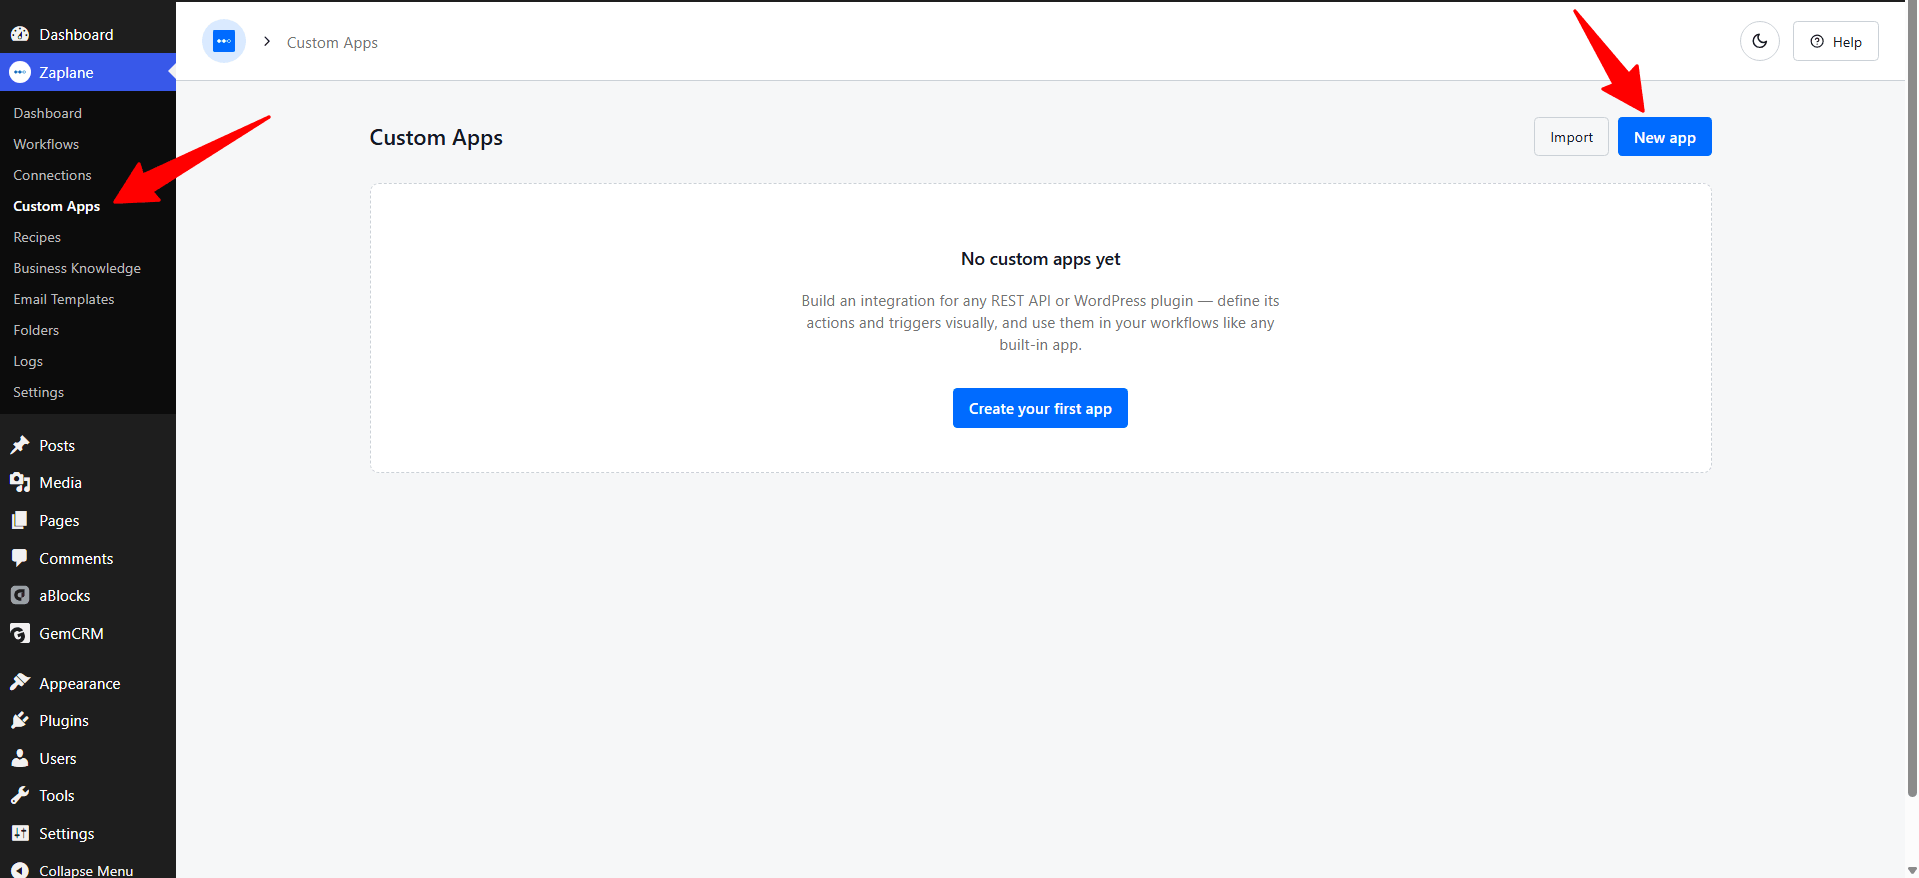
- Go to Zaplane > Custom Apps and click New app.
Step 2: Enter the App Details
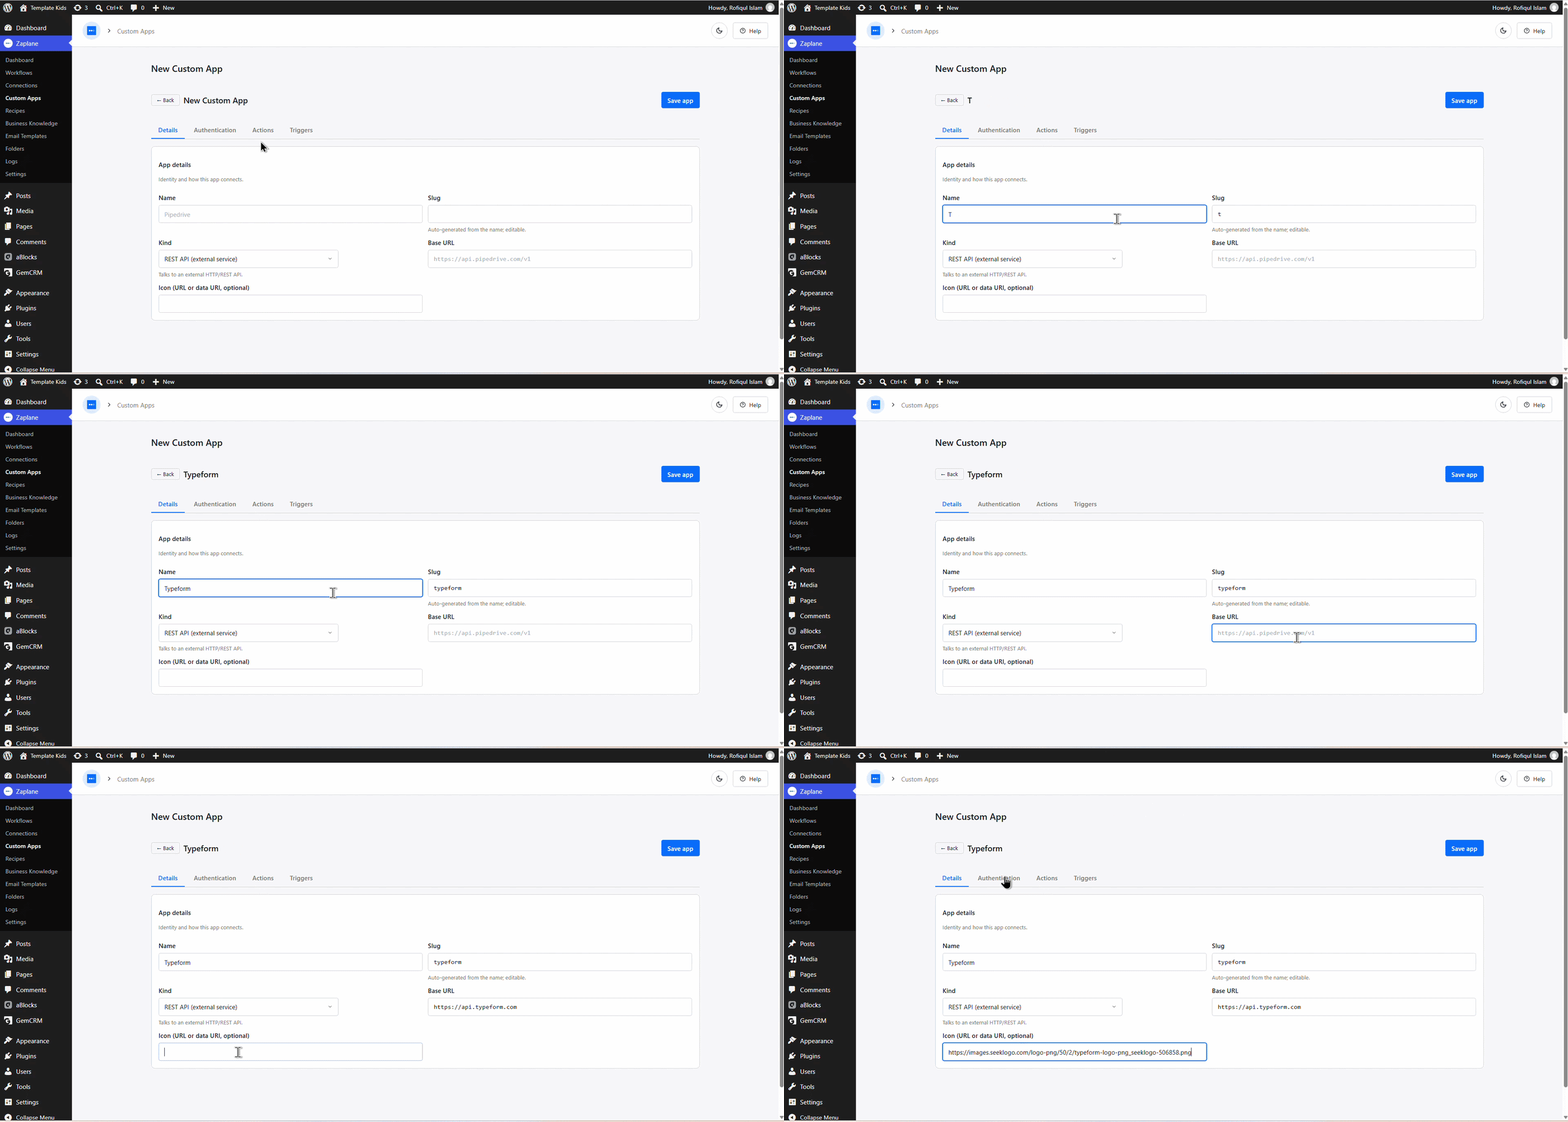
- On the Details tab, set the Name (Typeform), Slug, Kind (REST API – external service), Base URL (https://api.typeform.com), and optionally an Icon.
Step 3: Set Up Authentication
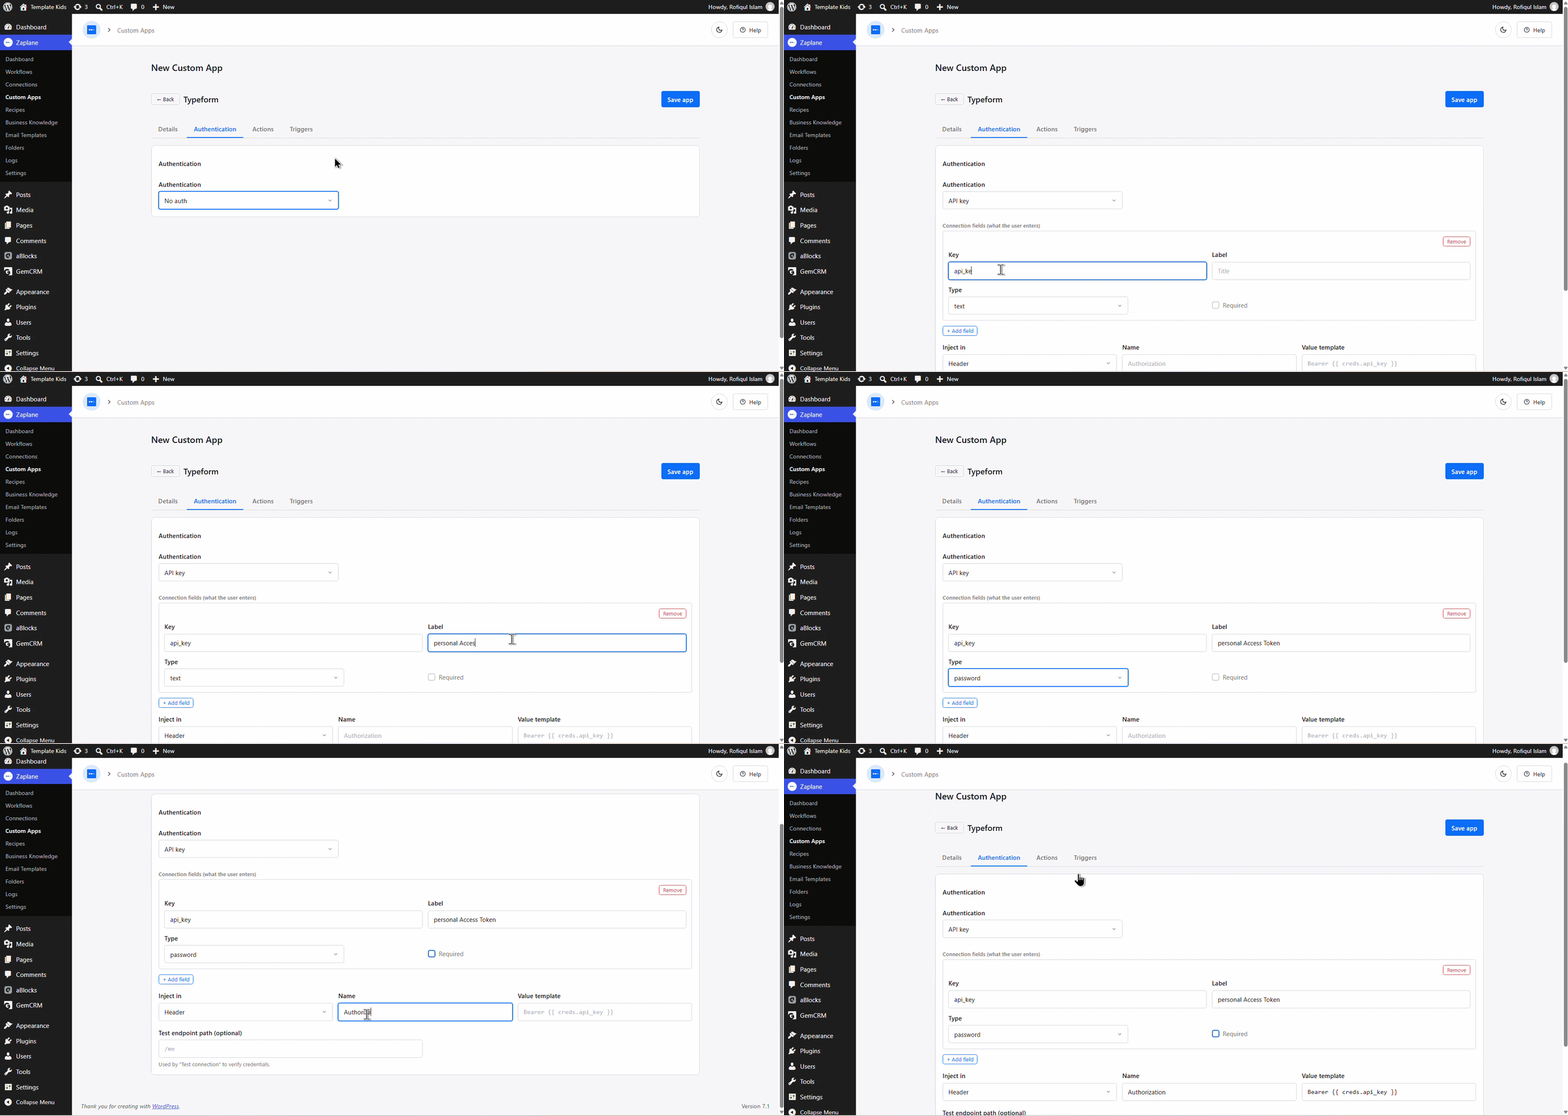
- On the Authentication tab, set Authentication to the API key. Add a connection field with Key api_key, Label “Personal Access Token”, and Type password. Under Inject in, choose Header, set Name to Authorization, and set the Value template to Bearer {{ creds.api_key }}.
Step 4: Add an Action
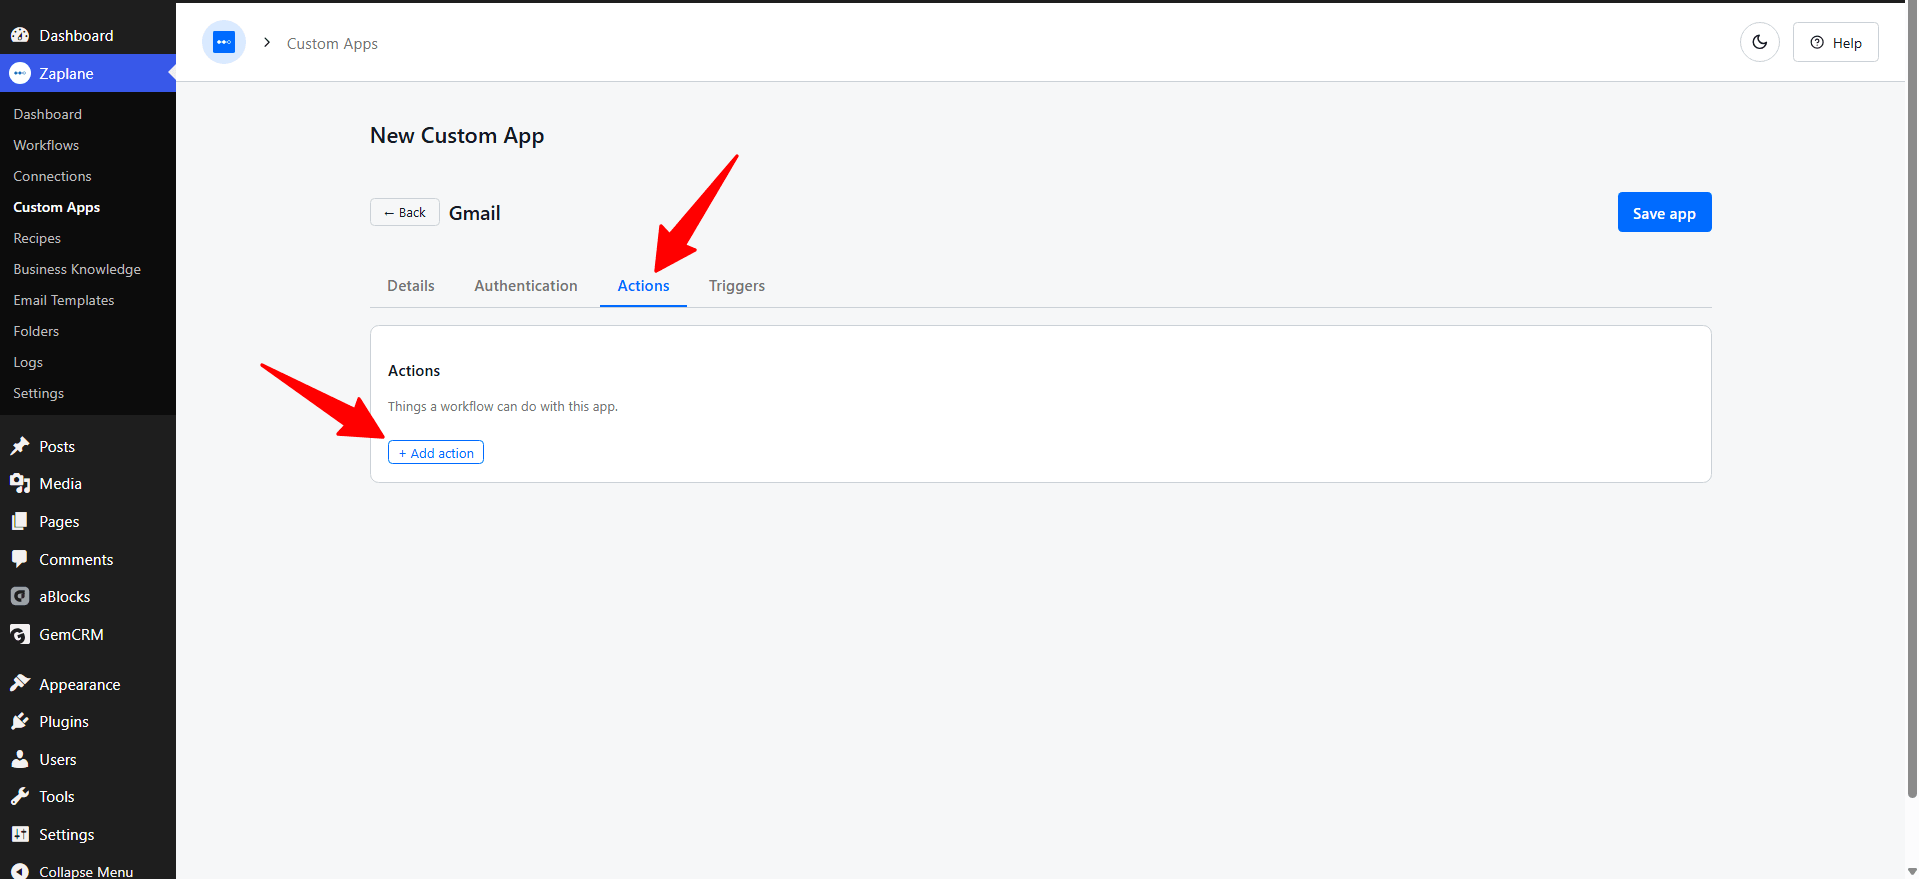
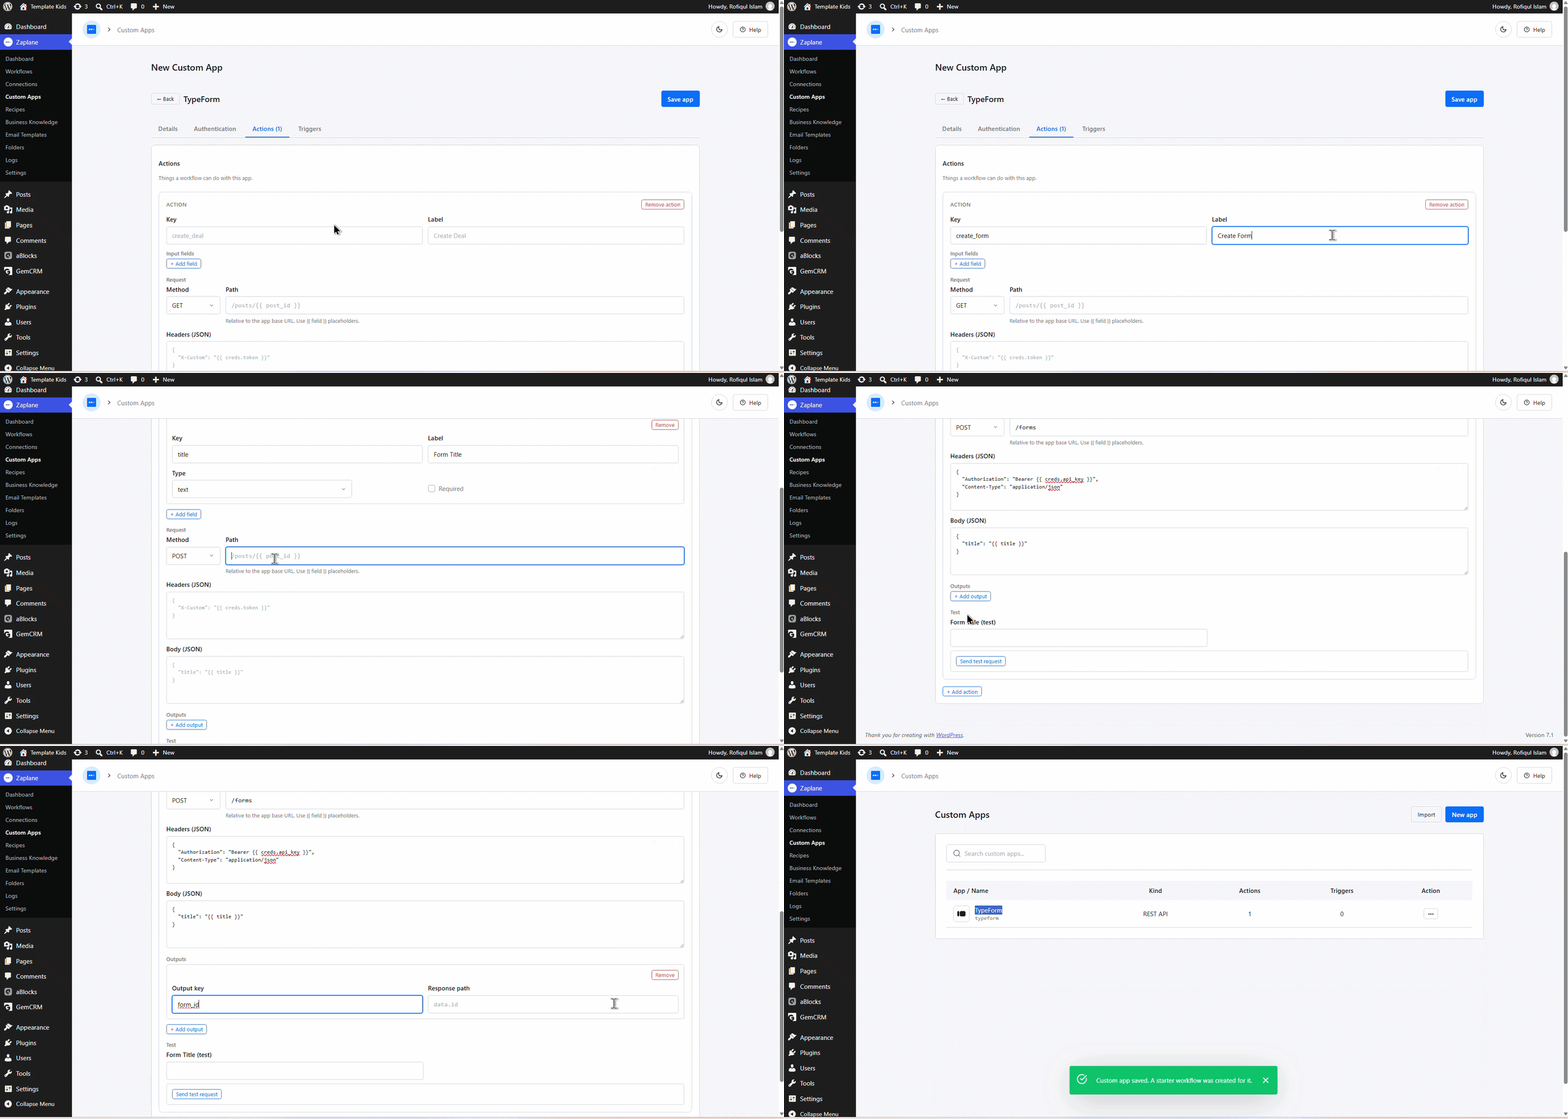
- On the Actions tab, click + Add action.
Step 5: Configure the Action
- Set the action’s Key and Label (e.g. create_form / “Create Form”), add an Input field for the form title, then set the Request Method to POST and the Path to /forms. Add the Headers (JSON) for authorization and content type, and the Body (JSON) mapping your input field into the request.
- Add an Output (Output key form_id, Response path data.id), enter a value in the test field, then click Send test request to confirm the action works.
- Click Save app. Zaplane confirms the custom app is saved and creates a starter workflow for it.
Part 2: Get Your Typeform Personal Access Token
Step 6: Open Your Account Settings
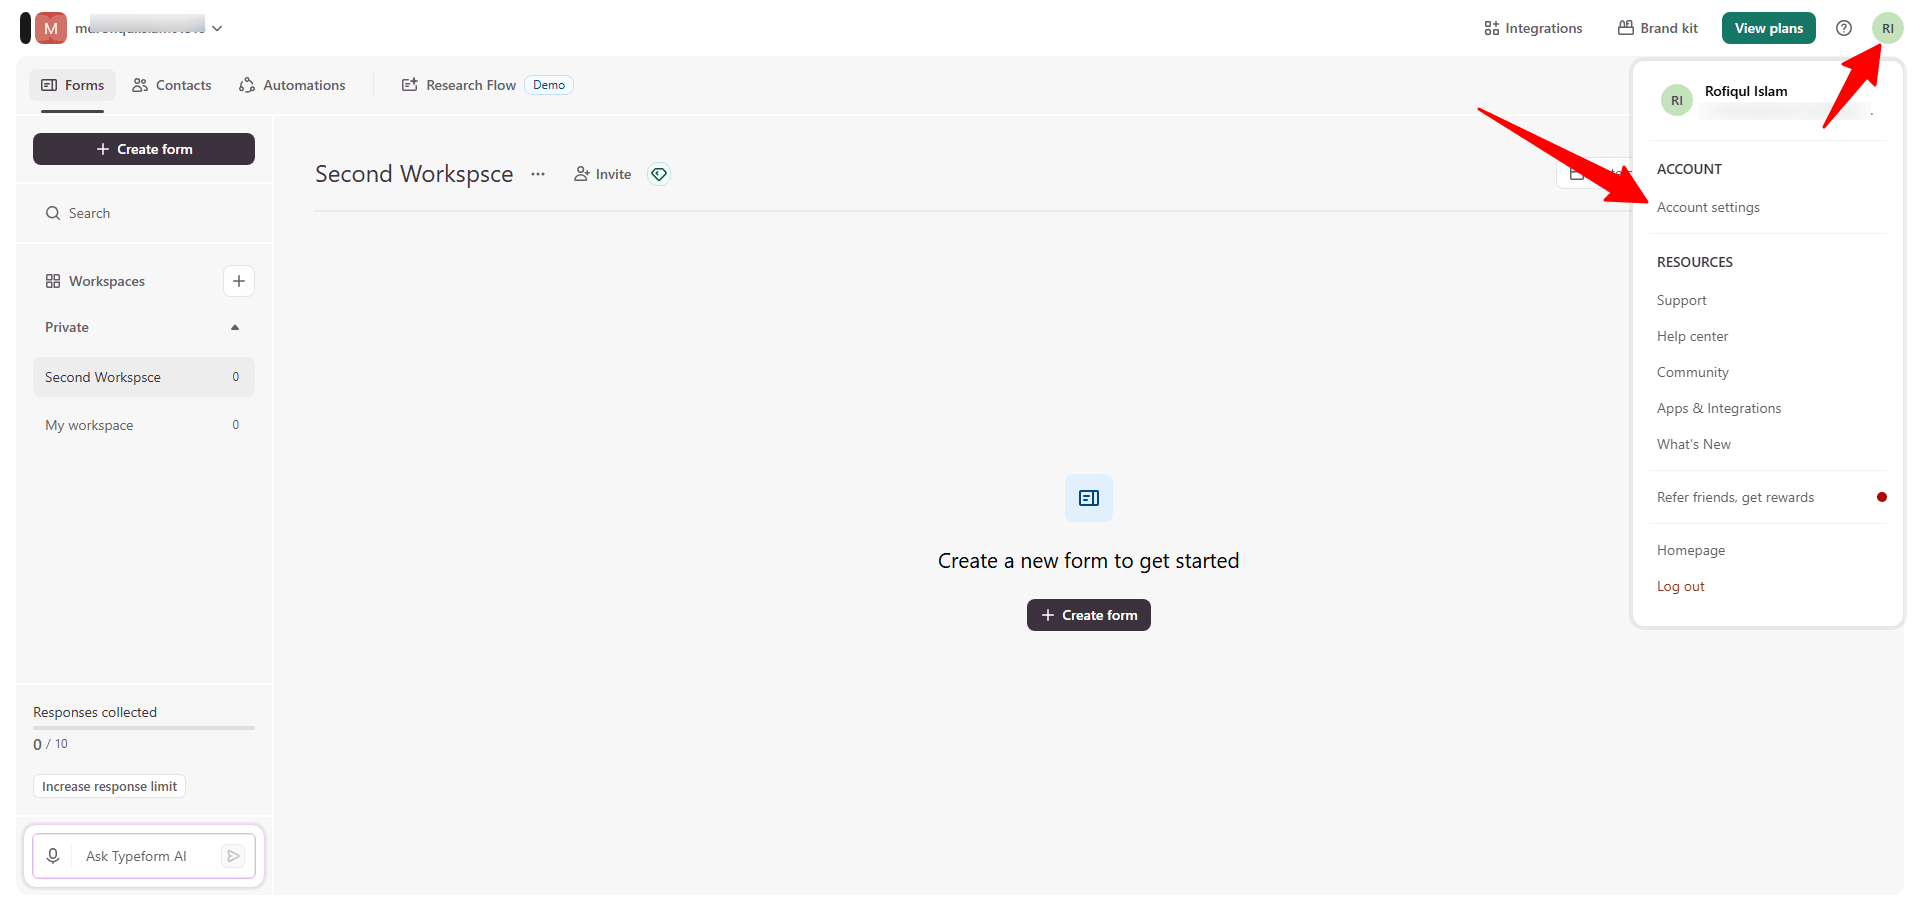
- In Typeform, click your profile icon in the top-right corner and select Account settings.
Step 7: Generate a New Token
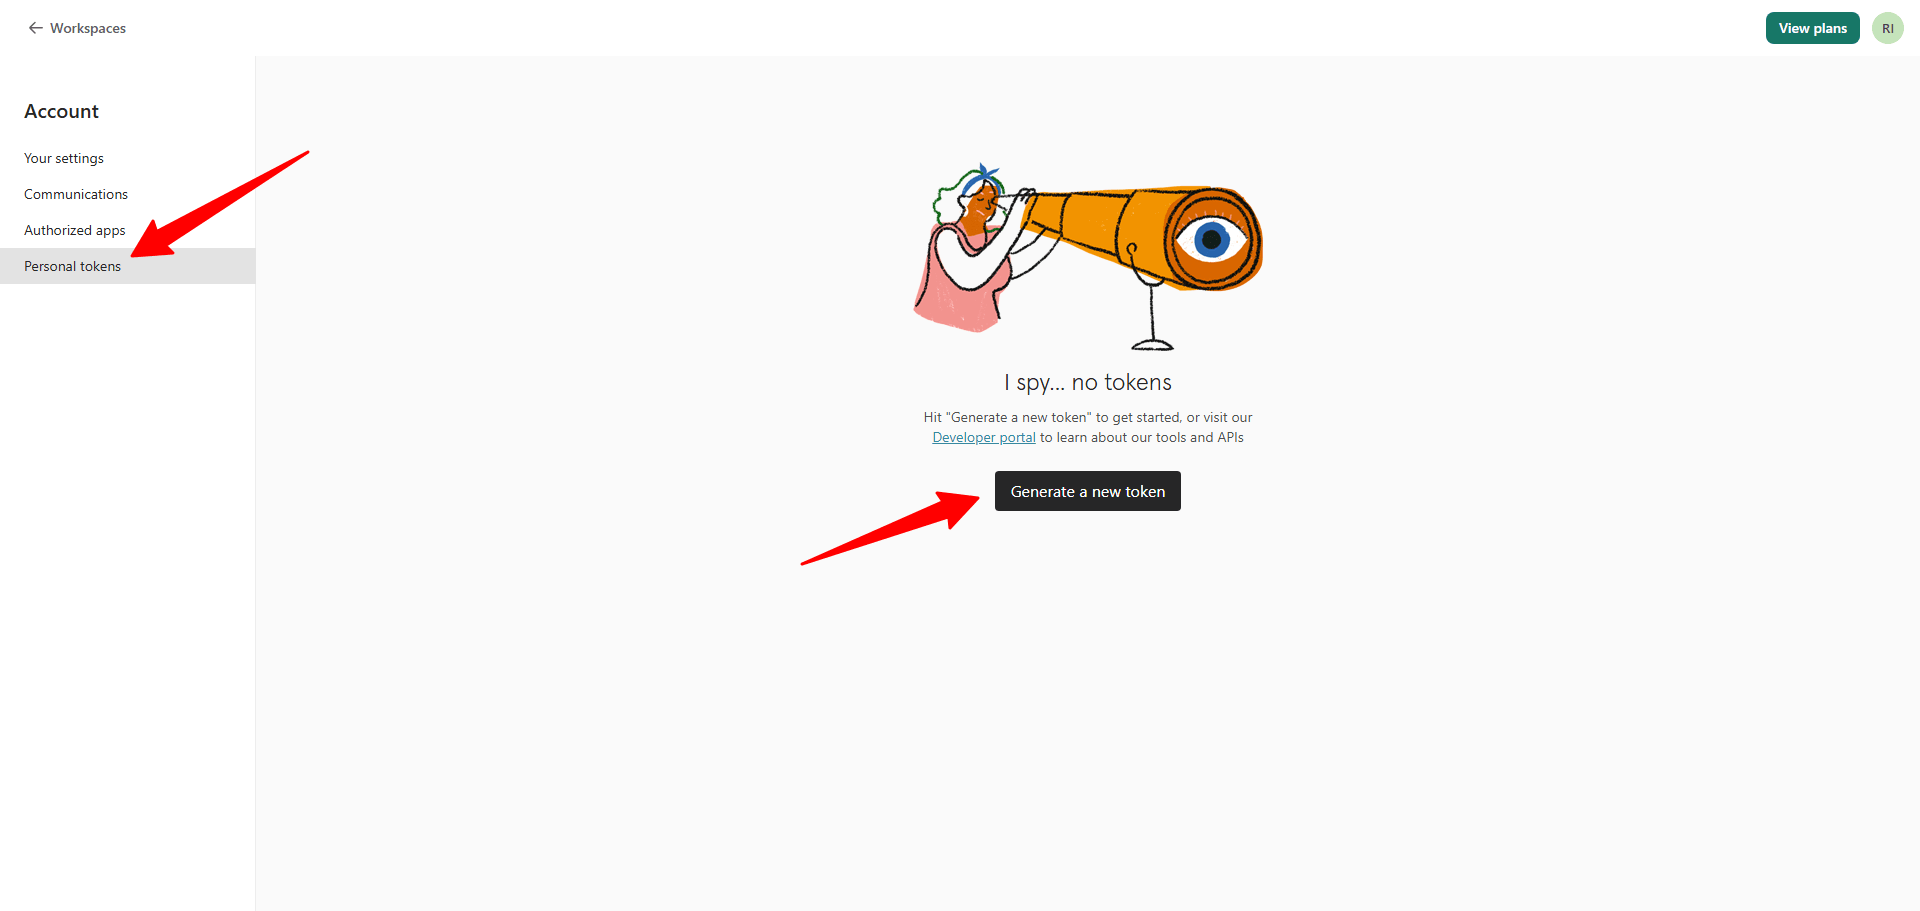
- On the Personal tokens page, click Generate a new token.
Step 8: Name the Token and Set Its Scope
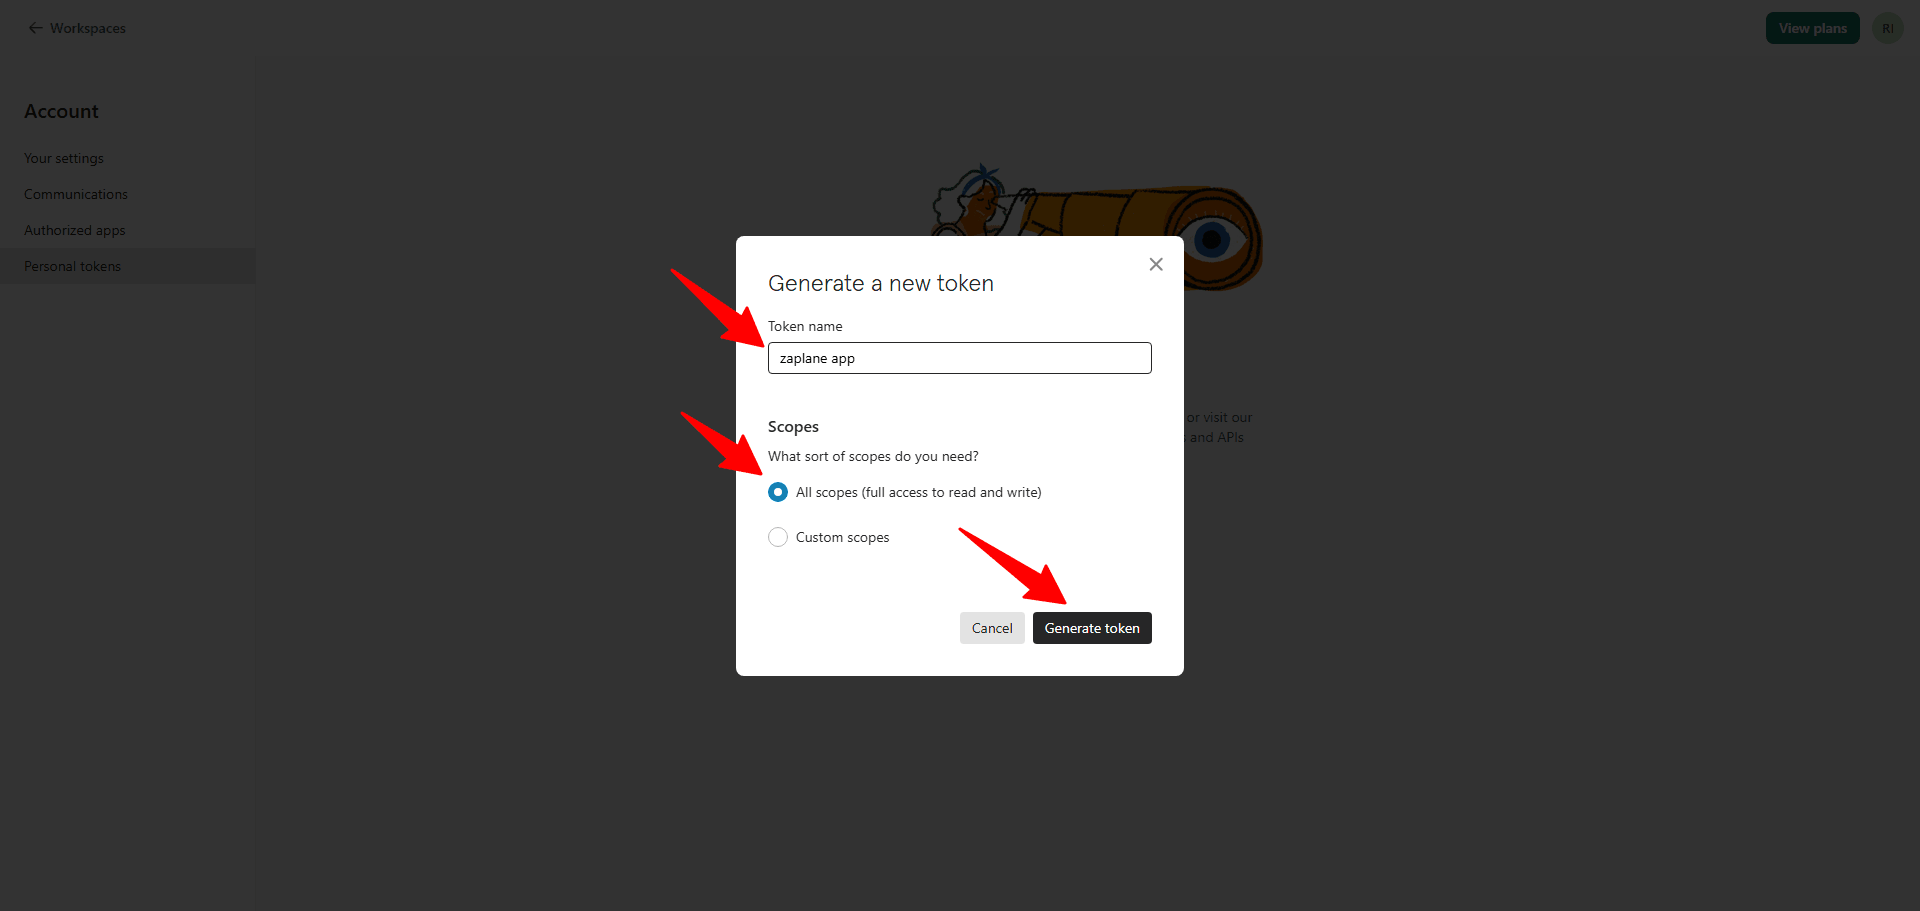
- Enter a Token name, choose All scopes (full access to read and write), then click Generate token.
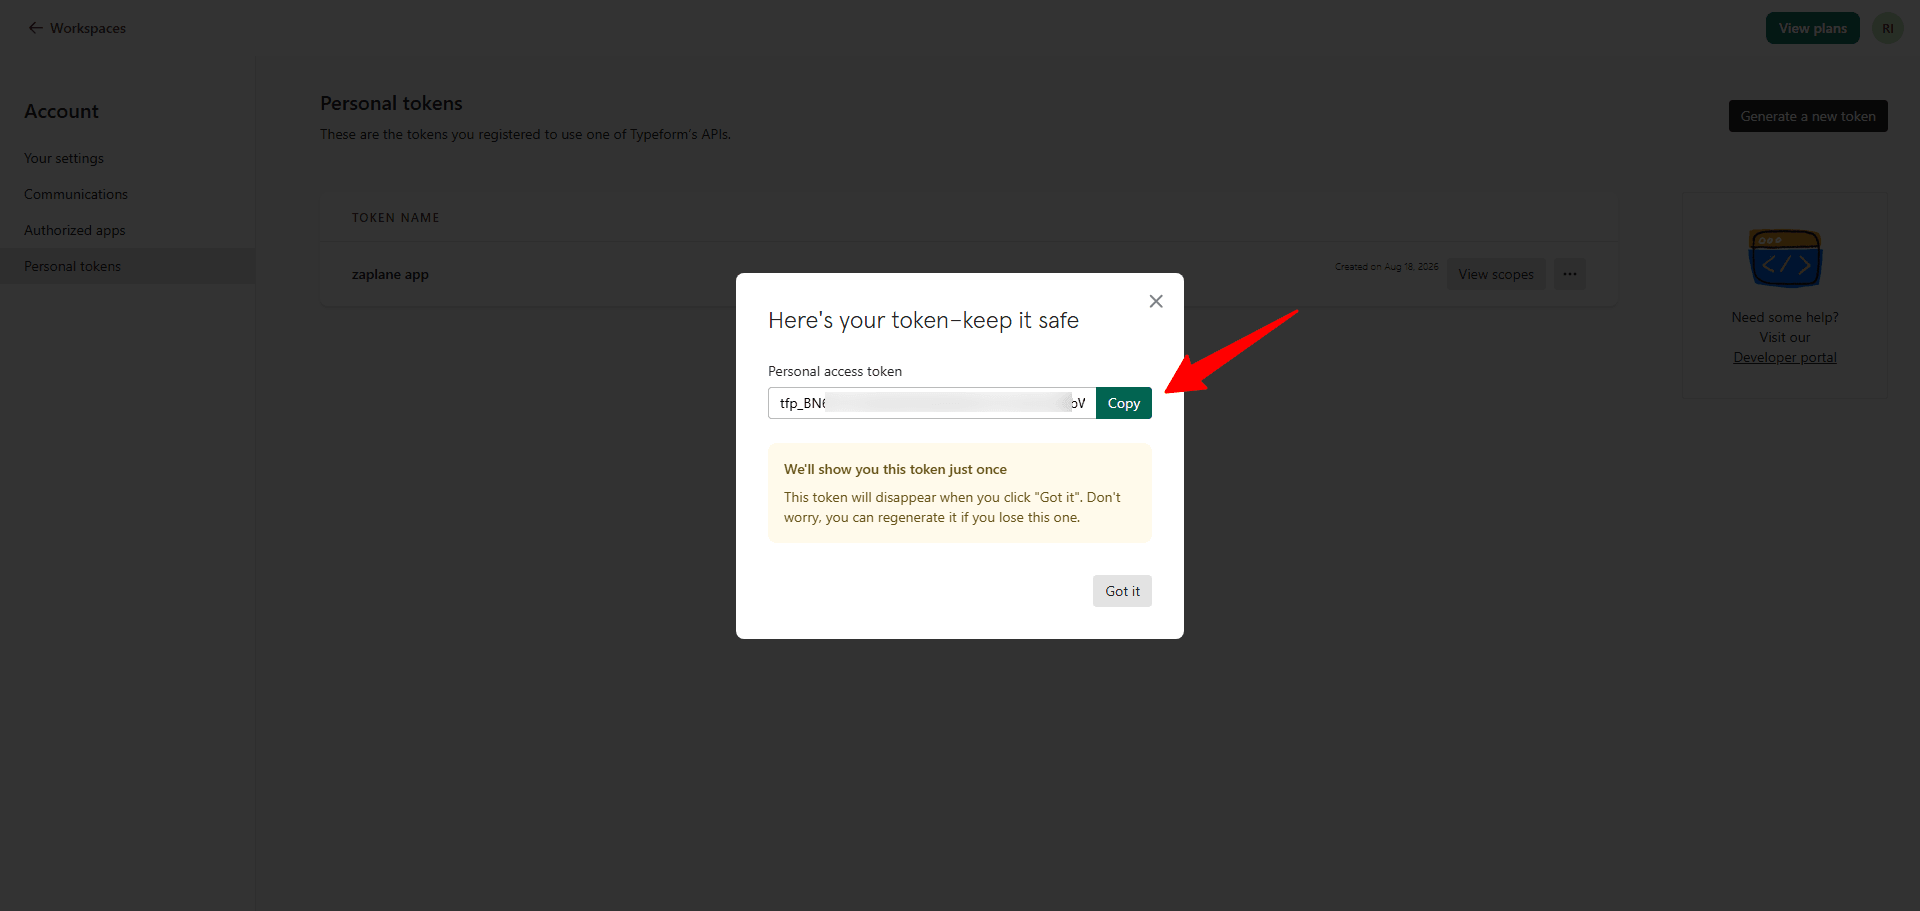
Step 9: Copy Your Token
- Click Copy to copy your personal access token — you’ll only be able to see it once, so save it somewhere safe.
Part 3: Connect and Use the Action in a Workflow
Step 10: Create the Typeform Connection
- Go to Zaplane > Connections, click Create credential, select Typeform, paste your Personal Access Token, and click Save Connection.
Step 11: Add the Action to Your Workflow
- In your workflow, add a new action, set Action Type to Create Form, and choose your Typeform connection under Select Connection.
Step 12: Configure the Workflow Action
- On the Configure tab, fill in the Form Title and choose a Workspace.
Step 13: Test and Save the Action
- On the Test tab, click Test Action, then click Save.
Step 14: Update and Activate the Workflow
- Click Update in the top-right corner to save your changes and keep the workflow Active.
Your Zaplane workflow now creates a new Typeform form automatically every time it runs, using your custom Typeform app.
Done!
Your custom Typeform app is live in Zaplane and ready to use in any workflow.