

The Human Approval tool lets you send an approval request by email whenever a workflow reaches a certain point, then branch the workflow based on whether the request is Approved or Rejected. We’ll add the Human Approval action to a workflow, configure it, and connect different actions to the Approved and Rejected branches.
Step 1: Create a Workflow
Go to Zaplane > Workflows from your WordPress dashboard, then click Create Workflow to open the workflow editor.
Before adding a Human Approval tool, you need to set up a trigger first. Here is how to do it quickly:
- Click Select an app under the Trigger box, then choose Apps.
- Search for and select your trigger app — in this example, we are using aBlocks Contact Form.
- Choose the Trigger Type that matches the event you want to watch for, then click Continue.
- On the Configure tab, set up any required options, then click Continue.
- On the Test tab, click Test Trigger to confirm it is working correctly, then click Save.
Once your trigger is saved, proceed to the next step to add the Human Approval tool.
Step 2: Add the Human Approval tool
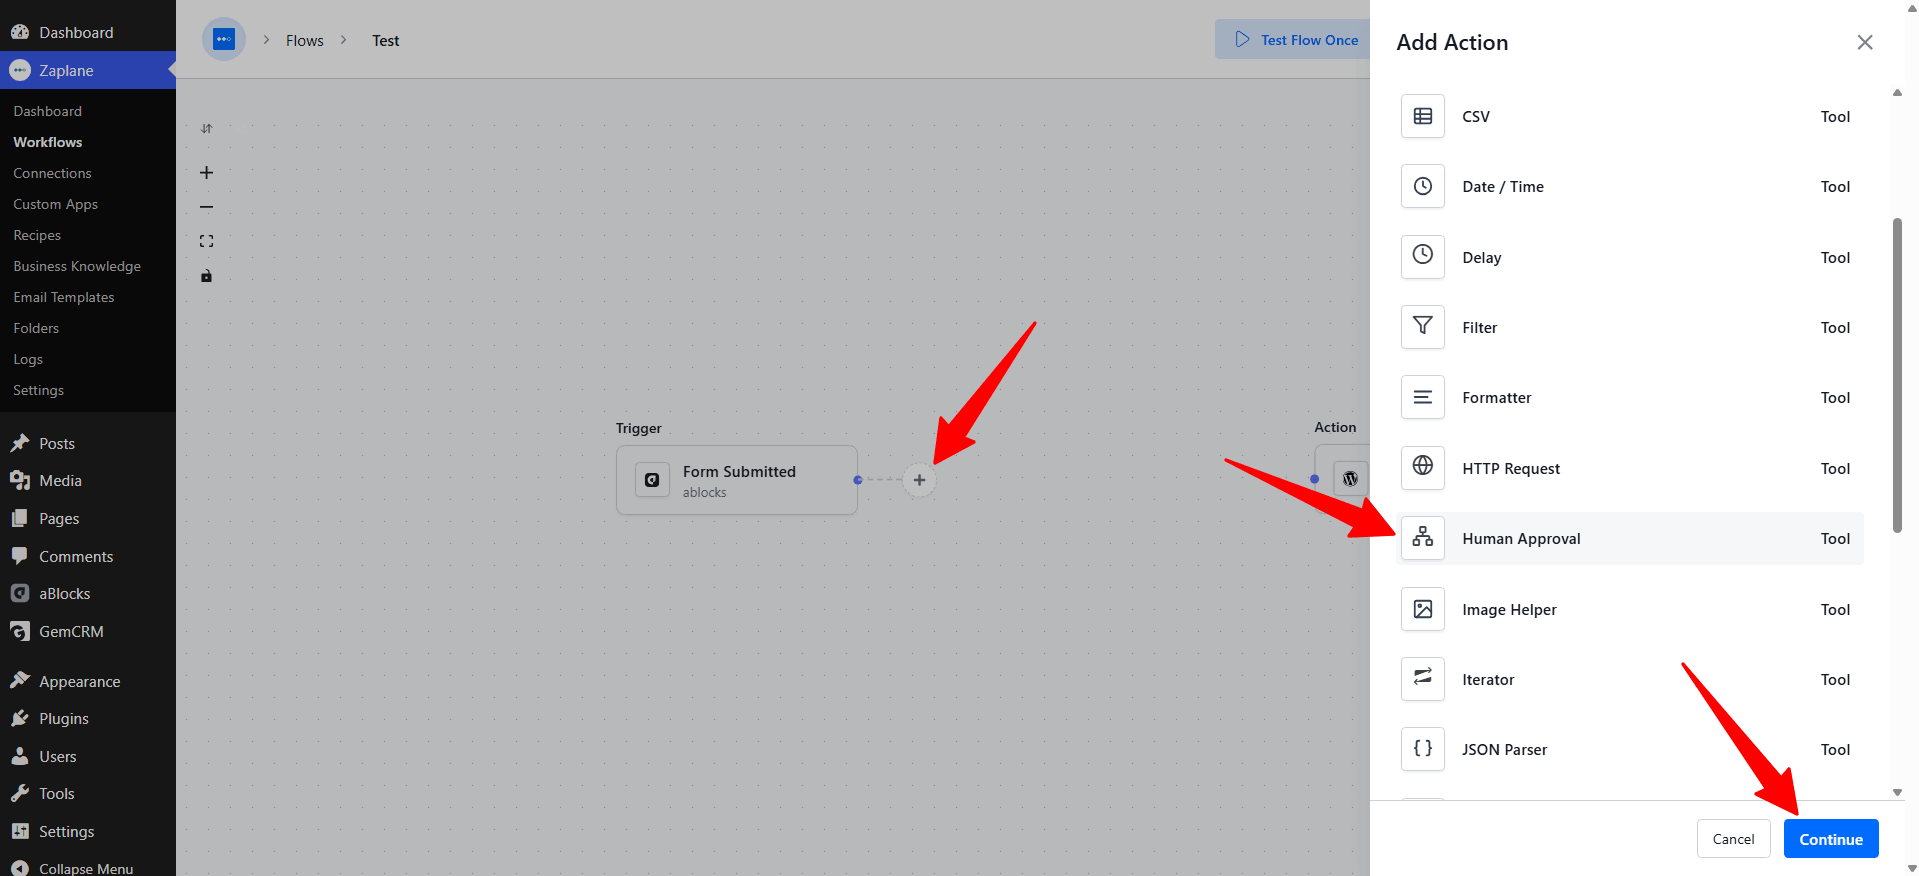
Click the + icon on your workflow canvas to open the Add Action panel, scroll the tool list, and select Human Approval.
Step 3: Select the Request Approval action
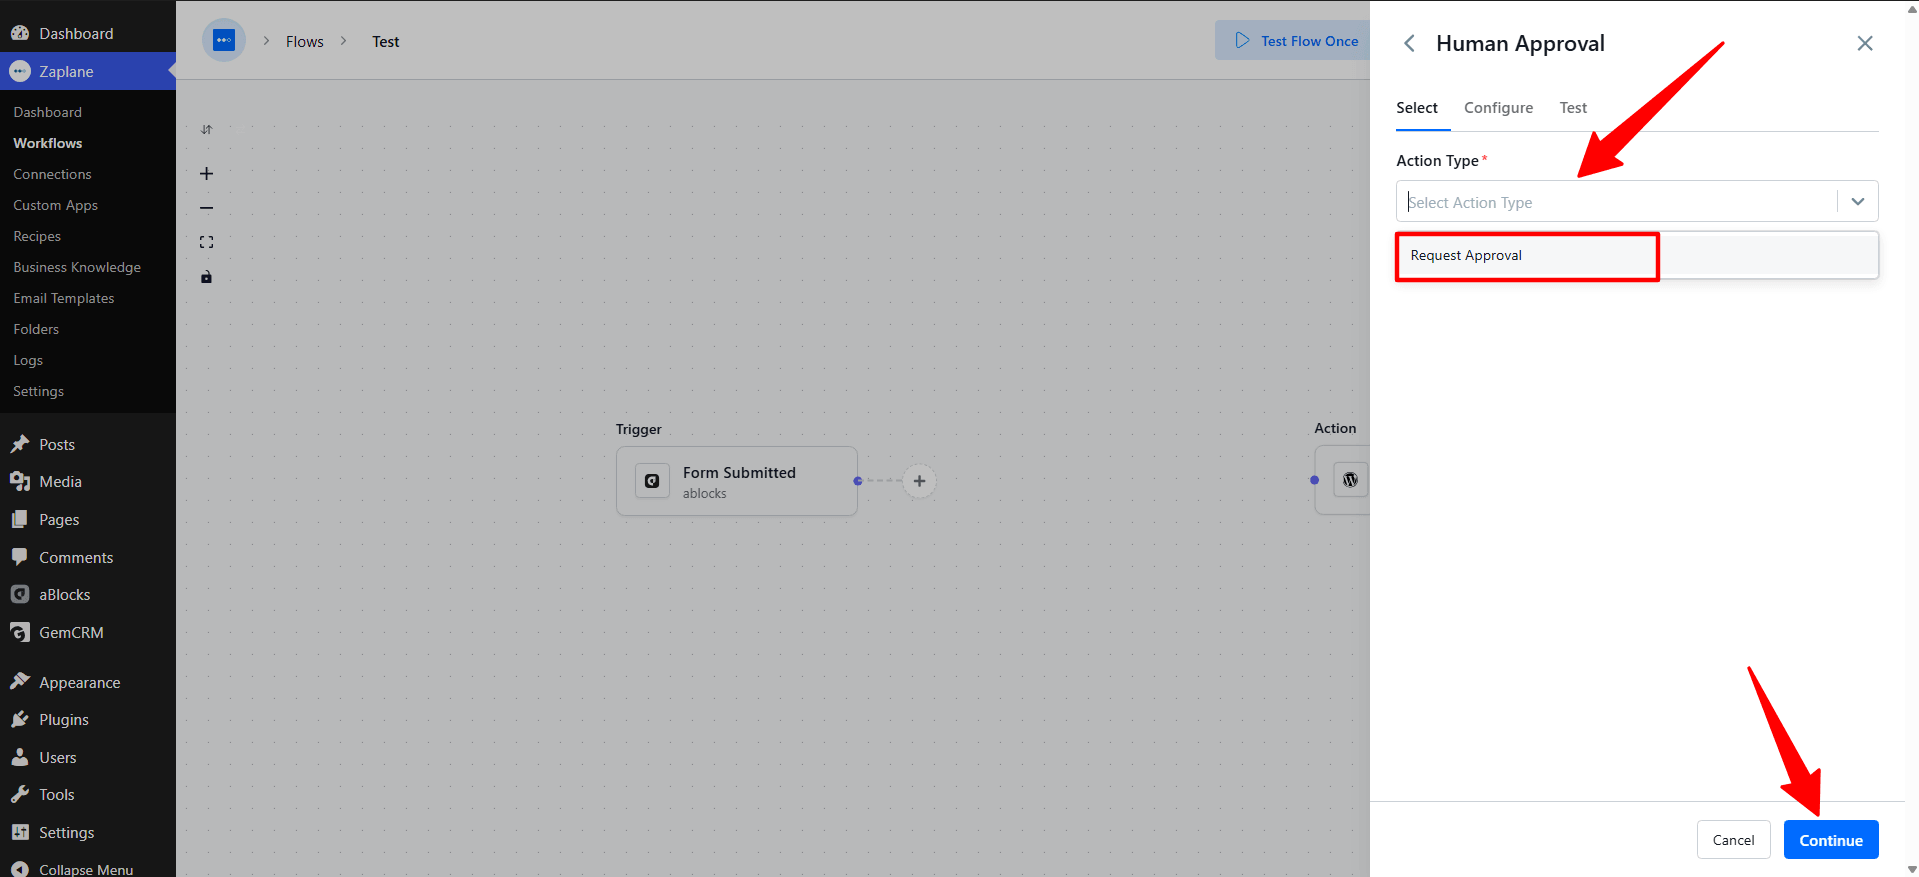
On the Select tab, choose Request Approval as the Action Type, then click Continue.
Step 4: Configure the approval request
On the Configure tab, fill in the Approver email(s), Email subject, and Message. Set the Approve button label and Reject button label, optionally enable Show a Reject button, and add a Slack incoming webhook URL if you want a Slack notification. You can also set a Timeout and choose what happens if it times out. Click Continue when done.

Step 5: Test the action and save
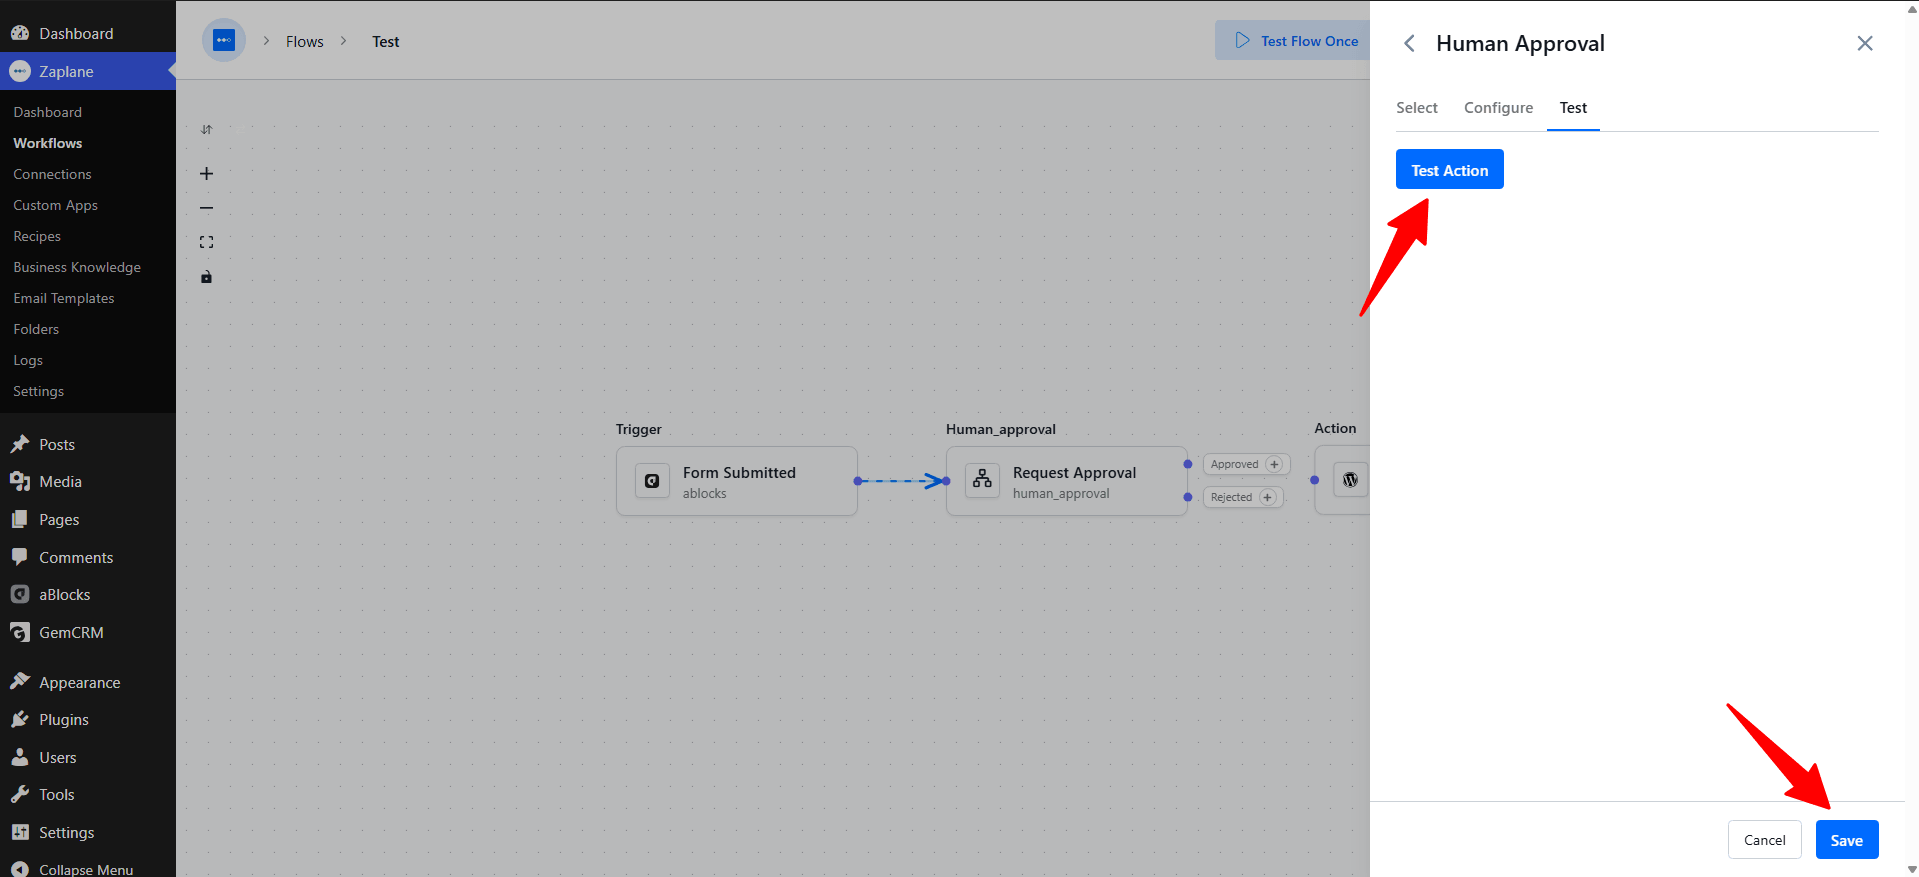
On the Test tab, click Test Action to send a sample approval request, then click Save.
Step 9: Update and activate the workflow
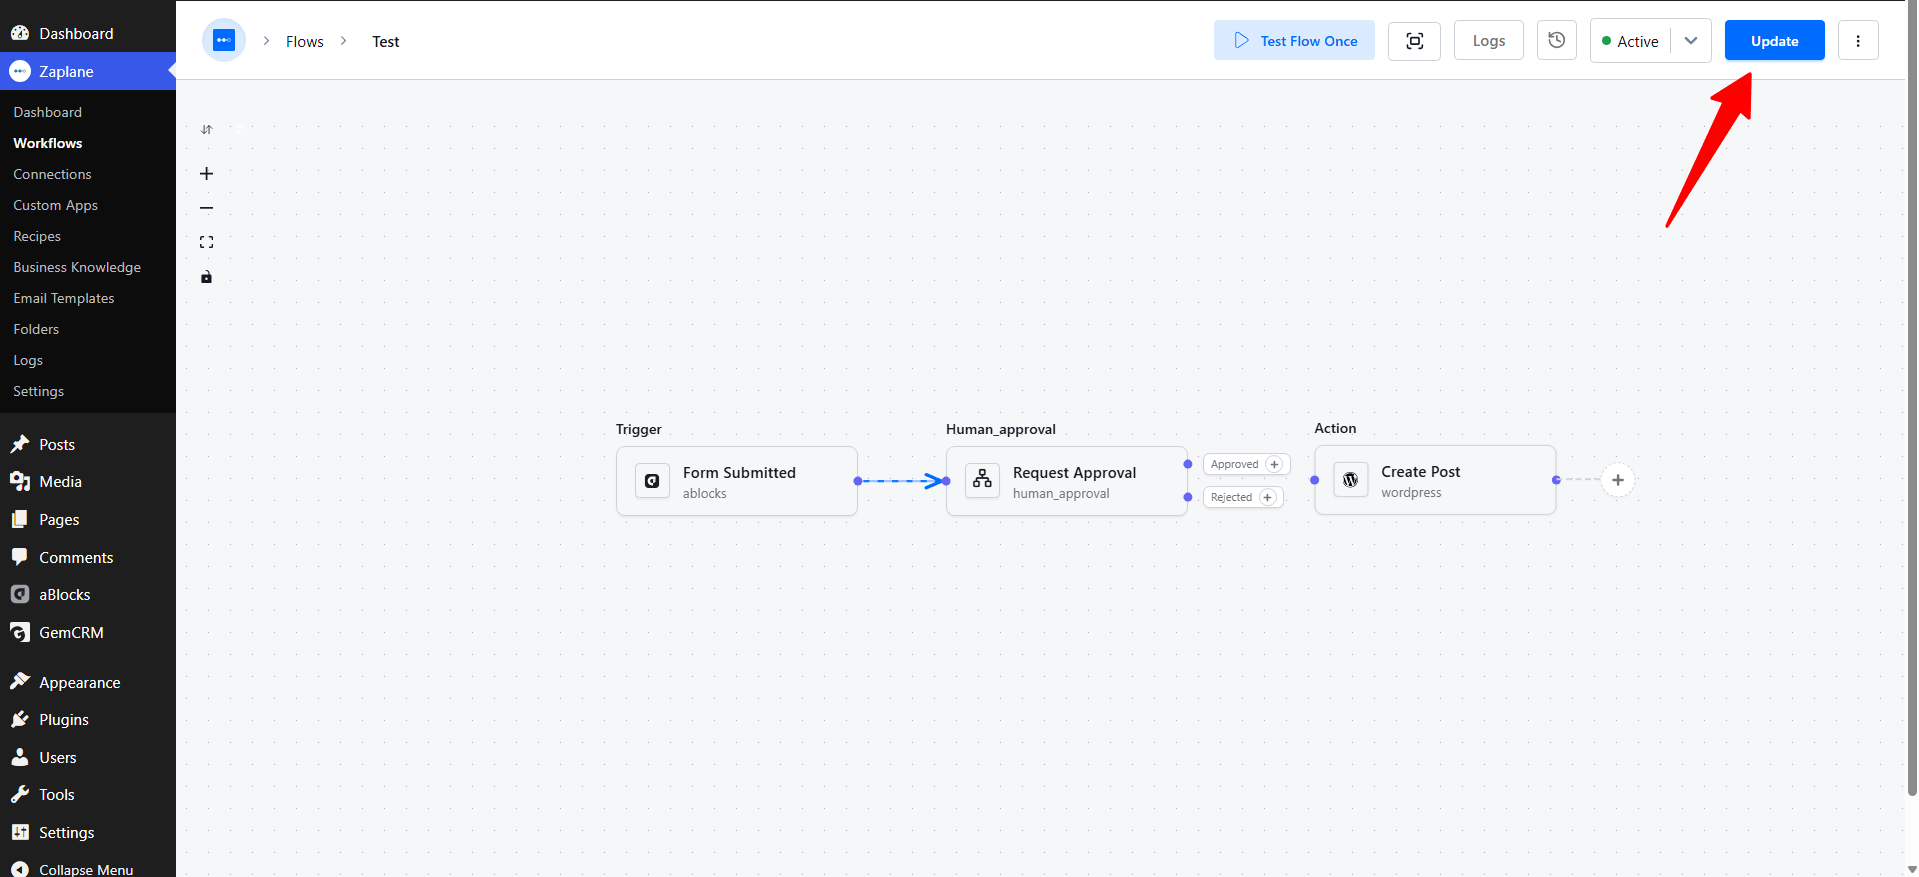
Click Update in the top-right corner to save and activate the workflow.
Step 6: Add an action to the Approved branch
Back on the canvas, click the + on the Approved branch and add the action that should run when the request is approved — for example, Create Contact in GemCRM.

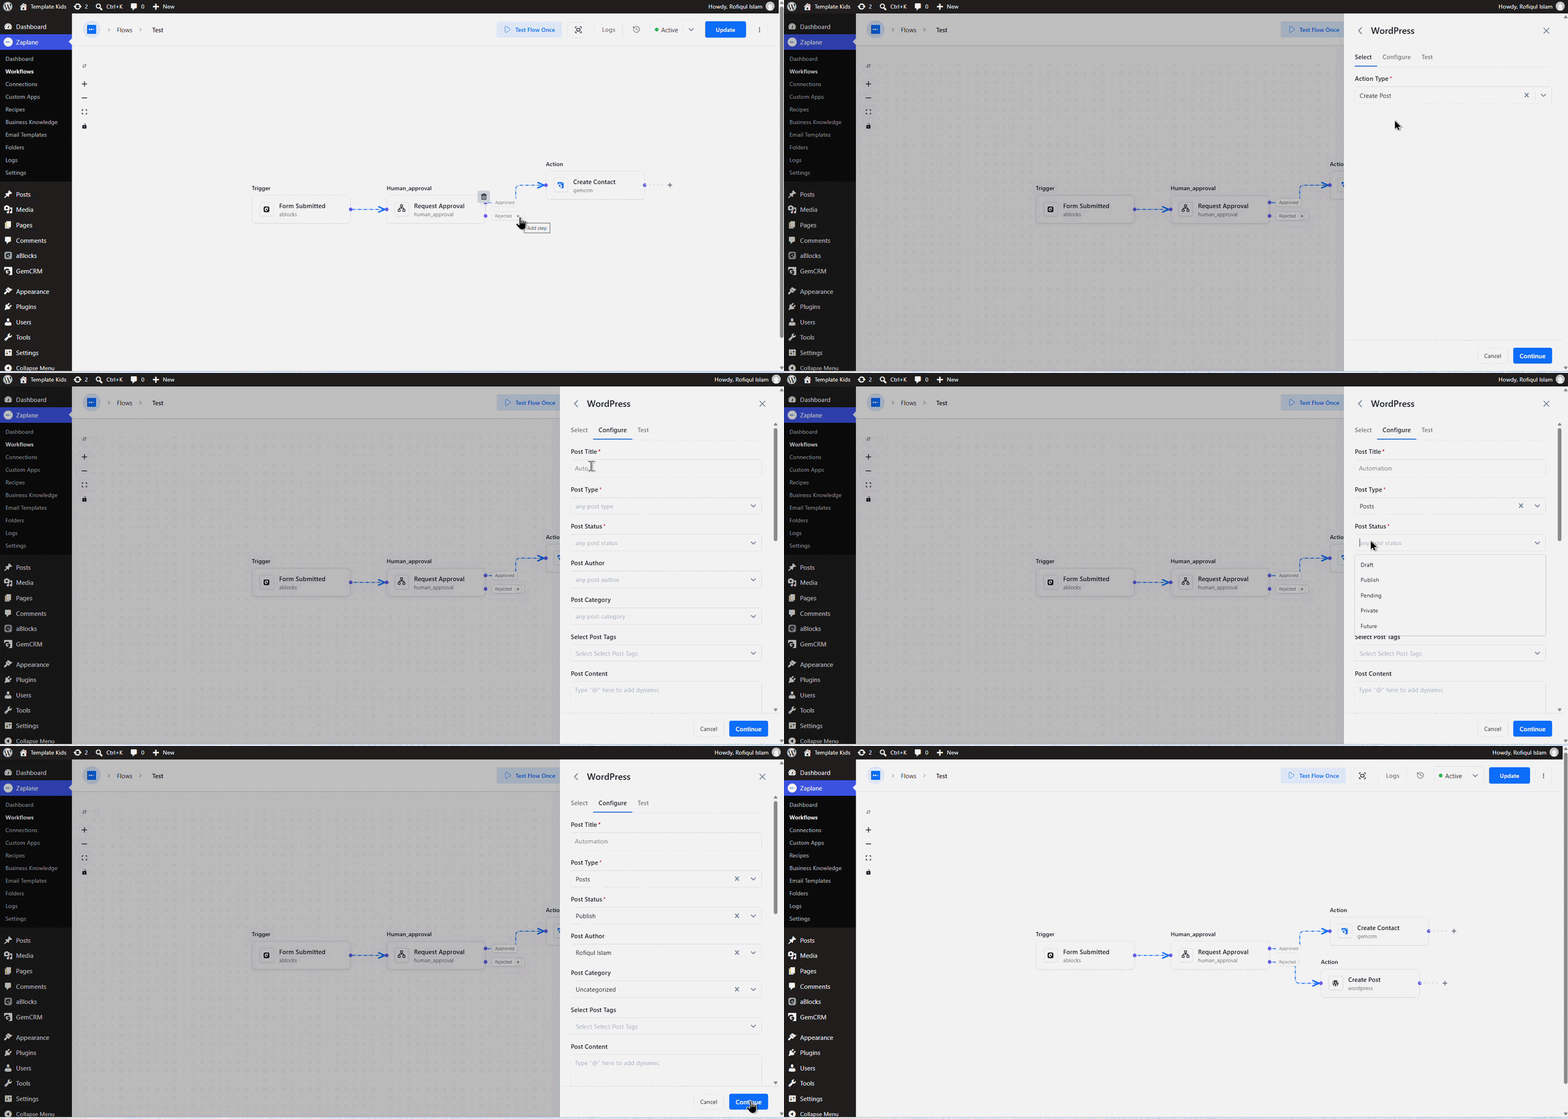
Step 7: Add an action to the Rejected branch
Click the + on the Rejected branch and add the action that should run when the request is rejected — for example, Create Post in WordPress.
Step 8: Test the full flow
Click Test Flow Once to run the whole workflow end to end, then open Log History → Log Details to confirm every step — including the branch action — shows as completed.
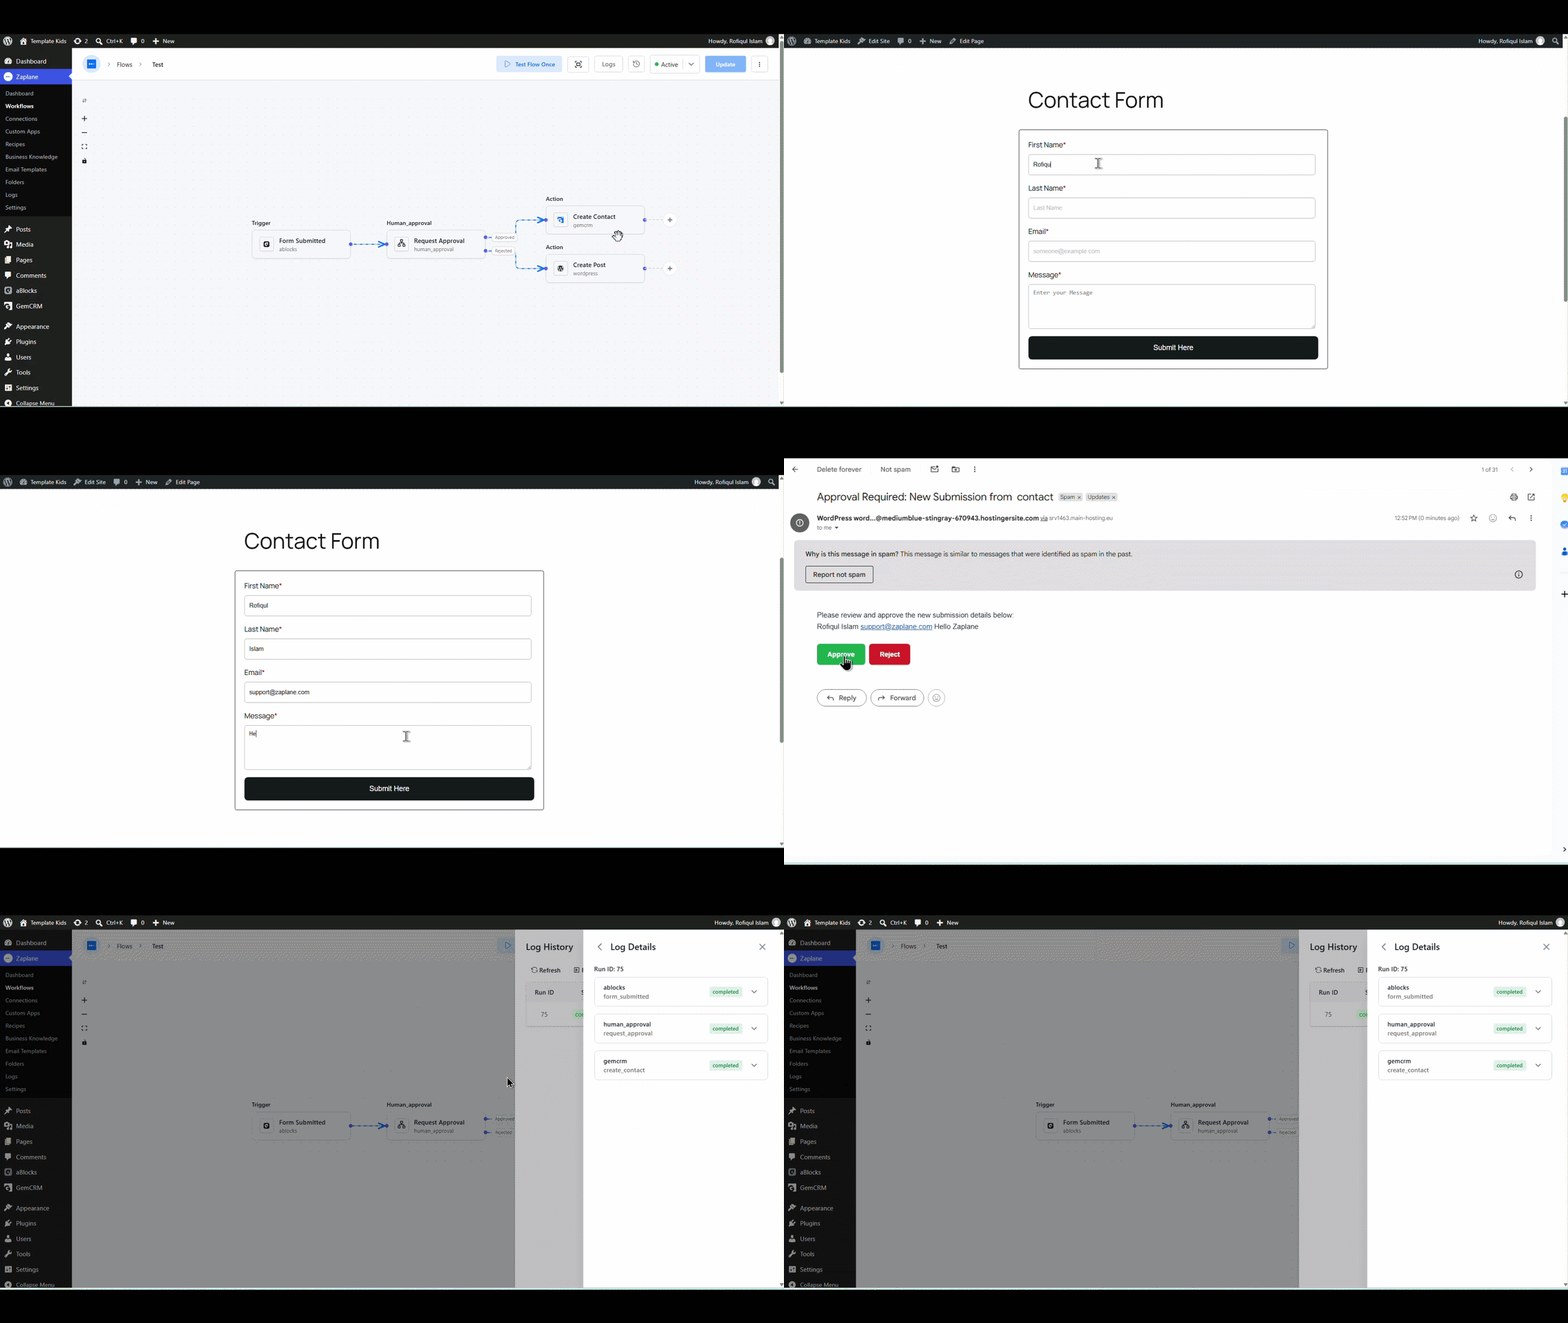
Your Zaplane workflow now pauses for a real person’s approval and automatically runs the correct action depending on whether the request is approved or rejected.
Done!
The Human Approval tool is live in your workflow.