

If a plugin or service doesn’t have a built-in Zaplane integration yet, you can build one yourself using Custom Apps — this lets you define triggers and actions for any WordPress hook or REST API, and then use them in your workflows just like a built-in app. This guide walks you through creating a custom app with a trigger, step by step.
Step 1: Start a New Custom App
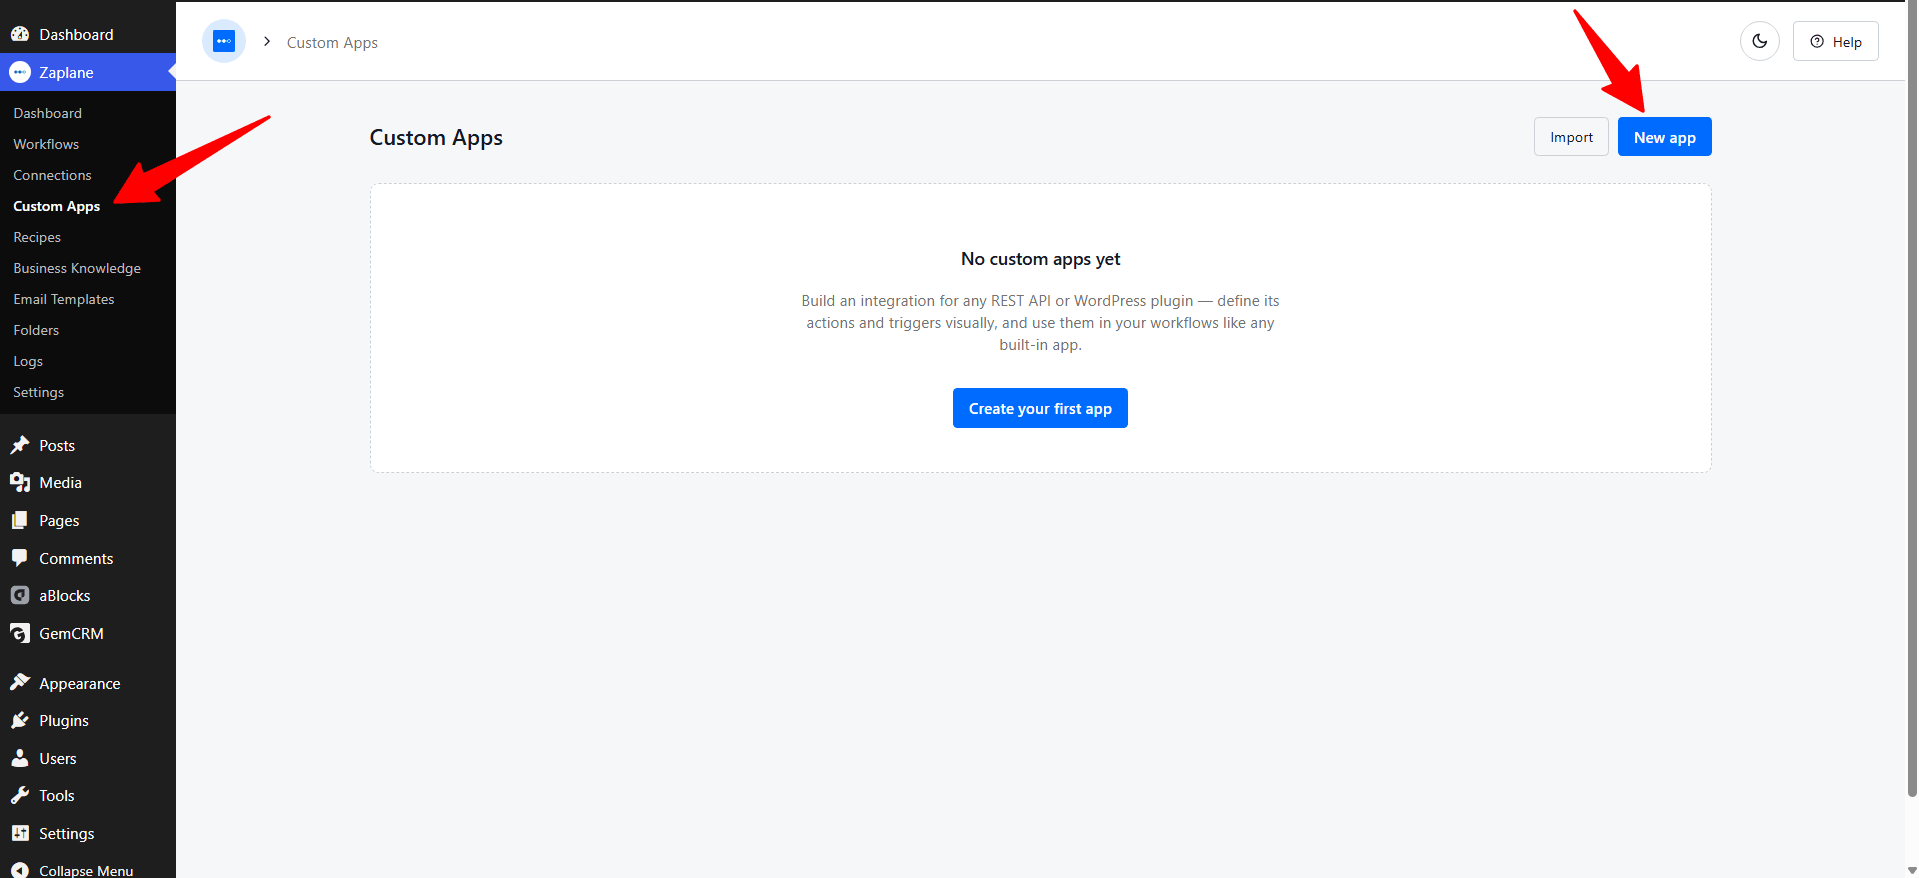
- Go to Zaplane > Custom Apps, then click New app.
Step 2: Fill in the App Details
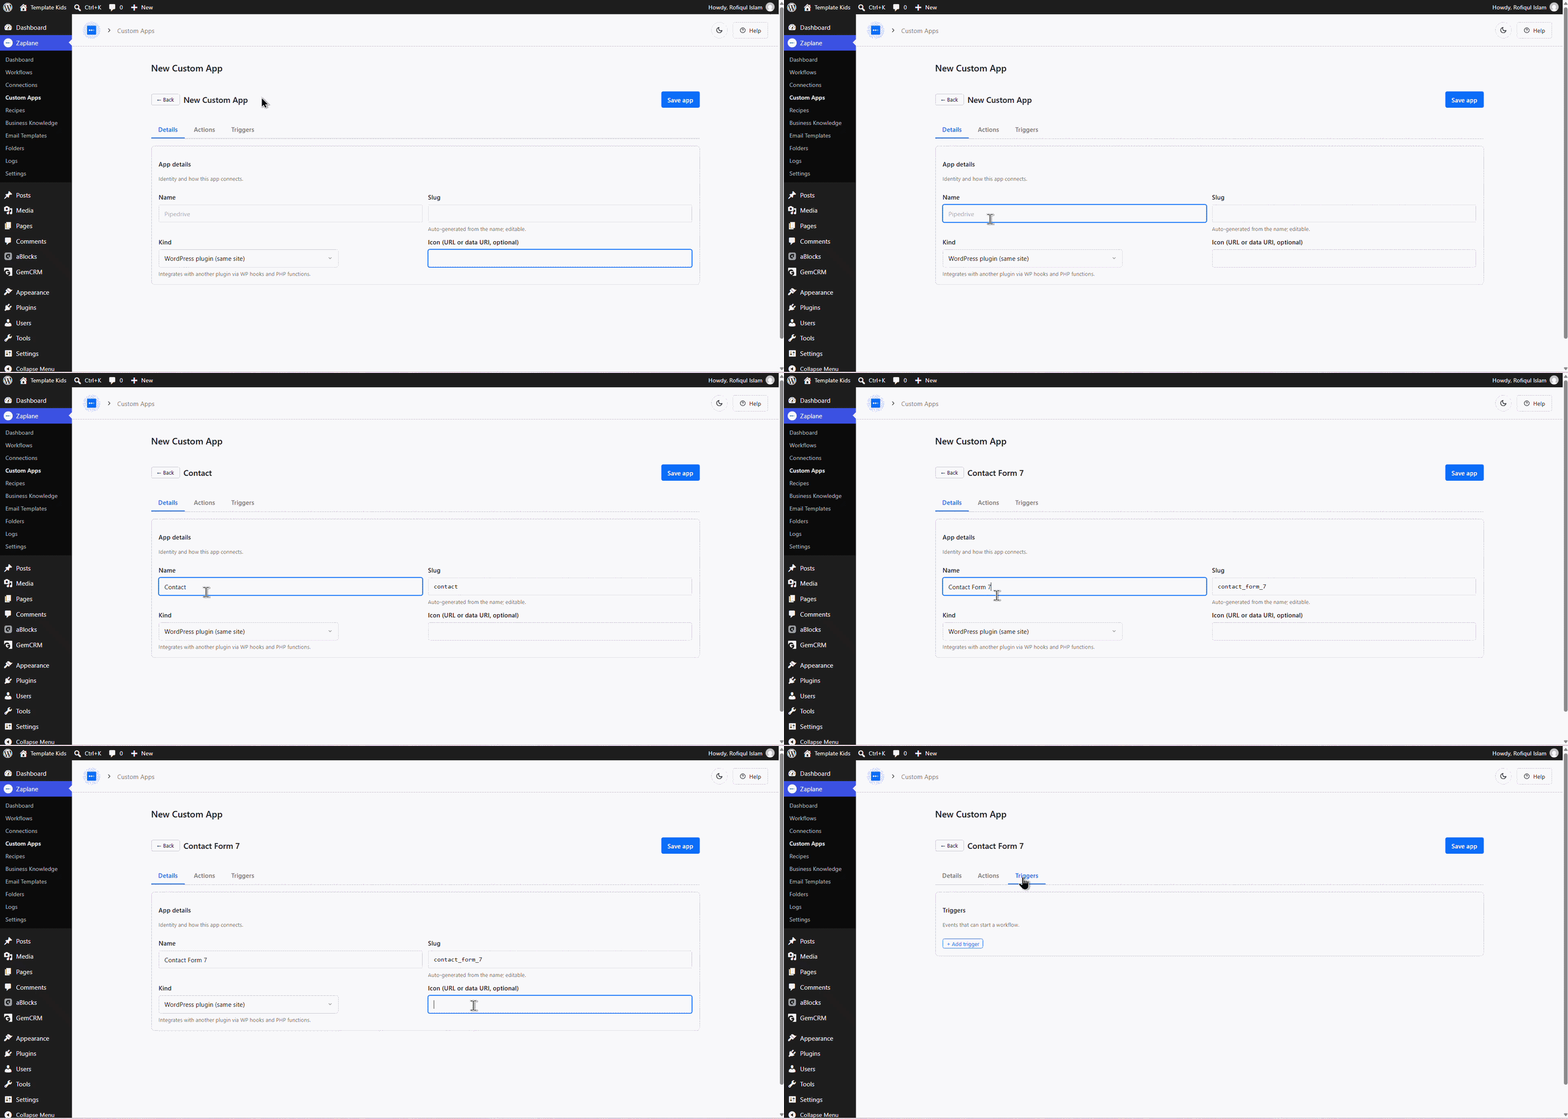
- On the Details tab, give your app a Name (the Slug is auto-generated from it, but you can edit it).
- Choose the Kind — WordPress plugin (same site) integrates with another plugin on the same site via WP hooks and PHP functions.
- Optionally add an Icon (a URL or data URI).
Step 3: Add a Trigger
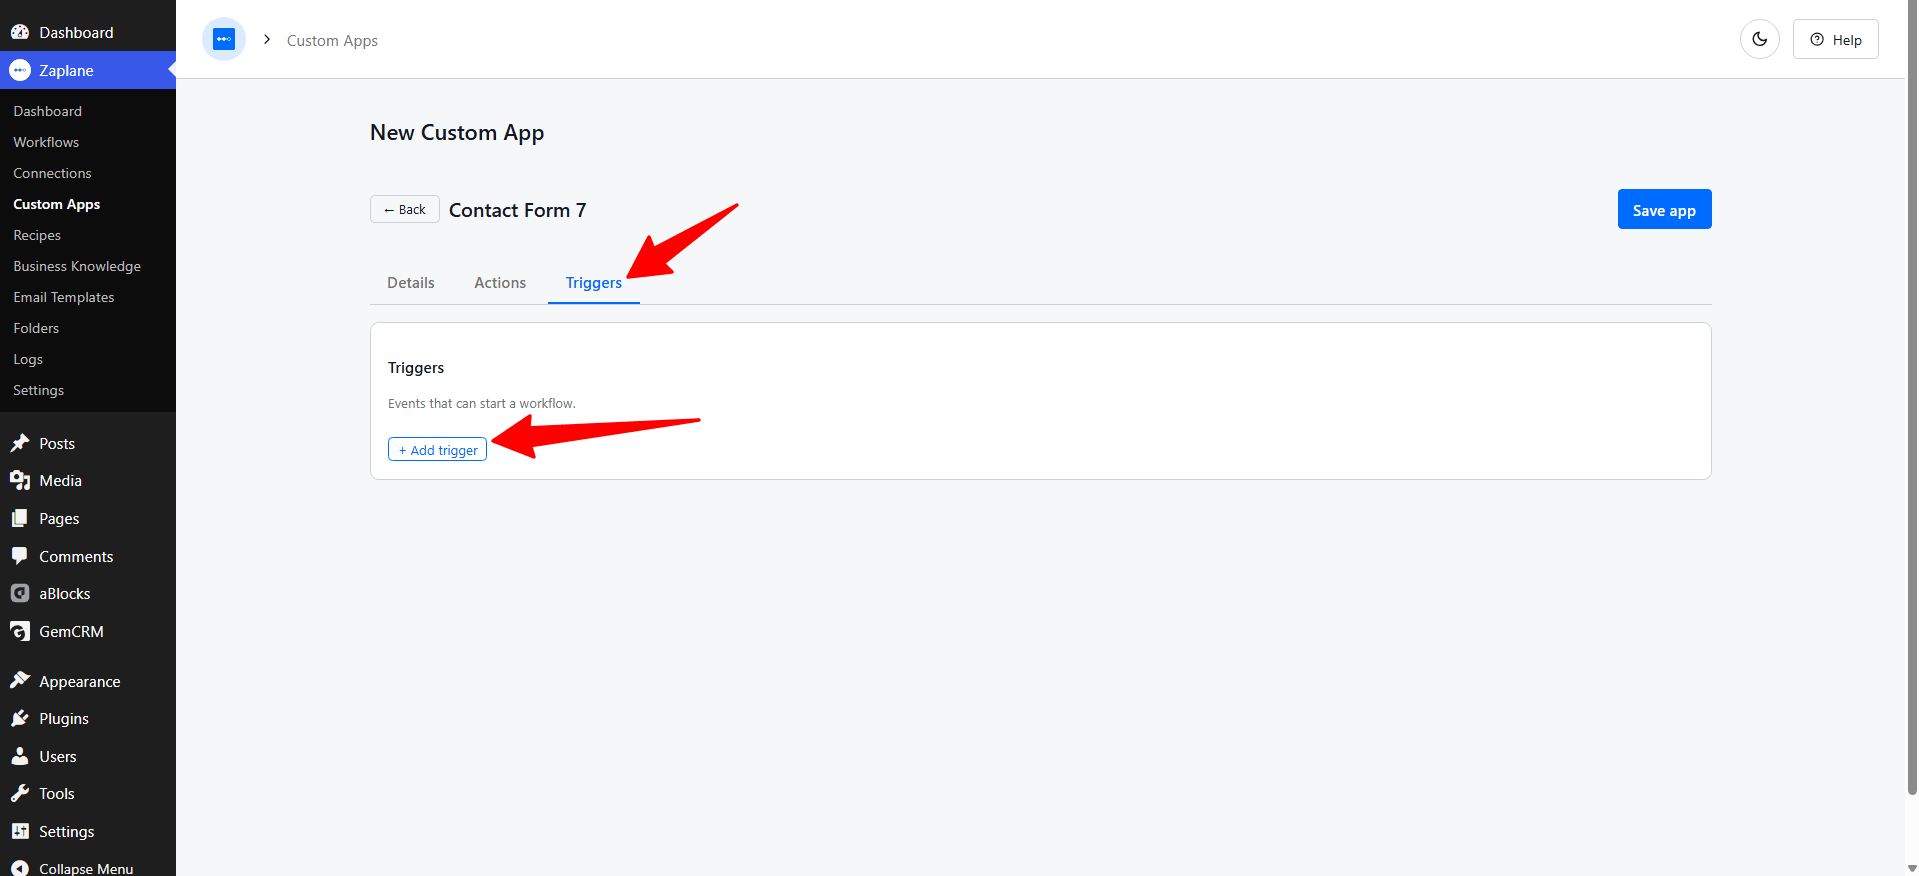
- Switch to the Triggers tab, then click + Add trigger.
Step 4: Configure the Trigger
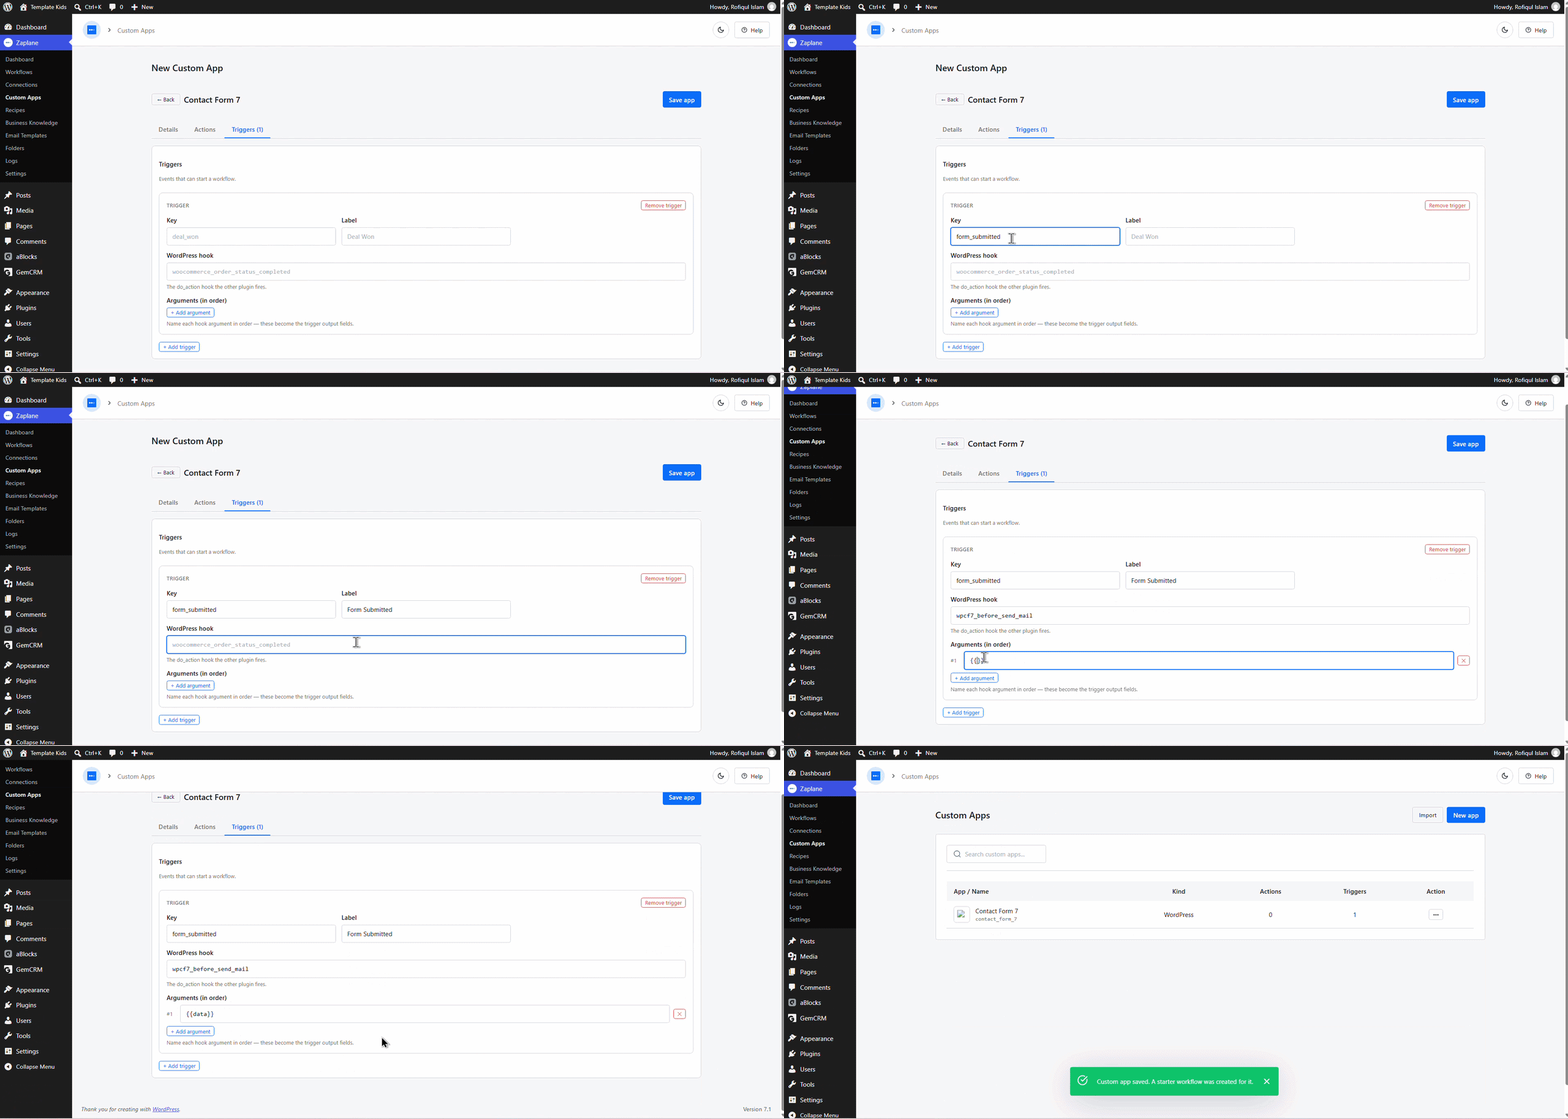
- Give the trigger a Key (a unique internal identifier) and a Label (what shows up in the trigger picker).
- Enter the WordPress hook the trigger should listen for — this is the do_action hook the other plugin fires.
- Under Arguments, click + Add argument for each hook argument, in order — these become the trigger’s output fields.
- Once everything looks right, click the Save app.
Step 5: Test the Trigger in a Workflow
- Your custom app now appears alongside Zaplane’s built-in apps. Add it to a workflow’s trigger just like any other app, then use Test Trigger to confirm it picks up the hook correctly before activating the workflow.
You’re all set
Your custom app is now available in Zaplane, and its trigger can be used to start a workflow just like any built-in integration.