

The MCP Client tool lets your workflow talk to any Model Context Protocol (MCP) server — list the tools it exposes, or call one directly — so you can use them alongside your other Zaplane steps.
Step 1: Create a Workflow
Go to Zaplane > Workflows from your WordPress dashboard, then click Create Workflow to open the workflow editor.
Before adding an MCP Client tool, you need to set up a trigger first. Here is how to do it quickly:
- Click Select an app under the Trigger box, then choose Apps.
- Search for and select your trigger app — in this example, we are using aBlocks Contact Form.
- Choose the Trigger Type that matches the event you want to watch for, then click Continue.
- On the Configure tab, set up any required options, then click Continue.
- On the Test tab, click Test Trigger to confirm it is working correctly, then click Save.
Once your trigger is saved, proceed to the next step to add the MCP Client tool.
Step 2: Add the MCP Client Tool
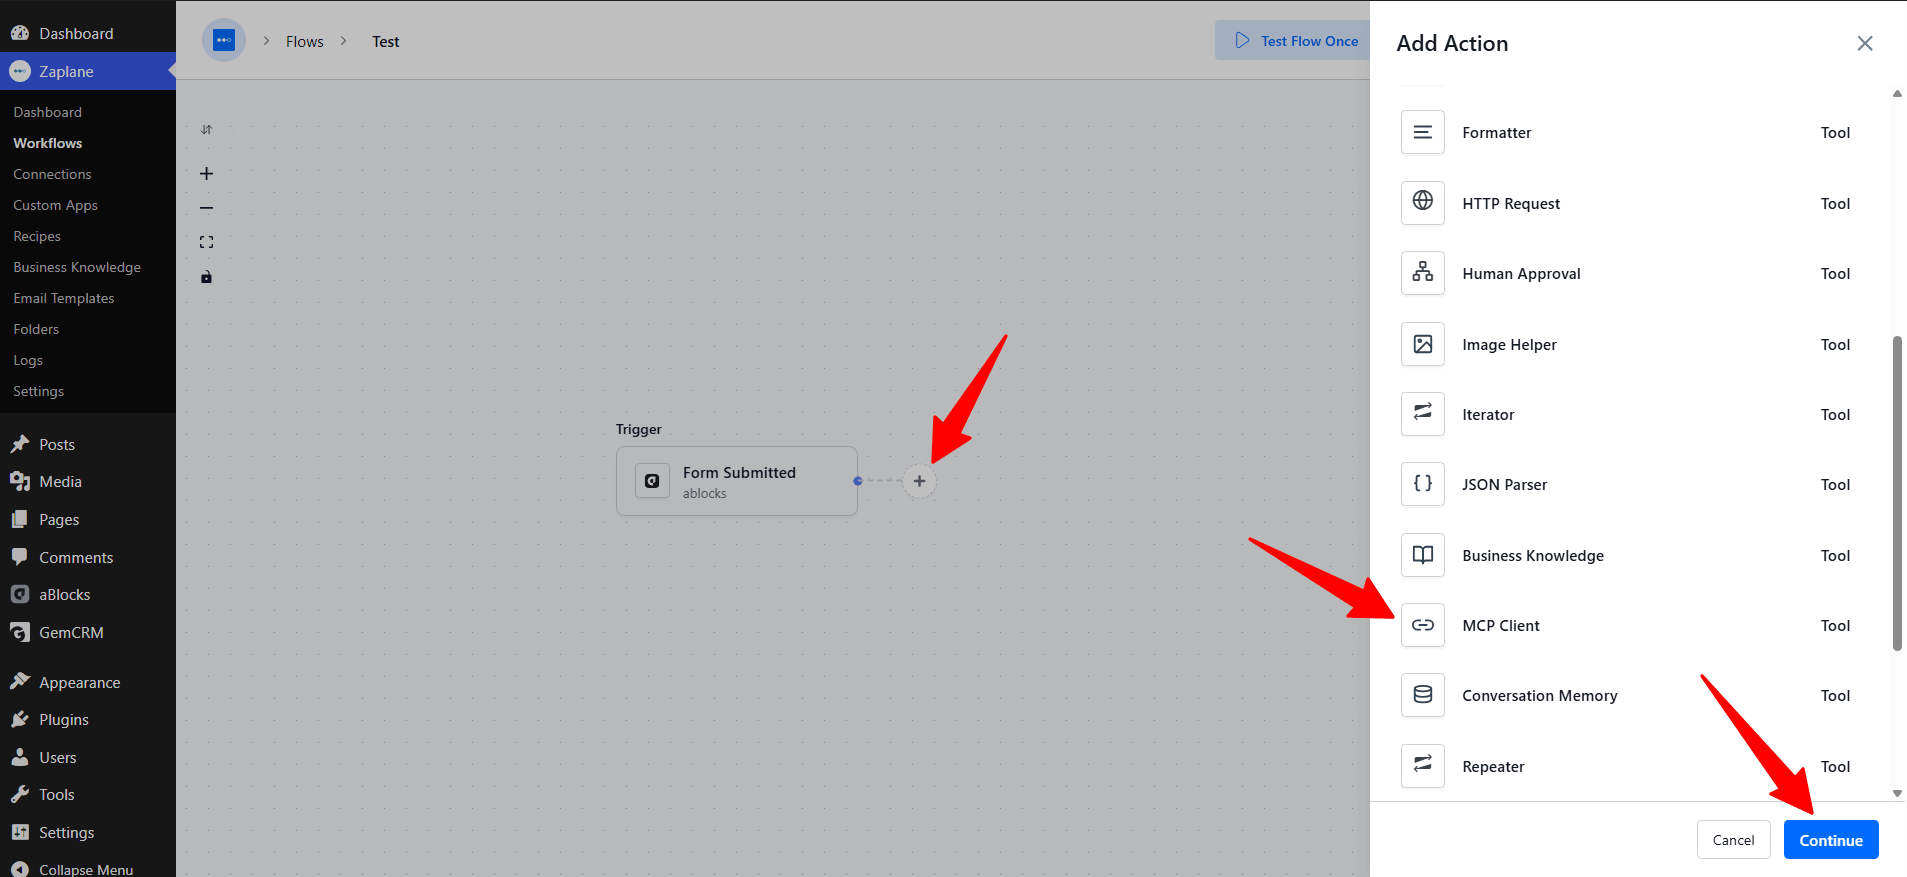
Click the + icon on your workflow canvas to open the Add Action panel, then select MCP Client from the list of built-in tools.
Step 3: Choose the Action Type
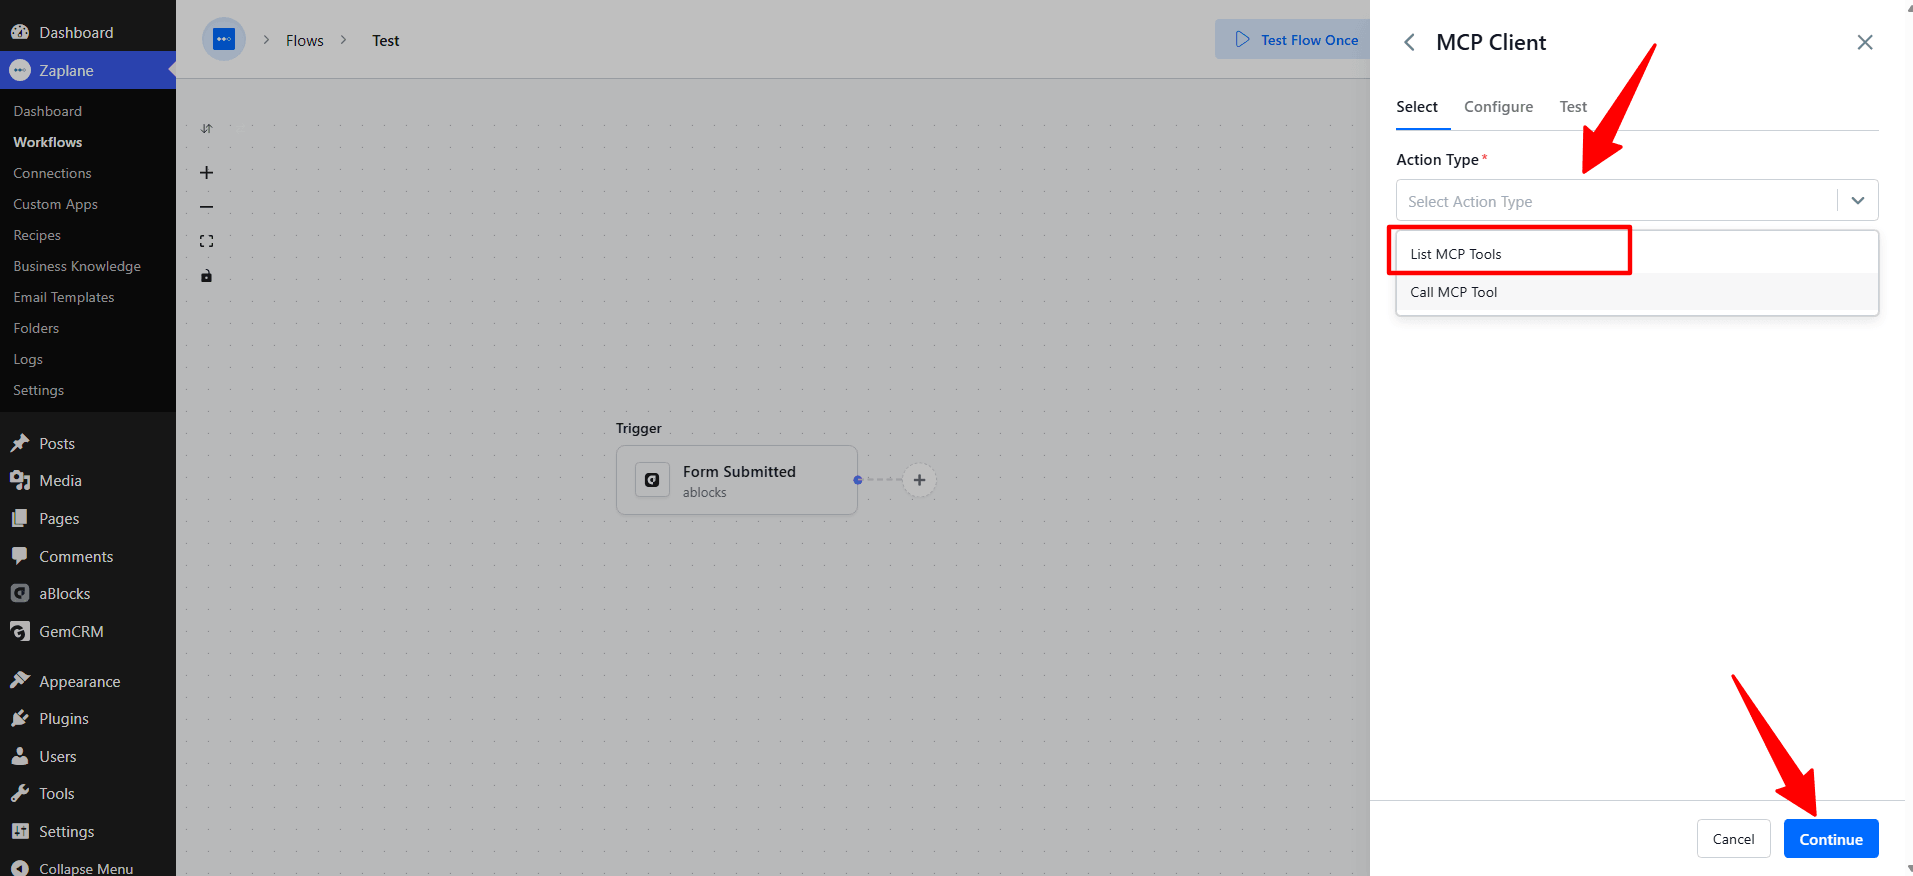
On the Select tab, open the Action Type dropdown and choose List MCP Tools to see what tools the server offers (an option to Call MCP Tool is also available if you already know which tool you want to run), then click Continue.
Step 4: Configure the Action
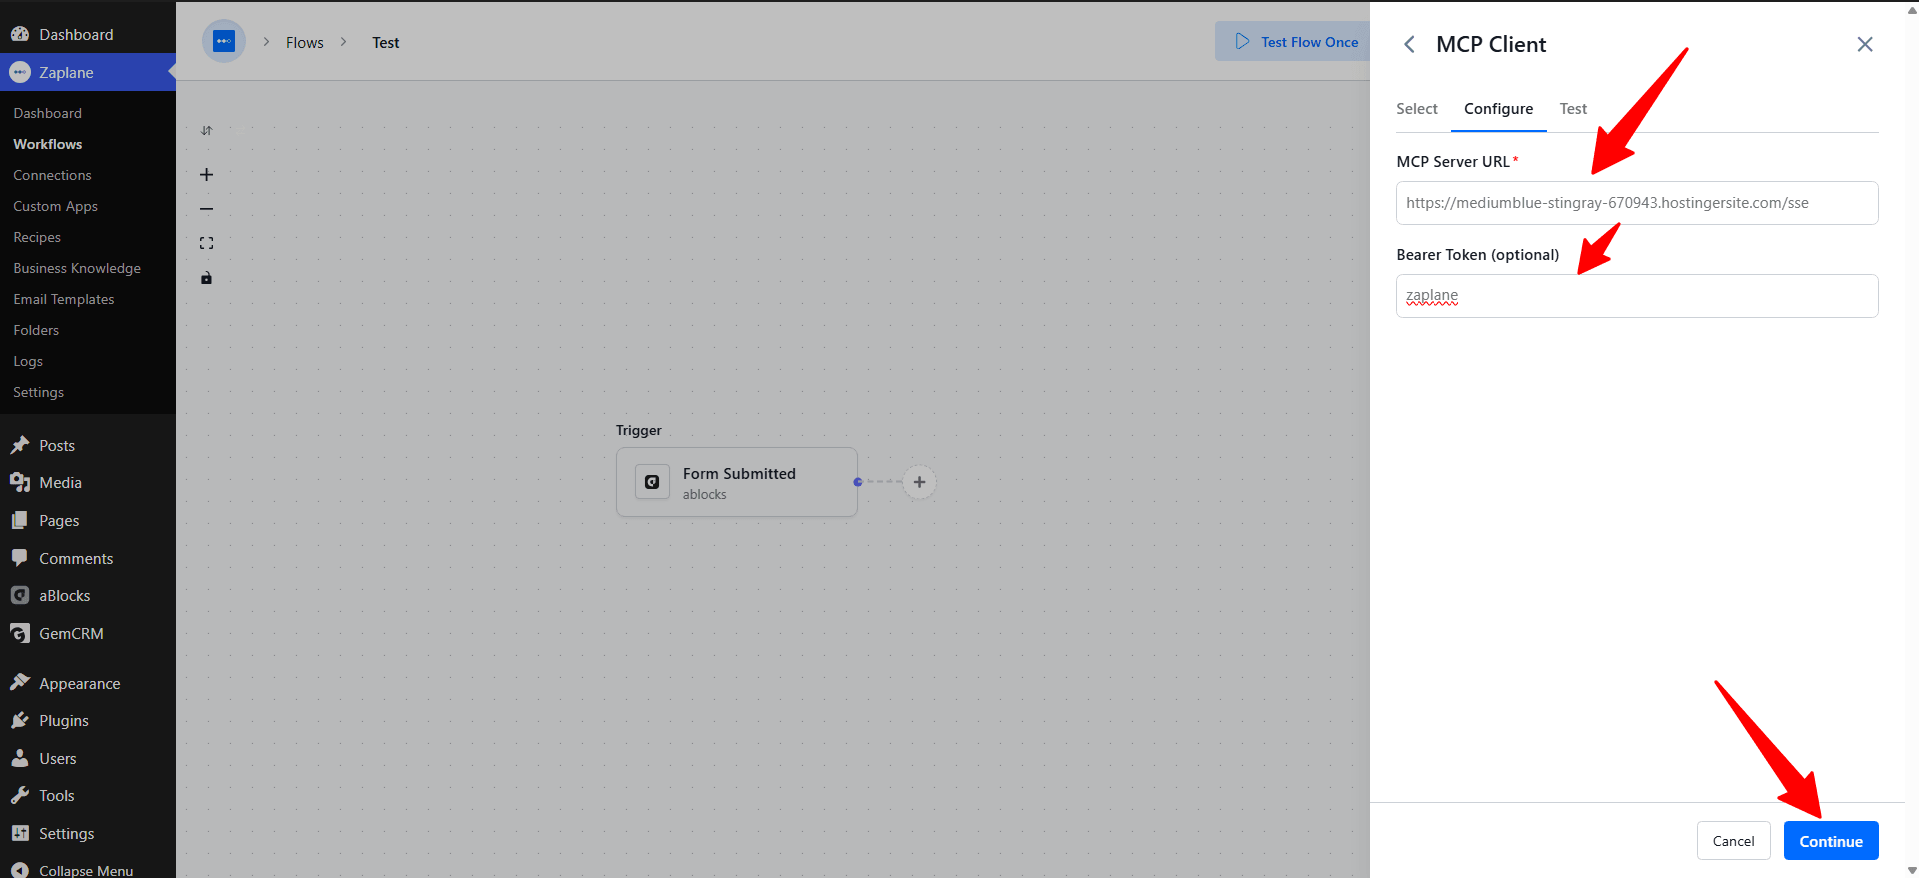
On the Configure tab, enter the MCP Server URL, and add a Bearer Token if the server requires authentication (optional). Click Continue when done.
Step 5: Test and Save the Action
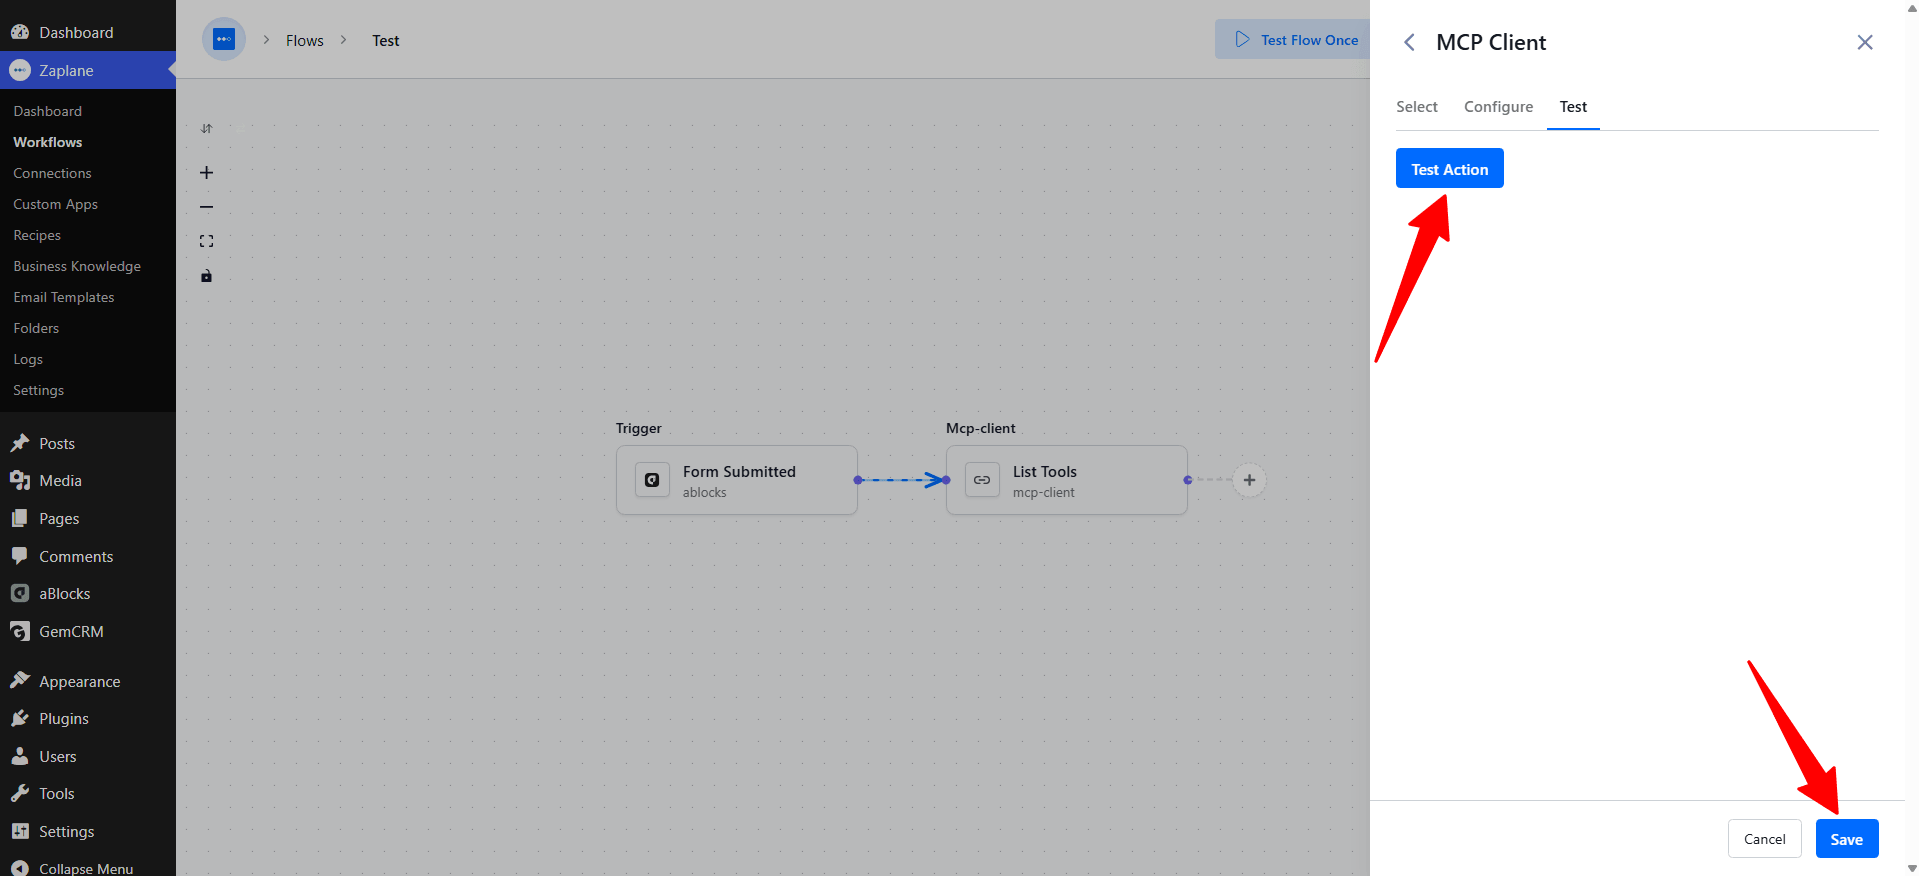
On the Test tab, click Test Action to confirm Zaplane can connect to the MCP server and list its tools, then click Save.
Step 6: Use the Tool List in a Downstream Action
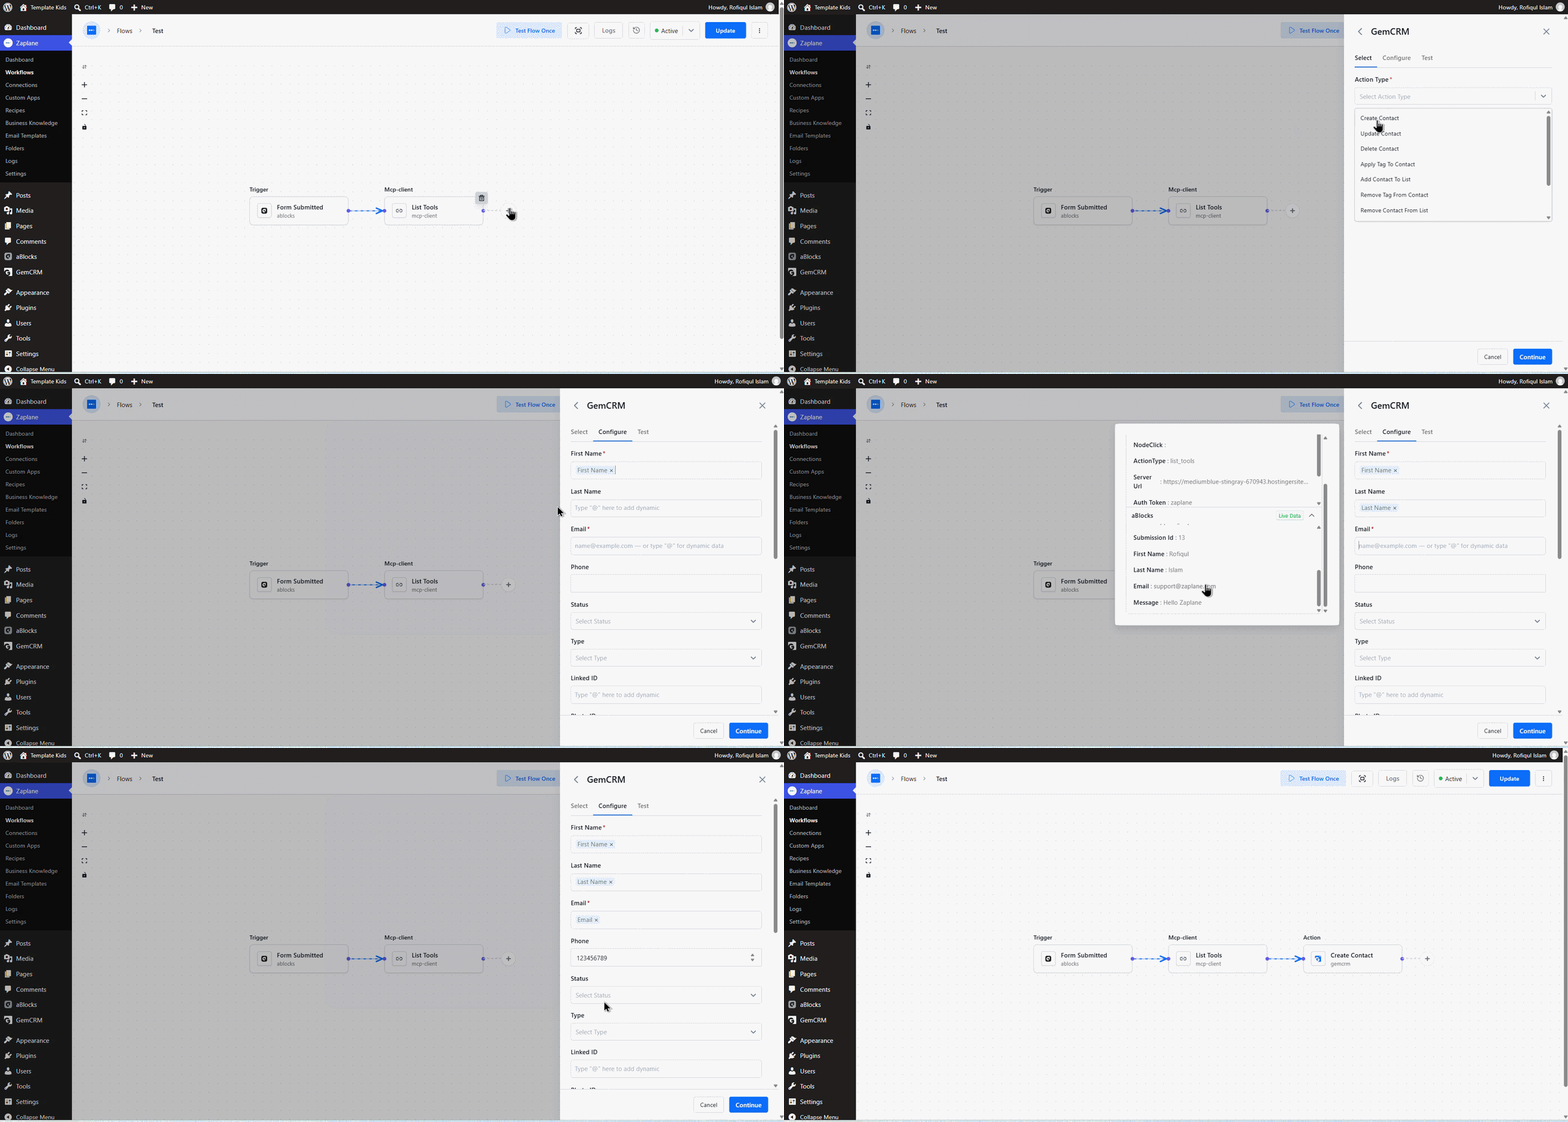
With the MCP server connected, click the + after the MCP Client step to add a next action — for example, creating a contact in GemCRM — and pass the tools or data returned by the MCP server into it.
Step 7: Update and Activate the Workflow
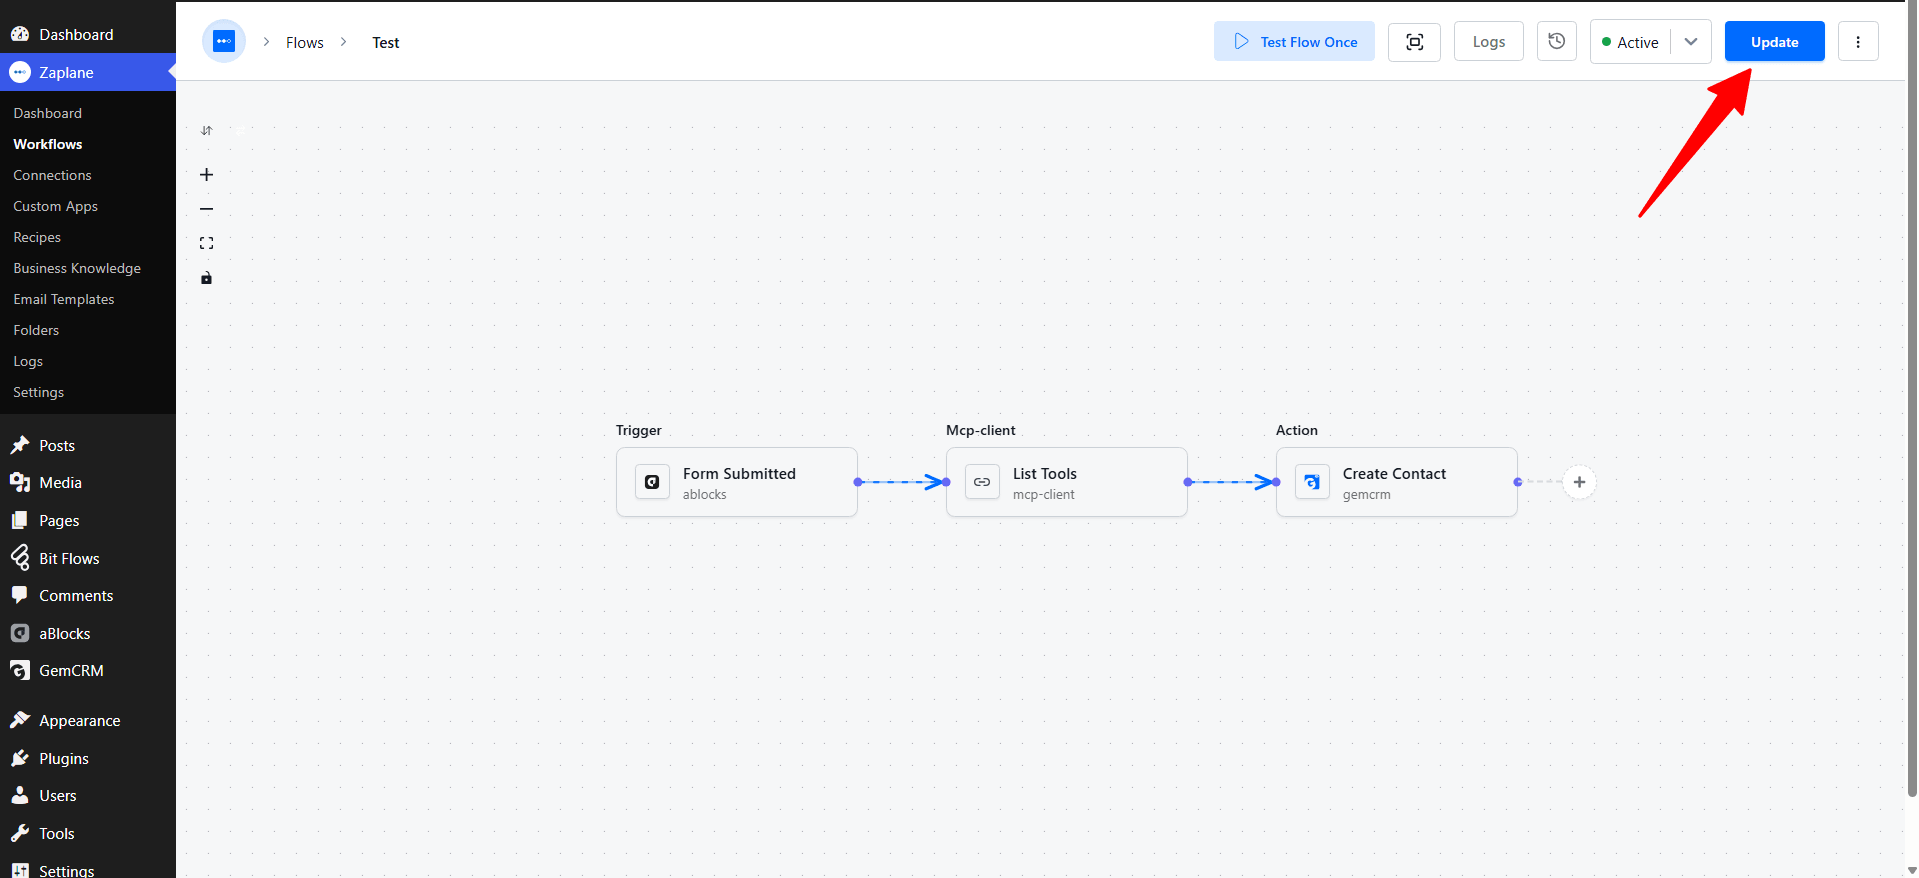
Back on the workflow canvas, click Update to save your changes and keep the workflow Active.
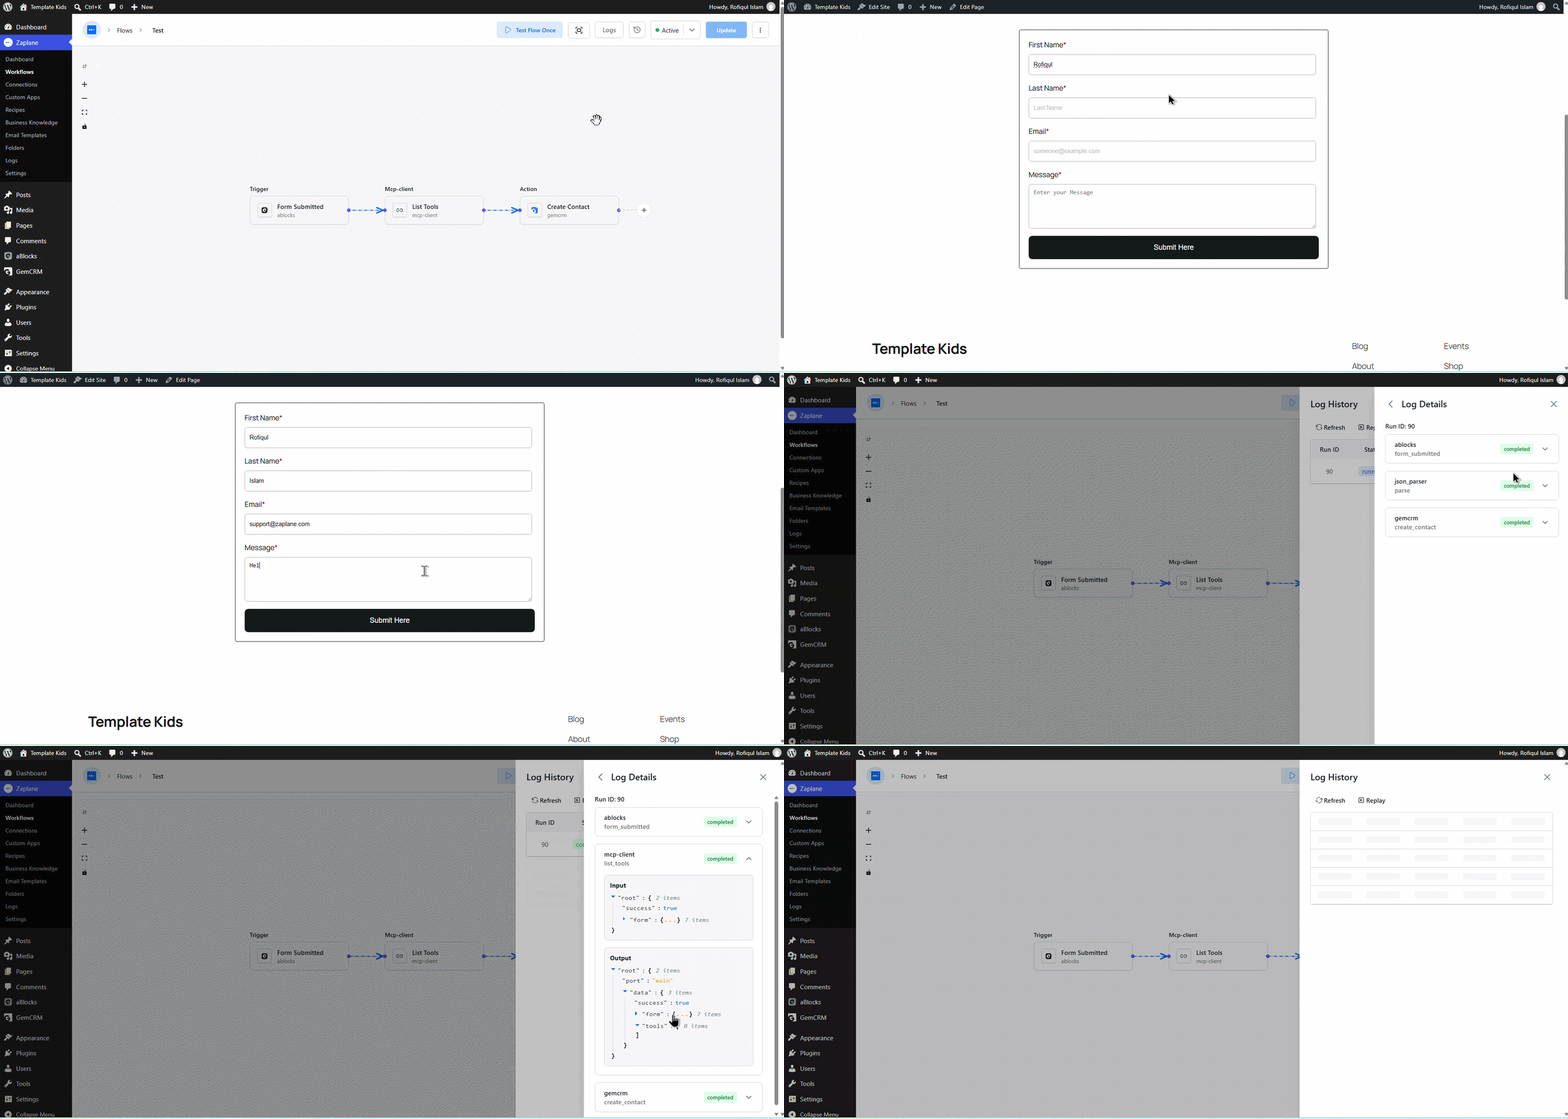
Your Zaplane workflow now connects to the MCP server automatically every time it runs, and passes what it finds on to whatever action comes next.
Done!
The MCP Client tool is now live in your workflow and will reach out to the MCP server every time this step is reached.