

The Schedule trigger starts your workflow on a repeating interval instead of waiting for an event — useful for anything that needs to run on its own, like periodic syncs or cleanup tasks.
Step 1: Create a Workflow
- Go to Zaplane > Workflows from your WordPress dashboard, then click Create Workflow to open the workflow editor.
Step 2: Add the Schedule Trigger
- Click Select an app under the Trigger box to open the Add Trigger panel, then choose Tools (Schedule is a built-in tool, not a third-party app).

- Search for and select Schedule from the list of tools.

Step 3: Choose the Trigger Type
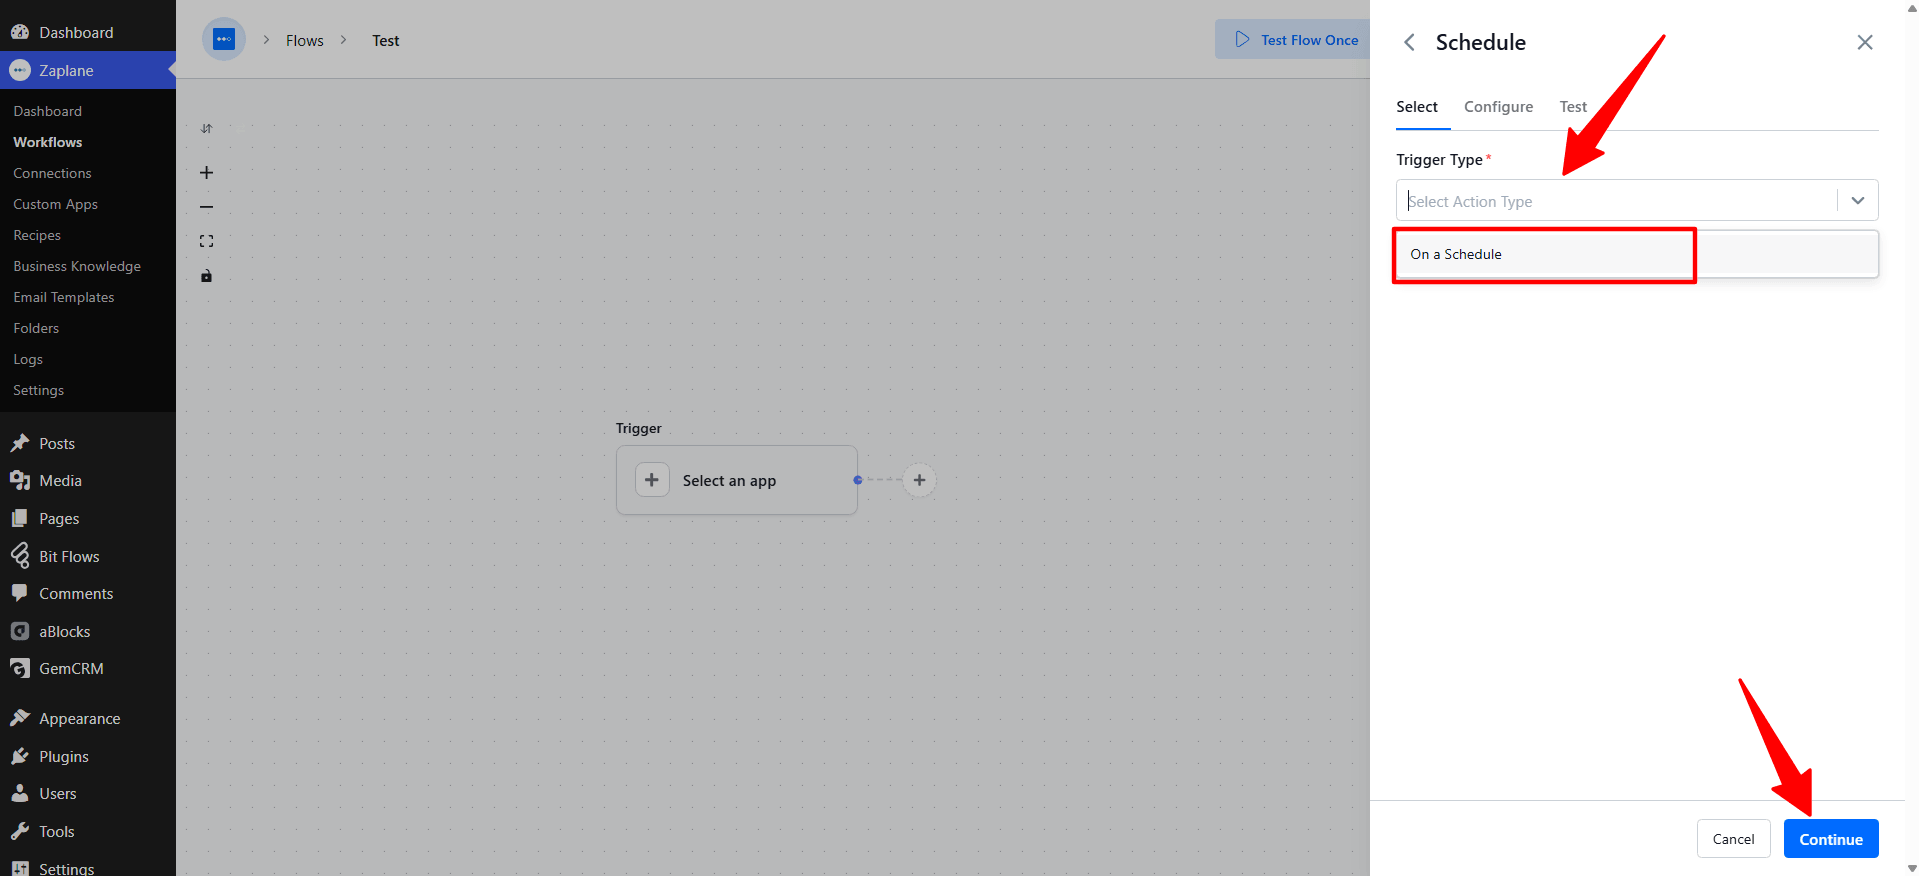
- On the Select tab, open the Trigger Type dropdown and choose On a Schedule, then click Continue.
Step 4: Configure the Trigger
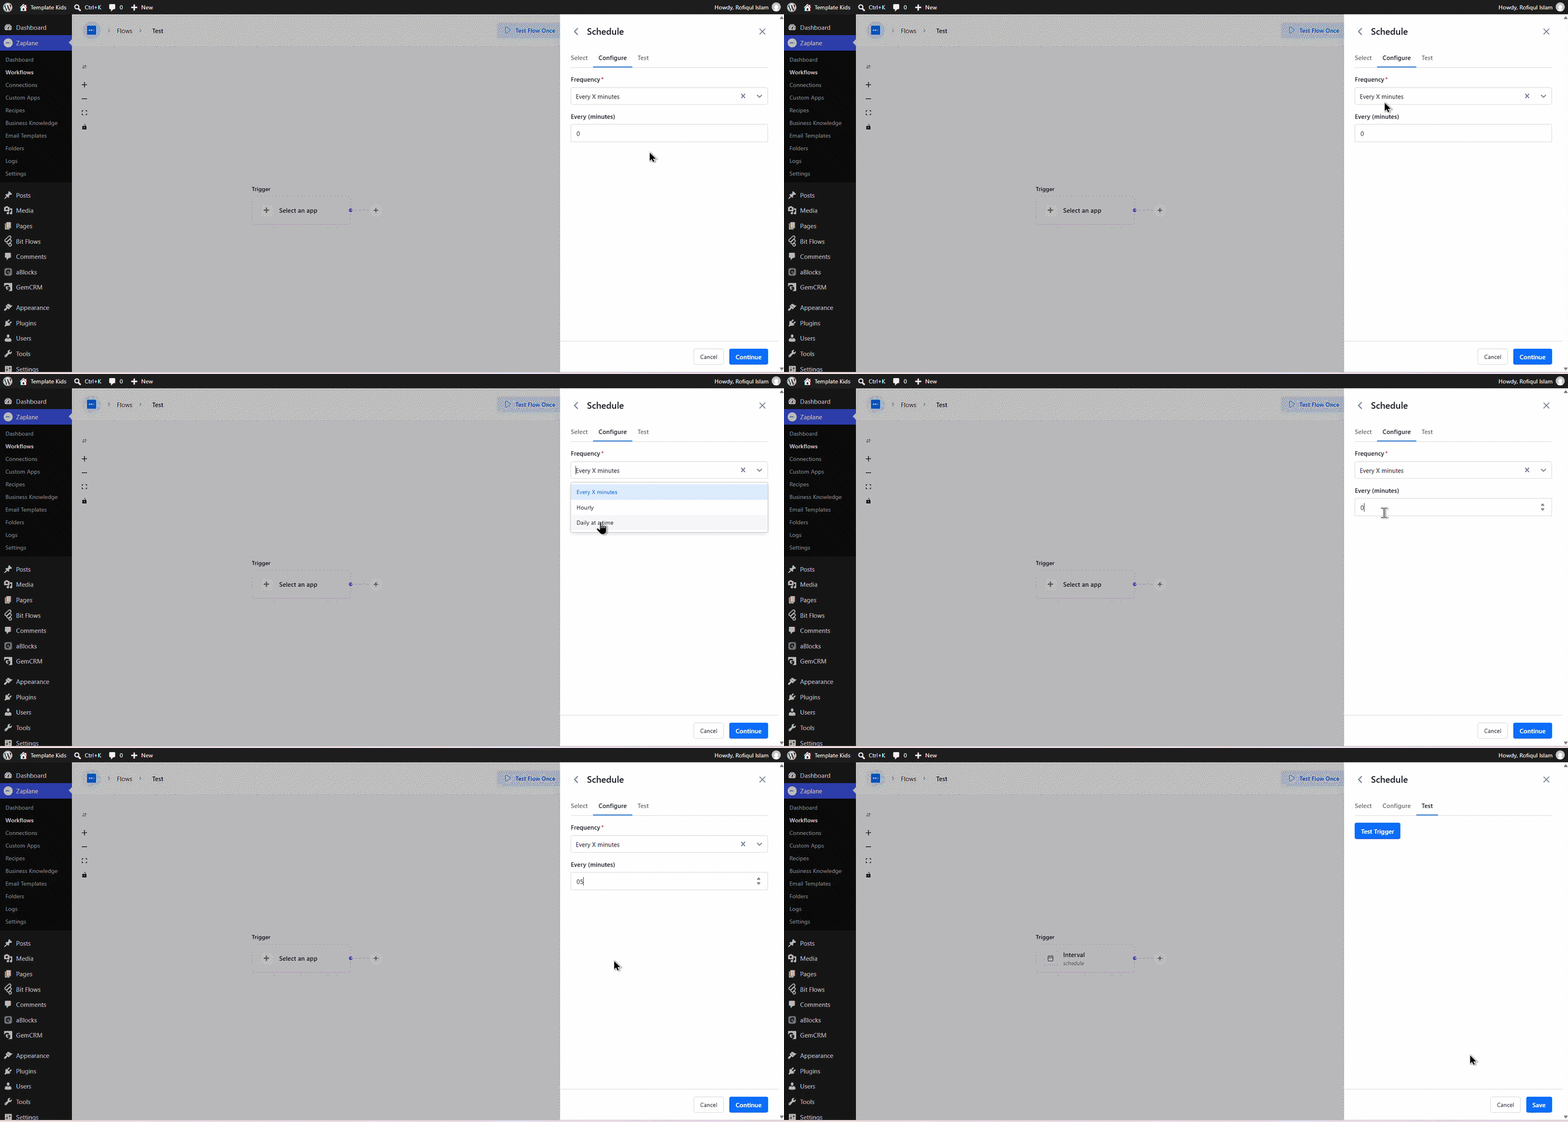
- On the Configure tab, set the Frequency to Every X minutes, then enter how often it should run under Every (minutes). Click Continue when done.
Step 5: Test and Save the Trigger
- On the Test tab, click Test Trigger to confirm it fires correctly, then click Save.

Step 6: Update and Activate the Workflow
- Back on the workflow canvas, click Update to save your changes and keep the workflow Active.
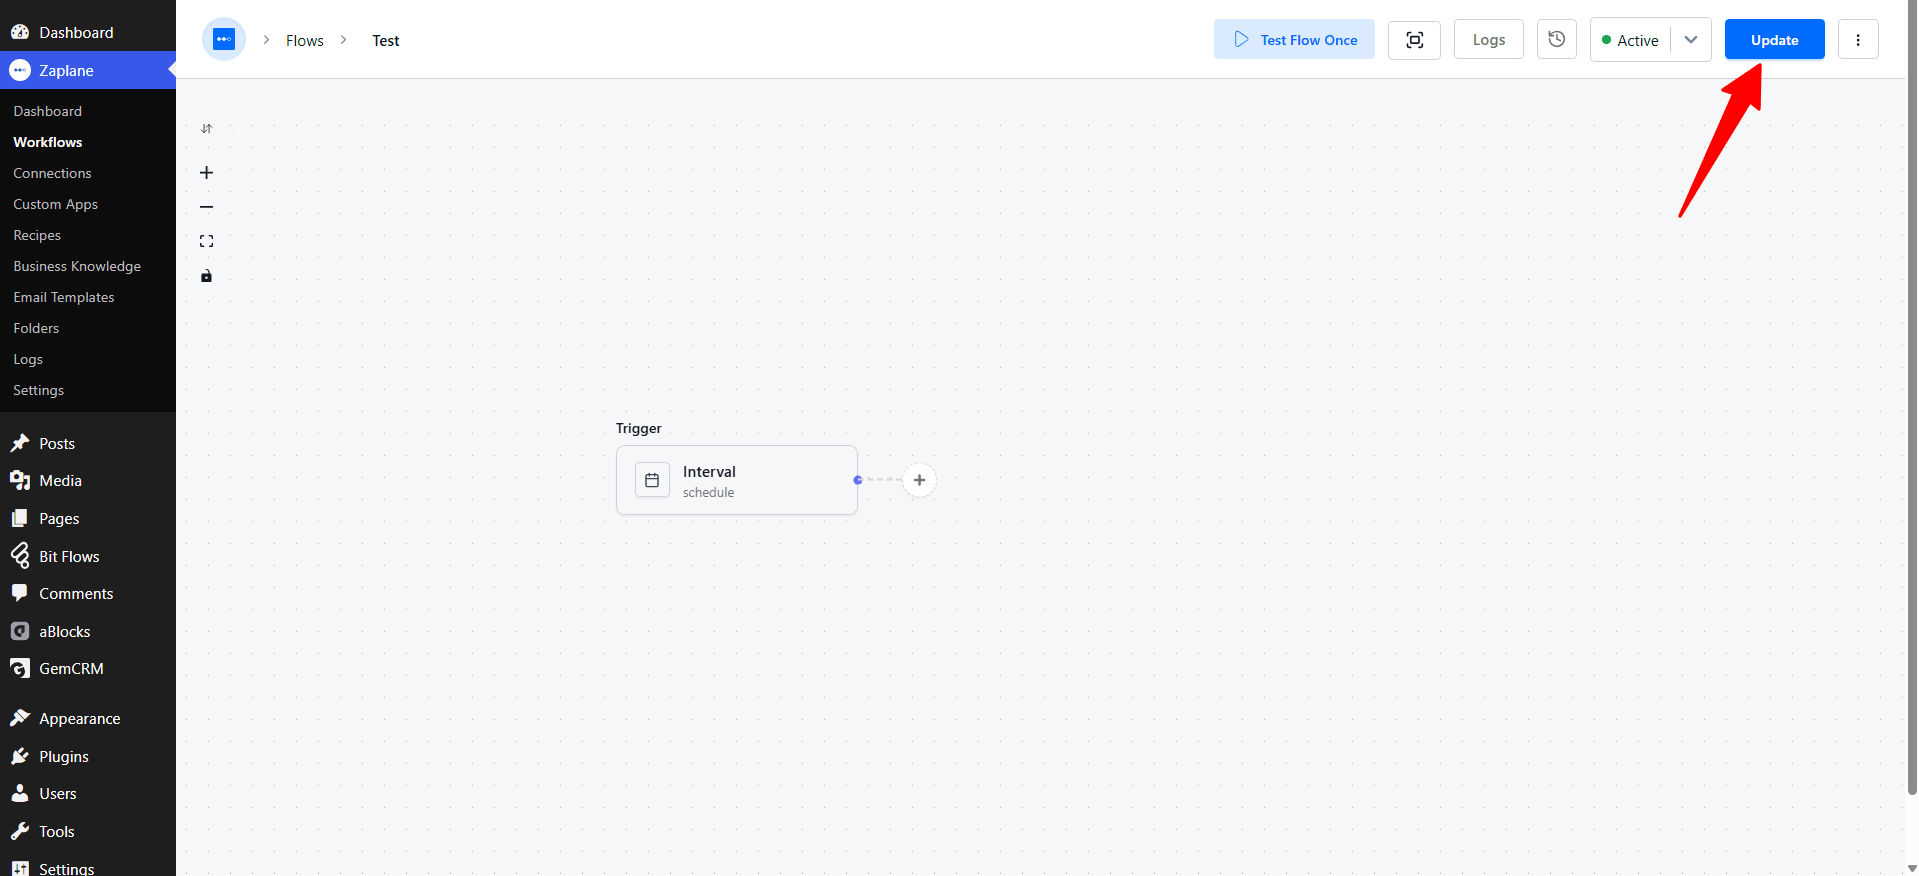
Your Zaplane workflow now starts automatically on the interval you set, without needing a separate trigger event.
Done!
The Schedule trigger is now live in your workflow and will kick off a run at every interval.